

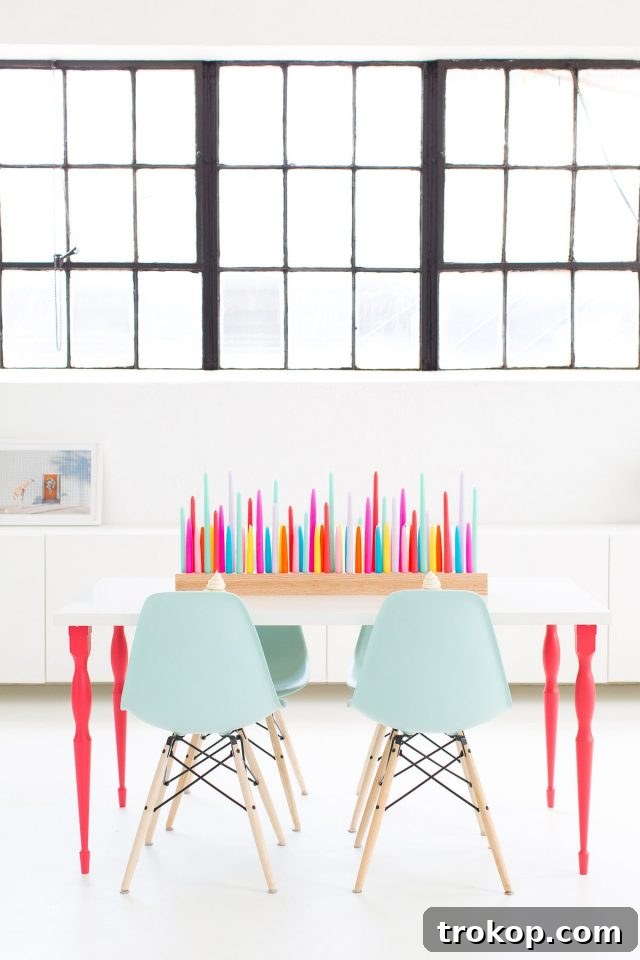
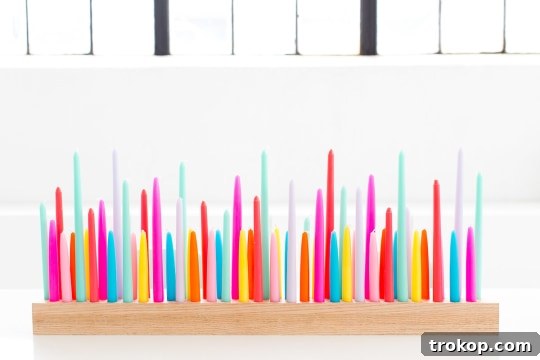
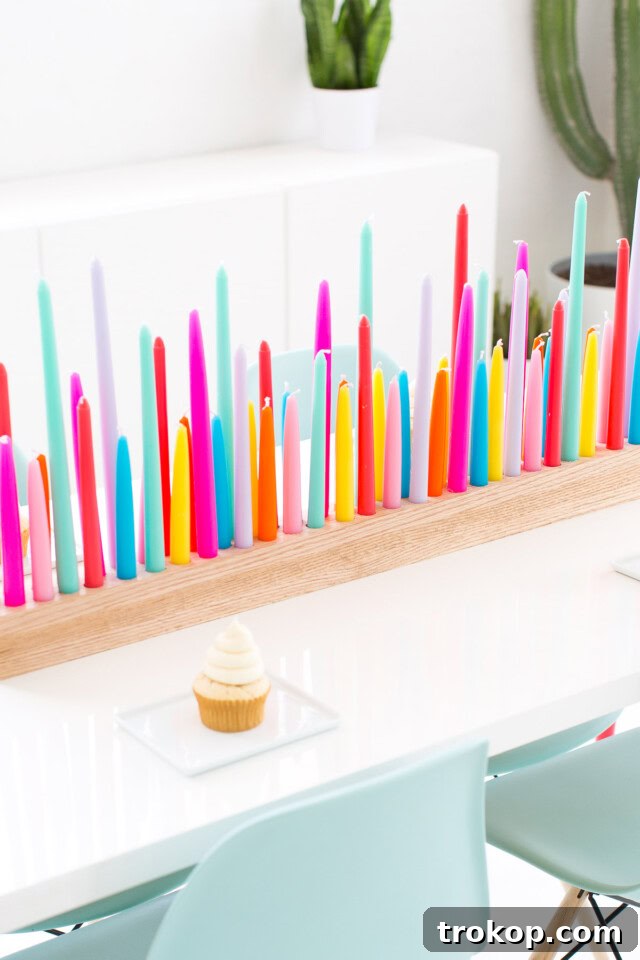
Transform your living space and infuse it with a vibrant pop of color using a dazzling Rainbow Taper DIY Candle Holder. This engaging project is surprisingly simple, requiring only a few basic tools and a touch of creativity. Whether illuminated, casting a warm, flickering glow, or standing unlit as a stunning decorative piece, this handcrafted candle holder promises to be a conversation starter and a true centerpiece in any room.

Why Choose a DIY Taper Candle Holder?
Are you yearning to break free from the monotony of mass-produced decor? For those who cherish the intimate ambiance created by romantic lighting and harbor a special fondness for the joyful spectrum of rainbows, prepare to elevate your next dinner party or cozy evening at home. This DIY Taper Candle Holder is not just a project; it’s an opportunity to infuse your personal style into your home decor, creating an atmosphere that is uniquely yours.
Unique Home Decor That Reflects You
This project is perfect for anyone seeking a distinctive touch that can’t be found in stores. Instead of settling for generic options, you can craft a piece that perfectly matches your aesthetic. Imagine a bespoke candle holder, meticulously designed by your hands, becoming the focal point of your dining table, mantelpiece, or shelf. Its inherent charm lies in its individuality, telling a story that only handmade items can convey.
Surprisingly Simple, Incredibly Rewarding
Don’t let the thought of DIY intimidate you. This project is surprisingly straightforward, making it accessible even for crafting novices. All you truly need is a sturdy piece of wood, a drill, and a spark of creativity. Within a few easy steps, you’ll transform a plain piece of lumber – or even give new life to recycled scrap wood – into a breathtaking candle display. The satisfaction of creating something beautiful and functional with your own hands is immensely rewarding.
Fully Customizable to Your Style
The beauty of this handmade candle holder lies in its complete customizability. You have the freedom to select the type of wood that best suits your taste, ranging from rustic and natural planks to sleek and modern finishes. Beyond the wood itself, you can paint, stain, or embellish your creation with various decorative elements to make it truly one-of-a-kind. Whether you envision a minimalist design or a vibrant, artistic statement piece, this project adapts to your vision. It’s no wonder this easy project has become one of our most beloved DIY candle holder ideas!


Table of Contents
Gather Your Essentials: Tools and Materials
Before you embark on your creative journey, ensure you have all the necessary items at hand. Gathering everything beforehand will make the crafting process smooth and enjoyable. Here’s a comprehensive list of what you’ll need to create your stunning DIY taper candle holder:
Essential Tools
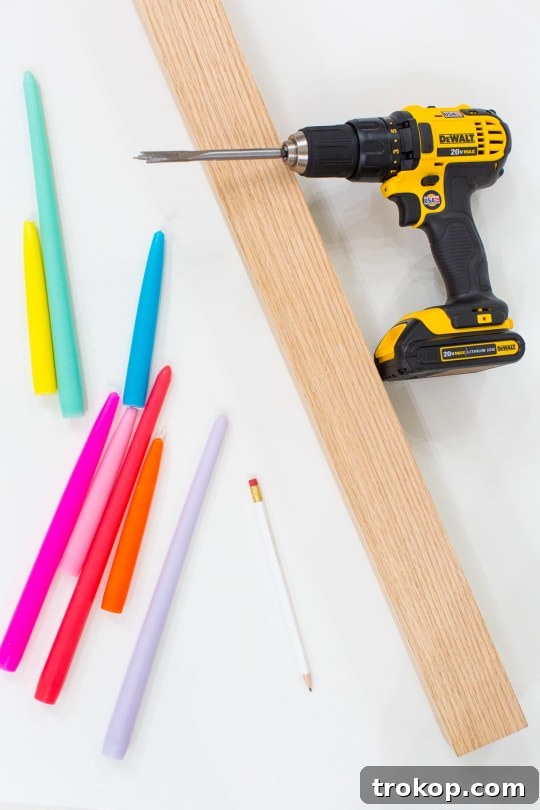
- Drill: A reliable power drill is crucial for creating clean, precise holes. Ensure it’s fully charged or has access to power.
- 3/4-inch Spade Bit Set: This specific drill bit size is recommended as it’s typically slightly wider than the standard diameter of taper candles, allowing for a snug but manageable fit. If your candles vary, consider a set with multiple sizes.
- Fine Sandpaper (Optional but Recommended): For a smooth, professional finish, especially if you’re working with rough lumber, fine-grit sandpaper will be invaluable.
Key Materials
- Wood Board: The foundation of your candle holder. Our example uses an oak wood board measuring approximately 4-inches high x 4-inches wide x 3-feet long. You can adjust these dimensions based on the number of candles you plan to include and your desired centerpiece length. Consider different wood types like pine, maple, or even reclaimed wood for varied aesthetics.
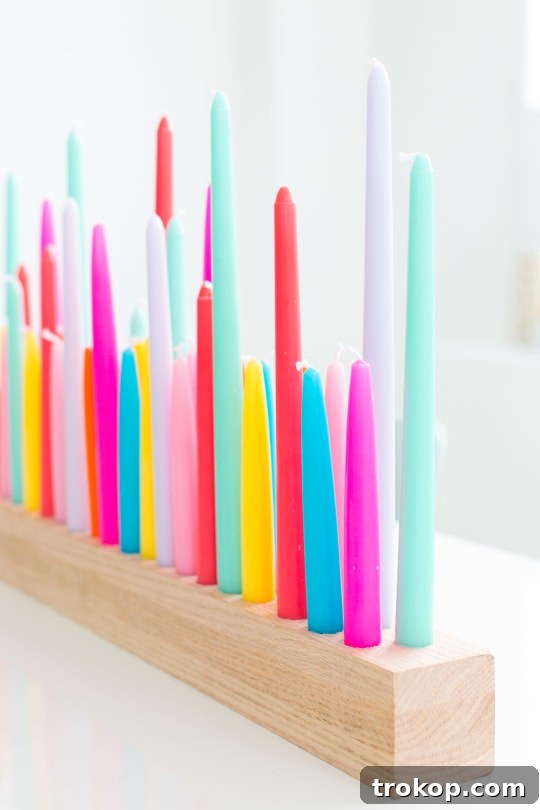
- Colorful Taper Candles: These are key to achieving the vibrant rainbow effect. We sourced ours online from Zest Candle, appreciating their range of heights, sizes, and colors, which contributes to a lovely staggered look. Aim for a full rainbow spectrum (red, orange, yellow, green, blue, indigo, violet), but feel free to select colors that best suit your personal preference or event theme.

Safety First: Important Candle Guidelines
While crafting and enjoying your beautiful new candle holder, safety should always be your utmost priority. We strongly advocate for responsible enjoyment of candles and do not endorse any activities that could lead to fire hazards. Please exercise extreme caution when lighting your centerpiece, especially if you opt for a design with many candles, like our example.
Spacing and Supervision
- Wick Spacing: It is critically important that none of the candle wicks ever touch each other when lit. Ensure ample space between each candle to prevent a larger, uncontrolled flame.
- Limited Lighting: For enhanced safety, we recommend only lighting a few candles at a time, especially for longer candle holders. This minimizes heat and open flames in one area.
- Never Leave Unattended: This is the golden rule of candle safety. Always remain in the room with lit candles and extinguish them before leaving, even for a short period.
Heat-Resistant Surfaces and Placement
- Stable Surface: Always place your candle holder on a flat, stable, and heat-resistant surface, away from any flammable materials such as curtains, paper, or loose fabrics.
- Ventilation: Ensure the area is well-ventilated but free from strong drafts, which can cause candles to burn unevenly or flare up.
- Children and Pets: Keep lit candles well out of reach of children and pets, who might accidentally knock them over.
- Extinguishment: Use a proper candle snuffer to extinguish flames to avoid hot wax splatters.
Step-by-Step Guide: Crafting Your Rainbow Candle Holder
Now that you’ve gathered your materials and reviewed the safety guidelines, let’s get down to the exciting part: building your very own rainbow taper candle holder. Follow these simple instructions for a smooth and successful DIY experience.
Step 1: Planning Your Design
Begin by carefully planning the layout of your candles. Decide on the total number of candles you want your holder to accommodate. Next, mark the exact spots where you’ll drill the holes for each taper candle. It’s crucial to ensure the spacing provides enough room for each candle, preventing them from touching when lit. While a perfectly symmetrical arrangement is one option, we found that a more freestyle approach, staggering the holes all the way down the wood, creates a wonderfully dynamic and organic look. Use a pencil to mark your spots clearly.
Step 2: Precision Drilling
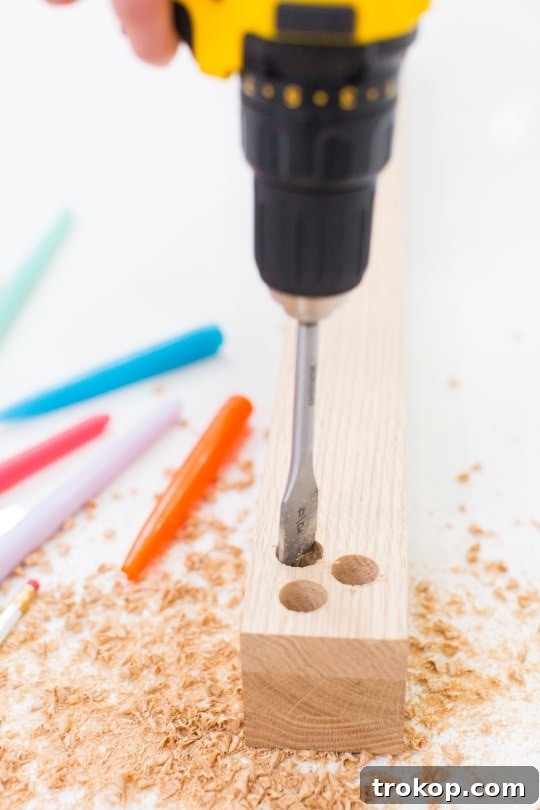
With your drill and the appropriate drill bit (e.g., a 3/4-inch spade bit for standard taper candles), carefully proceed to drill holes at your marked locations. For best results, ensure you drill straight down into the wood. Maintain a firm grip on the drill and apply steady pressure. The depth of each hole is critical; it should be sufficient to hold the taper candles securely and prevent them from wobbling or tipping over. Practice on a scrap piece of wood if you’re new to drilling.
Step 3: Finishing Touches
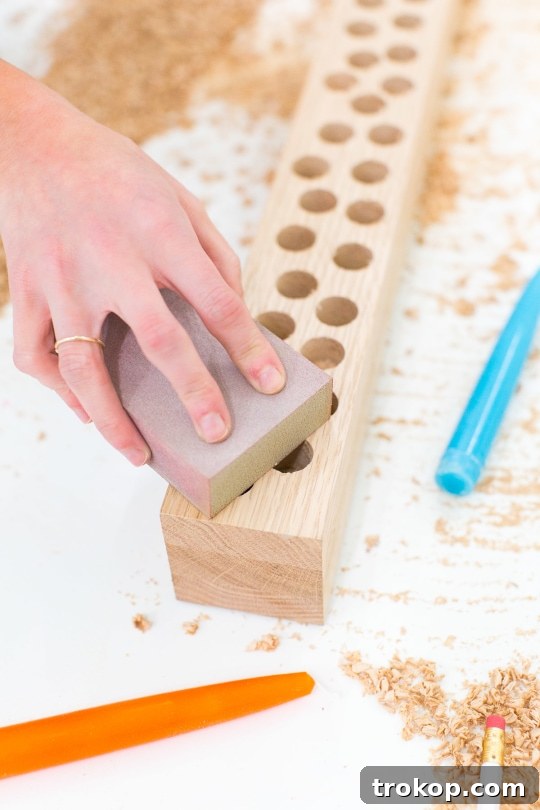
Once all your holes are drilled, inspect your wood. If you’ve used rough-hewn wood or notice any splintering around the drilled holes, this optional step is highly recommended. Using super-fine grit sandpaper, gently smooth all surfaces of the wood, paying particular attention to the edges and the inside of the drilled holes. This will create a more refined and finished look, enhancing both the aesthetic appeal and tactile feel of your candle holder. After sanding, wipe away any dust. Now, your beautiful DIY candle holder is ready for your chosen taper candles!
Expert Tips for a Flawless Finish
To ensure your DIY rainbow candle holder turns out perfectly and matches your vision, keep these additional tips and notes in mind. These suggestions can help you customize your creation even further and address common considerations.
Wood Selection Matters
- Size and Thickness: The dimensions of your wood board should be chosen to suit your taste and the space where the candle holder will reside. A thicker piece of wood generally offers more stability and a more substantial aesthetic.
- Diverse Options: Don’t limit yourself to a standard plank. Consider a unique branch for a truly natural and organic look, a piece of reclaimed wood for a rustic, eco-friendly vibe, or a pre-cut, sanded piece of lumber for a clean, modern finish. Each choice brings a different character to your final piece.
Customizing Your Creation
- Paint or Stain: If desired, add another layer of personalization by painting or staining the wood in a color that perfectly complements your existing home decor. If you plan to light your candles frequently, ensure any paint or stain used is heat-resistant to prevent discoloration or fumes.
- Sealant: For added durability and protection, especially if you foresee potential wax drips, consider applying a clear sealant or varnish after any paint or stain has dried completely.
- Embellishments: Get creative with additional embellishments! You could add small decorative feet to the base, etch designs into the wood, or even attach metallic accents for a touch of glamour.
Securing Your Candles
- Snug Fit: Taper candles are designed to fit snugly. If a candle feels slightly loose in a hole, you can wrap a small piece of aluminum foil or paper towel around the base of the candle before inserting it to create a tighter fit. Conversely, if a candle is too tight, gently widen the hole with sandpaper or a slightly larger drill bit, being careful not to overdo it.
- Wax Drops: To help candles stand perfectly upright, some people like to drip a small amount of hot wax into the bottom of the hole before inserting the candle. Let it cool slightly to form a stable base.

Achieving the Trendy “Drip Candle” Aesthetic
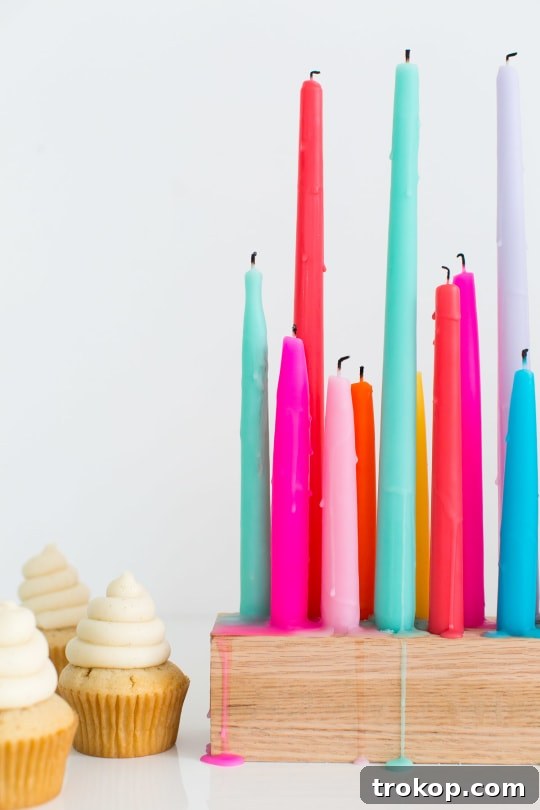
One of the most charming elements of a well-used candle holder is the natural, artistic flow of melted wax. If you love the vintage or romantic look of drip candles but don’t want to wait for ages for your new taper candles to burn down, there’s a quick and safe trick to achieve this effect almost instantly.
The Butane Torch Method
To get that cool, beautifully melted wax look without the extensive wait, we recommend using a butane (or culinary) torch. This tool provides a controlled flame that can quickly heat the candle wax.
- Even Application: Simply run the torch flame gently along the sides of the taper candles for a few seconds at a time. The heat will cause the wax to melt and elegantly drip down, mimicking the natural burn process.
- Instant Effect: You can achieve a full, artistic drip effect in a matter of seconds, allowing you to control the exact amount and pattern of the melted wax.
Safety with the Torch
When using a butane torch, even a small culinary one, exercise extreme caution:
- Ventilation: Work in a well-ventilated area to dissipate any fumes.
- Distance: Keep the flame moving and don’t hold it in one spot for too long to prevent excessive melting or scorching.
- Away from Flammables: Ensure no flammable materials are near your workspace.
- Manufacturer Instructions: Always follow the safety instructions provided with your butane torch.

Ignite Your Creativity: More DIY Candle and Aromatherapy Projects
We truly hope all fellow color enthusiasts and DIY lovers enjoy crafting this fantastic Rainbow Taper DIY Candle Holder! We adore it so much that it’s likely to grace the background of many future posts. If this project has sparked your interest in more candle-making or aromatherapy DIYs, you’re in luck! Here are some of our favorite creative projects from the archives to inspire your next endeavor:
- How to Make Wax Candles with Rosemary and Grapefruit: Create your own scented candles with refreshing, natural aromas.
- DIY Reed Diffuser: How to Make an Essential Oil Diffuser: A simple way to fill your home with continuous, pleasant fragrances.
- Faux Wood Candle Holder: For those who love the look of wood without the drilling.
- Copper Candle Holder: Add a touch of industrial chic with this elegant design.
- Wooden Taper Candle Holder: Another take on a wooden holder, with options for decorative patterns.
- DIY Citronella Candles (Using a Glass Jar and Balloons): Perfect for outdoor entertaining, keeping bugs at bay with style.

DIY Candle Holder for Taper Candles: Quick Overview
Equipment
-
Drill
-
3/4-inch spade drill bit
Materials
- 1 wood board (e.g., oak, 4″x4″x3′ long)
- 1 fine sand paper optional, for a smoother finish
- Taper candles in varying heights, sizes, and colors for a vibrant, staggered look
Instructions
-
Plan Your Layout: Determine how many taper candles your holder will accommodate. Using a pencil, mark the exact spots for drilling. Ensure adequate spacing between each mark to prevent candles from touching when lit. Consider a freestyle, staggered pattern for a more organic and visually interesting design.
-
Drill the Holes: Attach the 3/4-inch spade drill bit (or the appropriate size for your candles) to your drill. Carefully drill straight down into the wood at each marked location. Ensure the holes are deep enough to securely hold your taper candles, preventing them from leaning or falling.
-
Finish the Wood (Optional): If you desire a smoother finish, especially on rough wood, gently sand the entire surface of the board, including the edges and inside the drilled holes, with fine-grit sandpaper. Wipe away any sawdust. Once completed, your candle holder is ready for your chosen taper candles!

Share Your Masterpiece!
We absolutely love seeing your creative endeavors! Don’t forget to share your stunning Rainbow DIY Taper Candle Holder creations with us on Instagram. Be sure to use the hashtag #sugarandclothloves so we can admire your unique designs and celebrate your DIY success! If you’re eager to discover more quick and inspiring DIY projects, you can find them all right here!
Discover More Home Decor Inspiration
43 Top Amazon Wall Decor Ideas for Every Room in Your Home
Find gorgeous Amazon wall decor that makes a big impact…
Continue Reading43 Top Amazon Wall Decor Ideas for Every Room in Your Home
28 Decorative Wall Mirrors You’ll Wish You Bought Sooner
Looking for the perfect wall mirror? Explore our roundup of…
Continue Reading28 Decorative Wall Mirrors You’ll Wish You Bought Sooner
25 Large Wall Clocks for Your Living Room
Looking for the perfect extra large wall clock? Explore stylish…
Continue Reading25 Large Wall Clocks for Your Living Room
19 Unique & Easy Houseplants that We’re Loving
Looking for unique house plants? Dive into our guide to…
Continue Reading19 Unique & Easy Houseplants that We’re Loving