
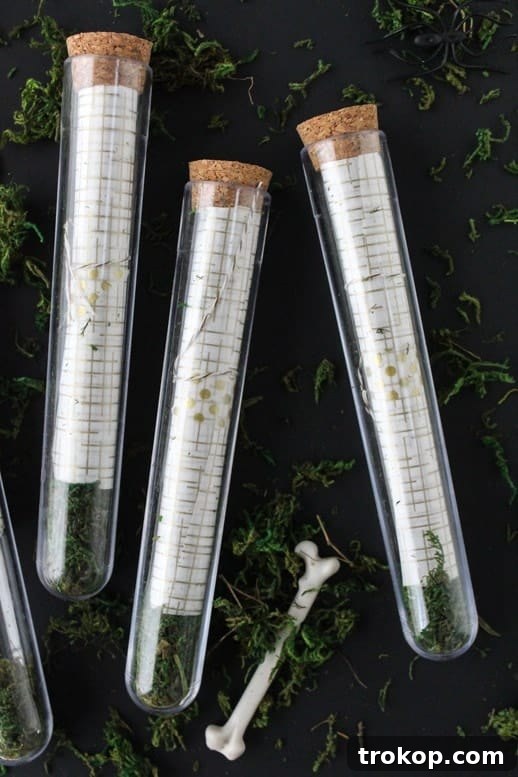
Are you ready to host a spellbinding Halloween gathering but shy away from overly gruesome decor? Our simple yet enchanting DIY scroll test tube invitations are the perfect solution for conjuring up a touch of spooky elegance without the horror. In just five minutes, you can craft unique, personalized invitations that promise an unforgettable event, whether it’s a mysterious dinner party or a whimsical Halloween celebration. These invitations are designed for those who appreciate the spirit of the season with a dash of sophistication and a sprinkle of fun, proving that Halloween doesn’t always have to be about jump scares and gore.
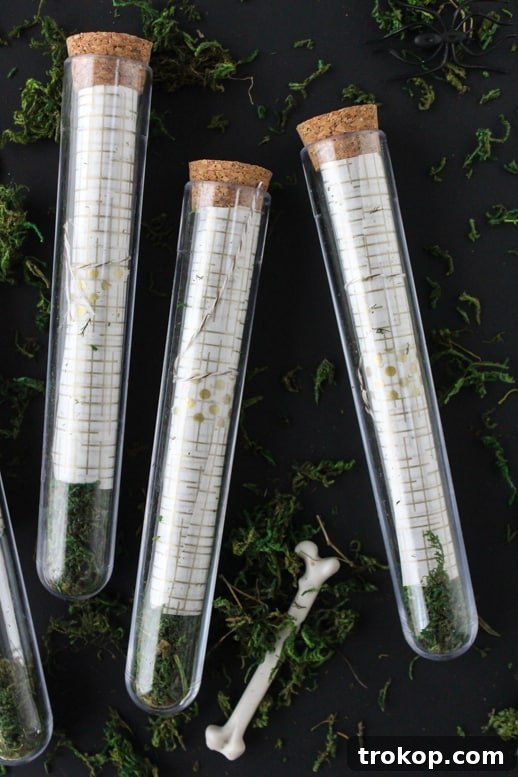
I’ll admit, when it comes to Halloween, I tend to lean towards the “cute and festive” rather than the “truly terrifying.” I’m the person who still covers her eyes during scary movie trailers and occasionally races to bed after hearing a bump in the night. So, when it comes to decorating, you won’t find me surrounded by blood and guts. My kind of Halloween is all about cozy pumpkin carving sessions, warm lattes, and delightful themed treats. But that doesn’t mean I don’t love a good party!
Dinner parties, especially, are my forte. And what better way to set the tone for a captivating autumn evening than with an invitation that’s both intriguing and stylish? These quick and easy DIY test tube invitations are perfect for anyone who wants to celebrate Halloween in a uniquely charming way, appealing to guests with a sense of wonder rather than fright. They offer a delightful blend of mystery and elegance, making them ideal for a range of gatherings, from sophisticated autumnal dinners to themed costume parties.
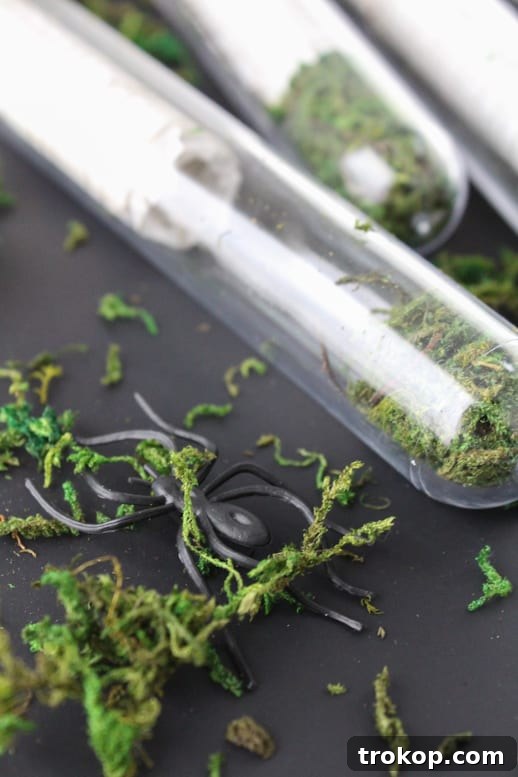
The beauty of these invitations lies in their incredible versatility. You can customize them to be as subtly eerie or as delightfully whimsical as you desire. For a more “creepy crawly” vibe, tuck in miniature plastic spiders, tiny skeleton hands, or even a faux eyeball alongside your scrolled message. Alternatively, keep it simple and sweet with a classic scroll and a small plastic bone for a touch of playful macabre. It’s like a mystery dinner party meets Halloween, creating an element of anticipation that traditional invitations simply can’t match. We even crafted these for our memorable Mad Scientist Party, where they were an absolute hit!
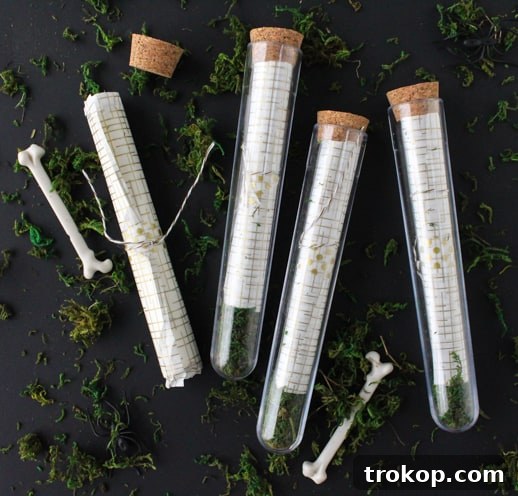
Materials and Tools Needed to Craft Your DIY Scroll Test Tube Invitations
Gathering your supplies is the first exciting step in bringing these unique invitations to life. Most items can be found at your local craft store, dollar store, or online, making this a budget-friendly and accessible DIY project.
- Plastic Test Tubes with Stoppers: These are the stars of our invitation! They come in a variety of sizes, so choose based on how much you plan to fill them with. Opt for clear plastic for durability and a good view of the contents.
- Graphic Decoupage Paper or Specialty Paper: This is optional but adds a touch of visual intrigue and texture. We used a lovely gold graphic decoupage paper from Martha Stewart, which provided an elegant contrast to the invitation scroll. You could also use patterned scrapbook paper, vellum, or even faux aged paper.
- Dried Moss: A small amount of dried moss instantly adds an earthy, mysterious, and slightly eerie touch, perfectly complementing a Halloween or mad scientist theme.
- Cardstock: For printing or writing your invitations. Choose a quality cardstock that holds ink well and can be easily rolled without creasing excessively. Off-white, cream, or light grey cardstock can enhance the vintage or spooky aesthetic.
- Decorative Tape or Washi Tape: This is used to seal your invitation scroll and can add another layer of design. Choose tapes with metallic accents, subtle patterns, or colors that match your theme.
- Twine or Ribbon: For tying your rolled invitations. Natural jute twine offers a rustic, organic look, while a thin satin ribbon could provide a touch of unexpected elegance.
- Scissors or Paper Trimmer: For precise cutting of your cardstock and decorative paper.
- Printer (Optional): If you plan to print your invitation details.
- Small “Knick-Knacks” (Optional): Plastic bones, miniature spiders, tiny bat charms, or other small thematic items from a dollar store or party supply shop to place inside the test tube.
How to Make Enchanting DIY Scroll Test Tube Invitations
Creating these unique invitations is surprisingly simple and requires minimal crafting experience. Follow these steps to assemble your captivating party invites that are sure to impress your guests.
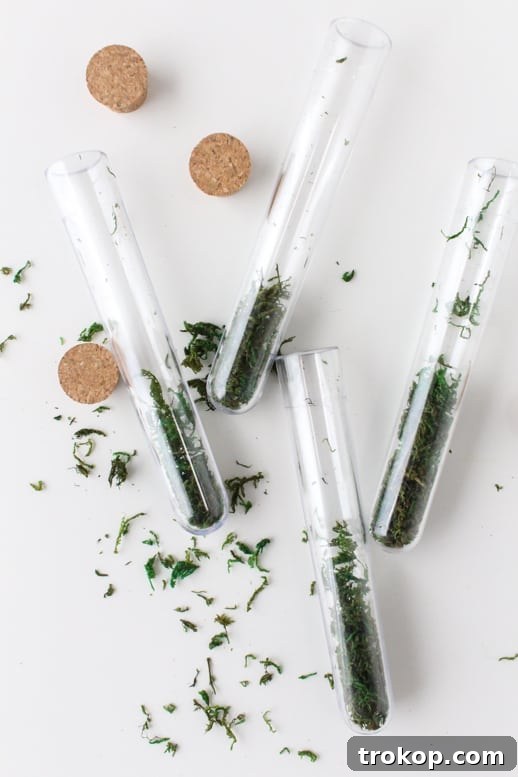
Step 1 – Prepare Your Test Tubes with a Bed of Moss
Begin by adding a small amount of dried moss into the bottom of each plastic test tube. You don’t need much – just enough to create a soft, mysterious base. Ensure you leave ample space above the moss for your rolled invitation and any additional decorative elements you plan to include. This moss adds an immediate touch of nature and intrigue, perfect for a spooky or earthy theme.
Step 2 – Craft Your Invitation Message
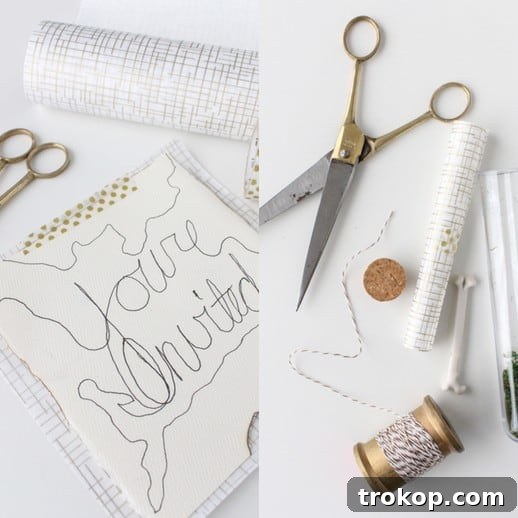
On your chosen cardstock, write or print your party invitations. This is where your creativity can truly shine! Consider using a spooky font for Halloween, or an elegant script for a more formal event. Keep the message concise but informative, including all the essential details: date, time, location, RSVP information, and any special instructions (like costume requirements). Make sure the size of your printed message will comfortably roll up to fit inside the test tube.
Step 3 – Layer with Decorative Paper
If you’re using graphic decoupage paper or another decorative sheet, layer it underneath your printed invitation. This adds visual depth and a touch of sophistication. The decorative paper should be slightly larger than your invitation cardstock, creating a subtle border when layered. This step is optional but highly recommended for enhancing the overall aesthetic.
Step 4 – Secure the Layers
Carefully align your invitation cardstock with the decorative paper (if using) and seal them together with a strip of decorative tape. Apply the tape along one edge, ensuring both pieces are firmly attached. This prevents the layers from separating when rolled and adds another decorative accent.
Step 5 – Roll and Tie Your Invitation Scroll
Gently roll up the layered invitation into a tight scroll. Once rolled, secure it with a piece of decorative tape or tie it snugly with twine or ribbon. A small bow or a simple knot with trailing ends can add to the charm. The tightness of the roll should be enough to fit easily into the test tube without damaging the paper.
Step 6 – Add Small Thematic Knick-Knacks
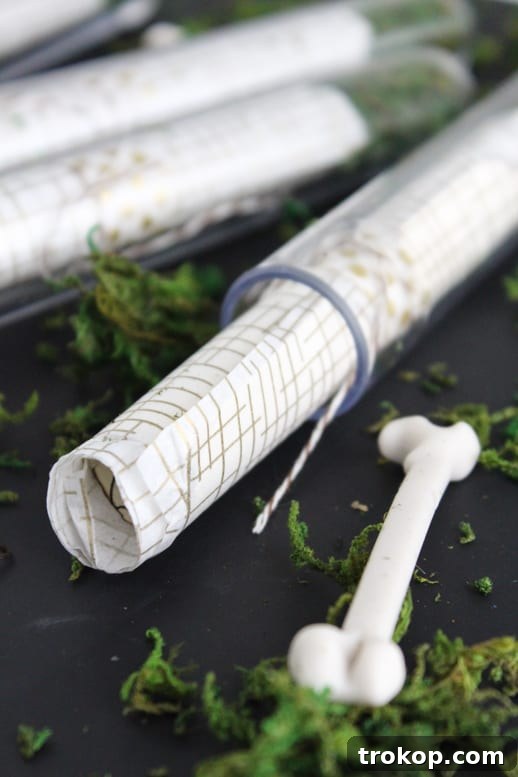
Now for the fun part! Carefully insert your rolled invitation into the test tube. Before sealing, add a small knick-knack to enhance your theme. For Halloween, plastic bones from the dollar store are a perfect, easy choice. Other ideas include miniature spiders, tiny potion bottles, glitter, or even confetti in your party’s colors. This surprise element makes opening the invitation an experience in itself.
Step 7 – Seal with a Cork
Once everything is neatly arranged inside the test tube, seal it securely with the cork. This keeps the contents safe and sound, and the natural cork stopper adds another tactile and rustic element to the overall design.
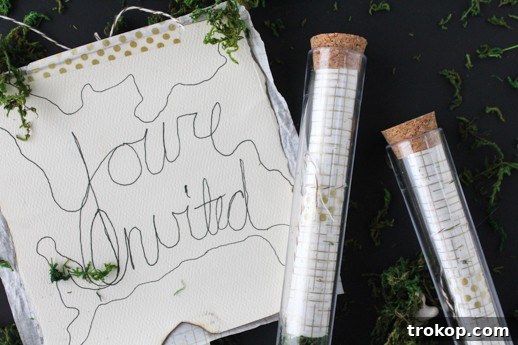
And there you have it! Your enchanting DIY test tube invitations are complete. Now, you can mail them (perhaps in a padded envelope or a cute jewelry box for extra protection) or hand-deliver them to invite guests to your next extraordinary party or dinner. These invitations are more than just information; they’re a tantalizing preview of the unique experience awaiting your guests.
Perhaps you’re also looking for another quick and chic five-minute DIY project? Our DIY bento box is perfect for back-to-school lunches, back-to-work meals, or delightful picnics in the park!
More Halloween DIYs and Delicious Recipes to Complete Your Celebration
Once your guests have received their captivating test tube invitations, it’s time to plan the rest of your Halloween festivities! If you’re seeking more easy Halloween DIY projects and festive holiday recipes to complete your party, look no further. We’ve gathered some of our favorite archives below to help you create a truly memorable and delightful spooky season.
- 5-Minute Easy Pumpkin Decal: Quickly transform ordinary glassware into festive Halloween decor with these simple pumpkin decals. A perfect project for adding a touch of holiday spirit to your drinkware or serving dishes without much effort.
- How to Make a Boozy Dirt Cup Recipe: Elevate a classic childhood treat into an adult-friendly delight. These boozy dirt cup cocktails are as delicious as they are playfully spooky, making them a fun addition to any Halloween spread.
- DIY Petri Dish Jello: For a truly unique and slightly scientific snack, try making these edible petri dish jell-o treats. They’re perfect for a mad scientist theme or just to add a quirky, gross-but-good element to your party food.
- Classic Zombie Cocktail Recipe: No Halloween party is complete without a signature spooky drink. Learn how to mix up a classic Zombie cocktail – a potent and flavorful concoction that’s sure to get the party started.
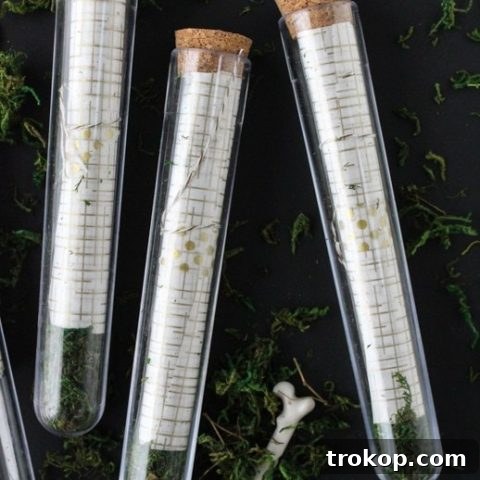
DIY Scroll Test Tube Invitations
45
45
DIY
Halloween
Equipment
-
Scissors
Materials
-
Plastic test tubes
Available in different sizes, depending on what you want to fill them with -
Graphic decoupage paper
Optional: Ours are from Martha Stewart. - Dried moss
- Cardstock
- Decorative tape
- Twine
Instructions
-
Fill each test tube with a tiny bit of dried moss. Leave enough room to still fit your invitations.
-
Write or print your invites on card stock.
-
Layer the graphic gold decoupage paper beneath.
-
Seal them together with tape.
-
Roll the invite up and tape or wrap with twine.
-
Then, insert it into the tube with a little knick knack like plastic bones from the Dollar Store.
-
Seal it with the cork.
$15
diy scroll test tube invitations, halloween invitations, unique party invitations, easy halloween craft

We absolutely love seeing your creative endeavors! Don’t forget to share your amazing Halloween party ideas and finished test tube invitations with us on Instagram using the hashtag #sugarandclothloves. Your projects inspire our community! And if you’re looking for more interior design inspiration, innovative DIY home decor tutorials, and unique ideas to personalize your living space, you can find a wealth of resources right here on our blog. Happy crafting and happy haunting!