Unlock your creativity and elevate your home decor with stunning DIY footed display bowls! If you’ve ever dreamt of owning beautiful, elevated serving pieces or unique terrarium holders but found their price tags prohibitive, you’re in the right place. We’re about to embark on a simple, budget-friendly project that transforms ordinary materials into elegant, versatile decorative accents perfect for any occasion or style.
My own journey into DIY footed bowls began with a moment of pure admiration (and subsequent heartbreak) during a trip to Miami. Wandering through the exquisite Perez Art Museum, my eyes landed on a breathtaking gold-footed bowl. It was everything I envisioned for my home – chic, modern, and exuding an understated luxury. That is, until I saw the price tag: a staggering $250 for the smaller version. My dreams of effortlessly elegant entertaining quickly collided with the harsh realities of a “budget life.” But instead of giving up, that spark of inspiration ignited a determination to recreate that beauty on my own terms, using humble materials I could easily source.
This project isn’t just about saving money; it’s about the satisfaction of crafting something beautiful with your own hands. It’s about customizing your space to reflect your unique taste without breaking the bank. These DIY footed display bowls are incredibly versatile, offering endless possibilities for styling. Whether you envision them gracing your dining table filled with delectable treats or housing a miniature green oasis, they are sure to become a cherished addition to your home. You can also check this DIY Footed Serving Bowls for an additional layer of decor to your table.
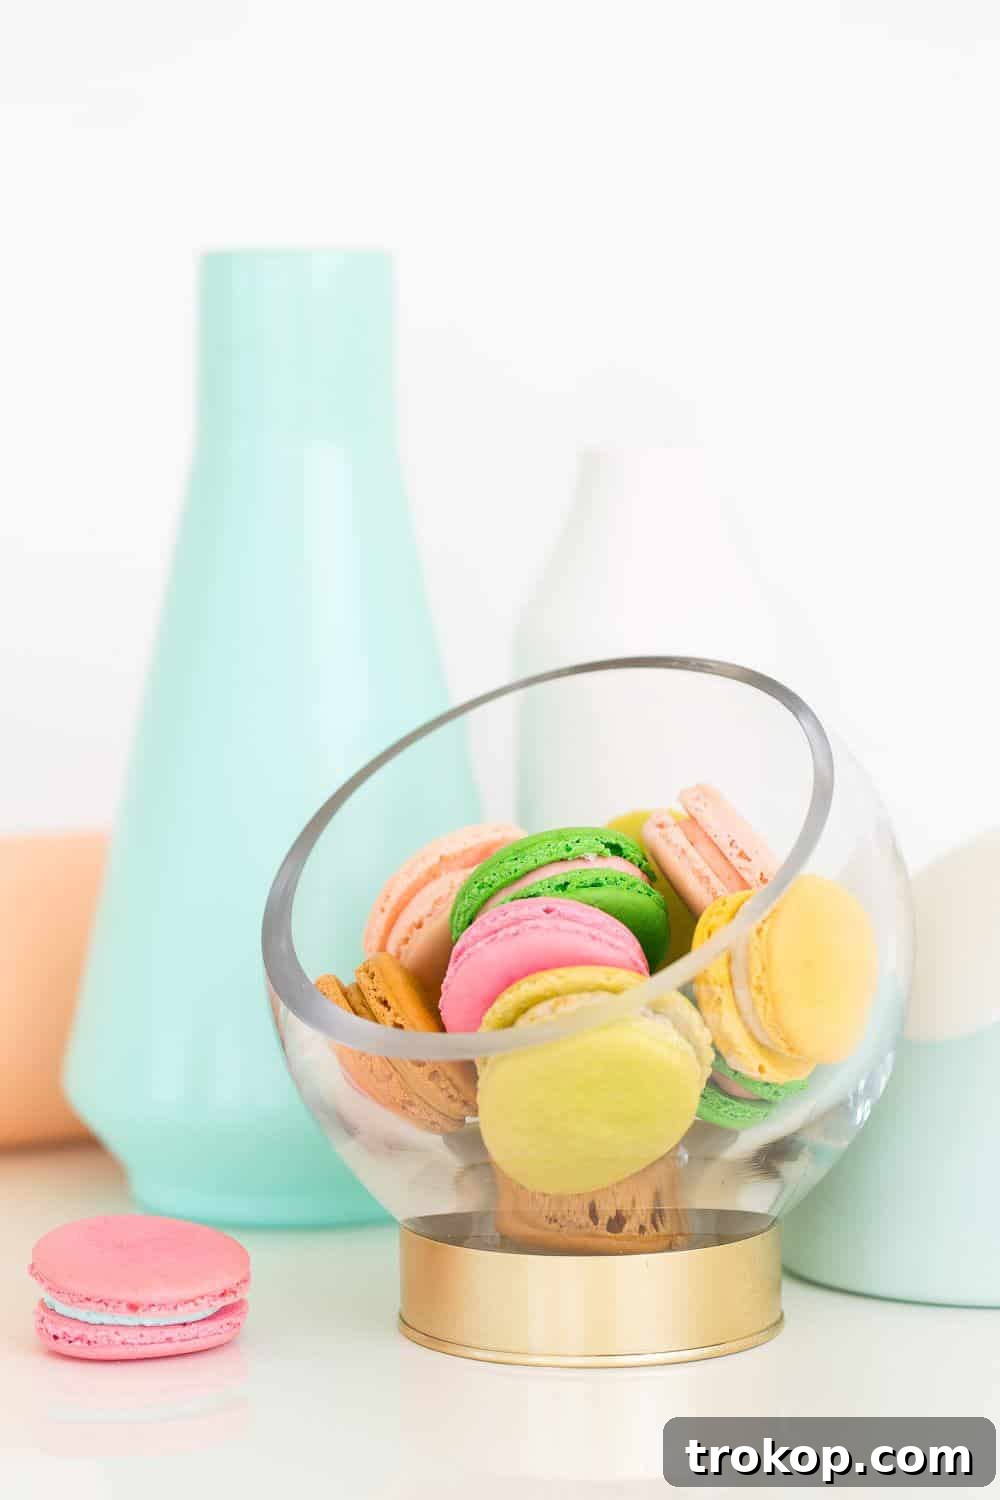
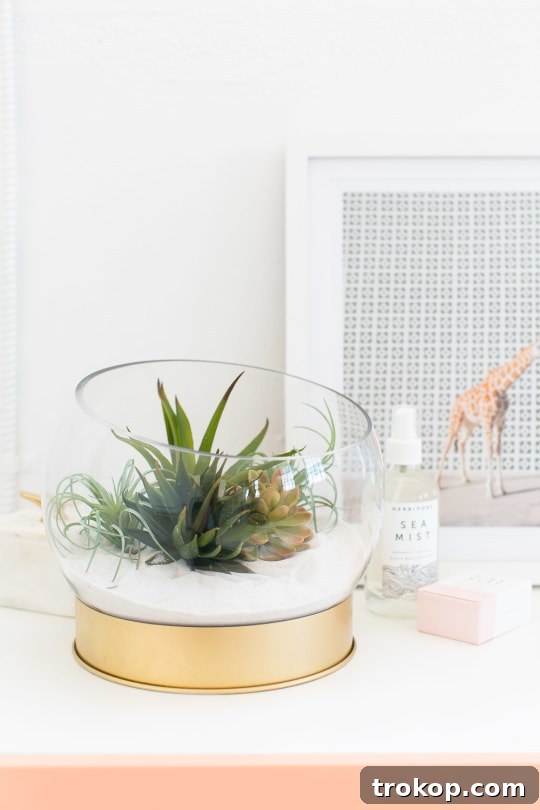
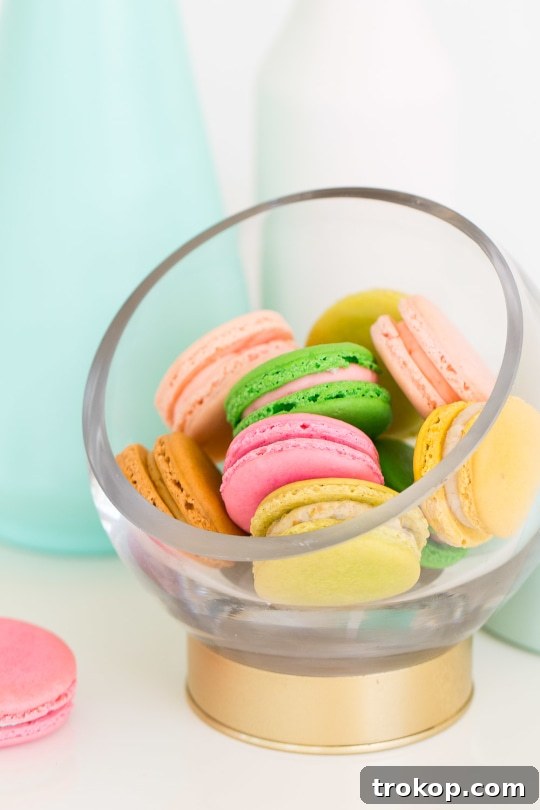
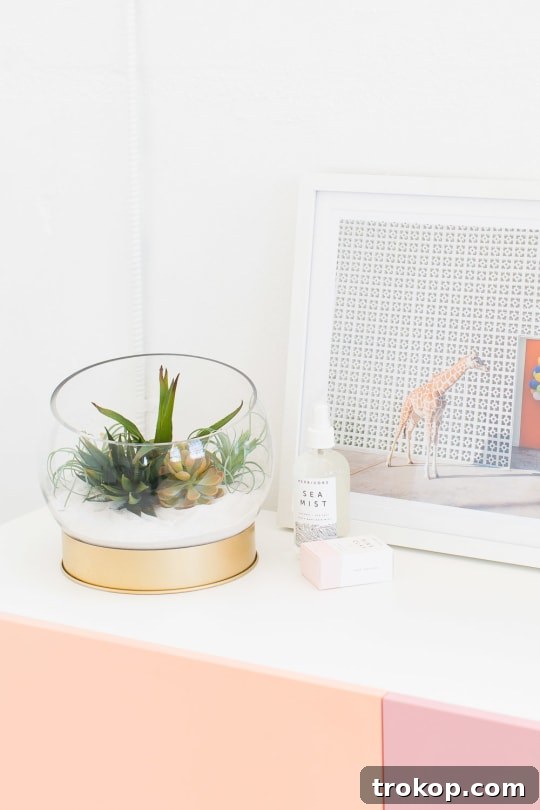
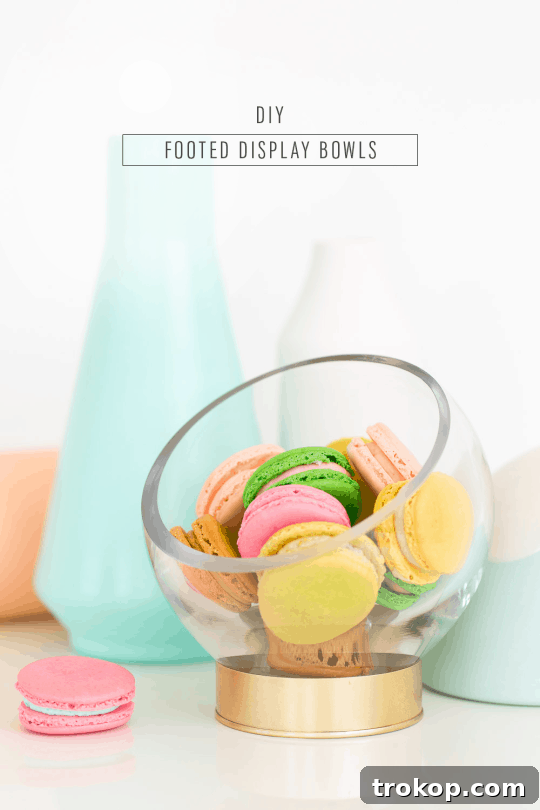
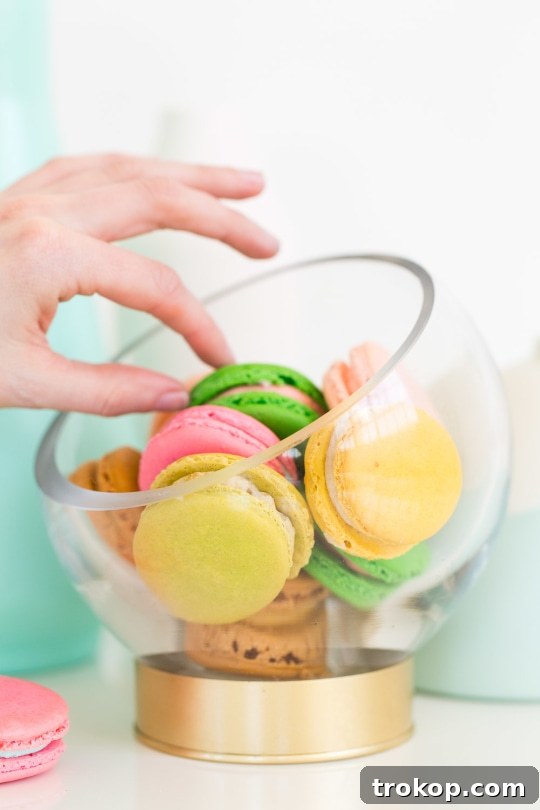
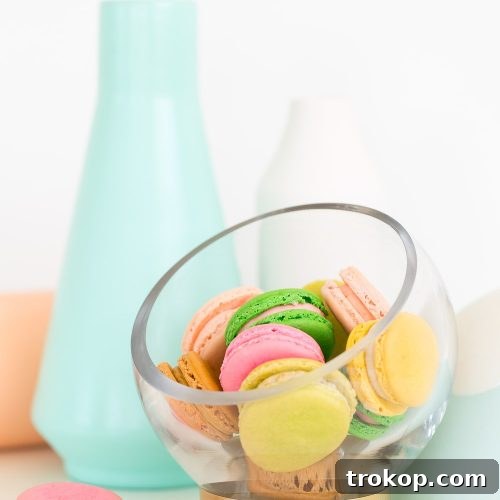
Initially, I considered making both of my creations into charming terrariums, perfect for showcasing small plants and bringing a touch of nature indoors. However, as often happens in a creative household, I had a few delightful macarons casually “laying around.” As soon as I placed them in the bowls, they just screamed to be displayed! The vibrant colors and delicate textures looked absolutely captivating. Now, I’m genuinely torn. Should these beautiful pieces serve as elegant serving bowls for treats, or should they become lush, miniature terrariums? I’ll let you weigh in on the great debate as we go through the steps!
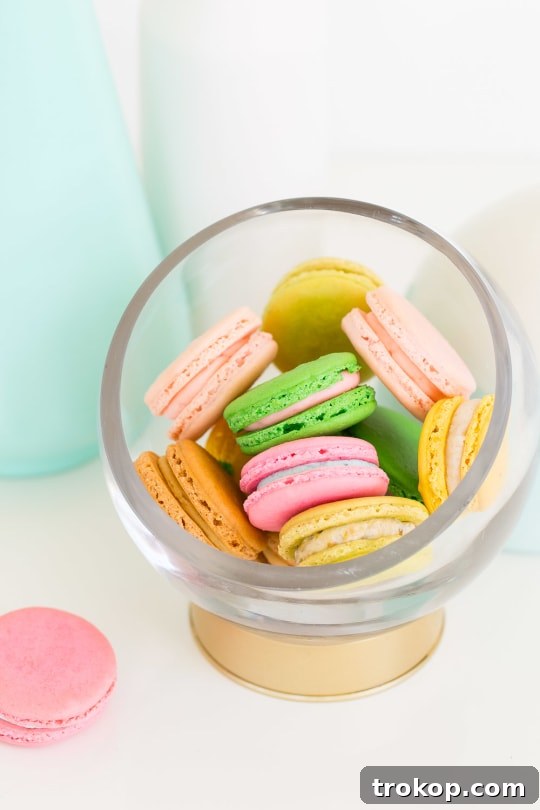
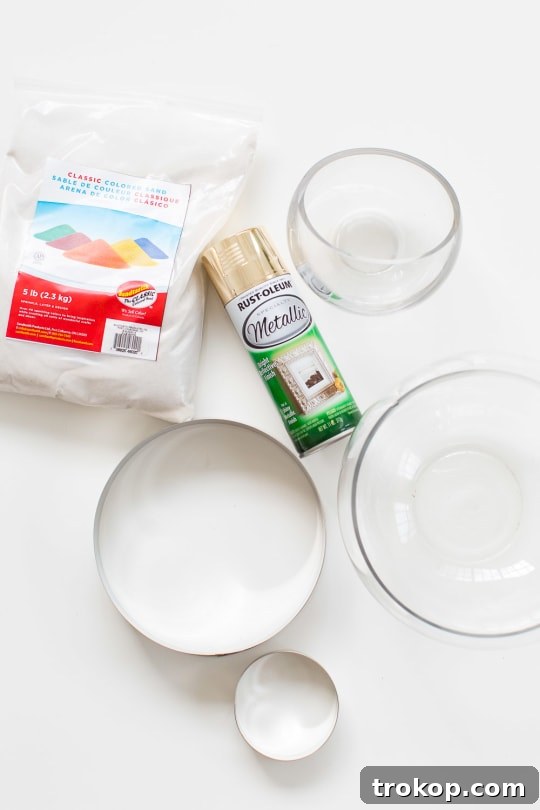
Table of Contents
Toggle
The Inspiration Behind the DIY Footed Bowls
Every great DIY project often starts with a moment of inspiration, typically followed by a dose of reality. For me, that moment occurred during a memorable trip to Miami in the Fall. The vibrant art scene and architectural beauty of the city left a lasting impression, particularly during our visit to the renowned Perez Art Museum. As I explored the galleries, my attention was captured by a truly exquisite gold-footed bowl. Its sleek design, radiant metallic finish, and elegant elevation immediately caught my eye. It was perfectly balanced – modern yet timeless, simple yet luxurious. I envisioned it as the perfect centerpiece for a chic dinner party or a sophisticated accent on a console table.
However, the dream quickly turned into a sobering realization when I inquired about the price. The small version of this captivating piece retailed for an astonishing $250. While its beauty was undeniable, that price point was simply not feasible for my everyday budget. This experience, however, didn’t dampen my spirits; instead, it ignited a creative spark. Why buy when I could build? This pivotal moment led to the decision to craft my own DIY footed display bowls, using readily available and much more affordable materials. It’s a testament to how creative problem-solving can transform an expensive desire into a rewarding and personal project.
Why DIY Your Own Footed Display Bowls?
Beyond the obvious cost savings, there are numerous compelling reasons to undertake this DIY project and create your own footed display bowls. Firstly, it offers unparalleled personalization. When you craft something yourself, you have complete control over the design elements – from the color of the feet to the size and style of the bowl. This allows you to create pieces that perfectly complement your existing home decor, match a specific aesthetic, or even reflect a seasonal theme. No more compromising on store-bought options that are “almost” what you want!
Secondly, the satisfaction of creating something beautiful with your own hands is immensely rewarding. There’s a unique sense of pride that comes with displaying an item you’ve made, knowing the effort and creativity that went into it. It’s also a fantastic way to develop new skills and gain confidence in your crafting abilities. Thirdly, DIY projects like this promote sustainability by encouraging you to repurpose or upcycle materials, rather than constantly buying new. This project specifically uses simple, often overlooked items, giving them a glamorous second life. Finally, these footed bowls are incredibly versatile. They aren’t just one-trick ponies; they can adapt to various functions, making them a smart and stylish investment of your time and effort. From elegant serving dishes to charming terrariums or even unique jewelry holders, their utility is limited only by your imagination.
Materials Needed to Make a DIY Footed Display Bowls
Gathering the right materials is the first step to any successful DIY project. For these elegant footed display bowls, we’re focusing on simplicity and accessibility. You might even have some of these items lying around your home already! The core components are standard cookie cutters and glass terrariums, which provide a clean, modern aesthetic. The magic truly happens with a touch of metallic spray paint, transforming the ordinary into something truly special. Here’s what you’ll need, along with a few optional items for those who wish to style their bowls as terrariums:
Metallic gold spray paint: While gold offers a classic, luxurious look, don’t hesitate to experiment with other metallic shades like silver, rose gold, or even a bold matte black to match your decor.
8 inch circle cookie cutter: This will serve as the base, or “foot,” for your larger display bowl. Ensure it’s sturdy enough to provide a stable foundation.
4.5 inch circle cookie cutter: For a smaller, complementary display bowl. Having different sizes adds visual interest to your arrangement.
Sandtastik white sand (optional for terrarium styling): Creates a clean, natural base for plants in a terrarium. Various colors of decorative sand can also be used.
Faux plants (optional for terrarium styling): Perfect for a low-maintenance terrarium. Consider small succulents, air plants, or moss for a realistic touch.
Large 7 inch glass terrarium (or this option): This will be the main bowl component. Look for clear glass designs that allow for optimal display.
Small 4.5 inch glass terrarium (or this option): A smaller version to create a cohesive set of display bowls. These clear glass bowls can also be found at craft stores or even dollar stores.
How To Make A DIY Footed Display Bowls
Creating these elegant footed display bowls is astonishingly simple and requires minimal crafting experience. The beauty lies in the clever combination of everyday items and a quick spray paint transformation. Follow these two straightforward steps to craft your own stylish home accents:
Step 1 — Choose Your Bases Wisely: The key to a successful footed bowl is ensuring stability and a pleasing aesthetic. You have complete creative freedom when it comes to the size of your terrarium (the bowl part) and your cookie cutter (the foot). However, the crucial detail is to make sure your chosen cookie cutter is slightly larger than the base of the glass terrarium. This slight overlap is essential for the terrarium to rest securely and nicely inside the cookie cutter, creating that elevated, “footed” effect. Before you commit to painting, perform a dry run: place your glass terrarium on top of your cookie cutter. Does it feel stable? Does the terrarium sit just inside the rim of the cookie cutter? If so, you’ve got the perfect match! This step ensures both functionality and an attractive finished product. Experiment with different combinations to find the perfect proportions for your desired look.
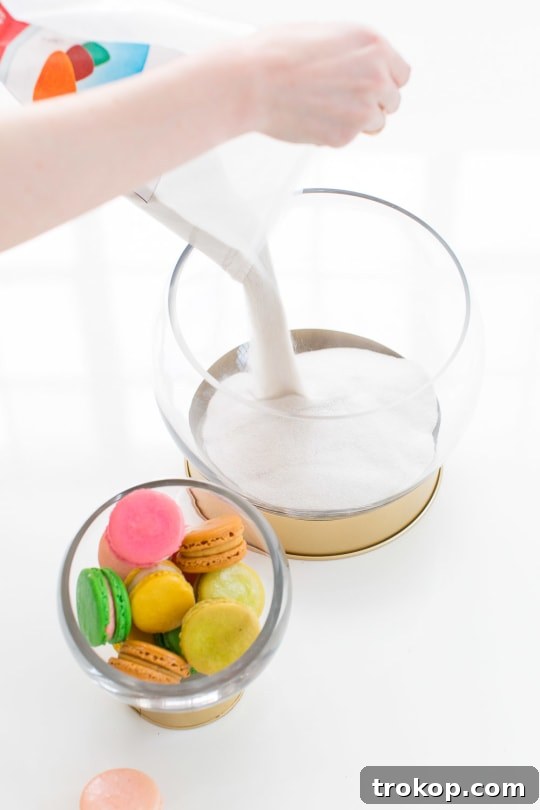
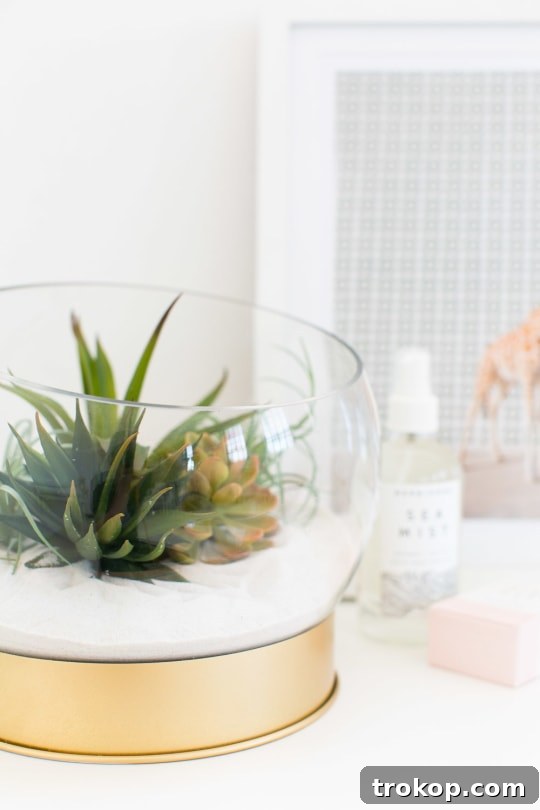
Step 2 — Transform and Assemble: Now for the fun part – adding that touch of glamour! Take your chosen cookie cutter and move to a well-ventilated area, preferably outdoors, or in a garage with open doors. Lay down a drop cloth or old newspaper to protect your work surface. Shake your metallic gold spray paint can vigorously for about a minute. Hold the can approximately 6-8 inches away from the cookie cutter and apply thin, even coats of paint. It’s always better to apply multiple light coats than one thick coat to prevent drips and ensure a smooth, professional finish. Rotate the cookie cutter to cover all angles, including the inner and outer edges. Once fully coated, allow the spray paint to dry completely according to the manufacturer’s instructions, which typically takes at least an hour, but often longer for full curing. After the paint is thoroughly dry, carefully place your glass terrarium onto the painted cookie cutter base. The terrarium should rest snugly within the slightly larger rim of the cookie cutter, creating your beautiful new footed display bowl. All that’s left is to fill it with your chosen items and proudly display your creation!
Styling Your DIY Footed Bowls: Serving or Terrarium?
As you’ve seen, these DIY footed bowls offer a delightful dilemma: are they elegant serving pieces or charming miniature terrariums? The beauty is, they can be both! Their versatile design makes them perfect for various uses, adapting to your needs and current decor. Let’s explore some styling ideas for each option:
Elegant Serving Solutions
When used as serving bowls, these footed creations instantly elevate any spread, making even simple snacks feel gourmet. Imagine them filled with vibrant fruits for a brunch, delicate pastries for an afternoon tea, or colorful candies for a festive celebration. They’re ideal for:
- Appetizers and Finger Foods: Arrange bruschetta, mini quiches, or cheese and crackers. The elevated design makes them easy for guests to access.
- Dessert Displays: Showcase macarons (as I discovered!), cupcakes, cookies, or small tarts. A mix of heights on a dessert table adds visual interest.
- Fresh Fruit Medleys: Bright berries, sliced kiwi, or grapes look incredibly appealing against the metallic foot.
- Table Centerpieces: Even when not filled with food, a pair of these bowls can act as a stunning centerpiece, perhaps holding decorative ornaments or floating candles.
For food safety, always place a protective barrier like parchment paper, a decorative napkin, or a small glass plate inside the terrarium bowl before adding direct food items. This prevents food from directly contacting the glass if it’s not food-grade certified, and also helps with easy cleanup.
Charming Terrarium Displays
If you’re leaning towards a botanical display, these footed bowls make exquisite terrarium holders. They offer a clear view of your miniature ecosystem, bringing a touch of nature indoors in a sophisticated way. Consider:
- Succulent Gardens: These low-maintenance plants thrive in open terrariums. Layer white sand, small pebbles for drainage, and a mix of small succulents for a desert-chic look.
- Air Plant Arrangements: Air plants (Tillandsia) require no soil, making them perfect for simple, elegant displays. Combine them with decorative rocks, moss, or driftwood for a minimalist aesthetic.
- Moss Terrariums: Create a lush, green scene with various types of preserved or live moss. Add tiny figurines or fairy garden elements for a whimsical touch.
- Faux Plant Displays: For zero maintenance, use realistic faux succulents or small botanical stems. This offers the beauty of plants without any care requirements.
Remember to consider the specific needs of live plants if you choose that route, ensuring adequate light and occasional watering (if applicable) to maintain their health.
It’s a perfect match with the mid-century vibe back to entertaining with this DIY Serving Tray!
So tell me, what do you think? Are they serving bowls or terrariums? I’m still on the fence and can’t seem to make up my mind, which is why their versatility is so appealing!
But whichever use you decide on, I hope you’ll enjoy these beautiful and budget-friendly DIY creations as much as I do. They are a testament to how simple ideas and a bit of creativity can transform your home decor.
More DIY Projects and Ideas
If you’ve enjoyed crafting these footed display bowls, you’re likely a fellow enthusiast of transforming everyday items into extraordinary home decor. The world of DIY is boundless, offering endless opportunities to personalize your space, save money, and unleash your creative potential. Here are some more inspiring DIY projects and ideas to keep your crafting momentum going:
- DIY Plate Clock: A fun way to turn decorative plates into functional timepieces.
- How to Make DIY Paper Flower Cake Topper: Add a handmade, delicate touch to your celebration cakes.
- DIY Fresh Flower Cake Topper: For a more natural and fragrant cake decoration.
- How to Make DIY Wooden Polaroid Displays (+ Video Tutorial): A charming way to showcase your favorite memories.
DIY Footed Display Bowls
Equipment
-
8 inch circle cookie cutter
-
4.5 inch circle cookie cutter
Materials
- Metallic gold spray paint
- Sandtastik white sand optional for terrarium styling
- Faux plants optional for terrarium styling
- Large 7 inch glass terrarium or this option
- Small 4.5 inch glass terrarium or this option
Instructions
-
Choose any size terrarium or cookie cutter base that you’d prefer. Make sure that the cookie cutter is slightly larger than the base of the glass terrarium so that it rests nicely inside and provides stability.
-
In a well-ventilated area, spray paint the cookie cutter gold (or your chosen metallic color) with thin, even coats. Let it dry completely according to product instructions. Once dry, place the glass terrarium on the footed base, then fill and display your elegant DIY bowls!

Don’t forget to share your beautifully crafted DIY Footed Display Bowls with us on Instagram! We absolutely love seeing all of your creative interpretations and how you style your handmade pieces. Make sure to use the hashtag #sugarandclothloves so we can admire your work and feature it. These bowls are more than just decor; they are a statement of personal style and DIY prowess. If you’re looking for even more interior design inspiration, innovative crafting ideas, or simply ways to add a personalized touch to your living spaces, you can find a wealth of our home decor tutorials and ideas right here on the blog!