
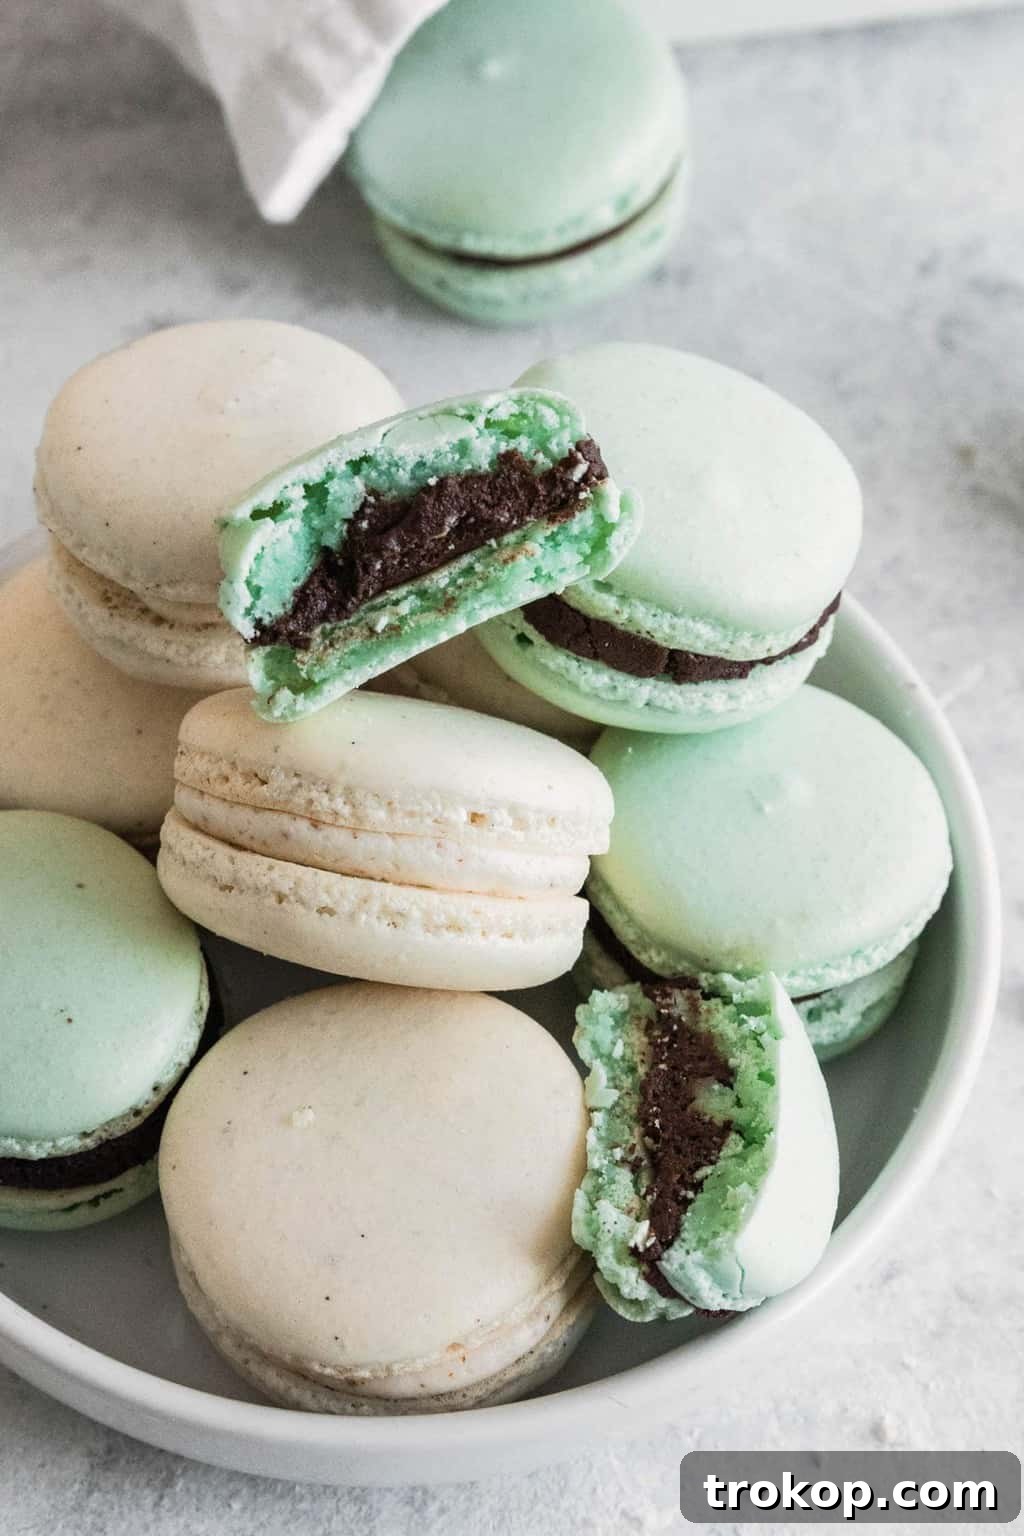
Welcome to the ultimate guide to mastering the delicate art of macaron making! For years, these enchanting French cookies have captivated bakers and dessert lovers alike with their vibrant colors, intricate ruffled “feet,” and irresistible chewy-crisp texture. They’re not just a treat for the palate but a feast for the eyes, offering endless possibilities for creative expression through flavor and decoration. While macarons often carry a reputation for being challenging to perfect, we’re here to demystify the process and equip you with a truly foolproof recipe.
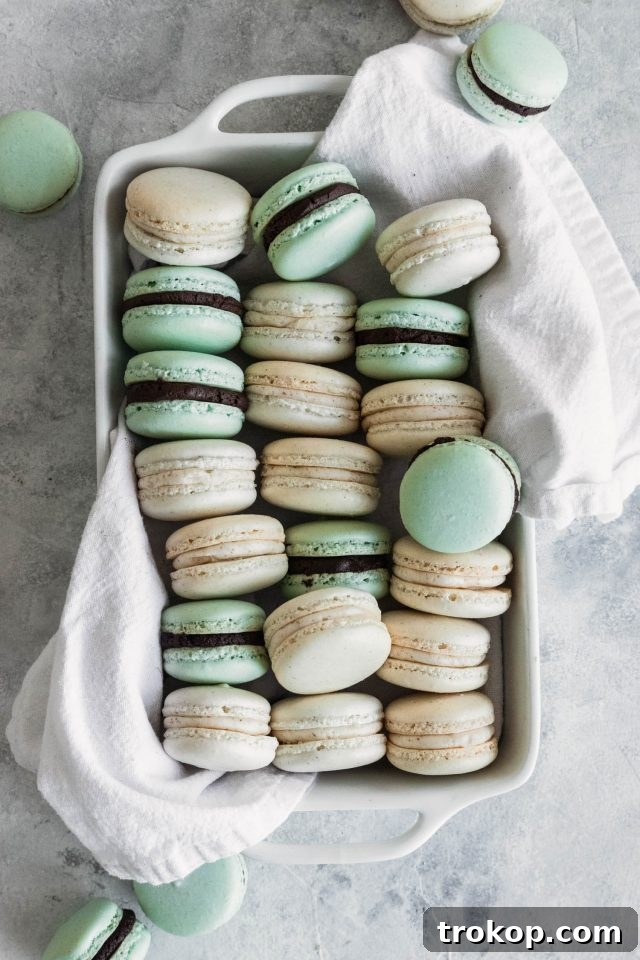
Indeed, macarons are more than just popular; they’re a culinary phenomenon. Their naturally gluten-free nature, combined with their capacity for infinite color and flavor combinations, makes them a versatile and elegant choice for any occasion. Here, Rebecca, a passionate baker from Good Things Baking, has meticulously broken down the process, transforming what seems like a daunting task into an accessible and enjoyable baking experience. Say goodbye to kitchen intimidation – with this comprehensive guide, you’ll confidently bake beautiful macarons every time.
We understand that baking macarons can sometimes present unexpected hurdles. That’s why this guide includes an extensive macaron troubleshooting section, designed to help you diagnose and resolve any common issues you might encounter. Believe us, we’ve made every mistake in the book, so we’ve packed this section with practical solutions to guide you to success.
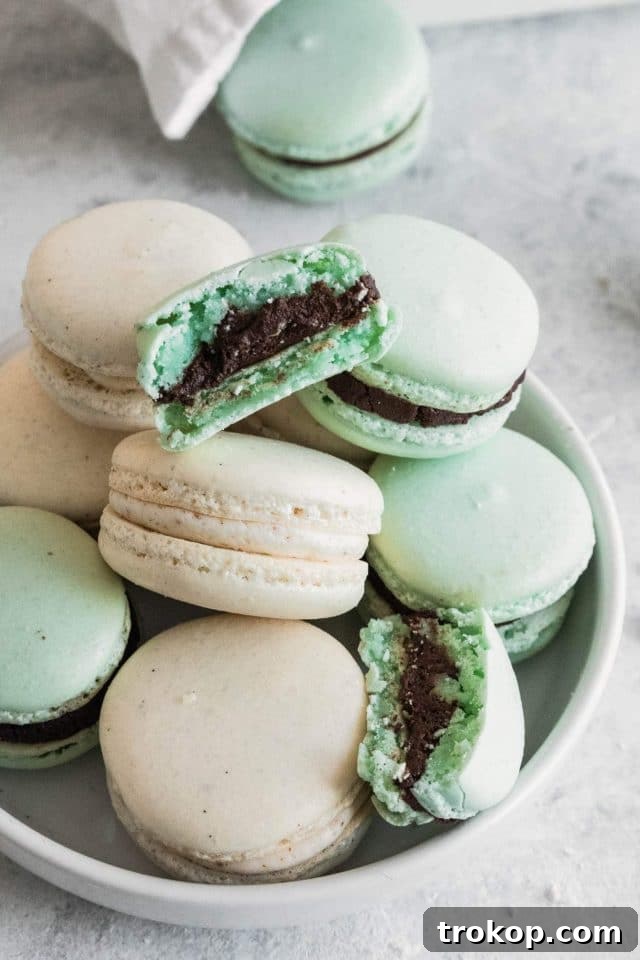
This recipe proudly utilizes the French meringue method, which Rebecca finds to be the simplest and most approachable technique for beginners and experienced bakers alike. While another method, the Italian method, also exists, it involves more complex steps like cooking sugar syrup to a precise temperature, which can add unnecessary complexity for those seeking an easy, foolproof approach.
While a concise recipe card is provided at the end of this post with all the necessary ingredient measurements and instructions, we strongly recommend reading through the entire article. We’ve woven in countless extra tips, detailed tricks, and helpful photos throughout the post, offering visual guidance for those trickier steps. These insights are invaluable for understanding the ‘why’ behind each action, ultimately leading to consistently perfect homemade macarons.
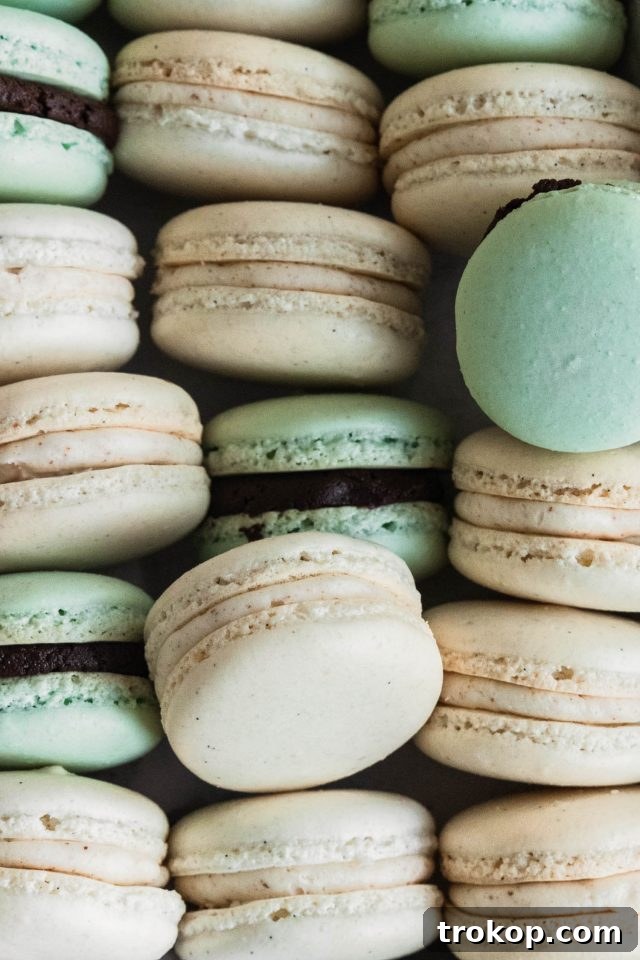
Essential Tools Needed for Macaron Making
Making perfect macarons relies heavily on having the right equipment. While some tools might seem optional, they significantly contribute to consistent results. Here’s a breakdown of the essential items you’ll need and why they are so crucial for your foolproof macaron journey:
- Kitchen Scale — For macaron baking, precision is paramount. Using a kitchen scale to measure ingredients by weight (grams) rather than volume (cups) eliminates inconsistencies that can arise from packing flour differently or having varying sizes of eggs. This small investment ensures more reliable outcomes every single time, making your macaron process truly foolproof.
- Parchment Paper — While silicone baking mats are popular for many baking tasks, parchment paper is highly recommended for macarons. Its slightly less slick surface provides better grip for the macaron batter, encouraging them to rise upwards and develop those signature “feet” rather than spreading outwards. Cut it to fit your baking sheets perfectly to prevent warping.
- Piping Bag & Round Tip — A good quality piping bag, fitted with a clean round tip (e.g., Wilton 1A or Ateco 805), is indispensable for creating uniform macaron shells. Using a large glass or jar to hold the piping bag upright while filling it makes the process much cleaner and easier, especially with sticky batter.
- Fine Mesh Sieve or Food Processor — Achieving smooth macaron shells requires thoroughly blended dry ingredients. Sifting your almond flour and powdered sugar together through a fine mesh sieve removes any lumps and ensures a light, even texture. If you don’t have a sieve, a food processor can effectively blend these ingredients into a fine, consistent powder, but be careful not to over-process and release oils from the almonds.
- Electric Hand or Stand Mixer — Whipping egg whites to the stiff peak stage, the foundation of a stable meringue, is best achieved with an electric mixer. A stand mixer with a whisk attachment is ideal, allowing you to gradually add sugar while beating. A powerful hand mixer can also work effectively.
- Rubber Spatula — A sturdy yet flexible rubber spatula is essential for the macaronage process, where you gently fold the dry ingredients into the meringue. Its design helps to incorporate ingredients without deflating the delicate meringue.
- Clean Baking Sheets — Flat, unwarped baking sheets are important for even heat distribution and level macaron shells. Using two sheets allows you to prepare your second batch while the first is baking.
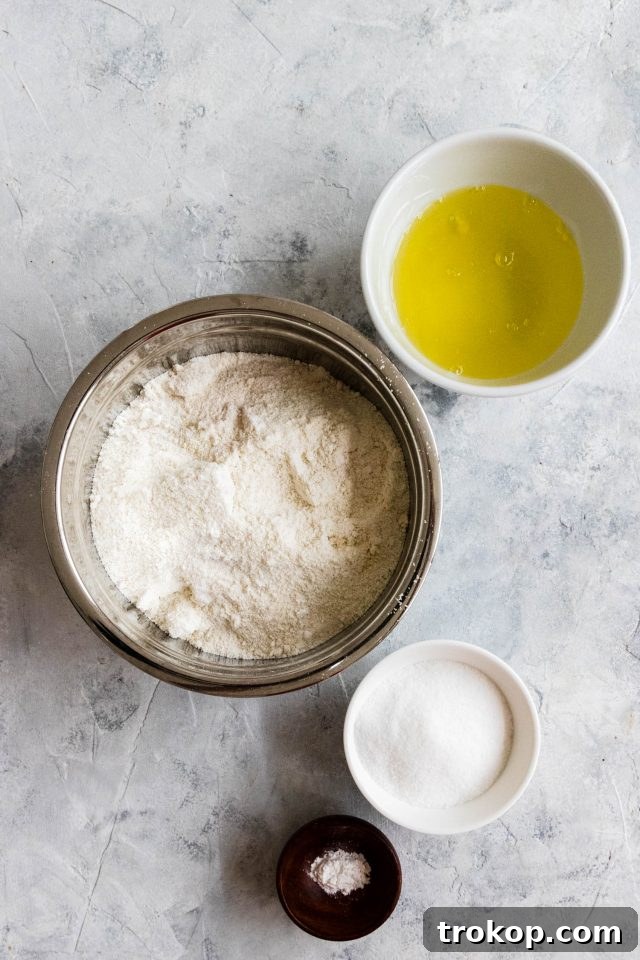
How to Make Foolproof French Macarons: Step-by-Step
Embarking on your macaron-making journey might seem daunting, but with this detailed, step-by-step guide, you’ll master the art of these delightful French cookies. We’ll be using the French meringue method, known for its straightforward approach, perfect for beginners aiming for consistent success. Remember, precision and patience are your best friends here.
Preparation is Key
- Prepare Your Baking Stations: Begin by precisely lining two clean baking sheets with parchment paper cut to fit them. If using a piping bag, trim the end and fit it with a clean, round frosting tip and coupler.
- Room Temperature Egg Whites: Carefully separate 4 large egg whites from their yolks, ensuring absolutely no yolk contaminates the whites. Weigh them to 120 grams for accuracy. Place the egg whites in a very clean mixing bowl and allow them to come to room temperature for at least 30 minutes. Room temperature egg whites whip up with greater volume and stability.
- Measure and Sift Dry Ingredients: Using your kitchen scale, accurately weigh 240 grams (approximately 2 cups) of powdered sugar and 224 grams (approximately 1.5 cups) of finely ground almond flour. Sift these two ingredients together through a fine mesh sieve into a separate clean bowl. This step is vital for removing any larger pieces of almond or lumps of sugar, ensuring your macaron shells are perfectly smooth. Discard any bits that don’t pass through the sieve. Stir in a generous pinch of fine salt, then set this dry mixture aside.
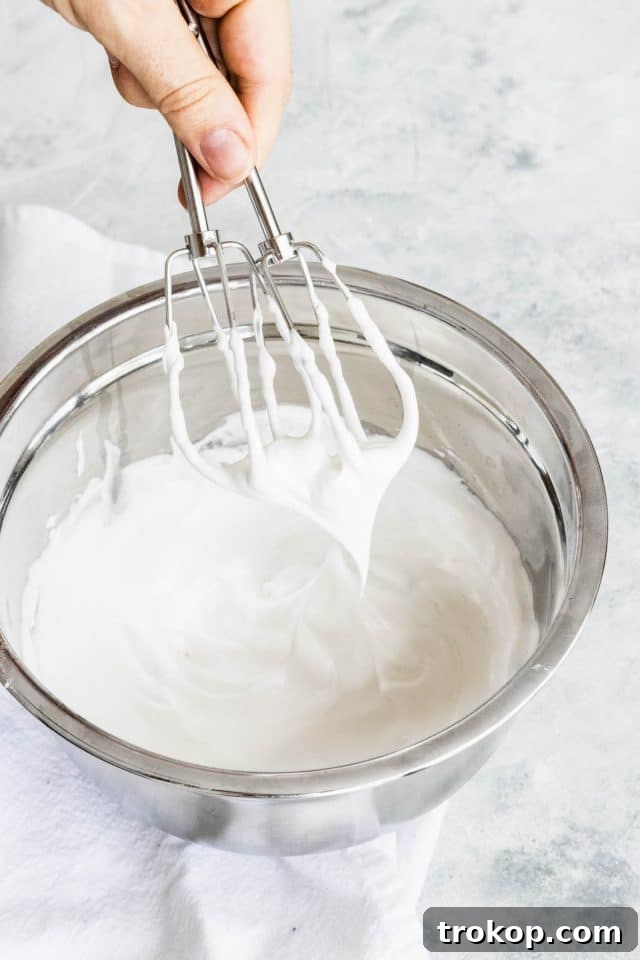
Creating the Perfect Meringue
- Whip the Egg Whites: Once your egg whites have reached room temperature, begin beating them on medium-high speed with your electric mixer. As they become frothy and bubbly, indicating they’re starting to aerate, add 1/4 teaspoon of cream of tartar. Cream of tartar is an acidic agent that helps stabilize the egg whites, allowing them to whip up faster and hold their volume better.
- Gradually Add Granulated Sugar: Continue beating, and slowly, gradually, add 100 grams (approximately 1/2 cup) of granulated sugar, one tablespoon at a time. Do not rush this step; adding sugar too quickly can deflate the meringue. Continue beating until you achieve the “stiff peak” stage. This means that when you lift the beaters out of the meringue, the peaks stand up firmly and straight, without flopping over even slightly. The meringue should also look glossy and smooth.
- Flavor and Color Your Meringue: Gently fold in 1 teaspoon of vanilla extract for flavor. If you desire colored macarons, add your gel food coloring at this stage. Gel colors are preferred over liquid food colorings as they add minimal moisture, preserving the meringue’s consistency. Mix just enough to achieve a uniform color.
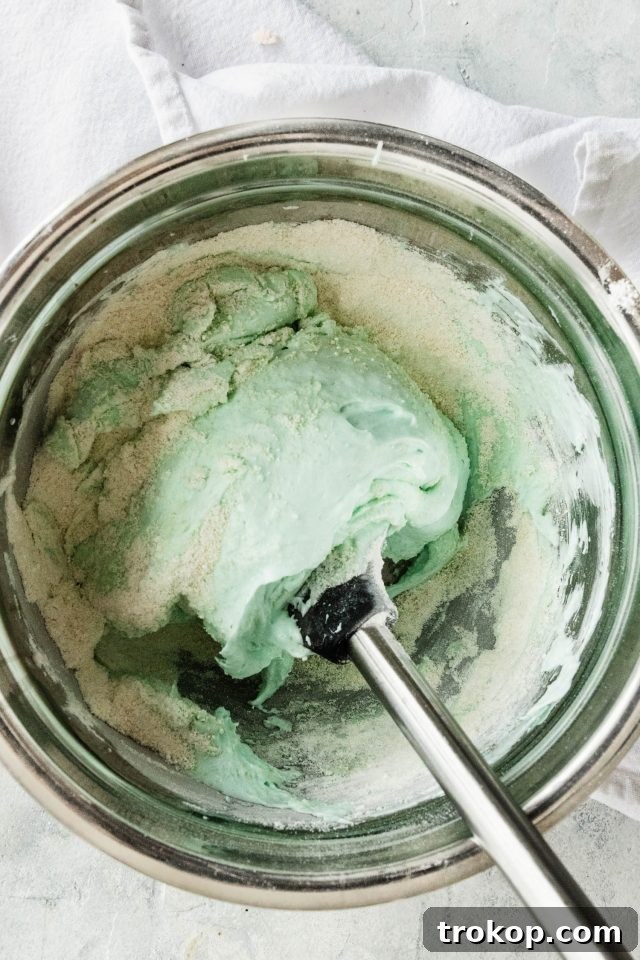
The Art of Macaronage
- Initial Incorporation: Add about one-third of your sifted almond flour and powdered sugar mixture to the stiff meringue. Using a rubber spatula, gently mix this portion until it is just combined. The goal here is to start loosening the meringue without deflating it too much.
- Achieving the “Lava” Consistency: Pour in the remaining almond flour mixture. Now comes the critical step known as “macaronage.” Using your spatula, gently fold the dry ingredients into the meringue, pressing the batter against the sides of the bowl and then folding it back over itself. Continue this motion, being careful not to overmix.
- Test for Perfect Consistency: The batter is ready when it flows off the spatula in a thick, continuous ribbon, resembling molten lava. You should be able to draw a “figure eight” with the ribbon of batter without it breaking. Another excellent test is to spread a small amount of batter up the side of your bowl. If it slowly and smoothly re-absorbs back into the main batter, it’s perfect. If it clings rigidly to the side, it’s undermixed. If it’s too runny and spreads out quickly, it’s overmixed. This stage is crucial for the characteristic smooth shells and delicate “feet” of macarons. If unsure, fold a few more times and re-test.
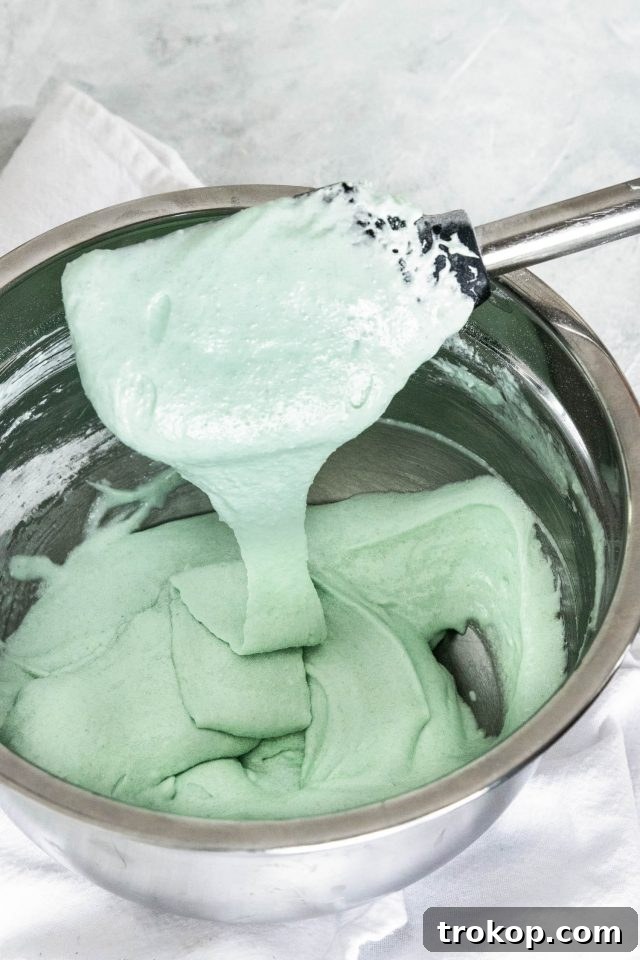
Piping Macaron Shells Perfectly
Once you’ve achieved the ideal macaron batter consistency, the next step is piping. This requires a steady hand and a bit of practice, but with these tips, you’ll be well on your way to beautifully uniform shells.
- Prepare Your Piping Bag: Fold down the top edges of your piping bag to create a cuff. This helps keep the outside of the bag clean and makes filling it much easier. Spoon your perfectly prepared macaron batter into the bag.
- Secure the Bag: Once filled, unfold the edges, twist the top of the bag securely to prevent batter from escaping, and place the twisted part in the joint of your thumb. Wrap the rest of your hand around the bag, ensuring a firm grip for controlled piping.
- Work in Batches: The entire batch of batter may not fit into one piping bag. If this is the case, repeat the filling and twisting steps for additional portions of batter.
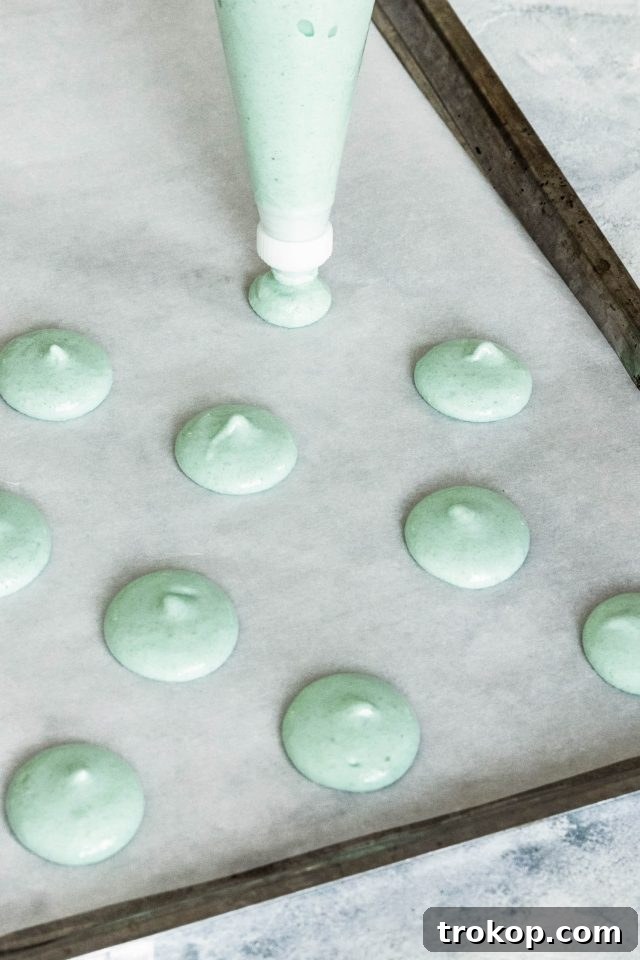
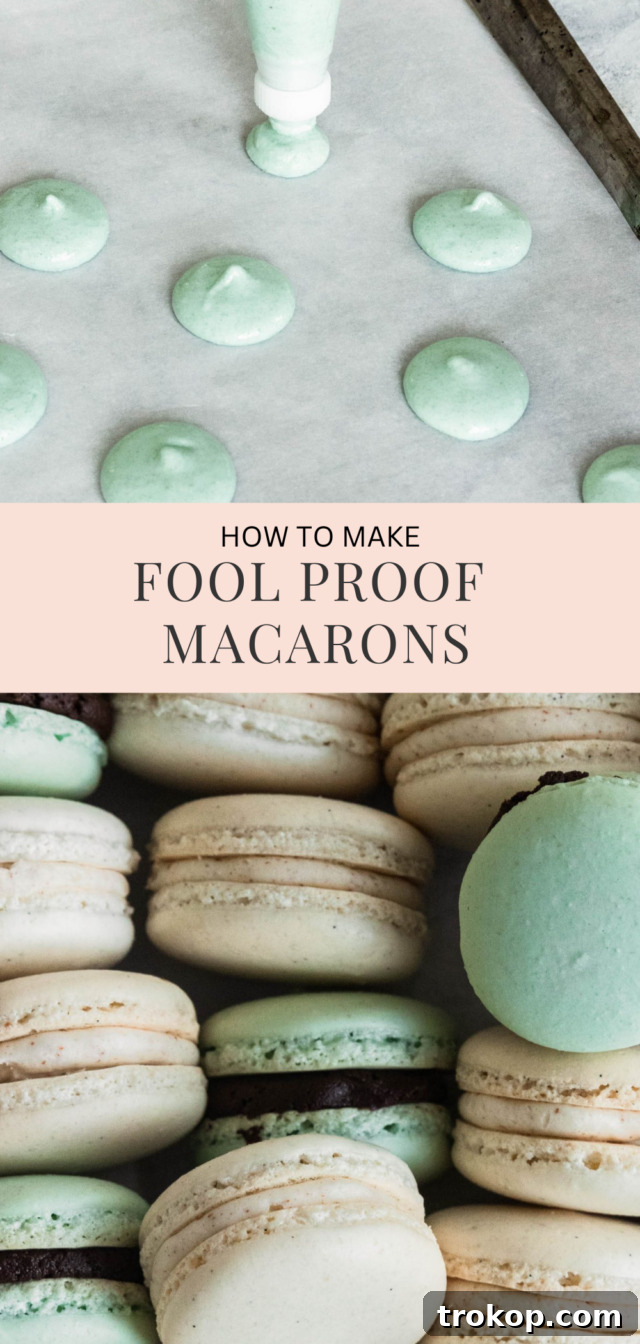
- Consistent Piping Technique: Hold the piping bag straight up, approximately one inch above the parchment-lined baking sheet. Apply gentle, even pressure, squeezing for a slow count of three to create a perfectly round macaron shell. Then, stop squeezing and lift the bag straight up and away quickly to avoid creating “tails” or peaks.
- Space and Tap: Continue piping uniform circles across the baking sheet, leaving at least an inch (2.5 cm) between each macaron to allow for spreading. Once the sheet is full, firmly tap the baking sheet on your counter several times. This crucial step helps to release any trapped air bubbles within the batter, which can cause cracked shells. You might see small bubbles rise to the surface; these can be gently popped with a toothpick for a smoother finish.
Baking Your Macarons for Perfect “Feet”
Baking macarons is where the magic happens, transforming delicate batter into crisp shells with characteristic ruffled “feet.” This stage requires careful attention to temperature and timing.
- Allow to Rest (Form a Skin): After piping, let your macarons rest on the baking sheets for approximately 30-60 minutes at room temperature. The exact time will vary depending on your kitchen’s humidity and temperature. They are ready when their tops appear dull, have lost their initial glossy sheen, and feel dry to the touch, forming a thin “skin.” You should be able to gently touch a shell without any batter sticking to your finger. This resting period is crucial for the formation of the distinctive “feet” and prevents cracking during baking.
- Preheat Your Oven: While the macarons are resting, preheat your oven to 300°F (150°C). Consistent oven temperature is key to successful macarons. You might find it helpful to use an oven thermometer to ensure accuracy, as oven temperatures can vary.
- Bake with Precision: Carefully place one baking sheet of macarons into the preheated oven. Bake for 15-16 minutes. Halfway through the baking time (around 7-8 minutes), rotate the baking sheet 180 degrees to ensure even baking. The goal is to bake them long enough so they don’t collapse upon cooling, but not so long that they burn or become too brittle.
- Test for Doneness: Macarons are done when they have developed their “feet” and the shells are set. Gently try to wiggle one macaron shell; if it doesn’t stick to the parchment paper and feels firm, it’s likely ready. The bottom edge should show a very slight browning. If they are still sticky or soft underneath, bake for another minute or two.
- Cool Completely: Remove the baked macarons from the oven and immediately transfer the parchment paper with the shells onto a wire cooling rack. Allow them to cool completely before attempting to peel them off the parchment. Trying to remove them too soon can cause them to break or leave their feet behind.
- Prepare Your Filling: While the macaron shells are cooling, prepare your chosen buttercream filling (recipe below). Transfer the cooled buttercream into a clean piping bag fitted with a large round or star piping tip. Twist the top shut, just as you did with the macaron batter.
- Assemble Your Macarons: Once the shells are entirely cool, match them up by similar size and shape. Pipe a generous dollop of filling onto the flat side of one macaron shell. Gently place a second macaron shell on top, flat side down, and lightly press them together to create a sandwich. Repeat with the remaining shells and filling.
Creative Ways to Decorate Your Macarons
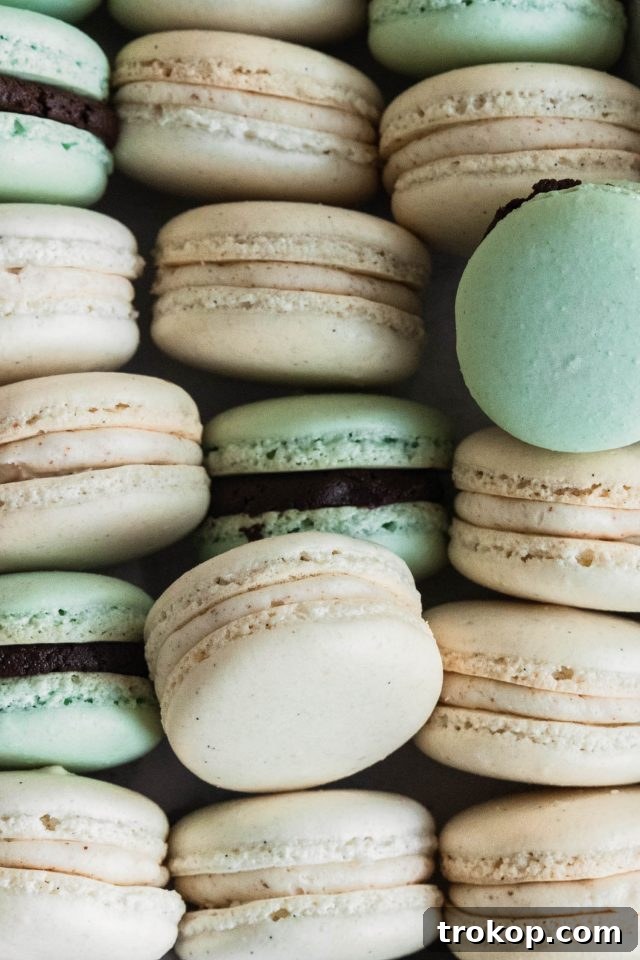
Once you’ve successfully baked your beautiful macaron shells and filled them, the fun doesn’t have to stop there! Macarons are miniature canvases, perfect for expressing your creativity. While the natural elegance of a plain macaron is undeniable, a few simple decorative touches can elevate them for any occasion. Here are some ideas to inspire you:
- Sprinkles and Edible Glitter: Before the shells fully dry after piping, you can gently sprinkle them with edible glitter, sanding sugar, or small sprinkles for an instant festive look. For filled macarons, a dab of frosting or a brush of edible glue can help sprinkles adhere to the assembled cookie.
- Drizzle or Dip: Melt some chocolate (white, dark, or milk) and drizzle it over the finished macarons for an elegant touch. Alternatively, dip half of a macaron in melted chocolate and then into chopped nuts, toasted coconut flakes, or more sprinkles.
- Brush Strokes & Gold Leaf: For an artistic flair, use a clean, food-safe paintbrush to create abstract designs or delicate lines with edible paint or colored gel food coloring (thinned with a tiny bit of alcohol like vodka). Edible gold or silver leaf can be carefully applied for a truly luxurious appearance.
- Ombre or Gradient Effects: Achieve stunning visual effects by gradually adding more food coloring to your batter as you pipe, creating a beautiful gradient from light to dark on your shells. Or, for a simpler approach, use two different colors of frosting in one piping bag for a swirled filling.
- Themed Decorations: Think seasonally or for special events! For Halloween, use black gel food coloring for the shells and pipe on spooky faces with white frosting. For Valentine’s Day, use pink shells and pipe tiny hearts with red frosting. Our fruit macarons are a great example of creative themed decorating.
- Dusting: A light dusting of cocoa powder or powdered sugar over the finished macarons can add a sophisticated touch and subtle flavor.
Expert Tips and Important Notes for Macaron Success
While this recipe is designed to be foolproof, mastering macarons also comes down to understanding the nuances of the ingredients and process. These expert tips and notes will help you achieve consistent success and stunning results every time.
- The Enemy of Meringue: Fats! This cannot be stressed enough: any trace of fat or oil will prevent your egg whites from whipping into a stable meringue. Ensure all your equipment – bowls, beaters, spatulas, and piping bags – are immaculately clean and grease-free. Even a tiny bit of egg yolk can ruin your meringue. Consider wiping down your bowls and tools with a tiny bit of white vinegar or lemon juice and then drying thoroughly for extra precaution. Using a new piping bag for each batch also minimizes the risk of fat residue.
- Tool Preparation is Crucial: Beyond just cleanliness, having your tools ready makes the process smooth. Parchment paper cut to size, piping bag fitted, and all ingredients weighed out and at the correct temperature (especially egg whites) before you begin will save you stress and improve outcomes.
- Separating Eggs: It’s often easier to separate egg yolks from whites when the eggs are cold, as the yolks are firmer. However, always allow your egg whites to come to a full room temperature before whipping. This ensures they reach maximum volume and stability, contributing to a lofty, strong meringue.
- Choose the Right Food Coloring: For vibrant macaron shells, always opt for gel or powder food coloring. Liquid food colorings introduce excess moisture into the batter, which can negatively impact the macaronage consistency and lead to flat or cracked shells. Gel colors are highly concentrated and deliver intense hues with minimal impact on the batter.
- Embrace Uniqueness & Matching: Even experienced bakers don’t always get perfectly identical macarons from a single batch. Machines make the flawless, identical macarons found in professional bakeries. Embrace the slight variations in your handmade creations! Before filling, go through your baked shells and pair up those that are most similar in size and shape for the best-looking finished cookies.
- Explore Diverse Fillings: While buttercream is a classic choice, don’t limit yourself! The sweetness of macaron shells pairs beautifully with a variety of fillings. Consider a rich chocolate ganache, a bright fruit curd (lemon, raspberry, passion fruit), or even a flavorful jam. The slight bitterness of dark chocolate or the tartness of fruit can create a wonderful balance against the sweet shells, offering exciting flavor combinations.
- “Ripening” for Best Flavor: Macarons are unique in that they often taste even better after a day or two in the refrigerator. This period, known as “ripening” or “maturing,” allows the moisture from the filling to slightly soften the shells, melding the flavors and creating that quintessential chewy-on-the-inside, crisp-on-the-outside texture. Plan to make them ahead for optimal enjoyment.
Macaron Troubleshooting: Common Problems & Solutions
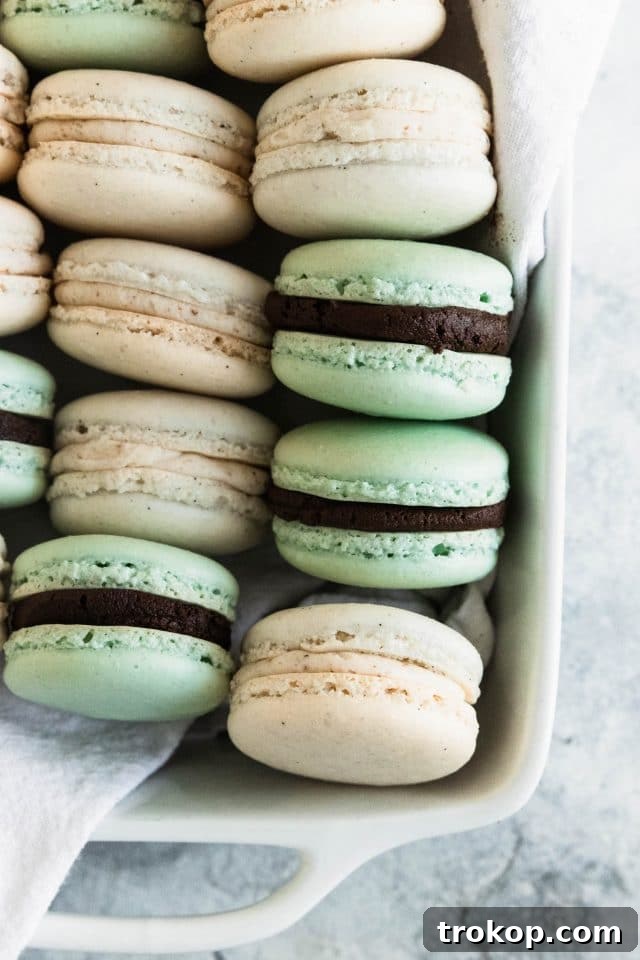
Macarons have a reputation for being finicky, but most common issues can be traced back to specific steps in the process. Don’t be discouraged by imperfections; every “mistake” is a learning opportunity! Here’s a comprehensive guide to common macaron problems, their likely causes, and practical solutions.
- Flat or Spreading Macarons:
- Cause: The batter was over-mixed during the macaronage stage, leading to a runny consistency. Alternatively, a tiny amount of fat (from egg yolk, oily bowl, or uncleaned tools) may have contaminated the meringue, causing it to deflate.
- Solution: Practice the macaronage technique carefully, aiming for the “lava” or “figure eight” consistency. Ensure all equipment is meticulously clean and free of grease. If you suspect overmixing, try reducing the number of folds in your next batch.
- Cracked Shells:
- Cause: Large air bubbles trapped in the batter, an unstable meringue (not whipped to stiff peaks), or insufficient drying time before baking.
- Solution: After piping, firmly tap the baking sheets on the counter several times to release air bubbles. Ensure your meringue reaches the stiff peak stage. Allow macarons to rest longer, until a dry “skin” forms (you should be able to touch them without batter sticking).
- Creative Fix: Don’t discard cracked shells! They can be repurposed into fun projects like DIY Dirt Worm Macarons.
- No “Feet” (Lack of Ruffled Edges):
- Cause: The most common reason is insufficient drying time, meaning the “skin” didn’t form properly. Without a dry skin, the trapped air and steam escape through the top, not the bottom, preventing the characteristic “feet” from lifting. Overmixing the batter can also contribute.
- Solution: Ensure macarons rest long enough for a dry skin to form. This can take anywhere from 30 minutes to 2 hours, depending on humidity. Test by gently touching a shell – if it’s tacky, it needs more time.
- Macarons Browning Too Quickly (Tops or Bottoms):
- Cause: Oven temperature is too high or unevenly distributed.
- Solution: Use an oven thermometer to verify your oven’s accuracy. Try lowering the oven temperature by 10°-15°F (5°-8°C) in your next batch. Rotate your baking sheets halfway through baking to ensure even cooking.
- Flat or Wrinkled Tops:
- Cause: The batter is either too wet (due to liquid food coloring, not enough sifting, or high humidity) or, more commonly, overmixed.
- Solution: Use gel or powder food coloring. Ensure dry ingredients are well-sifted. Master the macaronage technique to avoid overmixing.
- Feet That Spread Out (Instead of Rising Up):
- Cause: This usually points to overmixed batter. The batter is too loose and spreads horizontally rather than lifting vertically.
- Solution: Refine your macaronage technique. The batter should flow like “lava,” but not be excessively runny.
- Hollow Shells:
- Cause: This can be one of the most frustrating issues. Common culprits include over-whipped meringue, insufficient deflation during macaronage, or underbaked shells. If meringue is over-whipped, it creates too much air which collapses. Underbaked shells still have wet batter inside that deflates when removed from heat.
- Solution: Stop beating meringue precisely at the stiff peak stage. Ensure adequate macaronage, deflating some air while folding. Extend baking time slightly, ensuring the shells are fully cooked and firm. Some bakers also find that baking at a slightly lower temperature for a longer period helps prevent hollows.
- Lopsided Macarons:
- Cause: Uneven piping technique (not holding the bag straight), a warped baking sheet, parchment paper that isn’t lying flat, or an overly strong convection fan in your oven.
- Solution: Hold the piping bag perfectly vertical when piping. Use flat, unwarped baking sheets and cut parchment paper to fit precisely, securing corners with a tiny dab of batter if needed. If your convection fan is too strong, try turning it off or using a different oven setting.
- Creative Fix: Lopsided shells are perfect for playful creations like cheeseburger macarons!
- Peaked Shells or Rough Texture:
- Cause: Undermixed batter during the macaronage stage (not enough folding to smooth it out) or improperly sifted dry ingredients causing lumps.
- Solution: Thoroughly sift almond flour and powdered sugar together. Ensure proper macaronage; continue folding until the batter flows smoothly in a continuous ribbon. After piping, firmly tap the baking sheets on the counter and gently pop any visible peaks or bubbles with a toothpick.
How to Store Macarons for Optimal Freshness
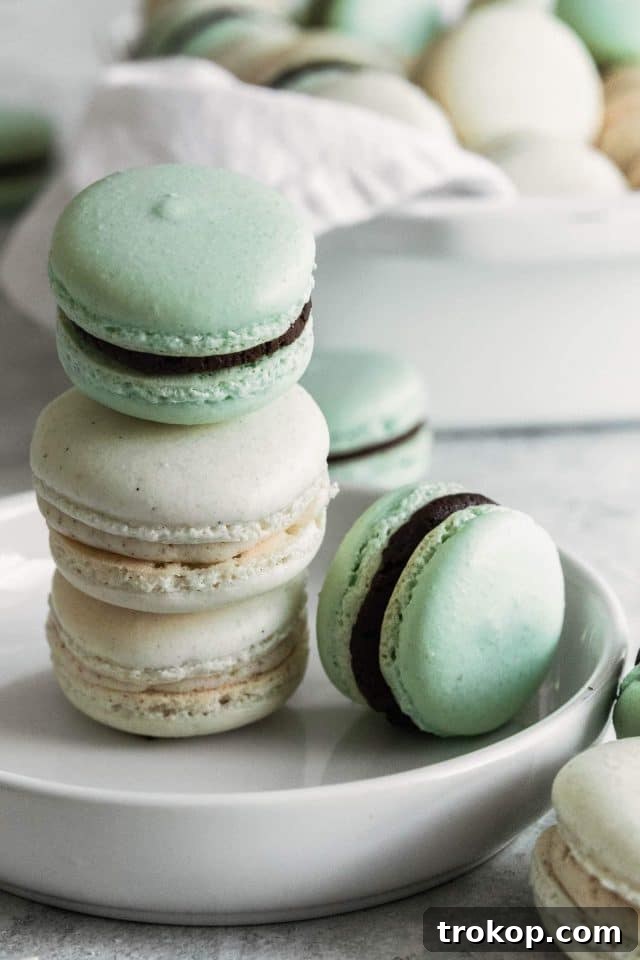
Proper storage is key to maintaining the delicate texture and flavor of your homemade macarons. These delightful cookies often improve with a little time, allowing the flavors of the shell and filling to meld beautifully. Here’s how to ensure your macarons stay fresh and delicious:
- Refrigeration for Ripening: Macarons are best consumed after they’ve had a chance to “ripen” in the refrigerator for at least 12-24 hours. This allows the moisture from the filling to subtly soften the cookie shells, creating that desirable chewy-crisp texture.
- Airtight Containers are Essential: Always store assembled macarons in an airtight container to prevent them from drying out or absorbing unwanted odors from the refrigerator. Place them in a single layer if possible, or separate layers with parchment paper to prevent sticking.
- Shelf Life:
- Standard Fillings (Buttercream, Ganache): Macarons filled with stable fillings like buttercream or chocolate ganache will keep well in the refrigerator for up to 5-7 days. Their flavor and texture often improve over the first few days.
- Wetter Fillings (Jams, Curds): If you use fillings with higher moisture content, such as fruit jams, curds, or fresh fruit fillings, their shelf life will be shorter, typically 3-4 days in the refrigerator. The excess moisture can cause the shells to become soggy more quickly.
- Freezing for Longer Storage: For extended storage, macarons freeze beautifully! Place assembled macarons in a single layer on a baking sheet and freeze until firm (about 1-2 hours). Once frozen, transfer them to an airtight freezer-safe container or freezer bag. They can be stored in the freezer for up to 1 month.
- Thawing Frozen Macarons: To enjoy frozen macarons, transfer them from the freezer to the refrigerator and allow them to thaw slowly overnight. For best texture, let them come to room temperature for about 15-30 minutes before serving.
- Avoid Room Temperature (for extended periods): While macarons can sit at room temperature for a couple of hours for serving, prolonged exposure to heat and humidity can negatively affect their texture and the stability of the filling.
Easy DIY Macaron Decoration Ideas
Our love affair with macarons is no secret! This delicate French pastry offers endless opportunities for creativity, not just in flavor but also in stunning visual designs. Once you’ve mastered the art of making the perfect macaron shells, the world of decoration opens up to you. Here are some of our favorite DIY ideas to make your macarons truly spectacular:
- Marbled Macarons — Create an elegant swirling effect with multiple gel food colorings in your batter before piping.
- Edible Gold Macarons — Add a touch of luxury by brushing or splattering edible gold paint or applying edible gold leaf to your finished shells.
- Potted Cactus Macarons — Get whimsical with green shells and pipe small, intricate “cactus” designs using green frosting and edible pearls for flowers.
- Gradient Macarons — Achieve a beautiful ombre look by gradually incorporating more food coloring into your macaron batter as you pipe your shells.
- Character Macarons: Transform your macarons into adorable characters or animals by using specific piping techniques or adding small edible features.
- Sparkle and Shine: A simple dusting of edible glitter or shimmering edible pearls can make any macaron look extra special for parties and celebrations.
For even more inspiration and macaron-related projects, explore our dedicated macaron category on the blog, where you’ll find a wealth of recipes and decorating tutorials.
Foolproof Macaron Recipe
A foolproof step-by-step recipe to guide you on how to make perfect macarons every time! You’ll never be intimidated in the kitchen again with these delightful French treats.
Prep Time: 40-45 minutes
Cook Time: 50 minutes
Total Time: 1 hour 30 minutes
Course: Desserts
Cuisine: French, Macarons
Equipment
- Baking sheets
- Parchment paper
- Kitchen scale (highly recommended for precision)
- Piping bag with a round tip (e.g., Wilton 1A or Ateco 805)
- Fine mesh sieve or food processor
- Mixing bowls (ensure they are immaculately clean)
- Electric hand or stand mixer (with whisk attachment)
- Rubber spatula
Ingredients
For the Macaron Shells:
- 4 large egg whites (approximately 120 grams), at room temperature
- ½ cup (100 grams) white granulated sugar
- ¼ tsp cream of tartar
- 1 tsp vanilla extract
- 2 cups (240 grams) powdered sugar, sifted
- 1 ½ cups (224 grams) fine almond flour, sifted
- 1 large pinch fine salt
- Gel food coloring (optional, for vibrant shells)
For the Buttercream Filling:
- ½ cup (114 grams / 1 stick) unsalted butter, softened
- 2 cups (240 grams) powdered sugar, sifted
- 2 tsp vanilla extract
- 1-2 tbsp heavy cream (or milk), as needed for consistency
For Chocolate Buttercream Variation:
- Replace ½ cup (60 grams) of the powdered sugar with dark cocoa powder. Adjust heavy cream as needed for desired consistency.
Instructions
- Prepare Your Workspace: Line two clean baking sheets with parchment paper. Prepare a piping bag by trimming the end and fitting it with a clean round piping tip and coupler.
- Separate Egg Whites: Carefully separate the 4 large egg whites (120g) from their yolks. Place them in a very clean mixing bowl and let them sit at room temperature for at least 30 minutes.
- Sift Dry Ingredients: In a separate bowl, sift together the powdered sugar (240g) and fine almond flour (224g) through a fine mesh sieve. Discard any larger pieces. Stir in the pinch of salt. Set aside.
- Whip Meringue (Initial Stage): Begin beating the room-temperature egg whites on medium-high speed with an electric mixer. When they become frothy, add the cream of tartar.
- Achieve Stiff Peaks: Slowly and gradually add the granulated sugar (100g) while continuing to beat the egg whites. Increase speed to high and beat until the meringue forms stiff, glossy peaks when you lift the beaters. Mix in the vanilla extract and gel food coloring (if using).
- Macaronage: Add one-third of the sifted dry ingredients to the meringue and gently fold with a rubber spatula until just combined. Add the remaining dry ingredients and continue to gently fold the mixture, pressing it against the sides of the bowl, until the batter reaches the “lava” consistency. It should flow off the spatula in a thick, continuous ribbon, allowing you to draw a figure eight without breaking.
- Pipe Macaron Shells: Fold down the edges of the prepared piping bag and fill it with the macaron batter. Twist the top of the bag shut. Holding the bag vertically, about 1 inch above the parchment paper, gently squeeze to a count of three, then stop and lift straight up. Repeat, leaving 1-1.5 inches between each shell.
- Tap and Rest: Once the baking sheet is full, firmly tap it on the counter 4-5 times to release air bubbles. Use a toothpick to pop any remaining visible bubbles. Let the piped macarons rest at room temperature for 30-60 minutes (or longer in humid conditions) until a dry skin forms on top. They should not be sticky to the touch.
- Bake Macarons: Preheat your oven to 300°F (150°C). Bake one sheet at a time for 15-16 minutes, rotating the baking sheet halfway through (at 7-8 minutes) for even baking. Macarons are done when they have developed “feet” and gently wiggle if nudged, easily detaching from the parchment.
- Cool and Fill: Remove from the oven and transfer the parchment paper onto a wire rack to cool completely. While cooling, prepare your buttercream filling.
- Assemble Macarons: Once the shells are completely cool, match them by size. Pipe a generous amount of filling onto the flat side of one shell, then gently top with a matching shell to create a sandwich.
To Make The Buttercream:
- In a clean mixing bowl, beat together the softened butter (114g) and sifted powdered sugar (240g) until light and fluffy.
- Stir in the vanilla extract (2 tsp) and 1 tablespoon of heavy cream. If the consistency is too thick, add more cream, half a tablespoon at a time, until it reaches a smooth, pipable consistency.
To Make Chocolate Buttercream:
- Follow the buttercream instructions, but replace ½ cup (60g) of the powdered sugar with dark cocoa powder. Adjust the amount of heavy cream as needed to achieve the correct consistency.
Nutrition Information (per serving)
- Serving: 45g
- Calories: 104 kcal
- Carbohydrates: 15g
- Protein: 1g
- Fat: 5g
- Saturated Fat: 2g
- Cholesterol: 7mg
- Sodium: 27mg
- Potassium: 8mg
- Fiber: 1g
- Sugar: 14g
- Vitamin A: 76IU
- Calcium: 10mg
- Iron: 1mg
Recipe Notes
- Yields 40-45 assembled macarons (80-90 individual shells).
- Prep time includes resting/drying time for shells.
- Baking time can vary based on oven, potentially requiring 45-60 minutes total if baking multiple sheets sequentially.
- For best flavor and texture, allow assembled macarons to “ripen” in an airtight container in the refrigerator for 12-24 hours before serving.
- Macarons can be frozen for up to 1 month. Thaw in the refrigerator overnight.
KEYWORD: cookies, french desserts, french macarons, gluten free, meringue, mini desserts, easy macaron recipe, foolproof macarons

We absolutely adore seeing your baking creations! Don’t forget to share your beautifully crafted macarons with us on Instagram using the hashtag #sugarandclothloves. We love celebrating your successes and seeing the unique twists you put on our recipes!
Craving more delightful treats? Discover an array of quick, delicious, and inspiring recipes by exploring our full recipe collection here!
More Sweet Inspirations:
- 34 Decadent Desserts for Valentine’s DaySweeten up your celebration with these irresistible desserts for Valentine’s…
- Homemade Macaron Ice Cream RecipeThis irresistible homemade macaron ice cream recipe is a match…
- Trick or Treat Yourself with These 31 Spooktacular Halloween DessertsFrom spooky cupcakes to creepy cookies, discover the most delicious…
- Galaxy Macarons RecipeIf you’ve mastered macarons, Galaxy Macarons are a great way…