
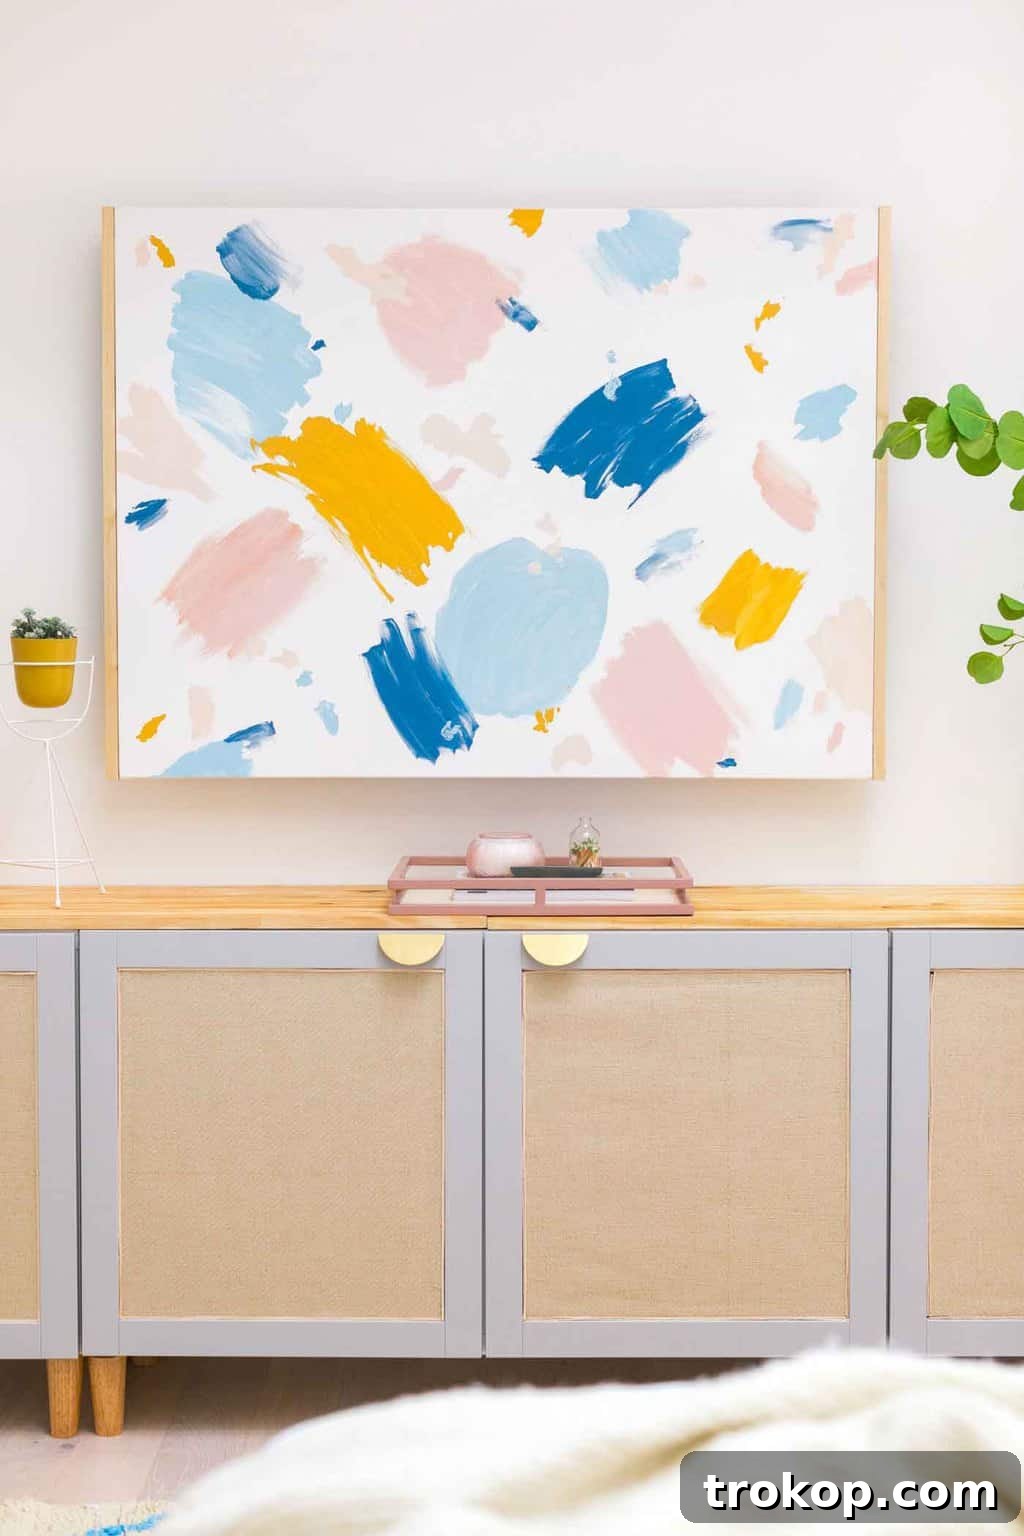
Transform Your Space: The Ultimate Rattan IKEA TV Stand Hack for Modern Homes
Rattan furniture is undeniably a hot trend in interior design right now, bringing warmth, texture, and a touch of organic elegance to any room. But achieving this coveted look doesn’t have to break the bank. We’re excited to share an incredibly easy and affordable DIY project: an IKEA TV stand hack that transforms a simple storage unit into a stunning rattan media console, perfect for your bedroom or living room. This isn’t just a functional piece; it’s a statement of style, blending minimalist design with bohemian charm, all while offering practical storage solutions.
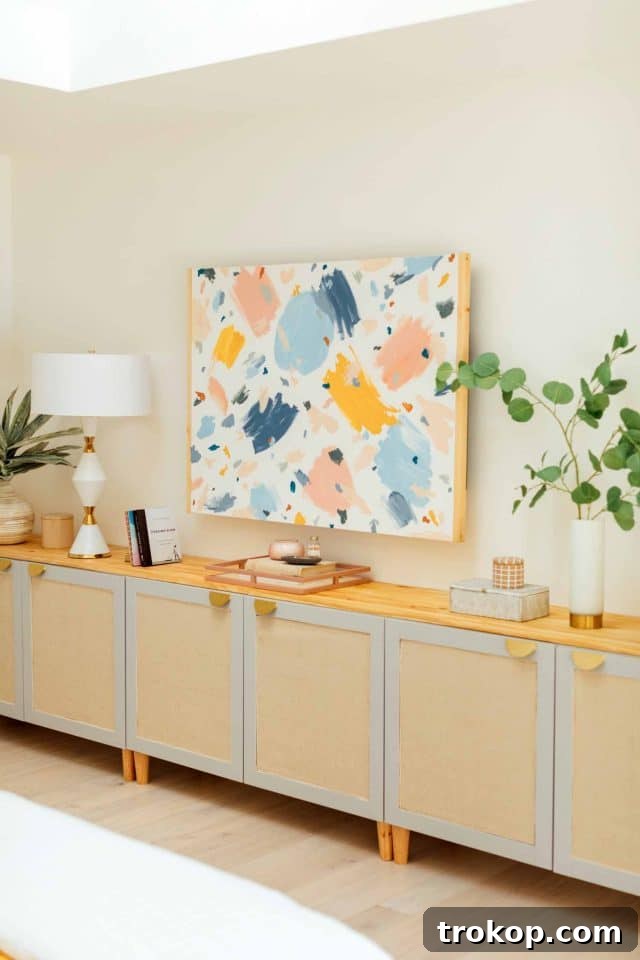
For those who follow our blog, you know our enthusiasm for a good IKEA hack runs deep. It’s a fantastic way to personalize mass-produced furniture, creating bespoke pieces that reflect your unique style without the custom furniture price tag. This particular project combines our enduring love for clever IKEA transformations with the timeless appeal of rattan, addressing a common need for stylish storage beneath the television. The result? A sophisticated DIY rattan IKEA TV unit that looks far more expensive than it is to create.
What makes this hack truly special is its versatility. You can tailor it to your specific home decor preferences, choosing colors, stains, and even sizing combinations that perfectly complement your space. Whether you envision a minimalist white finish with natural rattan or a dark stained wood top with elegant brass handles, the possibilities are endless. Essentially, you’re crafting a highly customized IKEA entertainment unit, tailored to fit perfectly into your personal sanctuary.
This project draws inspiration from popular design elements, offering a fresh take on modern storage. It’s reminiscent of our easy rattan drawers tutorial and stands out as one of our favorite IKEA Besta hacks. While some prefer a tech-free bedroom, others, like us, embrace the comfort of a well-equipped entertainment setup. This DIY TV stand ensures that your media space is both functional and beautifully integrated into your bedroom design.
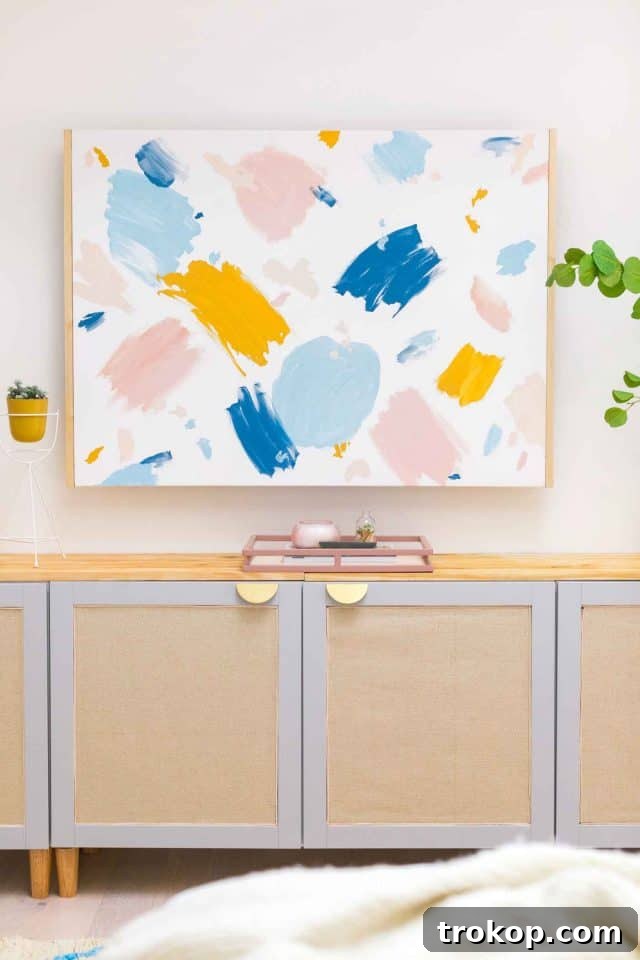
Materials and Tools for Your Rattan IKEA TV Stand
Creating this stylish DIY IKEA hack storage unit is remarkably straightforward, but it does require gathering a few specific supplies. Don’t let the list intimidate you; each item plays a crucial role in bringing this custom piece to life, and the process is as simple as carefully combining these elements. The beauty of a DIY project lies in the ability to select materials that perfectly align with your vision and budget, ensuring a unique outcome.
Essential Supplies for a DIY IKEA TV Cabinet
- Woven grasscloth wallpaper or a suitable alternative (this forms the rattan-like texture).
- Binder cane trim (for a neat, professional edge around the rattan).
- Box cutter or rotary cutter (for precise cutting of the grasscloth).
- Straight edge ruler (essential for accurate, clean cuts).
- Hot glue gun and hot glue sticks (for quick, secure bonding of trim).
- All-purpose glue (such as Weldbond, for adhering grasscloth to glass).
- Drill and various drill bits (for installing handles and other hardware).
- Handles of your choice (personalize your unit; C-half circle pulls were used here).
- Finished pine board (for the custom tabletop, providing a warm, natural contrast).
- Natural wood stain (to customize the pine board’s color).
- IKEA Besta cabinet frames (the foundational units for your stand).
- Sindvik IKEA doors in light gray (these will be modified with the rattan effect).
- IKEA Besta soft-closing push-open hinges (one pack per door, sold separately).
- Natural wood legs (to elevate the unit and add a custom touch).
- Optional: IKEA Besta support leg (recommended if placing a large, heavy TV on the stand for added stability).
Step-by-Step Guide: How To Make Your DIY IKEA TV Stand
Follow these detailed steps to construct your stunning, custom IKEA TV stand. Each stage is designed to be straightforward, ensuring a rewarding DIY experience and a professional-looking finished product. Take your time, and enjoy the process of bringing your vision to life.
Step 1 – Initial Cabinet Assembly: Begin by assembling the IKEA Besta cabinet frames according to the instructions provided by IKEA. This forms the structural foundation of your TV stand. However, it’s crucial to leave the doors off at this stage, as we’ll be customizing them before attachment. Ensuring a sturdy frame now will guarantee the longevity of your finished unit. Double-check all connections to make sure the frames are rigid and properly aligned.
Step 2 – Custom Leg Installation: Instead of using the standard BESTÅ legs, which often give a mass-produced look, twist your chosen natural wood legs onto the bottom of the cabinet frames. This simple swap immediately elevates the aesthetic of the unit, giving it a more bespoke and elegant appearance. The natural wood legs add warmth and a custom touch, making your stand truly unique.
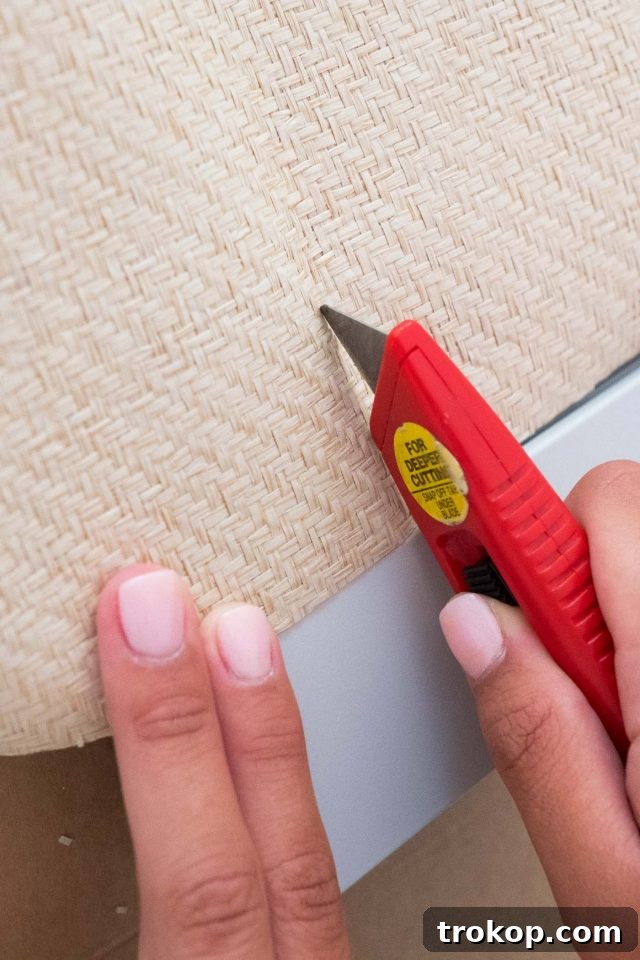
Step 3 – Preparing the Rattan/Grasscloth Inserts: Using a box cutter or rotary tool and a straight edge ruler, carefully cut the woven grasscloth wallpaper to fit precisely inside the edge of the door frame, on top of the glass panel. While you could technically cut the grasscloth to fit behind the glass, placing it on top creates a beautiful matte finish that truly enhances the rattan aesthetic. This approach gives the doors a distinct, textured front that feels both natural and refined. Measure twice, cut once, to ensure a perfect fit for each door.
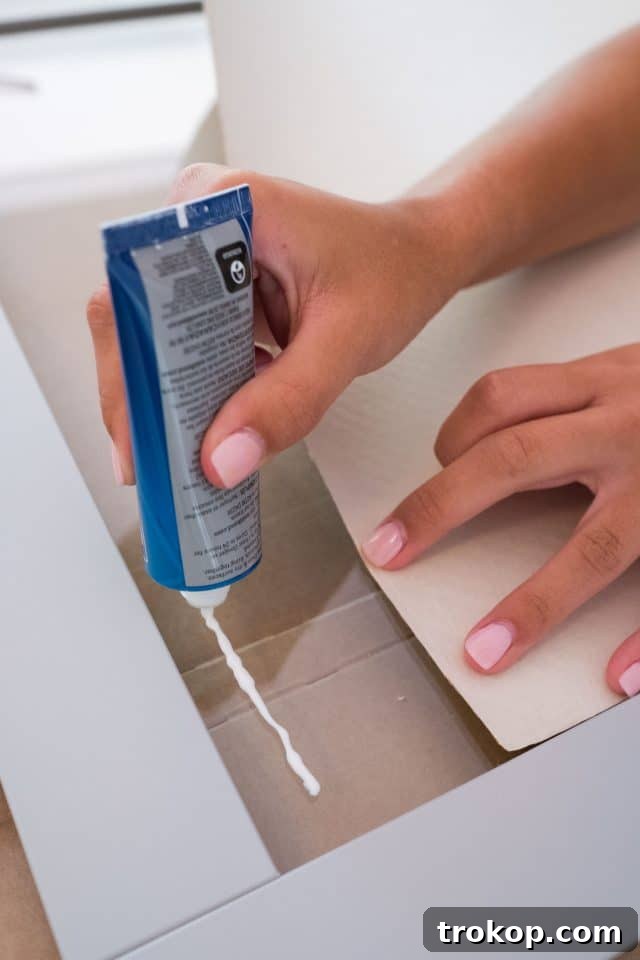
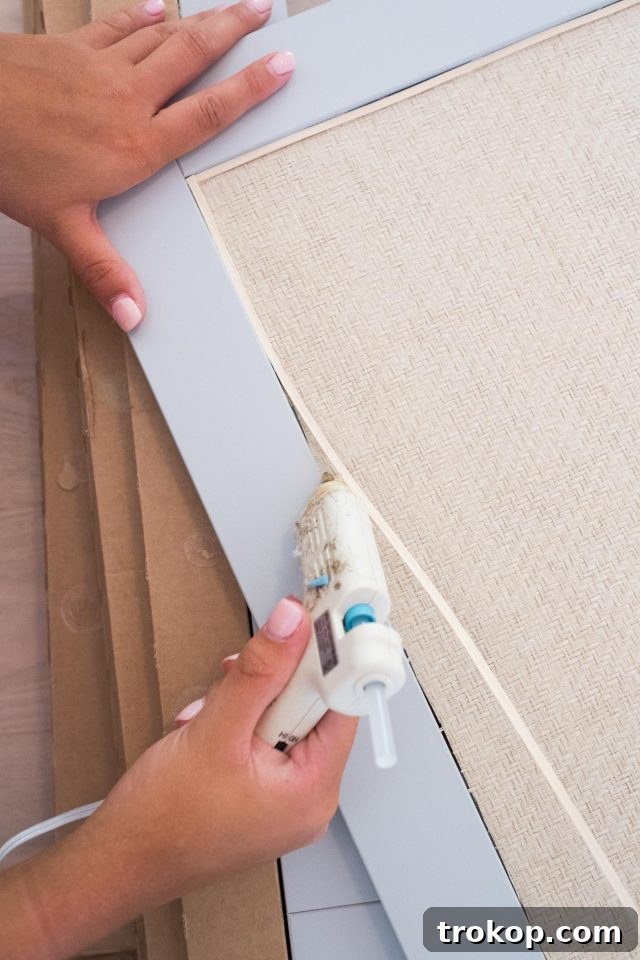
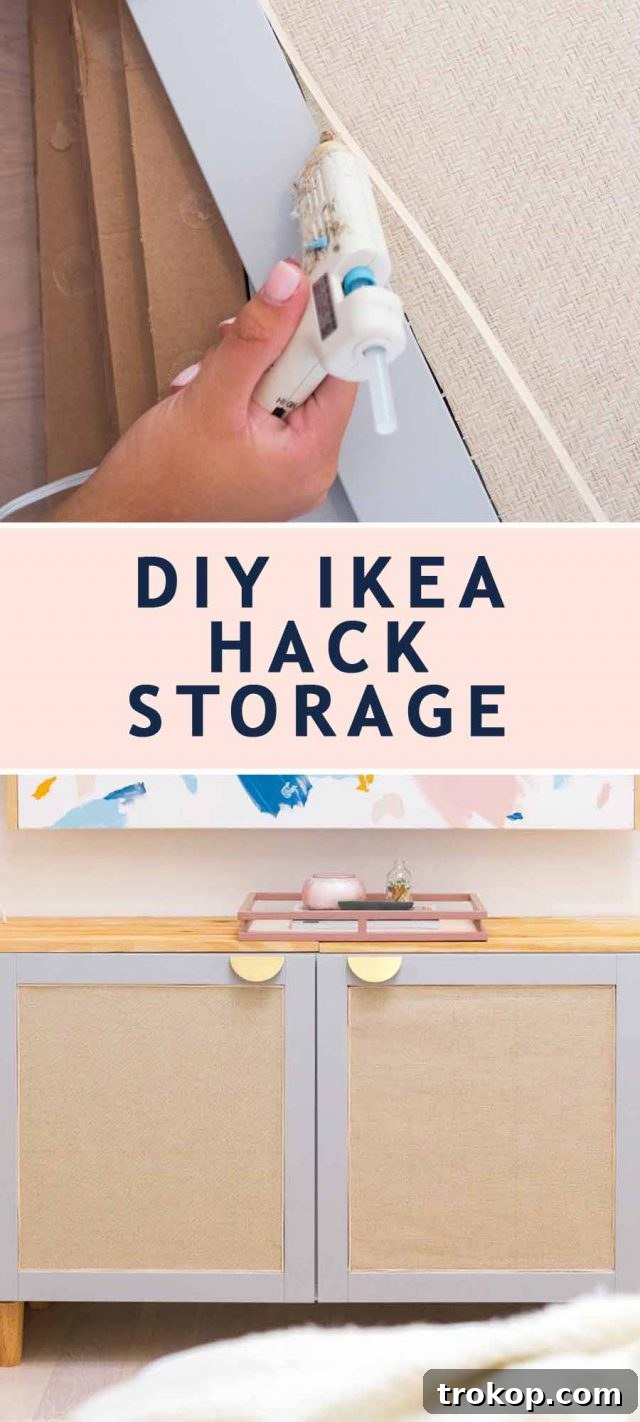
Step 4 – Adhering Rattan and Adding Trim: Once your grasscloth pieces are perfectly cut, use the all-purpose glue (like Weldbond) to firmly adhere the sheets to the glass panels of the Besta doors. Apply an even layer of glue to avoid bubbles and ensure a smooth, lasting bond. After the grasscloth is securely in place, use your hot glue gun and binder cane trim to create a clean, finished edge around all sides of the grasscloth. This trim not only hides any imperfections from cutting but also adds a refined detail, making the doors look professionally finished and seamlessly integrated.
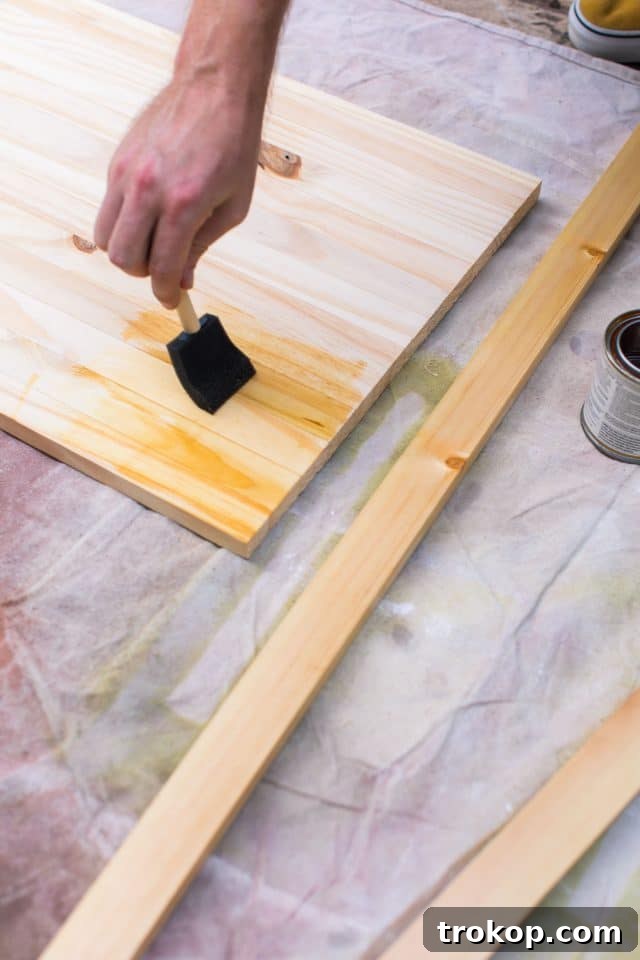
Step 5 – Preparing the Wood Top: While the grasscloth glue dries thoroughly, you can stain the finished pine board that will serve as the tabletop for your BESTA cabinets. Choose a wood stain color that complements your existing decor or creates a desired contrast. If you possess the tools and skills, use a table or rotary saw to cut the wood to fit the top of your cabinets precisely. Remember to account for the width of the doors; a common dimension for a single cabinet top might be around 16 3/4 inches deep by 47 1/4 inches wide. If you’re not confident in cutting wood yourself, don’t hesitate to ask your local home improvement store to cut it to your specified dimensions for you, ensuring a perfect fit.
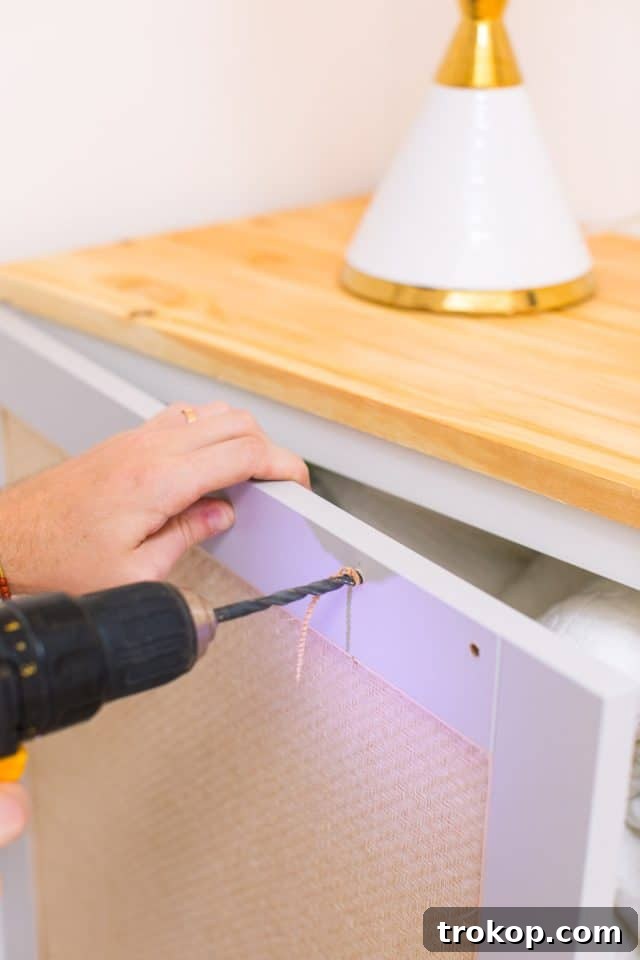
Step 6 – Handle Installation: Now it’s time to add the hardware that will complete the look of your doors. Carefully measure and mark the precise locations for installing your chosen handles on each door. Accuracy here is key for a symmetrical and professional appearance. Use your drill and appropriate drill bits to create the pilot holes for the handle screws. Attach the handles firmly, ensuring they are level and secure. This step adds both functionality and a touch of personal style to your newly hacked doors.
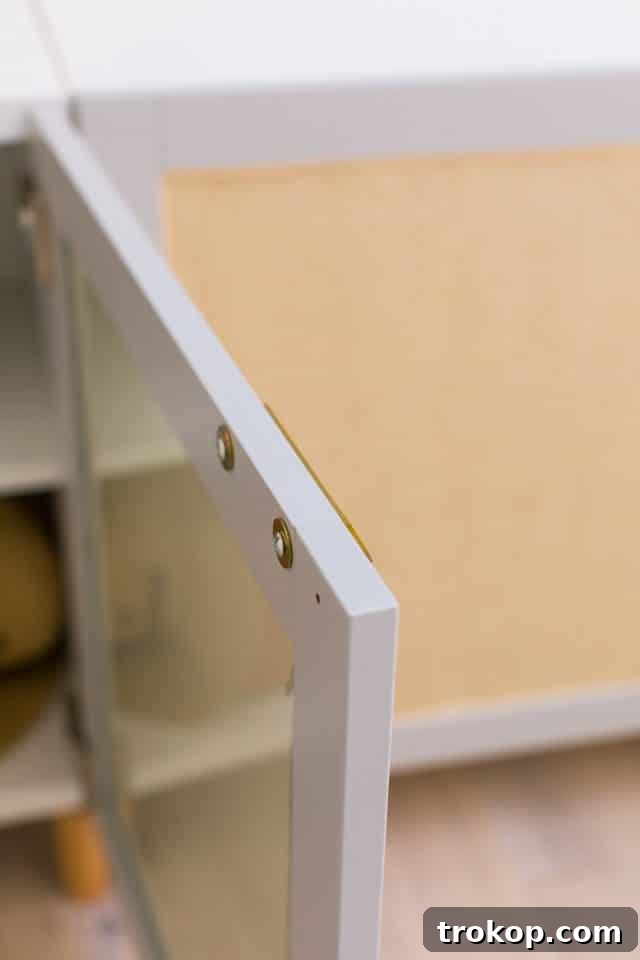
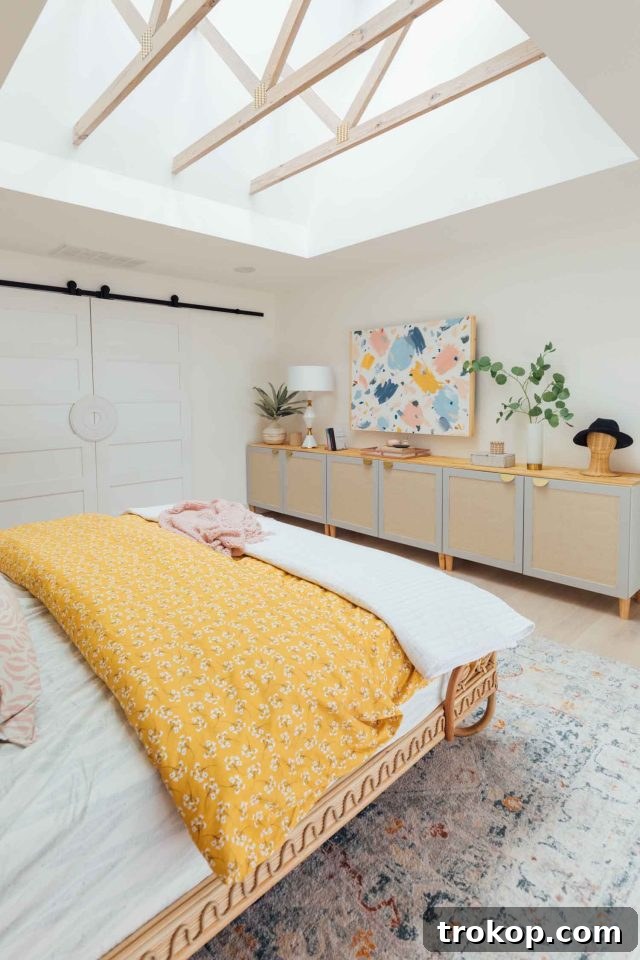
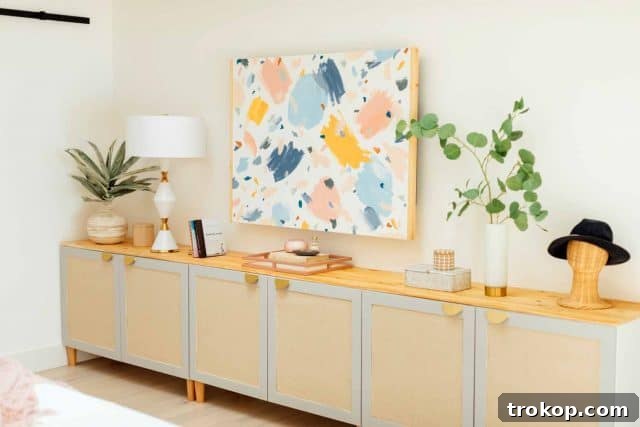
Step 7 – Final Assembly and Top Placement: Once the handles are attached and the grasscloth fronts are fully dry and secured, you can proceed to attach the customized doors to the cabinet frames using the IKEA Besta hinges. Finally, carefully place the stained wood top onto your assembled cabinet units. Secure it firmly using wood glue, and if possible, use clamps while the glue dries to ensure a strong, seamless bond. For our project, we combined three sets of BESTA cabinets to achieve a custom-length IKEA TV stand, using two longer pieces of wood as the topper instead of individual pieces for each cabinet. This creates a cohesive, expansive surface that enhances the custom feel of the unit and provides ample space for a large TV and decor.
Customizing Your IKEA TV Stand: Design Alternatives
While we specifically utilized the IKEA Besta cabinets for this rattan TV stand hack, the beauty of IKEA furniture lies in its adaptability. You can easily apply these design principles to other IKEA furniture options, creating a statement piece that truly reflects your personal style and storage needs. Thinking beyond the Besta, consider these alternatives and customization ideas:
- IKEA Kallax Unit: The popular Kallax shelving unit, which we’ve used for our DIY Playroom Idea, offers large cubbies perfect for incorporating rattan. Instead of applying rattan paper to cabinet doors, you could use it to line the back of shelves or create custom rattan fronts for Kallax bins.
- IKEA Lack TV Stand or Shelving Unit: For a sleeker, more minimalist base, the Lack series can be transformed. While the surfaces are typically solid, you could add rattan panels to the front edges or create custom drawer fronts for Lack units that offer storage.
- IKEA Billy Bookcases: Imagine a long, low media console crafted from multiple Billy bookcases laid horizontally. You could add rattan panels to the bottom doors, or even create unique rattan backing for open shelves to display decor items.
- Variations in Rattan Application: Beyond grasscloth wallpaper, explore different types of cane webbing or rattan sheeting. These come in various weaves and patterns, offering distinct visual textures. You could also experiment with painting the rattan itself for a pop of color, or staining it darker to match a rich wood tone.
- Hardware Choices: The handles you choose significantly impact the final look. From sleek modern pulls to vintage-inspired knobs, or even unique leather straps, hardware is an easy way to inject personality.
- Wood Top Variations: Instead of a natural pine board, consider a reclaimed wood top for a rustic-chic vibe (similar to our DIY IKEA Vanity Hack). A painted MDF board could offer a seamless, monochromatic look, or a marble slab could introduce a luxurious touch. The dimensions can also be adjusted to create an overhang or a flush finish, depending on your preference.
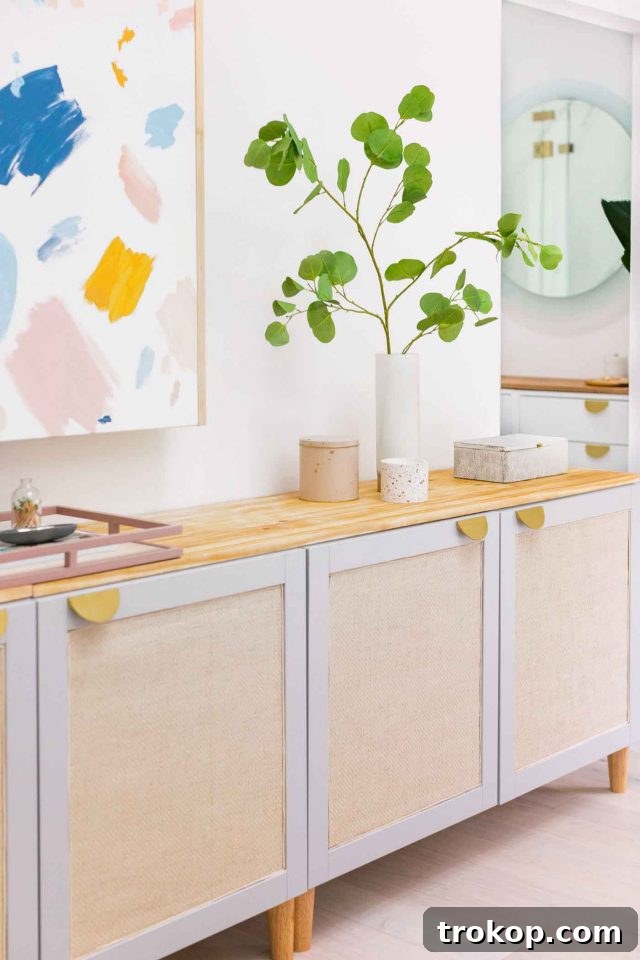
The final result of this hack is truly transformative. It looks incredibly custom and high-end, yet it avoids the overwhelming complexity or prohibitive expense often associated with bespoke furniture. This DIY approach offers a significantly more affordable option compared to many of the rattan media cabinets and storage units available on the market today, without compromising on style or quality.
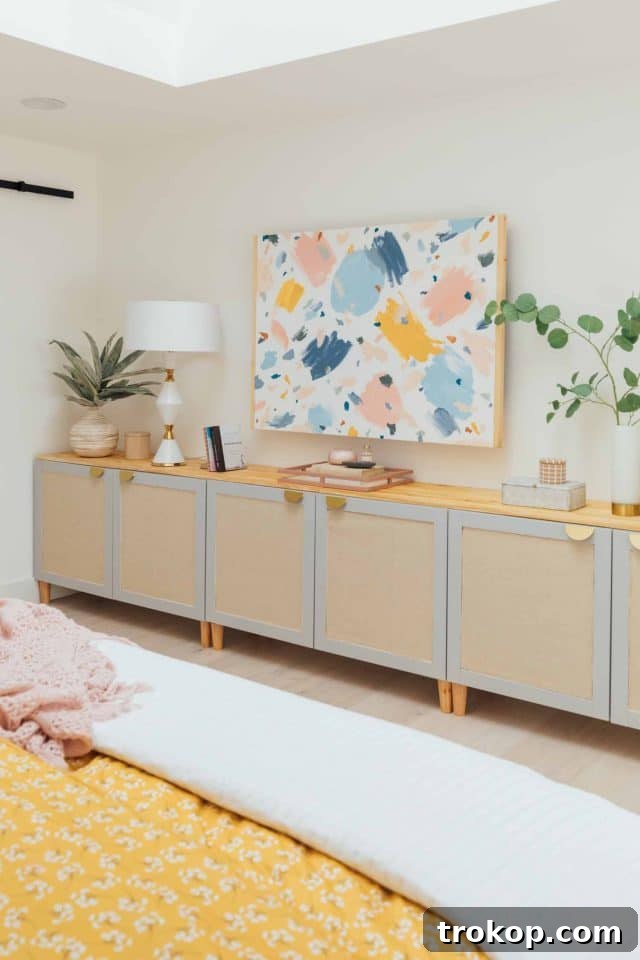
As you can see, the possibilities for customization are vast. Whether it’s adding a reclaimed wood top for a unique texture or integrating it into a larger built-in system, IKEA hacks offer unparalleled flexibility. We even utilized Besta cabinets in our living room makeover to create elegant faux built-ins, demonstrating just how versatile these units can be for various TV storage solutions.
More IKEA Hack Projects for Your Home
If you’re inspired by the ingenuity and affordability of transforming IKEA furniture, you’re in luck! Our blog is a treasure trove of creative IKEA hack projects designed to elevate every corner of your home. From functional storage to decorative statements, these DIYs prove that a little imagination and effort can go a long way. Explore more of our favorite IKEA transformations here:
- Chic IKEA Hack Bar Cart
- Delightful DIY IKEA Hack Ice Cream Cart
- Learn how to make a Stylish DIY IKEA Hack Floating Credenza
- Prepping for Guests with an IKEA Hack Dresser
- IKEA Bed Hack: DIY Wooden Headboard
- Discover our complete IKEA Kitchen and Kitchen Cabinets transformation
DIY Rattan IKEA TV Stand: A Detailed Recipe
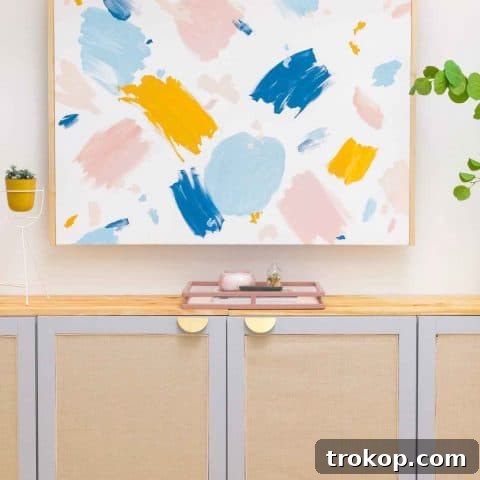
DIY Ikea TV Stand: How to Hack A Rattan Ikea TV Unit
Equipment Needed
-
Box cutter or rotary cutter
-
Straight edge ruler
-
Hot glue gun and glue sticks
-
Drill and bits
Materials List
- Woven grasscloth wallpaper
- Binder cane trim
- All-purpose glue (e.g., Weldbond)
- Handles of your choice C-half circle pulls were used here
- Finished pine board
- Natural wood stain
- Ikea Besta cabinet frames
- Ikea Sindvik doors light grey, with glass panels
- Ikea Besta hinges one pack needed per door
- Natural wood legs
Detailed Instructions
-
Assemble the IKEA Besta cabinet frame according to instructions, but keep the doors detached for now.
-
Replace the standard BESTA legs by twisting your natural wood legs onto the bottom of the frames.
-
Using a box cutter or rotary tool and a straight edge, carefully cut the grasscloth wallpaper to fit precisely inside the door frame, on top of the glass. The matte finish of the grasscloth creates a unique aesthetic compared to placing it behind the glass.
-
Once your grasscloth is cut to size, apply all-purpose glue (such as Weldbond) to adhere the sheets firmly to the glass of the Besta door.
-
Use the hot glue gun and binder cane trim to glue an edge piece all around the grasscloth edges, providing a clean, finished look.
-
While the grasscloth glue dries, stain the pine board for your cabinet top in your preferred wood color. If necessary, have your local home improvement store cut the wood to fit the top of your cabinets (e.g., 16 3/4″ deep x 47 1/4″ wide for a standard Besta unit).
-
Measure and mark the positions for your handles. Use your drill and appropriate bits to install your chosen handles securely onto the customized doors.
-
Attach the customized doors with handles and rattan fronts to the Besta cabinet frames using the IKEA Besta hinges. Finally, secure the stained wood top onto the cabinets using wood glue and clamps until dry.
Important Notes
- Please be aware that the overall cost of this DIY project will vary depending on the length and number of cabinet units you choose for your stand/cabinet.
- If you plan to place a large or heavy television on the stand, we highly recommend adding an IKEA Besta support leg in the middle of your combined units for enhanced stability and weight distribution.

We absolutely adore the final look of this DIY rattan IKEA TV stand! It truly looks like a custom-made piece, offering sophisticated storage without the custom price tag or complicated assembly process. This project is definitely a far more affordable alternative to many of the pre-made rattan media cabinets and storage units currently on the market, proving that style and budget can indeed go hand-in-hand.
Don’t forget to share your own DIY IKEA TV Stand or TV Cabinet creations with us on Instagram using the hashtag #sugarandclothloves. We love seeing how you bring these ideas to life and personalize them for your unique homes!