

Unlock your creative potential and transform your living space with stunning, custom abstract wooden artwork. This guide will show you how to easily cut wood into unique shapes using a Cricut Maker, and then assemble them into captivating art pieces that look expensive without breaking the bank. Whether you’re a seasoned crafter or just starting your DIY journey, you’ll find the process straightforward and incredibly rewarding.
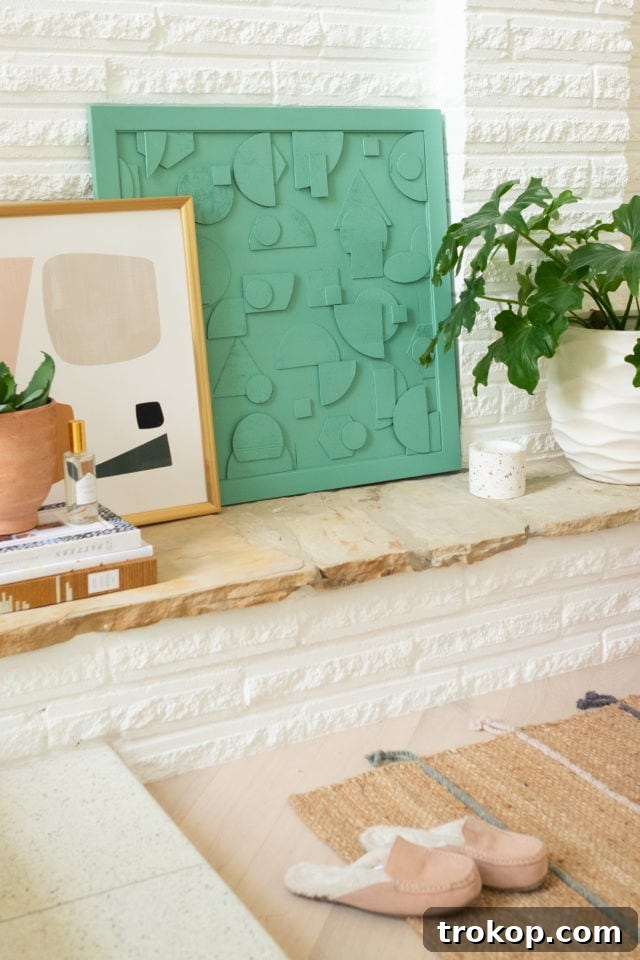
As I settle into our new home, the excitement of diving into fresh DIY projects is truly palpable! Home is where the heart is, and for me, that means infusing every corner with personal touches that reflect my style. This DIY wooden artwork project couldn’t have come at a better time, offering the perfect opportunity to create a bespoke piece for my newly arranged space.
The best part? I’m thrilled to share a method for cutting wood into shapes with remarkable ease. After the whirlwind of moving, the last thing anyone needs is a complex, multi-day craft project. This streamlined approach ensures you can create beautiful art without the hassle, making it perfect for busy individuals seeking stylish yet simple home decor solutions.
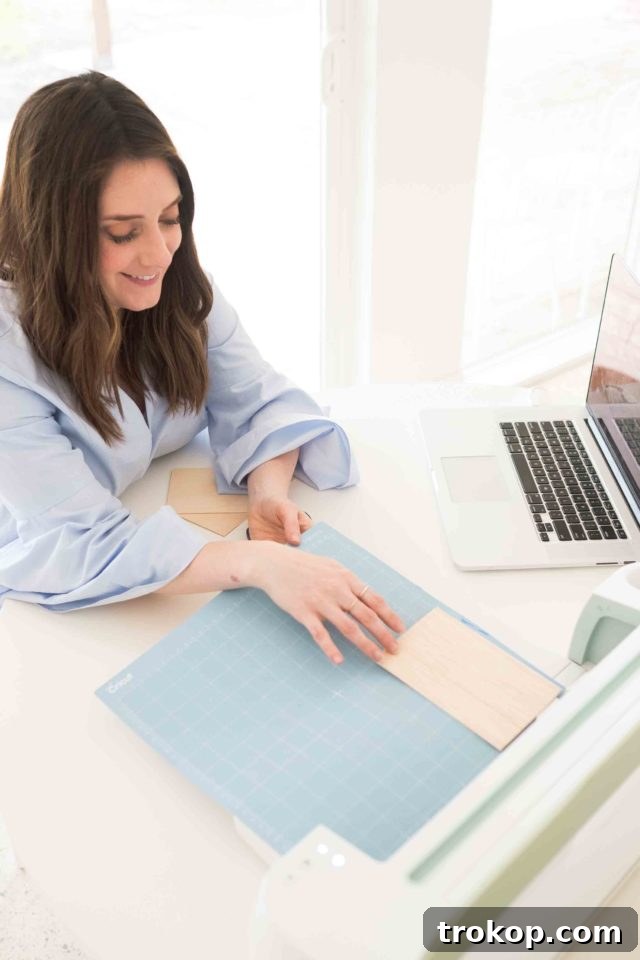
You’ll be delighted to know that this impactful home decor DIY requires only a few essential materials, one of which is an absolute game-changer for crafters: the Cricut Maker. That’s right, I’ve brought my (admittedly brand new – how could I resist the mint green version?) Cricut Maker out of its box. This incredible machine isn’t just a tool; it’s a crafter’s ultimate dream, opening up a world of possibilities for intricate and precise projects.
From practical items like these charming coasters made with Cricut Infusible Ink, which have become a household staple, to more ambitious decorative pieces, the Cricut Maker handles it all. I have many more exciting DIY ideas brewing for this versatile machine in the coming weeks, so stay tuned for more creative inspiration!
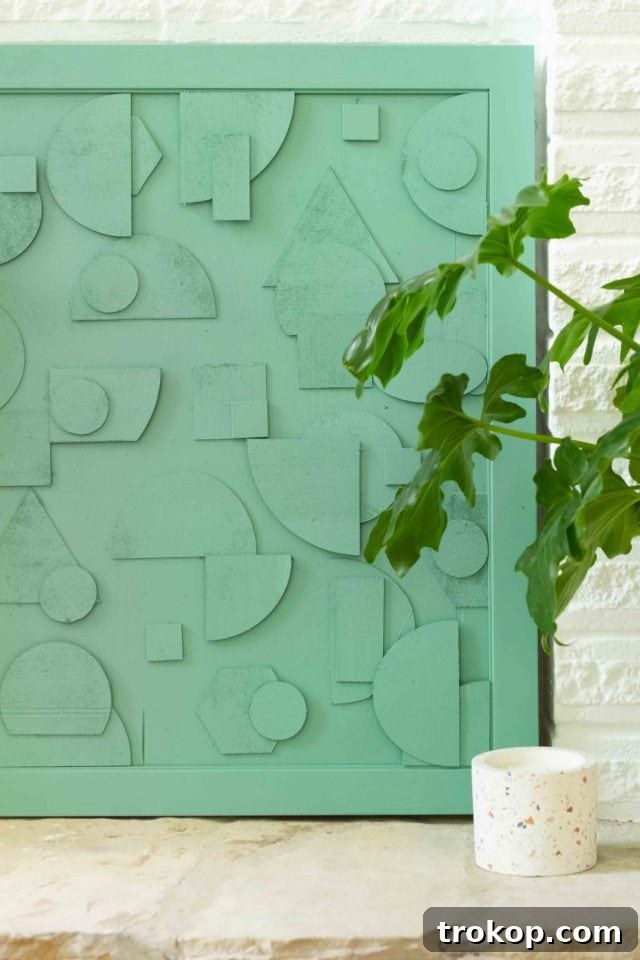
Table of Contents
What Woods are Compatible With the Cricut?
The inspiration for this project struck me after I discovered a stunning piece of artwork online. While beautiful, it simply wasn’t the right size for my space and came with a hefty price tag. That’s when I realized I could replicate the look, personalize it to my exact needs, and save a significant amount of money by making it myself.
The abstract shapes I envisioned were surprisingly simple and readily available within the Cricut Design Space. This meant the heavy lifting in terms of design was already done for me. My main tasks involved crafting a sturdy framework for mounting the artwork and precisely cutting the wood shapes using my trusted Cricut Maker.
When it comes to cutting wood with a Cricut Maker, you have two primary options: Basswood and Balsa wood. These particular wood types are chosen for their unique properties that make them ideal for intricate cutting machines.
Both Basswood and Balsa wood are relatively soft, allowing the Cricut Maker’s Knife Blade to glide through them smoothly, creating clean and precise cuts, even for complex designs. Despite their softness, they are robust enough to provide a substantial base for various crafting projects, including decorative artwork, models, and more. Basswood is known for its fine, even grain and light color, making it excellent for painting and staining. Balsa wood, even lighter and softer, is fantastic for projects requiring less density and offers a distinct, natural aesthetic. Selecting the right wood is crucial for a successful and satisfying crafting experience with your Cricut Maker.
Materials and Tools Needed to Make DIY Wooden Artwork
- Cricut Maker: Your essential cutting machine for precise wood shapes.
- Cricut Knife Blade: Specifically designed for cutting thicker materials like wood.
- Balsa Wood Sheets: Or basswood sheets, chosen for their compatibility with the Cricut Knife Blade.
- Wooden Picture Frame: A sturdy base for your artwork. We used a 24″ x 24″ frame, but any size suitable for your space will work.
- Piece of Scrap Wood to Fit Your Frame: Alternatively, you can use the chipboard backing that comes with the picture frame as your canvas.
- Hot Glue Gun and Glue Sticks: For securely attaching your wooden shapes to the canvas.
- Spray Paint: In your preferred color to add a vibrant or cohesive finish to your artwork.
How To Cut Wood Easily with the Cricut Maker
Designing Your Abstract Artwork:
- Step 1: Set Up Your Cricut Maker. Begin by connecting your computer to your Cricut Maker. Ensure your machine is ready for wood cutting by installing the Knife Blade. This is done by unlatching the side B cutter housing and carefully replacing the standard blade with the Knife Blade.
- Step 2: Select Your Shapes in Design Space. Open Cricut Design Space and browse through the extensive library of shapes. For an abstract look, experiment with a variety of geometric forms. We chose a mix of circles, rectangles, triangles, squares, half circles, hexagons, and ovals to create visual interest. Once you’ve selected all your desired shapes, click the “Make It” tab in the top right corner of the screen to proceed.
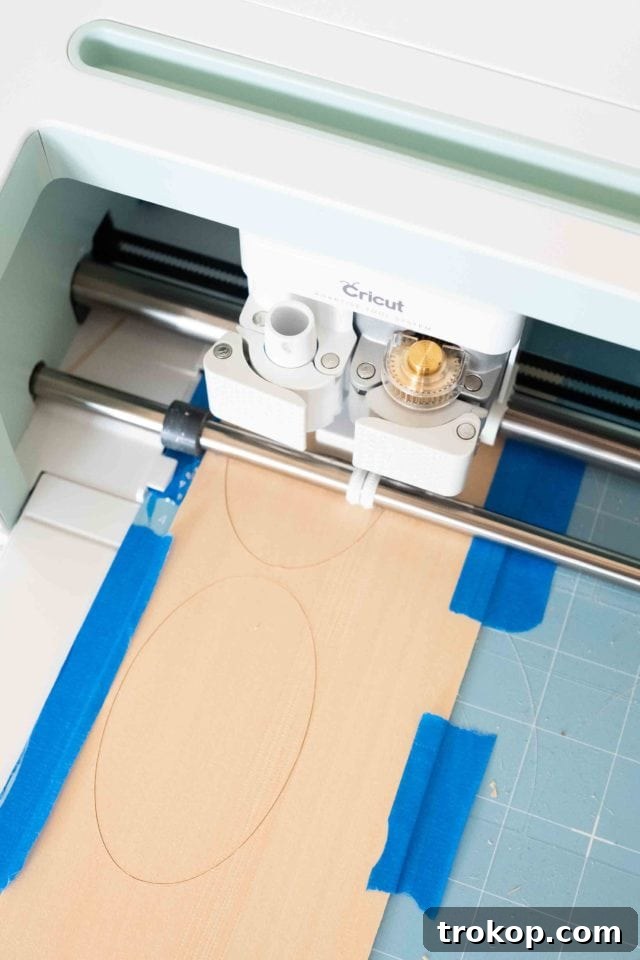
- Step 3: Prepare Your Wood for Cutting. For optimal results, it’s highly recommended to reinforce your wood sheets onto the Cricut mat using painter’s tape. This prevents any shifting during the cutting process, ensuring clean, accurate cuts. If your wood pieces are smaller than the mat, you can strategically arrange your shapes within Design Space to utilize the remaining material efficiently. For a comprehensive visual guide, you can follow a step-by-step tutorial on cutting shapes from Design Space here.
- Step 4: Confirm Material Settings. When cutting wood with your Cricut, selecting the correct material and depth of cut settings in Design Space is paramount. In our case, we opted for balsa wood, which we purchased in bulk, so we specifically selected “Balsa Wood” for the cutting material. This ensures the machine applies the appropriate pressure and number of passes for a clean cut.
- Step 5: Align and Load Your Mat. Carefully tape your wood securely to the cutting mat. Double-check that the placement of your shapes on the Design Space board accurately corresponds with the size and position of your wood material on the physical mat. Once aligned, load your mat into the machine by pressing the flashing double-sided arrow button. If the mat appears misaligned, simply press the unload/load button and try again.
- Step 6: Initiate the Cutting Process. With everything aligned and set, press the flashing Cricut logo button on your machine to begin cutting your wood shapes. The Cricut Maker will execute multiple passes to achieve a clean cut. Once the cutting process is complete, unload the mat and carefully separate your newly cut shapes from the wood sheet.
- Step 7: Repeat as Needed. Continue this process, cutting a variety of shapes until you have achieved the desired quantity and variation for your abstract wooden artwork. Don’t be afraid to experiment with different sizes and forms to create a truly unique composition.
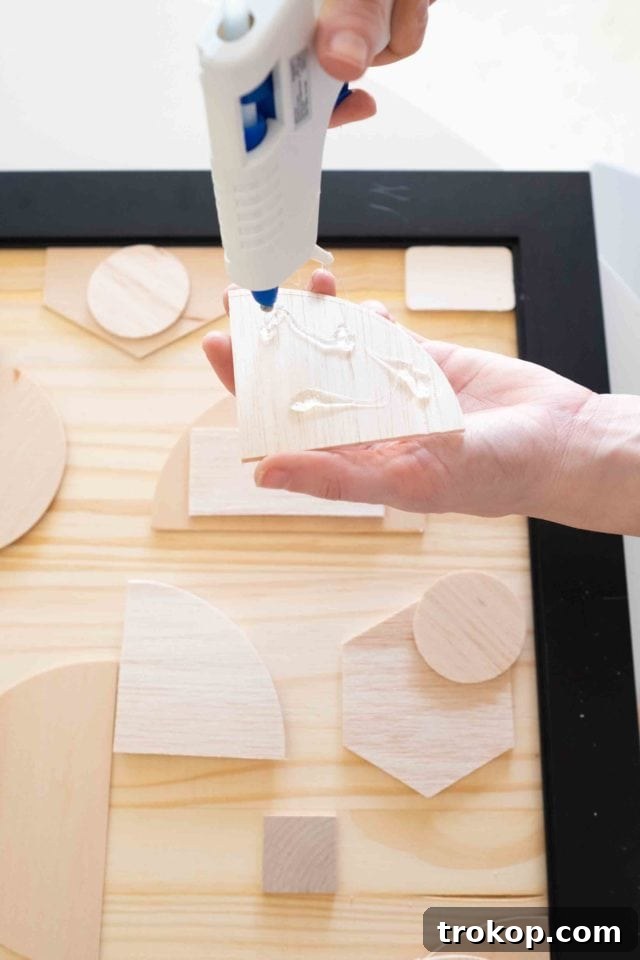
Assembling the Wooden Pieces:
- Step 8: Prepare Your Canvas. To create the base for your artwork, use a simple wooden frame. You can either glue the chipboard backing from the frame into place as your canvas or, for a more substantial and durable finished product, glue a piece of scrap wood to the back of the wooden frame. Ensure the surface is clean and dry before proceeding.
- Step 9: Arrange Your Shapes. Now comes the fun part – laying out your cut wooden shapes on your prepared board. Experiment with various arrangements, overlapping elements, and spacing until you achieve a visually pleasing composition that resonates with your artistic vision. Consider how different shapes interact and create flow within the piece.
- Step 10: Add Dimension (Optional). To infuse your artwork with depth and visual interest, consider adding dimension. This can be achieved by gluing additional smaller wooden squares or pieces behind some of your main shapes. This elevates certain elements, creating varying heights and shadows that add a professional, layered look to your abstract design.
- Step 11: Secure with Hot Glue. Once you are completely satisfied with your arrangement, carefully hot glue each wooden shape into its chosen position on your canvas. Work systematically, pressing each piece firmly into place. Allow the glue to dry completely, ensuring all components are securely attached.
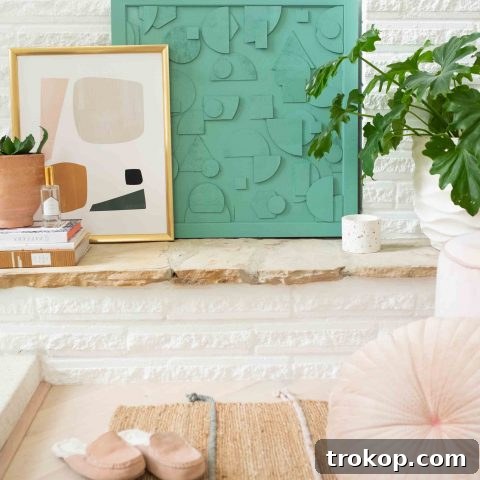
- Step 12: Apply Your Finish. The final step is to personalize your artwork with color. Spray paint the entire glued product with the color of your choice. A monochrome color, like my jade green choice, creates a sophisticated, cohesive look, highlighting the textures and shapes. Alternatively, you could paint individual shapes different vibrant colors for a dynamic color-block effect. Allow the spray paint to dry thoroughly according to the manufacturer’s instructions.
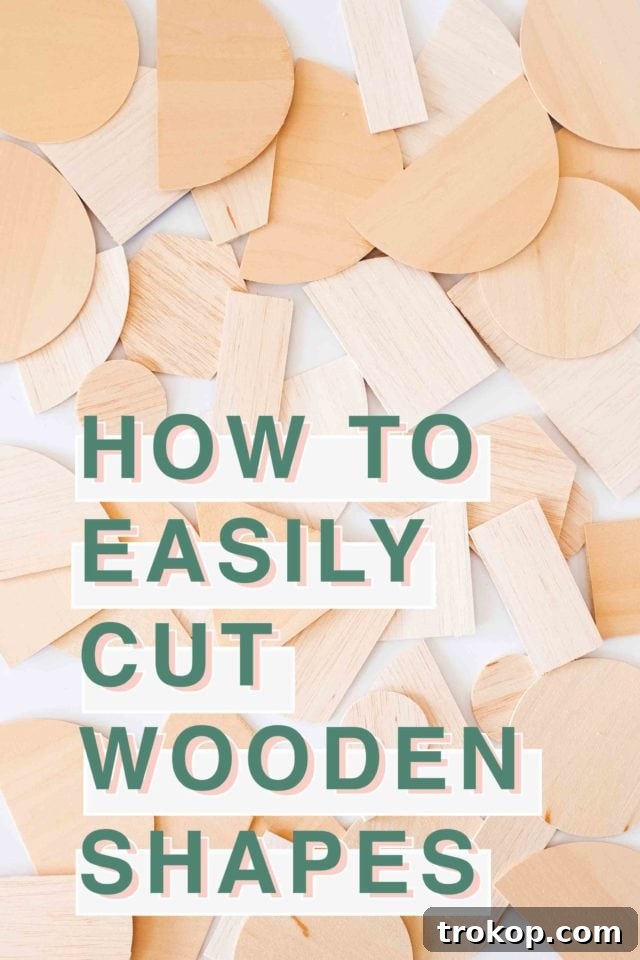
You’re now ready to display your custom DIY wooden artwork! I’ve been particularly drawn to all shades of jade green lately, which is why I opted to spray paint my entire project in a single, elegant shade of green. This monochrome approach beautifully emphasizes the intricate shapes and varying dimensions of the wood, creating a sophisticated and minimalist aesthetic.
However, the beauty of this DIY lies in its versatility. Imagine painting different shapes in contrasting or complementary colors to create a vibrant, playful color block version! The possibilities are truly endless, allowing you to tailor this project to perfectly match your existing decor or introduce a bold new statement piece.
Pro Tips for Cutting Wood Shapes Easily
How to Overlap Shapes for Dynamic Designs:
To create intriguing overlaps or custom cut-outs within your shapes, utilize the “slice” tool in Cricut Design Space. First, arrange the shapes you want to overlap (e.g., a half-circle on a rectangle) and then highlight both shapes. Click the “slice” tab. This action will create new, separate shapes where they intersected. You can then easily separate all the remaining pieces and delete any unwanted fragments, resulting in a unique, integrated design.
Adding Dimension to Your Artwork:
As mentioned in the assembly steps, one of the most effective ways to elevate your abstract artwork is by adding varying depths. By gluing smaller wooden squares or other scrap wood pieces behind certain shapes, you can make them stand out from the base. This creates dynamic shadows and highlights, making your piece appear more complex, professional, and visually engaging. Experiment with different thicknesses to achieve the desired effect.
Monitoring the Cutting Process:
The Cricut machine is programmed to perform a specific number of passes to ensure your material is thoroughly cut. However, based on our experience with basswood and balsa wood, the default number of passes can sometimes be excessive. We often found it beneficial to stop the cutting process prematurely.
Instead of letting the machine run its full programmed course, keep a close eye on the cutting process. As soon as the shapes appear to be fully cut, or if you notice any slight movement or pushing by the blade, press the pause button on your Cricut Maker and then unload the mat. If the Design Space software prompts you to cancel the cut, you can confidently click “yes” – your successfully cut shapes will remain intact, preventing unnecessary wear on your blade and material.
What if the Wood Moves Around While Cutting?
Securely taping your basswood or balsa wood sheets to the cutting mat is a critical step to ensure they remain perfectly in place throughout the cutting process. However, if, despite your best efforts, the material loosens from the tape and starts to shift while the Knife Blade is cutting, it is imperative to stop the cut immediately and cancel the operation in Design Space.
We strongly advise against attempting to re-cut on the same piece of wood if it has shifted. This can lead to inaccurate cuts, damage to your blade, or ruin your material. Instead, grab a fresh sheet of wood, apply the painter’s tape a little more firmly this time, ensuring comprehensive coverage and adhesion to the mat, and start the cutting process anew. This precaution will save you time, materials, and frustration in the long run.
More Wood DIY Project Ideas
If you’ve enjoyed creating this DIY wooden artwork and are looking for more inspiring home decor projects involving wood, be sure to explore our related posts below. We’ve got a variety of ideas to keep your crafting passion alive and your home beautifully decorated:
- DIY Wooden Polaroid Displays + Video Tutorial
- How To Make DIY Mini Wooden Serving Boards
- DIY Distressed Wooden Shelves
- DIY Wooden Birthday Cake Decor
DIY Wooden Artwork
A step-by-step guide on how to create your own wooden artwork that’s easy on the wallet!
- Active Time: 2 hours
- Dry Time: 6 hours
- Total Time: 8 hours
- Course: DIY
- Category: Home Decor
Equipment
- Cricut Maker
- Cricut Knife Blade
- Hot Glue Gun and Glue Sticks
Materials
- Balsa Wood Sheets (or Basswood)
- 1 Wooden Picture Frame (24″x24″ or size of your choice)
- 1 Piece of Scrap Wood (to fit your frame, or use the chipboard backing)
- Spray Paint (in the color of your choice)
Instructions
Designing your artwork:
- Connect your computer to your Cricut Maker and change the blade if necessary by unlatching the side B cutter and replacing it with the knife blade.
- Select your desired shapes from the Design Space options (e.g., circles, rectangles, triangles, squares, half circles, hexagons, ovals). After you have all desired shapes, click the “make it” tab in the top right corner.
- Tape down your wood securely to the mat and ensure your shapes on the design board line up with the size of your material selected in Design Space.
- Load your mat into the machine by lining it up and pressing the flashing double-sided arrow. (If your mat is misaligned, press the unload/load button and try again).
- Finally, press the flashing Cricut logo button on your machine, and your wood cut will begin. Once complete, unload the mat and separate your shapes from the wood sheet.
- Repeat this process until you have your desired amount of shape variations for your final wooden artwork.
Assembling the wooden pieces:
- To create the wooden canvas, use a simple wooden frame with the chipboard backing glued in place, or glue a piece of scrap wood to the back of a wooden frame for a heftier finished product.
- Lay out the shapes on your board and rearrange them to your liking.
- Optional: To add dimension, glue additional wooden squares behind some of your shapes to give them different heights.
- Once you have your shapes laid out on your wooden canvas, hot glue them into place and let dry.
- Now, spray paint the final glued product with the color of your choice and let dry.
Notes
- You can follow a step-by-step guide for cutting shapes from Design Space right here.
- Pro-tip: Reinforcing the wood with painter’s tape onto the Cricut mat is helpful.
- If your wood pieces are smaller than the mat, you can move the shapes around to fit on your remaining material.
- When cutting wood on your Cricut, it’s really important to ensure the right materials and depth of cut are selected. We used balsa wood and selected balsa wood for cutting in Design Space.
Cost: $50
Keywords: DIY wooden artwork, Cricut wood cutting, abstract wood art

This post is sponsored by Cricut. Sugar & Cloth has chosen to donate 5% of all sponsored campaigns to charity, which you can read more about right here.
Don’t forget to share your custom DIY wooden artwork with us on Instagram using the hashtag #sugarandclothloves. We absolutely adore seeing all your creative projects! If you’re hungry for more interior design inspiration, you can find all our home decor tutorials and innovative ideas right here.
Easy Wall Art Projects to Try at Home
Continue Reading
Continue Reading
Continue Reading
Continue Reading
Continue Reading
Continue Reading