
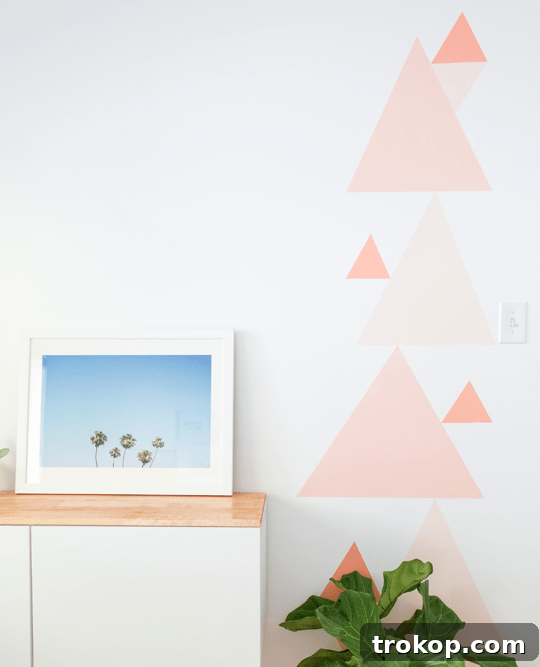
Transform any room with a vibrant, modern touch using our comprehensive guide to creating a stunning DIY Geometric Accent Wall. This quick and rewarding project promises to infuse personality and contemporary style into your living space, making it a perfect weekend endeavor for any home decorator.
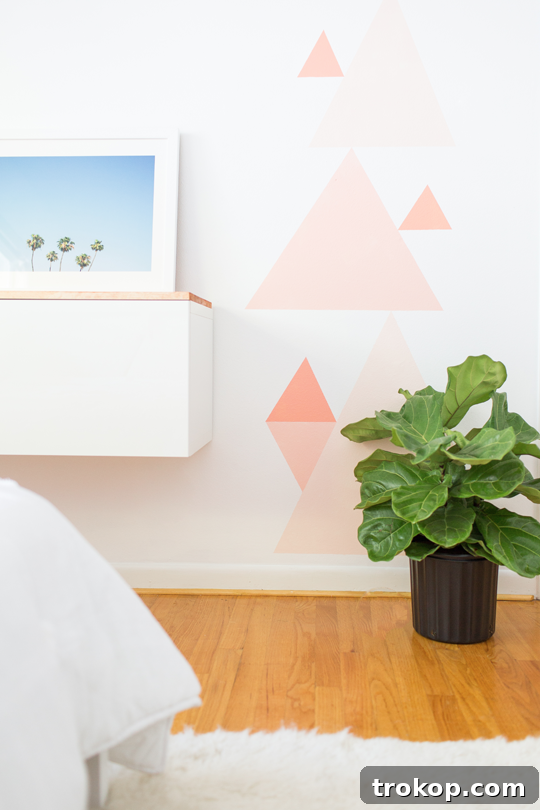
As part of our ongoing room makeover series, we are thrilled to unveil our take on the perpetually popular geometric accent wall – a design choice that effortlessly combines modern aesthetics with a playful touch. For Ainsley’s room transformation, the aim was to introduce a burst of color and contemporary flair while maintaining a bright and airy foundation.
While we adore the crisp, clean feel of an all-white room, a little girl’s sanctuary calls for something extra special. We wanted to “punch it up” with her favorite vibrant hues, creating a focal point that is both stylish and age-appropriate. This easy handmade wall painting idea is ideal for those seeking a quick weekend update without committing to painting an entire room. It acts as a clever visual trick, akin to a stylish table-runner for your wall, highlighting a specific section with captivating colors and patterns while allowing accessories to complete the room’s narrative.
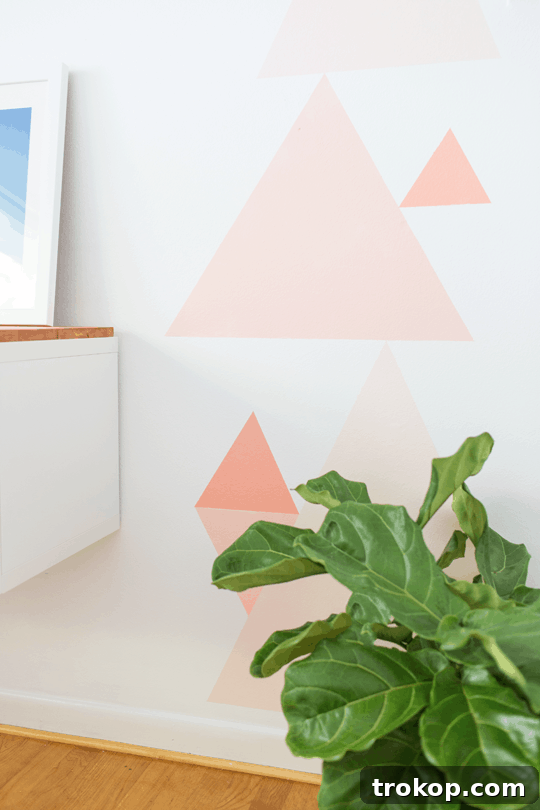
Table of Contents
Materials Needed for Your DIY Geometric Accent Wall
Gathering the right tools and materials is the first step to a successful DIY project. For this eye-catching geometric accent wall, you’ll need a few essential items to ensure crisp lines and a vibrant finish:
- High-Quality Paint — The foundation of your accent wall’s beauty lies in the paint. We recommend Valspar Reserve Paint for its exceptional coverage and durability. For Ainsley’s room, we chose a delightful palette of Simply Coral 2001-2A, Coral Mist 2001-2B, and Apricot Ice 2001-2C. These specific Valspar shades are exclusively available at Lowe’s, offering a harmonious blend that creates a sophisticated yet playful look.
- Painter’s Tape — Essential for creating sharp, clean geometric lines. Invest in a good quality painter’s tape that offers clean removal without damaging your existing wall paint or leaving residue.
- Mini Paint Rollers — You’ll want one mini roller for each paint color. This prevents color mixing and allows for quick, efficient application within your taped-off sections, giving you a smooth and even finish.
- Level — A trusty level is crucial for ensuring all your horizontal and vertical tape lines are perfectly straight, which is key to achieving a professional-looking geometric design.
- Drop Cloths or Old Sheets — To protect your floors and furniture from accidental paint splatters.
- Rags or Paper Towels — For quick clean-ups of any spills or drips.
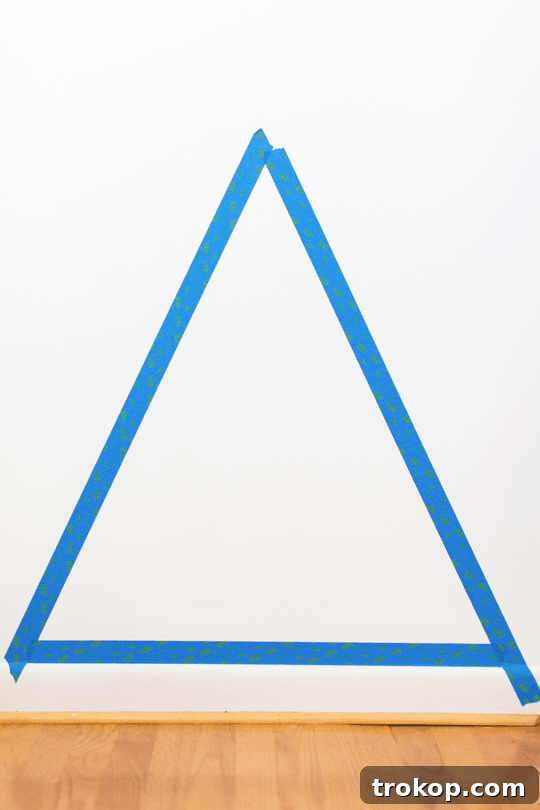
How to Create a Stunning Geometric Accent Wall
Ready to bring your vision to life? Follow these simple steps to create a captivating geometric accent wall that will be the envy of all your guests:
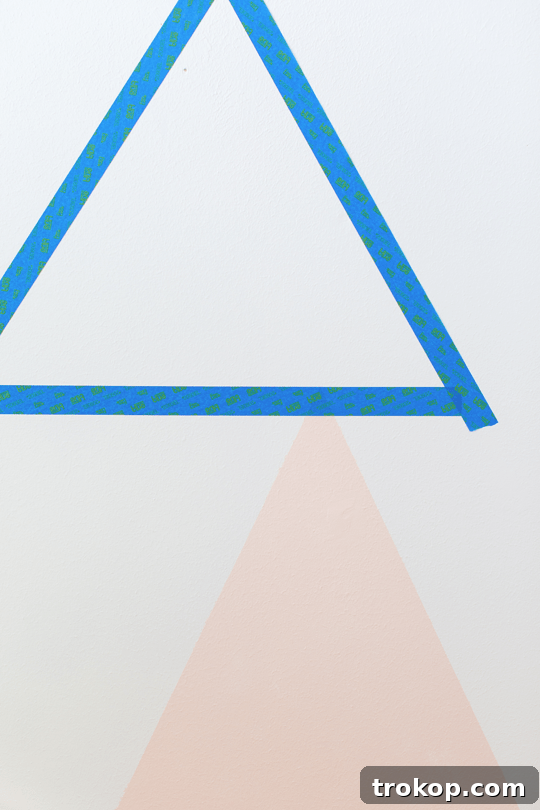
- Establish Your Base Triangle: Begin at the bottom of your chosen wall. Use your painter’s tape to carefully tape off a large triangle. Take your time to measure and use the level to ensure the bottom tape line is perfectly straight and level. This first triangle will serve as the anchor for your entire design, so precision here is important.
- Strategize Your Color Palette: Painting the bottom triangle first allows you to build the wall design upwards and visualize the final product more effectively. When selecting colors, consider using multiple shades from the same color family, as we did with the Valspar Reserve coral tones. This approach creates a cohesive and sophisticated accent wall that is toned down and not overly contrasting. It also frees you from the dilemma of choosing just one favorite color! An added benefit of Valspar Reserve paints is their stain and scrub resistance, making them an excellent choice for kids’ rooms where crayon mishaps might occur.
- Apply the First Color: With your first triangle taped, apply your initial chosen paint color using a mini roller. Ensure even coverage.
- Remove Tape and Allow to Dry: Carefully remove the painter’s tape while the paint is still slightly wet. This helps prevent the paint from peeling with the tape, ensuring a clean edge. Allow the paint to dry completely to the touch before proceeding. Drying times can vary, so consult your paint can for specific recommendations.
- Create the Next Staggered Triangle: Using the top edge of your first painted triangle as a guide, tape off your next triangle. This triangle should be slightly smaller than the first and intentionally off-centered to create a visually interesting, staggered effect as the design climbs the wall. This asymmetry adds dynamism to your geometric pattern.
- Repeat for Larger Shapes: Continue this process of taping, painting, and drying for all your larger, primary geometric shapes. Ensure each new triangle touches the previous one, maintaining a continuous flow up the wall. Allowing each section to dry thoroughly before taping the next prevents smudging and ensures distinct lines.
- Introduce Smaller Accent Triangles: Once your main staggered triangles are complete and dry, use painter’s tape and your level to create smaller triangles on either side of selected larger triangles. These smaller shapes serve as “points of interest,” adding intricate detail. While you can add several, avoid overcrowding the design to maintain visual balance and prevent a cluttered look.
- Paint and Dry Small Triangles: Paint these smaller triangles with your chosen accent colors. Let them dry completely.
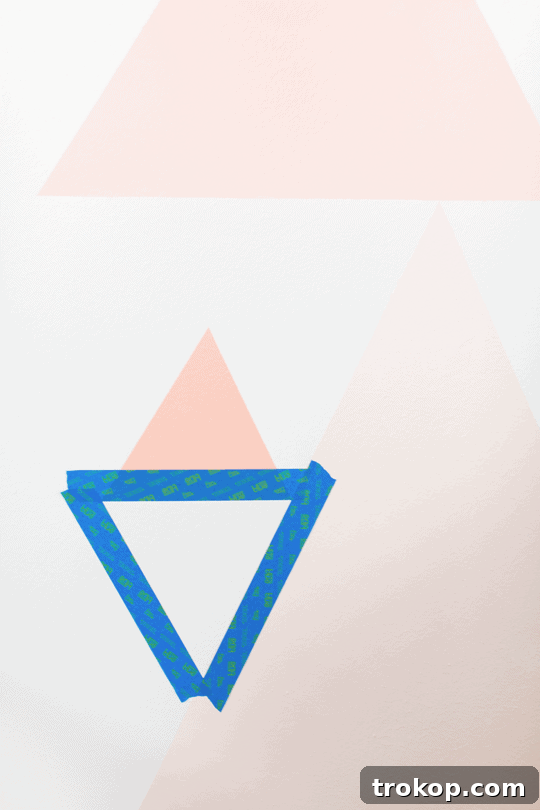
- Form Color-Blocked Diamond Shapes: For an extra layer of complexity and visual appeal, tape off a triangle that is mirrored upside down on top of some of your small triangles. This technique transforms adjacent triangles into striking color-blocked diamond shapes, adding depth and a playful dimension to your wall.
- Complete the Diamond Shapes: Paint the mirrored triangles and allow them to dry. And just like that, you’re ready to step back, admire your handiwork, and style your room around your stunning new DIY geometric accent wall!
Pro Tips for a Perfect Geometric Accent Wall
Achieving a flawless geometric accent wall can be simple with these expert tips and tricks:
Achieving Soft Edges for Less Defined Shapes
If your design calls for a softer, more blended aesthetic rather than super crisp lines, there’s a trick. During your final two coats of paint, gently pull up on your painter’s tape while the paint is still wet. Alternatively, after removing the tape, use a cotton swab lightly dampened with isopropyl rubbing alcohol to gently touch up any slightly blurred edges before the paint fully cures. This technique can create a beautiful, almost watercolor-like depth to your geometric forms, offering a unique visual texture.
Thorough Preparation is Key
Before you even open a can of paint, ensure your space is adequately prepared. Remove all personal items, furniture, and wall decor from the immediate area. Cover floors with drop cloths or old sheets and mask off any outlets, light switches, or trim with painter’s tape. A clean, unobstructed workspace not only prevents accidental damage but also allows you to focus on creating perfect lines and enjoying the painting process without interruption.
Working Efficiently in Sections
It’s not always practical or even possible to paint large sections of a wall all at once. If you’re tackling a particularly intricate design or a large wall, consider working in smaller, manageable sections. This approach allows you to focus on precision for each shape without rushing. Paint one color in a section and allow it to dry completely before moving on to an adjacent area or a different color. This strategy prevents colors from bleeding into each other and ensures clean, distinct geometric divisions.
Design with Confidence: Create a Stencil
Not everyone feels comfortable freehanding complex geometric designs. If precision is paramount or if you’re working on an intricate pattern (or even a fun mural for kids!), creating a stencil can be a game-changer. Sketch your desired design on paper first, or use a projector to display it directly onto the wall. Once satisfied, use painter’s tape to meticulously outline these projected or sketched areas. This method guarantees symmetry and allows you to transfer your design with confidence before applying paint.
Embrace the Process and Have Fun
While painting a geometric accent wall might seem straightforward, “practice makes perfect” truly applies here. Don’t stress yourself out! This is a creative endeavor, so enjoy the journey. If you’re a beginner, try sketching your design on post-it notes or practice on a spare piece of cardboard first. This allows you to experiment with shapes and color combinations, providing a clear outline to follow when you move to the wall. Remember, minor imperfections often add to the handmade charm of a DIY project!
Choosing Your Perfect Geometric Design
Before you tape, consider the overall feel you want to achieve. Do you prefer a subtle, minimalist look with a few large shapes, or a dynamic, intricate pattern with many small ones? Sketch out several ideas on paper or use online design tools to visualize different layouts. Think about how the shapes will interact with each other and with the existing furniture in the room. You can opt for consistent shapes of varying sizes, or mix different polygons for an eclectic vibe. Don’t be afraid to experiment with angles and overlaps to create unique visual interest.
Essential Safety and Cleaning Tips
Always ensure good ventilation when painting by opening windows and doors. Wear old clothes and consider gloves to protect your hands. Keep a damp rag handy for immediate clean-ups of any paint drips or spills. Once your project is complete and fully dry, dispose of paint cans and materials responsibly according to local regulations. Proper cleanup ensures a beautiful result and a safe environment.
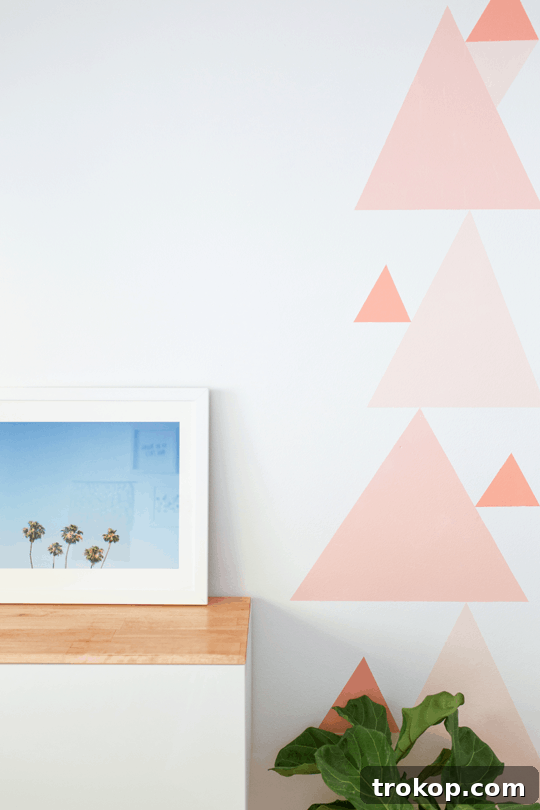
I seriously love the outcome of this project. While I initially considered an ombre version for Ainsley’s room, I ultimately opted for an even distribution of colors. This choice ensured that the entire wall felt cohesive and vibrant, rather than directing the eye to just one specific section. The result is perfectly balanced – just the right amount of playful femininity for her, yet versatile enough to serve as a stylish and neutral backdrop when the room transforms into a guest space. It’s truly a testament to the power of thoughtful design.
What’s your favorite weekend paint project that delivered instant gratification? I must admit, I’m always drawn to room makeovers that offer quick and satisfying results. There’s something incredibly rewarding about seeing a space transform so dramatically in such a short amount of time!
This room makeover series, including this captivating geometric accent wall, is proudly made possible through our wonderful partnership with Valspar. You can discover the superior quality and diverse color options of Valspar Reserve paints exclusively at Lowe’s. We extend our sincere gratitude for supporting the brands that enable us to consistently bring you bigger, better, and more inspiring content for your home and DIY adventures!