
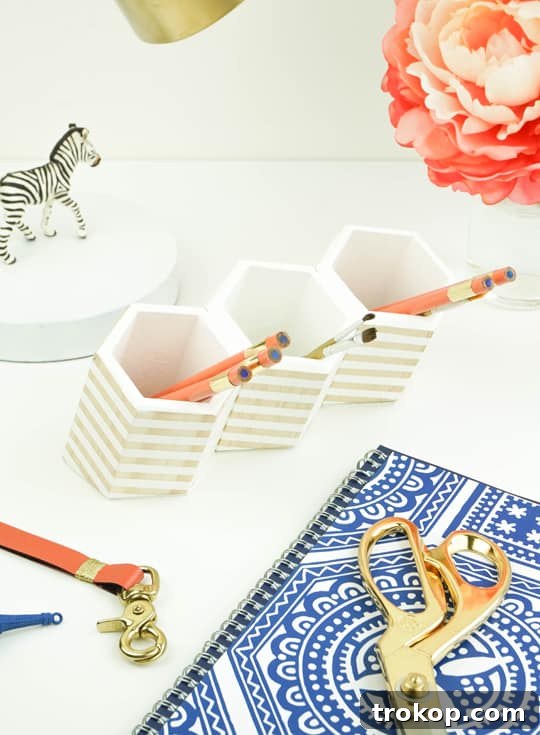
DIY Hexagonal Desktop Organizer: Elevate Your Workspace with Style and Function
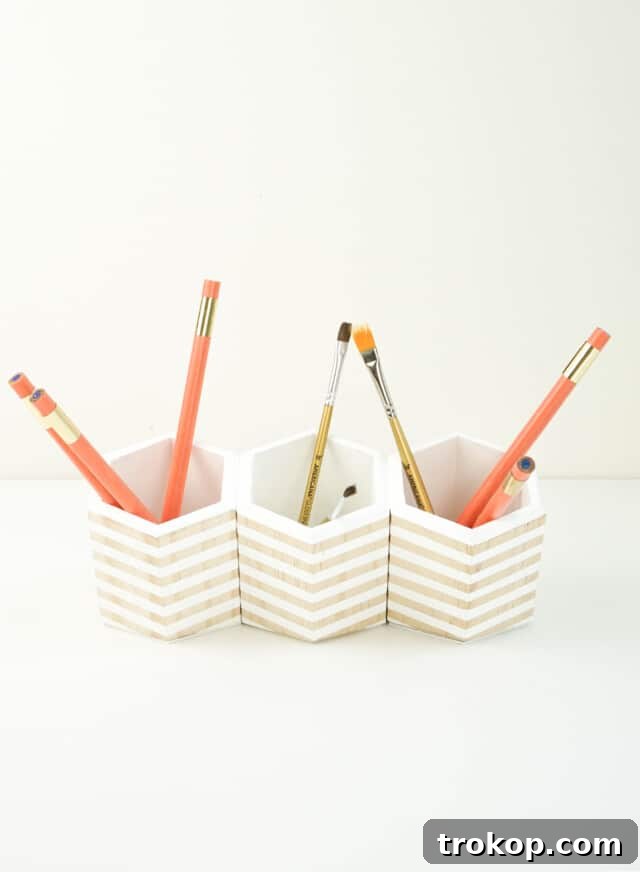
Is your desk a chaotic landscape of pens, papers, and forgotten gadgets? Do you dream of a workspace that’s not only impeccably organized but also beautifully reflects your personal style? Look no further! This comprehensive guide will walk you through creating a stunning Hexagonal DIY Desktop Organizer – a chic and practical solution to tame desk clutter while elegantly displaying your favorite decorative items. Perfect for students heading back to school or college, remote workers seeking an office refresh, or anyone who simply loves a tidy and inspiring environment, this project is designed for both ease and impact.
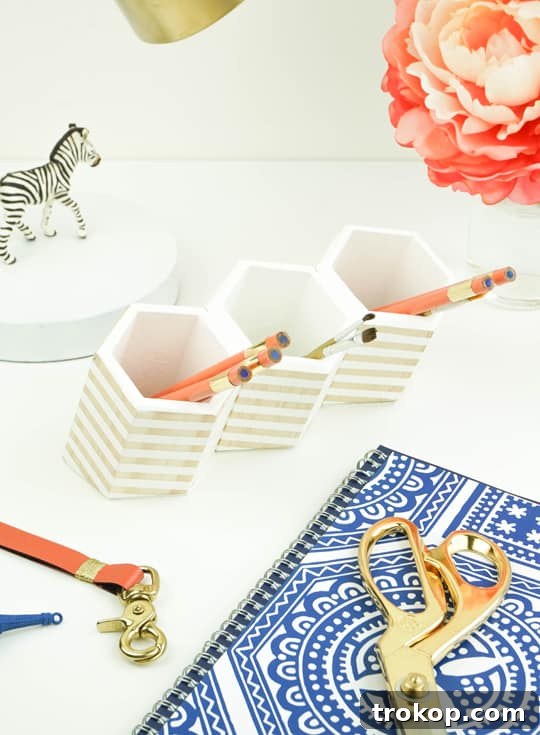
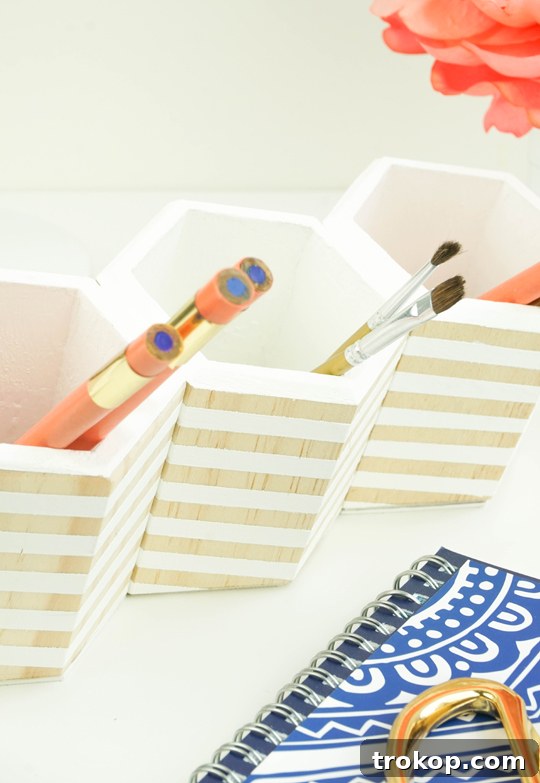
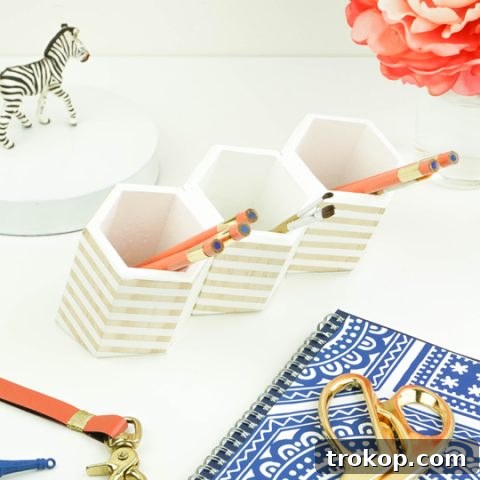
Whether you’re gearing up for a new academic year or simply looking to inject some fresh energy into your home office, a well-organized desk can significantly boost productivity and mood. This DIY desktop organizer, crafted with a touch of modern flair, offers ample space for all your essential supplies. Its unique angled opening not only makes it easy to access items but also adds a sculptural, artistic element to your desk. From pretty pens and pencils to your collection of cute pouches and accessories, everything will have its designated spot.
Many of us share a profound love for office supplies – those delightful tools that make work and study a little more enjoyable. So, why not give them a home that’s as charming as they are? This hexagonal organizer is not just about containment; it’s about curated display, allowing you to appreciate your favorite items while maintaining a clutter-free environment. It’s a perfect companion to other smart storage solutions, such as a DIY leather hexagon vanity tray, which can keep makeup and brushes perfectly in place.
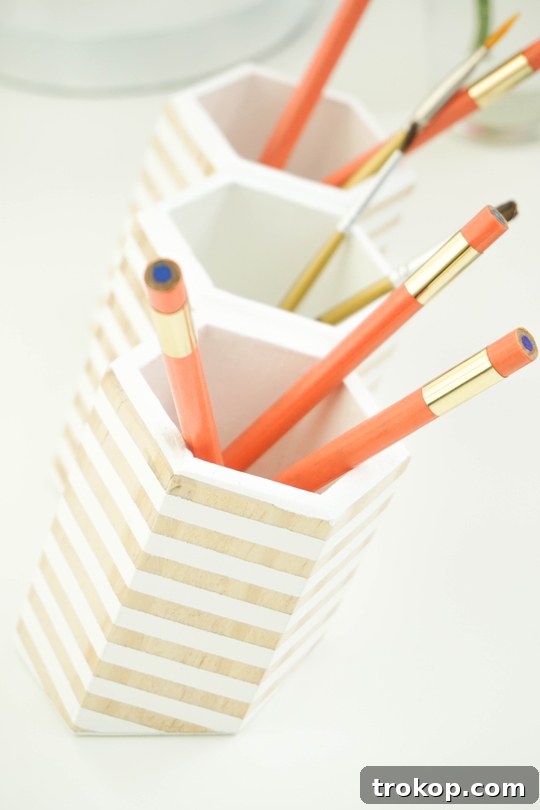
Table of Contents
Why a DIY Hexagonal Organizer?
In today’s fast-paced world, maintaining an organized workspace is more crucial than ever. A cluttered desk can lead to a cluttered mind, impacting focus and efficiency. This DIY project offers a personalized solution that goes beyond generic store-bought organizers. The hexagonal shape brings a contemporary, geometric aesthetic to your desk, making it a stylish focal point rather than just a storage unit. By creating it yourself, you gain the satisfaction of a handmade item and the freedom to customize it to perfectly match your decor and organizational needs. It’s an empowering project that combines functionality with artistic expression, proving that practical items can also be beautiful.
Materials and Tools Needed
Before diving into the creative process, ensure you have all the necessary materials and tools on hand. Gathering everything beforehand will make your crafting experience smooth and enjoyable. We’ve selected items that are generally easy to find at craft stores or online, allowing you to focus on the fun part – building your beautiful organizer!
- Hexagonal Wooden Cups (3-5 recommended): These form the core structure of your organizer. While any unfinished wooden boxes can work, the modern, clean lines of hexagonal cups are ideal for achieving the contemporary look of this project. Consider purchasing these specific hexagonal wooden cups or explore similar hexagon storage options here to find what best suits your taste.
- Patterning Tape or Washi Tape (1/4″ wide): Essential for creating those crisp, stylish stripe patterns. Washi tape, known for its easy application and removal, is a fantastic choice for masking off areas. Ensure it’s good quality to prevent paint bleed. You can find patterning tape or a wide variety of washi tape online.
- White Acrylic Paint: A versatile choice that offers a clean, modern aesthetic. However, feel free to unleash your creativity and choose any other color that complements your existing workspace decor. Acrylic paint is durable and easy to work with. Get your white acrylic paint here.
- Wood Glue: Crucial for securely bonding the wooden cups together and attaching the bases. A strong, quick-drying wood glue will ensure your organizer is sturdy and long-lasting. Look for a reliable wood glue.
- Heavy Card Stock or Chipboard: This will be used to create the custom bottoms for your angled cups, ensuring all your supplies stay securely inside.
- Miter Saw or Hand Saw: A miter saw offers precision for achieving the perfect angled cuts, but a hand saw can also be used with careful measurement and technique. Always prioritize safety when using any saw.
- Ruler and Pencil: For accurate measurements and marking your cutting and taping lines. Precision is key for a polished finish.
- Scissors: For cutting tape and card stock.
- Paintbrush: A good quality brush will ensure smooth, even application of your chosen paint color.
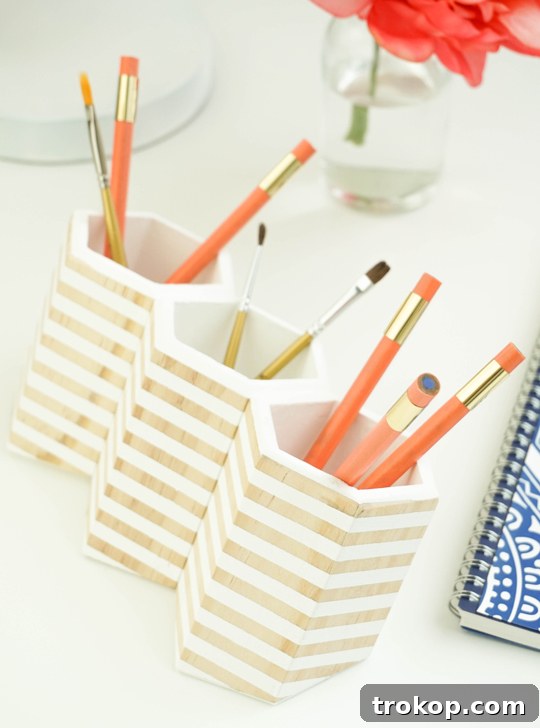
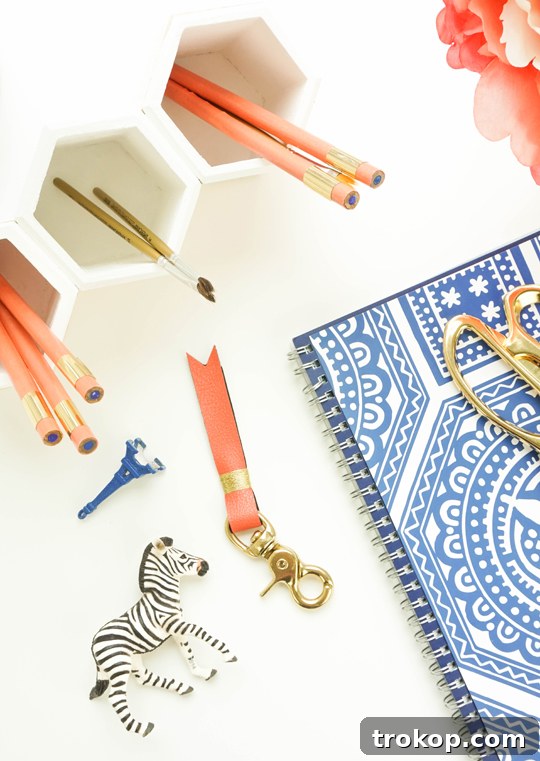
DIY Desk Organizer – How To Make A DIY Desktop Organizer
Creating this hexagonal desktop organizer is a rewarding process that allows for both precision and creativity. Follow these detailed steps to build your own functional and beautiful desk accessory.
Step 1: Mark Your Angles for a Modern Look
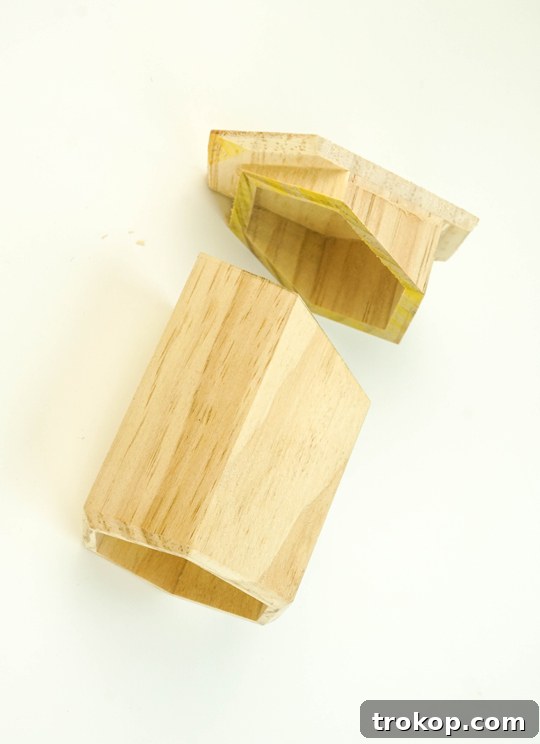
Begin by taking one of your hexagonal wooden cups. Using a ruler and a pencil, carefully draw a diagonal line on one of the side facets of each cup, extending towards the base. This angled cut is what gives the organizer its distinctive, modern, and sculptural appeal. For a visually appealing slope, I chose to draw the diagonal at a precise 22.5-degree angle. This specific angle creates an elegant opening that not only looks great but also makes it easier to retrieve items from the organizer. Repeat this marking process for all the cups you intend to use in your organizer (typically three for a cluster, but you can adjust based on your needs).
Step 2: Execute the Angled Cut with Precision
With your diagonal lines marked, it’s time to make the cuts. If you are using a miter saw, set its blade to match the angle you drew on the cups – in my case, 22.5 degrees. Carefully align each cup with the saw blade, ensuring the pencil line guides your cut. Saw along the angled pencil line, effectively removing a portion of the base of each cup. If you are using a hand saw, take extra care to maintain a consistent angle throughout the cut. Clamp the cup securely to prevent movement and ensure a clean, straight cut. Always wear appropriate safety gear, such as safety glasses, when operating any type of saw.
Step 3: Create Crisp Stripe Patterns with Tape
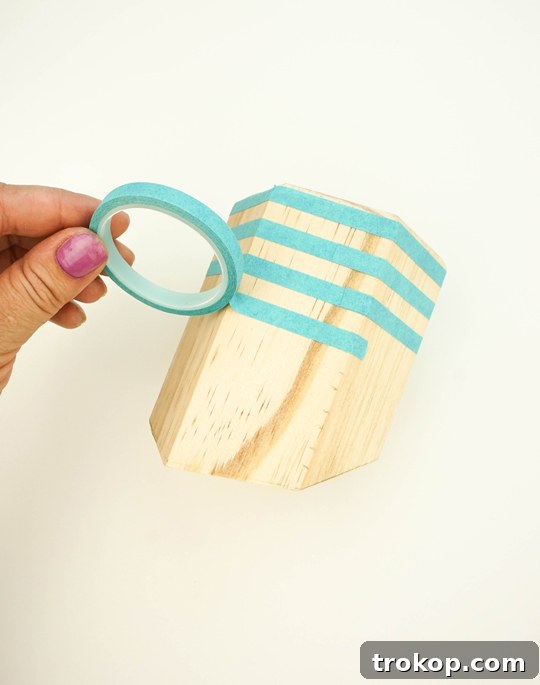
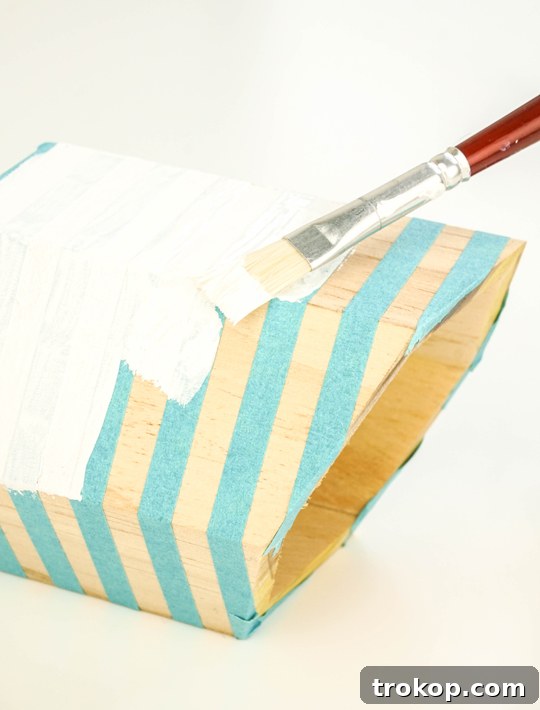
Now comes the fun part of adding visual interest! Take your 1/4″ wide patterning tape or washi tape and carefully apply horizontal stripes around the exterior of each cup. Start at the top edge (the mouth of the cup) and work your way downwards towards the newly angled bottom. The key to sharp, professional-looking stripes is to press the tape down very firmly along its entire length. This crucial step prevents any paint from seeping underneath the tape, ensuring clean lines. Do your best to maintain consistent spacing between the stripes and to line them up as uniformly as possible from one cup to the next for a cohesive look across your assembled organizer.
Step 4: Paint Your Cups with Chosen Color
With the tape firmly in place, it’s time to paint. Using your chosen acrylic paint (white for a classic look, or any color that matches your aesthetic), carefully paint the exposed wooden surfaces of each cup. Be sure to cover the outside of the cup, the rim, and even a little bit of the inside for a finished appearance. Apply the paint in thin, even coats to avoid drips and ensure smooth coverage. Don’t overload your paintbrush.
Step 5: Allow to Dry and Reapply If Needed
Once the first coat of paint is applied, allow the cups to dry completely. Drying times can vary depending on the paint brand, humidity, and thickness of application. Refer to your paint’s instructions for best results. After the first coat is dry, assess the coverage. If the wood grain is still visible or you desire a more vibrant color, apply a second coat of paint. Again, ensure thorough drying before proceeding to the next step.
Step 6: Create Custom Card Stock Bases
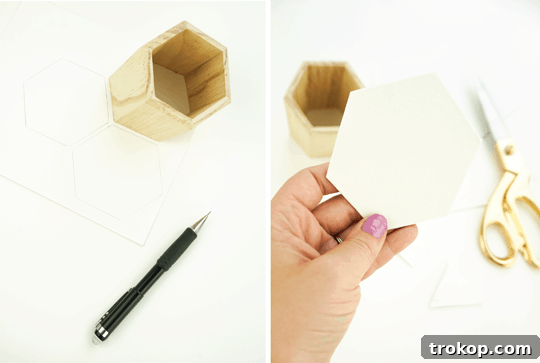
While your paint is drying, prepare the bases for your cups. Turn one of the angled cups upside down onto a piece of heavy card stock or chipboard. Carefully trace around the bottom opening of the cup with a pencil. This will give you the exact hexagonal shape needed. Repeat this tracing process twice more to create three identical hexagonal shapes on your card stock. These pieces will form the new, flat bottoms for your cups, preventing items from falling out of the angled opening.
Step 7: Cut Out the Hexagons
Using a sharp pair of scissors, meticulously cut out the three hexagonal shapes you just traced from the card stock. Take your time to cut precisely along the pencil lines, as well-fitting bases will contribute to the overall neatness and stability of your finished organizer. These cut-outs are now ready to be attached to the bottom of your cups.
Step 8: Attach Card Stock Hexagons to Cups
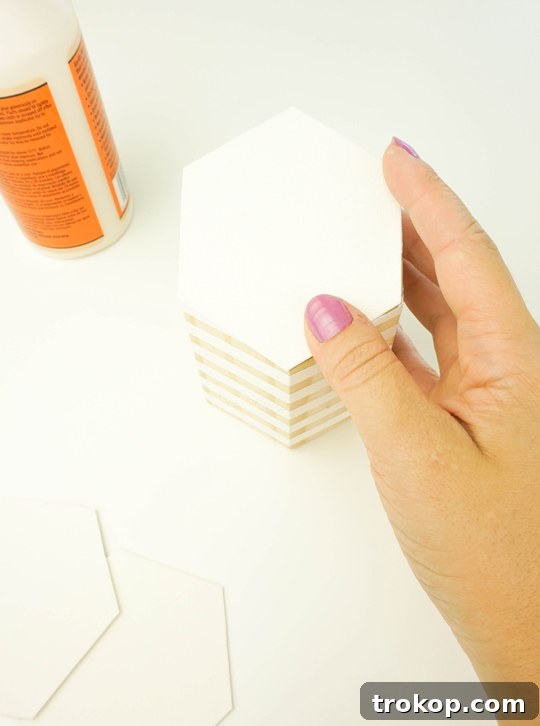
Once your painted cups are completely dry, gently remove the patterning or washi tape to reveal your crisp stripes. Turn each cup upside down. Apply a thin, even bead of wood glue around the bottom edge of the cup where the card stock hexagon will sit. Carefully place one of your cut-out card stock hexagons onto the glued edge, pressing down firmly to ensure a good bond. Allow the glue to set according to the manufacturer’s instructions. This step creates a solid base for each individual cup.
Step 9: Assemble the Organizer Cluster
Now that each cup has its own stable bottom, it’s time to assemble them into a cohesive unit. Arrange the three cups side-by-side in your desired configuration. Apply a generous line of wood glue along the touching edges of the hexagonal cups. Press them together firmly and hold them in place for a few moments, or use clamps if you have them, to allow the glue to begin bonding. This will create a sturdy, unified desktop organizer.
Step 10: Final Drying and Filling
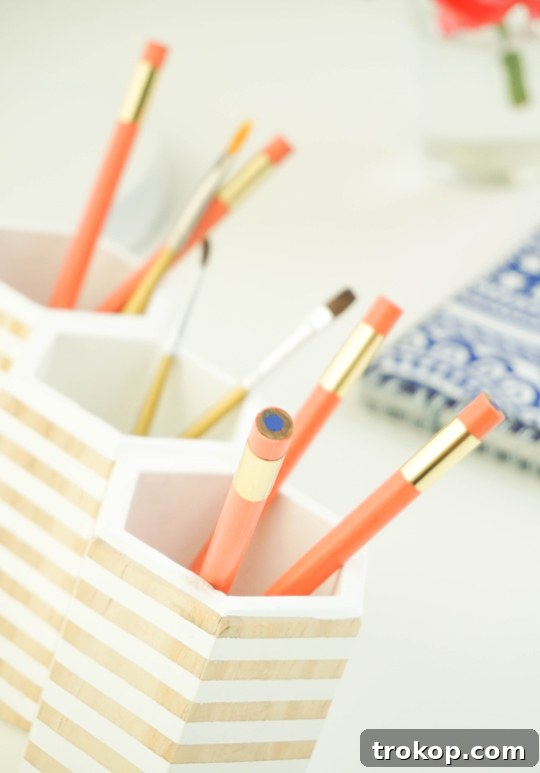
Allow the entire assembled organizer to dry completely for several hours, or even overnight, to ensure the wood glue has fully cured and formed strong bonds. Once dry, your beautiful and functional Hexagonal DIY Desktop Organizer is ready for use! Fill it with your favorite pens, pencils, markers, scissors, rulers, and any other supplies that need a tidy home. Admire your handiwork and enjoy your newly organized workspace. Wasn’t that incredibly easy and rewarding?
Tips for Success and Customization
To ensure your DIY hexagonal desktop organizer is not only functional but also perfectly tailored to your style, consider these additional tips:
- Paint Color Choices: While white offers a minimalist, modern look, don’t hesitate to experiment with vibrant colors, pastels, or even metallic paints to match your room’s aesthetic. You could also try a gradient effect!
- Stripe Variations: Instead of simple horizontal stripes, explore vertical stripes, chevron patterns, or geometric designs using your patterning tape. The possibilities are endless!
- Alternative Materials: If wooden cups aren’t readily available, you could adapt this concept using sturdy cardboard tubes (cut and shaped), PVC pipes, or even recycled containers, though the hexagonal shape might be harder to achieve.
- Enhancing Durability: For extra protection and longevity, consider applying a clear sealant or varnish over the painted surface once it’s completely dry. This will protect against spills and daily wear and tear.
- Personalized Touches: Add small embellishments like decorative buttons, miniature charms, or even hand-painted details once the main paint has dried. Make it uniquely yours!
- Safety First: When using power tools like a miter saw, always follow manufacturer instructions, wear appropriate safety gear (like eye protection), and ensure your workspace is clear. If you’re uncomfortable using power tools, a hand saw and careful clamping can achieve similar results with patience.
Other DIY Organization Projects
The beauty of this project is that it results in a modern desk organizer perfect for corralling supplies and keeping your study space or home office uncluttered and tidy throughout the year. Beyond stationery, this versatile design also makes for a fantastic beauty organizer for your makeup brushes and cosmetics. And to truly optimize your workspace, consider pairing it with a Geometric DIY Chalkboard Desk – a brilliant way to jot down notes and keep track of your to-dos. If you’re looking for more innovative ways to stay organized and elevate your decor, here are some of our favorite desk organizer ideas from our archives:
- Desk Organizer with Cork Board: Combine traditional storage with a functional pin-up surface for notes, photos, and inspiration.
- Nesting Tray Organizer: Create a scalable storage solution with trays that fit together perfectly, offering flexible organization for various items.
- Desktop Dry Erase Board Frame: Transform a simple picture frame into a chic and convenient dry-erase board for quick notes and reminders.
- Geometric Chalkboard Desk: A stylish and interactive desk surface that allows you to doodle, write lists, or display inspirational quotes directly on your workspace.
- Vanity Tray with Storage: Elevate your beauty routine with a custom tray that not only holds your essentials but also offers hidden storage compartments.
- Leather Hexagon Vanity Tray: A sophisticated and elegant tray, perfect for organizing jewelry, makeup, or small desk items, adding a touch of luxury to any surface.
Hexagon DIY Pen Holder: Quick Guide
Print This Guide
Create a pretty way to keep your desk organized while displaying all your cute things at the same time!
1 hr 40 mins
DIY
Office
Equipment
- Miter saw or hand saw (for precise angled cuts)
- Ruler (for accurate measurements)
- Pencil (for marking lines)
- Scissors (for cutting tape and card stock)
- Wood glue (for strong bonds)
- Paint brush (for smooth paint application)
Materials
- 3 hexagonal wooden cups (the foundation of your organizer)
- Patterning tape or washi tape (1/4″ wide, for creating crisp stripes)
- White acrylic paint or any other color (your choice for customization)
- Heavy card stock or chipboard (for the custom cup bottoms)
Instructions
- Mark Angles: Using a ruler and pencil, draw a diagonal line on one side facet of each cup, extending towards the base. A 22.5-degree angle is recommended for a modern slope.
- Set Saw Angle: Adjust your miter saw to the angle marked on your cups (e.g., 22.5 degrees).
- Cut Bases: Carefully saw along the angled pencil line on each cup, cutting off the original base. Always use safety precautions.
- Apply Stripes: Tape 1/4″ horizontal stripes around each cup with patterning or washi tape. Start from the top rim and work downwards. Press the tape down very firmly to prevent paint from seeping.
- Paint Cups: Paint the exterior, rim, and a small portion of the interior of each cup with acrylic paint.
- Dry and Recoat: Allow the paint to dry completely. Apply a second coat if necessary for full coverage and vibrancy, then let dry again.
- Trace Bottoms: Once paint is dry and tape is removed, trace around the angled bottom opening of one cup onto heavy card stock. Repeat twice more to get three hexagonal shapes.
- Cut Hexagons: Cut out the three traced hexagons carefully with scissors. These will serve as the new bottoms for your cups.
- Attach Bottoms: Turn the cups upside down. Apply wood glue to the bottom edge of each cup and firmly attach a card stock hexagon, ensuring a secure fit.
- Assemble Organizer: Arrange the three cups side-by-side. Apply wood glue along the touching facets of the cups and press them together firmly to create a unified organizer.
- Final Dry and Fill: Allow the entire assembled organizer to dry completely (preferably overnight) before filling it with your favorite office supplies or decorative items.
~ $15 (materials may vary)
Keywords:
diy pen holder, desk organization, hexagonal craft, home office diy
We absolutely love seeing your creative projects! Don’t forget to share your finished DIY Desktop Organizer with us on Instagram using the hashtag #sugarandclothloves. Your creations inspire us and our community! For more interior design inspiration, innovative DIY home decor tutorials, and stylish ideas to personalize your space, be sure to explore the rest of our website.
Beyond the Desk: More Inspiration
A well-curated space extends beyond just your desk. Explore these articles for more ideas to brighten your surroundings and enhance your home:
46 Cute Desk Accessories to Brighten Your Workspace
From colorful pens to quirky paperweights, spruce up your work area with these hand-picked adorable desk accessories. Find inspiration to infuse personality and charm into your daily grind, making every moment at your desk a little brighter.
Continue Reading46 Cute Desk Accessories to Brighten Your Workspace
19 Unique & Easy Houseplants that We’re Loving
Looking for unique houseplants to add life and freshness to your interior? Dive into our guide to discover 19 stunning yet easy-to-care-for plants that will transform any room into a vibrant oasis, boosting both aesthetics and air quality.
Continue Reading19 Unique & Easy Houseplants that We’re Loving
16 Genius Ikea Desk Hacks You Need In Your Life
Discover the ultimate IKEA desk hack guide for a stylish and incredibly functional workspace on a budget. These clever modifications transform ordinary IKEA pieces into bespoke solutions, perfect for any home office, student room, or creative studio.
Continue Reading16 Genius Ikea Desk Hacks You Need In Your Life
DIY Flip Photo Album
This DIY Flip Photo Album tutorial shows you how to create a charming, interactive photo display perfect for your desktop. Preserve cherished memories in a unique way, adding a personal and heartwarming touch to your workspace or any room in your home.
Continue ReadingDIY Flip Photo Album
Conclusion
Creating your own Hexagonal DIY Desktop Organizer is more than just a craft project; it’s an investment in a more organized, productive, and aesthetically pleasing workspace. With simple materials and a bit of creativity, you can transform everyday clutter into a stylish display, proving that functionality and beauty can indeed go hand-in-hand. We hope this detailed guide empowers you to embark on this rewarding DIY journey and enjoy the many benefits of a well-ordered environment. Remember, a tidy desk often leads to a clear mind, paving the way for greater focus and inspiration. Happy crafting!