

Transform Your Bedroom: The Ultimate DIY Faux Brass Headboard Guide
Craving a touch of modern luxury and undeniable glam in your bedroom without breaking the bank? Look no further! This comprehensive guide will walk you through creating a stunning DIY Faux Brass Headboard in just an afternoon. It’s an incredibly rewarding project that adds a sophisticated metallic sheen and a chic focal point to any sleeping space.
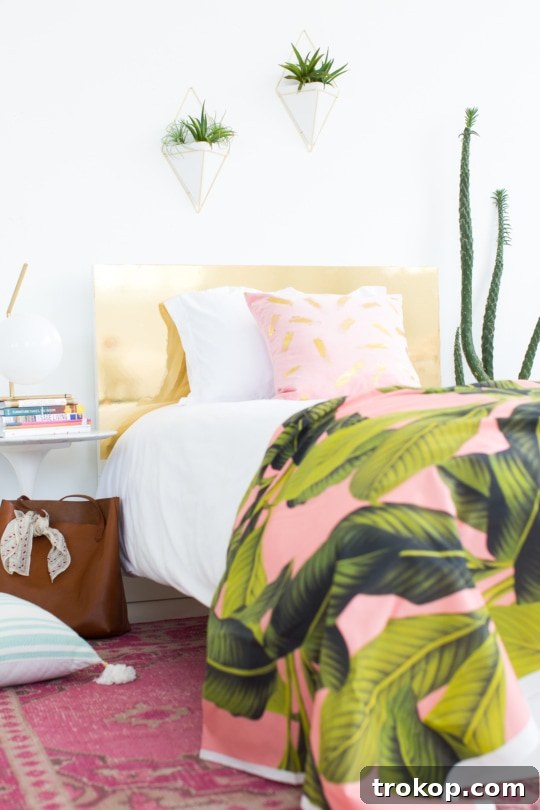
As a devoted fan of IKEA hacks, we initially tackled this project using a simple plain white bed frame. Its smooth, minimalist surface provided the perfect blank canvas for our metallic gold transformation. However, the beauty of this DIY project lies in its versatility. You don’t necessarily need a new IKEA frame; you can effortlessly upgrade an existing headboard with a smooth surface, or even construct your own from materials like MDF or plywood. The key is a clean, flat foundation to ensure a flawless finish.
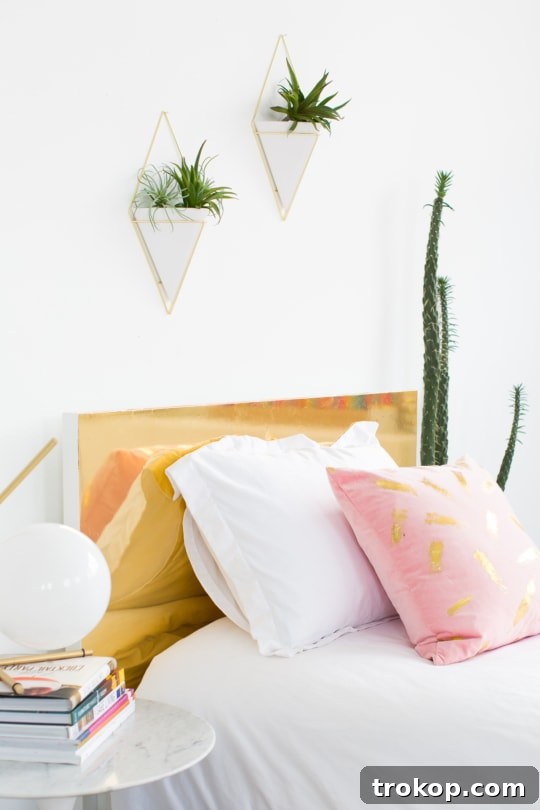
Table of Contents
Why Choose a Faux Brass Headboard?
The allure of a brass headboard is undeniable. It evokes a sense of vintage charm combined with contemporary elegance, making it a favorite in interior design. However, genuine brass headboards can be quite expensive, heavy, and require specific polishing to maintain their shine. This DIY faux brass alternative offers all the visual appeal of real brass without the high cost, significant weight, or strenuous upkeep. Using metallic gold adhesive vinyl not only makes this project incredibly budget-friendly but also lightweight and simple to clean. It’s the perfect solution for achieving a high-end look on a DIY budget.
Materials Needed To Make A DIY Faux Brass Headboard For Your Bed
Gathering the right tools is the first step to a successful DIY project. For this faux brass headboard, you’ll need just a few key items:
- Metallic Gold Indoor/Outdoor Adhesive Vinyl: The star of our show! Choose a high-quality vinyl for better adhesion and durability. Ensure you have enough to cover your entire headboard, plus a little extra for mistakes and trimming.
- Scissors: Essential for cutting the vinyl to a manageable size before application.
- Craft Squeegee: This tool is absolutely crucial for smoothing out air bubbles and ensuring a perfectly flat application. Don’t skip this!
- X-Acto Knife (or utility knife): For precise trimming of excess vinyl around the edges, giving your headboard a professional, custom-fit finish.
- Measuring Tape or Ruler: For accurate measurements of your headboard and vinyl.
- Cleaning Supplies: A soft cloth and mild cleaner (like rubbing alcohol or all-purpose cleaner) to thoroughly clean your headboard surface before application.
Preparing Your Headboard for Application
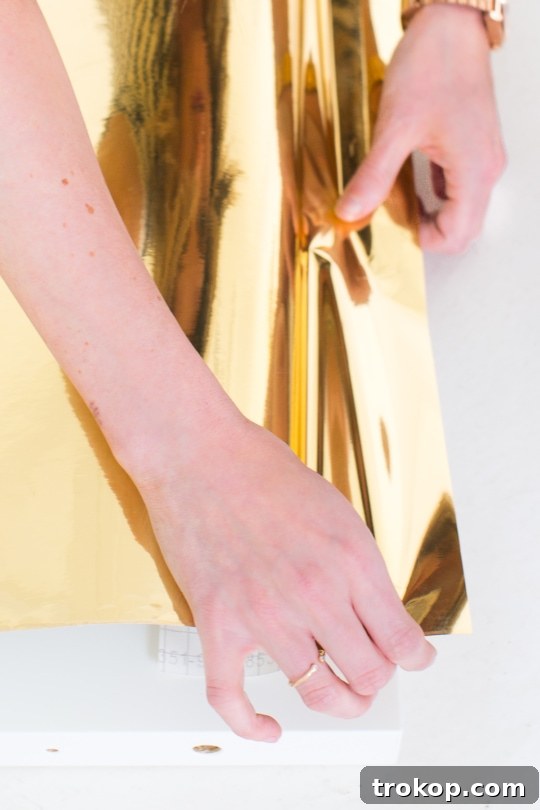
A successful vinyl application starts with proper surface preparation. First, ensure your headboard is completely clean and free of dust, grease, or any residues. Use a mild cleaner and a soft cloth to wipe down the entire surface, then let it dry thoroughly. Any particles left on the surface can create bumps or prevent the vinyl from adhering properly. If your headboard has any rough spots or imperfections, a light sanding followed by another cleaning can help achieve the smoothest possible canvas for your faux brass finish. For maximum adhesion, especially if working with a painted surface, consider a very light scuff sand and a wipe-down with rubbing alcohol to ensure a pristine, bond-ready surface.
Mastering Adhesive Vinyl Application for a Flawless Finish
While the concept of transforming your headboard with a “giant metallic gold foil sticker” sounds wonderfully simple, achieving a professional, bubble-free finish with adhesive vinyl requires a bit of patience and technique. It’s a meticulous process, but the stunning, seamless result is absolutely worth every moment of effort. The key is to avoid trapping air bubbles underneath the foil, which can compromise the smooth, reflective surface you’re aiming for.
Working with large sheets of adhesive vinyl can be tricky, but these tips will help you conquer the challenge. First, ensure your working environment is clean and dust-free. Any speck of dust trapped under the vinyl will be visible. When applying, it’s often best to work from one side to the other, or from the center outwards, gradually peeling the backing paper and smoothing the vinyl simultaneously with your craft squeegee. Use firm, overlapping strokes to push out any air. If a bubble does appear, try to work it towards the edge with your squeegee. For stubborn tiny bubbles that are trapped in the middle, a very fine needle can be used to poke a small hole, allowing the air to escape, then re-smooth the area with your squeegee. Practice on a small scrap piece first if you’re new to vinyl application.
The affordability of adhesive vinyl makes it an incredible medium for completely revamping furniture. Beyond headboards, this technique opens up a world of creative possibilities. You can easily undertake other stylish transformations, such as creating DIY Metallic Gold Legs for tables or chairs, crafting DIY Metallic Patterned Glassware for a festive touch, or even adding sophisticated DIY Faux Brass Drawer Fronts to dressers and cabinets. The versatility of metallic adhesive vinyl truly empowers you to infuse glamour into every corner of your home.
Steps To Make Your DIY Faux Brass Headboard
Follow these simple, yet crucial, steps to transform your ordinary headboard into a magnificent faux brass statement piece:
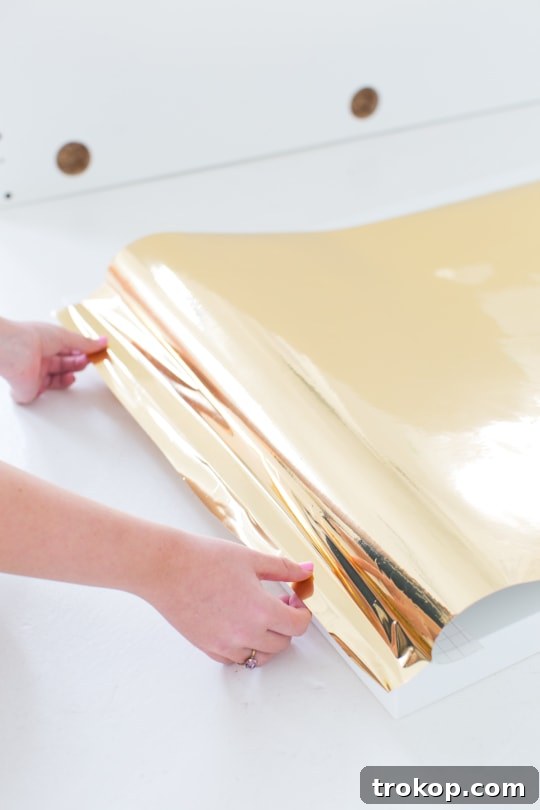
Step 1 — Measure and Cut Your Vinyl: Begin by precisely measuring the dimensions of your headboard surface. Accuracy here is key for minimizing waste and ensuring good coverage. Once you have your measurements, unroll your metallic gold adhesive vinyl and carefully cut out a piece that is slightly larger than your headboard on all sides – leave an extra 2-3 centimeters (about 1 inch) around each edge. This allowance will give you room to maneuver during application and to achieve a perfectly clean trim later.
Step 2 — Apply the Vinyl Gradually and Smoothly: This is arguably the most critical step. Start by peeling back just a small section of the vinyl’s backing paper from one edge. Align this exposed adhesive edge with the corresponding edge of your headboard. Press it down gently to secure. Now, slowly and systematically peel away more of the backing paper while simultaneously using your craft squeegee to smooth the vinyl onto the headboard surface. Work in small sections, applying firm, overlapping strokes with the squeegee to push any air bubbles outwards towards the edges. Consistency is your friend here – take your time and avoid rushing. If you encounter a stubborn bubble, gently lift the vinyl in that area and re-apply, using the squeegee to smooth it down again.
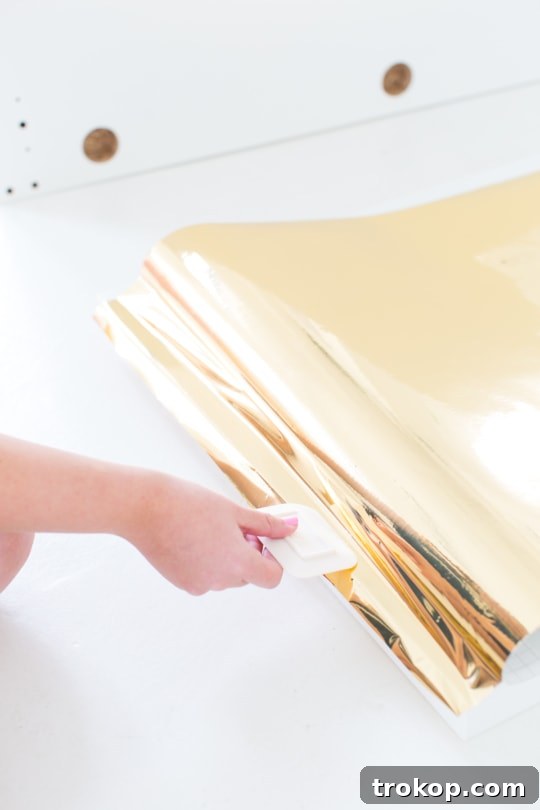
Step 3 — Trim for a Perfect Finish: Once the entire headboard surface is completely covered with vinyl and you’ve meticulously smoothed out all air bubbles, it’s time to refine the edges. Carefully flip the headboard over or work from the back side, ensuring it’s stable. Take your X-Acto knife and, using the edges of the headboard as a guide, carefully trim away all the excess vinyl hanging over. Hold the knife at a slight angle for a cleaner cut. This step is essential for creating a professional, seamless look that makes your faux brass headboard appear expertly crafted. Take your time to achieve crisp, clean lines.
Care and Maintenance for Your New Headboard
To ensure your beautiful faux brass headboard retains its shine and allure for years to come, simple care is all that’s needed. Avoid abrasive cleaners or harsh chemicals, which can damage the vinyl surface. Instead, a soft, damp cloth with a mild soap solution is usually sufficient for wiping away dust or smudges. For deeper cleaning, a gentle window cleaner applied to a cloth (not directly to the headboard) can work wonders. Be mindful of sharp objects or excessive friction, as these could scratch or tear the vinyl. With minimal effort, your DIY faux brass headboard will continue to be a stunning focal point in your bedroom.
Creative Variations and Customization
This project is just the beginning! Once you’ve mastered the basic application, consider personalizing your faux brass headboard even further. You could incorporate geometric patterns by cutting vinyl into shapes or strips before applying them. Use a contrasting color for an inlaid effect, or combine different metallic shades for a multi-tonal look. If you’re feeling adventurous, you could even create a tufted effect using upholstery tacks over the vinyl, though this would require careful planning to prevent tearing. This DIY technique allows for endless creativity, giving you the freedom to design a headboard that perfectly reflects your unique style.
Frequently Asked Questions for Brass Headboards:
Delving deeper into common queries surrounding brass headboards can help you make informed decisions for your bedroom decor.
Can I Spray Paint A Brass Headboard Instead?
Yes, spray painting is an alternative method to achieve a metallic finish on a headboard, whether it’s genuine brass or another material. However, it involves a different set of considerations and steps. For optimal results, you will need to thoroughly sand the headboard first to create a rough surface for the paint to adhere to, followed by a thorough cleaning to remove all dust. Next, apply a high-quality primer designed for the material of your headboard (metal, wood, MDF) to ensure even coverage and paint longevity. Finally, apply several thin coats of metallic spray paint specifically formulated for metal surfaces, following the manufacturer’s instructions for drying times between coats. While spray painting offers a durable finish, it can be more time-consuming due to the multiple drying stages, and achieving a perfectly smooth, mirror-like finish can be more challenging than with vinyl, as drips or uneven application can occur. Adhesive vinyl, on the other hand, often provides a smoother, more reflective surface with quicker application time.
Are Brass Headboards In Style?
Absolutely! Brass headboards are far from a fleeting trend; they represent a classic design choice that consistently holds its appeal in the world of interior decor. Their inherent warmth and lustrous shine add an undeniable touch of elegance, sophistication, and sometimes a hint of vintage charm to any bedroom. Brass is incredibly versatile, complementing a wide range of interior styles, from opulent glam and sophisticated mid-century modern to minimalist and even industrial aesthetics. Its ability to pair seamlessly with various color palettes – from deep jewel tones to soft neutrals – makes it a timeless investment piece. Whether you opt for a sleek, polished look or a more aged, antique brass finish, a brass headboard provides a luxurious focal point that enhances the overall ambiance of your personal sanctuary for years to come.
Bedroom Sources and Styling Inspiration
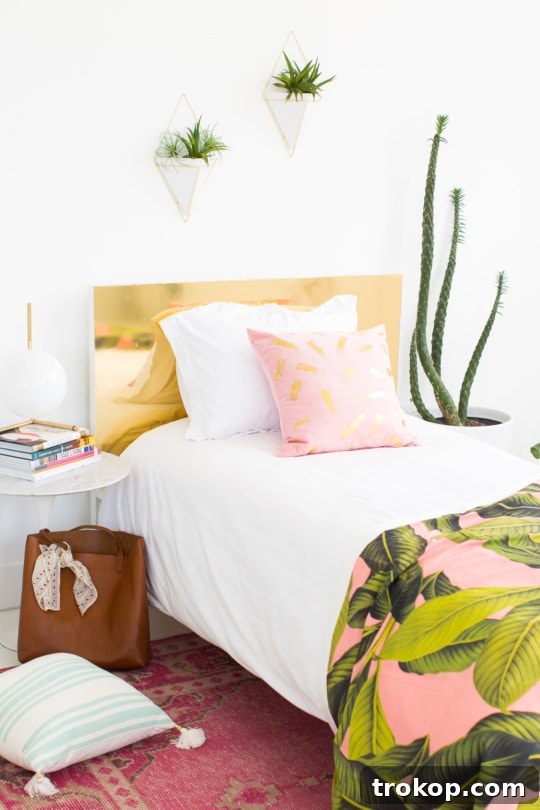
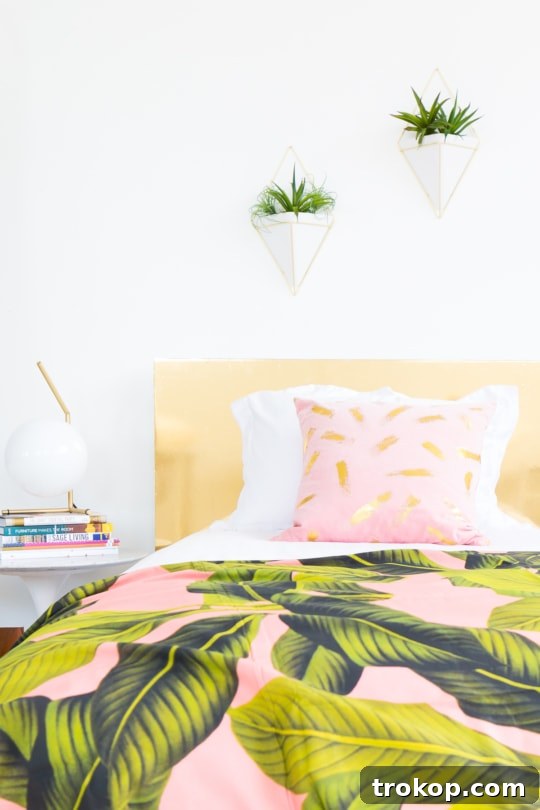
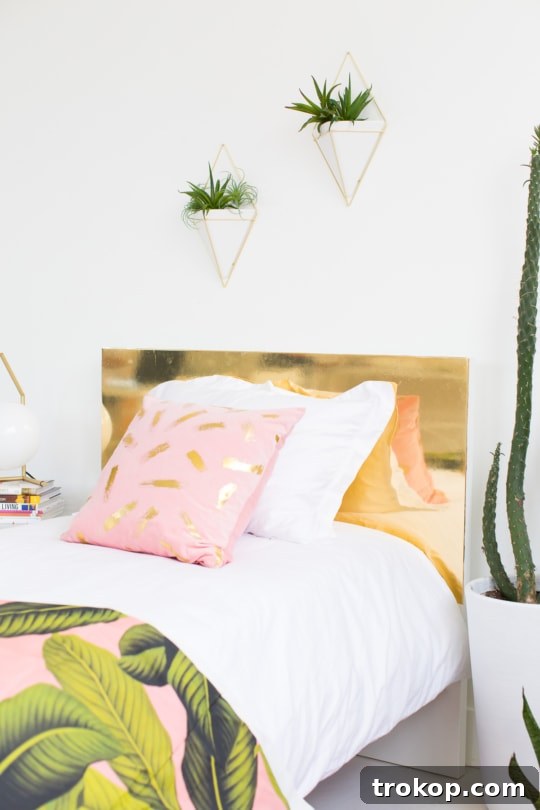
While this particular bedroom might lean towards a distinctively feminine aesthetic – perhaps even a princess-worthy retreat, if you will! – it demonstrates how a faux brass headboard can anchor a beautifully curated space. The metallic sheen of the headboard provides a sophisticated backdrop that allows other decor elements to truly shine. Currently, we’re busy styling a fantastic collaboration with Amazon in Seattle, so for exclusive behind-the-scenes glimpses and more design inspiration, be sure to follow along on Instagram and Snapchat!
Naturally, no glam bedroom is complete without a touch of soft color and texture. We styled this space with our own DIY metallic gold brushstroke pillow, which beautifully echoes the headboard’s metallic theme. The room also features a super cute Pari pink rug from Lulu & Georgia, adding a soft, inviting warmth. To complete the look, a tropical palm print throw crafted from Spoonflower fabric introduces a playful, breezy element, creating a harmonious blend of glam and relaxed comfort.
- Pari Rug from Lulu & Georgia
- Dot & Bo Daphne Tulip Side Table
- FLOS Table Lamp
- DIY Gold Brushstroke Pillow
- Clothing Rack from Urban Outfitters
- Palm Leaf Fabric Throw from Spoonflower
- Hanging Planters
More Easy DIY Bedroom Projects
If you loved this project and are eager for more ways to personalize your living space, explore a few of our other favorite DIY transformations from the archives. Each project offers a unique way to inject personality and style into your home, proving that beautiful decor doesn’t always require a hefty price tag or professional help.
- DIY Ikea Hack Side Table: Learn how to transform a basic IKEA piece into a custom side table with a unique design.
- Ikea Hack – DIY Wooden Headboard Using Stikwood: Discover another creative way to upgrade an IKEA bed frame with the rustic elegance of real wood.
- How I Styled Our Guest Room for Listing + Home Staging Tips!: Get expert advice on staging a room to maximize its appeal, perfect for guests or preparing a home for sale.
- DIY Hanging Diamond Decor Mobile: Add a playful yet chic accent to any room with this easy-to-make decorative mobile.
Embrace your inner DIY enthusiast and create a home that truly reflects your style. Happy crafting!