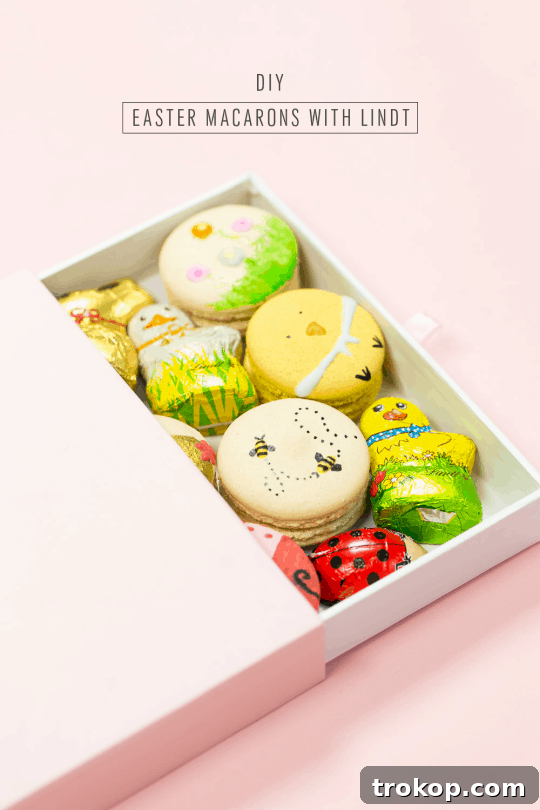
Easter brings with it a delightful array of vibrant colors, festive decorations, and, of course, delicious treats. Among the most elegant and captivating desserts are macarons – those delicate, airy French confections known for their crisp shell and chewy, flavorful interior. This year, we’re taking the Easter celebration to a new level by combining the timeless charm of macarons with the playful spirit of spring, inspired by the exquisite craftsmanship of Lindt chocolates. Get ready to embark on a sweet adventure to create your very own DIY Easter macarons, adorned with custom, paintable royal icing.
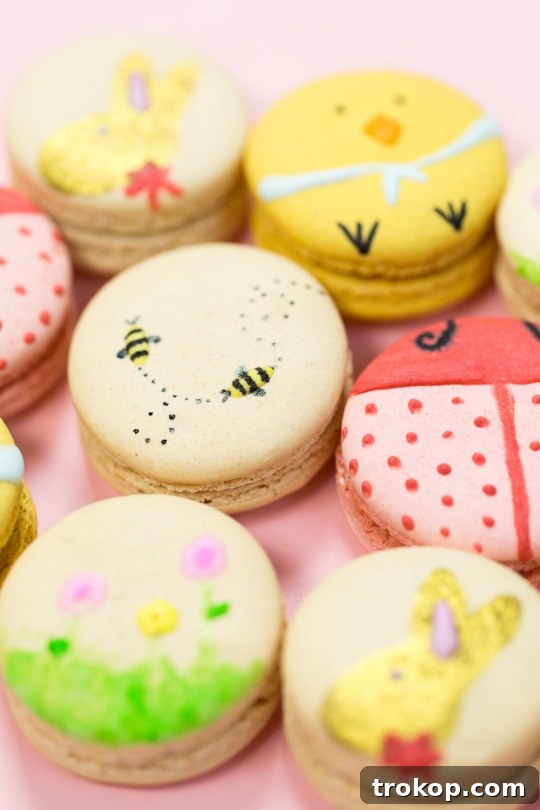
I firmly believe that macarons can never be too beautiful to eat. While some might hesitate to bite into a miniature work of art, these edible masterpieces offer the best of both worlds: stunning visual appeal and irresistible flavor. Imagine crafting delightful Easter-themed designs like cheerful chicks, buzzing bees, vibrant ladybugs, or even the iconic Lindt Gold Bunny, all on top of a perfectly baked macaron shell. And the best part? Each bite comes with the promise of luxury, especially when paired with a fine chocolate experience.
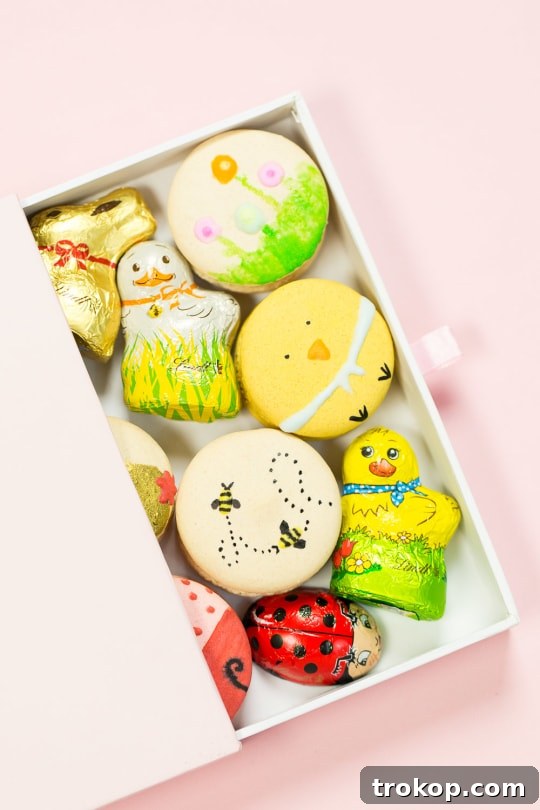
Our inspiration comes directly from the spring collection of Lindt, a brand synonymous with quality and joy. They challenged us to whip up some DIY Easter Macarons that capture the essence of their delightful springtime goodies, and we’re thrilled with the results. Even if your macaron-making journey has its bumps along the way, the sheer joy of creating these edible art pieces, coupled with the thought of enjoying them alongside a piece of premium Lindt chocolate, makes it an absolute win-win scenario.
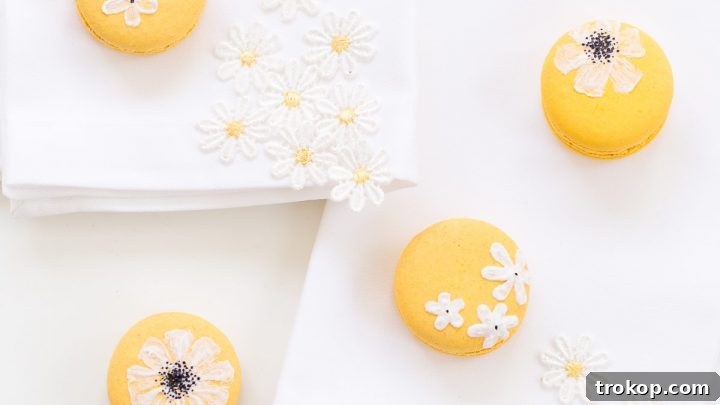
If you’re eager for more Easter macaron inspiration beyond these enchanting designs, be sure to explore our delightful DIY Easter Wildflower Macarons, which offer another sweet theme perfect for the season of renewal.

Ingredients and Tools Needed to Make DIY Easter Macarons
Crafting these adorable Easter macarons requires a blend of standard macaron ingredients and specific tools for artistic decoration. Here’s what you’ll need to bring your edible spring visions to life:
— Macarons in the flavors of your choice — If you’re looking for a reliable base, we have an easy macarons recipe to get you started!
— Paintable royal icing — Our recipe is provided below, ensuring you have the perfect consistency for painting.
— Almond extract — Used for thinning edible gold dust to create a shimmering paint.
— Gel food colors — Essential for achieving vibrant hues in your royal icing paints. Gel colors provide intense pigment without adding too much liquid, which is crucial for icing consistency.
— Edible gold dust — For adding a touch of luxury and sparkle, particularly for our Lindt Gold Bunny design.
— Food-dedicated paint brushes — Ensure these brushes are clean, new, and used exclusively for food to prevent cross-contamination.
— Black edible food marker — Perfect for adding fine details like eyes, antennas, and outlines.
How To Make DIY Easter Macarons
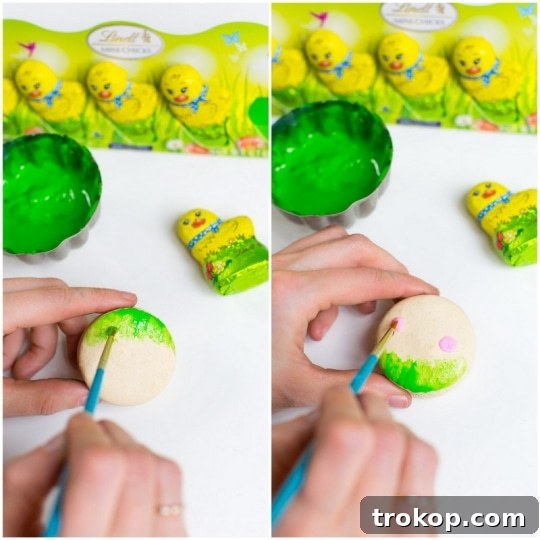
Decorating macarons with royal icing is an enjoyable and creative process, much like painting with watercolors. The key is understanding how to work with layers: either allowing each layer to dry completely before adding the next for crisp lines, or blending colors while the icing is still wet for softer, more gradient effects. For designs like our flower cookie, starting with a base layer such as green grass and then adding petals and stems ensures depth and detail.
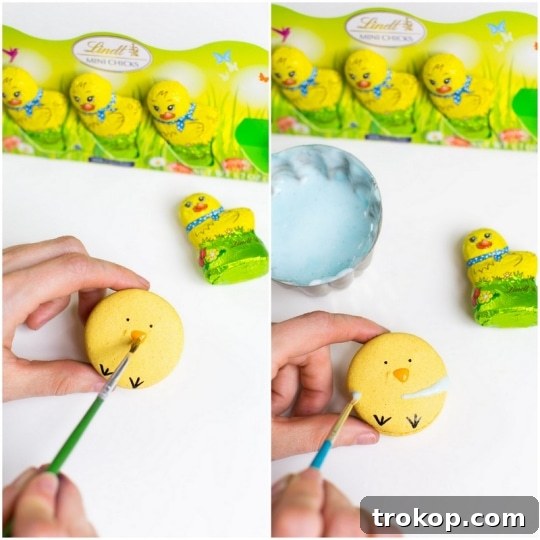
1. Easter Chick Macarons
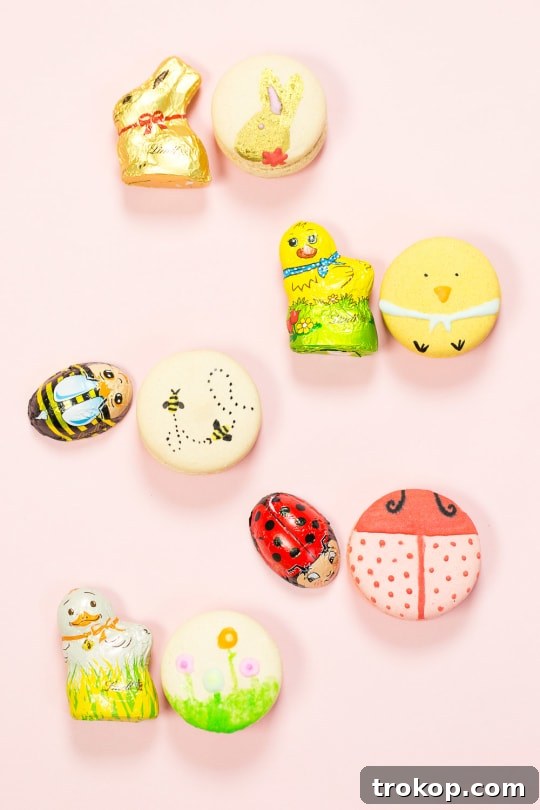
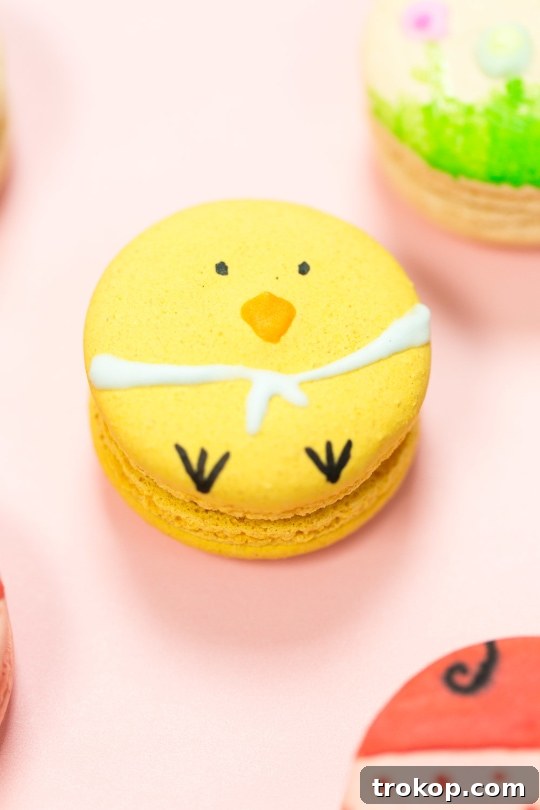
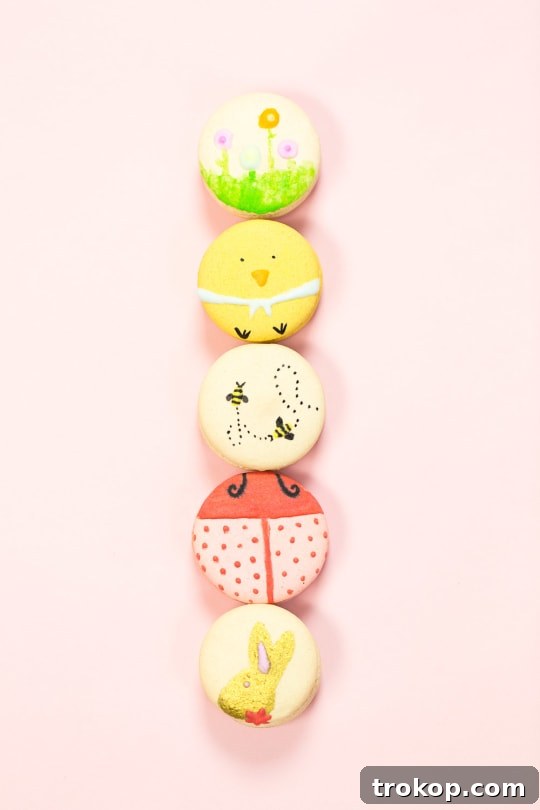
Bring these adorable Easter chicks to life with vibrant icing colors. Use orange royal icing to form the sweet little beak. For a charming touch, add a light blue bandanna around the chick’s neck. Once these details have dried, pick up your black edible marker to carefully draw expressive eyes and delicate feet. This layering technique ensures clean lines and a professional finish, making each chick macaron uniquely endearing.
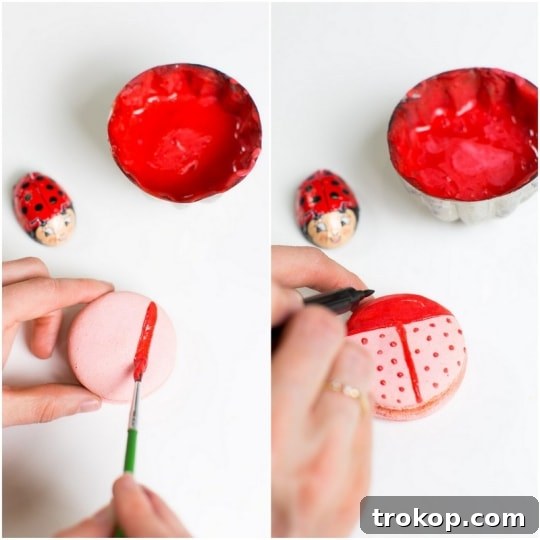
2. Lady Bug Macarons
To create these charming ladybug macarons, we opted for a light pink macaron base, perfect for capturing the fresh colors of spring. With your paintable royal icing, create the ladybug’s distinctive red body. We used a “Lindt red” shade for the body and characteristic dots, giving a nod to our chocolate inspiration. After the red icing has completely dried, use your edible black marker to carefully draw the delicate antennas, adding the finishing touch to your cute bug.

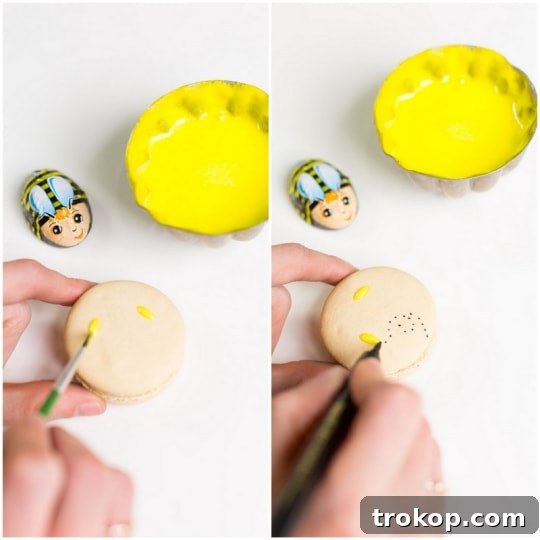
3. Bee Macarons
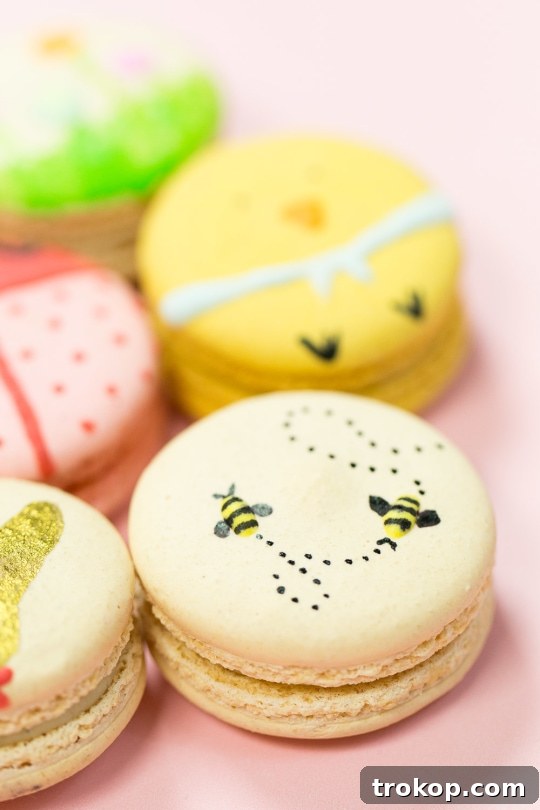
For our bee macarons, we aimed for a design that was both cute and minimalist, perfectly capturing the essence of these industrious spring creatures. Begin by painting the macaron shells with yellow royal icing for the bees’ bodies. Allow these yellow bases to dry thoroughly. Once dry, use a black edible marker to add the signature dotted lines, delicate wings, and the iconic bee stripes. This simple yet effective approach results in delightful bee macarons that are sure to charm.
4. Gold Bunny Macarons
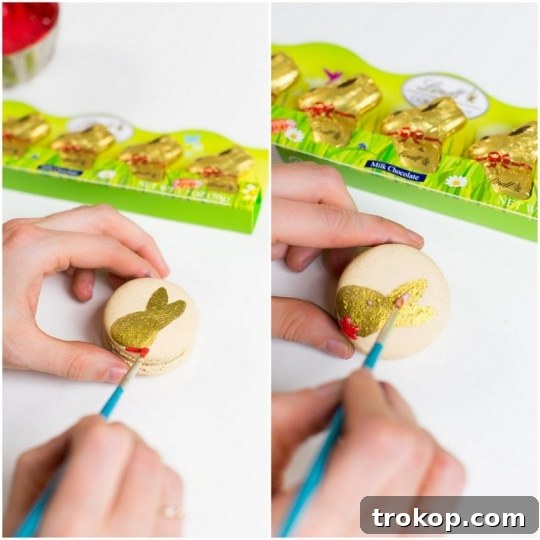
No Easter collection would be complete without a nod to the iconic Lindt Gold Bunny! To recreate its luxurious shimmer, mix edible gold dust with a small splash of almond extract to create a rich, paintable gold. Carefully brush this opulent gold paint onto your macaron shells and allow them to dry completely. Once the gold is set, meticulously paint on the distinctive red bow tie, delicate pink eyes, and the charming inner ears, bringing the beloved Lindt Gold Bunny to life on your macarons.
Tips and Notes in Making DIY Easter Macarons
Achieving perfect macarons can be a delicate art, but with these essential tips, you’ll be well on your way to crafting flawless shells and beautifully decorated treats:
— **Aged Egg Whites for Stability:** For the macaron shells, always use aged egg whites. This means separating your eggs a day or two in advance and letting the whites sit uncovered in a bowl in the refrigerator. Aging them helps evaporate some moisture, creating a more stable meringue and a more robust macaron structure, leading to better “feet” and fewer cracks.
— **Precision with a Kitchen Scale:** Macaron recipes demand precision. Using a kitchen scale to measure all your ingredients, especially almond flour and powdered sugar, is crucial. Even a small deviation can significantly impact the final texture and appearance of your macarons, making a scale an invaluable tool.
— **Sift Dry Ingredients Thoroughly:** To prevent lumps and ensure a silky-smooth macaron batter, sift your powdered sugar and almond flour together multiple times. This step is vital for achieving the characteristic smooth top of macaron shells.
— **Uniform Piping for Consistency:** Use a piping bag fitted with a round tip to pipe your macaron batter onto the baking sheet. Aim for uniform circles to ensure even baking and consistent sizes, which is essential for pairing shells later.
— **Release Air Bubbles:** After piping, firmly tap the baking sheet on your counter several times. This helps release any trapped air bubbles, preventing hollow shells and cracks during baking.
— **Develop a “Skin” Before Baking:** Allow the piped macaron shells to air dry until a “skin” forms on the surface. This can take anywhere from 30 minutes to a few hours, depending on humidity. Gently touching the surface should not leave any batter on your finger. This skin is critical for achieving the distinct “feet” and preventing cracking.
— **Low Oven Temperature for Perfection:** Bake your macarons at a relatively low oven temperature for a more extended period. This gentle baking helps prevent cracking and ensures the macarons cook through evenly, resulting in that ideal chewy interior.
— **Flavorful Fillings:** Don’t forget the filling! While royal icing is for decorating, a delicious buttercream, ganache, or jam filling completes the macaron experience. Experiment with flavors that complement your macaron shells and overall Easter theme.
— **Patience is Key:** Macaron making requires patience at every step, from resting the batter to allowing icing layers to dry. Rushing the process can lead to disappointing results. Take your time, enjoy the journey, and you’ll be rewarded with beautiful, tasty treats.
Why Macarons Make Perfect Easter Treats
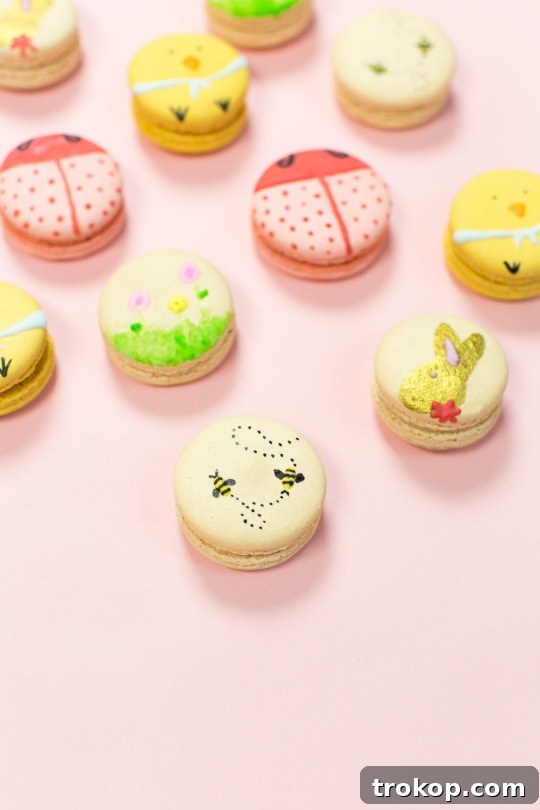
Macarons are more than just a dessert; they are an experience. Their delicate texture, vibrant colors, and endless flavor possibilities make them an ideal choice for Easter. They’re naturally elegant, adding a touch of sophistication to any Easter brunch or dessert table. Beyond their aesthetic appeal, macarons offer a wonderful opportunity for creativity. Painting them with royal icing transforms baking into an artistic endeavor, making them a fantastic activity for all ages, especially for little ones after an exciting Easter egg hunt. They also make thoughtful, personalized gifts, showing off your culinary and artistic skills.
The Art of Royal Icing: A Versatile Medium
Paintable royal icing is an incredibly versatile medium for decorating. Its smooth consistency and quick-drying nature make it perfect for intricate designs. Unlike traditional buttercream, royal icing hardens to a crisp finish, protecting your designs and allowing for easy stacking and gifting. You can achieve various effects by adjusting its thickness – from thick outlines to flood consistency for filling in areas. Mastering this medium opens up a world of decorating possibilities, not just for macarons but also for cookies, cakes, and other confections.
The truly delightful aspect of these Lindt chocolate-inspired macarons is how accessible and enjoyable they are to paint. You have complete creative freedom to make them as detailed or as simple as you desire. They serve as a fantastic edible art project, offering a sweet, engaging activity for children (and adults!) after an energetic afternoon egg hunt. It’s a chance to combine a love for baking with artistic expression, creating memories and delicious treats simultaneously.
Are you searching for even more personalized Easter gift ideas? Don’t miss our curated list of the 25 most personalized Easter goodies, guaranteed to make your loved ones “HOP” with joy!
What are some of your most cherished Easter traditions? I’m certainly adding these DIY Easter macarons to my future family tradition list. Because, let’s be honest, my kids will be gently “encouraged” to become master macaron artists. All with a whole lot of love, of course!
More Delicious Macarons Recipes
If you’ve enjoyed creating these festive Easter macarons, you’re in for a treat! Explore some of our other favorite macaron recipes that promise to delight your taste buds and impress your guests:
- How to Make Galaxy Macarons Recipe
- DIY Easter Wildflower Macarons
- How To Make DIY Edible Gold Macarons
- DIY Brunch Macarons
Paintable Royal Icing Recipe
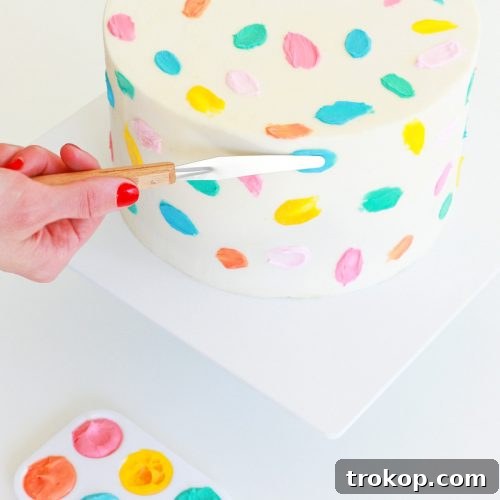
Paintable royal icing is a really fun way to decorate cakes, cookies, or any other sweet treat that you can dream up! Its smooth finish and ability to hold intricate designs make it perfect for edible art.
Equipment
-
Mixer
Ingredients
- 3 tbsp meringue powder
- 4 cup Confectioner’s sugar
- 5.5 tbsp warm water
- Gel food colors in your choice of colors
Instructions
-
Mix all ingredients in a mixer for 7-10 minutes or until soft peaks form in the icing.
-
Divide the icing into separate bowls.
-
Add in a few drops of your favorite food colors and stir to make edible paints.
Nutrition

Don’t forget to share your Easter macaron creations with us on Instagram using the hashtag #sugarandclothloves. We genuinely adore seeing all your wonderful masterpieces! If you’re looking for more quick and delicious recipes to add to your repertoire, you can find them all right here, including a tempting selection of desserts to satisfy any sweet craving!