
Craft Your Own Custom No-Sew Table Runner with Cricut: The Ultimate Guide
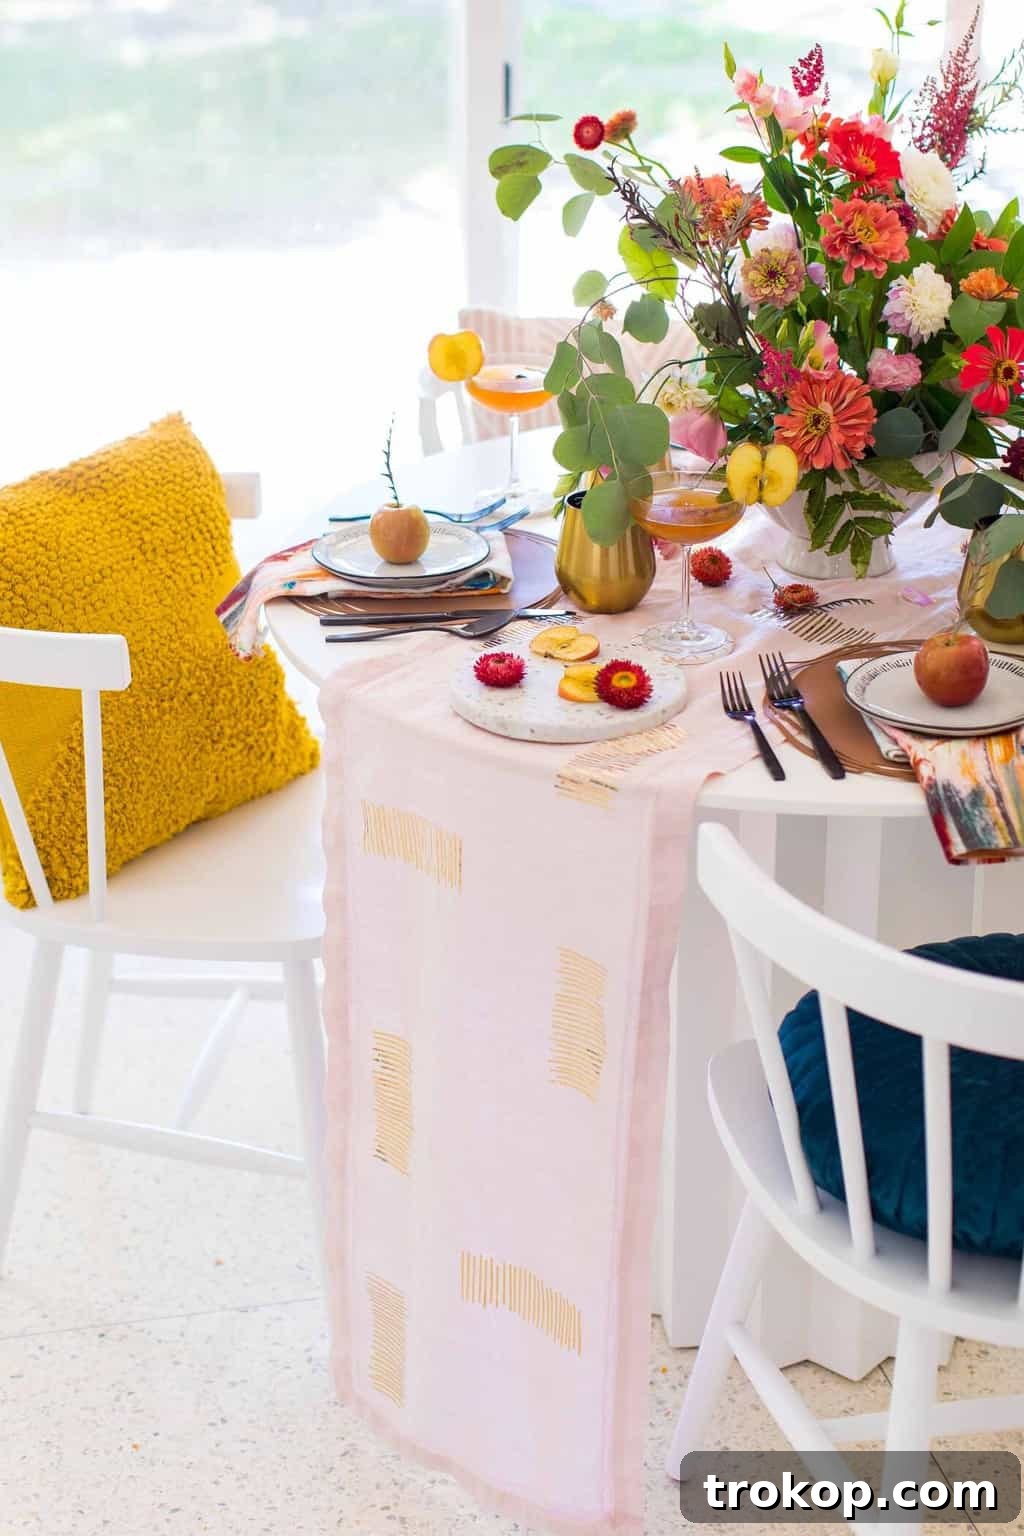
There’s an undeniable charm in a meticulously styled dining table, especially when celebrating holidays or hosting special gatherings. While we might not be orchestrating elaborate tablescapes for our routine weeknight meals, the ability to effortlessly transform your dining area with a personalized touch is invaluable. This comprehensive guide introduces you to a stunning DIY table runner project that is not only incredibly simple to make but also promises to be a versatile and cherished addition to your home decor collection.
Imagine creating a statement piece that perfectly complements your existing linens, reflects your unique aesthetic, and effortlessly ties your entire table setting together. This project offers boundless customization possibilities, allowing you to choose colors, patterns, and themes that resonate with your personal style. Initially designed to enhance elegant fall decorating ideas in collaboration with Cricut, this no-sew table runner concept is remarkably adaptable for year-round use.
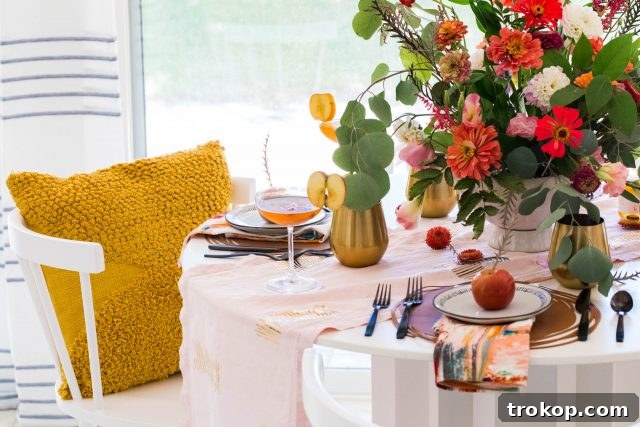
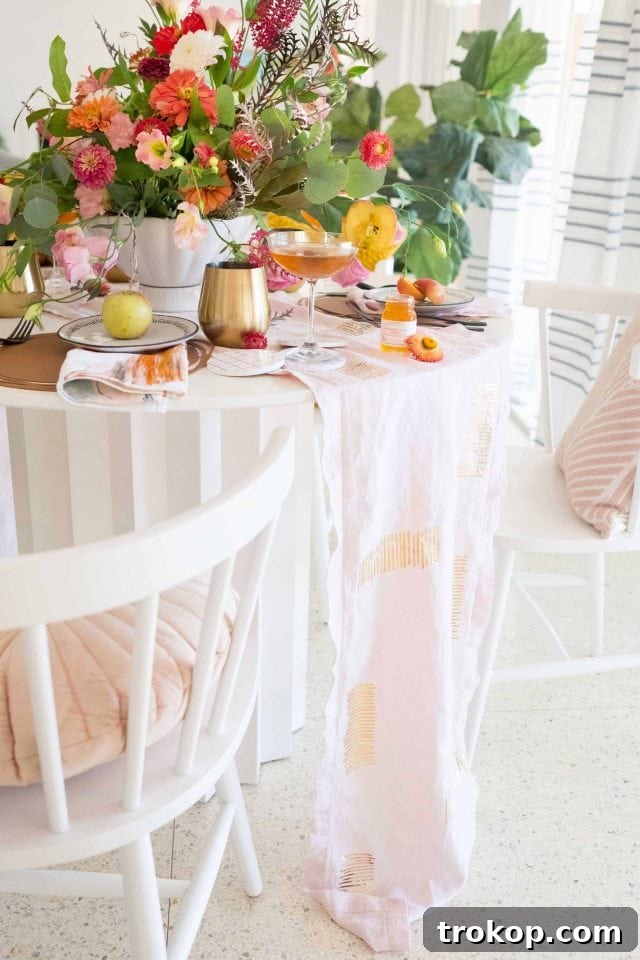
Whether you envision a festive holiday display, a chic bridal shower setup, or an elevated everyday dining experience, this DIY runner is your blank canvas. It pairs beautifully with other handmade elements like easy DIY placemats and custom DIY coasters, creating a cohesive and polished look. Alternatively, let it stand alone to introduce delightful texture and visual interest to a minimalist kitchen table. The flexibility of this design means you can easily achieve diverse aesthetics, from a sophisticated blush pink and gold combination ideal for wedding table decor or bridal shower decorations, to a contemporary approach for your Thanksgiving table decor.
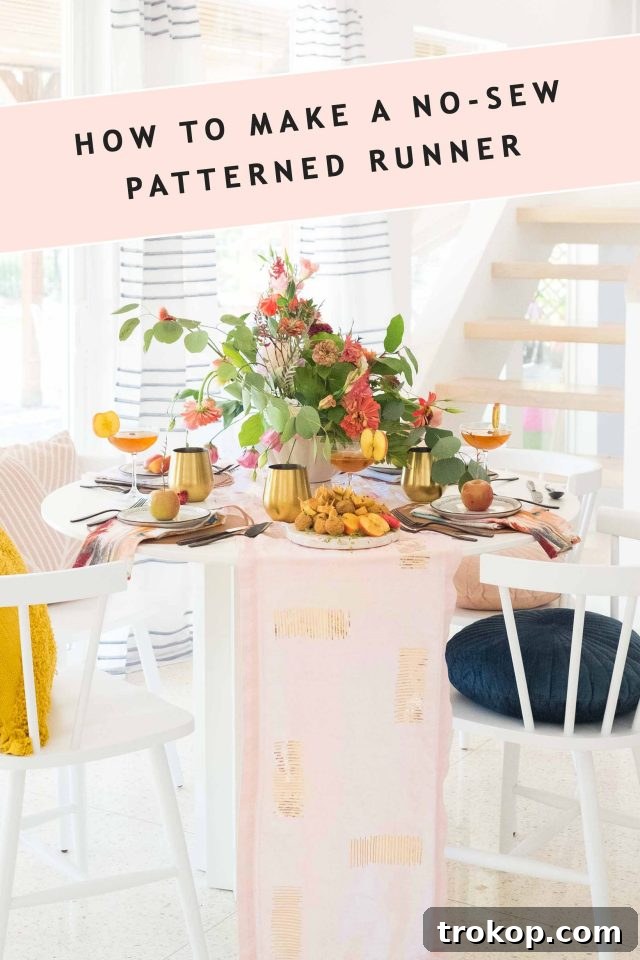
Table of Contents
Why Choose a DIY Table Runner? The Benefits of Custom Table Decor
In a world of mass-produced goods, the allure of handmade items, especially for home decor, is undeniable. A DIY table runner offers a plethora of advantages that make it a superior choice for personalizing your living space and enhancing your dining experiences.
- Unleash Personalization: The most significant benefit is the complete creative freedom. You are not limited by what’s available in stores. Choose your fabric, select your colors, and design patterns that perfectly align with your home’s aesthetic or a specific event’s theme. This means your table decor will truly reflect your personality and style.
- Budget-Friendly Elegance: Crafting your own table runner with a Cricut often proves more economical than purchasing designer alternatives, especially for bespoke designs. You can take advantage of fabric sales and choose affordable yet high-quality iron-on vinyl to create a luxurious look without the hefty price tag.
- Seasonal Versatility: With the ease of this no-sew method, you can create multiple runners for various seasons and holidays. Imagine a vibrant floral runner for spring, a patriotic design for summer, warm earth tones for fall, and sparkling metallics for winter festivities. Your table can always be in season!
- Unique & Memorable: A handmade table runner is inherently unique. It adds a special touch that store-bought items simply cannot replicate, making your dinner parties and family gatherings feel more intimate and memorable. Your guests will undoubtedly appreciate the effort and artistry.
- Perfect Handmade Gift: A custom-designed table runner makes an incredibly thoughtful and cherished gift. Whether for a housewarming, a wedding, an anniversary, or a holiday, a handmade item imbued with personal care speaks volumes.
- Accessible to All Skill Levels: The “no-sew” aspect makes this project approachable for beginners and seasoned crafters alike. The Cricut machine handles the intricate cutting, leaving you to focus on design and application, ensuring professional-looking results without the need for sewing expertise.
Planning Your Design and Materials: Setting the Foundation for Success
A successful DIY project always starts with thoughtful planning. Before you even turn on your Cricut, consider the foundational elements of your table runner: the base fabric and the aesthetic of your design.
Choosing Your Runner Base Fabric:
The fabric you select will dictate the overall feel and durability of your table runner. Keep these points in mind:
- Material Type: For table runners, opt for sturdy, washable fabrics. Linen, cotton, and various blends are excellent choices. Linen, as demonstrated in this project (a blush pink variant), provides a beautiful texture, a natural drape, and a sophisticated feel that pairs wonderfully with metallic accents. Cotton offers great versatility and is easy to work with.
- Color Palette: Decide whether your runner will serve as a neutral backdrop for a vibrant design or make a bold statement itself. Light colors like white, cream, or soft pastels allow your iron-on design to truly pop. Deeper hues can create a dramatic and luxurious effect. Consider how the fabric color will harmonize with your dinnerware, napkins, and overall dining room decor.
- Dimensions: Measure your dining table to determine the ideal length and width for your runner. A general guideline is for the runner to extend approximately 6 to 12 inches over each end of the table. Standard widths typically range from 14 to 18 inches, but this is entirely customizable based on your table size and preference.
Conceptualizing Your Iron-On Design:
The Cricut machine unlocks endless creative possibilities for your iron-on design. Take time to brainstorm and sketch out your ideas:
- Patterns and Motifs: Geometric shapes, abstract lines (like the elegant design featured here), polka dots, stripes, or intricate floral patterns can all be cut with precision. Think about the scale of the pattern – will it be a repeating motif, a central design, or scattered accents?
- Text and Typography: Add a personal touch with monograms, inspiring quotes, family names, or celebratory phrases. This is particularly effective for special events like weddings, anniversaries, or holiday dinners. Experiment with different fonts to match your desired aesthetic.
- Thematic Elements: Align your design with a specific theme. Think snowflakes or reindeer for Christmas, autumnal leaves for Thanksgiving, hearts for Valentine’s Day, or anchors for a coastal theme.
- Iron-On Vinyl Selection: The type and color of iron-on vinyl dramatically impact the final look. Cricut Metallic Gold Foil was chosen for its luxurious sparkle and sophisticated finish. However, you can explore various options: matte for a subtle look, glitter for added dazzle, holographic for a playful sheen, or even patterned iron-on for unique visual interest.
Essential Materials for Your Cricut Table Runner: Gather Your Crafting Arsenal
Having all your materials organized and ready before you begin will make the crafting process much smoother and more enjoyable. Here’s a detailed list of what you’ll need to create your custom no-sew table runner:
- CRICUT MAKER for Cutting the Iron-On Design: This versatile smart cutting machine is the powerhouse of your project. It’s designed to cut a vast array of materials, including delicate iron-on vinyl, with unparalleled precision. The Maker’s adaptive tool system ensures clean, intricate cuts every time, making professional-looking results attainable for crafters of all levels.
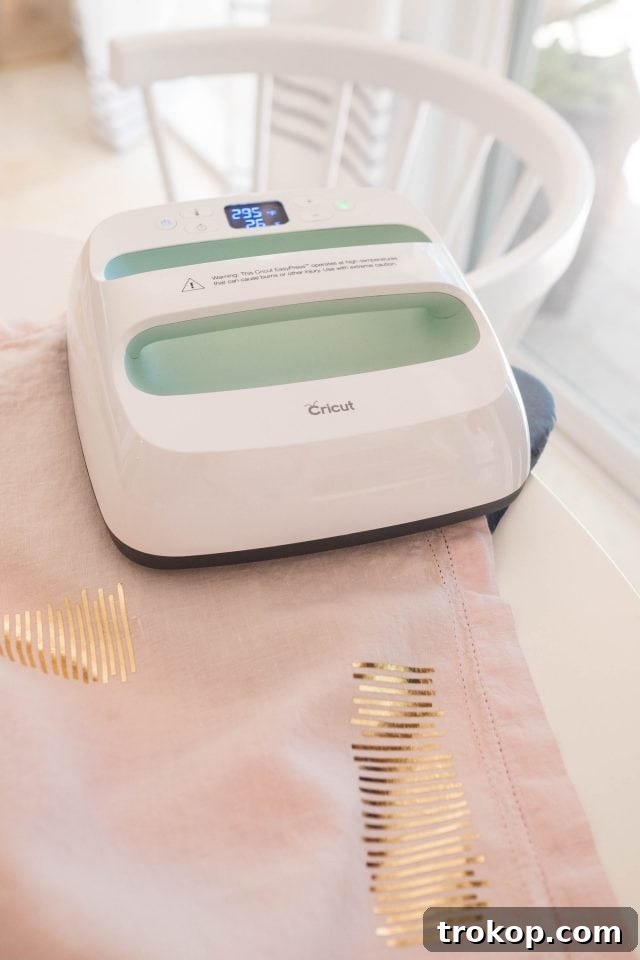
- CRICUT EASYPRESS 2 for Applying Your Iron-On Design: Forget the frustrations of a standard iron! The EasyPress 2 delivers consistent, edge-to-edge heat, ensuring flawless and long-lasting iron-on transfers. Its precise temperature and timer settings are crucial for optimal adhesion of your vinyl to the fabric, resulting in a durable and professional finish.
- CRICUT FINE POINT BLADE: This is the standard blade that comes with your Cricut Maker and is perfectly suited for cutting light to medium-weight materials, including most types of iron-on vinyl. Ensure it is sharp and correctly installed for the best cutting results.
- CRICUT IRON-ON VINYL in Your Chosen Color: This is where your design comes to life! For the elegant look showcased in this guide, the Cricut Metallic Gold Foil was used, adding a luxurious sparkle. Choose a color and finish that complements your chosen fabric and overall aesthetic. Ensure you purchase enough vinyl to accommodate the full length and complexity of your design.
- Fabric or Runner of Your Choice: This forms the base of your project. A linen runner in a soft blush pink was selected for its elegant texture and ability to highlight the gold design. Consider pre-washing and ironing your fabric before starting to ensure it’s clean and wrinkle-free for application.
- CRICUT MEDIUM GRIP MAT: This mat is essential for securely holding your iron-on vinyl in place during the cutting process. Its adhesive surface prevents the material from shifting, guaranteeing precise cuts according to your design. Make sure your mat is clean and sticky enough for optimal performance.
- Heat-Resistant Mat (Highly Recommended): While not always listed, a Cricut Heat-Resistant Mat (or a thick towel) is crucial. It protects your work surface from the high heat of the EasyPress and ensures even heat distribution to your project.
- Weeding Tool (Optional but Extremely Helpful): A small, hook-like weeding tool simplifies the process of removing excess vinyl from your cut design. It allows for meticulous detail work, especially for intricate patterns.
Step-by-Step: Crafting Your No-Sew Masterpiece
With your materials assembled and your design concept clear, it’s time to bring your custom table runner to life. Follow these detailed instructions to ensure a seamless and successful crafting experience.
1. Setting Up Your Cricut Machine
Begin by powering on your Cricut Maker and connecting it to your computer or mobile device via USB cable or Bluetooth. Confirm that the Fine Point Blade is securely seated in Clamp B of the machine. This ensures your Cricut is ready for precision cutting.
2. Designing in Cricut Design Space
Open Cricut Design Space, your creative hub for this project. You have two primary options for your design:
- Create a Custom Design: If you have a specific pattern or text in mind, utilize Design Space’s robust tools to create it from scratch. You can import SVG files you’ve designed in other software like Adobe Photoshop or Illustrator. For our featured abstract line design, a custom creation in Photoshop was uploaded for a unique touch.
- Utilize a Pre-Made Template: For convenience, you can download this custom design template. Simply upload it directly into Cricut Design Space, and you’re ready to proceed to the next step.
Ensure your design is sized appropriately for your table runner. You may need to duplicate elements to cover the entire length of your runner, or arrange them to create a continuous pattern.

3. Precision Cutting Your Iron-On Vinyl
Once your design is finalized in Design Space, click the prominent “Make It” button in the top right corner. On the preparation screen that follows, select your material setting. For this project, “Foil Iron-On” is the correct choice, but adjust as needed for different types of iron-on vinyl.
Crucial Pro-Tip for Iron-On Vinyl: When using iron-on (HTV), always place the material onto your medium grip mat with the shiny side (carrier sheet) facing down. More importantly, you MUST activate the “Mirror” setting in Design Space for your design (this option is typically found on the left-hand side of the screen on the “Prepare” screen). While it might not seem critical for abstract lines, skipping this step for text or directional designs will result in your image being transferred backward onto your fabric. Always mirror your iron-on designs!
Carefully load your mat, with the vinyl secured face-down, into your Cricut Maker. Once loaded, press the “Go” button to initiate the cutting process. After the cut is complete, unload the mat and gently remove any excess vinyl around your design using a weeding tool. You should be left with only your desired pattern adhered to the clear carrier sheet.
4. Flawless Application with EasyPress
Now comes the exciting part: transferring your design! The Cricut EasyPress ensures a professional, durable bond.
- Preheat the EasyPress: Power on your Cricut EasyPress 2. Set the temperature to 295°F (155°C) and the timer to 30 seconds. Wait patiently until the Cricut logo on the EasyPress turns green, indicating it has reached the precise optimal temperature for your iron-on vinyl.
- Prepare Your Workspace & Fabric: Place your heat-resistant mat on a firm, flat surface. Lay your table runner fabric smoothly on top of the mat. For optimal adhesion and to remove any moisture from the fabric, preheat the specific area where your design will go for 5 seconds using the EasyPress.
- Position Your Design: Carefully place your weeded iron-on design onto your fabric, carrier sheet facing up. For an abstract, scattered look like the one featured, cut your larger design into smaller strips and arrange them artistically across the runner.
- First Press: Place the preheated EasyPress directly on top of your design. Apply light, even pressure for the full 30 seconds. Avoid wiggling or shifting the EasyPress during this time.
- Double-Sided Adhesion: Without disturbing the design, carefully flip over your runner fabric. Repeat the pressing process on the backside for another 30 seconds. This crucial step ensures thorough heat penetration and robust adhesion from both sides of the fabric, maximizing the durability of your design.
5. The Final Revealing Touches
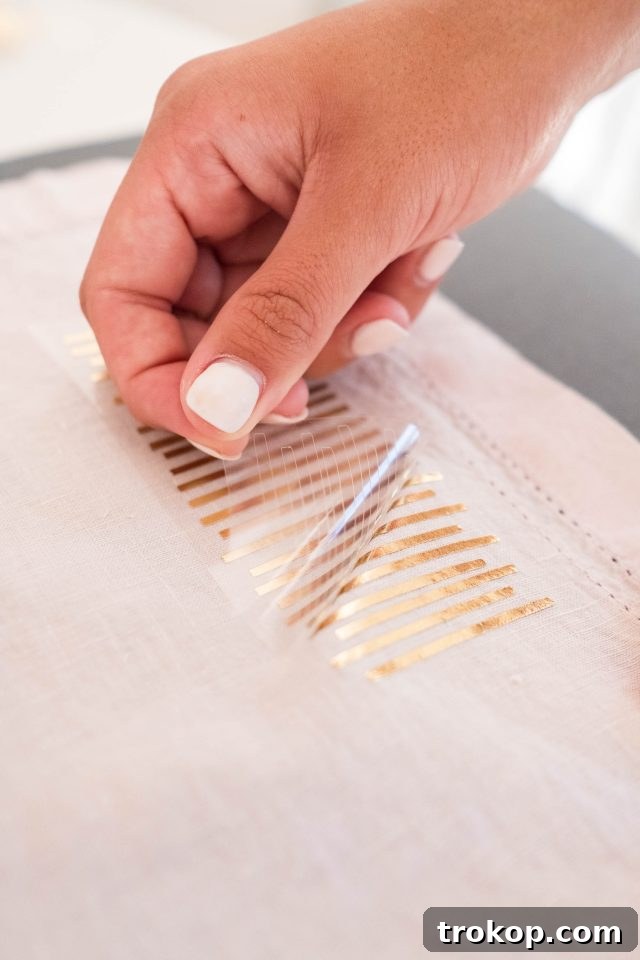
Once both sides have been pressed, allow the design to cool completely. This is critical for most iron-on vinyls, as attempting to peel too early (a “warm peel”) can cause the design to lift. Once cool, carefully and slowly peel off the clear carrier sheet from the iron-on design. If you notice any part of the design lifting with the carrier sheet, gently place the sheet back down, apply more heat with the EasyPress to that specific area, and then allow it to cool again before attempting to peel. Patience here ensures a perfectly adhered and long-lasting transfer.
Repeat the entire cutting and application process for any remaining sections of your design until your completed DIY table runner is fully adorned. Step back, admire your handiwork, and get ready to elevate your dining space!
Maintaining Your Iron-On Table Runner: Care Instructions for Lasting Beauty
Your beautifully crafted DIY table runner is designed to be admired and used, which means it’s bound to encounter the occasional spill or mess. Proper care is paramount to ensure the longevity of your iron-on designs, especially those featuring delicate metallic accents like gold foil.
Best Practices for Washing Your Runner with Iron-On Designs:
- Prioritize Handwashing: For the longest lifespan and to protect the integrity of your iron-on designs, handwashing is always the gentlest and most recommended method. Fill a clean sink or basin with cool or cold water and a small amount of mild detergent. Gently submerge the runner and agitate the water, focusing on any soiled areas. Avoid vigorous scrubbing directly on the iron-on.
- Targeted Stain Treatment: For stubborn stains, apply a gentle spot treatment product suitable for your fabric type. Work the treatment into the stain delicately by hand, using cold water. Again, refrain from harsh rubbing directly on the vinyl design.
- Steer Clear of Harsh Chemicals: Never use bleach, harsh chemical stain removers, or fabric softeners, as these can severely damage both the fabric and the adhesive properties of the iron-on vinyl, leading to peeling or discoloration.
- Air Dry Flat: After washing, gently squeeze out any excess water – do not wring or twist the fabric, as this can distort the design and create deep wrinkles. Lay the table runner flat on a clean, dry surface or hang it over a drying rack, ensuring even airflow. Air drying minimizes wrinkles and, crucially, prevents the high heat damage that machine dryers can inflict on iron-on designs, which can cause them to lift, crack, or melt.
Expert Tips for Removing Wrinkles:
Despite careful washing and drying, wrinkles may sometimes appear. Here’s how to safely smooth them out without compromising your design:
- Steaming is Best: The safest and most effective method for wrinkle removal is using a garment steamer. Direct the steam to the backside of the runner (the side opposite the iron-on design). The steam will gently relax the fabric fibers without direct heat contact with the vinyl, preventing damage.
- Cautious Ironing: If steaming isn’t an option and you must iron, proceed with extreme caution. Set your iron to the lowest heat setting (typically for delicate fabrics). Always place a thin cotton towel, parchment paper, or a specific pressing cloth between the iron and the iron-on design. Never iron directly on the vinyl, as this will cause it to melt, stick to your iron, or peel. Iron the backside of the runner whenever possible to further protect the design.
Smart Storage for Lasting Beauty: Keeping Your Runner Pristine
For those who value both beauty and convenience, smart storage solutions are a game-changer. Proper storage not only preserves the pristine condition of your custom table runner but also ensures it’s always ready for a quick table transformation without the dreaded chore of ironing out stubborn creases.
The Rolling Method: Your Best Defense Against Wrinkles
The cardinal rule for storing table runners, delicate table linens, and even lace runners, is to roll them rather than fold them. Think of it as handling a precious map or a delicate piece of artwork. Rolling minimizes sharp creases and folds that are difficult to remove and can, over time, weaken the adhesion of your iron-on designs.
- How to Roll Correctly: Lay your clean, dry table runner flat on a smooth, clean surface. Starting from one end, gently and evenly roll the runner tightly. Ensure the roll is firm but not overly compressed, and check that no wrinkles are forming during the process. The goal is a smooth, cylindrical shape.
- Optimal Storage Containers: Once rolled, store your runners in suitable containers. A clear storage bin, such as this one, is an excellent organizational choice. The transparency allows you to effortlessly glance inside and identify the runner you need without disturbing others, saving you time and effort. Beyond convenience, these bins offer vital protection against dust, moisture, and potential damage, keeping your beautiful linens in pristine condition until their next appearance.
Additional Tips for Longevity:
- Choose a Cool, Dry Location: Always store your table linens in a cool, dry environment, away from direct sunlight. Sunlight can cause fabrics to fade and may degrade the iron-on vinyl over extended periods.
- Utilize Acid-Free Protection: For particularly delicate or heirloom runners, consider rolling them with acid-free tissue paper. This adds an extra layer of protection against environmental elements and prevents yellowing or material degradation.
- Categorize and Label: If you have a collection of runners, categorizing them by season, occasion, or color scheme (e.g., “Holiday Runners,” “Everyday Linens,” “Spring/Summer”) and labeling your storage bins will enhance organization and make retrieval even more efficient.
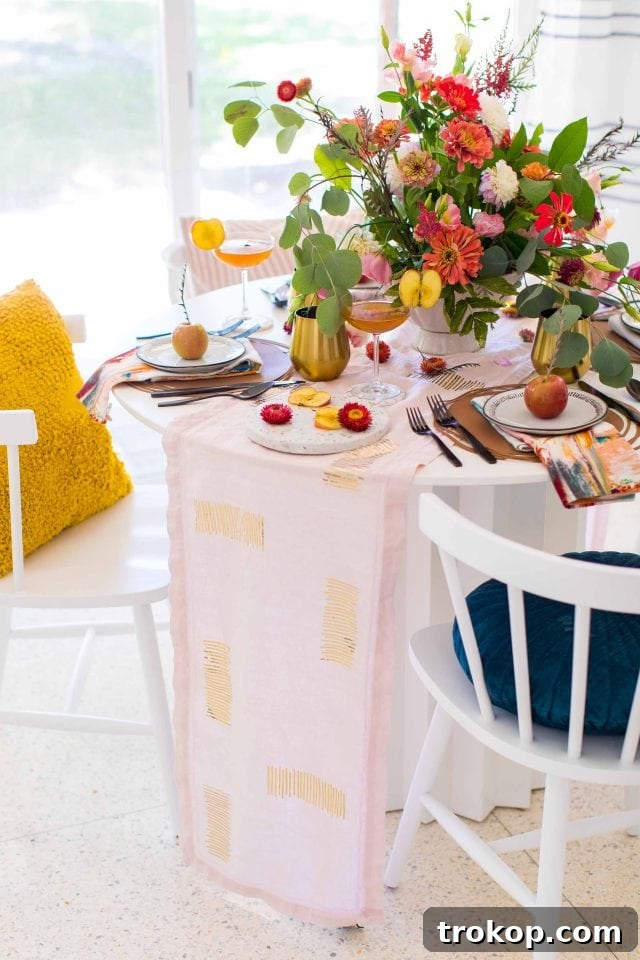
Styling Your Custom Runner for Any Occasion: Elevate Your Table Setting
Your newly created DIY table runner is more than just a decor item; it’s the foundation for countless stunning tablescapes. Here are some creative ideas to help you style it for various occasions, ensuring your table always makes a memorable impression.
- Festive Holiday Feasts: For Thanksgiving, pair a metallic gold runner with rich autumnal hues of deep reds, burnt oranges, and forest greens. Incorporate natural elements like miniature pumpkins, gourds, scattered leaves, and rustic candles. For Christmas, amplify the sparkle with evergreen sprigs, berries, pinecones, and delicate fairy lights woven along the runner’s length.
- Everyday Elegance: Elevate a casual weeknight dinner with your custom runner. Keep the dinnerware simple – think classic white porcelain or natural stoneware. Add a small vase with fresh, seasonal flowers or a few elegant taper candles to create an inviting and sophisticated ambiance without being overly formal.
- Chic Celebrations: For events like bridal showers, baby showers, or engagement parties, let the blush pink and gold combination of this runner shine. Complement it with delicate floral arrangements in soft hues, elegant stemware, and personalized place cards to tie the theme together beautifully.
- Themed Parties: If your runner features a specific pattern or color scheme, lean into that theme for your entire tablescape. A nautical-themed runner, for instance, could be paired with mini anchor decorations, rope accents, seashells, and crisp blue and white stripes in other linens.
- Layering Techniques: Don’t hesitate to layer your custom runner over a solid-colored tablecloth. This adds depth, visual contrast, and can make your patterned runner truly pop. A neutral tablecloth can provide a sophisticated backdrop, while a coordinating color can create a rich, monochromatic look.
- Centerpiece Harmony: Use your runner as the unifying base for your centerpiece. A long, narrow floral arrangement, a series of small votive candles, a collection of decorative objects, or a grouping of varying height vases can all sit beautifully atop your runner, enhancing its design and creating a cohesive focal point for your table.
Conclusion: Unleash Your Inner Crafter and Adorn Your Table
Crafting your own no-sew DIY table runner using a Cricut machine is an immensely rewarding and accessible project that culminates in a beautiful, personalized piece of home decor. From the initial spark of design inspiration and the careful selection of your fabric to the precise cutting of iron-on vinyl and its flawless application, each step offers an opportunity for creative expression and attention to detail. This method not only provides a cost-effective way to refresh your dining space but also opens up endless possibilities for creating unique and memorable tablescapes for every season, holiday, and celebration.
By following the detailed steps and embracing the care and storage tips outlined in this guide, your custom table runner will remain a cherished and pristine element of your decor for many years to come. So, gather your materials, unleash your inner crafter, and prepare to impress your family and guests with a dining table that truly reflects your personal style and creative spirit. Happy crafting!
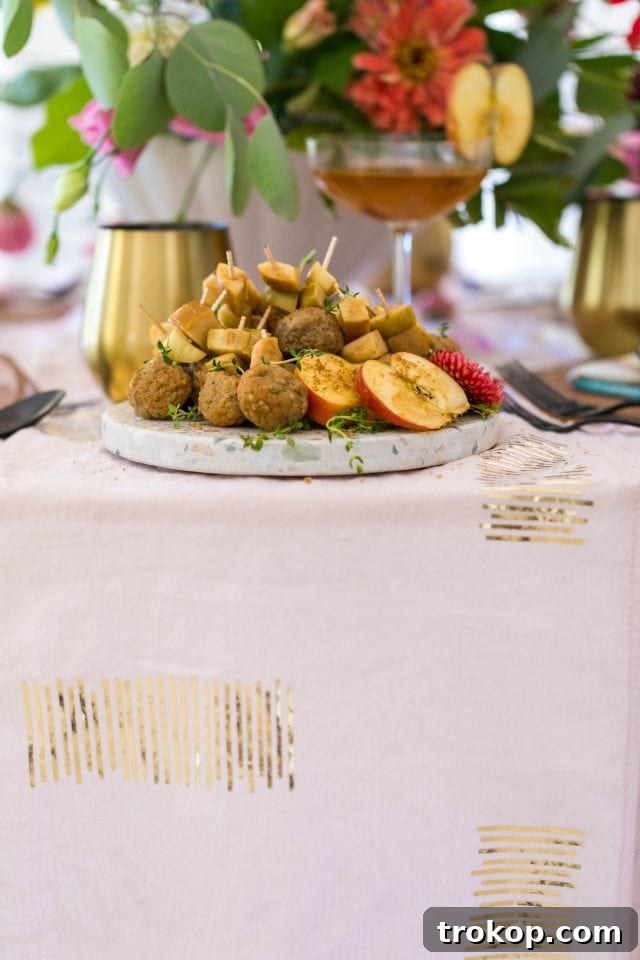
To further complete your ultimate table setting vision, I encourage you to explore my full fall table decor post here. This comprehensive resource is packed with additional fantastic ideas, including a delightful apple cider vinegar cocktail recipe, an easy crockpot meatballs recipe perfect for entertaining, and a host of other complementary table decor DIY projects that will perfectly pair with your new, custom-made runner!
This post is sponsored by Cricut. Sugar & Cloth is committed to giving back, and has chosen to donate 5% of all sponsored campaign proceeds to charity. You can read more about this initiative right here.