
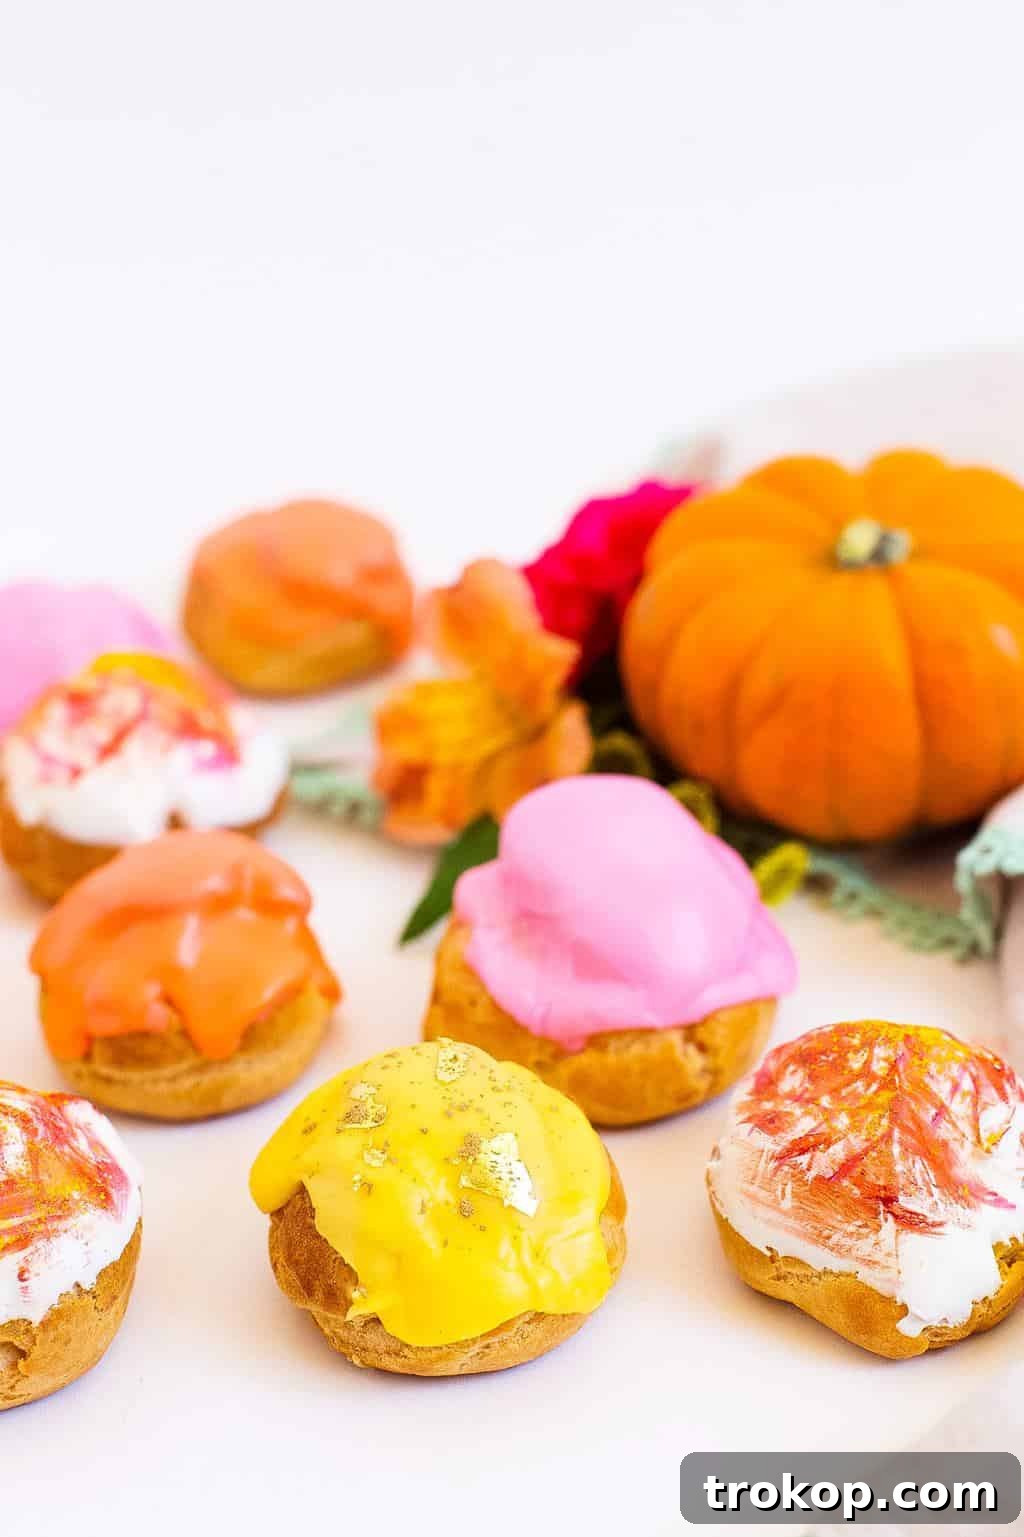
As autumn leaves begin to paint the landscape with their warm hues, there’s an undeniable call for comforting flavors and cozy indulgences. Among the most cherished traditions of the season is the celebration of pumpkin, a versatile ingredient that transforms into everything from savory soups to sweet treats. This year, we invite you to elevate your fall dessert repertoire with our exquisite Pumpkin Cream Puffs – a delicate pastry filled with luscious pumpkin pie custard and finished with an enchanting dusting of edible gold luster. These aren’t just desserts; they’re tiny masterpieces, perfect for gracing any festive table, especially as elegant Thanksgiving desserts.
Imagine biting into a light, airy shell, yielding to a smooth, creamy filling that bursts with the rich, spiced essence of pumpkin pie. Our Pumpkin Cream Puffs offer just that – a delightful contrast in textures and a symphony of seasonal flavors that will transport you straight to a cozy fireplace on a crisp autumn evening. Beyond their captivating taste, these treats are surprisingly accessible to make, allowing even novice bakers to create impressive confections. Get ready to impress your family and friends as we delve into the art of crafting these irresistible pumpkin cream puffs, a true highlight of the pumpkin season.
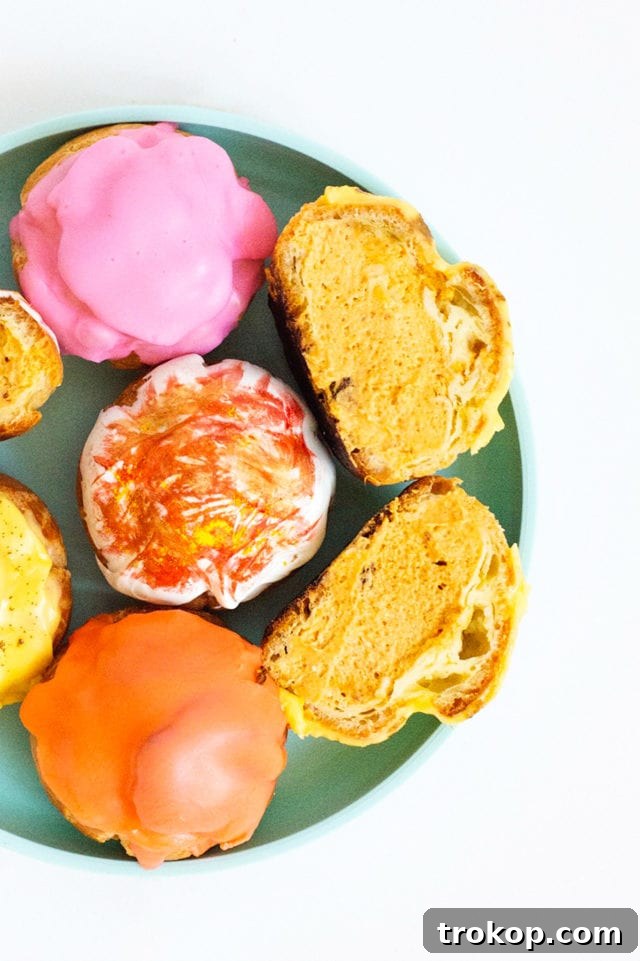
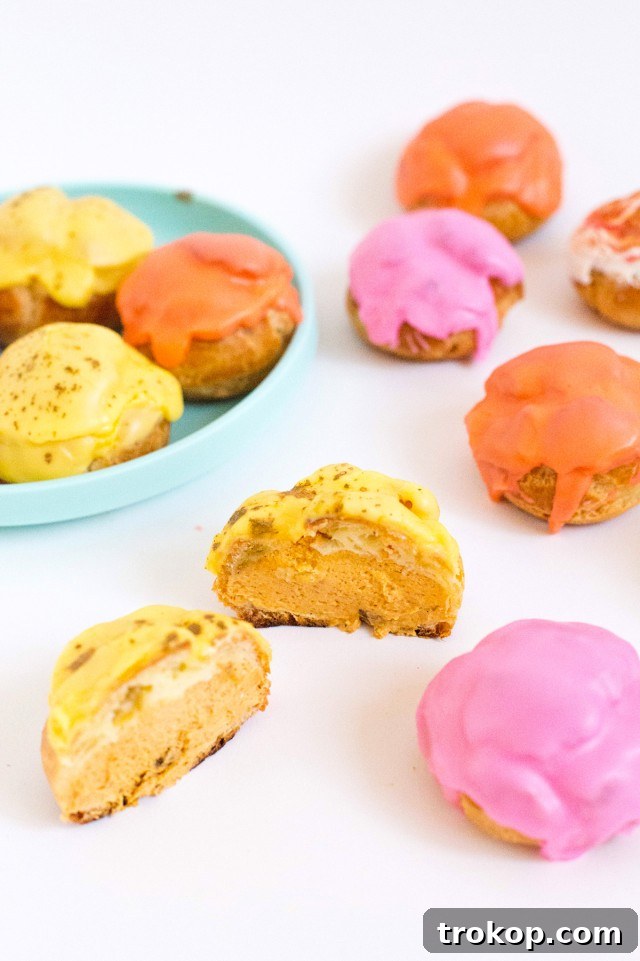
Table of Contents
What is a Cream Puff?
At the heart of a perfect cream puff lies Choux Pastry dough, also elegantly known as Pâte à Choux. This seemingly complex French pastry dough is surprisingly simple to master and forms the foundation for a variety of beloved confections, including eclairs, churros, and, of course, cream puffs. What makes Choux pastry unique is its high moisture content, which generates steam during baking. This steam is trapped within the dough, causing it to puff up dramatically and create a characteristic hollow center, ideal for filling.
Once baked to a beautiful golden brown and allowed to cool, these light-as-air shells are ready to be transformed. While traditionally filled with sweetened whipped cream, the versatility of cream puffs allows for endless possibilities. You can explore fillings like rich pastry cream, velvety custard, refreshing ice cream, or our seasonal favorite: a spiced pumpkin pie custard. A dusting of powdered sugar is the classic finishing touch, though we’ll explore more adventurous decorations later.
Don’t let the fancy name deter you; mastering Pâte à Choux is a rewarding experience that unlocks a world of dessert creation. It’s truly unbelievable how many different treats you can conjure from this one foundational dough. Beyond cream puffs, think elegant eclairs, delightful French crullers, and crispy churros, just to name a few! Once you get the hang of it, you’ll find yourself reaching for this recipe again and again.
Essential Ingredients for Pumpkin Cream Puffs
Crafting these delectable Pumpkin Cream Puffs requires a selection of fresh, quality ingredients that contribute to both the structural integrity of the shells and the rich flavor of the filling. Here’s what you’ll need, along with a few helpful notes:
- Unsalted butter: Using unsalted butter allows you to control the exact amount of salt in your recipe, ensuring a balanced flavor.
- White granulated sugar: Provides a subtle sweetness to the choux pastry, enhancing its overall appeal.
- Salt: A pinch of salt is crucial for balancing the flavors and bringing out the natural sweetness in both the pastry and the filling.
- All-purpose flour: The backbone of our choux pastry, providing structure to the delicate shells.
- Eggs: Essential for the characteristic puff and richness of choux pastry, contributing to both texture and flavor. Ensure they are at room temperature for better incorporation into the dough.
- Cinnamon: Adds a warm, aromatic note to the cream puff shells, complementing the pumpkin filling beautifully.
- Egg wash: A simple mixture of 1 egg whisked with 1 tablespoon of water. This is brushed on the shells before baking to give them a beautiful golden sheen and a crispier finish.
- Heavy whipping cream: Forms the base of our light and airy pumpkin filling. Ensure it’s very cold for optimal whipping results.
- Pumpkin puree: This is the star of our filling, providing authentic pumpkin flavor. It’s crucial to use pure pumpkin puree, not pumpkin pie filling, as the latter contains added spices and sweeteners that would alter the flavor profile of our custard.
- Whipped cream cheese: Adds a delightful tang and creamy texture to the pumpkin filling, making it even more decadent.
- Powdered sugar: Sweetens both the pumpkin filling and the optional glaze. Its fine texture ensures a smooth, lump-free consistency.
- Pumpkin pie spice: A blend of cinnamon, ginger, nutmeg, and cloves, this spice blend is indispensable for that classic fall flavor. Keep it on hand for other seasonal treats like Sparkling Pumpkin Cider, Gingersnap Pumpkin Pie, and Snickerdoodle Pumpkin Pie Ice Cream Sandwiches.
- Vanilla bean paste: Offers a more intense and complex vanilla flavor compared to extract, with visible specks of vanilla bean. You can substitute with 1 teaspoon of pure vanilla extract if paste is unavailable.
- Gel food coloring: Optional, but highly recommended for adding vibrant, festive colors to your glaze without thinning it out.
- Edible gold luster dust: An optional topping that provides a luxurious shimmer, turning your cream puffs into truly show-stopping desserts.
Step-by-Step Guide to Making Pumpkin Cream Puffs
Making cream puffs might seem daunting, but by following these detailed steps, you’ll achieve perfect results every time. We’ll break it down into three main stages: making the shells, preparing the filling, and assembly.
Crafting the Perfect Choux Pastry Shells
The foundation of our pumpkin cream puffs is the light and airy choux pastry shell. Achieving a crispy exterior and a hollow interior is key, and these steps will guide you there:
- Prepare the base: In a medium saucepan, combine 1 cup of water, 4 oz (1/2 cup) of unsalted butter, 2 tablespoons of granulated sugar, and 1/8 teaspoon of salt. Bring this mixture to a rolling boil over medium-high heat.
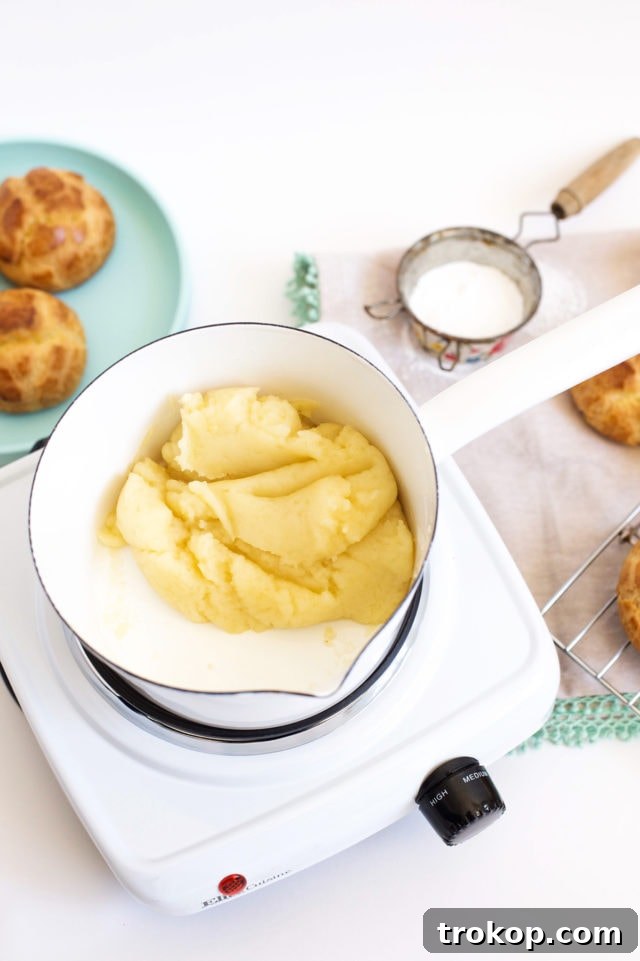
- Incorporate the flour: As soon as the mixture reaches a boil, reduce the heat to medium. Add all of the all-purpose flour at once and stir vigorously with a wooden spoon or spatula. The goal is to quickly incorporate the flour until a smooth dough ball forms.
- Cook the dough: Continue stirring the mixture constantly for about 2-3 minutes. This step, known as “drying out” the dough, is crucial. The dough will begin to pull away from the sides of the saucepan and leave a thin film or coating on the bottom. This indicates that sufficient moisture has evaporated. Remove from heat and allow the dough to cool slightly for a few minutes.
- Add the eggs: Transfer the cooled dough ball into a mixing bowl. Using a hand mixer or a stand mixer fitted with the paddle attachment, begin mixing in the eggs one at a time on medium speed. It’s important to ensure each egg is fully incorporated and the mixture is smooth before adding the next egg. Adding eggs too quickly can result in a greasy or separated dough.
- Finalize the dough: Once all four eggs have been added and thoroughly combined, mix in the 1/2 teaspoon of cinnamon. The dough should be glossy, smooth, and fall from the paddle in a V-shape. Congratulations, you’ve successfully made your Choux Pastry dough!
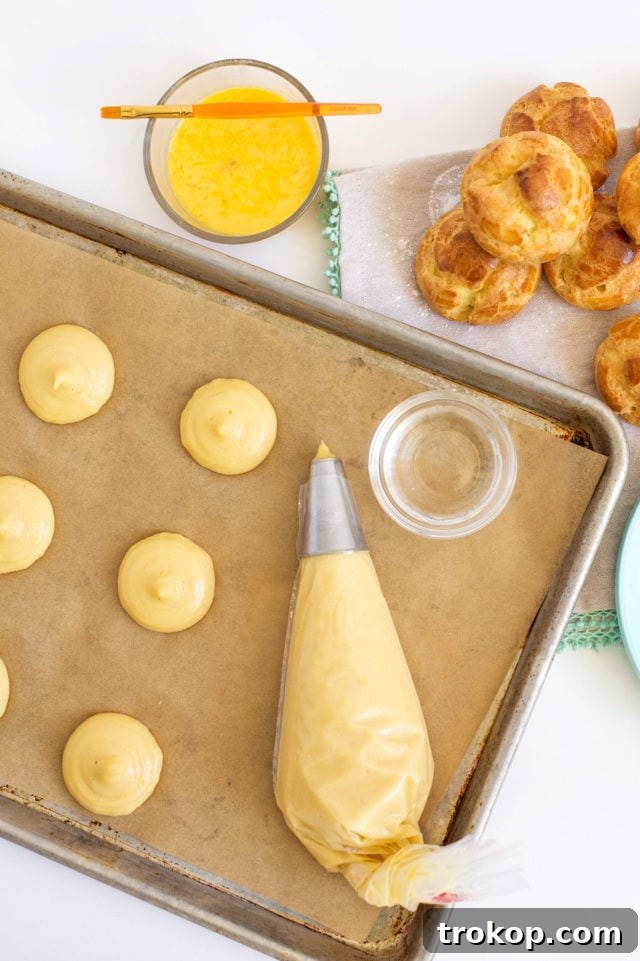
- Pipe the shells: Transfer your choux pastry dough into a piping bag fitted with a large plain round tip (e.g., Wilton 1A or Ateco 806).
- Preheat and prep: Preheat your oven to 350°F (175°C). Line a large baking sheet with parchment paper. This prevents sticking and ensures even baking.
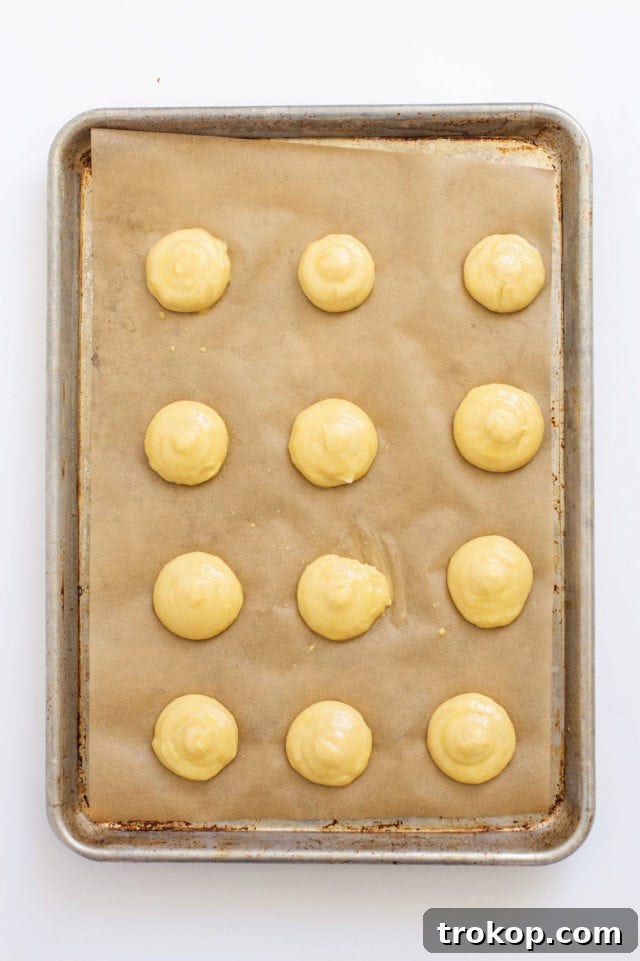
- Form the puffs: Pipe 2-inch circles of dough onto the lined baking sheet, leaving about 1.5 inches between each puff to allow for expansion. If any puffs have small peaks on top, gently dab them down with a clean finger dipped in a little water to ensure an even rise.
- Apply egg wash: Lightly brush the top of each piped dough circle with the prepared egg wash (1 whisked egg + 1 tbsp water). This will give them a beautiful golden crust.
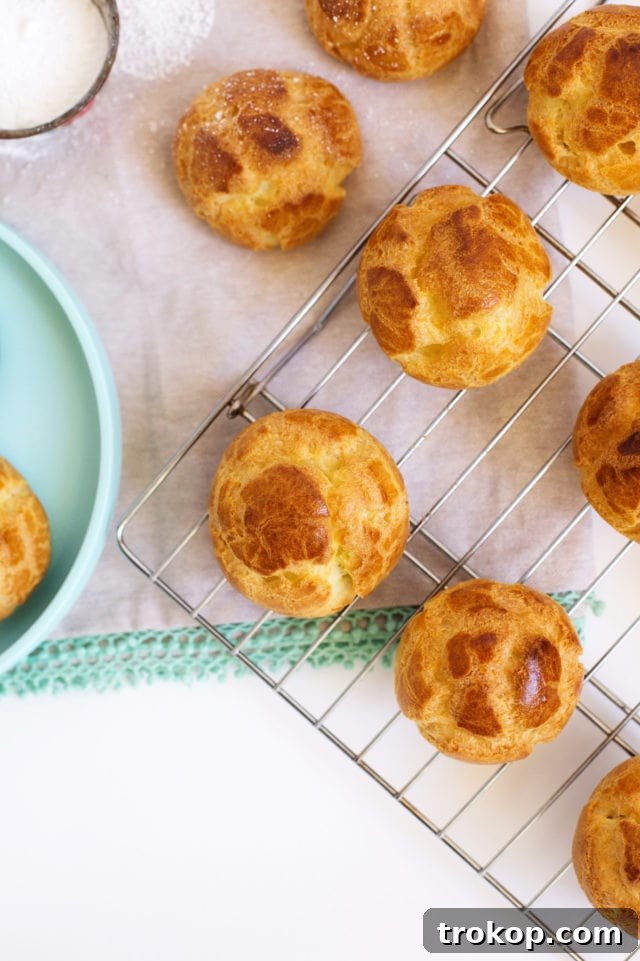
- Bake in two stages: Bake the puffs in the preheated oven at 350°F (175°C) for 12 minutes. This initial phase helps them rise. Then, without opening the oven door, increase the oven temperature to 425°F (220°C) and bake for another 10-13 minutes, or until the puffs are significantly raised, deep golden brown in color, and feel light and hollow. The higher temperature helps to dry out the interior and create a crisp shell. Avoid opening the oven door during baking, especially in the first phase, as this can cause the puffs to deflate. Once baked, turn off the oven and let the puffs sit in the cooling oven for 10-15 minutes with the door slightly ajar to further dry out the interior. This helps prevent them from collapsing.
- Cool completely: Remove the puffs from the oven and allow them to cool completely to room temperature on a wire rack before attempting to fill them. Warm puffs will melt the filling.
Preparing the Luscious Pumpkin Pie Filling
While your beautifully baked choux pastry shells are cooling, you can whip up the rich and creamy pumpkin pie filling. This custard-like mixture is bursting with classic fall spices and a smooth texture that perfectly complements the light pastry.
- Whip the heavy cream: In a large, chilled mixing bowl, whip the heavy cream until stiff peaks have formed. For the best results, use a hand or stand mixer on medium-high speed. While possible by hand, a mixer makes this process much quicker and ensures consistent aeration.
- Combine pumpkin mixture: In a separate bowl, combine the pumpkin puree, whipped cream cheese, powdered sugar, pumpkin pie spice, and vanilla bean paste. Mix until all ingredients are thoroughly combined and the mixture is smooth and lump-free.
- Fold in whipped cream: Gently fold the whipped cream into the pumpkin mixture. Be careful not to overmix, as this can deflate the whipped cream and reduce the lightness of the filling.
- Prepare for piping: Transfer the pumpkin filling into a piping bag fitted with a small plain round tip (e.g., Ateco #12). Now your delicious pumpkin choux are ready for their creamy interior!
Filling Your Pumpkin Cream Puffs with Ease
Once your shells are cooled and your filling is ready, it’s time for the satisfying step of bringing these two components together:
With a sharp paring knife, carefully cut a small ‘x’ into the bottom of each cooled cream puff shell. Insert the small round piping tip into the ‘x’ and gently squeeze the piping bag, filling the hollow interior of the puff until it feels full and slightly heavy. Be careful not to overfill, as the puff might burst. Place the filled cream puffs in the refrigerator while you prepare your chosen glaze or decorations.
Combining the beloved flavors of pumpkin pie, the creamy richness of cream cheese, and the delicate crispness of choux pastry, these Pumpkin Cream Puffs are destined to become your new favorite fall dessert. The wait for them to cool might be the hardest part, but that first bite will prove it’s worth every moment!
Elevate Your Dessert with Elegant Decorations
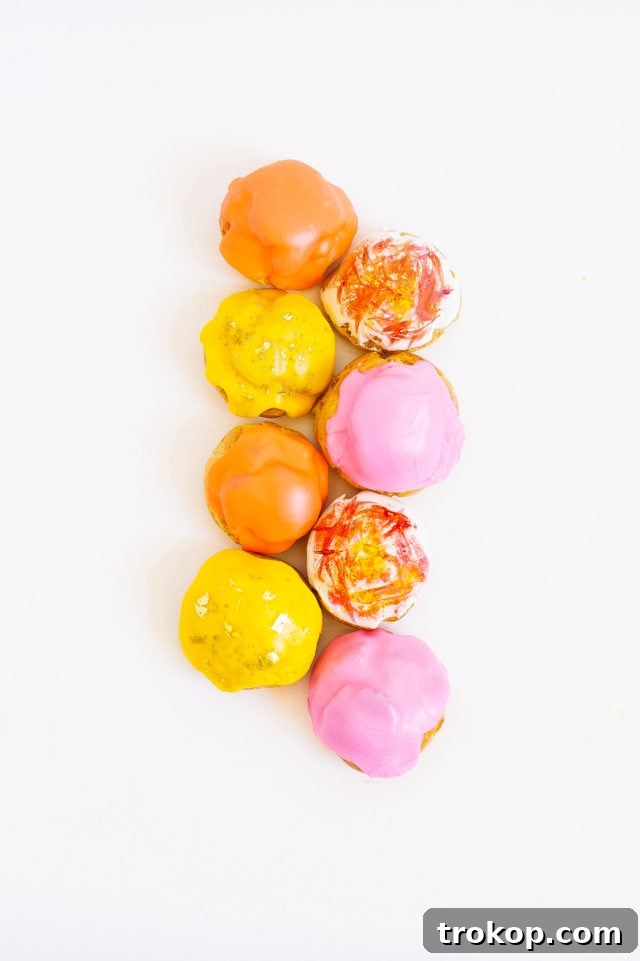
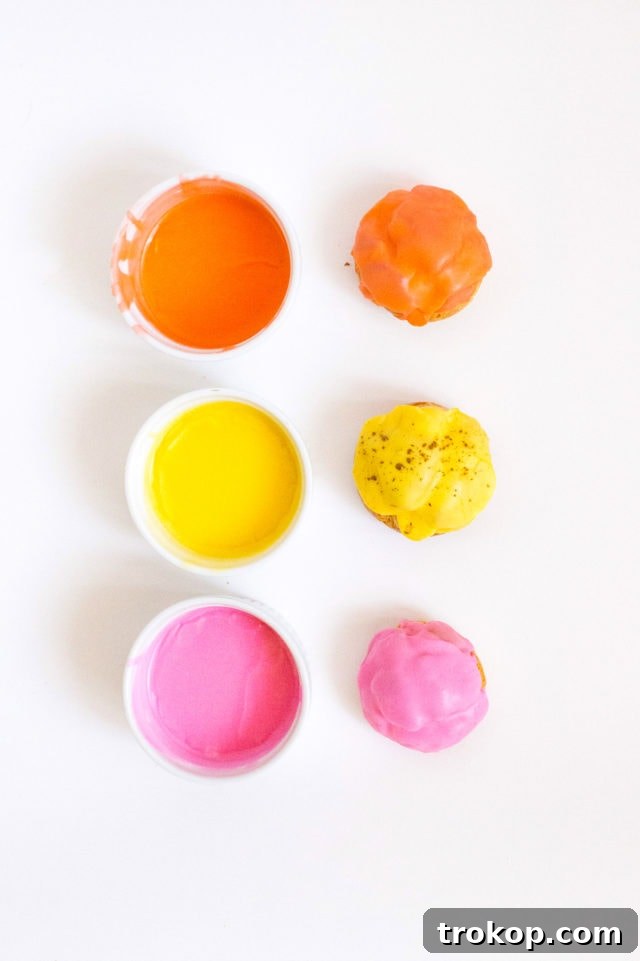
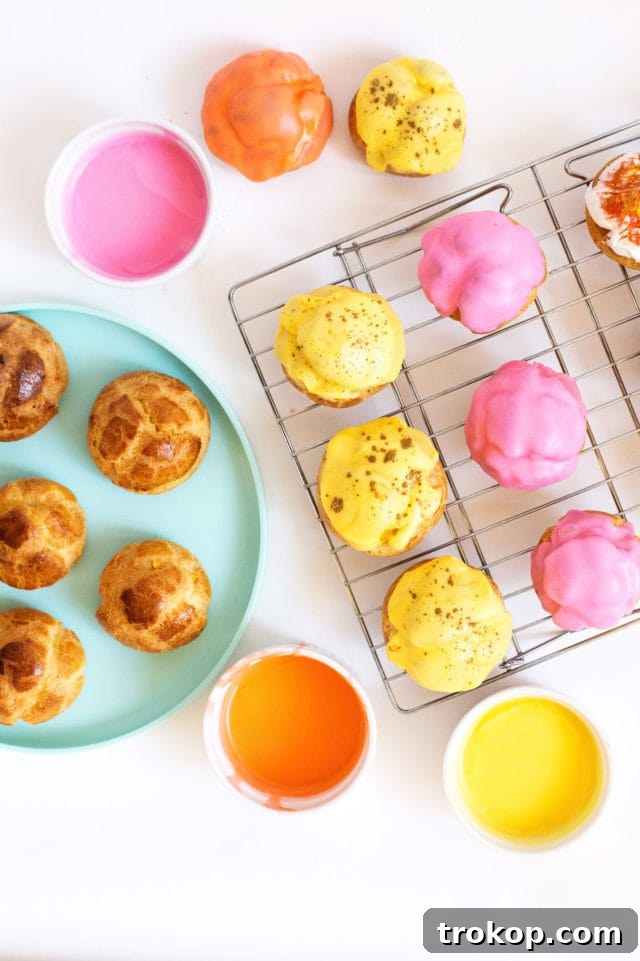
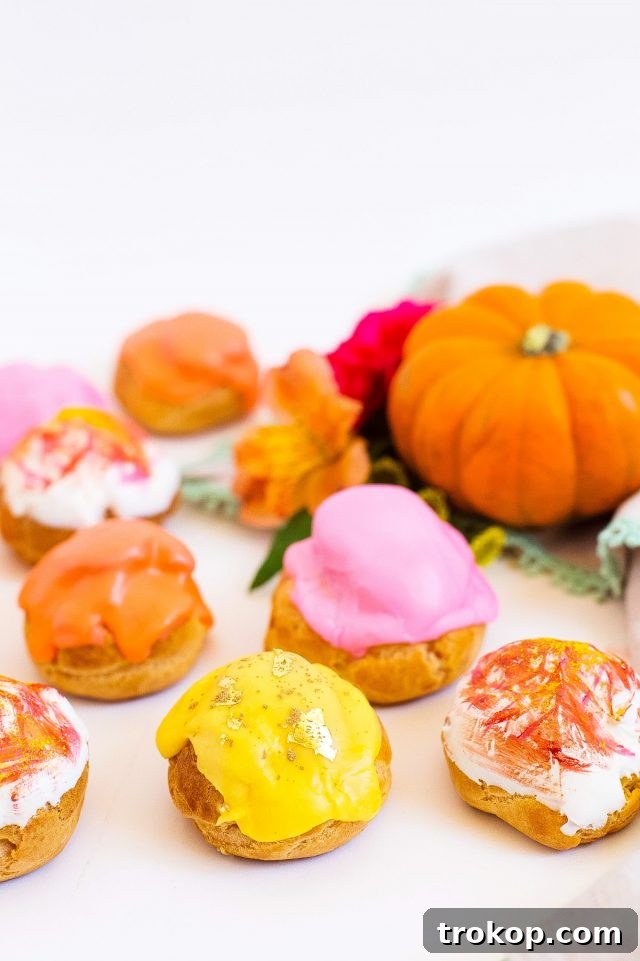
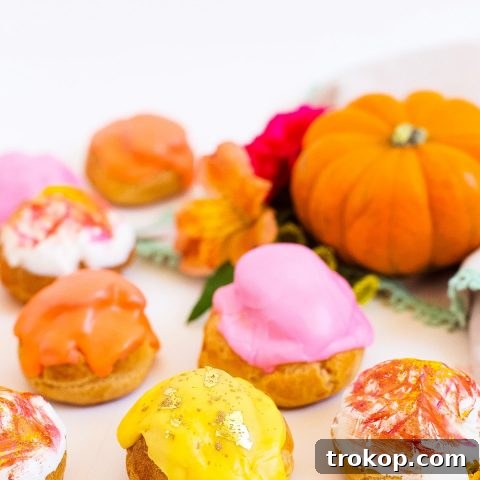
While a simple dusting of confectioner’s sugar is traditional for cream puffs, we encourage you to get creative and add an extra touch of flair to your pumpkin pie cream puffs. For a truly show-stopping presentation, we opted for vibrant gel food colors to paint the tops of our glazed puffs, making them as visually appealing as they are delicious.
How to Make a Smooth Glaze
A beautiful glaze can transform your cream puffs, adding an extra layer of sweetness and a canvas for decoration:
- Mix the glaze: In a bowl, add 1 1/2 cups of powdered sugar. Begin by mixing in 1 tablespoon of water at a time, stirring until you achieve a smooth, thick consistency, much like a classic donut glaze. The glaze should be thick enough to coat the back of a spoon and adhere to the cream puff without running off immediately. Adjust water content carefully; too much will make it too thin.
- Color the glaze (optional): If you plan to use multiple colors, separate the glaze into smaller bowls. Add your desired gel food coloring to each bowl and mix until the color is evenly distributed. Gel colors are preferred because they are highly pigmented and won’t significantly thin out your glaze compared to liquid food colorings.
- Dip and dry: Dip the top of each filled cream puff into the prepared glaze, allowing any excess to drip off. Place them on a wire rack set over parchment paper to catch drips. Allow the glaze to dry completely before adding any additional decorations like food color splatters, sprinkles, or luster dusts. Once dry, your elegantly glazed cream puffs are ready to be enjoyed!
Adding a Touch of Shimmer with Luster Dust
For an extra touch of glamour, consider adding edible luster dust:
We sprinkled some edible gold luster dust over our glazed cream puffs for a beautiful, shimmery effect. This fine, iridescent dust instantly elevates any dessert, making it feel luxurious. Luster dust is incredibly versatile; it’s not just for pastries! You can also use it for decorative projects like making DIY lipstick glassware. For a more intense shimmer, you could even lightly dip the glazed tops of your pumpkin cream puffs directly into the luster dust.
Expert Recipe Notes and Baking Tips
Achieving bakery-quality pumpkin cream puffs is within your reach with these helpful notes and troubleshooting tips:
The Magic of Egg Wash: Purpose and Preparation
Our pumpkin cream puff recipe specifically calls for an egg wash, and for good reason. An egg wash is a simple mixture, typically consisting of one egg whisked with one tablespoon of water. Sometimes a splash of milk or cream can be used instead of water, or just an egg yolk for a richer color.
The primary purpose of applying an egg wash to pastries and breads right before baking is purely aesthetic. It does not significantly alter the flavor of the finished product. Instead, it works wonders to create that beautiful, shiny, and deeply golden-brown finish that makes baked goods look so appealing. The proteins in the egg wash caramelize and brown quickly in the oven, providing a professional, polished appearance to your cream puffs. For our pumpkin cream puffs, this golden sheen adds to their festive appeal.
Troubleshooting: Why Are My Cream Puff Shells Flat?
If your cream puff shells emerge from the oven looking deflated or flat, it’s a common baking hurdle, but one that’s easily understood and avoided:
- Under-baked: The most frequent culprit is under-baking. Choux pastry needs enough time to develop a strong, stable crust that can support its puffed shape. If removed from the oven too soon, the steam inside will condense, and the weak crust will collapse. Ensure they are golden brown and feel very light.
- Oven door opened too early/often: Choux pastry relies on steam to puff up. Opening the oven door, especially during the crucial initial baking phase (the first 15-20 minutes), allows steam to escape too quickly and can cause the puffs to deflate. Resist the urge to peek!
- Not pierced after baking (if applicable): While our recipe doesn’t explicitly call for piercing, some recipes suggest making a small slit in the baked puffs immediately after removing them from the oven. This allows excess steam to escape, helping to keep them crisp and prevent internal sogginess, which can lead to collapse.
- Too much liquid in the dough: If your choux pastry dough is too wet (e.g., too much water or butter, or not drying it out sufficiently on the stovetop), it might struggle to hold its shape and puff correctly. The dough should be thick enough to hold its shape when piped.
- Eggs added when dough is too hot: If you add the eggs to the dough when it’s still very hot, they can scramble, ruining the texture and ability of the dough to puff. Always allow the dough to cool slightly after cooking on the stovetop before incorporating the eggs.
Alternative Filling Methods
While cutting a small ‘x’ in the bottom is a common way to fill cream puffs, there’s another popular method:
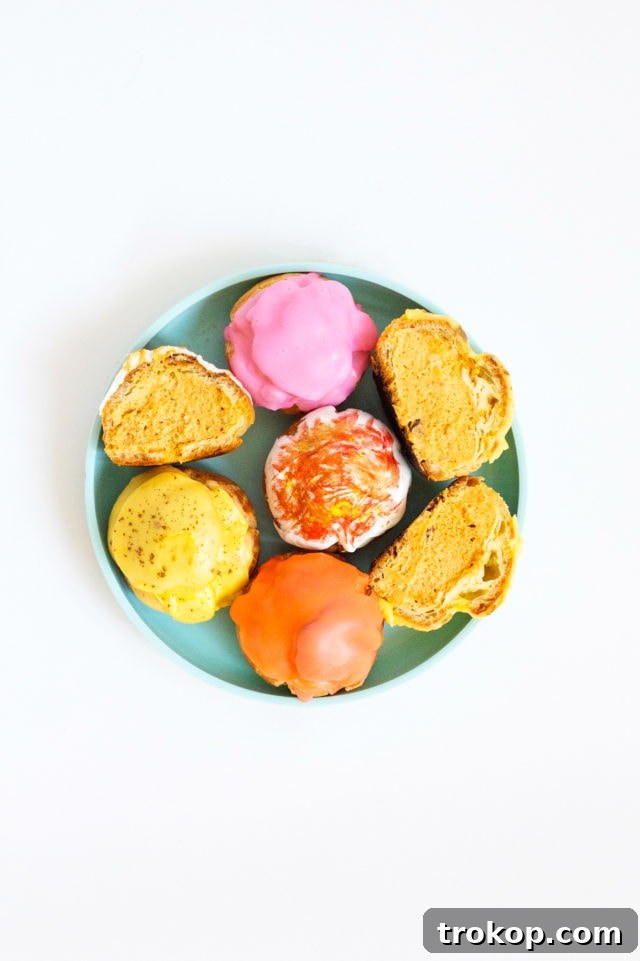
Instead of piping through a small hole, you can simply cut the cooled cream puff shells in half horizontally using a serrated knife. Then, generously pipe the pumpkin pie filling onto the bottom half of each shell and gently place the top half back on. This method allows for a beautiful visual presentation of the filling and can sometimes be easier for beginners.
Storage Tips for Optimal Freshness
To ensure your delicious pumpkin cream puffs remain fresh and enjoyable:
Store your pumpkin-filled cream puffs in an airtight container in the refrigerator. Cream puffs are best enjoyed within 1-2 days of being filled. For longer storage, particularly if you want to make them ahead, consider freezing the unfilled shells. Baked choux pastry shells actually keep exceptionally well in the freezer for up to a month. Simply let them defrost at room temperature for a short while, then recrisp them in a hot oven (around 300°F/150°C) for 5-10 minutes before cooling and filling. Filled cream puffs can also be frozen for a short period, but the texture of the filling might change slightly upon thawing. If freezing filled, wrap them individually in plastic wrap and then store in an airtight container; they will defrost quickly at room temperature or in the refrigerator.
More Irresistible Pumpkin Recipes
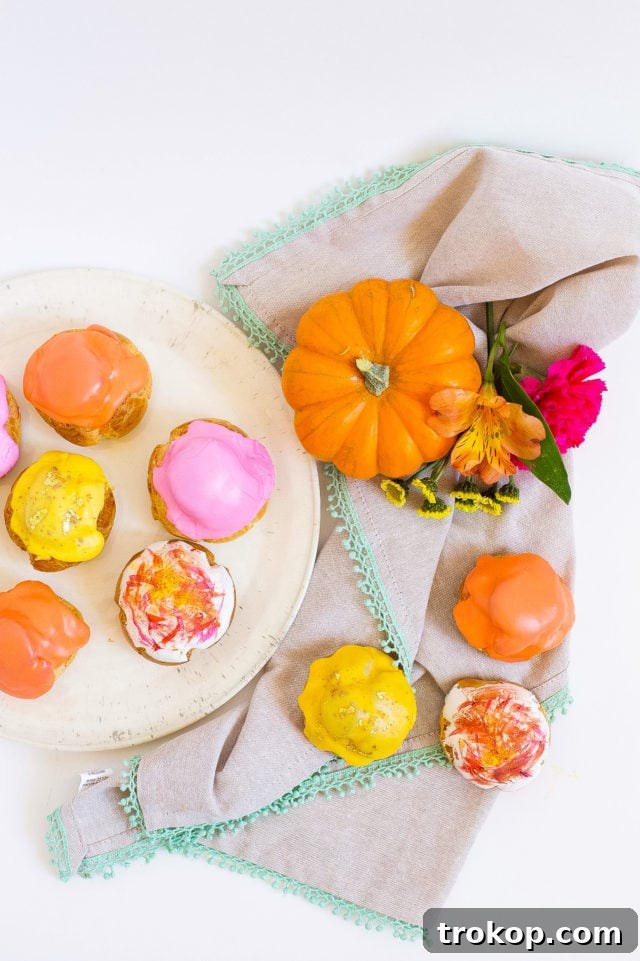
We absolutely adore how this dessert encourages creativity, allowing you to transform simple ingredients into edible works of art with vibrant icing, a sprinkle of glitter, or a dash of sprinkles. With this easy Pumpkin Cream Puffs recipe, you’re now perfectly equipped to serve your guests truly memorable and delicious treats! But the joy of pumpkin doesn’t stop here. For those who can’t get enough of this versatile fall flavor, we’ve curated a list of more easy pumpkin recipes that are sure to become new favorites:
- Keto Pumpkin Cheesecake: A guilt-free indulgence that captures all the creamy, spiced goodness of traditional pumpkin cheesecake.
- No Bake Gingersnap Pumpkin Pie: Perfect for when you need a quick, impressive dessert without turning on the oven, featuring a spicy gingersnap crust.
- Pumpkin Blondies: Chewy, moist, and packed with pumpkin flavor and warm spices – a delightful alternative to brownies.
- Pumpkin Pie Homemade Pop Tarts: A nostalgic treat with a homemade twist, bringing the flavors of pumpkin pie to a beloved breakfast pastry.
Print Recipe
Pumpkin Cream Puffs: Full Recipe
Equipment
-
Medium saucepan
-
Mixer
-
Mixing bowl
-
Baking sheet
-
2 Pastry bags We used 16-inch pastry bags.
-
Large round piping tip for the cream puff shells
-
Small round piping tip We used a plain #12 for the filling.
-
Food safe paintbrush
Ingredients
For the cream puff shell:
- 1 cup water
- 4 oz stick butter 1 stick or 1/2 cup
- 2 tbsp sugar
- ⅛ tsp salt
- 1 cup all-purpose flour
- 4 eggs room temperature
- ½ tsp cinnamon
- Egg wash 1 egg + 1 tablespoon water
For the pumpkin pie filling:
- ¾ cup heavy whipping cream
- ⅔ cup pumpkin puree not pumpkin pie filling
- ½ cup whipped cream cheese
- ¼ cup powdered sugar
- 2 tsp pumpkin pie spice
- 1 tsp vanilla bean paste substitute vanilla extract
For the glaze (enough for 2 different colors):
- 1 ½ cup powdered sugar
- 2-3 tbsp water
- Gel food coloring optional
- Edible gold luster dust
Instructions
To make the cream puff shells:
-
In a medium saucepan, combine the water, butter, sugar, and salt and bring to a boil over medium-high heat.
-
Once the mixture comes to a boil, reduce heat to medium. Add all of the flour at once and quickly stir to combine until a smooth dough ball forms.
-
Stir the mixture constantly for about 2-3 minutes until the dough begins to pull away from the sides of your saucepan and leaves a thin film on the bottom. Allow to cool slightly.
-
Place the cooled dough ball into a mixing bowl. With a hand or stand mixer, begin mixing in your eggs one at a time on medium speed. Ensure each egg is well combined into the mixture before adding the next. Allow the mixture to cool for a few minutes if still warm.
-
Once all of your eggs have been added, mix in your cinnamon. You now have your Choux Pastry dough.
-
Transfer your dough into a piping bag, fitted with the large plain round tip.
-
Preheat your oven to 350°F (175°C), and line a baking sheet with parchment paper.
-
Pipe 2-inch circles of dough on the lined baking sheet. Keep them about 1.5 inches apart. If your puffs have little peaks, dab a clean finger in a little water to soften them.
-
Lightly brush each puff with egg wash, and bake in the oven at 350°F (175°C) for 12 minutes.
-
Then, raise the oven temperature to 425°F (220°C) and bake for another 10-13 minutes, or until golden brown and hollow. Allow the puffs to cool completely to room temperature before filling.
To make the pumpkin filling:
-
While your puffs are cooling, whip your heavy cream until stiff peaks have formed with a hand or stand mixer on medium speed.
-
In a separate bowl, combine the pumpkin puree, whipped cream cheese, powdered sugar, pumpkin pie spice, and vanilla bean paste until well combined.
-
Gently fold the whipped cream into your pumpkin mixture and add to a piping bag fitted with a small plain round tip.
To fill the cream puffs:
-
With a sharp paring knife, cut a small ‘x’ in the bottom of each puff and fill with the pumpkin pie mix. Place filled cream puffs in the fridge while you prepare the glaze.
Optional: To make the glaze:
-
In a bowl, add powdered sugar and mix in 1 tablespoon of water at a time until you achieve a smooth, thick consistency similar to a donut glaze.
-
Before dipping, separate the glaze and color with desired gel food colors if preferred.
-
Dip the top of each puff and allow it to dry completely before adding any food color splatters, sprinkles, or luster dusts.
Optional: To decorate the tops:
-
Sprinkle edible gold luster dust for a shimmery effect, or lightly dip the glazed tops into it.
Nutrition

We absolutely love seeing your culinary creations! Don’t forget to share your pumpkin cream puffs with us on Instagram using the hashtag #sugarandclothloves. For more quick and delicious recipes to inspire your next kitchen adventure, you can find them all right here!
40 Delicious Easter Desserts to Sweeten Your Celebration
Get inspired by these festive and easy-to-make Easter desserts that…
Continue Reading40 Delicious Easter Desserts to Sweeten Your Celebration
34 Decadent Desserts for Valentine’s Day
Sweeten up your celebration with these irresistible desserts for Valentine’s…
Continue Reading34 Decadent Desserts for Valentine’s Day
46 Delicious Thanksgiving Dessert Ideas to Sweeten Your Holiday
From classic pies to creative twists, these easy Thanksgiving dessert…
Continue Reading46 Delicious Thanksgiving Dessert Ideas to Sweeten Your Holiday
20 Best Bisquick Dessert Recipes
Check out our favorite Bisquick dessert recipes that are easy…
Continue Reading20 Best Bisquick Dessert Recipes