
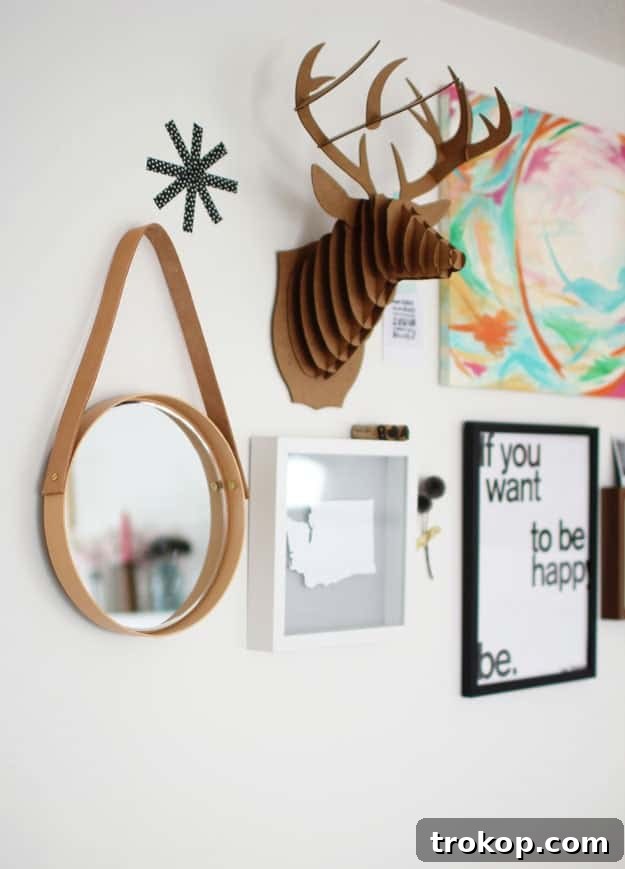
Unlock your inner interior designer and craft a breathtaking, designer-look wall mirror that will fool even the most discerning eye. This incredibly satisfying DIY project transforms a humble hat box, a sleek leather strap, and a dash of creativity into a sophisticated round hanging mirror. Forget about expensive tools or complex techniques – this accessible craft empowers anyone to create high-end home decor on a budget. It’s an artful blend of rustic charm and modern minimalism, making it a versatile accent piece for virtually any space.
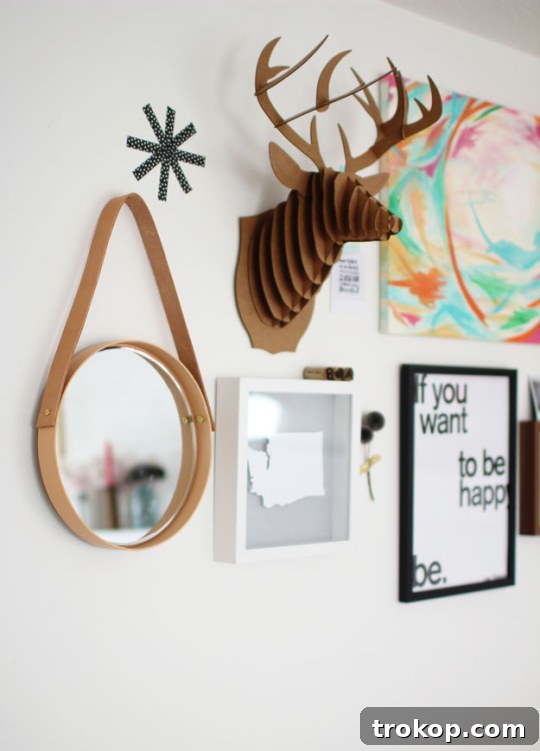
Are you searching for a unique, stylish, and surprisingly simple DIY project that will instantly elevate your living spaces? Look no further! This round mirror project truly hits all the right notes. By repurposing common items like a paper mache hat box, a basic round mirror insert, and a refined leather strap, you can construct an upscale hanging mirror that adds both character and light to your rooms. Imagine this exquisite piece gracing your entryway, bringing a touch of elegance to your bedroom, or revitalizing any blank wall that yearns for a bit of personality and flair.
What makes this DIY hanging mirror project even more appealing? It’s remarkably budget-friendly, making designer style accessible without breaking the bank. It’s also beginner-approved, meaning even those new to crafting can achieve impressive results. Best of all, it’s completely customizable. Whether your aesthetic leans towards a natural wood finish, a bold painted frame that pops, or a gently distressed look for vintage appeal, this clever hack allows you to tailor the mirror’s vibe to perfectly complement your existing home decor. Prepare to be immensely proud every time a guest inquires where you acquired such a chic piece, and you get to confidently reply, “Oh, I made it myself!” (A special thank you to Aileen of At Home in Love for the original inspiration!) For those who enjoy easy mirror projects, be sure to explore our other tutorials, including a fringe boho mirror, a sophisticated concrete vanity mirror, and a vibrant color block wall hanging mirror.
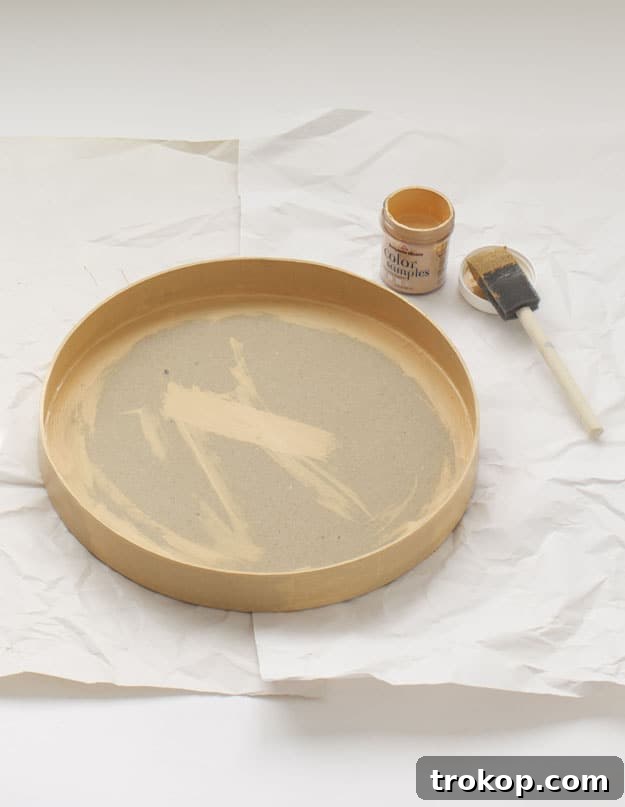
Table of Contents
Materials and Tools Needed for Your DIY Round Mirror Project
Gathering your materials is the first exciting step in bringing your vision to life. This project requires only a handful of accessible items, many of which you might already have or can easily source from local craft stores or online retailers. Choose your colors and finishes thoughtfully to ensure your finished mirror perfectly complements your home’s aesthetic.
- Round Paper Mache Hat Box Lid: The foundation of your mirror frame! We recommend a 12-inch Darice Hat Box from Joann for its ideal size and depth. The key is to find a lid deep enough to fully enclose your mirror insert without it protruding. A flush fit ensures a clean, professional, and polished appearance. You can often find similar options online here. Consider different sizes if you want a larger or smaller statement piece.
- Round Mirror Insert: This is the reflective heart of your project. A 12-inch round mirror, matching the diameter of your hat box lid, works perfectly. These are readily available at craft stores like Joann, or you can find comparable sizes online. Ensure the mirror’s thickness is appropriate for the hat box lid’s depth.
- Leather Belt Blank: This will form your elegant hanging strap. We used a natural hide tooling strap, 1.25 inches wide, sourced from Hobby Lobby. This width provides a sturdy yet stylish look. Alternatively, you can purchase one online. Before cutting, hold the blank up to your wall and the intended hanging spot to determine your desired strap length, allowing for some overlap for securing to the lid. You can also experiment with different leather colors or textures to match your desired aesthetic.
- Paint: Select a high-quality paint that either closely matches or beautifully contrasts with your chosen leather strap. Hardware stores offer a vast spectrum of shades, making it easy to find the perfect hue. A matte or satin finish often works best for a sophisticated, designer feel.
- Sponge Brush or Small Foam Roller: Essential for achieving a smooth, even, and streak-free finish on the paper mache surface of your hat box lid. These tools help prevent brush marks and ensure a professional look.
- Hole Punch (Standard): For creating small pilot holes in the hat box lid where the strap will be attached.
- Drill or Leather Hole Punch: A more robust tool needed to create clean, precise holes through the thick leather strap. Choose a drill bit size appropriate for your brass bolts. This type of tool will make the job much easier.
- Brass Hex Nuts and Bolts: These will securely fasten your leather strap to the mirror frame, adding a touch of industrial chic. Select a finish (e.g., polished brass, antique brass, black) that harmonizes with both your leather and paint color. Ensure the bolts are long enough to pass through both the leather and the hat box lid, with enough threading for the nuts.
- Superglue (or Strong Adhesive): Crucial for firmly adhering the mirror to the inside of the hat box lid. Look for a strong, fast-drying adhesive specifically designed for glass and paper or cardboard.
- Heavy Books or Weights: To apply even pressure while the mirror’s adhesive dries, ensuring a strong, lasting bond.
How to Make a DIY Round Mirror with a Leather Strap: Step-by-Step Instructions
Crafting your own designer-look hanging mirror is a straightforward and rewarding process. Follow these simple steps to create a beautiful, personalized piece of wall decor that will impress everyone.
1 — Prepare and Paint Your Hat Box Lid:
Begin by giving your hat box lid a fresh coat of paint. Using your sponge brush or small foam roller, apply a smooth, even layer of your chosen paint color to the outer sides and the top rim of the lid. There’s no need to paint the very center of the lid’s interior, as this area will be completely covered by your mirror. For best results, apply multiple thin coats rather than one thick one, allowing each coat to dry completely before applying the next. This technique prevents drips and ensures a perfectly smooth finish. Once painted, set the lid aside to dry thoroughly according to the paint manufacturer’s instructions.
2 — Attach the Leather Strap to the Lid:
First, carefully position your leather strap on the hat box lid to determine your desired hanging angle and the placement of the attachment points. Use a standard hole punch to create two small, evenly spaced pilot holes in the hat box lid where the strap will connect. Aim for symmetry to ensure your mirror hangs straight. Next, transfer these hole positions precisely onto the ends of your leather strap using a pen or marker. With a leather punch or drill, create clean holes in the strap at your marked points. Ensure the holes in the strap align perfectly with the holes in the hat box lid. Finally, thread your brass bolts through the strap and the lid, securing them firmly with the hex nuts on the inside of the lid. Make sure they are tightened securely, but avoid overtightening which could damage the hat box material.
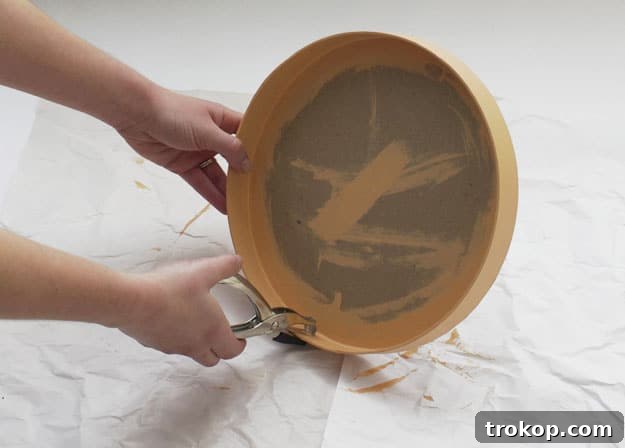
Punch 2 small holes in the lid where the strap will connect, ensuring they are symmetrical.
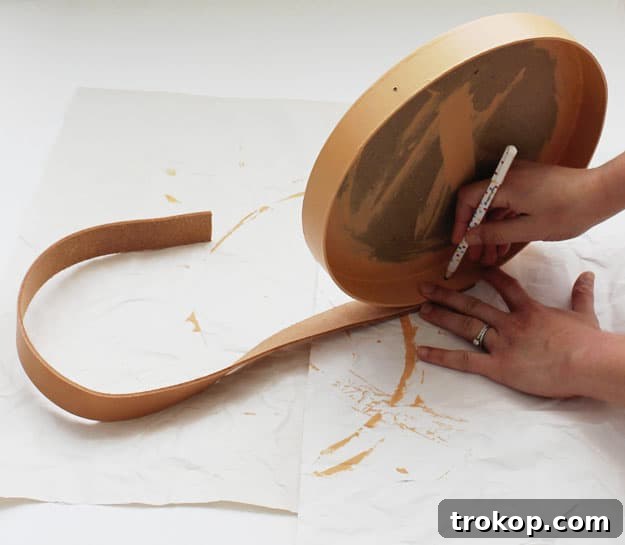
Mark those hole positions onto the ends of the leather strap using a pen for accurate placement.
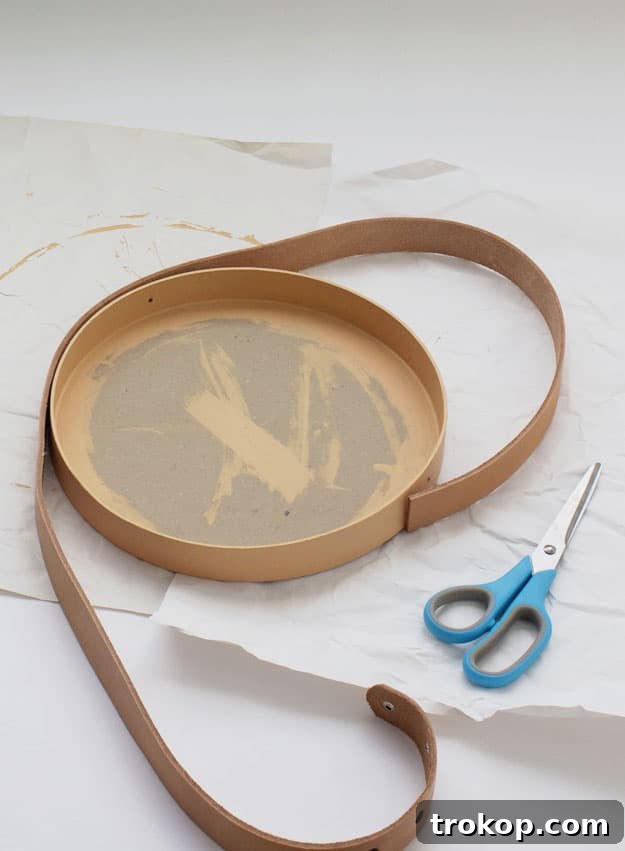
Use a leather punch or drill to make the holes in the strap, then secure it to the lid using brass bolts and hex nuts, ensuring a strong connection.
3 — Mount the Mirror Insert:
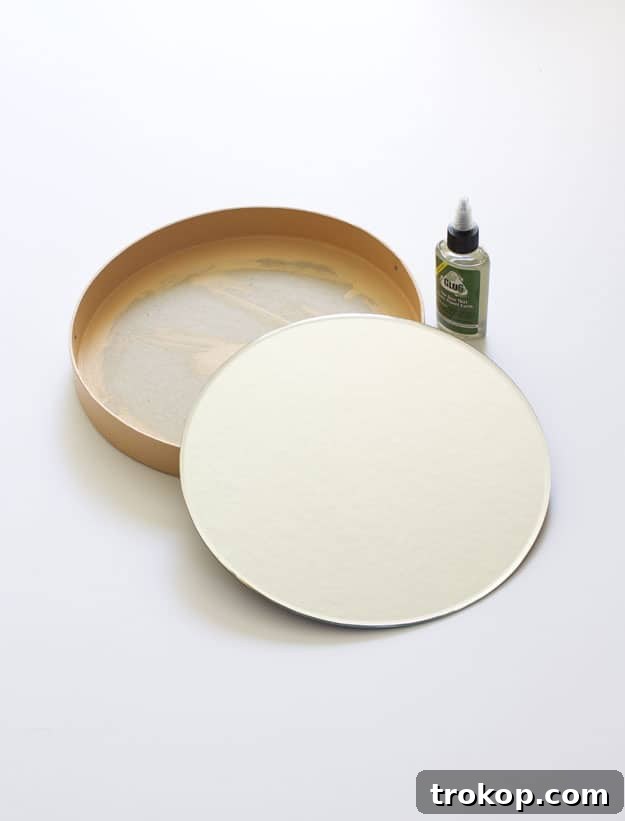
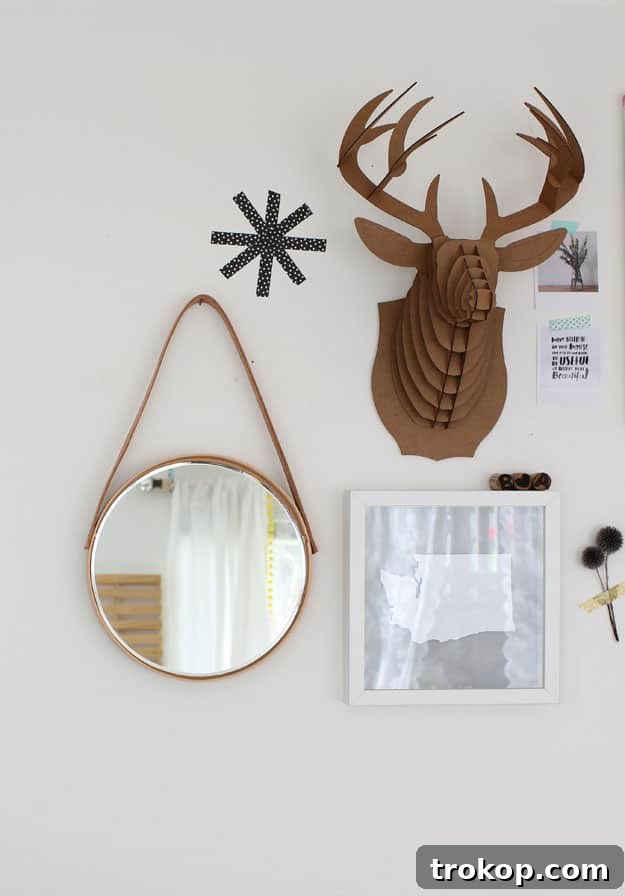
With the strap securely in place, it’s time to mount your mirror. Apply a generous amount of superglue or a strong adhesive specifically designed for glass to the back of your round mirror. Carefully center the mirror on the inside surface of the hat box lid, pressing it down firmly. Immediately place a few heavy books or other weights evenly across the surface of the mirror to apply continuous pressure. This ensures a strong, even bond as the glue dries. Allow the adhesive to cure completely, which can take several hours or even overnight, depending on the product instructions. Once the glue is thoroughly dry and the mirror is firmly secured, your stunning DIY hanging mirror is ready to adorn your walls. You’ll be amazed that this elegant piece started its life as a simple hat box!
Tutorial Notes and Tips for Your DIY Mirror Project
To ensure your DIY round mirror project goes smoothly and achieves the best possible result, keep these valuable tips and creative ideas in mind:
- Mirror Sizing Tip for Visual Impact: If your chosen mirror is slightly smaller than the hat box lid, don’t worry! You can use this to your advantage. Consider adding a painted or patterned backing behind the mirror before adhering it to create a beautiful layered effect that adds depth and visual interest. Alternatively, center the smaller mirror for a minimalist, floating look that highlights the hat box frame.
- Strap Placement is Key for Balance: Precision is crucial when attaching your leather strap. Before punching any holes, carefully measure and mark the exact positions where the strap will connect to the hat box lid. Ensure the holes are evenly spaced and perfectly aligned, perhaps using a ruler or a paper template, to guarantee that your finished mirror hangs perfectly straight and balanced on your wall.
- Creative Leather Alternatives: While a leather strap offers a classic, sophisticated look, don’t feel limited! If leather isn’t available or doesn’t suit your style, consider alternative materials. A robust canvas strap can offer a more casual or industrial vibe, while a thick rope could lend a nautical or bohemian touch. Even a sturdy, decorative ribbon could work for a lighter, more delicate mirror. Just be certain that your chosen material is strong enough to safely support the entire weight of the mirror.
- Hardware Hack for a Seamless Front: For an even cleaner and more polished appearance on the front of your mirror, consider using brass Chicago screws or dome cap nuts instead of standard hex nuts. These specialized fasteners offer a more finished, decorative look, concealing the raw edges of the bolts and adding an extra touch of craftsmanship.
- Secure Mounting Tip: The safety of your hanging mirror is paramount. Always use a heavy-duty wall hook or a picture hanger that is specifically rated to safely support the combined weight of your finished mirror (typically at least 5-10 lbs, but always check the mirror’s actual weight). Ensure the hook is properly installed into a wall stud or with appropriate drywall anchors.
- Unleash Your Creativity: Customization Possibilities are Endless: This simple design is a fantastic canvas for personalization!
- Color Blocking: Paint the hat box in bold, contrasting color blocks for a modern artistic statement.
- Metallic Accents: Add elegant gold leaf edging around the rim of the hat box or along the strap for a touch of glamour.
- Vintage Appeal: Distress the painted surface of the hat box with sandpaper for a charming, vintage or farmhouse-inspired look.
- Textural Elements: Glue on twine, fabric scraps, or small decorative elements to the frame.
- Pattern Play: Use stencils or freehand designs to paint intricate patterns on the hat box.
The minimalist structure of this DIY mirror allows for incredible flexibility in styling, ensuring your creation truly reflects your unique taste.
More Creative Wall Decor DIYs to Inspire You
If you’ve enjoyed crafting this stylish hanging mirror, you’ll love exploring these other inspiring DIY wall decor projects:
- DIY Rainbow Art Wall Hanging: Add a burst of color!
- DIY Floral Embroidery Ring Backdrop: Elegant and botanical.
- Abstract Shapes DIY Fabric Wall Art: Modern and artistic.
- DIY Geometric Metal Wall Hang: Sleek and contemporary.
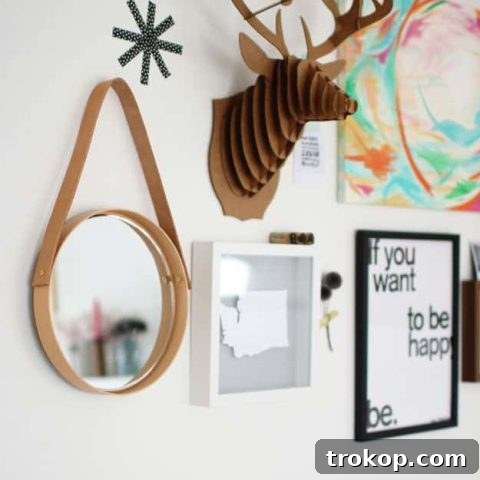
Round Mirror with Leather Strap: Project Overview
Craft a designer-look wall DIY round mirror using a hat box, leather strap, and your creativity. This project is perfect for adding a touch of modern elegance to any room without requiring heavy tools or a significant budget.
1 hr
1 hr
DIY Home Decor
Mirrors, Wall Art
Equipment
- Sponge brush or foam roller
- Standard hole punch
- Drill or specialized leather hole punch
- Superglue or strong adhesive for glass
- Heavy books or weights
Materials
- 1 round mirror (approx. 12″ wide)
- 1 paper mache hat box lid (approx. 12″ wide)
- 1 leather belt blank (1.25″ wide, cut to your desired hanging length)
- 2 brass hex nuts and bolts
- Paint (chosen to match or complement your leather)
Instructions
- Paint the hat box: Apply paint evenly to the lid and outer sides of the hat box. Avoid painting the center of the lid’s interior, as the mirror will cover this area. Allow ample time for the paint to dry completely between coats and before proceeding.
- Attach the strap to the lid (Part 1): Using a standard hole punch, create two small holes in the hat box lid where the leather strap will be secured. Ensure these holes are positioned symmetrically for balanced hanging.
- Attach the strap to the lid (Part 2): Place the ends of your leather strap over the holes you just punched in the lid. Use a pen to mark the exact locations onto the strap. Then, use a leather punch or a drill to create corresponding holes in the leather strap.
- Attach the strap to the lid (Part 3): Securely attach the painted leather strap to the hat box lid using the brass bolts and hex nuts. Ensure all connections are tight and stable.
- Mount the mirror: Apply a strong superglue or adhesive to the back surface of your round mirror. Carefully center the mirror onto the inside of the hat box lid. Place several heavy books or other weights on the mirror to apply even pressure while the adhesive cures completely. Once dry, your elegant new mirror is ready to hang!
$60
DIY round mirror, hanging mirror, leather strap, home decor, craft project

Explore More Inspiring Decor Ideas
43 Top Amazon Wall Decor Ideas for Every Room in Your Home
Discover gorgeous Amazon wall decor finds that make a big impact without the big price tag. Transform your spaces effortlessly!
Continue Reading
28 Decorative Wall Mirrors You’ll Wish You Bought Sooner
Searching for the perfect statement wall mirror? Explore our curated roundup of stunning decorative mirrors that will transform your room.
Continue Reading
25 Large Wall Clocks for Your Living Room: Time-Honored Style
On the hunt for an extra-large wall clock to make a statement? Discover stylish and functional timepieces for your living room.
Continue Reading
19 Unique & Easy Houseplants that We’re Loving
Looking to add some unique greenery to your home? Dive into our comprehensive guide to easy-to-care-for and distinctive houseplants.
Continue Reading