
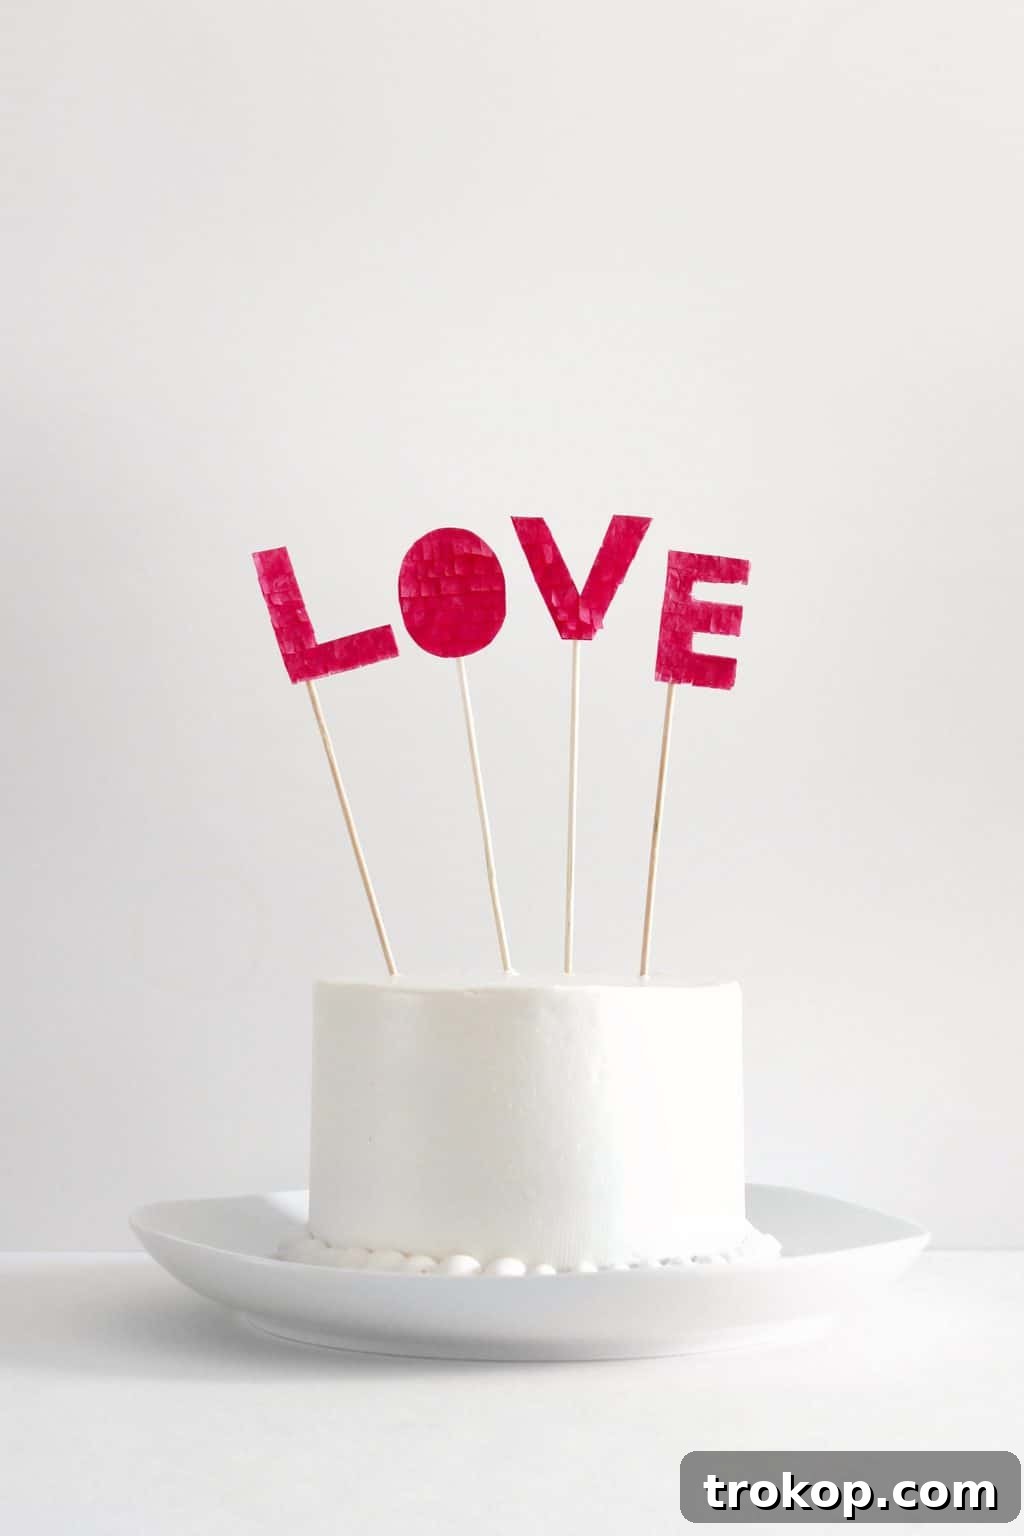
Welcome to the enchanting world of DIY crafts, where a sprinkle of creativity can transform any celebration! This guide unveils the magic behind crafting a beautiful DIY Fringed Love Cake Topper, a delightful addition perfect for Valentine’s Day, anniversaries, birthdays, or any occasion that calls for a touch of personalized charm. Forget generic store-bought decorations; this simple, handmade topper promises to add a unique, heartfelt flourish to your desserts, making every moment sweeter and more memorable.
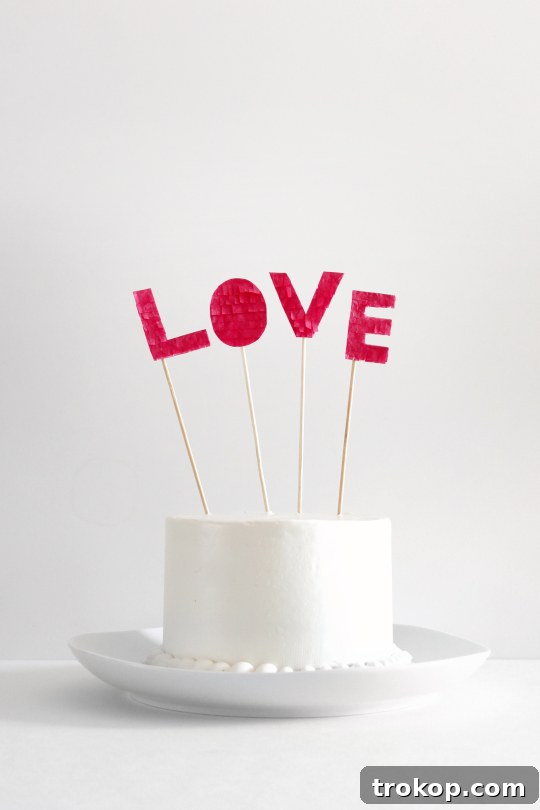
As Valentine’s Day approaches, or perhaps a special anniversary or birthday, finding that perfect gesture to express your affection can feel like a last-minute scramble. Look no further! This easy-to-follow tutorial for a DIY Fringed Love Cake Topper offers an incredibly thoughtful and impactful way to show you care. In just about 30 minutes, you can craft a bespoke decoration that speaks volumes without uttering a single word.
Imagine this scenario: you acquire a delicious cake (whether you bake your own masterpiece like this delightful raspberry cake or pick up a gourmet treat from your favorite bakery), adorn it with this charming, handmade topper, and leave it as a sweet surprise for your loved one. The personal touch of a DIY creation instantly elevates the sentiment, showcasing effort and affection that resonates far deeper than any off-the-shelf item. Plus, you get to enjoy the cake too – a truly win-win situation in our book!
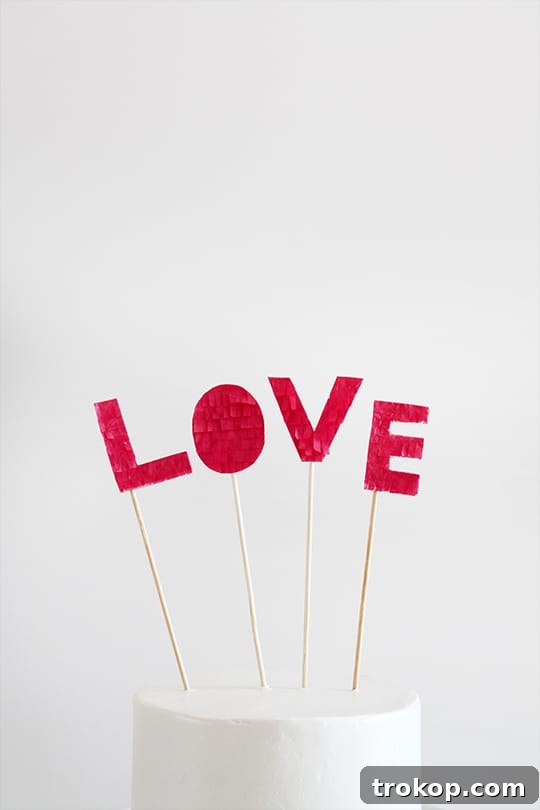
Table of Contents
Materials and Tools Needed
Gathering your supplies is the first exciting step in any DIY project. For this delightful fringed cake topper, you’ll need just a few readily available items. The beauty of this craft lies in its simplicity and the ability to customize your materials to perfectly match your theme or recipient’s preferences.
- Red or pink tissue paper: These colors are perfect for conveying love and warmth, making them ideal for Valentine’s Day or romantic celebrations. However, feel free to experiment with any color palette to suit different occasions – vibrant blues and greens for a birthday, pastels for a baby shower, or shimmering metallics for a sophisticated anniversary. The thin, delicate nature of tissue paper is crucial for achieving that light, airy fringe effect.
- Fringing scissors: While not strictly essential, fringing scissors are a game-changer for this project. They feature multiple blades that cut several parallel strips at once, significantly speeding up the fringing process and ensuring uniform cuts. If you’re a keen crafter, these are a worthwhile investment.
- Scissors: A standard pair of sharp scissors will be needed for cutting your cardstock and general trimming. If you don’t have fringing scissors, a good, sharp pair will also work for the tissue paper fringe, though it will require a bit more patience and precision.
- Cardstock: This will form the sturdy base for your letters. Choose a cardstock that is firm enough to hold its shape when covered with fringe and stood upright on sticks. White or a neutral color is often best, as it will be largely covered by the tissue paper, but a complementary color could also peek through for added visual interest.
- Glue: A reliable craft glue or strong liquid adhesive is essential for securely attaching the tissue paper fringe to the cardstock and the finished letters to the kabob sticks. Ensure it dries clear to maintain a neat finish.
- Kabob sticks: These thin wooden sticks will serve as the supports for your cake topper, allowing it to stand proudly above your cake. You can find them in various lengths at most grocery stores or craft shops. Their natural wood finish provides a rustic charm, but you could also paint them to match your topper for an extra touch.
How to Make a DIY Fringed Love Cake Topper
Creating this fringed cake topper is a wonderfully rewarding experience, yielding a professional-looking decoration with minimal effort. Follow these simple steps to bring your personalized message to life:
1 — Prepare Your Cardstock Bases: Begin by cutting four uniform squares from your chosen cardstock. The size of these squares will determine the ultimate size of your letters. Aim for squares that are approximately 3-4 inches (7.5-10 cm) on each side for a standard cake, but feel free to adjust based on your cake’s dimensions and your desired visual impact. Uniformity is key here to ensure all your letters are consistently sized and proportioned, creating a cohesive topper.
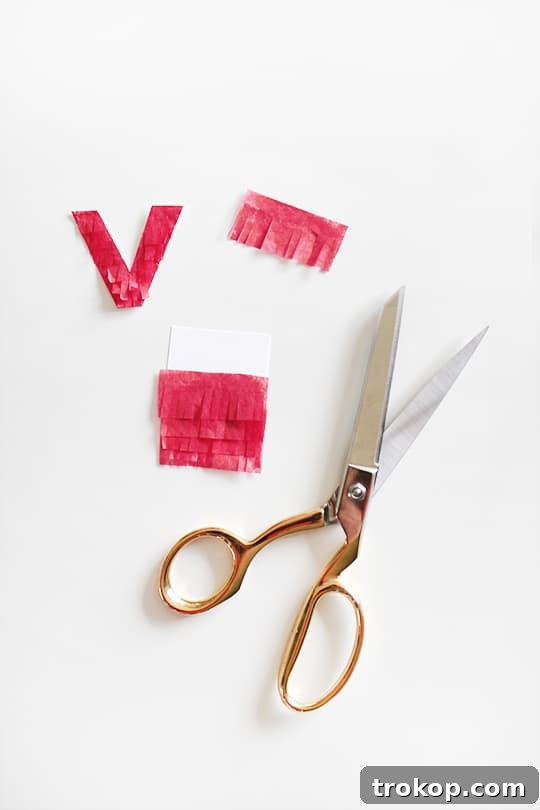
2 — Craft the Delicate Fringe: Next, take your tissue paper and cut it into small, straight strips. These strips should be roughly 1-2 inches (2.5-5 cm) wide and as long as your cardstock squares. Now comes the fun part: using your fringing scissors, carefully cut fringe along one long edge of each tissue paper strip. If you don’t have fringing scissors, a regular pair of sharp scissors will do the trick – just exercise patience and cut small, even snips, leaving about a quarter-inch (0.6 cm) intact along the top edge. The goal is to create a delicate, feathery texture that will give your topper its unique charm. The length of your fringe cuts will influence the fluffiness of your letters, so experiment with shorter or longer cuts if you wish.
3 — Apply the First Layer of Fringe: Take one of your cardstock squares. Apply a thin line of glue along the very bottom edge of the square. Carefully position the unfringed edge of your first tissue paper strip onto this glue line, pressing down gently to ensure it adheres securely. Make sure the fringe hangs downwards, extending slightly below the cardstock edge to give a nice base to your letter.
4 — Layer for Fullness: Continue to apply strips of fringe piece by piece, working your way upwards on the cardstock square. For each subsequent strip, apply glue just above the previous layer of fringe, overlapping the strips slightly. This overlapping technique is crucial for building volume and creating that lush, full fringed effect. Ensure each layer is evenly spaced and covers the adhesive line of the previous strip. The more layers you add, the denser and more luxurious your fringe will appear.
5 — Allow to Dry Thoroughly: Once you’ve covered an entire cardstock square with fringe, set it aside to dry completely. This step is vital to prevent the fringe from shifting or detaching when you cut out your letters. Depending on the type of glue you use and the humidity, this could take anywhere from 15 minutes to an hour. Repeat steps 2-5 for all four of your cardstock squares until each one is beautifully fringed and dry.
6 — Cut Out Your Letters: This is where your message takes shape! If you’re concerned about cutting letters freehand, turn your dry, fringed square over so the plain cardstock side is facing up. Using a pencil, carefully trace your desired letter (e.g., ‘L’ for “LOVE”) onto the back, ensuring you draw it as a mirror image (backwards). This way, when you cut it out and flip it over, the letter will be correctly oriented with a clean, un-fringed edge for a professional finish. Alternatively, if you’re confident in your freehand skills, simply cut out your letter shape directly from the fringed side, being mindful of the fringe. Spell out “LOVE” or choose any message that resonates with your occasion, such as “BABE,” “YAY,” “MY BOO,” “HBD” for Happy Birthday, “CONGRATS,” “HELLO,” or even initials or numbers for specific anniversaries or birth years. Experiment with different fonts – block letters are generally easier to cut and provide a sturdy base for the fringe.
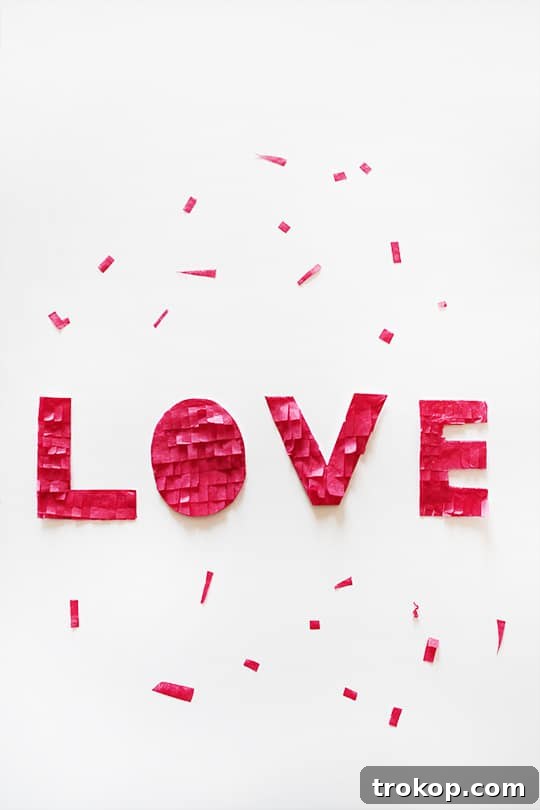
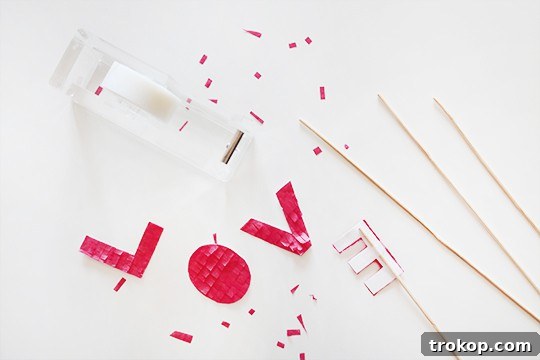
7 — Prepare Your Kabob Sticks: Take your kabob sticks. If they are quite long and would dwarf your cake or topper, simply cut them in half using strong scissors or a small craft knife. The ideal length will allow the letters to stand proudly above the cake without being too wobbly or too short. You might even want to trim them to varying heights to create a dynamic, tiered look for your message.
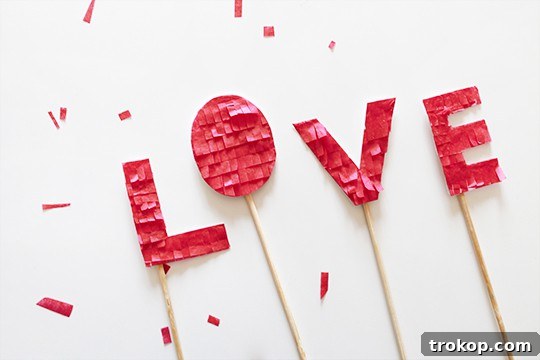
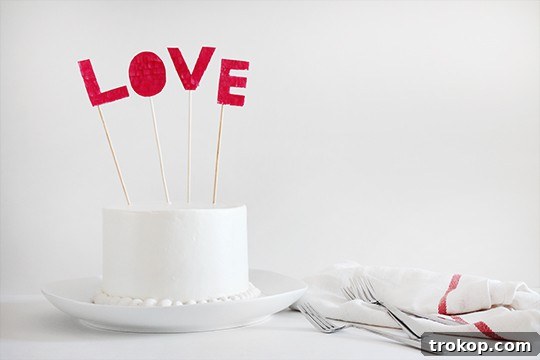
8 — Assemble Your Topper: Once all your letters are cut and your sticks are prepared, it’s time for assembly. Turn each fringed letter over to its plain cardstock side. Securely tape or glue the kabob stick to the back of each letter. For a quick fix, clear craft tape works well. For a more permanent and robust attachment, a strong liquid glue is recommended. Position the stick so that the letter is balanced and will stand upright. Ensure the glue is completely dry before proceeding. Finally, gently insert the finished letter sticks into your cake, arranging them to spell out your heartfelt message. Space them evenly for the best visual appeal, and admire your beautiful, handmade creation!
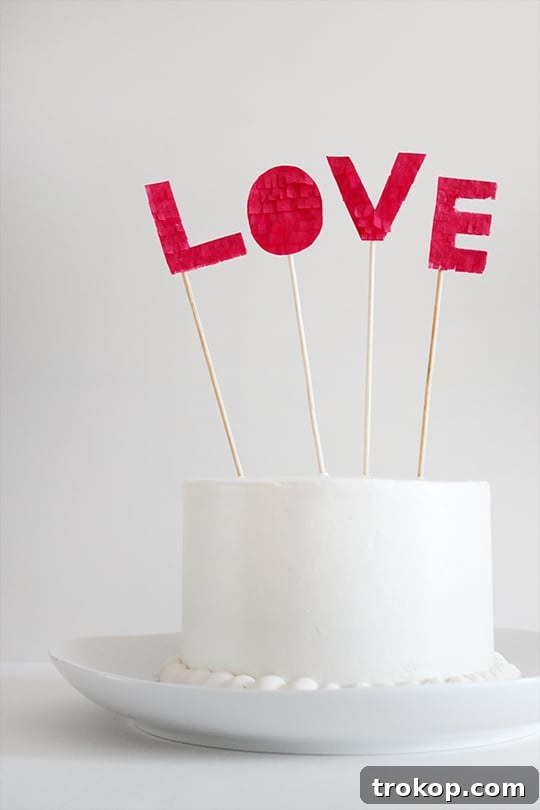
Tips for Success & Customization:
- Color Palette: While red and pink are classic for love-themed toppers, don’t limit yourself! Use pastels for a baby shower, bright primary colors for a child’s birthday, or sophisticated metallics like gold and silver for a milestone anniversary.
- Message Versatility: Beyond “LOVE,” consider “HAPPY BIRTHDAY,” a person’s name, “CONGRATS,” “GRAD,” or even numbers for age-specific celebrations. This craft is incredibly adaptable to any message you want to convey.
- Fringe Texture: Experiment with different types of paper for your fringe. While tissue paper creates a soft, delicate look, crepe paper can offer a more defined, crinkly fringe, and even thin foil gift wrap could add a festive sparkle.
- Adhesive Control: Use glue sparingly to avoid saturating the delicate tissue paper. A thin, even layer is all you need for a secure bond.
- Handle with Care: Once assembled, these toppers are delicate. Handle them gently to avoid crushing the fringe. Store them flat in a box if preparing them in advance.
This DIY Fringed Love Cake Topper is more than just a decoration; it’s a labor of love, a tangible expression of care that will surely delight. It’s a fantastic way to personalize any dessert, transforming an ordinary cake into a centerpiece of joy and affection. So, gather your materials, unleash your inner crafter, and get ready to impress with this charming and unique creation!
Looking for more dessert inspiration to pair with your stunning new cake topper? Explore some of our other delectable recipes and festive ideas:
Baileys Tiramisu Crepe Cake Recipe
Infused with Baileys and using crepes as a twist on a classic, this Tiramisu Crepe Cake is a showstopper that combines rich flavors with a delicate texture. It’s the perfect elegant dessert for any special occasion, offering a sophisticated alternative to traditional cakes.
Continue ReadingBaileys Tiramisu Crepe Cake Recipe
40 Delicious Easter Desserts to Sweeten Your Celebration
Get inspired by these festive and easy-to-make Easter desserts that range from classic to creative. Whether you need a quick treat or a showstopping finale for your holiday meal, this collection has something to satisfy every sweet craving.
Continue Reading40 Delicious Easter Desserts to Sweeten Your Celebration
34 Decadent Desserts for Valentine’s Day
Sweeten up your celebration with these irresistible desserts for Valentine’s Day. From rich chocolates to fruity delights, this curated list provides a wide array of decadent recipes perfect for sharing with your special someone, ensuring a truly memorable romantic treat.
Continue Reading34 Decadent Desserts for Valentine’s Day
Gingerbread Muffin Recipe with Lemon Glaze
Add a touch of spice to your breakfast or snack time with this delightful Gingerbread Muffin Recipe, perfectly complemented by a zesty lemon glaze. These muffins are wonderfully moist and flavorful, making them a comforting treat during the colder months or a delightful addition to any brunch spread.
Continue ReadingGingerbread Muffin Recipe with Lemon Glaze