
Craft Your Own Cognac Leather Woven Stool: A Step-by-Step DIY Guide for Elegant Home Decor
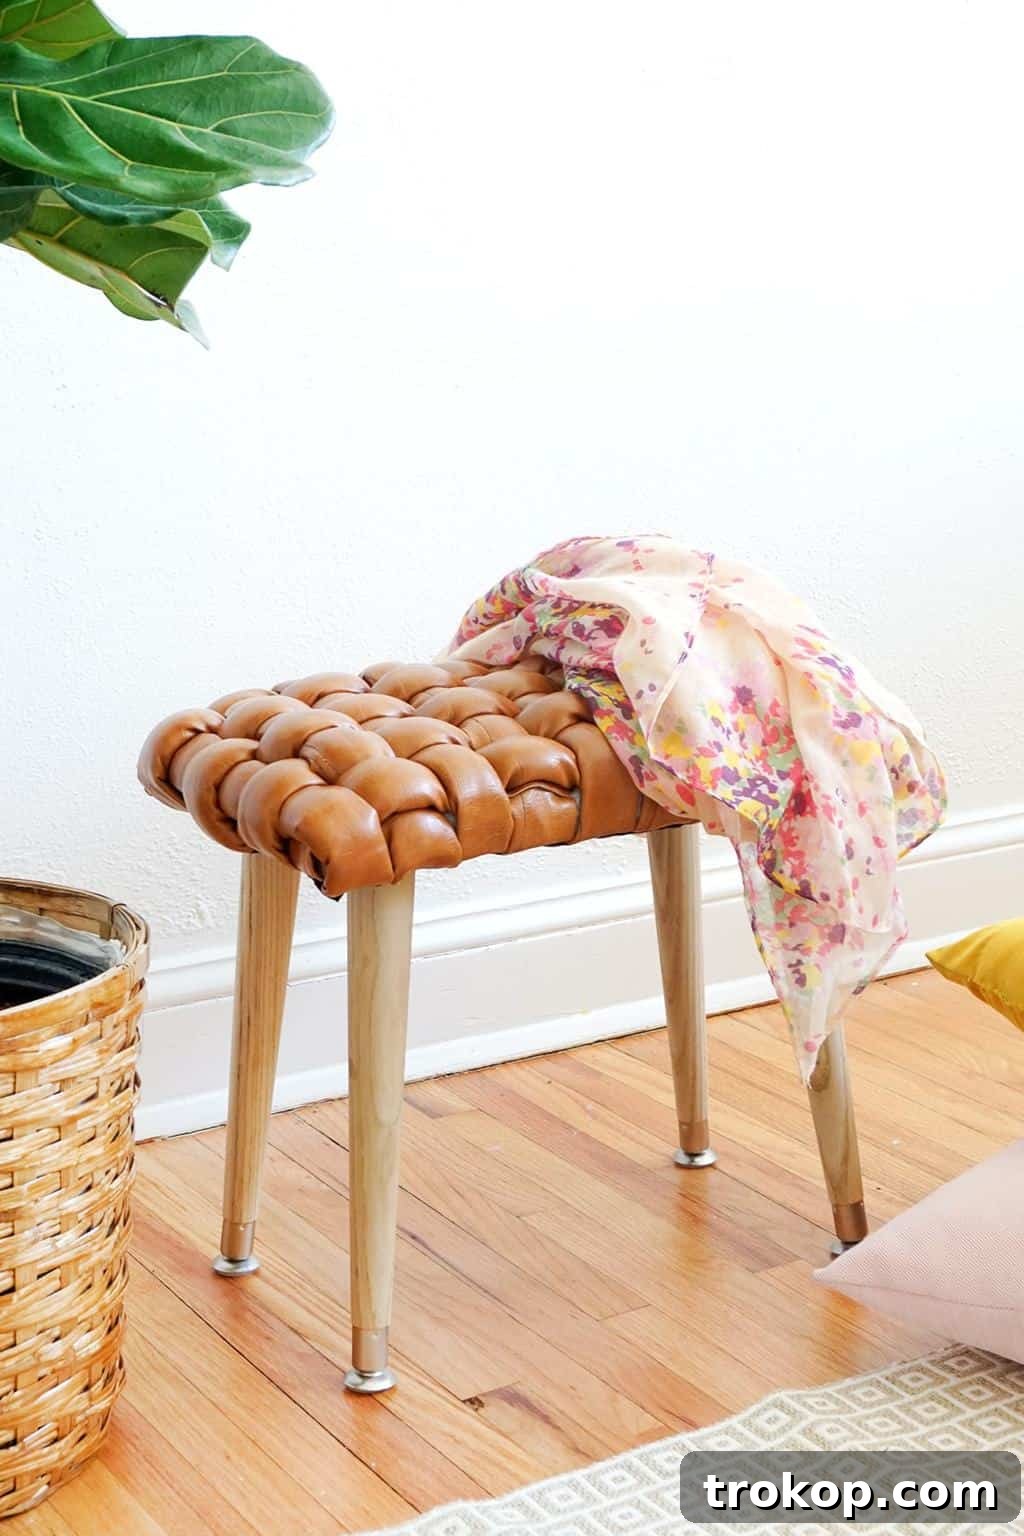
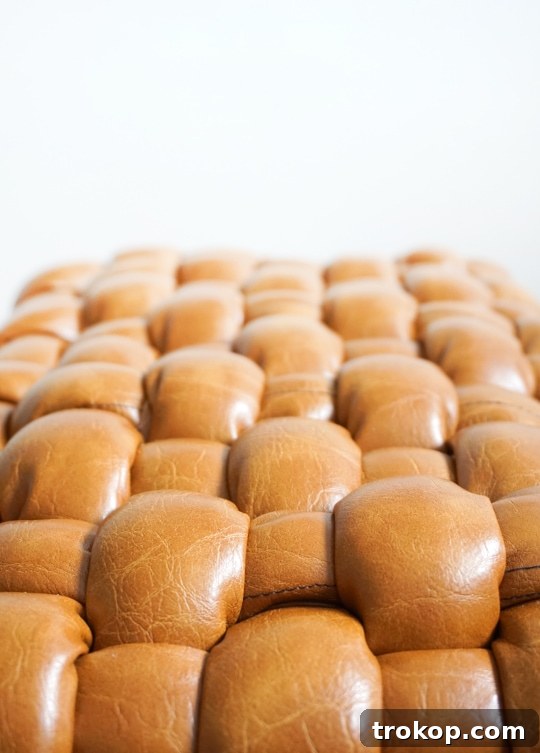
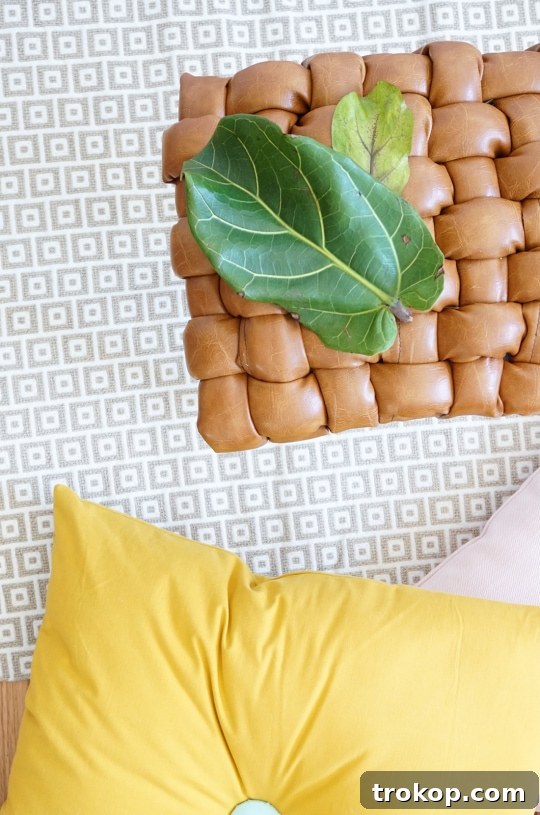
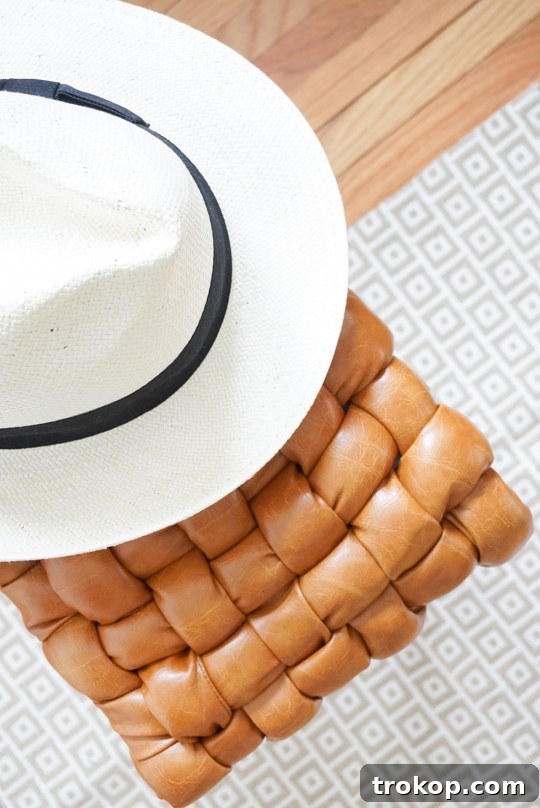
Transform your living space with a touch of custom elegance by crafting your very own DIY Woven Leather Stool. This step-by-step tutorial is designed to help you create a piece so chic and professional-looking, everyone will assume it’s a high-end store purchase. Embrace the satisfaction of handmade decor and infuse your home with a unique blend of rustic charm and modern sophistication.
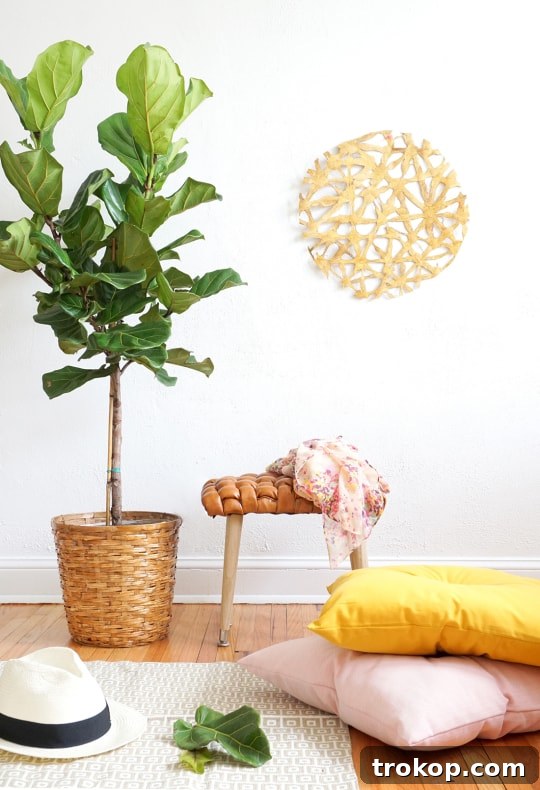
The allure of cognac-hued leather has taken the design world by storm, especially when it comes to luxurious sofas and accent pieces. While a new leather sofa might not be within everyone’s immediate budget, the desire to incorporate this warm, inviting tone into our homes is undeniable. As avid DIY enthusiasts, we understand the thrill of achieving a designer look without the hefty price tag.
That’s where this ingenious DIY Woven Leather Stool project comes in. It’s the perfect solution for satisfying that cognac leather craving. With a little creativity and some carefully selected materials, you can craft a functional and fashionable furniture piece that adds character and warmth to any room. If you’re eager to introduce the sophisticated charm of cognac leather into your home without breaking the bank, then this hands-on project is tailor-made for you!
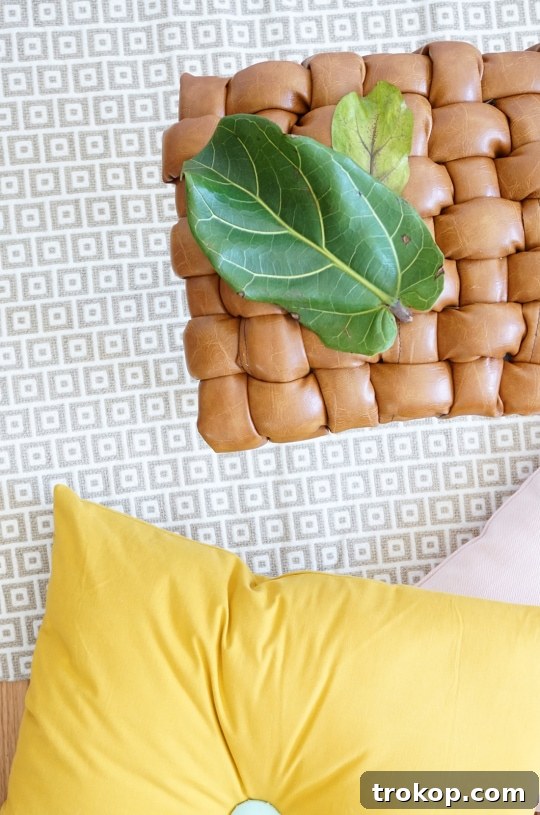
Table of Contents
Why DIY a Woven Leather Stool?
Crafting your own furniture isn’t just a hobby; it’s a statement. In an era of mass-produced goods, a DIY woven leather stool offers unparalleled benefits. Firstly, it provides a cost-effective alternative to expensive designer pieces. You get to choose your materials, ensuring quality and sustainability if you opt for ethically sourced leather or high-quality faux alternatives. Secondly, personalization is key. You’re not limited to existing designs or color palettes; you can customize every aspect to perfectly match your home’s aesthetic. From the shade of cognac to the style of the legs, your stool will be truly one-of-a-kind. Lastly, there’s immense satisfaction in creating something beautiful and functional with your own hands. This project is not only an opportunity to enhance your home decor but also to build new skills and unleash your inner artisan.
Materials Needed to Make a DIY Woven Leather Stool
Before diving into the weaving magic, gather all your essential tools and materials. Having everything ready will streamline your crafting process and ensure a smooth, enjoyable experience. For this project, we’ve carefully selected materials that offer both durability and a luxurious finish.
- 1/2” – 1” thick MDF or plywood board: Cut to 9” width x 15” length dimensions. This will form the sturdy base of your stool. MDF is a cost-effective choice that is easy to cut and work with, while plywood offers greater strength and screw-holding ability.
- 1 yard of faux leather or real leather: We recommend a rich cognac hue to capture that desired designer look. Specifically, the faux leather in San Fran Caramel is an excellent choice for its appearance and workability. Faux leather is often more affordable and easier to maintain, while real leather offers unmatched durability and a unique patina over time.
- 9 yards of 1” diameter piping cord filler: This crucial material gives the leather strips their plump, woven texture. You can typically find this at most fabric or craft stores. Ensure it’s firm enough to hold its shape but flexible enough to sew around.
- Synthetic fiber batting: Provides cushioning and comfort for the stool’s seat. Choose a medium-density batting for a balanced feel.
- Sewing machine: Essential for encasing the cording within the leather strips. Any standard home sewing machine capable of handling medium-weight fabrics will work.
- Basic sewing supplies: Pins, sharp fabric scissors, strong polyester thread (matching or contrasting, as desired), and a white colored pencil or tailor’s chalk for marking.
- Staple gun + ½” Staples: For securely attaching the leather strips and batting to the board. An electric staple gun can make this process quicker and less strenuous.
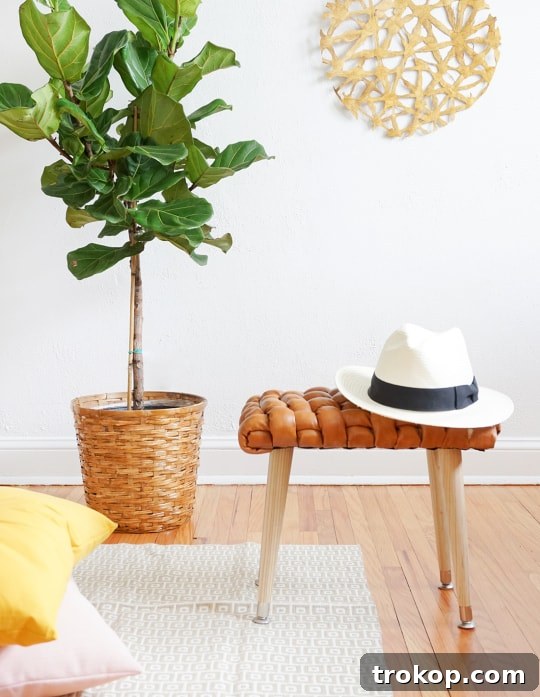
- 4 of these 12” tall tapered wood legs: Tapered legs offer a sleek, mid-century modern aesthetic that perfectly complements the woven leather.
- 4 of these Angled leg brackets: These brackets allow you to attach the tapered legs at a slight angle, enhancing both the style and stability of the stool.
- Lightweight cotton fabric: Optional, but highly recommended for creating a clean, finished look on the underside of your stool.
How to Make a DIY Woven Leather Stool
Creating your woven leather stool is a rewarding process that combines sewing and basic carpentry skills. Follow these detailed steps to craft your masterpiece.
Step-by-Step: Creating Your Leather Cording Strips
- Cut Faux Leather Strips: Carefully cut your faux leather into two sets of 4-inch wide strips. You will need seven strips that are 29 inches long and ten strips that are 18 inches long. Precision here is key for a uniform weave.
- Cut Cording: Similarly, cut your piping cord filler. You’ll need seven strips that are 26 inches long and ten strips that are 15 inches long.
- Prepare for Cording Encasement: Once both your faux leather and cording are cut, you’re ready to start encasing the cording within the leather strips. This process will give your strips their desired plumpness and professional finish.
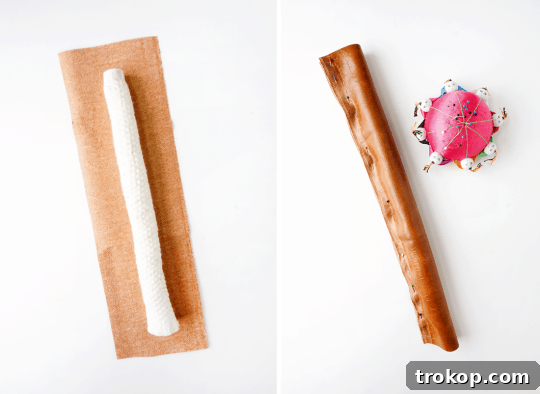
- Center and Fold Short Strips: Take the shorter cording strips and center each one precisely along the length of its corresponding short faux leather strip. Fold the faux leather strip in half lengthwise, encasing the cording securely inside.
- Pin into Place: Use sewing pins to hold the folded faux leather in place around the cording. Ensure the cording remains centered and the leather edges are aligned.
- Repeat for Longer Strips: Perform the same centering, folding, and pinning process for the longer faux leather strips and cording.
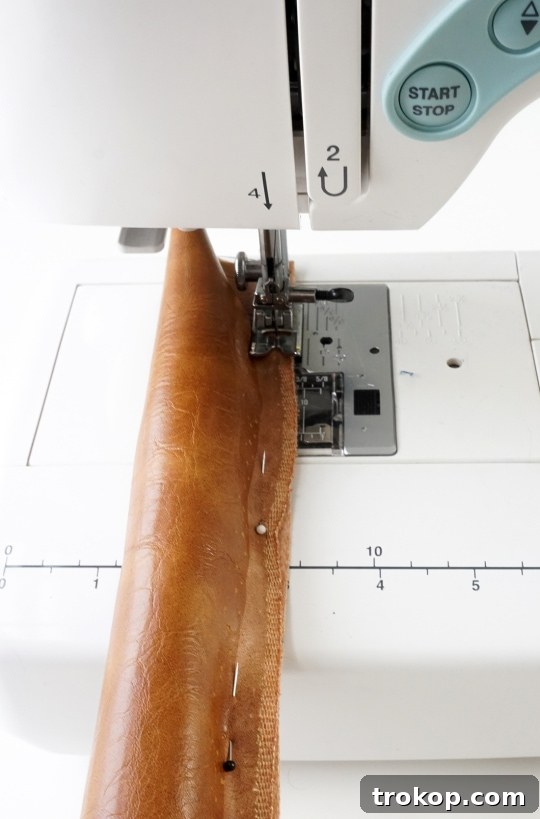
- Thread Your Sewing Machine: Thread your sewing machine. For a subtle, integrated look, use a thread color that matches your faux leather. For a more distinctive, handmade aesthetic, a contrasting thread color (like the one we used) can add a charming detail. Adjust your needle position to be as close to the leather cording as possible without sewing through it. This will create a tight, professional finish.
- Sew a Straight Stitch: Begin sewing a straight stitch along the length of each cording strip, carefully removing pins as you go. Maintain a consistent seam allowance and tension to ensure even results.
- Repeat for All Cordings: Continue this sewing process for all seven long and ten short cording strips until each is perfectly encased in faux leather.
Step-by-Step: Assembling Your Woven Stool Base
- Position Leg Brackets: Place the angled leg brackets at each corner of your MDF or plywood board. These brackets will provide the foundation for your stool’s legs.
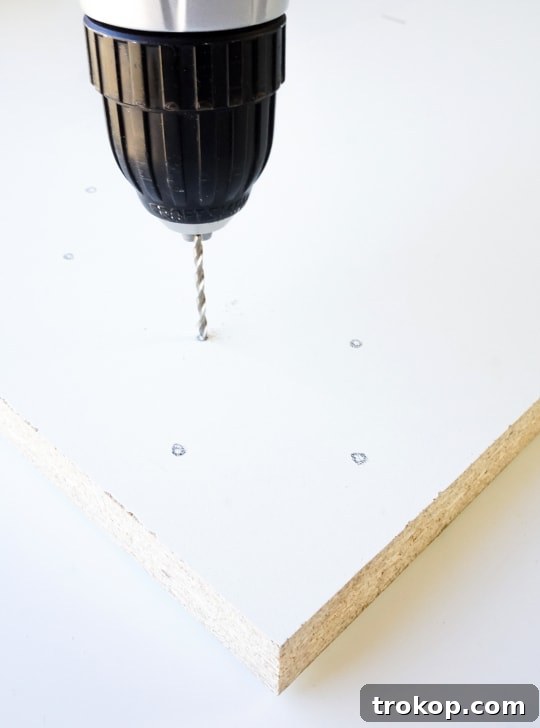
- Mark and Pre-Drill Holes: Using a pencil, mark the precise locations for the screw holes of each bracket. Then, pre-drill pilot holes to prevent the wood from splitting when you screw in the brackets later. This ensures a clean and secure attachment.
- Flip the Board: Turn the board over so the top surface is facing upwards.
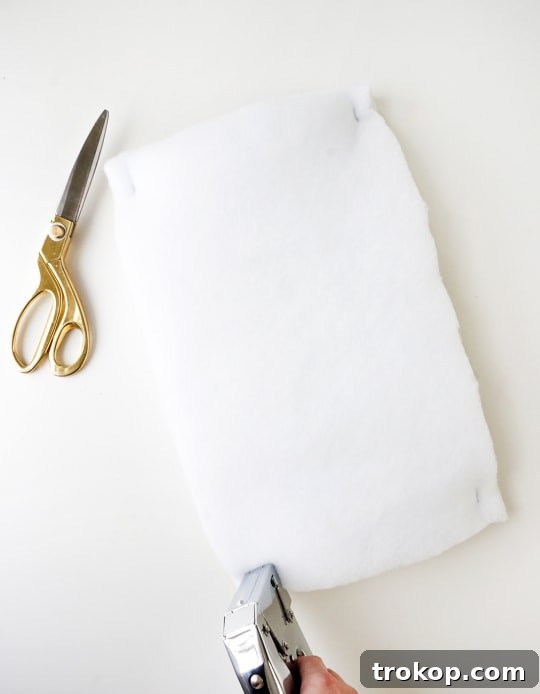
- Attach Batting: Cut four layers of synthetic fiber batting to the same size as your board. Layer them evenly on the top surface. Secure the batting to the board with a staple in each corner to hold it in place temporarily. This batting provides the comfortable, cushioned surface for your woven seat.
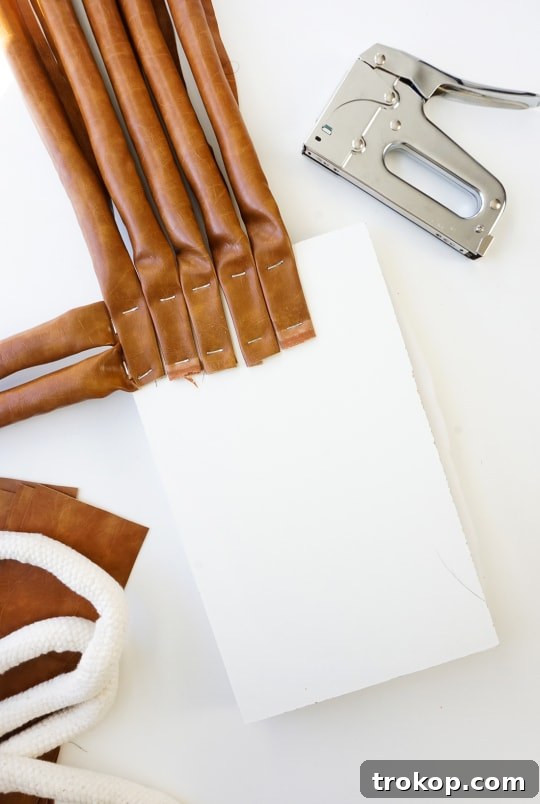
- Staple Initial Leather Strips: Flip the board back over so the underside is facing up. Begin stapling the seven long leather strips along the underside of one of the shorter edges of the board. Position them evenly spaced, ensuring about 1.5 inches of space between each strip. Next, staple the ten short leather strips along the underside of one of the longer edges of the board, again ensuring even spacing. Pull each strip taut before stapling to minimize slack.
- Orient for Weaving: Flip the board over again, so the batting-covered side is facing up. Lay the long strips (your warp) across the length of the board. These strips will run lengthwise from one stapled edge to the other.
- Understand Weaving Basics: If you’re new to weaving, think of the long strips running lengthwise as your “warp” and the shorter strips running right to left as your “weft.” You’ll be creating a simple basket weave pattern.
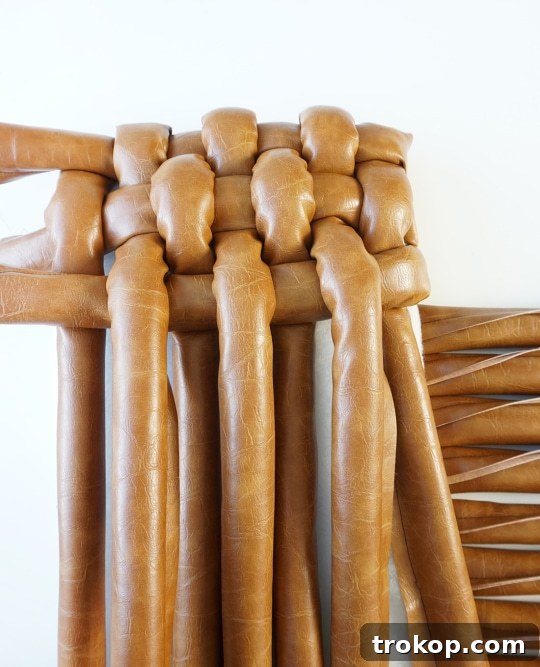
- Begin Weaving: Start weaving the shorter (weft) strips through the longer (warp) strips using an “over one, under one” basket weave technique. Ensure you push the shorter strips tightly back towards the top (the stapled edge) as you weave. Pull everything very tight as you go to create a firm, taut woven surface. The tighter your weave, the more professional and durable your stool will be.
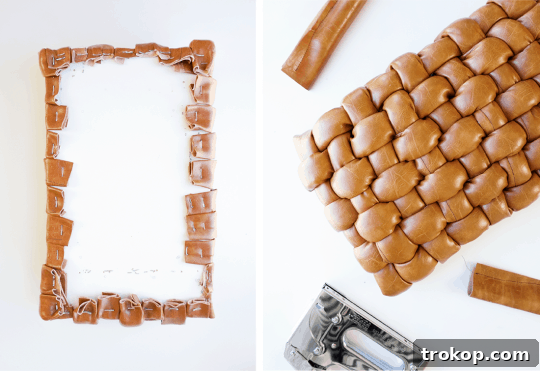
- Secure Weft Cords: After you have woven in approximately three short (weft) strips, flip the board over. Staple these three woven weft cords securely to the bottom side of the board, near the edge where they emerge. This helps maintain tension and prevents the weave from shifting. Repeat this process as you weave more strips.
- Embrace Handmade Charm: Don’t worry if your contrast stitching shows a bit; this actually adds to the unique, handmade quality and character of your woven stool. It’s a testament to your craftsmanship!
Step-by-Step: Finishing Touches and Leg Attachment
- Complete the Weaving: Continue the weaving process until the entire top surface of the stool is covered with the tightly woven leather strips. Ensure all gaps are minimized and the weave is consistent.
- Secure Warp Strips: Once the weaving is complete, finish by pulling the remaining long (warp) strips taut and stapling them to the bottom side of the board. Trim any excess leather if necessary.
- Clear Bracket Holes: Carefully cut back any leather strips that may be covering your pre-drilled bracket holes. Re-staple any loosened strips if needed to maintain a tidy underside.
- Conceal the Underside (Optional): At this stage, you may choose to conceal the stapled underside of the stool with a piece of lightweight cotton fabric. While optional, this step creates a much cleaner and more finished-looking piece, elevating its overall craftsmanship.
- Cut and Prepare Fabric Cover: If you choose the optional step, cut a piece of lightweight cotton fabric 1-2 inches larger than the dimensions of your board.
- Fold and Iron Edges: Fold the raw edges of the fabric under, creating clean hems so that the fabric is precisely the size of the board. Iron the folded edges to keep them crisp and in place.
- Staple Fabric Cover: Lay the prepared fabric over the bottom of the stool, ensuring it’s centered and smooth. Staple one edge of the fabric into place.
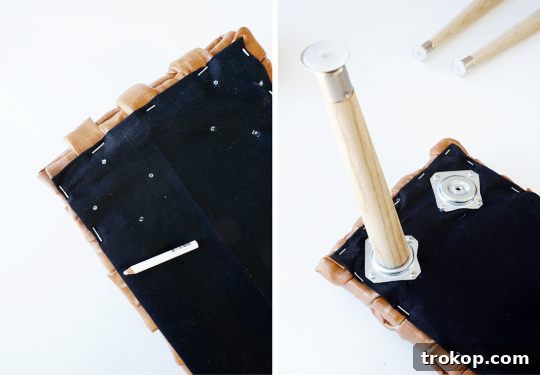
- Mark Bracket Holes on Fabric: Using a white colored pencil or chalk, carefully mark the locations of the pre-drilled bracket holes on the surface of the fabric. This will guide you when attaching the brackets.
- Staple Remaining Fabric Sides: Staple the remaining sides of the fabric into place, pulling it taut as you go for a neat finish. Trim any excess fabric around the edges.
- Attach Brackets and Legs: Finally, align the angled leg brackets with your marked and pre-drilled holes. Screw the brackets securely into place. Then, screw the 12-inch tapered wood legs into their respective brackets. Ensure all legs are tightened for stability.
Can You Stain A Rush Seat?
Yes, absolutely! While our current project focuses on a woven leather stool, if you were to craft a stool with a natural rush seat, staining is a fantastic option to customize its appearance. Staining allows you to deepen the natural color of the rush, match it to existing furniture, or protect it with a clear finish. For natural rush, you can use wood stains, varying from light oak to darker walnut hues. It’s best to apply the stain evenly with a brush or cloth, allowing it to penetrate the fibers. Always test on an inconspicuous area first. After staining, a protective topcoat, such as polyurethane or clear lacquer, is recommended to seal the rush and protect it from wear and tear, ensuring longevity and ease of cleaning. Staining can truly transform a simple rush seat into a focal point, adding that perfect touch of added character and finish.
Do Couches Break-In?
Yes, couches definitely “break-in” over time, much like a new pair of shoes or even our new DIY leather stool. The initial stiffness you might experience with a brand-new sofa, or any upholstered furniture, is completely normal. This is due to the newness of the foam cushions, springs, and upholstery fabric. For leather couches, the material itself can feel rigid at first. However, with regular use, the cushioning materials (foam, down, synthetic fibers) will begin to compress and conform to your body. The upholstery fabric or leather will also soften and relax, developing a more supple feel and, in the case of leather, a unique patina. Typically, a new couch will start to feel noticeably more comfortable within a week or two of consistent use. So, rest assured, your new furniture piece will become your favorite spot for relaxation as it settles into its natural, comfortable state. This applies to both store-bought sofas and handcrafted pieces like your DIY woven leather stool, which will gain character and comfort with every use.
Should Stool Legs Be Angled?
The decision to angle stool legs is often a blend of aesthetics, stability, and design philosophy. While perfectly vertical legs offer a classic, straightforward look, angling the legs can significantly impact the overall appearance and feel of a stool. Most angled stool legs are set between 0 and 14 degrees from vertical. This subtle outward slant creates a more dynamic, mid-century modern, or contemporary aesthetic. Beyond style, angled legs can also contribute to the stool’s stability, especially if the base is narrow, by widening the footprint. They can also make a stool appear lighter and more elegant. However, the angle shouldn’t be too steep, as this could compromise structural integrity or create an awkward visual. For our DIY woven leather stool, using angled leg brackets introduces a sophisticated touch that complements the texture of the woven leather, giving it a more refined and visually appealing presence.
Styling Your New Woven Leather Stool
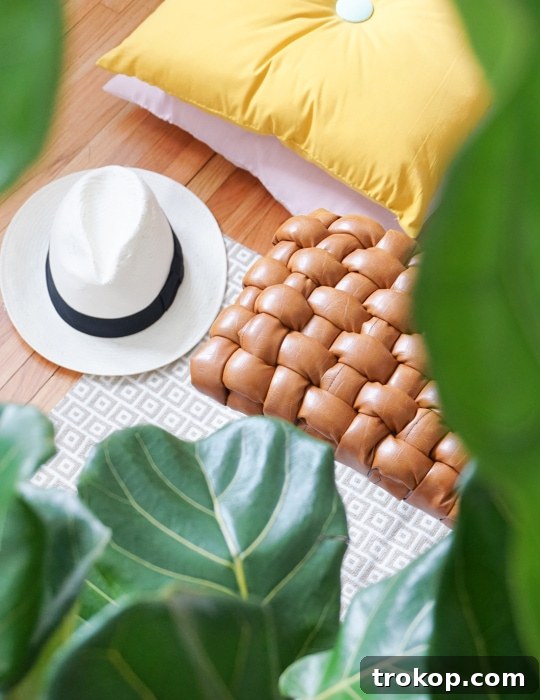
Now that your DIY woven leather stool is complete, it’s time to find its perfect spot in your home! This versatile piece can serve multiple purposes and instantly upgrade any space. Pair this textural beauty with your favorite lounge chair to create a cozy reading nook, offering a perfect spot to rest a book or a cup of coffee. Alternatively, tuck a pair of these stools under a console table in your entryway or living room, providing additional seating that can be pulled out whenever guests arrive. Its cognac hue and woven texture make it a fantastic accent in bohemian, rustic, industrial, or even minimalist interiors. Consider using it as a unique nightstand, a chic vanity stool, or simply a standalone decorative piece. No matter where you place it, your space just received a significant upgrade in both style and functionality!
Care and Maintenance for Your DIY Leather Stool
To ensure your beautiful DIY woven leather stool remains a cherished piece for years to come, a little care and maintenance go a long way. If you’ve used faux leather, it’s generally very easy to clean. Simply wipe it down with a damp cloth and mild soap for spills or dirt. Avoid harsh chemicals or abrasive cleaners, as these can damage the material. For real leather, specialized leather cleaners and conditioners are recommended to keep the material supple and prevent cracking. Always test any cleaning product on an inconspicuous area first. For the wooden legs, a quick dusting and occasional wipe with a wood-friendly cleaner will suffice. Regularly check the screws on the leg brackets to ensure they remain tight, especially if the stool is frequently moved or used. With proper care, your handmade stool will continue to be a stunning and functional addition to your home decor.
What do you think? Are you into the cognac leather trend? Share your thoughts and creations with us!
For more of our favorite DIY projects, check out a few favorites from the archives —
- These Great DIY Plant Stand Ideas can provide you with both a fashionable and functional look!
- Gorgeous DIY Coffee Table Ideas To Try At Home: from modern to farmhouse and everything in between.
- DIY Playroom Idea: full of easy ideas, playroom storage hacks and clever storage solutions.
- A Trendy DIY Ikea TV Stand with a super-easy tutorial for a custom look!
- DIY Woven Room Divider: up your home decor game on a budget with this stylish project.
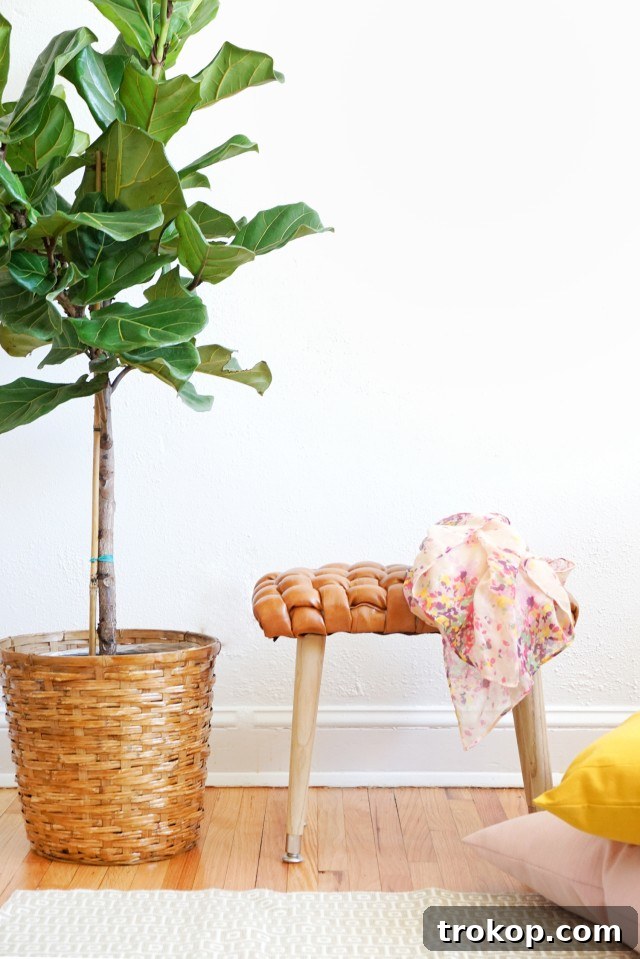
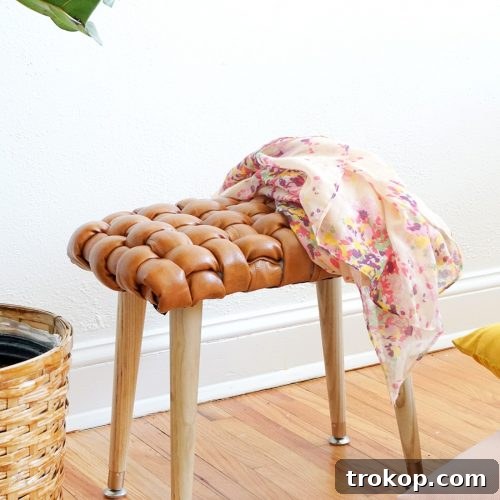
DIY Woven Stool – Quick Reference Guide
Print Recipe
Learn how to make your own DIY Woven Stool using a simple weaving technique, perfect for enhancing your home decor.
4 hrs
4 hrs
DIY
Home Decor
Equipment
- Sewing machine
- Staple gun
- 1/2″ staples
- Basic sewing supplies (pins, scissors, thread, white colored pencil or chalk, etc.)
Materials
- 1 MDF or plywood board (1/2″-1″ thick, cut to 9” width x 15” length)
- 1 yd faux leather or leather
- 9 yd piping cord filler (1″ diameter)
- Synthetic fiber batting
- 4 tapered wood legs (12″ tall)
- 4 angled leg brackets
- Lightweight cotton fabric (optional)
Instructions
How to make your leather cording strips:
- Cut the faux leather in 4” wide strips at 2 different lengths: 7 strips at 29” long and 10 strips at 18” long.
- Cut cording into 7 strips at 26” length and 10 strips at 15” length.
- Once the faux leather and cording is cut, start encasing the cording in the leather strips.
- Center the short cording strips on the short faux leather strips and fold the faux leather in half (around the casing).
- Pin into place.
- Do the same with the longer faux leather & cording.
- Next, thread your machine (we used a contrasting thread) and move your needle all the way over so it’s as close to the leather cording as possible.
- Sew a straight stitch along the length of the cording, removing pins as you go.
- Repeat with all cordings.
How to make your woven stool:
- Position the angled leg brackets at each corner of the board.
- Mark with a pencil and pre-drill holes for where the legs will sit.
- Flip the board over.
- Cut 4 layers of batting the same size as the board and attach onto the board with a staple in each corner.
- Next, begin stapling the long leather strips along the underside of the shorter edge of the board, and the short leather strips along the underside of the longer edge of the board.
- Next, flip the board over and lay the long strips over the length of the board. Think of the long strips as your warp (running lengthwise) and your shorter strips as your weft (running right to left).
- Begin weaving the strips together with a basket type weave comprised of ‘over one, under one.’ Make sure to push the shorter strips back up towards the top, and pull everything very tight as you go.
- As soon as you’ve woven in about 3 short strips, staple those 3 weft cords on the bottom side of the board towards the edge.
- The contrast stitching showing adds a charming handmade quality.
- Continue weaving until the entire top of the stool is woven.
- Finish by stapling the long warp strips to the bottom side of the board.
- Then, cut back any strips (& re-staple, if necessary) that cover up your pre-drilled bracket holes.
- At this point, you may want to conceal the underside of the stool with lightweight cotton fabric.
- This step is totally optional, but we think it creates a more finished looking piece.
- Cut a piece of lightweight cotton 1-2” larger than the size of the board.
- Fold raw edges under so that it’s the size of the board and iron to keep in place.
- Lay the fabric over the bottom of the stool and staple one edge into place.
- Mark pre-drilled bracket holes on the surface of the fabric with a white colored pencil.
- Staple the remaining sides of the fabric into place.
- Screw brackets into place and screw in legs.
$120
diy woven stool, leather stool, home decor

Our Most Popular DIY’s!
DIY Pom Pom Wall Hang
Continue Reading
DIY Marble Table Top with Gold Accents
Continue Reading
Ikea Bed Hack: DIY Wooden Headboard With Stikwood
Continue Reading
DIY Ikea hack dresser and prepping for guests
Continue Reading
DIY Ikea Hack Floating Credenza
Continue Reading
How to Make a DIY Knot Pillow
Continue Reading