
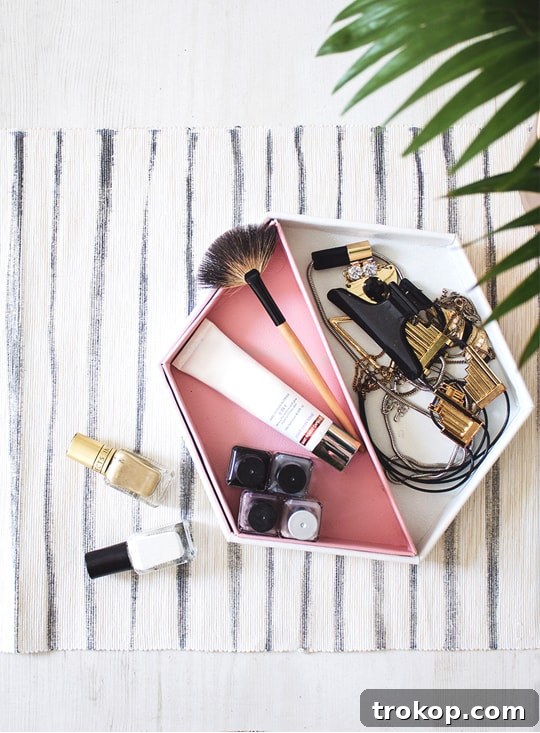
Craft Your Own Elegance: The Ultimate DIY Leather Hexagon Vanity Tray Tutorial
Transform clutter into curated style with our definitive guide to crafting a magnificent Leather Hexagon DIY Vanity Tray. This elegant yet practical project is more than just a storage solution; it’s an opportunity to infuse your personal aesthetic into your living space, creating a bespoke piece that speaks volumes about your taste.
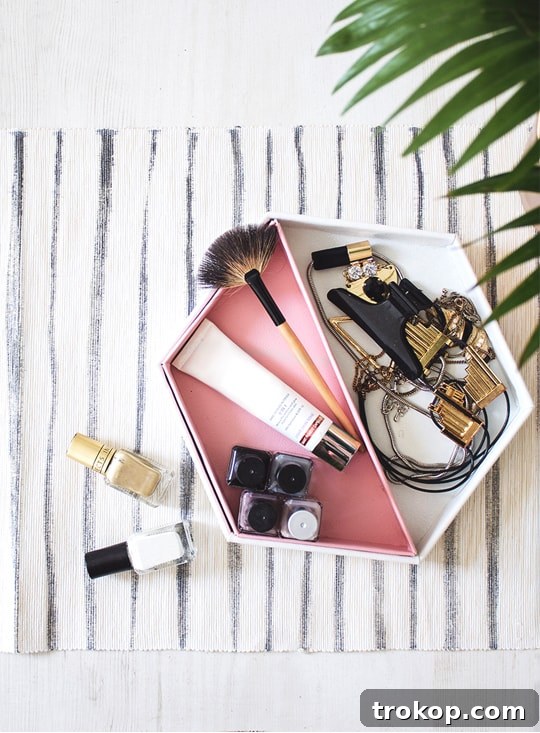
Are you yearning for a stylish and functional way to keep your vanity essentials neatly arranged? Or perhaps a sophisticated catch-all for your entryway, a chic organizer for your desk, or a thoughtful, handmade gift? Look no further! This comprehensive tutorial will empower you to create a stunning leather hexagon tray that adds a touch of modern elegance and unparalleled organization to any room.
Why Choose a DIY Leather Hexagon Vanity Tray?
Crafting your own vanity tray offers a multitude of benefits beyond simple aesthetics. First and foremost, it allows for complete customization. You get to select the perfect leather colors and textures that seamlessly integrate with your existing decor or stand out as a unique statement piece. Imagine choosing rich, earthy tones for a rustic feel or sleek, minimalist shades for a contemporary vibe. The choice is entirely yours, enabling a truly personalized home accessory.
Beyond personalization, a DIY project fosters a sense of accomplishment and creative fulfillment. There’s immense satisfaction in turning raw materials into a beautiful, functional item with your own hands. It’s an engaging and accessible craft suitable for creators of all skill levels, from beginners looking for an entry point into leatherwork to seasoned crafters seeking a rewarding weekend project.
Moreover, opting for DIY often presents a more sustainable and cost-effective alternative to purchasing high-end designer trays. You can utilize readily available materials, repurpose leather scraps, and enjoy the process without breaking the bank. The result is a durable, high-quality item that not only enhances your home organization but also showcases your unique flair for design.
The Allure of the Hexagon Design
The hexagon, with its six perfectly symmetrical sides, is a fascinating geometric shape that brings a contemporary and sophisticated edge to any design. Its balanced form is inherently pleasing to the eye, making it a popular choice in modern interior design. For a vanity tray, the hexagon’s distinct shape offers a creative departure from traditional squares or circles, instantly elevating the perceived luxury and craftsmanship of the piece.
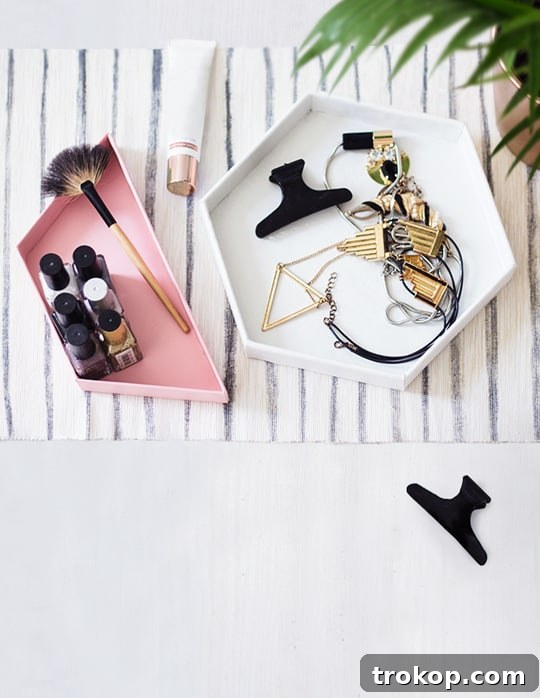
This unique form is not just about looks; it’s also highly practical. The six sides provide distinct internal divisions, allowing you to categorize your items efficiently. Whether it’s makeup brushes, jewelry, keys, or office supplies, the hexagonal structure helps prevent items from rolling around and keeps everything in its designated place, contributing to a more organized and serene environment.
Materials and Tools for Your Hexagon Tray
Before embarking on your crafting adventure, gathering all the necessary materials and tools is crucial. High-quality supplies will ensure a beautiful, long-lasting finish for your leather hexagon vanity tray. Here’s a detailed breakdown of what you’ll need:
- Leather sheets: Select two complementary or contrasting colors of your choice. A thickness of approximately 2mm is ideal, as it offers sufficient rigidity for the tray’s structure while remaining pliable enough to fold cleanly. Consider full-grain or top-grain leather for durability and a luxurious feel, or explore high-quality vegan leather alternatives for an ethical choice.
- Hexagon templates: Precision is key! We provide downloadable PDF templates for both the large tray and the inner tray. Print these at 100% scale to ensure accurate sizing.
- A4 thick cardstock paper: Or any similar thickness to cardboard. This will form the sturdy internal structure of your tray. Choose a heavyweight cardstock (e.g., 200-300 gsm) that can withstand glue without warping. You might need a few sheets depending on the size of your trays.
- Pencil: A sharp pencil is essential for precise tracing on both cardstock and the reverse side of your leather.
- Scissors: Good quality, sharp scissors are vital for initial cuts on cardstock and for trimming leather.
- Exacto knife or rotary cutter: A sharp blade is paramount for clean, crisp cuts on leather. An Exacto knife allows for intricate details and straight lines, while a rotary cutter is excellent for long, even cuts, especially when paired with a self-healing cutting mat. Always use a cutting mat underneath to protect your work surface.
- All-purpose glue, glue gun, or leather adhesive: The right adhesive is critical for a strong, lasting bond. For leather, a specialized leather adhesive or strong contact cement is recommended. If using an all-purpose glue, ensure it’s suitable for bonding leather and paper/cardboard. A glue gun can be handy for quick assembly of the cardstock base, but for the leather, a more controlled application of liquid adhesive is usually better for a smooth finish.
Crafting Your Leather Hexagon Vanity Tray: A Step-by-Step Guide
Now that you have all your materials, let’s dive into the creation process. Follow these detailed steps to bring your stylish leather hexagon vanity tray to life.
-
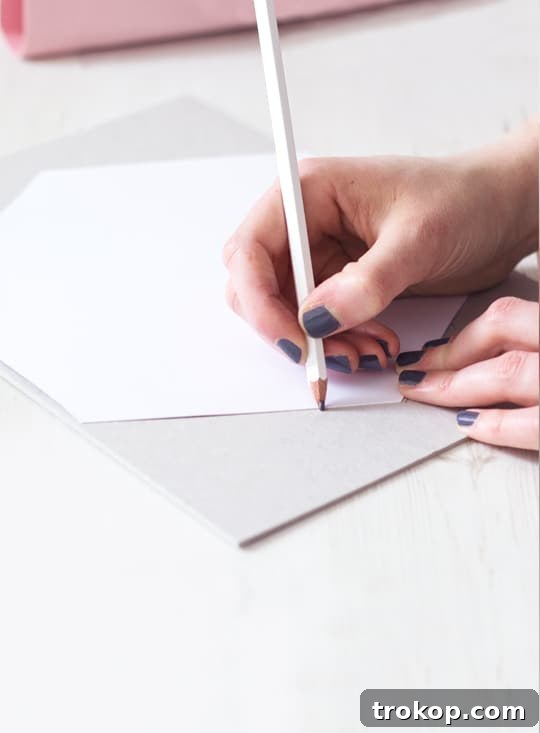
Preparing Your Templates and Cardstock Base: Begin by printing the large and inner hexagon tray templates at their actual size (100% scale). Carefully cut out these paper templates. Next, lay your templates onto your thick cardstock paper and trace around them accurately with a pencil. Using your sharp scissors or Exacto knife, meticulously cut out these cardstock shapes. These pieces will form the robust structural foundation of your trays, so precision here will contribute to a professional final product.
-
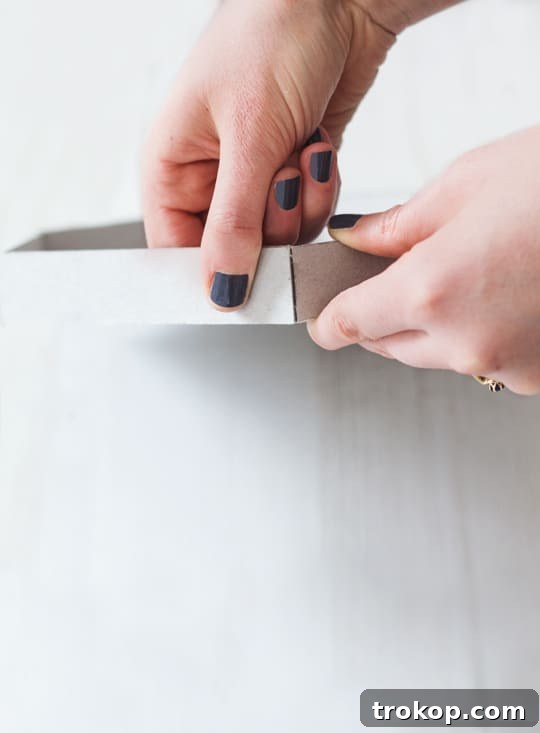
Assembling the Foundation: With your cardstock pieces cut, it’s time to build the tray’s core. Start with the larger tray base. Apply a thin, even layer of all-purpose glue along the edges of the cardstock pieces that will form the sides, then carefully press them together. Work methodically around the hexagon, ensuring each side connects securely to its neighbors and the base. Don’t worry if the cardstock assembly looks a little rough; it will soon be covered by beautiful leather. Repeat this process for the smaller, inner tray. Allow the glue to set firmly according to the manufacturer’s instructions to create a stable, rigid structure before moving on to the leather work.

-
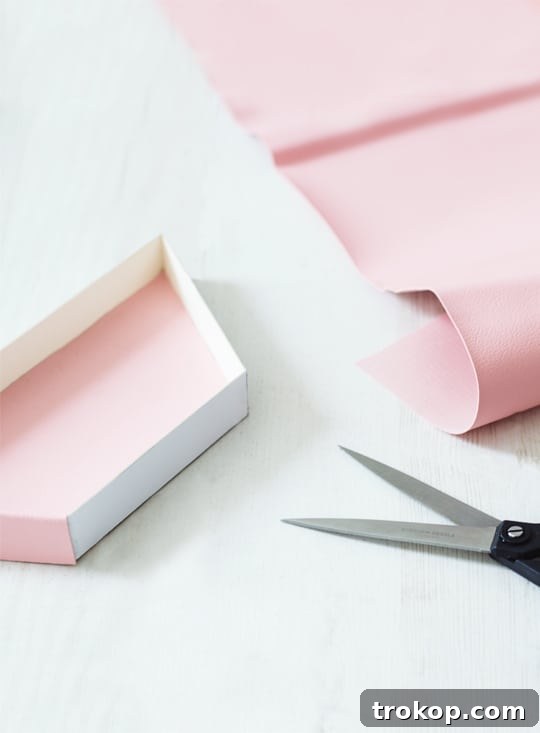
Precision Leather Cutting: This step requires careful attention to detail. For the side panels of both trays, use your original paper template as a guide, but this time, double the depth of the sides when tracing onto the leather. This extra depth is crucial because the leather needs to wrap over the top edge of the cardstock and extend down to cover both the outside and inside of each side panel for a seamless finish. For the flat bases (bottom exterior and interior pieces), simply trace the assembled cardstock tray directly onto the leather with a pen. Crucially, leave a slight border of approximately 1-2 cm around the edge of the base pieces. This border will be folded over later to hide any raw edges and create a clean, finished look. Use your Exacto knife or rotary cutter for precise, clean cuts, ensuring all edges are smooth and straight.
-
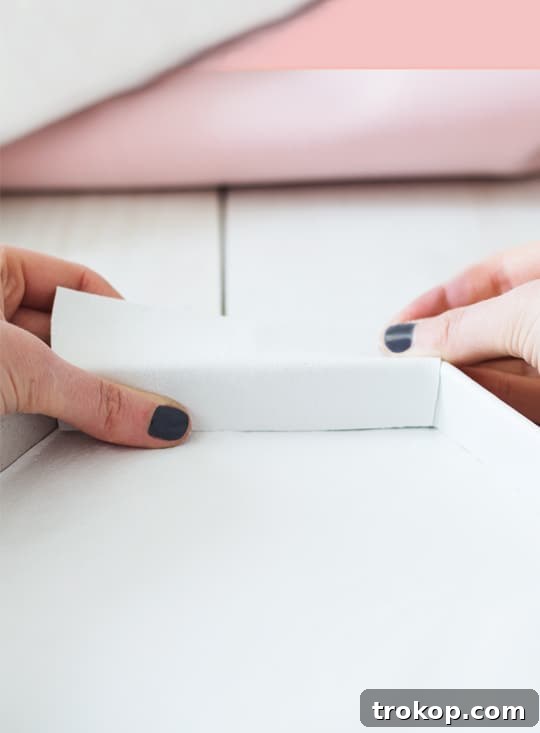
Folding and Adhering the Leather Exterior: Now for the transformation! Begin by applying a generous, yet even, amount of your chosen leather adhesive to the reverse (rough) side of the leather pieces designed for the tray’s sides. Spread the glue thoroughly to ensure full coverage without creating noticeable lumps. Carefully align and fold the leather edges inwards, wrapping them over the top and then adhering them to the inside of the cardstock structure. Ensure the folds are crisp and clean, meeting evenly at the corners for a professional appearance. Gently press the folded edges firmly onto the cardstock base. Hold them in place for several minutes, applying consistent pressure, to allow the glue to establish a strong bond. A helpful tip is to apply a thin line of glue along the top edge of each cardstock side before folding the leather over. This helps create a smooth, bubble-free fold and a beautifully defined top edge.
-
Completing the Interior and Base: Repeat the folding and gluing process for all exterior sides of your main tray. Once the exterior is fully covered and adhered, it’s time to work on the interior. Take the pre-cut leather piece for the inner lining, apply glue to its back, and carefully fit it into the tray, pressing it firmly against the interior cardstock walls. Finally, take the bottom base piece of leather (with the slight border) and glue it to the exterior bottom of the tray. Carefully fold the excess border leather underneath, securing it with glue to create a neat, finished base.
-
The Finishing Touches: After all the leather pieces are securely glued, allow the entire tray to dry completely, ideally for at least 24 hours. This ensures maximum bond strength and prevents any shifting. Once dry, meticulously inspect your tray. Using your Exacto knife, carefully trim off any excess leather that may have overlapped or protruded unevenly. This final trimming step is essential for achieving a perfectly polished and professional-looking leather hexagon vanity tray.
Expert Tips for a Flawless Finish
Achieving a truly professional-looking DIY leather hexagon vanity tray involves a few key techniques and considerations. Keep these expert tips in mind to ensure your project stands out:
- Maintain a Sharp Blade: Whether you’re using scissors, an Exacto knife, or a rotary cutter, a consistently sharp blade is your best friend. Dull blades can tear or drag the leather, resulting in ragged, uneven edges that are difficult to conceal. Replace blades regularly for the cleanest cuts.
- Master Glue Application: The trick to invisible seams and a smooth finish is a light and even application of glue. Too much glue can seep through porous leather, leaving unsightly marks. Too little, and your bond won’t be secure. Apply glue with a brush or a fine-tipped applicator, spreading it to the very edges without globbing. For contact cement, follow instructions carefully regarding drying time before bonding.
- Apply Consistent Pressure: When adhering leather to the cardstock, sustained and even pressure is crucial. Use clamps, heavy books, or even just your fingers for several minutes to ensure the glue sets properly. This prevents lifting or bubbling. For larger flat surfaces, placing weights evenly across the glued area while drying can make a significant difference.
- Practice Makes Perfect: If you’re new to leather crafting, consider practicing on small scraps of leather before tackling your main project. This allows you to get a feel for cutting, gluing, and folding your specific material without risking your final pieces.
- Mind the Grain: Pay attention to the natural grain of your leather. Sometimes, cutting or folding along the grain can yield better results or a more consistent look.
- Ventilation for Adhesives: Always work in a well-ventilated area, especially when using strong leather adhesives, to ensure your safety and quick drying.
Beyond the Vanity: Creative Uses for Your DIY Tray
Your newly crafted leather hexagon tray is incredibly versatile and can enhance organization and style throughout your home. While perfect for beauty products on your vanity – its wipeable leather surface is ideal for cosmetic spills – its utility extends far beyond the bathroom. Consider these creative uses:
- Entryway Catch-All: Keep keys, wallets, sunglasses, and mail neatly contained as soon as you walk in the door.
- Desk Organizer: Tidy up pens, paper clips, sticky notes, and small stationery items on your office or craft desk.
- Nightstand Companion: Hold your watch, rings, charging cables, and remote controls in one elegant spot by your bed.
- Coffee Table Accent: Use it to display small decorative items, coasters, or as a remote control holder.
- Jewelry Tray: A chic way to organize rings, earrings, and delicate necklaces, preventing tangles.
- Hostess Gift or Housewarming Present: Handmade gifts are always appreciated. Fill it with a small candle, artisanal soaps, or gourmet chocolates for a truly personal touch.
And don’t forget those leftover leather scraps! Repurpose them into unique DIY leather drawer pulls, stylish DIY leather bar and drink tags, or even small cable organizers. The possibilities are endless when you embrace the art of leather crafting!
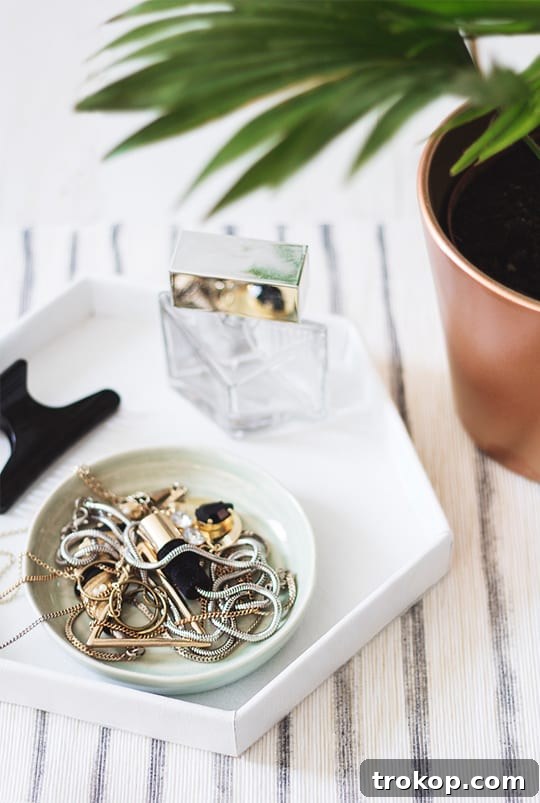
DIY Project Summary: Leather Hexagon Vanity Tray
Keep your space organized and in impeccable style with this elegant and easy-to-make Leather Hexagon DIY Vanity Tray.
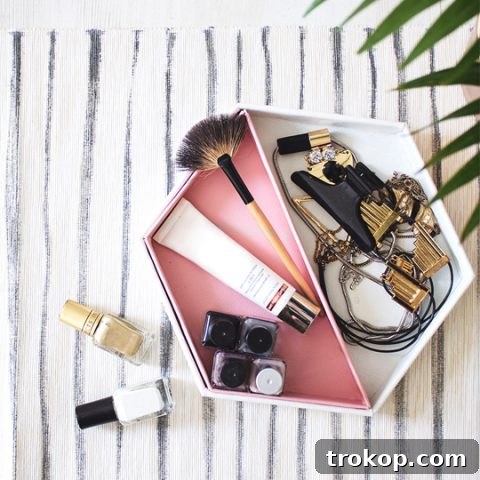
Leather Hexagon DIY Vanity Tray
Prep Time: 1 hour
Total Time: 1 hour
Course: DIY
Category: Vanity Tray
Equipment
- Pencil
- Exacto knife or Rotary Cutter
- Scissors
Materials
- 2 leather sheets (color of choice, approx. 2mm thickness)
- 4 A4 thick cardstock paper (minimum A4 thickness)
- 1 large hexagon tray template
- 1 inner tray template
- All-purpose glue or leather adhesive
Instructions
-
Trace and cut the hexagon tray and inner tray template onto the cardstock: This will serve as the base structure of your tray. Ensure accurate cuts for a precise foundation.
-
Assemble and glue all the cardstock pieces together: Start with the tray base first. Press the sides together firmly with your fingers. Don’t worry too much about it looking a little messy at this stage, as you’re going to cover this later with leather. Allow glue to dry completely.
-
Cut the leather: For the sides, use the template as a guide, doubling the depth of the sides to ensure enough material to cover both the outside and inside of each. For the tray bases, trace the assembled cardstock tray onto the leather with a pen, leaving a slight border (approximately 1-2 cm) around the edge for neat folding later.
-
Fold and glue the leather: Apply a generous amount of glue evenly on the rough side of the leather pieces for the sides, spreading it carefully to avoid lumps. Carefully fold the leather edges inwards, wrapping them over the top of the cardstock and adhering them to the inside. Ensure the folds are clean and meet evenly at the corners. Gently press the folded edges onto the craft card base, adhering them firmly. Hold them in place for a few minutes to allow the glue to set. A handy tip is to put a thin line of glue along the top edge of each cardstock side as you bring the leather over, to create a smooth fold without any air bubbles.
-
Repeat this for each side: Once all exterior sides are covered, glue in the inside leather piece, followed by the bottom exterior base piece. Ensure all edges are tightly sealed.
-
Finishing touches: Once the glue dries completely (allow ample time for a strong bond), carefully trim off any excess leather that may have overlapped or protruded, using your Exacto knife for a clean, professional edge.
Estimated Cost: $30
Keywords: diy vanity tray, leather vanity tray, hexagon tray, home organization, leather craft

Explore More Organizing & Decor Ideas
If you’ve enjoyed crafting your leather hexagon vanity tray and are eager to tackle more home improvement projects, we have a wealth of inspiration for you. From clever storage hacks to beautiful decor ideas, these resources will help you maintain an organized and stylish home.
- Creative Bow Holder Ideas: Keep accessories neat with these charming DIY projects.
- DIY Desk Organizer: Create a tidy and efficient workspace with custom solutions.
- Best Under the Bed Storage Ideas: Maximize space in smaller rooms with smart storage for shoes and more.
- Inspiring Ikea Kallax Hacks: Transform simple furniture into custom, high-end pieces for any room.
Related Articles to Inspire Your Next Project
28 Decorative Wall Mirrors You’ll Wish You Bought Sooner
Looking for the perfect wall mirror? Explore our roundup of…
Continue Reading28 Decorative Wall Mirrors You’ll Wish You Bought Sooner
60+ Affordable Amazon Bathroom Decor Finds
From shower curtains to bath mats, elevate your bathroom style…
Continue Reading60+ Affordable Amazon Bathroom Decor Finds
22 Inspiring Small Laundry Room Ideas for Small Spaces
Say goodbye to laundry woes with these small laundry room…
Continue Reading22 Inspiring Small Laundry Room Ideas for Small Spaces
Inspiring Ikea Kallax Hacks for Every Room
Looking for budget-friendly furniture makeovers? Check out these game-changing Ikea…
Continue ReadingInspiring Ikea Kallax Hacks for Every Room