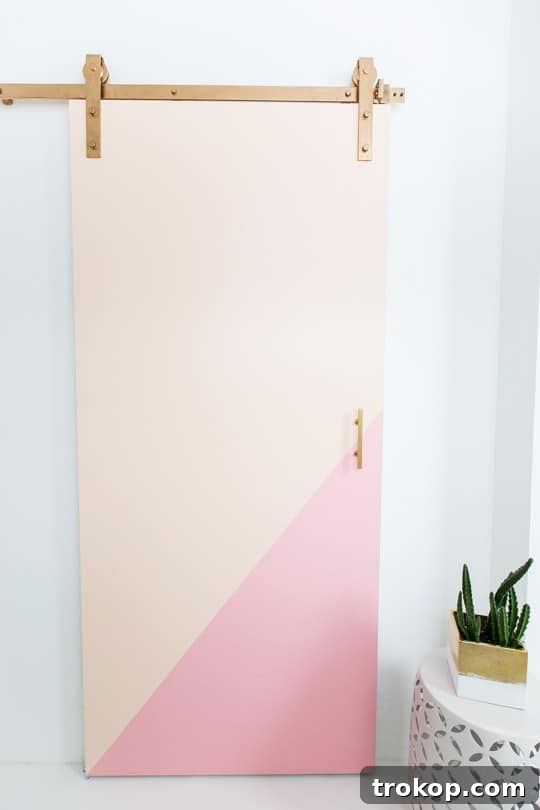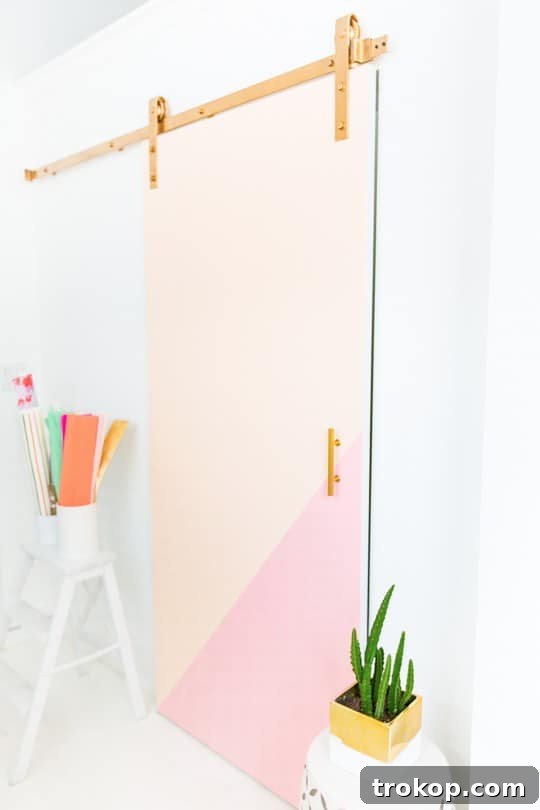
Transform your living space with a striking blend of rustic charm and contemporary design! This Color Block DIY Barn Door project offers a fresh, modern twist on the beloved sliding door trend, allowing you to infuse personality and vibrant style into any room.
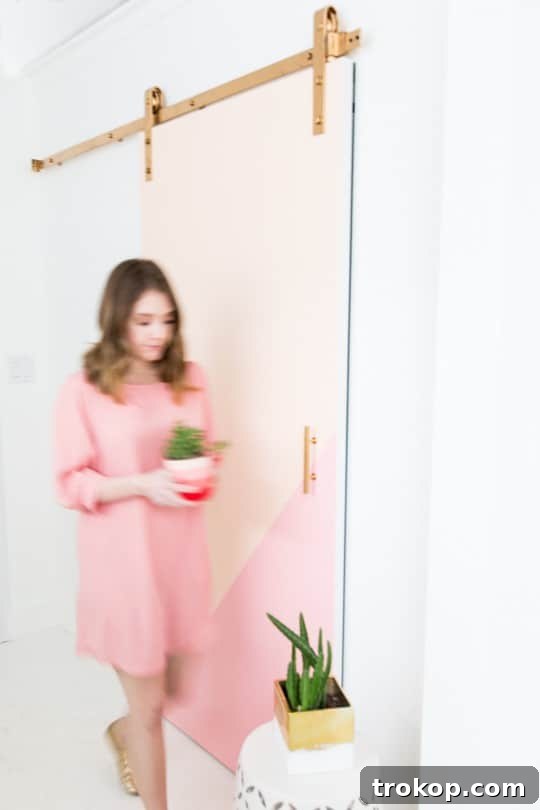
Are you searching for an innovative way to introduce a dynamic splash of color and unique style into your home? Look no further than the exciting world of DIY, specifically the increasingly popular project of crafting a color block barn door. Barn doors have long been celebrated in interior design for their remarkable ability to save space while adding a touch of rustic, farmhouse-inspired appeal. Their functionality, allowing doors to slide along a track rather than swinging open, makes them perfect for smaller rooms, hallways, or even defining open-plan areas without permanent walls.
However, the versatility of the barn door extends far beyond traditional farmhouse aesthetics. By embracing the creative technique of color blocking – incorporating vibrant hues and defined geometric patterns – you can elevate this practical design element into a true statement piece. This approach transforms a simple door into a captivating focal point that reflects modern sensibilities and personal style. Imagine a bold, two-toned door gliding effortlessly to reveal a pantry, a home office, or a chic closet. The possibilities are endless, and the visual impact is undeniable.
We’ve been dreaming up this fantastic, mod sliding door concept specifically for our new studio, aiming to blend functionality with a distinctive, artful presence. This guide will walk you through every step, from selecting your materials to the final installation, ensuring you can replicate this stylish transformation in your own home with confidence.
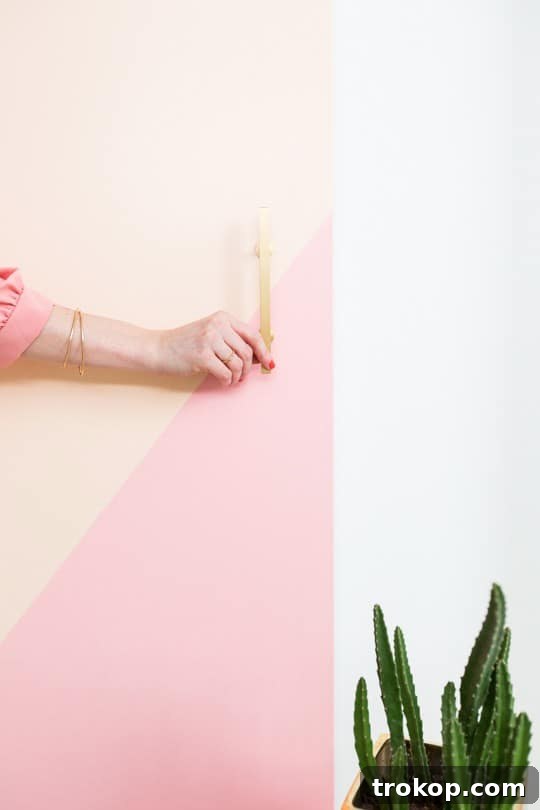
Materials and Tools Needed for Your DIY Barn Door
Before embarking on any successful DIY project, gathering all the necessary materials and tools is crucial. This not only streamlines the process but also ensures you have everything on hand to achieve a professional finish. Here’s a detailed list of what you’ll need to create your stunning color block barn door:
- Bent Strap Barn Door Roller Hardware Kit: Opt for a high-quality kit that includes the track, rollers, and all essential mounting hardware. Our chosen kit was a 78.75-inch matte black steel system, perfect for a standard door opening. Consider the aesthetic of the straps and rollers as they contribute significantly to the door’s overall look. Different styles (e.g., top-mount, face-mount) exist, so choose one that aligns with your design vision.
- Painter’s Tape: A crucial item for achieving those crisp, clean lines essential for color blocking. Invest in good quality painter’s tape, like FrogTape or 3M ScotchBlue, to prevent paint bleed and ensure sharp edges.
- Medium Sandpaper: We recommend a 120-grit sandpaper, which is ideal for smoothing out the door’s surface, preparing it for paint, and removing any minor imperfections or rough patches. Finer grits (like 220-grit) can be used for an even smoother finish between coats, while coarser grits (80-grit) are for heavy material removal if the door is particularly rough.
- 30×80-inch Hollow Core Slab Door: This is a standard size for interior doors. A hollow core door is lighter and easier to work with, though a solid core door would offer better sound insulation and a more substantial feel. Ensure the door is unfinished if you plan to paint all sides, or choose a pre-primed slab for easier preparation.
- Metallic Gold Spray Paint (Optional): If your desired hardware finish isn’t available, spray paint offers a fantastic customization option. We chose metallic gold to transform our black hardware, adding an elegant contrast. Ensure you use a paint designed for metal with good adhesion and a durable finish, such as Rust-Oleum or Krylon brands.
- Mini Paint Roller Brush and Tray: Ideal for achieving a smooth, even application of paint on larger flat surfaces like a door. A good quality foam or microfiber roller minimizes brush strokes, prevents texture, and speeds up painting.
- Interior White Satin Paint: Essential for priming or painting the edges of an unfinished slab door. Satin finish offers a subtle sheen, good durability for high-traffic areas, and is easy to clean. It also provides an excellent base for your color-blocking colors.
- Satin Paint in Your Choice of Colors: For the color blocking design, select high-quality interior satin paint. We used Pantone Nude Satin and Quartz Pink Satin, which provided a sophisticated yet playful contrast. Consider sampling colors first to see how they look in your space’s natural and artificial lighting.
- Brushed Brass Pull Bar: A stylish handle can dramatically enhance the door’s overall look. Our choice was a 3-3/4-inch cabinet drawer pull bar in brushed brass, offering a modern touch. Explore different styles and finishes (e.g., matte black, chrome, bronze) to match your aesthetic and door design.
- Two #8-32 x 2-inch Round Combo Screws: These specific screws are often needed for handles when the standard screws provided with the handle are too short for a slab door, especially hollow core doors with internal framing. Always double-check the required length for your specific door and handle.
- Drill and Drill Bits: A cordless drill with various drill bit sizes will be essential for attaching hardware, drilling handle holes, and possibly creating pilot holes for track installation. Ensure you have wood bits and possibly masonry bits if attaching to concrete walls.
- Measuring Tape: Accuracy is key in DIY. A reliable measuring tape is indispensable for all measurements, from door dimensions to hardware placement and track height.
- Pencil: For marking measurements and outlines on the door and wall before drilling or painting.
- Safety Gear: Always include safety glasses, work gloves, and a dust mask, especially when sanding, drilling, or spray painting, to protect yourself from dust and fumes.
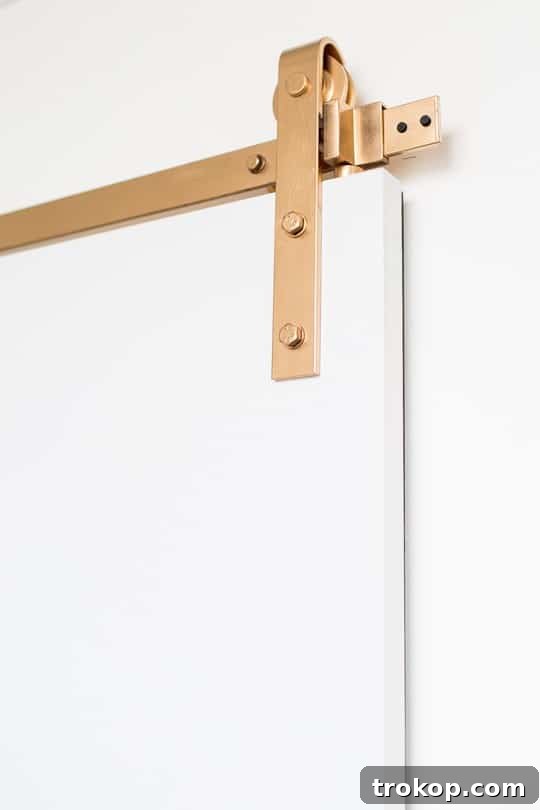
Customizing Your DIY Barn Door Hardware for a Unique Look
While many barn door hardware kits are readily available in popular finishes like black, nickel, or gold, sometimes you desire a specific shade or a unique pop of color that isn’t standard. This project is all about personalization, and customizing your hardware is a fantastic way to achieve a truly bespoke look. Our particular hardware kit, at the time, was only available in black, but we envisioned a more vibrant, luxurious gold. Here’s how we achieved that custom finish and prepared the door for painting:
- Prepare and Spray Paint Hardware: Before assembling any components, carefully lay out all the metal hardware pieces (track, rollers, brackets) in a well-ventilated area. Clean them thoroughly with a degreaser or rubbing alcohol to remove any grease, dust, or residue, which can impede paint adhesion. Once dry, apply several thin, even coats of your chosen metallic gold spray paint, allowing each coat to dry completely according to the manufacturer’s instructions before applying the next. This multi-coat approach ensures uniform coverage and a durable finish, preventing drips and runs. Make sure to paint all visible sides and edges. For best results and longevity, you might consider applying a metal primer before the spray paint and a clear topcoat afterward. Let the painted hardware cure fully for at least 24-48 hours before handling or assembling to prevent chips or scratches.
- Sand the Slab Door Surface: Take your medium-grit (120-grit) sandpaper and thoroughly sand both faces of the hollow core slab door. If the door has any significant imperfections or a rough factory finish, you may start with a slightly coarser grit (e.g., 80 or 100) and then move to 120-grit for smoothing. Sand in the direction of the wood grain, applying even pressure. The goal is to create a slightly textured surface that paint can grip onto, rather than a slick, non-porous one. After sanding, use a vacuum with a brush attachment and then wipe down the entire door with a damp (not wet) cloth or a tack cloth to remove all dust, and then let it dry completely. Proper dust removal is essential for a smooth paint finish.
- Prime and Paint Door Sides: Since you’re likely starting with an unfinished slab door, the raw edges will need attention. Apply at least one coat of interior white satin paint (or your chosen base color) to all four sides (top, bottom, and vertical edges) of the door using a mini roller or brush. This step serves multiple purposes: it seals the raw wood, provides a consistent base color, and ensures a smooth, finished look for parts of the door that might peek out when sliding. Allowing the sides to dry completely between coats and before handling ensures that you won’t smudge them later when painting the main faces of the door.
By meticulously following these preliminary steps, you’re laying a solid foundation for a professional-looking, highly personalized, and durable finish, ready for the exciting color blocking stage. Patience in preparation pays dividends in the final outcome.
How to Color Block Paint a Door: A Step-by-Step Guide
Color blocking is a fantastic technique to add visual interest and a contemporary flair to your barn door. The key to success lies in meticulous preparation and patience to achieve those sharp, clean lines. Here’s a detailed guide on how to color block paint your door, transforming it into a piece of art:
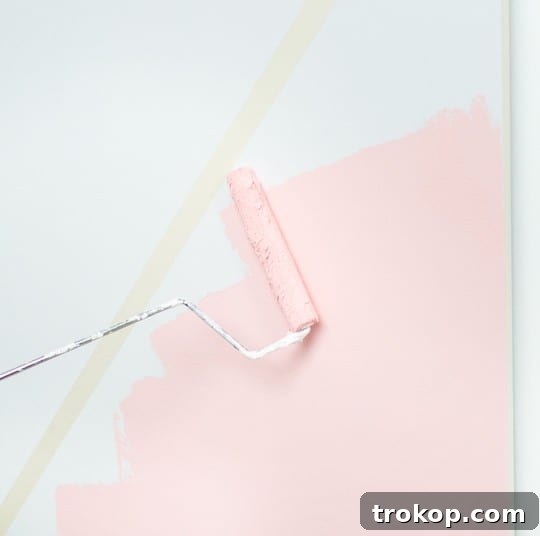
- Define Your First Color Block Section: Begin by planning your design. For a modern, dynamic look, we opted for a 45-degree diagonal angle to section off the bottom left corner of the door. Use your measuring tape and a light pencil to mark guide points on the door’s surface. Consider marking a few points along the intended line and then connecting them. Once you’re satisfied with the angle and placement, carefully apply high-quality painter’s tape along the marked line, ensuring it adheres firmly to the door. For the crispest lines, use a credit card or your fingernail to “burnish” the edges of the tape, creating a tight seal that prevents paint bleed underneath.
- Paint the First Color Section: With your first section precisely taped off, apply your chosen paint color. We used Pantone Quartz Pink for this bottom corner. Use a mini paint roller for smooth, even coverage on the larger areas, and a small angled brush for any edges or corners close to the tape. Apply two to three thin coats rather than one thick coat, allowing each coat to dry to the touch (typically 1-2 hours) before applying the next. This layering technique helps prevent drips, ensures consistent color saturation, and improves durability. Once the final coat is applied, let this first painted section dry and set for approximately 24 hours. This crucial drying time ensures the paint is sufficiently cured and hardened before you apply new tape over it, minimizing the risk of peeling.
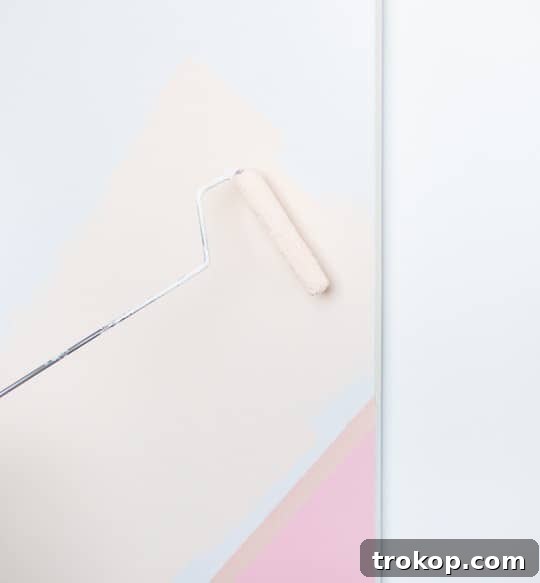
- Protect the Painted Corner for the Second Color: After the first color has fully dried for 24 hours, it’s time to tape off for your second color. Carefully place a new strip of painter’s tape directly along and slightly over the edge of the newly painted pink corner. The goal is to cover and protect the finished pink section while creating a clean, crisp line for the next color. Take your time with this step, using your measuring tape and a straight edge to ensure the tape is perfectly straight and firmly pressed down. Again, burnish the tape edges to prevent any paint from seeping underneath.
- Paint the Second Color Section: Now, apply your second chosen paint color to the remaining, untaped portion of the door. We selected Pantone Nude for this section. As with the first color, use a mini roller for smooth coverage, applying two to three thin, even coats, and allow each coat to dry to the touch. Once the final coat of the second color is applied, carefully peel off all painter’s tape while the paint is still slightly wet (but not dripping). This technique often helps prevent the paint from drying and adhering to the tape, which can lead to peeling or jagged lines upon removal. Pull the tape slowly at a 45-degree angle away from the painted surface to reveal your perfectly crisp color-blocked lines.
Allow the entire door to dry and set for another 24 to 72 hours, depending on your paint manufacturer’s recommendations. This extended curing time is essential. It ensures the paint is fully hardened and more durable, making the door less susceptible to marks, scratches, or damage during handling and installation. For optimal longevity, particularly on a high-traffic item like a door, a full cure is paramount.
Beyond this diagonal design, countless other fun paint design ideas can be explored for your door. Check out our simple wall painting designs post for easy patterns that can be made with tape, offering inspiration for stripes, geometric shapes, or even chevrons. Or, for those feeling more adventurous and wishing to add a truly unique touch, explore our easy handmade wall painting designs post if you wish to freehand a custom design directly onto the door.
Essential Tips for Installing Your Barn Door Track Securely
Installing a barn door track might seem intimidating, but with careful planning and attention to detail, it’s a perfectly achievable DIY project. While we aren’t professional door installers, we’ve successfully tackled this process and are here to share insights to help you. Always remember that safety and precision are paramount for a functional and aesthetically pleasing result.
For a visual aid, this excellent video tutorial on how to install a barn door track provides clear guidance. Additionally, many hardware kits come with comprehensive documentation, such as this helpful PDF version of the instructions here. Our kit from Lowe’s, for example, offered incredibly detailed instructions, which proved invaluable.
You should always meticulously follow the instructions included with your specific hardware kit, as components and mounting methods can vary significantly. However, there are crucial general considerations that require your independent judgment and careful execution:
- Door Height vs. Track Height: The height at which you install the track is critical and will depend on your specific door and desired floor clearance. Manufacturers often provide a recommended track height, but you must verify this against your actual door dimensions. To prevent the door from dragging or rubbing on the floor, you’ll generally need to add an additional inch to the door’s height measurement when determining the track’s bottom edge. For example, if your door is 80 inches tall, the bottom of the track should be roughly 81 inches from the floor to allow for proper clearance with the rollers attached. Always factor in the height of the rollers when calculating.
- Pre-Measure, Pre-Measure, Pre-Measure: We cannot stress this enough. Before drilling a single hole, take multiple measurements. Measure the door opening width and height, the door itself, and then carefully mark potential track locations on the wall. Use a level extensively – a long 4-foot level is ideal for accuracy – to ensure your marks are perfectly straight and plumb. Any misalignment will lead to a door that doesn’t slide smoothly, hangs crookedly, or unevenly scrapes the floor.
- Locate and Mark Studs Accurately: Barn door tracks must be securely mounted into wall studs for stability and safety. The door’s weight is considerable, and drywall alone cannot support it. Use a reliable stud finder to locate and clearly mark the center of each stud along the entire intended track path. If your studs don’t align perfectly with the pre-drilled holes in your track, or if you have insufficient studs in the right locations, you *must* install a sturdy header board (also known as a ledger board). This is a piece of solid wood (typically a 1×4 or 1×6, stained or painted to match your decor) securely fastened horizontally across the wall, into multiple studs. This header board then provides a solid and continuous surface to mount your track. This step is often overlooked but absolutely crucial for preventing the track from pulling away from the wall under the door’s weight.
- Consider Door Overlap and Track Length: Ensure your barn door is wider than the door opening it covers. A general rule is to have at least 1-2 inches of overlap on each side of the opening (when the door is closed) to ensure privacy and prevent light gaps. This overlap also influences the required length of your track; the track needs to be at least twice the width of the door opening, plus the desired overlap on the open side, to allow the door to fully clear the opening.
- Tools for Precision and Safety: Beyond a measuring tape and pencil, a good quality level, a reliable stud finder, and the correct drill bits for your wall material (wood, drywall, masonry) are indispensable. Always wear safety glasses when drilling. Have a second person assist you, especially when marking long lines or lifting the track into place.
While we might not be professional door installers, we assure you that with careful attention to these details and your kit’s instructions, installing a barn door track is entirely within reach for the average DIYer, resulting in a beautiful and functional addition to your home!
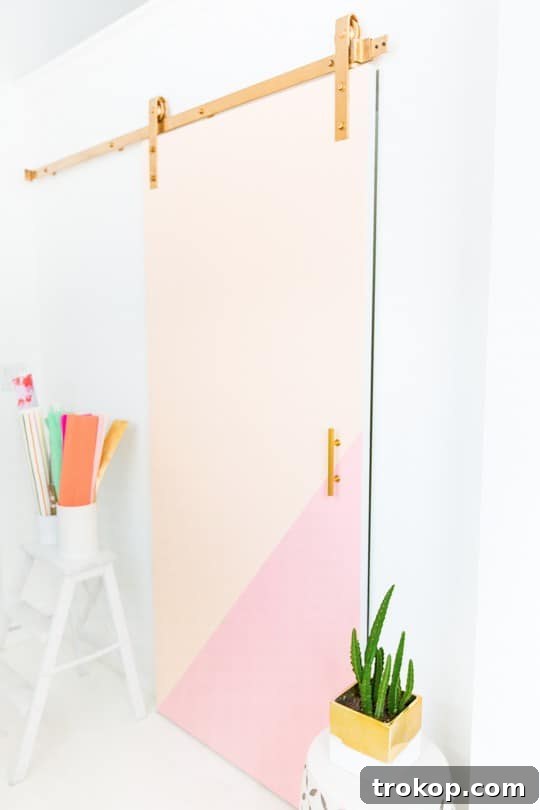
How to Install a DIY Barn Door: From Start to Finish
Once your track is securely in place and your door beautifully color-blocked and cured, the final steps involve assembling the door and hanging it. This process is incredibly rewarding and brings your creative vision to life. Follow these steps carefully to ensure a smooth, safe, and fully functional barn door installation:
- Determine Door Size and Placement: First, accurately measure the dimensions of your doorway (width and height). Your barn door should ideally be 2 to 4 inches wider and 1 to 2 inches taller than the opening it will cover. This overlap ensures proper privacy, light blockage, and a more aesthetically pleasing appearance when the door is closed. Strategically select a location for your barn door that not only functions well, allowing full clearance when opened, but also complements your overall room design and flow. Consider furniture placement and wall space availability.
- Mark and Attach the Track to the Wall: Using a long level, draw a perfectly straight horizontal line on the wall where the top edge of your barn door track will be installed. As discussed in the previous section, ensure this line accounts for the door’s height plus adequate floor clearance, including the rollers. Use a stud finder to mark the precise locations of the wall studs along this line. If necessary, install a sturdy header board into the studs. Then, attach the barn door track to the wall (or header board) using the heavy-duty screws provided in your hardware kit, making sure each screw goes directly into a stud or the securely fastened header board. Confirm the track is absolutely level using your level again after it’s fully mounted; even a slight tilt can affect door operation.
- Attach Rollers to the Door: Lay your newly painted barn door flat on a clean, protected surface (such as moving blankets or cardboard to prevent scratches). Refer to your specific hardware kit’s instructions for the precise placement of the rollers. Typically, rollers are attached to the top edge of the door, several inches in from each side. Mark the drilling points carefully with a pencil, ensuring they are equidistant from the top edge and parallel to each other. Drill pilot holes of the appropriate size to prevent wood splitting, then securely fasten the rollers to the door using the screws provided. Double-check that all components are tightened firmly but not over-tightened.
- Hang the Door on the Track: This step is best done with a helper due to the door’s weight and size. With one person on each end of the door, carefully lift the door and align the roller wheels with the track. Gently guide the wheels onto the track, ensuring they are fully seated and engaged. Once the door is hanging, carefully slide it back and forth a few times to test its initial movement and ensure it doesn’t immediately bind or come off the track.
- Adjust and Test Functionality: With the door hanging, make any necessary fine-tune adjustments. Most barn door rollers allow for minor height adjustments, which can be crucial for achieving perfect levelness and optimal floor clearance. Slide the barn door fully open and closed multiple times. Pay attention to any sticking points, rubbing sounds, or resistance. If the door isn’t sliding smoothly, re-check the levelness of the track, the tightness of the roller bolts, and ensure there are no obstructions on the floor or wall. Install any floor guides or stoppers included in your kit at this stage. Floor guides prevent the door from swinging out from the wall, and stoppers define the limits of the door’s travel along the track.
Congratulations, your barn door is now successfully installed and ready for the final touch – the handle!
Installing a Stylish Door Handle on Your DIY Barn Door
The door handle is more than just a functional component; it’s a design element that adds polish and personality to your DIY barn door. Selecting and installing the right handle can significantly enhance the door’s aesthetic appeal, providing both practicality and a finishing touch to your custom creation. Here’s how to install your chosen pull bar, ensuring it’s both secure and perfectly placed:
- Precise Handle Placement and Marking: First, determine the ideal height for your handle. Generally, this is around waist to chest height (typically 36-40 inches from the floor) for comfortable access for most adults. For our specific brushed brass pull bar, which has two screw points, we began by measuring 3 inches in from the side of the door and made a light pencil mark at your chosen height. From that initial mark, measure down an additional 3-3/4 inches (the center-to-center distance of the handle’s screw holes) to mark the position for the second screw hole. It’s crucial to double-check that both marked points are precisely 3 inches from the door’s edge (or whatever equal distance you prefer for a different location) and perfectly vertical. Use a small level to ensure the marks are aligned vertically and horizontally. This meticulous measuring prevents a crooked handle.
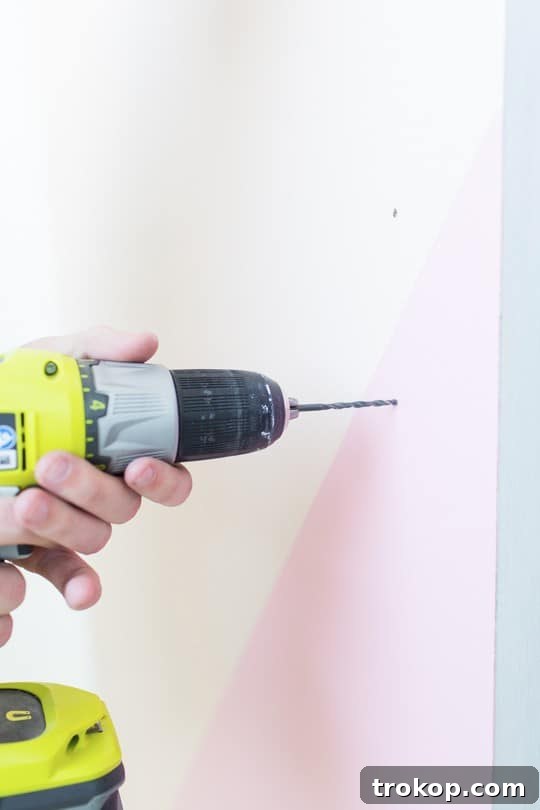
- Drill Through the Door: Once your marks are confirmed, select a drill bit that precisely matches the diameter of your handle screws (in our case, sized for #8 screws). With the door securely propped up or lying flat, carefully drill two holes all the way through the door at your marked points. It’s often recommended to drill from the front face of the door towards the back. This technique ensures that any minor splintering or excess wood material pushed through by the drill bit will occur on the back side of the door, which will ultimately be covered by the screw heads or washers on the interior side. This helps maintain a cleaner, more professional finish on the visible front of your door. Apply steady, even pressure and let the drill do the work.
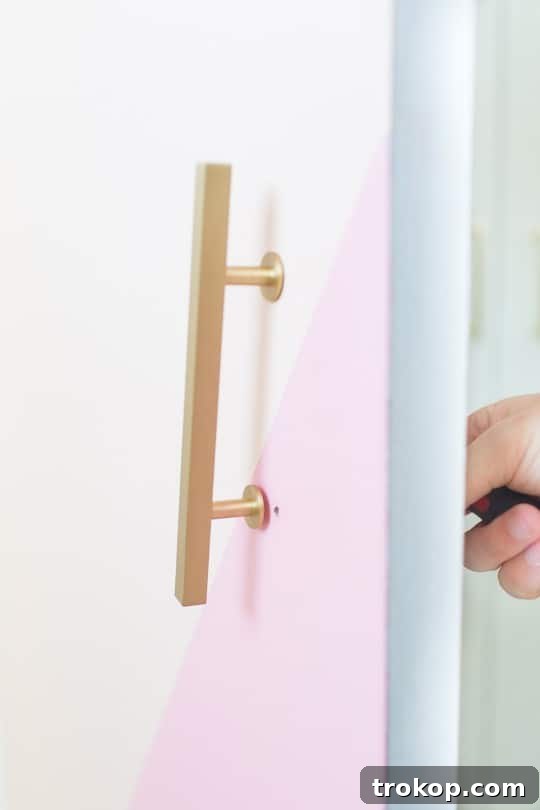
- Install the Handle with Appropriate Screws: Now, align your brushed brass pull bar with the drilled holes on the front of the door. Insert the #8 round combo screws through the outer two holes of the handle and then through the door, reaching the back side. You’ll notice we specified using #8 round screws instead of the ones that typically come with a cabinet pull bar. This is a common issue: standard handle screws are often too short to pass entirely through a thicker slab door, especially hollow core doors which may have internal framing. Ensure your replacement screws are long enough to pass through the door and securely engage with the handle’s threads. On the back side, if your handle came with a flush pull or a backplate, install it now, securing it with the nuts or screws provided. Tighten the screws firmly, but avoid overtightening, which could strip the threads or damage the door surface. Test the handle to ensure it is robust and comfortable to use.
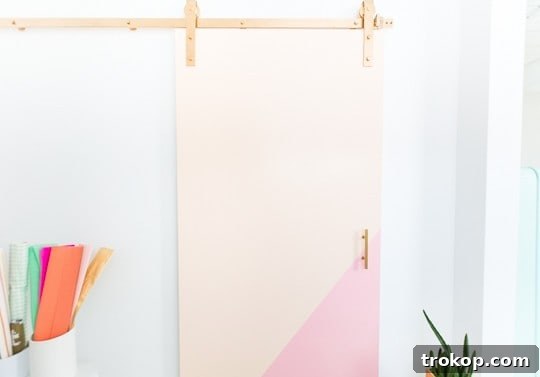
Once your stylish handle is securely installed, your custom color block barn door is complete and ready to impress! We are particularly fond of the sophisticated look achieved by using a solid painted slab door, which offers a sleek, modern alternative to the more traditional textured doors often associated with barn door functionality. This smooth finish truly allows the striking color blocking to shine and integrate seamlessly into a wide range of contemporary interior designs, elevating your space with minimal effort.
More Decor and Design Ideas to Complement Your New Door
Now that your stunning color block barn door is a focal point in your home, you might be wondering how to further enhance the space and tie it all together. This modern take on a classic feature opens up a world of interior design possibilities, allowing you to build upon its unique aesthetic. So, what do you think of where we’re headed with this space so far?
A color block barn door is incredibly versatile. It can serve as the centerpiece of a minimalist design, a vibrant accent in an eclectic room, or even a sophisticated element in a transitional space. By strategically integrating other decor elements, you can amplify its impact and create a truly cohesive and inviting environment. Consider these ideas to complement its fresh, contemporary appeal:
- Harmonizing Color Palettes: Echo the colors from your barn door in other elements of the room, such as throw pillows, an area rug, curtains, or subtle wall art. You don’t need to match them exactly; instead, select complementary shades, tints, or tones that create a cohesive flow and visual balance without overwhelming the space.
- Strategic Lighting: Highlight your new door with thoughtful lighting. A strategically placed wall sconce, recessed lighting, or adjustable track lighting can draw attention to its design and unique color scheme, especially if the colors offer a subtle sheen. Lighting can also change the perception of colors throughout the day, adding dynamic interest.
- Minimalist Furniture and Accessories: If your barn door is a bold statement with its color blocking, balance it with clean-lined, minimalist furniture. This allows the door to truly shine as the primary focal point without competing with overly ornate or complex furnishings. Opt for simplicity in shapes and forms.
- Texture Play: Introduce different textures through textiles, decor, and furniture to add depth and warmth to the room. A plush rug, a sleek metallic lamp, a textured fabric throw, or a rustic wooden side table can all create beautiful contrast and tactile interest, enhancing the smooth finish of your door. Mix soft with hard, smooth with rough.
- Greenery and Natural Elements: Incorporate houseplants or other natural elements like dried botanicals to add life, freshness, and softness to the area. The vibrant greens of plants can beautifully complement the painted hues of your door, introducing an organic touch that contrasts with the geometric design.
- Wall Art and Mirrors: Select wall art that either features colors from your door or provides a striking contrast. Large mirrors can also be excellent choices, reflecting light and making the space feel larger and brighter, while also bouncing the door’s colors around the room.
If you’re new to following our #sugarandclothstudio renovation journey, you can catch up on the entire transformation from the very beginning here, including our honest insights and challenges in renovating. Don’t miss our most recent update on the kitchenette, which showcases more of our DIY spirit and design philosophy in action.
And for more inspiring DIY projects and decor ideas that align with a modern and creative home, explore these popular posts:
- Ikea Besta Door Colors – DIY Color Block Storage Ideas: Take your color-blocking skills beyond doors and apply them to custom storage solutions, creating a unified and stylish look throughout your home.
- Beautiful DIY Tassels For Your Door Handle: Add an extra touch of handmade charm and unique personality to any door, including your new barn door, with these easy-to-make decorative accents.
- 36 Modern Budget Door Mats We’re Loving: Discover stylish and affordable ways to welcome guests and complete your entryway or any door transition with a mat that reflects your modern aesthetic.
We hope this comprehensive guide empowers you to create a captivating and functional color block barn door that not only saves space but also becomes a vibrant and personal expression of your unique style. Embrace the joy of DIY and enjoy the transformed look of your home!