
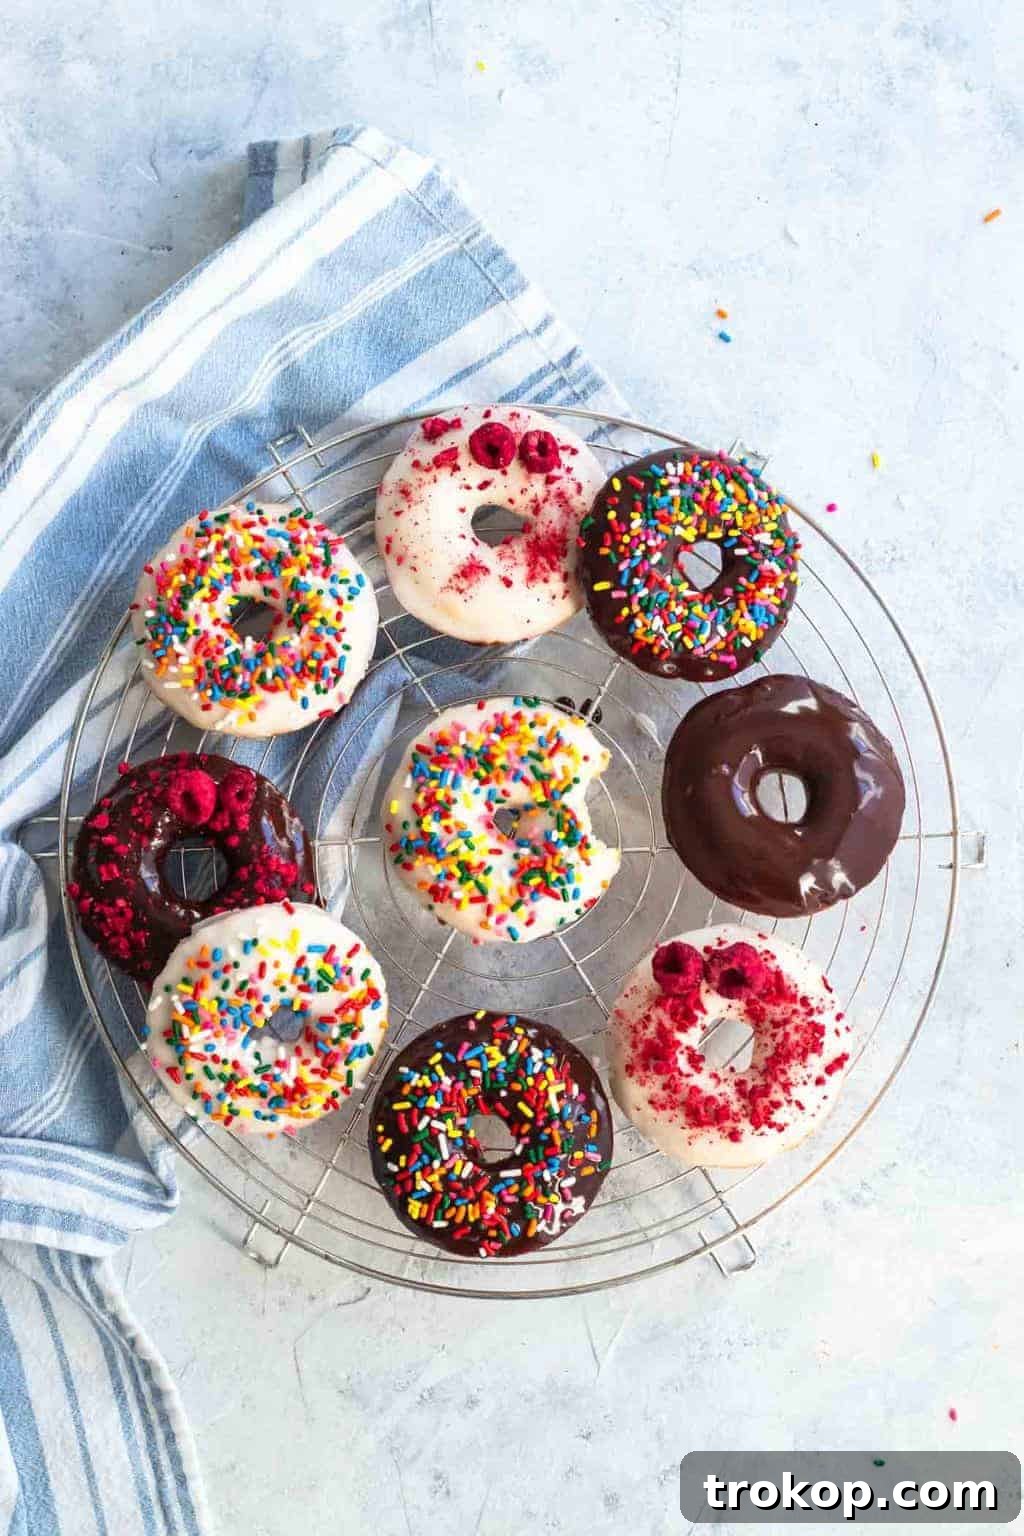
Welcome to the ultimate guide for creating irresistible **gluten-free baked donuts**! If you’ve been searching for a sweet treat that caters to dietary sensitivities without compromising on flavor or texture, your quest ends here. This easy-to-follow recipe promises fluffy, delicious donuts, perfectly baked and ready for your favorite glazes and toppings. Whether it’s a special occasion or just a craving for something sweet, these homemade delights are a treat everyone can enjoy, making gluten-free baking a joy, not a challenge.
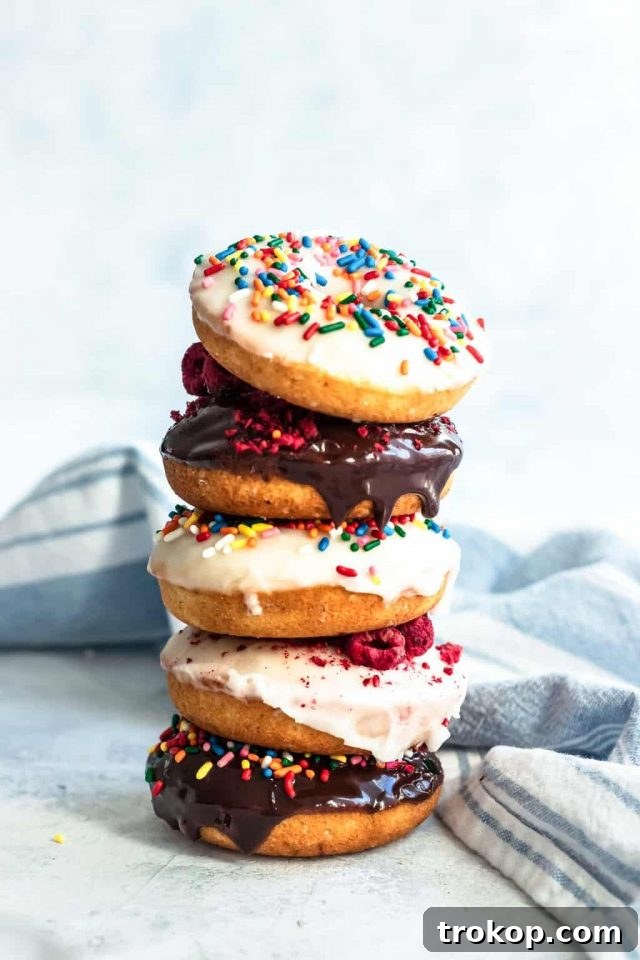
In today’s world, food allergies and sensitivities are increasingly common, which can make indulging in beloved desserts a bit tricky. But fret not! This simple **gluten-free donut recipe** is designed to be the perfect sweet escape, accessible to all. As a passionate baker, I understand the desire to enjoy classic baked goods without limitations. Donuts, after all, hold a special place in the hearts of many, and the thought of missing out due to dietary needs is simply unacceptable!
What makes these donuts even more appealing is their incredible ease and speed of preparation. You can whip up the batter in about 15 minutes, and baking takes even less time. The beauty of these donuts lies in their versatility; they serve as a perfect canvas for any flavor profile you desire. Customize them with a variety of glazes, sprinkles, and toppings to create a unique treat every time. Let’s dive into the details and start baking these delightful **homemade gluten-free donuts**!
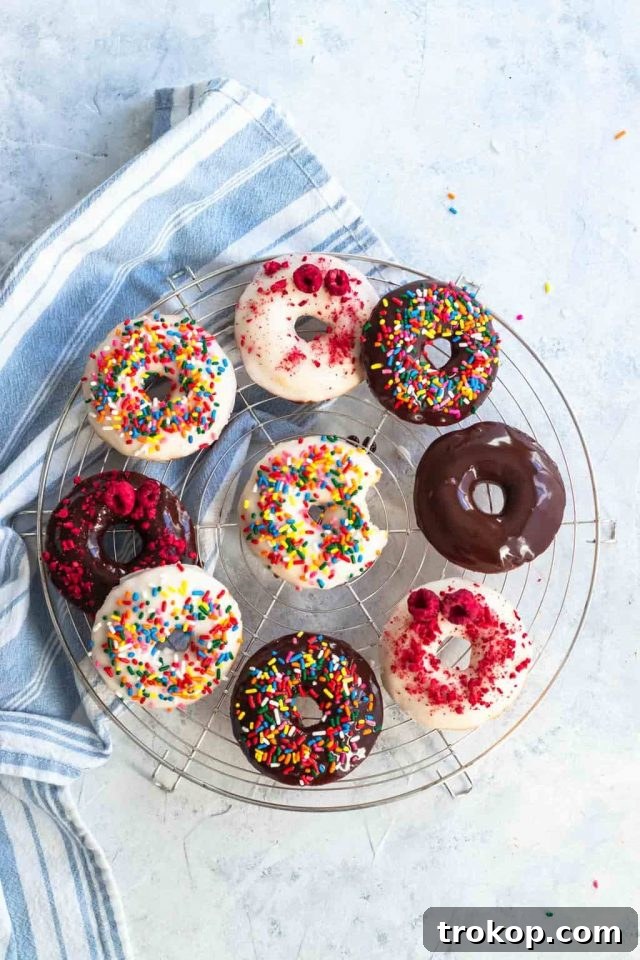
Table of Contents
Understanding Gluten-Free Baking
Gluten is a composite protein found predominantly in wheat, barley, and rye. It’s the magical component responsible for giving traditional baked goods like bread their characteristic elasticity, chewiness, and structural integrity. For many, consuming gluten is a non-issue. However, a growing number of individuals experience adverse reactions to gluten, ranging from mild sensitivities to severe conditions like Celiac disease.
Celiac disease is an autoimmune disorder where ingesting gluten leads to damage in the small intestine, impairing nutrient absorption. Beyond Celiac, gluten intolerance or non-celiac gluten sensitivity can cause a host of uncomfortable symptoms, including digestive issues, fatigue, and headaches. Thankfully, the culinary world has made incredible strides in offering delicious alternatives. There are numerous naturally gluten-free grains available, and many brands now produce high-quality, all-purpose gluten-free flour blends that perform remarkably similar to traditional wheat flour in most recipes.
When embarking on your gluten-free baking journey, especially with recipes like our luscious chocolate donuts, it’s crucial to be vigilant about all ingredients. Always check labels to ensure that every component, from flour to chocolate, is certified gluten-free. For chocolate, pure, unsweetened varieties are naturally gluten-free, making them a safe and delicious choice for your baked treats. Being mindful of ingredients ensures your delicious creations are safe for everyone to enjoy.

Essential Equipment for Making Gluten-Free Donuts
Making these delightful gluten-free donuts doesn’t require an arsenal of fancy kitchen gadgets. The most crucial specialty tool you’ll need is a **donut pan**. For this recipe, which yields 12 donuts, we highly recommend having two standard six-cavity donut pans, such as Wilton’s Six Donut Pans. Even if your pans boast a non-stick coating, it’s always a good practice to thoroughly grease each donut cavity to ensure your beautifully baked donuts release effortlessly, preventing any unfortunate sticking or breakage.
If you’re charmed by smaller treats, a mini donut pan can also be used with this recipe. Just remember to adjust baking times, as smaller donuts will cook faster. Alternatively, for those who prefer a cake-like donut without the traditional hole, a mini muffin pan can serve as an excellent substitute. While these won’t have the classic donut shape, they’ll still deliver all the delicious flavor and moist texture.
A **wire cooling rack** is another invaluable piece of equipment. It allows air to circulate around your freshly baked donuts, preventing them from becoming soggy and ensuring they cool evenly before glazing. This step is key to achieving that perfect texture.
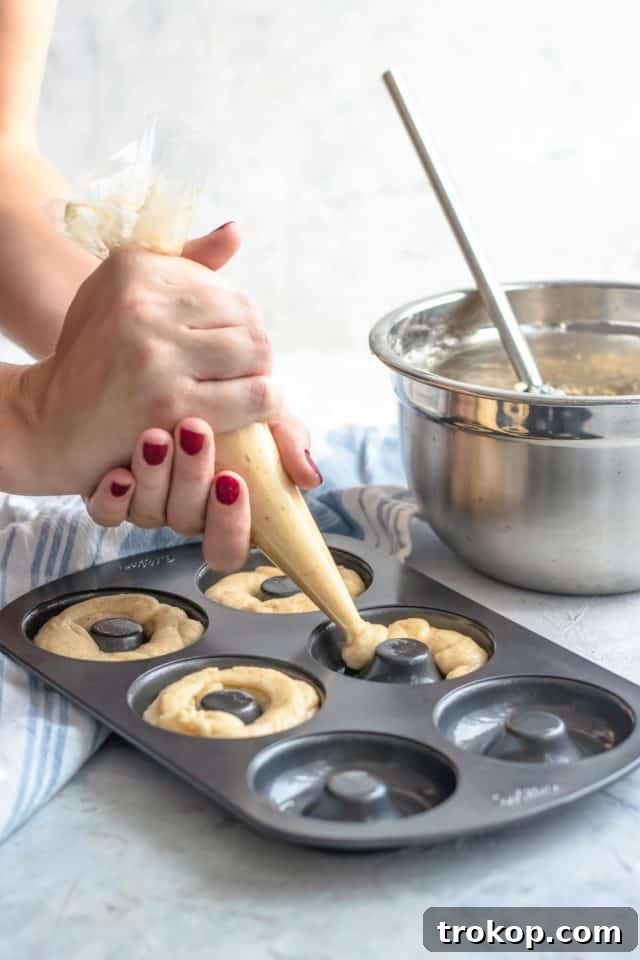
To neatly transfer the batter into the donut pan, a **piping bag** is a game-changer. Simply fill the bag with your donut batter, snip off a corner, and gently squeeze the batter into each greased donut ring. This method is far less messy and much more efficient than attempting to spoon and smooth the batter into the intricate donut shapes. If you don’t have a dedicated piping bag, a large freezer-safe Ziploc bag with a corner snipped off works just as effectively.
Step-by-Step Guide: How to Make Gluten-Free Donuts
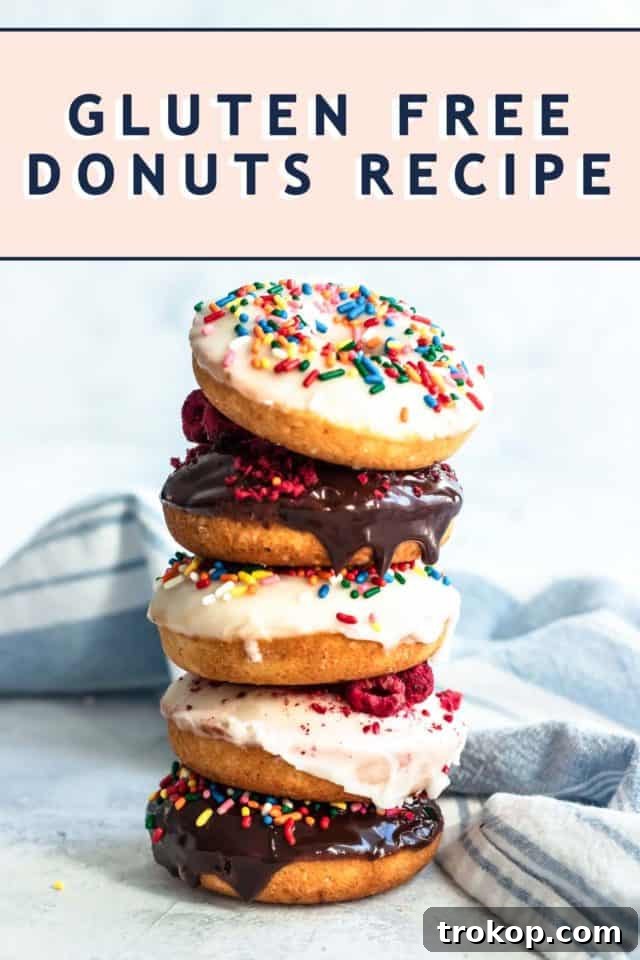
Creating these delightful **gluten-free baked donuts** is a straightforward process that yields impressive results. Follow these steps for a perfect batch:
1. Prepare Your Workspace: Begin by preheating your oven to 350°F (175°C) and thoroughly greasing your donut pans. Proper greasing ensures your donuts will pop out easily once baked. For best results, also take out all refrigerated ingredients, such as eggs and yogurt, about 20-30 minutes before you start mixing. Allowing them to come to room temperature helps them incorporate more smoothly into the batter, resulting in a more uniform and tender donut.
2. Combine Wet Ingredients: In a small, microwave-safe mixing bowl, melt the unsalted butter until just liquefied, then let it cool slightly – it shouldn’t be hot enough to cook the eggs. Once cooled, stir in your room-temperature eggs, plain whole milk yogurt (ensure it’s not Greek yogurt for the correct consistency), and vanilla extract. Whisk these wet ingredients until they are smooth and well combined, then set this mixture aside.
3. Mix Dry Ingredients: In a large mixing bowl, combine the gluten-free all-purpose flour, white granulated sugar, lightly packed brown sugar, cornstarch, baking powder, baking soda, salt, and ground nutmeg. Whisk these dry ingredients together thoroughly to ensure all leavening agents and spices are evenly distributed. The nutmeg might seem like an unusual addition, but it’s a classic secret ingredient in many donut recipes, subtly enhancing other flavors without being overpowering. If you’re not a fan, you can certainly omit it.
4. Combine Wet and Dry: Once your dry ingredients are mixed, create a small well in the center of the bowl. Pour the wet ingredient mixture into this well. Gently stir everything together until just combined. Be careful not to overmix the batter; overmixing can lead to a tougher texture in gluten-free baked goods.
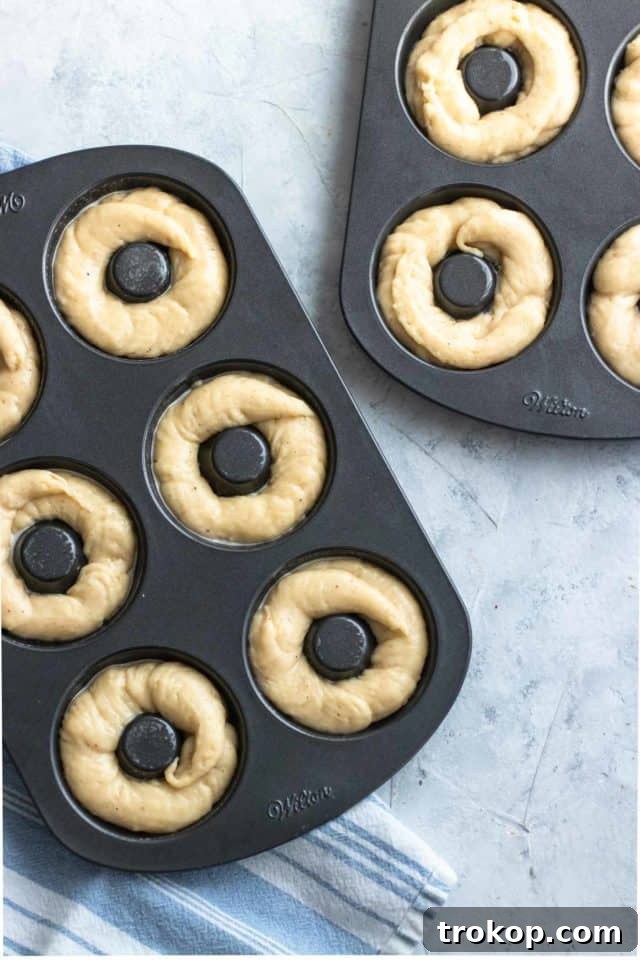
5. Fill Donut Pans: Transfer the batter into a piping bag (or a sturdy plastic zippered bag with a corner snipped off). Pipe the batter into each greased donut ring, filling them to about two-thirds full. It’s important not to overfill, as this can cause the batter to overflow and obscure the donut hole. If you find yourself with uneven amounts, don’t hesitate to redistribute the batter to ensure each donut is uniformly sized.
6. Bake to Perfection: Place the filled donut pans into your preheated oven and bake for approximately 10-12 minutes. The donuts are ready when they are lightly golden brown around the edges and spring back slightly when gently touched. Immediately remove them from the oven and let them sit in the pans for about 5 minutes before carefully transferring them to a wire cooling rack. Allow them to cool completely before you begin the exciting step of glazing and topping. Enjoy your perfectly baked **homemade gluten-free donuts**!
Storing Your Homemade Gluten-Free Donuts
Once your delicious **gluten-free baked donuts** are glazed and decorated, proper storage is key to maintaining their freshness and wonderful texture. Place them in an airtight container and store them at room temperature for 2-3 days. This helps to keep them moist and prevents them from drying out. Avoid refrigerating the donuts if possible, as the cool, dry air of a refrigerator can often make baked goods stale and tough prematurely.
If you wish to extend their shelf life, especially if you’ve baked a large batch, you can freeze unglazed donuts. Once cooled completely, place them in a single layer on a baking sheet and freeze until solid. Then, transfer the frozen donuts to a freezer-safe bag or container for up to 2-3 months. When you’re ready to enjoy them, simply thaw at room temperature and then glaze and decorate as desired. For glazed donuts, freezing might alter the glaze’s texture slightly, so it’s generally best to freeze them plain and glaze after thawing.
Making These Donuts Dairy-Free
Absolutely! This versatile **gluten-free donut recipe** can easily be adapted to be completely dairy-free, allowing even more people to enjoy these delightful treats. The modifications are simple and yield equally delicious results.
To make the donuts dairy-free, you’ll need to substitute the butter and yogurt. For butter, opt for a high-quality dairy-free butter substitute or an equal amount of vegetable oil (like canola or refined coconut oil). When it comes to the yogurt, select a plain, unsweetened yogurt made from coconut milk, almond milk, or soy milk. Be sure to choose a dairy-free yogurt that is not “Greek” style, as traditional Greek yogurt has a thicker consistency than what’s needed for this recipe.
For the glazes, the process is just as simple. Instead of cow’s milk, use your preferred plant-based milk. Almond milk, oat milk, or coconut milk all work wonderfully in both the vanilla and chocolate glazes, maintaining the smooth consistency and delicious flavor. With these straightforward substitutions, you can confidently create delectable **gluten-free and dairy-free donuts** that are inclusive and satisfying for all dietary needs.
Are Gluten-Free Donuts a Healthy Option?
When considering the health aspect of **gluten-free donuts**, it’s important to distinguish them from their traditional fried counterparts. Because these donuts are baked rather than deep-fried, they inherently contain less fat and fewer calories, making them a healthier indulgence compared to most bakery-bought options. Baking eliminates the need for large amounts of oil used in frying, significantly cutting down on saturated and trans fats.
However, while they are a “healthier” alternative, it’s still crucial to remember that these are donuts. They contain sugars and fats, albeit in more controlled amounts. Moderation remains key to enjoying them as part of a balanced diet. Some gluten-free flours, especially whole-grain varieties, can offer additional fiber and nutrients not found in traditional refined wheat flour. For instance, flours like oat flour, brown rice flour, or sorghum flour, which are often part of gluten-free blends, contribute more dietary fiber and complex carbohydrates. So, while they might not be a health food, they offer a delightful way to satisfy a sweet craving more mindfully. Enjoy them as a treat, appreciating the thoughtful ingredients and baking method!
Choosing the Best Flour for Gluten-Free Donuts
The foundation of a great **gluten-free donut** lies in selecting the right flour. Unlike yeast-risen donuts that might benefit from specific flour types for gluten development, baked cake donuts, like this recipe, fare best with all-purpose flour blends. For gluten-free baking, texture is often the trickiest element to perfect, and the choice of flour blend plays a monumental role in achieving that desired moist and fluffy crumb.
Fortunately, the market is now rich with excellent **gluten-free all-purpose flour blends**, readily available in most grocery stores. These blends are specifically formulated to mimic the properties of wheat flour, combining various gluten-free grains and starches for optimal results. For this particular recipe, we had fantastic success using Bob’s Red Mill 1-to-1 Baking Flour (the one in the blue bag). This blend is often favored for its reliable performance in a wide array of baked goods.
A crucial ingredient often found in these blends is **xanthan gum**. This natural polysaccharide acts as a binder, providing the elasticity and structure that gluten would typically offer. If your chosen gluten-free flour blend, such as Pamela’s All-Purpose Flour, does not include xanthan gum, it is highly recommended to add about ½ teaspoon per cup of flour to ensure your donuts achieve the perfect texture and don’t crumble. With the right blend and potentially a touch of xanthan gum, you’ll find that crafting delicious **homemade gluten-free donuts** is both simple and rewarding, using ingredients often already in your pantry or refrigerator.
Why Bread Flour is Not Ideal for Donuts
While bread flour is an absolute champion when it comes to baking artisanal loaves, baguettes, and other yeast-leavened breads, it’s generally not the best choice for crafting light and fluffy cake donuts, especially **gluten-free baked donuts**. The primary reason lies in its high protein content. Bread flour contains a higher percentage of gluten-forming proteins compared to all-purpose flour. When mixed with water and kneaded, these proteins develop a strong gluten network, which is essential for trapping gas and creating that characteristic chewy texture and robust structure found in bread.
However, for cake donuts, which are typically leavened with baking powder and baking soda rather than yeast, a strong gluten structure is counterproductive. The goal for a cake donut is a tender, crumbly, and melt-in-your-mouth consistency. Using bread flour, even in a non-gluten-free context, would result in donuts that are tough, dense, and overly chewy, far from the delicate treat we aim for. In the realm of gluten-free baking, where the challenge is to mimic that tenderness, sticking to specially formulated gluten-free all-purpose blends designed for cakes and pastries is paramount to achieving the desired soft and delicious outcome.
What Exactly is Stiff Dough?
In baking, “stiff dough” refers to a dough with a relatively low hydration level, meaning it contains less liquid in proportion to its flour. This results in a dough that is firm to the touch, not sticky, and holds its shape well. It’s often used for recipes where structure and a certain chewiness are desired, like some types of bread or pasta.
However, when making **gluten-free baked donuts** or other cake-like pastries, you’re generally aiming for a batter rather than a stiff dough. A stiff dough for donuts would typically result in a very dense and heavy donut, not the light and fluffy texture we’re striving for. For our baked gluten-free donuts, the batter should be thick enough to hold its form when piped into the donut pan, but still pourable. It should be easy to mix and should not require kneading. The reference to “stiff dough” and tapping bread for a “thump” in the original text likely refers to traditional bread making and isn’t directly applicable to this specific baked cake donut recipe. Our goal is a tender cake-like crumb, not a bread-like chewiness.
Creative Topping Ideas for Your Donuts
One of the most exciting parts of making **homemade gluten-free donuts** is the endless possibilities for customization! Since these are a basic vanilla donut base, they serve as a perfect canvas for any flavor and aesthetic you can dream up. We’ve included recipes for both a classic vanilla glaze and a rich chocolate ganache, along with instructions for delicious cinnamon sugar donuts, but don’t stop there!
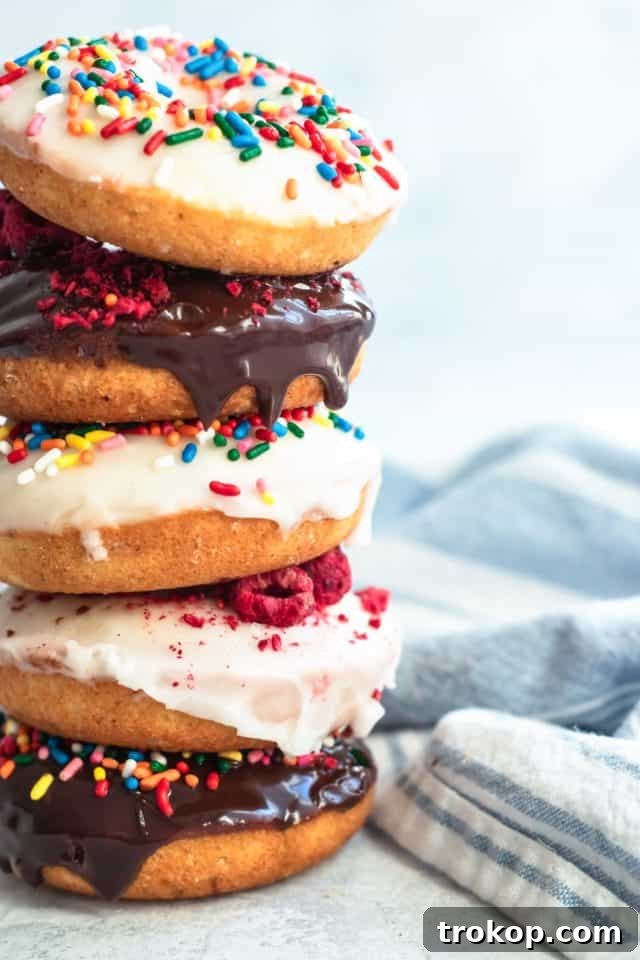
Let your imagination run wild with toppings. Sprinkle anything your heart desires on top of your freshly glazed donuts: vibrant rainbow sprinkles for a festive touch, finely chopped nuts (like pecans or walnuts) for added crunch, a dusting of powdered sugar for simple elegance, or even mini chocolate chips for an extra cocoa boost. For a sophisticated twist, we’ve experimented with crushed freeze-dried raspberries, which add a beautiful color and tangy flavor. Another fantastic idea is to drizzle contrasting glazes, like chocolate ganache over a vanilla glazed donut, creating an appealing visual and flavor combination. Feel free to be as creative as you’d like; these donuts are a wonderful opportunity to involve kids in the kitchen, letting them decorate their own masterpieces!
Beyond the included glazes, consider other delicious options: a zesty lemon glaze for a brighter flavor, a rich maple glaze for a comforting autumn touch, or even a simple coating of melted butter rolled in flavored sugars. The versatility of these **baked gluten-free donuts** truly makes them a treat for every taste and occasion.

More Delightful Donut Recipes to Explore
If you’ve fallen in love with making **homemade donuts** and are looking for more delicious variations to try, you’re in luck! Our archives are filled with easy and tempting donut recipes that cater to various tastes and preferences. Once you master these **easy baked gluten-free donuts**, you might want to explore other exciting flavor profiles and baking adventures:
- Champagne Donuts & White Chocolate Glaze: For a touch of elegance and festive sparkle.
- Classic Cinnamon Sugar Donuts: A timeless favorite that’s simple yet incredibly satisfying.
- Pink Lemonade Donuts: A bright and tangy treat perfect for summer or a cheerful brunch.
- Baked Cake Donuts With Rich Chocolate Glaze: For the ultimate chocolate lover.
- Adorable Mini Baked Donuts: Perfect for parties or when you want just a small bite of sweetness.
And for those truly adventurous bakers looking to elevate their donut game even further, we have a special tutorial on how to make injectable donuts! Imagine filling your homemade donuts with custards, jams, or creams for an extra burst of flavor. Happy baking!

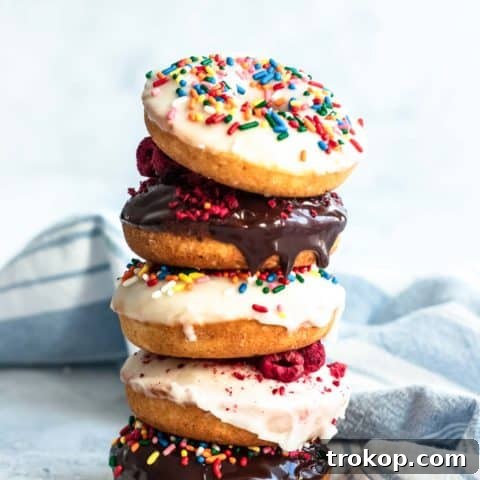
Easy Baked Gluten-Free Donuts Recipe
These baked gluten-free donuts come together in about 15 minutes and take even less time to bake. You can coat or frost them in whatever flavors you like to make a completely customized treat!
15 mins
12 mins
27 mins
Equipment
- Donut pans (two standard 6-cavity pans recommended)
- Large mixing bowl
- Microwave safe bowl
- Piping bag (or large freezer-safe Ziploc bag)
- Wire cooling rack
Ingredients
For the donuts —
- 1 ½ cup gluten-free all-purpose flour
- ½ tsp xanthan gum (only needed if your flour blend doesn’t contain any)
- ½ cup white granulated sugar
- ¼ cup brown sugar (lightly packed)
- ¼ cup cornstarch
- 1 ½ tsp baking powder
- ¼ tsp baking soda
- ¼ tsp salt
- ¼ tsp ground nutmeg
- ½ cup unsalted butter (melted)
- 2 eggs (at room temperature)
- ¾ cup plain whole milk yogurt (not Greek)
- 2 tsp vanilla extract
For the vanilla glaze:
- ¼ cup milk
- 2 cup powdered sugar
- 1 tsp vanilla extract
For the chocolate ganache —
- ½ cup whipping cream
- ½ dark chocolate (chopped)
For cinnamon sugar donuts —
- ¼ cup butter
- ½ cup white granulated sugar
- 2 tbsp ground cinnamon
Instructions
- 1. Preheat the oven to 350°F (175°C), and thoroughly grease your donut pans. Allow eggs and yogurt to come to room temperature for easier mixing.
- 2. Melt the butter in a microwave-safe bowl and let it cool slightly. Stir in the eggs, yogurt, and vanilla extract until the mixture is smooth. Set aside.
- 3. In a large mixing bowl, combine the gluten-free flour, white sugar, brown sugar, cornstarch, baking powder, baking soda, salt, and nutmeg until thoroughly combined. Create a well in the center, then pour in the wet ingredients and stir until just combined. Do not overmix.
- 4. When the batter is ready, spoon it into a plastic zippered bag or piping bag. Snip the corner off the bag and squeeze the batter into each donut ring until it’s about 2/3 full. Ensure the center ring is clear of batter to maintain the donut hole.
- 5. Bake the donuts for about 12 minutes, or until the edges are lightly golden brown. Remove from the oven, let them sit in the pans for about 5 minutes, then transfer to a cooling rack. Allow to cool completely before frosting or coating.
For the vanilla glaze —
- 1. Heat the milk in a small saucepan until steaming, then sift in the powdered sugar.
- 2. Whisk until the sugar has completely combined and the mixture is smooth, then stir in the vanilla extract.
- 3. Dip the cooled donuts into the glaze and immediately sprinkle with any desired nuts, sprinkles, or berries before the glaze sets.
For the chocolate ganache —
- 1. Place the chopped dark chocolate in a mixing bowl and add a pinch of salt. Heat the whipping cream until it’s gently simmering (not boiling), then pour it over the chocolate.
- 2. Allow it to sit undisturbed for about 10 minutes to melt the chocolate, then gently stir until the mixture becomes smooth and thick.
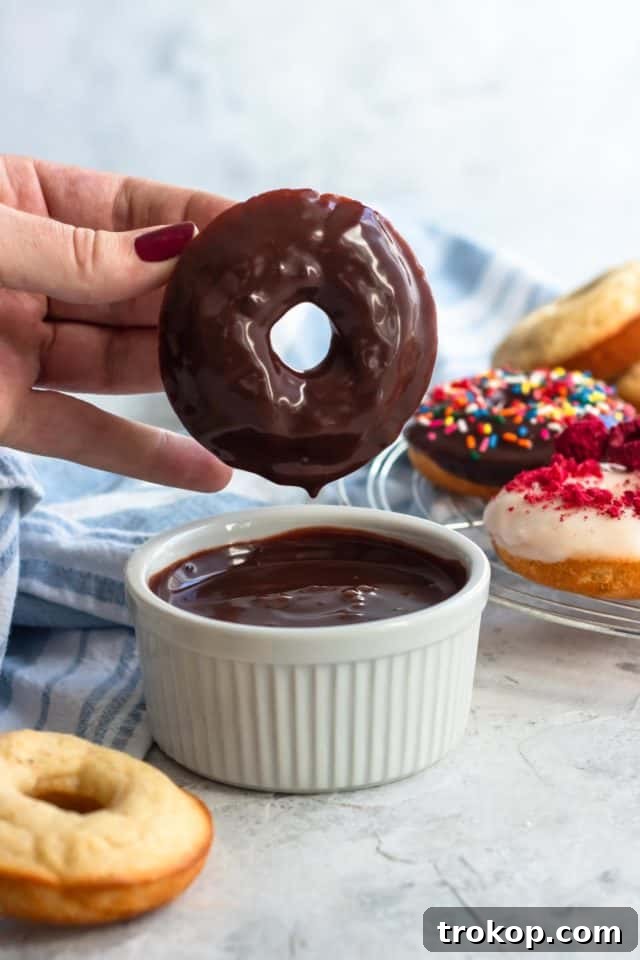
- 3. Allow the ganache to cool until it’s no longer runny but still pliable enough for dipping. Dip the cooled donuts and sprinkle with desired toppings. The ganache will set more quickly if refrigerated briefly.
For cinnamon sugar donuts —
- 1. Melt a quarter cup of butter in a shallow dish.
- 2. In another shallow dish, stir together a ½ cup of white granulated sugar and 2 tablespoons of ground cinnamon.
- 3. Dip both sides of the cooled donuts in the melted butter, allowing any excess to drip off, and then toss generously in the cinnamon sugar mixture until evenly coated.
Nutrition
Notes
After the donuts have been glazed, store them in an airtight container on the counter for 2-3 days to maintain freshness. Refrigeration is not recommended as it can dry out the donuts.

We absolutely love seeing your culinary creations! Don’t forget to share your **gluten-free baked donuts** with us on Instagram using the hashtag #sugarandclothloves. Looking for more quick and delicious recipes to expand your baking repertoire? Find them all right here!
You Might Also Love These Recipes:
34 Decadent Desserts for Valentine’s Day
Sweeten up your celebration with these irresistible desserts for Valentine’s Day, ranging from classic chocolates to inventive fruity delights. Find the perfect treat to share with loved ones or simply indulge yourself in.
Continue Reading34 Decadent Desserts for Valentine’s Day
46 Delicious Thanksgiving Dessert Ideas to Sweeten Your Holiday
From classic pumpkin pies to creative new twists, these easy Thanksgiving dessert ideas will ensure your holiday feast ends on a perfectly sweet note. Explore a variety of options to delight every guest.
Continue Reading46 Delicious Thanksgiving Dessert Ideas to Sweeten Your Holiday
20 Best Bisquick Dessert Recipes
Discover our favorite Bisquick dessert recipes that are incredibly easy and quick to make, perfect for satisfying your sweet tooth with minimal effort. From cookies to cobblers, find your next go-to treat.
Continue Reading20 Best Bisquick Dessert Recipes
45 Alcoholic Desserts to Liven Up Your Next Party
Who says desserts are just for kids? Enter the sophisticated world of alcoholic desserts! These 45 recipes offer a delightful way to infuse your next party with exciting flavors and a grown-up twist. From boozy cakes to spirited ice creams, find the perfect sweet treat to impress your guests.
Continue Reading45 Alcoholic Desserts to Liven Up Your Next Party