
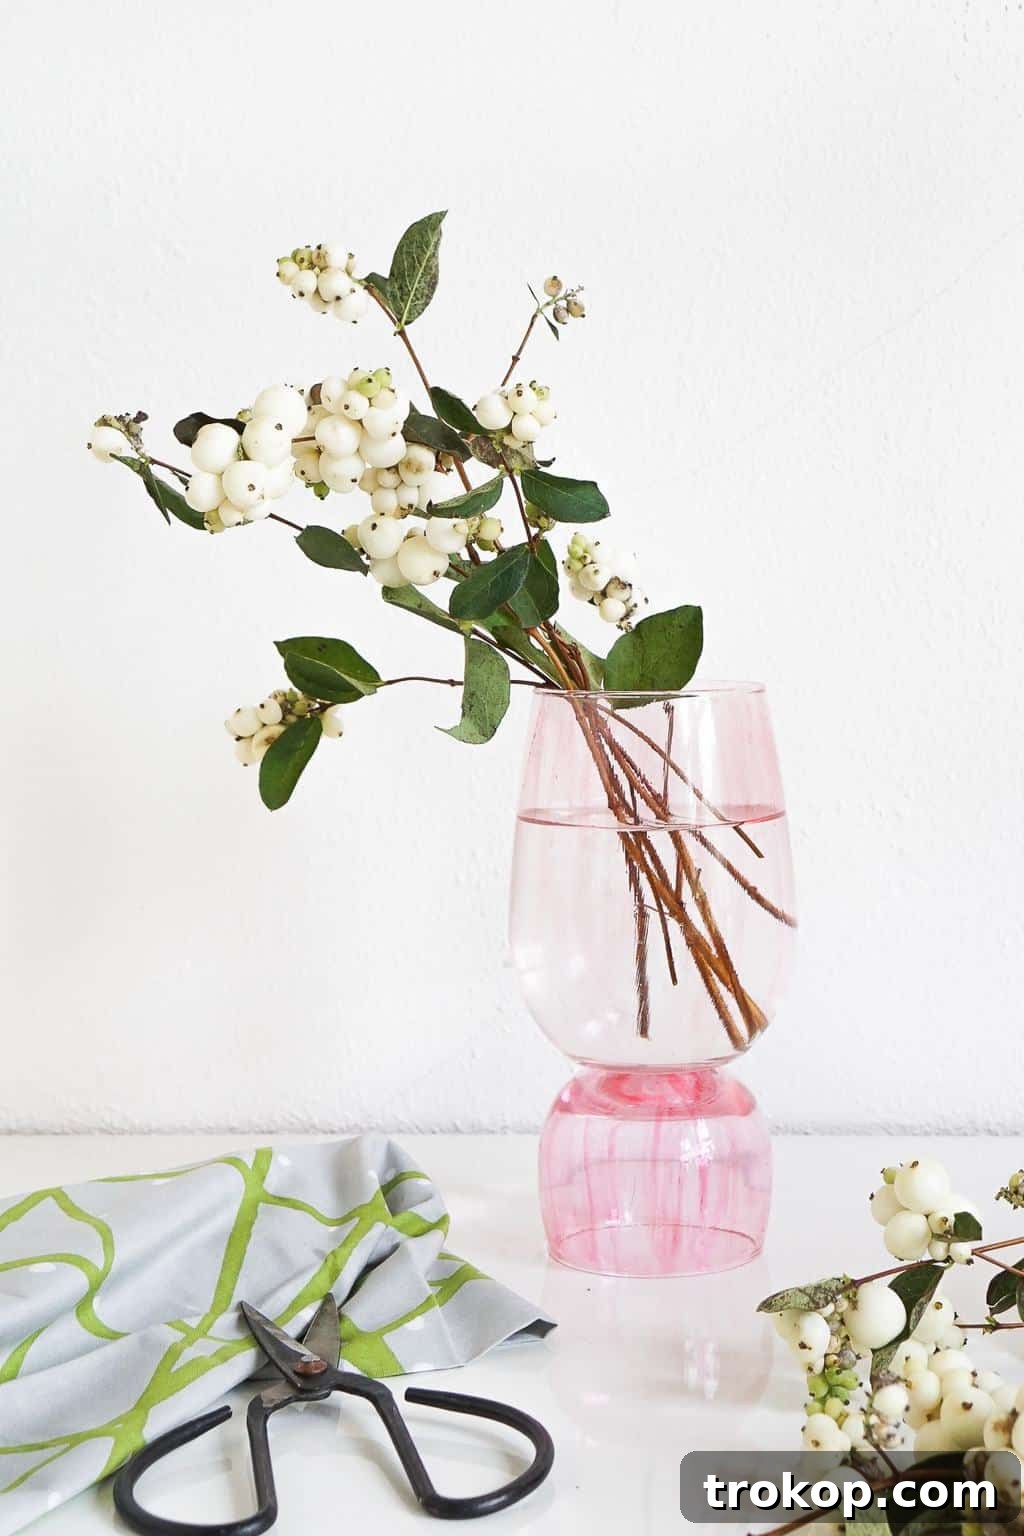
Unleash your creativity and transform mundane drinking glasses into exquisite, sculptural decorative pieces with our easy-to-follow tutorial for a DIY Stacked Painted Vase! This project is a fantastic way to add a touch of modern elegance to your home decor without breaking the bank, turning everyday items into conversation starters.
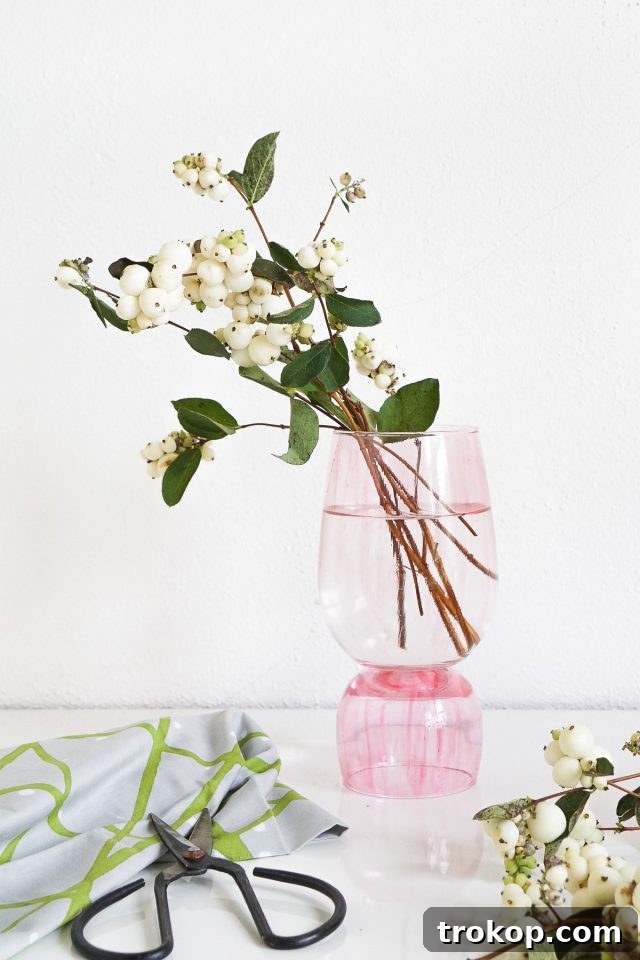
Crafting unique and stylish home decor items is incredibly satisfying, especially when it’s both affordable and allows for personal expression. This particular DIY project embraces the principles of upcycling and personalization, guiding you through the process of repurposing common glassware into trendy, stacked painted vases. It’s a wonderful opportunity to give new life to items you might already own or to transform inexpensive finds into high-end looking decor.
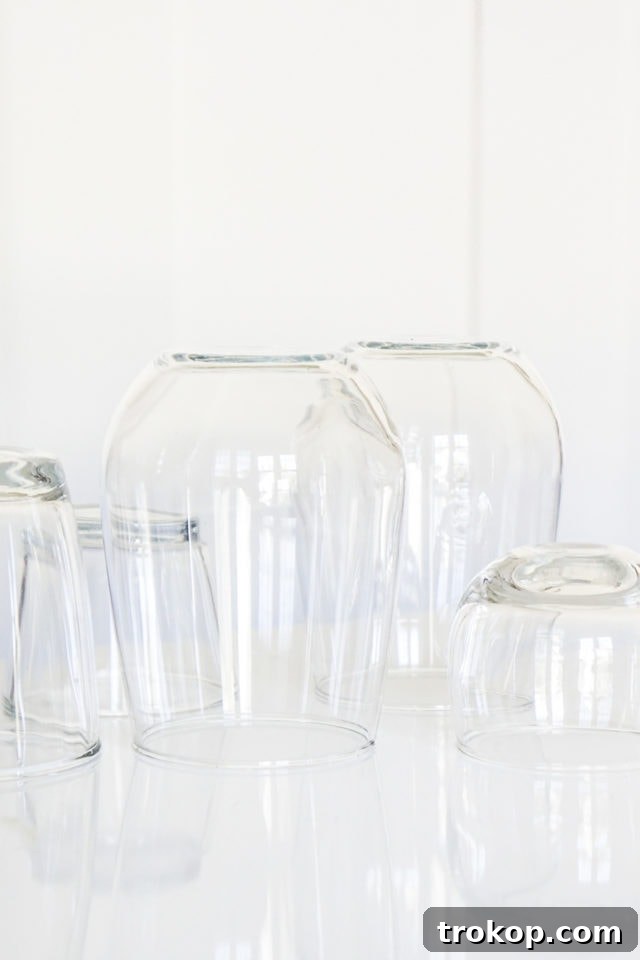
One of the joys of DIY lies in the hunt for materials. Many enthusiasts, myself included, adore thrift shopping precisely because you never know what hidden gems you might discover. On a recent trip, I stumbled upon a treasure trove of drinking glasses – a big ole haul that was absolutely perfect for this very DIY project. These versatile glasses also lend themselves beautifully to other crafts, such as making DIY citronella candles, proving that everyday items hold immense creative potential.
The beauty of this stacking technique is its ability to create a sophisticated, sculptural look with minimal effort. By carefully layering different sized glasses and applying a few coats of vibrant or translucent glass paint, you can achieve a modern aesthetic that rivals designer pieces. This method is an exceptional way to transform items you might otherwise discard, offering them a fresh, contemporary makeover. Moreover, a handmade stacked vase makes for a truly thoughtful and unique gift for friends, family, or even as a housewarming present.
This tutorial is meticulously designed to be accessible for crafters of all skill levels, requiring no specialized artistic skills or prior experience with glass painting. We will meticulously guide you through each step of the process, from the initial preparation of your glassware to the precise techniques for achieving a flawless stacked effect. You’ll be genuinely surprised and delighted by how effortlessly you can craft a designer-worthy vase that instantly elevates the ambiance of any room. Prepare to unleash your inner artist and witness the incredible transformation of plain glass into a stunning, personalized focal point for your home!
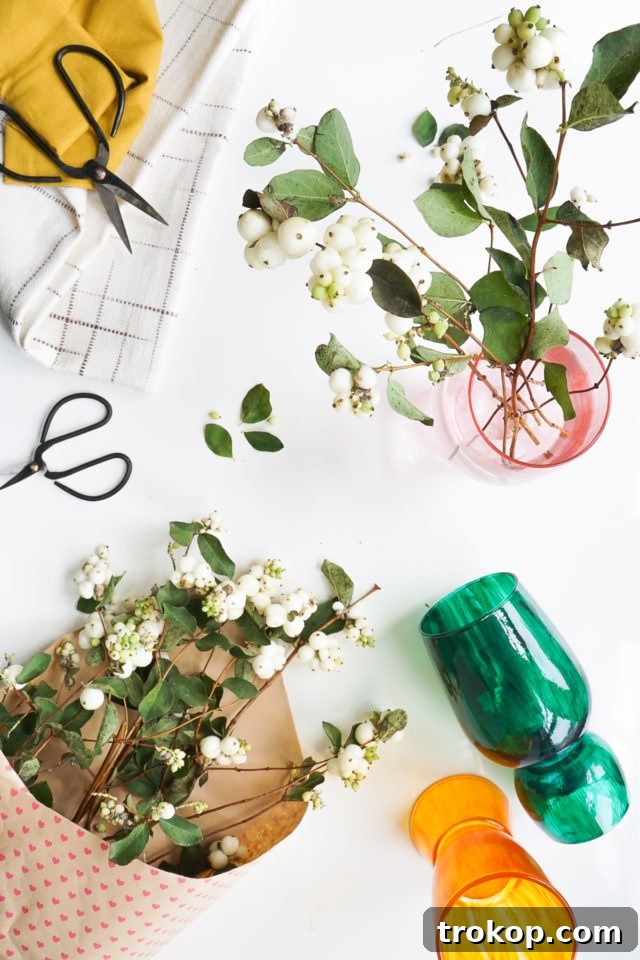
Table of Contents
Materials and Tools Needed for Your DIY Stacked Vase
Gathering the right supplies is the first exciting step in any creative project. For this stacked painted vase, you’ll find that most items are readily available, perhaps even in your own home or at a local craft store. Here’s a detailed list of everything you’ll need:
- Large Stemless Glass: The foundation of your stacked design. While we love the charm of thrifted glassware, you can easily find similar options online here. The key is to choose a glass with a stable base that can support the smaller glass on top. Consider different shapes and sizes to achieve various visual effects for your unique DIY vase.
- Short Stemless Glass: This glass will sit upside down on the larger one, forming the “stack.” It is crucial that this glass has the exact same base diameter as the large glass to ensure a secure and aesthetically pleasing bond. Matching sizes create a seamless, integrated look.
- Glass Paint: Select a high-quality glass paint in your desired color. These paints are specifically formulated to adhere to glass surfaces and can be cured for durability. Popular brands offer a wide spectrum of colors, allowing for endless customization. You can find excellent options like this one.
- Glass Paint Thinner (Optional): If you prefer a more translucent, stained-glass effect rather than an opaque finish, a glass paint thinner can be mixed with your paint. This allows light to beautifully filter through, enhancing the delicate nature of a bud vase.
- Flat Paintbrush: To achieve a smooth, even application with minimal brushstrokes, opt for a soft, flat brush. Apply the paint using long, fluid strokes. Alternatively, a foam sponge brush can create a different, perhaps more textured, finish. A good quality brush will make a significant difference in the final look of your painted glass vase. Find a suitable brush here.
- Wax Paper: Essential for protecting your work surface and providing a non-stick area for your painted glasses to dry on. This prevents the paint from adhering to your table.
- Oven: A standard kitchen oven is required for curing the glass paint, which strengthens its adherence and makes it dishwasher-safe (check paint instructions).
- Super Glue: A strong, clear adhesive specifically designed for glass is vital for securely bonding the two glasses together. Ensure it dries clear to maintain the aesthetic appeal of your stacked vase. This super glue is a good choice for reliable adhesion.
How to Make a Stacked DIY Painted Vase: A Step-by-Step Guide
Creating your stunning stacked painted vase is a straightforward and rewarding process. Follow these detailed steps to achieve a professional and beautiful result:
1 — Prepare and Paint Your Glassware: Begin by thoroughly washing both glasses with soap and water to remove any dust, oils, or fingerprints. Dry them completely. Once clean, place them on your wax paper. Dip your flat paintbrush into the glass paint and carefully apply an even coat to the entire outside surface of both glasses, including the bottom. If you desire a more translucent finish, mix a small amount of glass paint thinner with your chosen color before application. Aim for smooth, consistent strokes to minimize visible brush marks. For a richer, more opaque color, you can plan on applying multiple thin coats, allowing each to dry partially before adding the next.
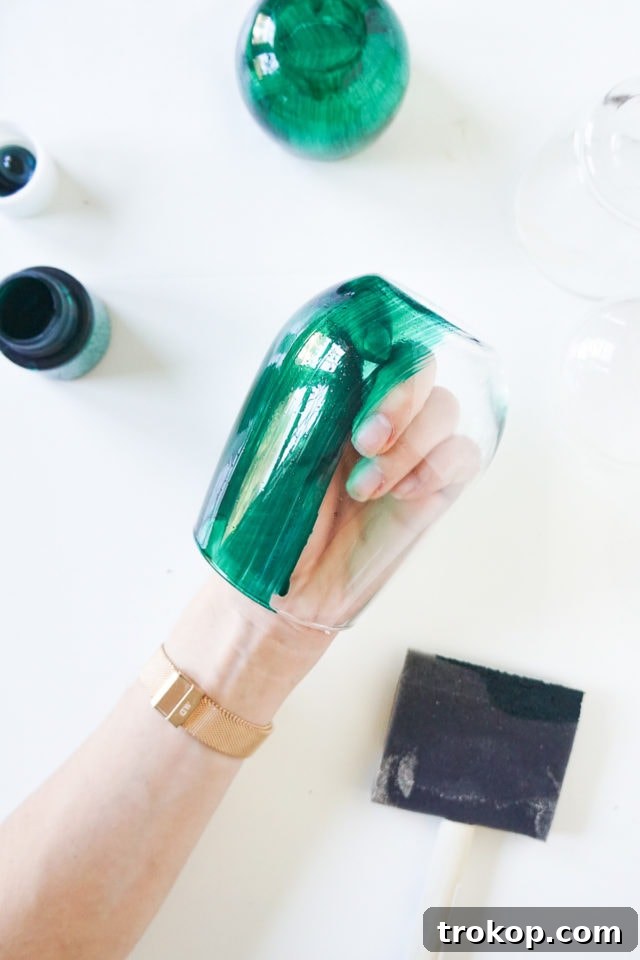
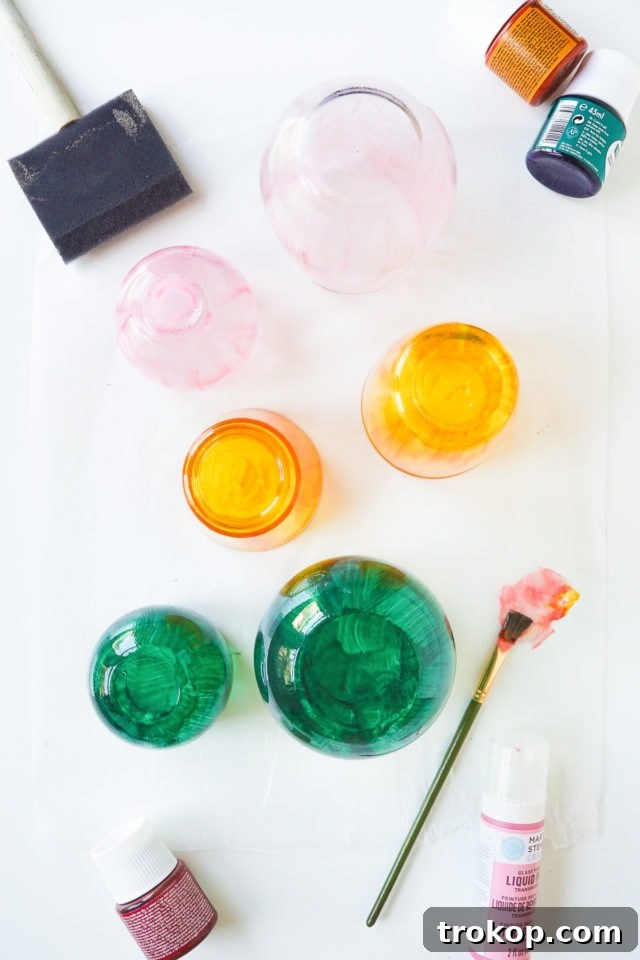
2 — Air Dry the Painted Glasses: Once both glasses are fully painted to your satisfaction, carefully place them back on the wax paper. It is crucial to allow them to air dry completely for at least 24 hours. This initial drying period ensures the paint sets properly before the curing process. Avoid touching the painted surfaces during this time to prevent smudges or imperfections. Proper drying is key to the longevity and durability of your painted glass vase.
3 — Cure the Paint in the Oven: After the 24-hour air-drying period, your glasses are ready for the curing process. Preheat your oven to 325°F (163°C). Once preheated, carefully place the painted glasses inside on a baking sheet. Bake them for approximately 40 minutes. This heat treatment is vital as it cures the glass paint, making it significantly more durable and chip-resistant. After baking, turn off the oven and allow the glasses to cool down completely inside the oven to prevent thermal shock, which could crack the glass. This step ensures your DIY vase can withstand light use and cleaning.
4 — Assemble the Stack: Once the glasses are completely cool, it’s time to assemble your stacked masterpiece. Take the smaller glass and turn it upside down. Apply a generous, but not excessive, amount of strong, clear super glue specifically formulated for glass to the entire rim of its base. Ensure an even application to create a strong bond.
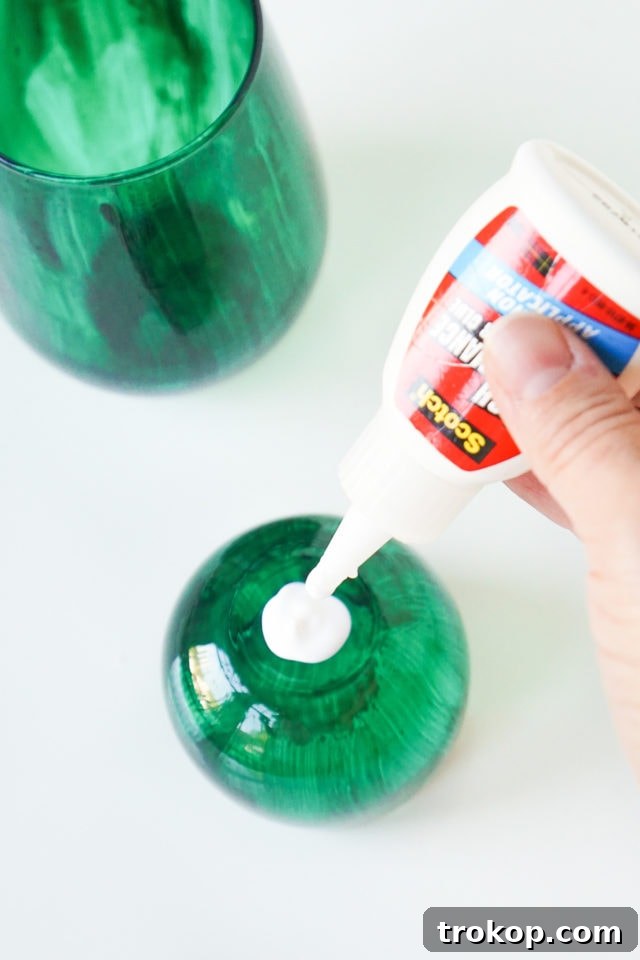
5 — Stack the Glasses: With the glue applied, carefully pick up the larger glass and place it right-side up directly on top of the inverted smaller glass. Align the bases perfectly, pressing them firmly together to ensure maximum contact and a strong bond. Hold the two pieces together for a minute or two, applying gentle pressure, to allow the glue to begin setting.
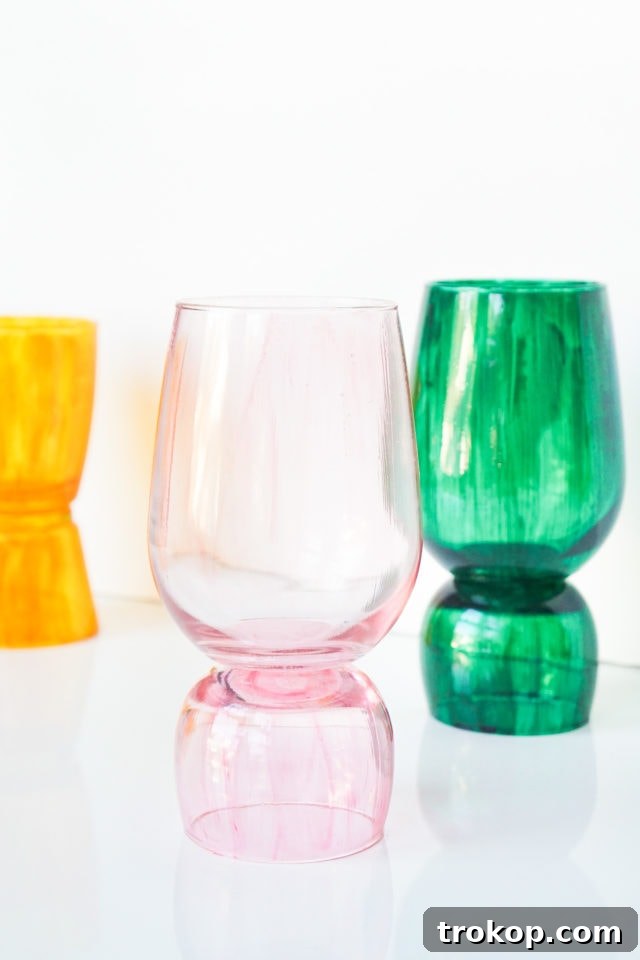
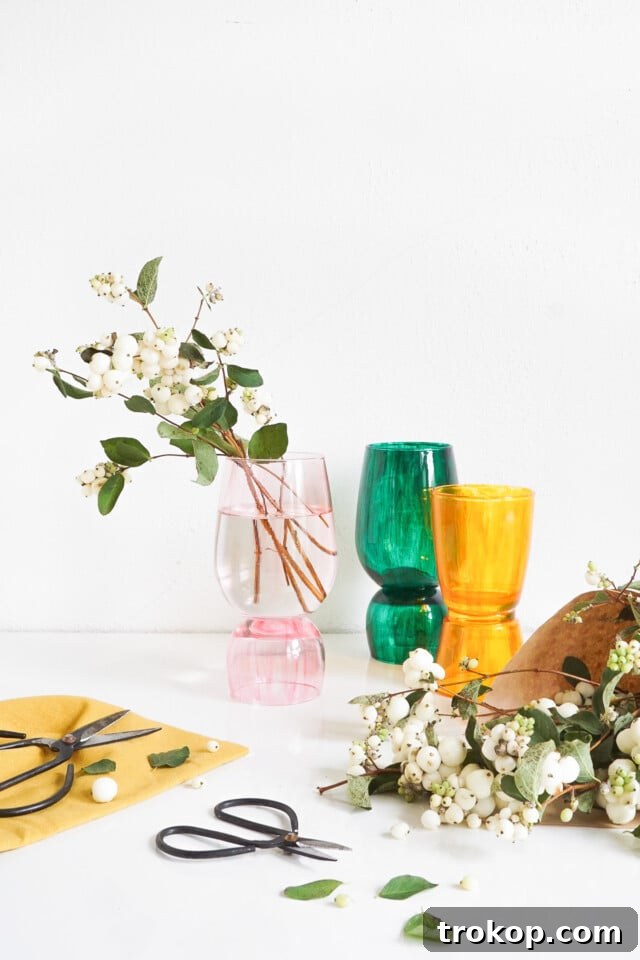
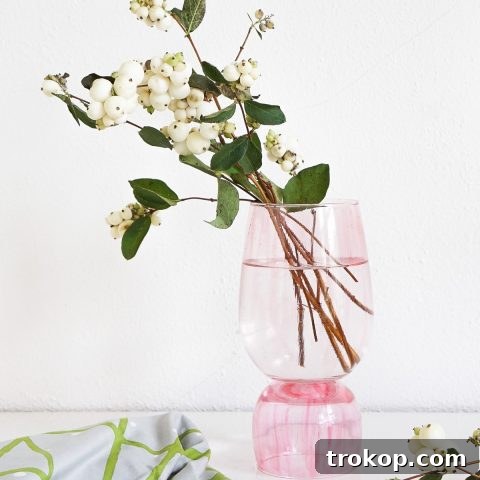
6 — Final Dry and Enjoy: After stacking, set the newly formed stacked vase aside and allow the super glue to dry and cure completely for at least another 24 hours. This final curing period is crucial for the structural integrity of your vase, ensuring it is stable and secure for use. Once fully cured, your personalized DIY stacked painted vase is ready! Fill it with water and adorn it with your favorite florals – perhaps elegant berry branches, cheerful sunflowers, rustic dried wheat, or even unique decorative feathers. This beautiful piece will undoubtedly become a charming focal point in your home decor.
Tutorial Notes and Tips for Your Painted Glass Vase Project
To ensure your DIY stacked painted vase turns out perfectly and lasts for years to come, keep these additional tips and notes in mind:
- Thorough Preparation is Key: Before you even open your paint, meticulously wash both glasses with warm, soapy water. Use a lint-free cloth to dry them completely, as any residue, dust, or oils can prevent the paint from adhering properly, leading to an uneven finish or peeling.
- Achieving Opaque or Translucent Finishes: For a bold, opaque color, apply 2-3 thin coats of glass paint. It is absolutely essential to allow each coat to dry to the touch before applying the next. Rushing this step can cause the paint to streak or peel. If you prefer a more subtle, translucent effect, mix your glass paint with a small amount of glass paint thinner before the first coat. Experiment with ratios on a test piece of glass to find your ideal level of transparency.
- Experiment with Colors and Designs: Don’t limit yourself to a single color! This project offers endless possibilities for creative expression. Consider a sophisticated monochromatic look using different shades of the same color, or create a striking contrast with complementary hues. You could even try an elegant ombre effect by gradually blending two colors. Stencils or masking tape can also be used to create geometric patterns or stripes, adding another layer of personalization to your unique home decor piece.
- Curing for Durability: The oven curing step is not optional; it’s vital. This process permanently bonds the paint to the glass, making it far more durable and resistant to scratches and chips. Always follow the paint manufacturer’s specific instructions for curing times and temperatures, as they can vary slightly between brands.
- Safe Handling and Care: Once your vase is complete and fully cured, it’s best to hand-wash it gently with mild soap and cool water. Avoid using abrasive cleaners, scouring pads, or placing it in the dishwasher, as these can damage the painted surface over time. Treat your beautiful DIY vase with care to preserve its vibrant finish.
- Alternative Adhesives: While super glue is effective, for larger or heavier glasses, you might consider a two-part epoxy specifically formulated for glass. These often offer an even stronger, more permanent bond. Always ensure any adhesive you choose dries clear.
More Easy DIY’s for Flowers and Plants to Enhance Your Space
Our inspiration for these DIY stacked vases this season drew heavily from the rich tones of emeralds, ochres, and blushes, leading to our choice of warm and inviting colors. If you’re looking for more unique and creative DIY projects to beautifully showcase your foliage and greenery, explore some of our favorite archives. These projects offer diverse styles and techniques to add personalized touches to your home:
- Patterned Vase: Learn to create intricate or simple patterns on your vases for an artistic flair.
- Mid Century Modern Planter: Craft a stylish planter that echoes the timeless design of the mid-20th century.
- Mini Face Planters: Add a whimsical and personal touch to your small plants with these adorable face planters.
- Hanging Planter made from Bundt Cake Pans: Repurpose kitchenware into charming hanging planters for a unique look.
- Outdoor Vertical Garden: Create a stunning living wall for succulents or other small plants to maximize your outdoor space.
Stacked DIY Painted Vase (Summary)
20 mins
40 mins
2 days
2 days 1 hr
DIY
Plants
Equipment
- Paint brush
- Wax paper
- Super glue
- Oven
Materials
- 1 large glass
- 1 small glass
- 1 glass paint (color of choice)
- 1 glass paint thinner (optional)
Instructions
-
Paint: Paint the outside of both glasses, including the bottom, with glass paint. For a more translucent finish, mix the paint with a small amount of glass paint thinner.
-
Dry: Place the painted glasses on wax paper and allow them to dry for 24 hours.
-
Cure: After 24 hours, bake the glasses in a preheated oven at 325°F (163°C) for 40 minutes. This cures the paint and makes it more durable. Let them cool completely.
-
Assemble: Turn the smaller glass upside down. Apply a generous amount of super glue to the base of the smaller glass.
-
Stack: Carefully place the larger glass right-side up on top of the smaller glass, ensuring the bases are firmly touching.
-
Dry: Allow the glue to dry and cure for 24 hours before handling or using the vase.
Notes

Explore More Plant & Decor DIYs
19 Unique & Easy Houseplants that We’re Loving
Looking for unique house plants to add character to your home? Dive into our guide to discover 19 easy-to-care-for varieties that are trending and beautiful.
Continue Reading19 Unique & Easy Houseplants that We’re Loving
Faux Boxwood Wall with a DIY Neon Sign
Bring an element of lush nature and a personalized glow to your home or patio with a DIY faux boxwood wall complete with a custom neon sign.
Continue ReadingFaux Boxwood Wall with a DIY Neon Sign
19 Edible Flower Recipes
Beyond decor, flowers can be a delightful addition to your kitchen! Sharing a collection of 19 edible flower recipes for you to explore, adding beauty and unique flavors to your dishes.
Continue Reading19 Edible Flower Recipes
20 Simple & Attractive DIY Plant Stand Ideas
Looking for plant stands that will showcase your plants quite beautifully? Discover 20 simple yet attractive DIY plant stand ideas to elevate your greenery and complement your home decor.
Continue Reading20 Simple & Attractive DIY Plant Stand Ideas