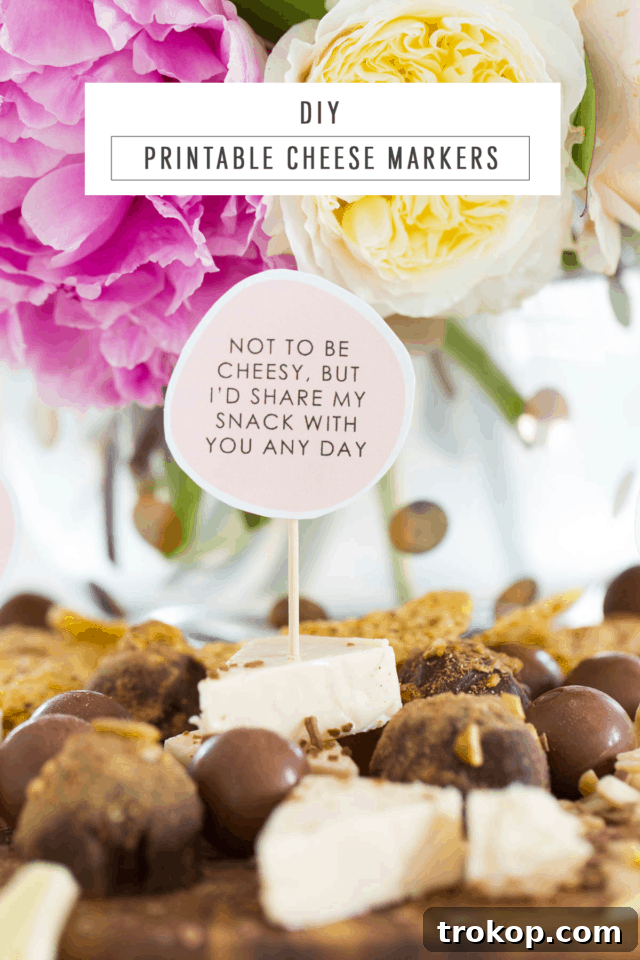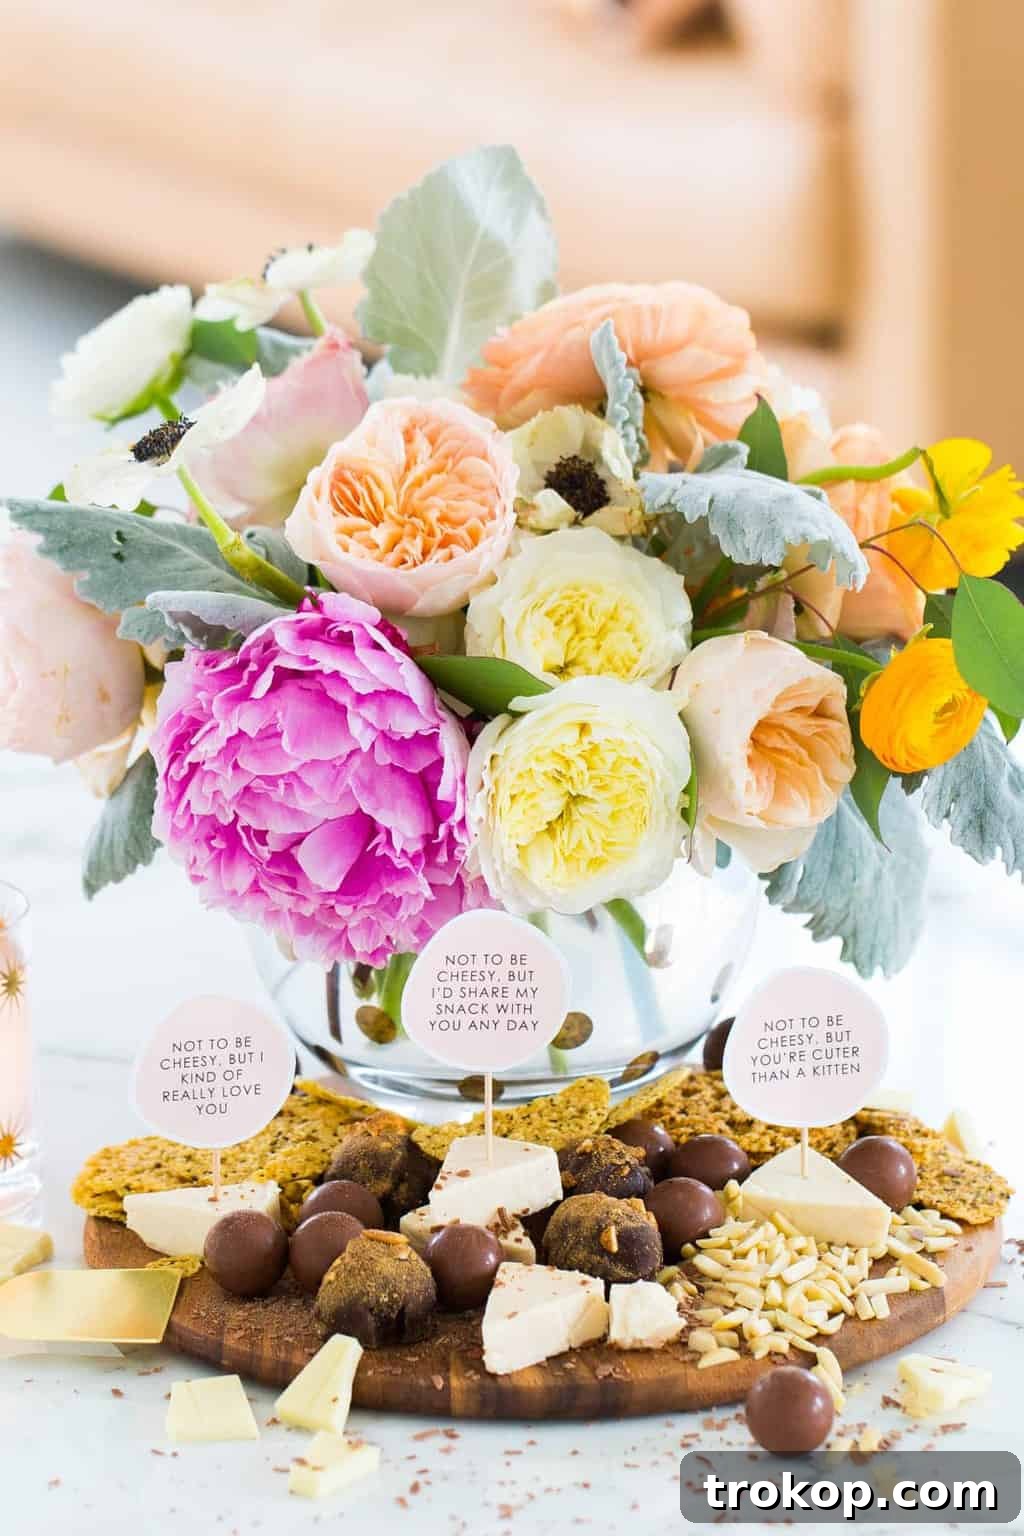
In the world of entertaining, it’s often the small, thoughtful details that leave the biggest impression. And when it comes to expressing affection, sometimes a subtle hint is far more charming than a grand gesture. These exquisite, free printable DIY Cheese Board Markers are designed to do just that – offering a sweet and understated way to convey your true feelings, whether it’s “I love you,” “You’re grate,” or a playful “Don’t brie shy.” Perfect for setting a romantic mood or simply adding a touch of personality to your culinary creations, these markers transform a simple snack into a memorable experience.
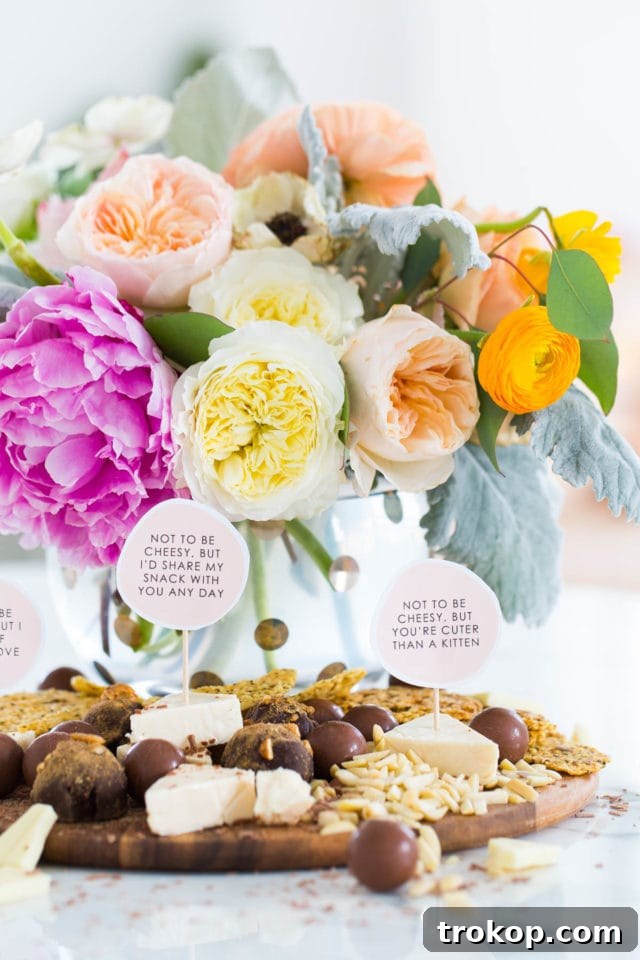
There’s a unique intimacy in sharing food, especially a beautifully curated cheese board. It’s an invitation to linger, converse, and savor. While our daily lives can often be a whirlwind of busy schedules, quick bites, and microwave meals, there’s immense joy in slowing down and crafting something delightful. These DIY Cheese Board Markers elevate even the simplest snack pairing, injecting a touch of sophistication and whimsy. Imagine presenting a spread of gourmet cheeses and artisanal chocolates, each piece thoughtfully identified with a marker that not only names the delicacy but also whispers a sweet sentiment. It’s an effortless way to make any gathering feel special, turning an ordinary moment into an extraordinary one.
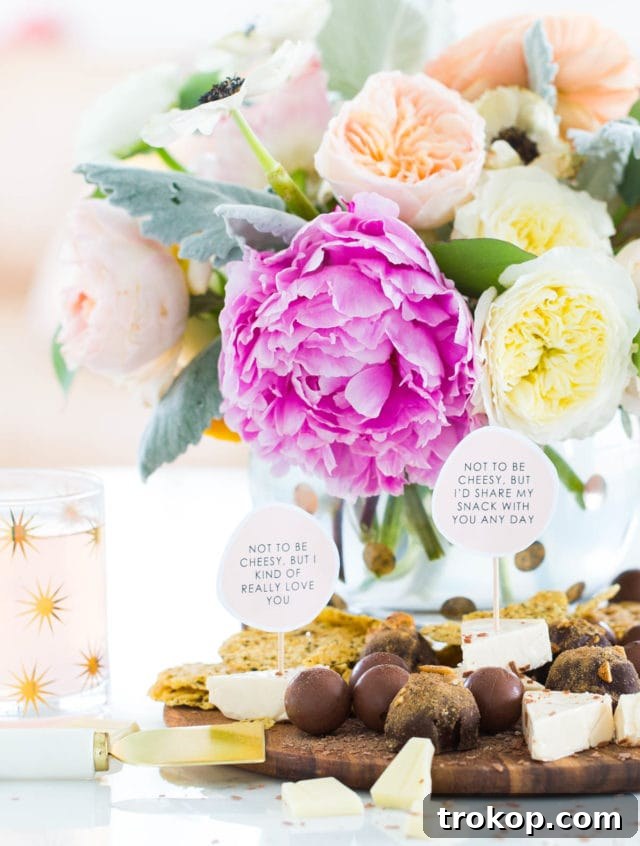
A well-arranged chocolate and cheese board automatically exudes an aura of elegance. When paired with complementary elements like DIY Cheese Knives, the entire presentation becomes a feast for the eyes as much as the palate. But to truly win hearts, add a pop of vibrant color – perhaps a blush pink – and a series of “cheesy” pick-up lines or heartfelt messages. This combination not only guides your guests through the selection but also sparks smiles and conversation, creating an atmosphere of warmth and affection. It’s a guaranteed recipe for charm!
The Allure of Cheese Boards: More Than Just a Snack
Cheese boards have become a quintessential element of modern entertaining, and for good reason. They are incredibly versatile, visually stunning, and offer a delightful array of flavors and textures that cater to diverse palates. A well-constructed cheese board is more than just an appetizer; it’s an experience, encouraging guests to explore new combinations and savor each bite. From creamy brie to sharp cheddar, pungent blue to mild goat cheese, the possibilities are endless. Accompanying elements like fresh fruits, crunchy nuts, sweet preserves, and artisan crackers elevate the presentation, transforming a simple offering into a culinary masterpiece. Moreover, cheese boards foster interaction, inviting people to gather around, share discoveries, and enjoy good company. They’re perfect for intimate gatherings, festive parties, or a quiet evening in, making them a staple for any host. These boards allow for a relaxed dining experience, where guests can graze at their leisure, making them ideal for casual get-togethers and more formal celebrations alike.
Infusing Romance and Personality with DIY Markers
While the inherent charm of a cheese board is undeniable, adding a personal touch makes it truly unforgettable. Our DIY Cheese Board Markers do precisely this, allowing you to infuse your personality and affection into every aspect of your spread. Imagine a “Brie Mine” marker nestled next to a wedge of creamy brie, or a “You’re Grate” tag pointing to a delectable Gruyère. These playful, romantic messages are perfect for Valentine’s Day, anniversaries, or simply to show someone you care. They serve a dual purpose: helping guests identify different cheese types while simultaneously delivering a subtle, heartwarming message. This thoughtful detail not only enhances the aesthetic appeal but also adds an element of fun and surprise, making your culinary presentation truly unique and memorable. By taking a few moments to craft these charming markers, you elevate your hosting game and create an inviting atmosphere that guests will surely appreciate and remember.
Materials and Tools Needed To Make DIY Chocolate & Cheese Board Printable Love Markers
Creating these charming cheese board markers is surprisingly simple, requiring only a few basic supplies that you likely already have or can easily acquire. Here’s everything you’ll need to bring your personalized cheese board vision to life:
- Downloadable Printables: Choose your preferred design for the markers. We offer a classic and elegant black and white version, or for a touch of whimsy and romance, a delightful pink bubbles design. Printing these on sturdy cardstock is highly recommended for durability and a professional finish, ensuring they stand up proudly on your board.
- Scissors: A good pair of sharp scissors will ensure clean, precise cuts for your markers. For intricate designs or a crisp edge, consider using a craft knife and cutting mat.
- Tape: Standard clear adhesive tape or double-sided tape works perfectly for attaching your markers to their stands. For extra security or a more polished look, a strong craft adhesive can also be used, ensuring the markers stay firmly in place throughout your event.
- Toothpicks or Mini Dowel Rods: These will serve as the stands for your markers, allowing them to be easily inserted into the cheese or other items on your board. Mini dowel rods offer a slightly more substantial and elegant look, while toothpicks are a readily available and budget-friendly option. Consider decorative toothpicks or even small bamboo skewers for an added flourish, matching the overall theme of your board.
- Optional: Printer and Cardstock: While the printables are digital, you’ll need a reliable printer to bring them to life. High-quality cardstock (e.g., 65-110 lb weight) will make your markers sturdy and professional-looking, preventing them from bending or tearing easily. Using a thicker paper stock also gives them a more premium feel.
How to Make Our Printable DIY Cheese Board Markers
As promised, this DIY project is incredibly straightforward and suitable for crafters of all skill levels. You’ll be surprised at how quickly you can transform a simple printable into a charming and functional accessory for your next gathering. Follow these easy steps to create your personalized cheese board markers:
Step 1: Download and Print Your Markers
First, access our free downloadable printable templates. Decide whether you prefer the classic elegance of the black and white design or the playful charm of the pink bubbles version. Once you’ve made your choice, download the PDF file. For the best results, print these markers on a good quality cardstock. This will give them a robust feel and prevent them from curling or wilting when placed on your cheese board. Ensure your printer settings are optimized for high-quality printing to capture all the intricate details of the design. A thicker paper stock (like 80lb or 100lb cover stock) will make them feel more substantial and professional.
Step 2: Cut Out Your Markers
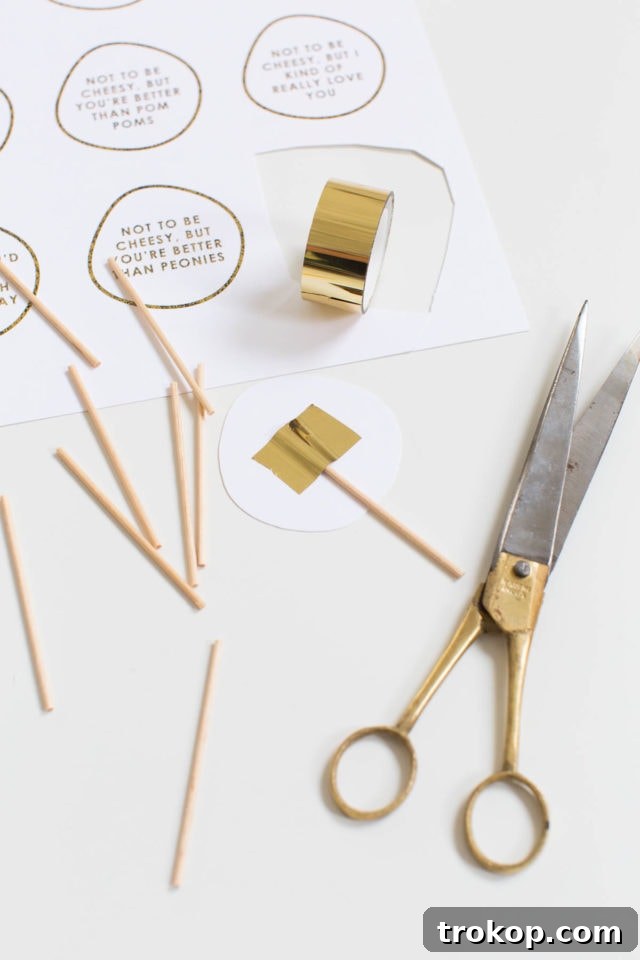
Carefully use your scissors to cut out each individual marker from the printed sheet. Take your time with this step to ensure clean edges and a polished look. Precision in cutting makes a big difference in the final appearance. If you have a craft knife and a cutting mat, you can achieve even more precise cuts, especially for intricate designs or straight lines. However, sharp scissors will work perfectly well for most users. You can cut them as individual flags or fold them over if the design allows, creating a double-sided marker for extra flair.
Step 3: Attach Markers to Picks
Now it’s time to give your markers their stands. Take a toothpick or a mini dowel rod. Apply a small piece of clear tape or a dab of strong craft glue to the back of each cut-out marker. Then, firmly press the marker onto the top portion of your chosen pick, ensuring it’s securely attached and straight. If you’re using double-sided tape, it can make this step even quicker and cleaner, providing an almost invisible bond. For a more robust attachment, a hot glue gun with a small amount of glue can also be effective. Allow any glue to dry completely before handling or placing on your cheese board to prevent accidental detachment.
Step 4: Personalize (Optional but Recommended)
While the printables come with charming pre-designed messages, you have the option to personalize them further. Before printing, you can open the PDF in a suitable editor (like Adobe Acrobat or a free online PDF editor) and add custom text directly onto the markers. This is ideal if you want to specify exact cheese types, add personal notes, or even print guests’ names for a truly bespoke experience. Alternatively, once printed, you can use a fine-tip permanent marker to handwrite your cheese names or additional playful messages on the blank spaces provided or on the back of the markers. This adds a lovely handmade touch and allows for last-minute adjustments based on your cheese selection.
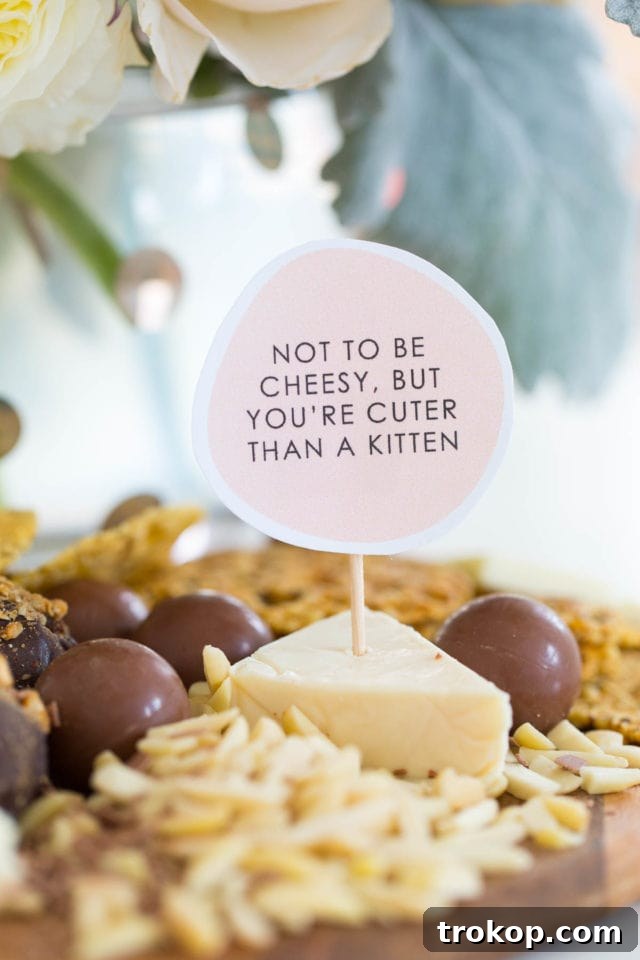
Initially, I tried to make things a bit more complicated for myself, attempting to incorporate my gold foil machine. As often happens with DIY experiments, it didn’t quite go as planned! This led to some interesting variations in my how-to photos – some showing the black and white, others a spotted gold version, and ultimately, I gravitated towards the vibrant pink. It’s all part of the creative process, and sometimes, happy accidents lead to the best discoveries! I absolutely adore how the blush version turned out, especially when paired with fresh flowers and colorful fruits on the board. For now, I’ll continue practicing my gold foiling technique, but I’m thrilled with the simplicity and charm of these printable options, proving that elegance doesn’t always require elaborate steps.
Tips for Customization and Perfect Presentation
Beyond the basic steps, there are numerous ways to customize your cheese board markers and ensure your presentation is absolutely flawless. Consider the theme of your event: for a romantic evening, stick to the blush pink printables with heartfelt messages. For a more sophisticated gathering, the black and white option provides an elegant touch. Don’t be afraid to mix and match. You could have some markers identifying cheese types, while others offer playful compliments, adding an element of surprise for your guests. Experiment with different types of picks too – bamboo skewers cut to size, or even small decorative cocktail picks can add to the aesthetic, complementing the overall style of your board. Remember, the goal is to create a cohesive and inviting display that delights your guests and reflects your unique style. Arrange your markers artfully, ensuring they are easily visible but not overcrowding the board, letting your delicious selections shine. Think about varying heights for your markers to add visual interest, and place them strategically near the items they identify.
Beyond Valentine’s Day: Versatile Marker Ideas
While these “love markers” are undeniably perfect for Valentine’s Day, their versatility extends far beyond a single holiday. With a quick change of message, they can become indispensable tools for any host or hostess. Imagine using them for a sophisticated wine and cheese tasting, labeling each cheese with its origin, type, and perhaps even suggested wine pairings. For a holiday gathering, markers could identify seasonal flavors, festive treats, or ingredients for guests with dietary restrictions. At a children’s party, they could label different snack stations with fun characters or names, making food discovery an interactive game. Bridal showers, baby showers, birthdays, or even casual get-togethers can all benefit from these charming little details. They serve to inform, entertain, and add a personalized flair to any edible display, making your event feel thoughtfully curated and extra special. Simply adapt the messages and colors to suit your occasion, and these printables will quickly become your go-to entertaining hack, simplifying your hosting duties while enhancing the guest experience.
More Valentine’s Day DIY’s to Ignite Your Creativity
We absolutely love finding creative ways to celebrate Valentine’s Day, and clearly, we enjoy serving up subtle messages with our cheeses! But if you’re looking for more ways to sprinkle some love and DIY charm into your celebrations, you’re in luck. Beyond our delightful cheese board markers, we have a treasure trove of easy and fun Valentine’s Day DIY projects perfect for gifting, decorating, or simply indulging in a little creative self-love. Explore some of our favorite archived projects below to spark your imagination and make this Valentine’s Day (or any day you want to share a little love) extra special:
- Candied Valentine’s Day Printables: Sweet messages you can literally eat! These printables combine edible treats with heartfelt notes, perfect for a unique and delicious gift.
- Fringed Love Cake Topper: Add a festive and whimsical touch to any dessert with this easy-to-make cake topper that screams “love” and adds a celebratory flourish.
- Love Potion Bath Set: Create a luxurious and relaxing gift for yourself or a loved one with these enchanting bath products, perfect for a pampering session and self-care.
- Funny Printable Valentine’s Day Cards: If your love language is laughter, these witty and humorous cards are the perfect way to express your affection with a smile and a good chuckle.
- DIY Boob Macarons & Valentine’s Printables: A cheeky and utterly unique take on Valentine’s treats, paired with matching printables for a truly memorable (and perhaps giggle-inducing) celebration that’s sure to be a conversation starter.