Are you tired of staring at the same old, uninspired furniture? Do you dream of injecting personality and vibrancy into your living space without breaking the bank? Look no further! A simple chair can be so much more than just a place to sit; it can be a blank canvas awaiting your artistic touch. With a splash of paint and a dash of creativity, you can transform boring, outdated pieces into captivating works of art that truly reflect your unique style. This comprehensive guide will walk you through the exciting world of DIY chair paint designs, showing you how to embark on your very own painted chair makeover and surprise your friends with stunning, custom-made furniture.

The Allure of a DIY Chair Makeover: From Forgotten to Fabulous
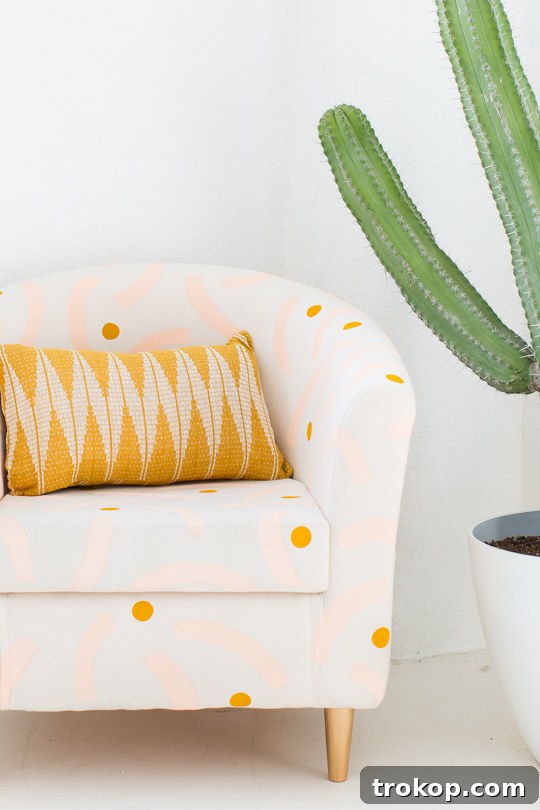
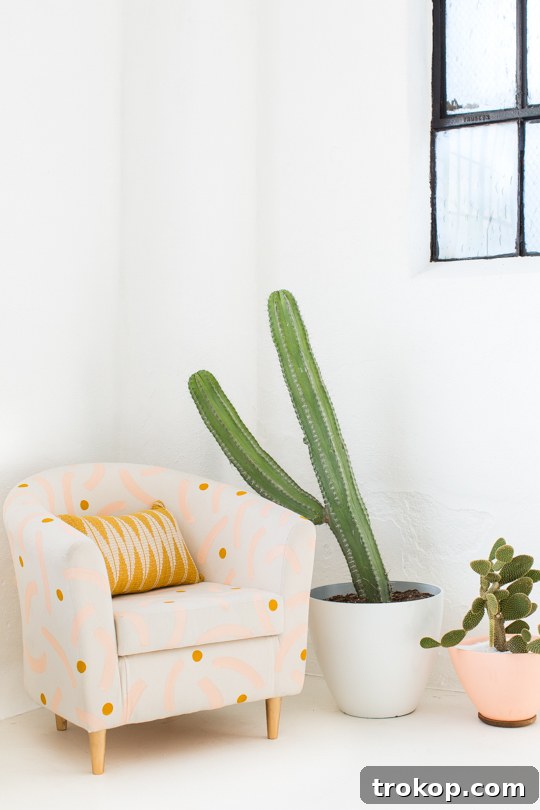
Every home has that one piece of furniture – a chair tucked away in a corner, an inherited piece that doesn’t quite fit your aesthetic, or perhaps an impulse buy that lost its charm. For me, it was an old Ikea chair that had resided in my home for what felt like an eternity. It was one of those items that simply existed, so much a part of the background that I often forgot I even owned it. But then, inspiration struck! After a lively DIY workshop left me with an abundance of leftover fabric paint, I decided to take a leap of faith. What better way to revive a forgotten piece than to give it a vibrant new lease on life? And if my ambitious DIY painted chair makeover didn’t quite go as planned, well, at least I wouldn’t be missing a chair I barely noticed. Thankfully, the outcome was far from disastrous!
Upcycling furniture through painting is more than just a creative hobby; it’s a sustainable choice that allows you to reduce waste and give new purpose to existing items. It’s also an incredibly budget-friendly way to update your decor, saving you from the expense of buying new furniture. Beyond the practical benefits, there’s immense satisfaction in transforming something ordinary into a conversation starter, a unique piece that tells a story. From subtle accents to bold declarations, the possibilities for creative chair designs are endless, allowing you to personalize your home like never before. And speaking of personalization, if your chair’s legs are a bit bland, don’t forget you can always craft your own DIY Metallic Gold Legs to add an extra touch of glamour!
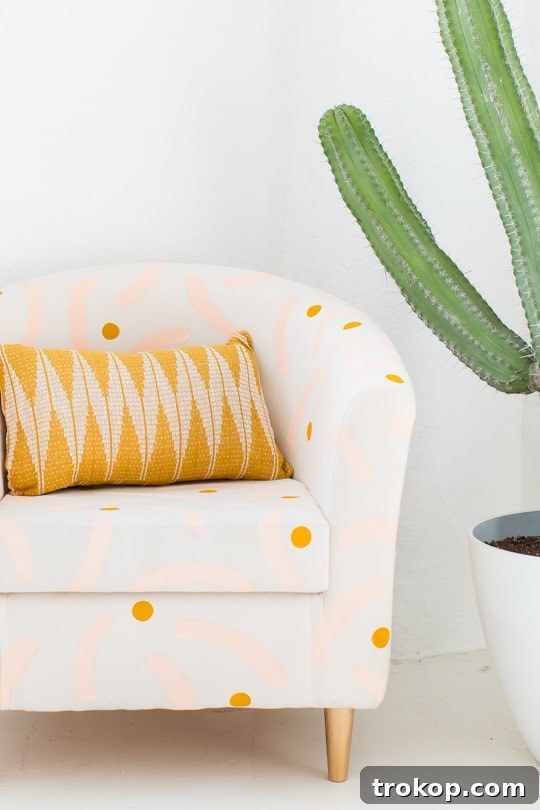
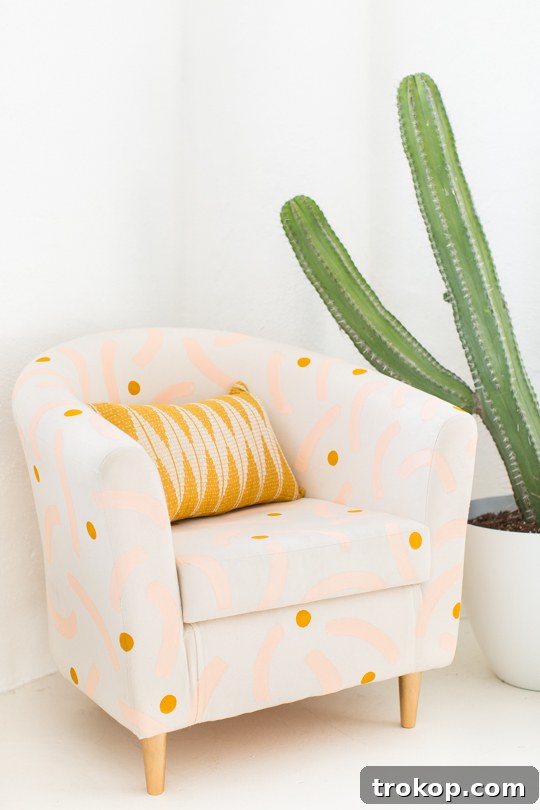
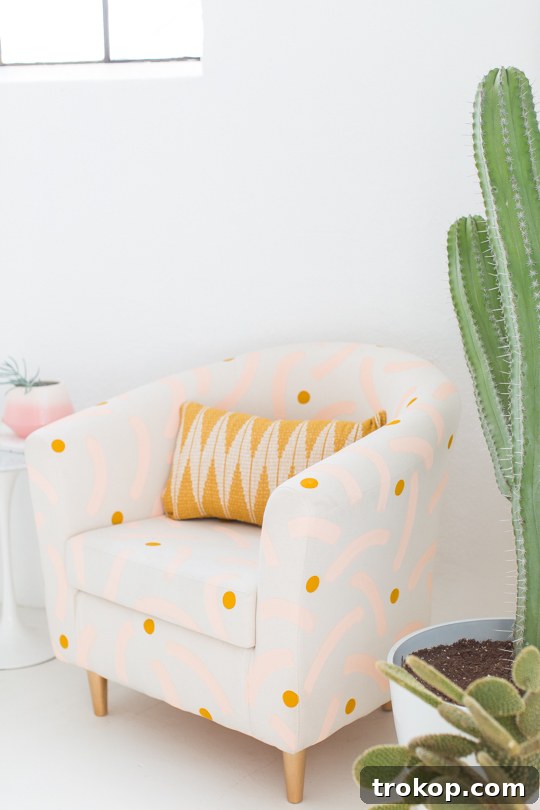
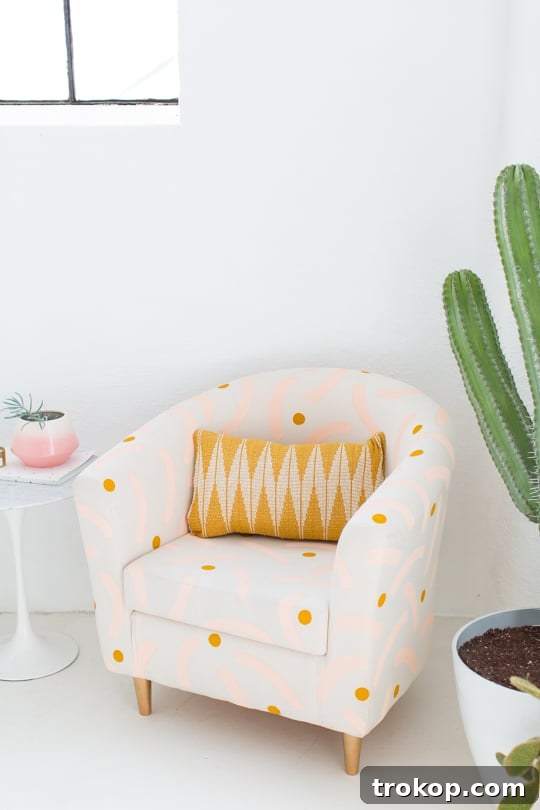
I absolutely adore how my chair turned out. While I admit the pattern is a little unconventional and full of personality, it truly made the piece pop. Have you ever considered painting a bold pattern on one of your old chairs? One of the best aspects of using good quality fabric paint, especially when applied lightly, is that it doesn’t result in a stiff or “scratchy” finish. The fabric remains soft and inviting, proving that fabric chair painting can be both beautiful and comfortable.
Choosing Your Canvas: Finding the Perfect Chair for Upcycling
Before diving into the painting process, selecting the right chair is paramount. Look for chairs with a sturdy frame, as you’re investing time and effort into its transformation. Fabric chairs, like my Ikea piece, are fantastic candidates for fabric paints, allowing for soft, integrated designs. Wooden chairs, on the other hand, offer a smooth surface for a wide range of paints, from chalk paint to acrylics, and can be distressed for a rustic look or given a glossy, modern finish. Even metal chairs can be transformed with the right primers and spray paints. Consider the chair’s shape and lines – some designs lend themselves better to geometric patterns, while others might inspire more organic or abstract motifs. Don’t be afraid to pick a chair with character; imperfections can often add to its charm once painted.
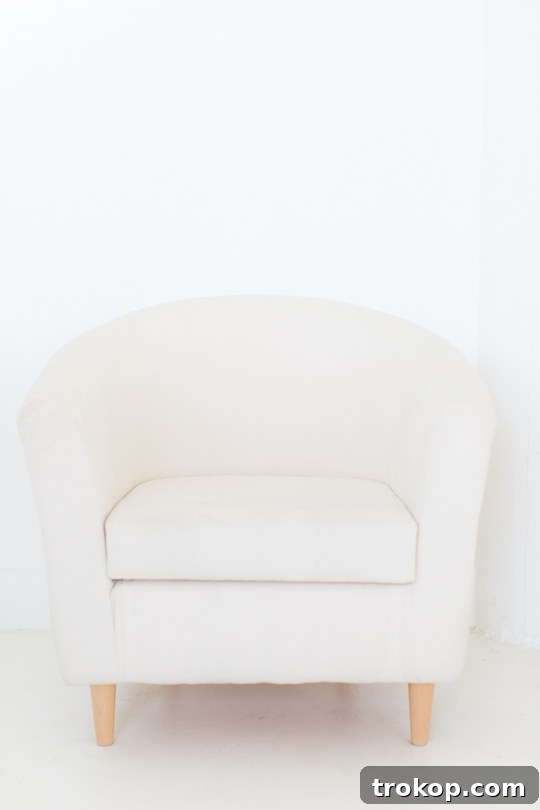
Here’s a look at the “before” to truly appreciate the transformation:
Gathering Your Creative Arsenal: Essential Materials and Tools for a DIY Painted Chair
Having the right tools and materials on hand will make your DIY furniture painting project smooth and enjoyable. Here’s what you’ll need:
- An old chair (fabric, wood, or metal) – your canvas!
- Cleaning supplies: Mild detergent, warm water, and a cloth to thoroughly clean the chair surface.
- Sandpaper: Fine-grit sandpaper (120-220 grit) for wooden chairs to create a smooth surface for paint adhesion.
- Painter’s tape: Essential for masking off areas you don’t want to paint or for creating crisp lines for patterns.
- Foam brush: Ideal for smooth, even application of paint, especially for larger areas.
- Foam pouncer: Perfect for creating uniform dots or circular patterns.
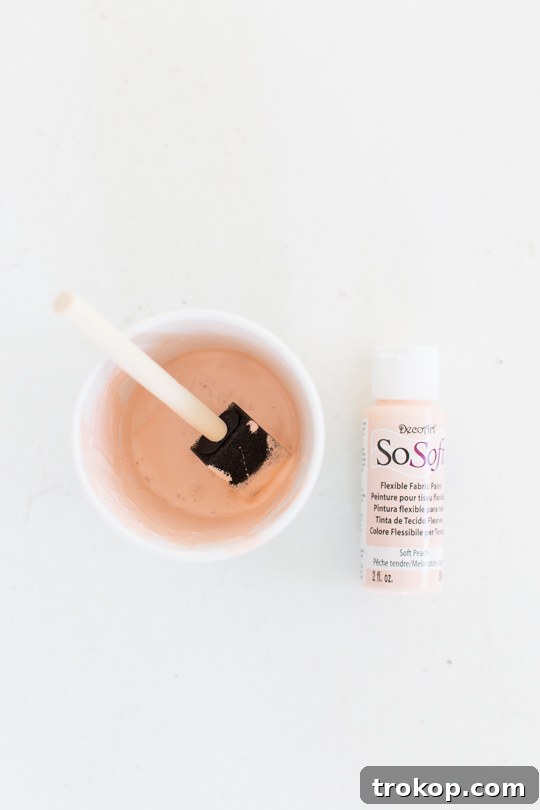
- Fabric paint: If you’re painting a fabric chair. I used DecorArt SoSoft fabric acrylic paint in Peaches and Cream and Antique Gold.
- Acrylic or chalk paint: For wooden or metal chairs, choose a paint specifically designed for furniture.
- Gold spray paint: (Optional) For spraying the legs or adding metallic accents.
- Protective topcoat/sealant: Crucial for durability. Fabric sealant for fabric chairs, or clear polyurethane/wax for wooden chairs.
- Drop cloth or old newspapers: To protect your work area.
- Gloves: To keep your hands clean.
Step-by-Step Guide: Bringing Your Vision to Life with DIY Chair Paint Designs
Ready to transform your old chair? Follow these instructions to create your custom DIY painted chair masterpiece.
1. Preparation is Key: Legs and Cushion
- Begin by thoroughly cleaning your chair. For fabric chairs, vacuum thoroughly and spot clean any stains. For wooden chairs, wipe down with a damp cloth and mild detergent, then allow to dry completely.
- If your chair has detachable peg legs, unscrew them. This allows for easier and more precise painting.
- Using your gold spray paint, give the legs a couple of thin, even coats. Allow ample drying time between coats and before reattaching them. This adds a touch of elegance and visual interest to your redesigned chair.
- Carefully remove the seat cushion from the chair frame. Painting the cushion separately allows for a seamless pattern across the entire seating area and prevents awkward breaks near seams.
- For wooden chairs, lightly sand all surfaces you intend to paint with fine-grit sandpaper. This helps the paint adhere better and ensures a smoother finish. Wipe away any sanding dust before priming. If your chair is made of wood and you’re using acrylic or latex paint, consider applying a coat of primer first, especially if you’re going from a dark color to a light one, or if the wood is raw.
2. Laying the Foundation: Base Colors and Patterns
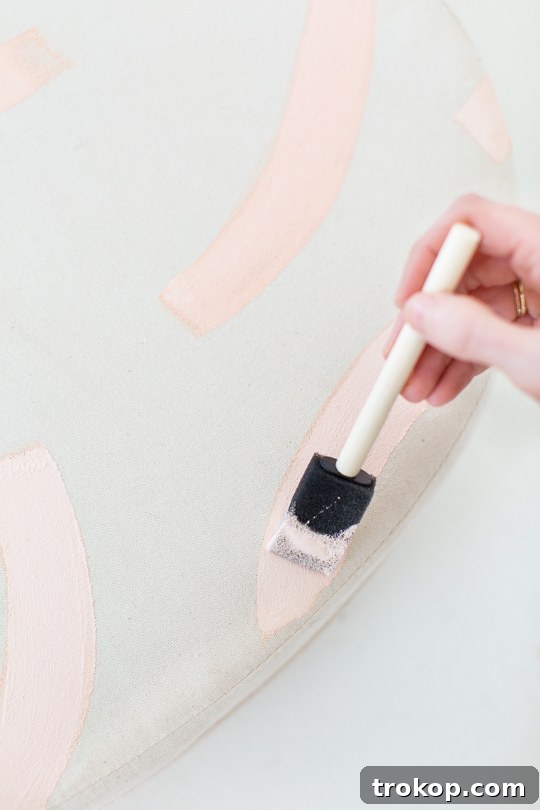
- With the seat cushion removed, start painting your chosen base pattern onto the cushion. For my chair, I began by applying peach half-circles using a foam brush. Apply fabric paint in thin, even layers. Multiple thin coats are always better than one thick coat, as it prevents cracking and keeps the fabric flexible.
- Once the cushion’s base pattern is complete (or after the first coat has dried), proceed to paint the rest of the chair frame. If it’s a fabric frame, continue your fabric paint design. If it’s a wooden frame, apply your chosen furniture paint. Work in sections, ensuring smooth coverage.
- Allow each coat of paint to dry completely according to the manufacturer’s instructions before applying the next. Patience is key for a professional-looking finish.
3. Adding Flair: Details and Embellishments
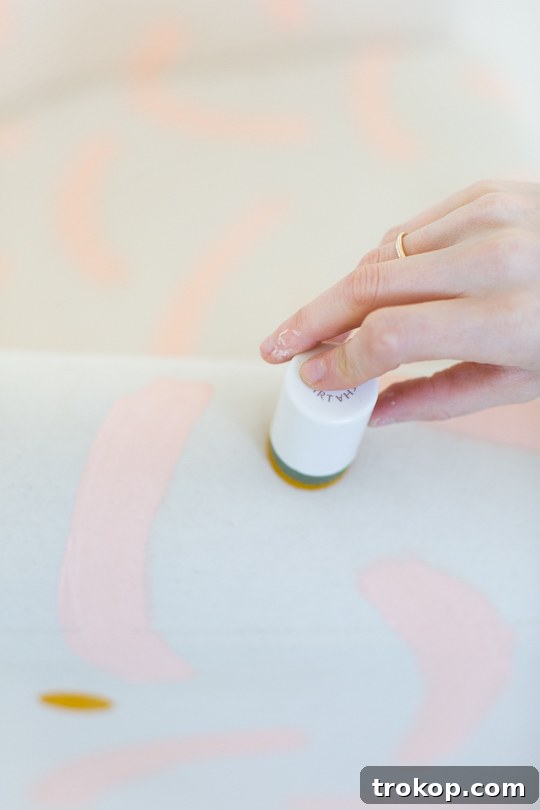
- Once your base pattern and paint on the chair are completely dry, it’s time to add the secondary details. I used a foam pouncer and antique gold fabric paint to randomly apply dots throughout the peach design. This technique is incredibly simple yet creates a delightful, playful effect.
- Experiment with different patterns! You could use painter’s tape to create crisp geometric lines, stencils for more intricate designs, or even freehand abstract brushstrokes for a truly unique look.
- Once all the paint has been applied and is thoroughly dry (this might take 24-48 hours depending on paint type and humidity), it’s time to seal your masterpiece. For fabric chairs, use a fabric sealant spray to protect the paint and ensure its longevity. For wooden chairs, apply a clear protective topcoat like polyurethane or furniture wax. This step is crucial for making your unique seating durable and resistant to wear and tear.
- Finally, reattach the seat cushion and the newly painted gold legs. Stand back and admire your handiwork!
This entire process, from preparing the chair to adding the final details, was surprisingly simple and completed in just a few hours. The key is to work meticulously and allow adequate drying time between steps. The transformation is incredibly rewarding, breathing new life into a piece of furniture that was once overlooked.
Styling Your Newly Transformed Chair
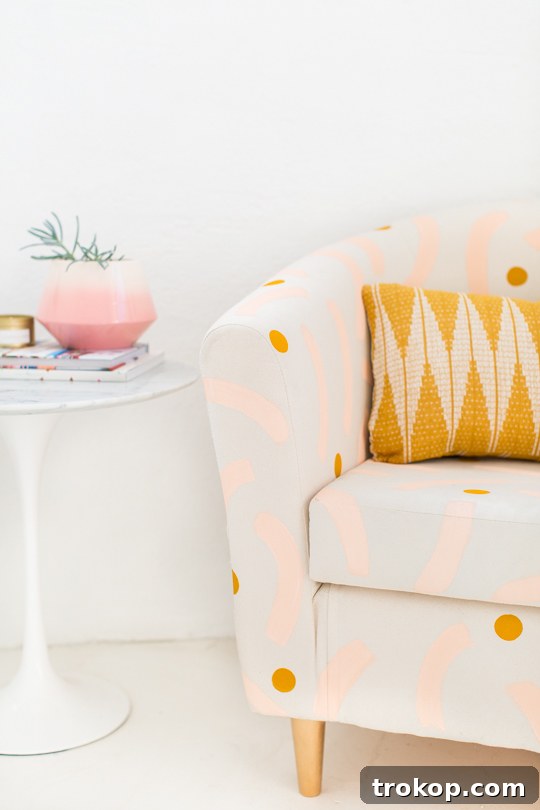
Once your painted chair is complete, it’s time to integrate it into your home decor. A boldly patterned chair can become a fantastic focal point in a living room, bedroom, or even a entryway. To make your chair even cozier and to complement your new design, consider pairing it with these DIY Tasseled Throw Pillows. The texture and color of decorative pillows can further enhance the chair’s appeal and tie it into the room’s overall aesthetic. Remember, your newly designed chair is an expression of your personal style, so have fun arranging and styling it!
Unleash Your Inner Artist: Tips for Success with DIY Furniture Painting
While the process is straightforward, a few tips can elevate your DIY chair paint designs from good to great:
- **Patience is a Virtue:** Rushing the drying process can lead to uneven finishes or sticky surfaces. Always allow each coat to dry completely.
- **Thin Coats are Best:** Especially with fabric paint, thin layers prevent stiffness and cracking. For wooden chairs, thin coats minimize brush strokes and allow for a smoother finish.
- **Test Your Paint:** Always test your paint and pattern on an inconspicuous area or a scrap piece of similar material first. This allows you to check color, adhesion, and technique.
- **Work in a Well-Ventilated Area:** Especially when using spray paint or strong sealants, ensure good airflow.
- **Embrace Imperfection:** DIY projects have a charm that comes from their handmade nature. Don’t stress over minor imperfections; they often add character!
- **Consider Different Techniques:** While I opted for half-circles and dots, you could explore stenciling, ombré effects, stripes, or even a more “messy brush stroke” style, as I once did on a pillow, for a free-spirited, artistic vibe.
Beyond the Chair: More DIY Home Decor Inspiration
The satisfaction of transforming an old chair is just the beginning! If you’ve enjoyed this DIY chair makeover, there’s a whole world of home decor projects waiting for you to explore. Here are some more ideas to spark your creativity and help you continue personalizing your space:
- Easy and Simple Wall Painting Design Ideas for a New Look
- Our Revamped, Open Concept Living Room & Dining Room Design
- Amazon Home Decor – Our Favorite Amazon Furniture Finds
- Cane Decor Trend: The Rattan Furniture We’re Loving
Your home is a reflection of you, and with DIY projects, you have the power to infuse every corner with your unique taste. Don’t forget to share your amazing DIY Chair Paint Designs with us on Instagram using the hashtag #sugarandclothloves. We absolutely love seeing all of your creative transformations!
Looking for even more interior design inspiration and tutorials? You can find a wealth of our home decor DIY ideas right here!
DIY Painted Chair
Equipment
-
Foam brush
-
Foam pouncer
Materials
- 2 fabric paint in colors of your choice
- 1 gold spray paint optional for spraying the legs
Instructions
-
Screw off the peg legs of your chair and spray paint them gold. Reattach them after they have dried.
-
Remove the seat cushion and start painting the peach half circles on the cushion. Then, paint the rest of the chair with the seat cushion removed.
-
Once the peach pattern paint is dry, use foam pouncer and antique gold paint to make dots randomly throughout the couch. Let dry.