
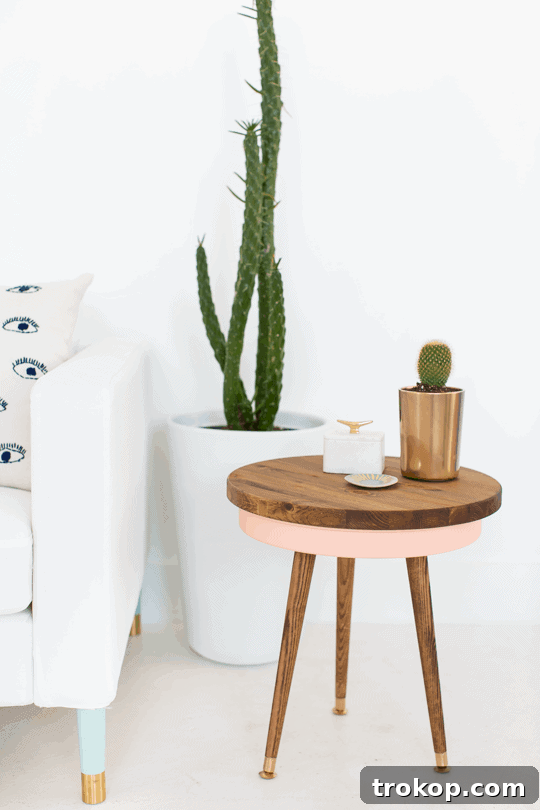
Embark on an exciting DIY journey to create a stylish and highly functional mid-century modern side table. This comprehensive, step-by-step tutorial will guide you through crafting a unique piece from scratch that not only captures the timeless aesthetic of the era but also offers practical storage solutions for your everyday essentials. Get ready to transform your living space with a touch of DIY charm!
Craft Your Own Iconic DIY Mid-Century Modern Side Table with Storage
Our passion for all things mid-century modern is undeniable, and we’re thrilled to share another project that brings this coveted style within reach for everyone. While authentic mid-century modern furniture can often come with a hefty price tag, we firmly believe that iconic design shouldn’t be exclusive. That’s why we’ve dedicated ourselves to building stunning mid-century furniture pieces ourselves, proving that you can achieve high-end aesthetics on a budget.
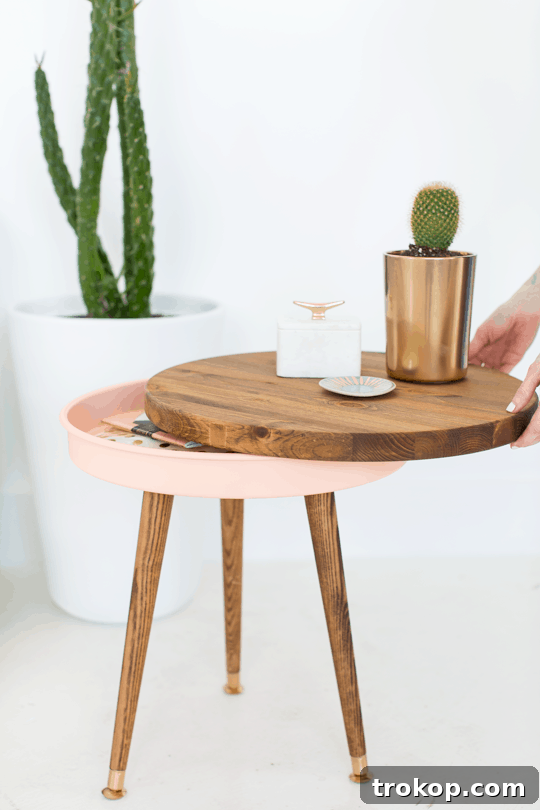
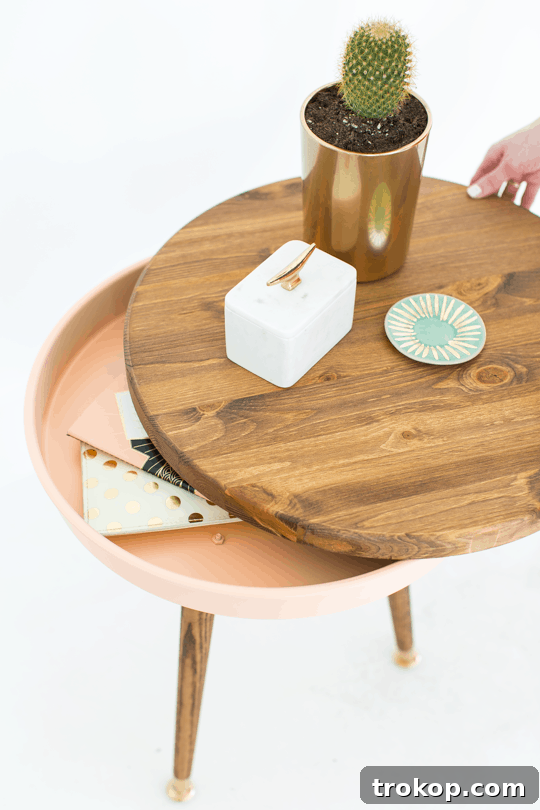
From chic planters to a versatile daybed, our DIY journey into mid-century design has been incredibly rewarding. Our latest endeavor is this incredibly easy DIY Mid Century Side Table, which goes beyond mere aesthetics by incorporating a clever storage feature. This hidden compartment is perfect for stowing away those small but important items that often clutter your living space, like TV remote controls, charging cables, or your current favorite magazine. Imagine a clutter-free, stylish surface where everything you need is still conveniently at hand.
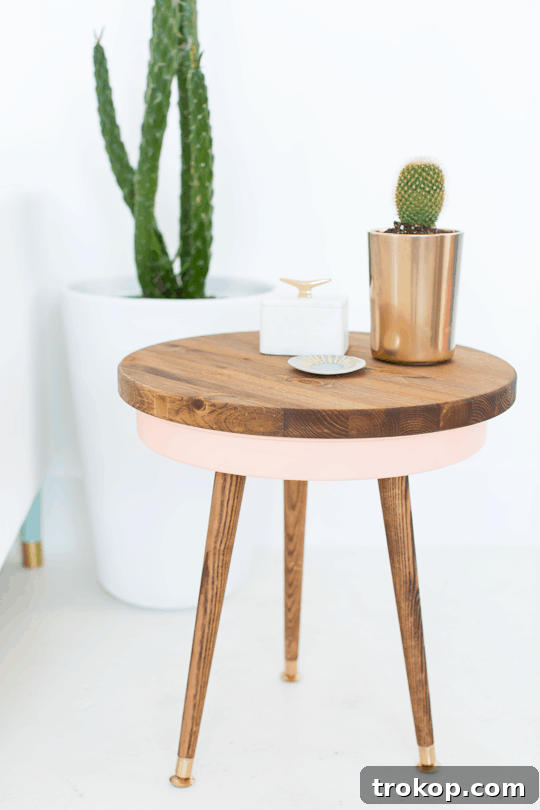
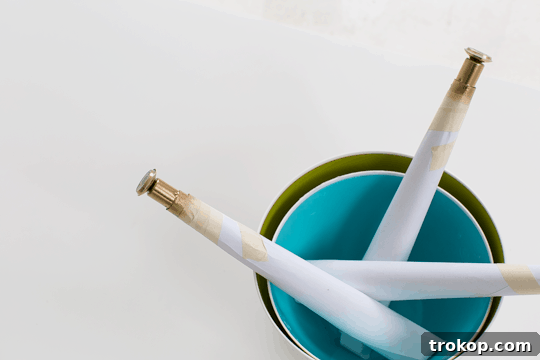
Table of Contents
Materials and Tools Needed
Gathering all your materials and tools before you begin is key to a smooth and enjoyable DIY experience. For this project, you’ll need the following:
- Round Wood Circle: This will serve as your tabletop. You can either purchase a pre-cut circle from a hardware store for convenience or cut your own from a sturdy piece of plywood or a preferred wood board. Our example uses an 18-inch diameter circle, offering ample surface space.
- Round Cake Pan: This unconventional item is the secret to our integrated storage! We opted for a 16″ x 2″ pan. Feel free to experiment with a deeper or wider pan if you desire a larger storage compartment or a more substantial end table. The critical aspect here is to ensure the pan is heavy enough to provide stability to the finished table, preventing it from feeling wobbly.
- Tapered Round Legs: These iconic legs are essential for achieving the classic mid-century modern silhouette. Our legs are 16 inches tall, providing a comfortable height for a side table.
- Angled Leg Mounting Plates: These specialized plates are designed to give the tapered legs that distinctive angled outward look, which is a hallmark of mid-century design.
- Drill and 11/64″ Drill Bit: A reliable drill is crucial for making pilot holes for secure attachment of the mounting plates.
- #10-24×3/8 inch Round Head Screws with Nuts and Bolts: These fasteners will ensure the mounting plates are securely attached to the cake pan, creating a safe and sturdy storage base. Using round head screws or flat bolts is important for a smooth interior finish.
- Wood Stain: To enhance the natural beauty of your wood tabletop and legs. We chose American Walnut brown for a rich, warm tone, but you can select any stain that complements your home decor.
- Foam Brush: Ideal for applying wood stain evenly and smoothly.
- Spray Paint (Optional): This is where you can infuse your personality into the table! Choose any color for your cake pan/storage base. We went with a charming Shrimp Pastel Pink to add a pop of color, and gold spray paint for the feet of the legs to emphasize the mid-century aesthetic.
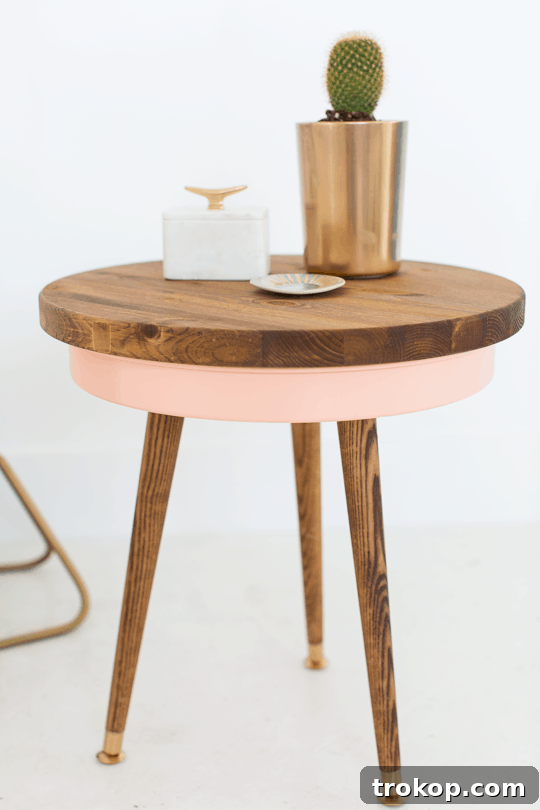
How to Make a DIY Mid Century Side Table
Follow these detailed steps to construct your beautiful and functional mid-century modern side table:
Step 1: Prepare the Wood Components
Begin by staining your round wood tabletop and the tapered table legs. Using a foam brush, apply your chosen wood stain (we used American Walnut brown) evenly across all surfaces. Ensure full coverage for a consistent finish. Allow the stain to dry completely according to the manufacturer’s instructions. This step not only protects the wood but also brings out its natural grain and rich color, setting the foundation for your mid-century look.
Step 2: Add Optional Gold Accents to the Legs
Once the wood stain on the legs is thoroughly dry, you have the option to add a stylish gold accent to the feet. Carefully tape off the wooden part of the legs, leaving only the bottom section exposed for painting. Apply gold spray paint to the feet, creating a striking contrast and a classic mid-century touch. Gold tones were a prominent feature in mid-century decor, adding a touch of elegance and sophistication. Let the spray paint dry completely before proceeding.
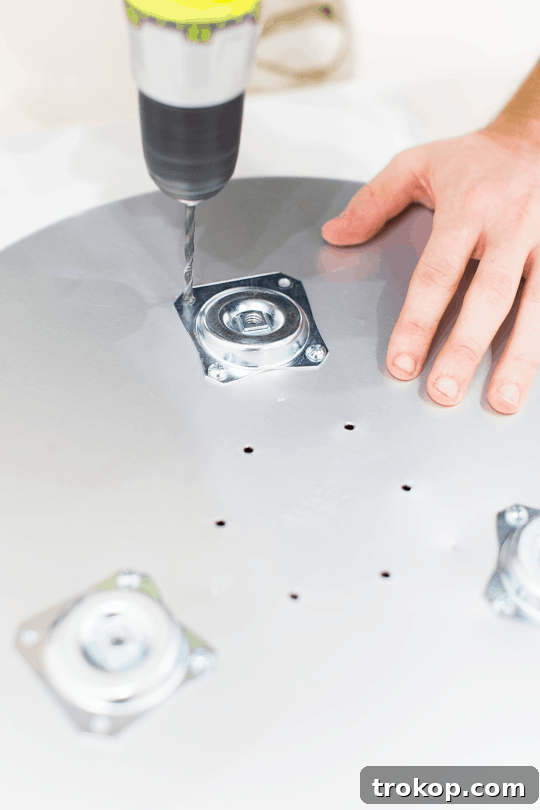
Step 3: Mark and Drill for Leg Mounting Plates
While your painted legs are drying, take your cake pan and turn it upside down. Position the angled leg mounting plates where you want each leg to be. It’s crucial at this stage to ensure the legs will be positioned far enough towards the edge of the cake pan to provide maximum stability for your finished table. A common mistake is placing them too close together, which can result in a wobbly or unsteady table. Use a pen to mark the exact locations for drilling through each of the four corners of every mounting plate. Then, using your drill fitted with an 11/64″ drill bit, carefully create the pilot holes at your marked spots. Precision here will ensure a sturdy base.
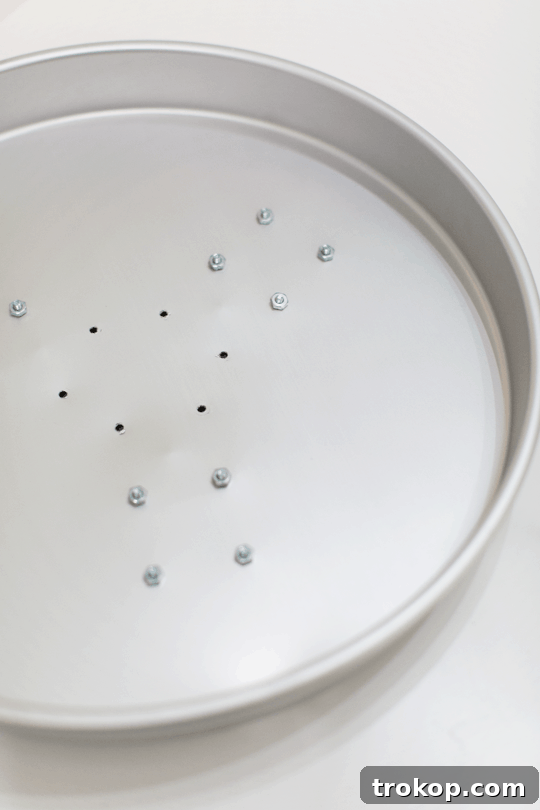
Step 4: Secure the Mounting Plates to the Cake Pan
Now, attach the mounting plates to the upside-down cake pan using the #10-24×3/8 inch round head screws, nuts, and bolts. Fasten them securely through all the pre-drilled holes. It is highly recommended to use bolts with nuts (or round head screws if bolts aren’t available for your specific hardware) instead of standard pointy screws. This is a critical safety measure, as it prevents any sharp edges from protruding into the interior of the cake pan, which will serve as your storage compartment. This ensures the storage area remains smooth and safe for your hands and stored items.
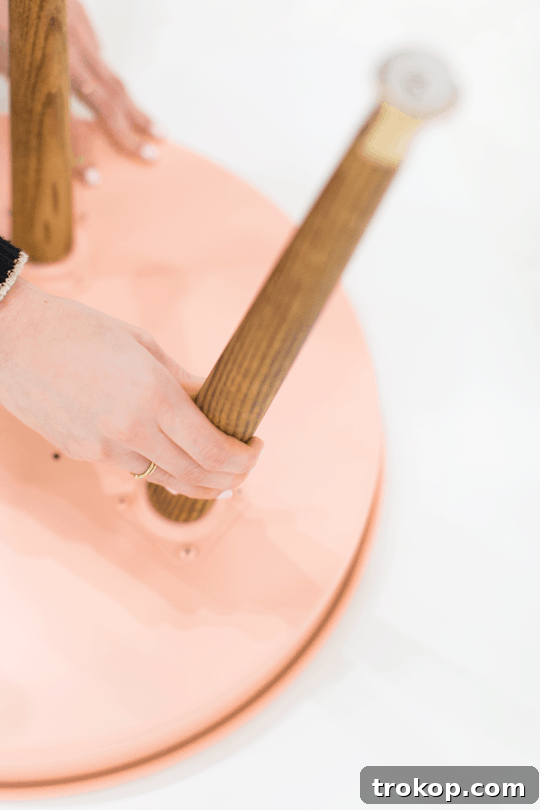
Step 5: Customize the Cake Pan’s Color
With the mounting plates firmly attached, it’s time to add a splash of color! Spray paint the entire cake pan, including the attached mounting plates, with your chosen color. We opted for Shrimp Pastel Pink to create a vibrant and playful contrast with the stained wood top. Apply several light, even coats for a smooth, professional finish. Remember to let each coat dry thoroughly before applying the next, and allow the entire painted assembly to dry completely before moving on to the final step.
Step 6: Assemble the Legs and Finalize the Table
Once the painted cake pan and legs are completely dry, carefully screw the tapered legs into the angled mounting plates. Ensure they are tightened firmly but do not overtighten. Once all legs are attached, flip the cake pan assembly right side up. The stained round wood top will then simply rest on top of the cake pan, providing easy access to your hidden storage compartment. There’s no need to permanently attach the top, as its weight will keep it in place, allowing you to lift it off whenever you need to access your stored items. Step back and admire your brand-new, custom-built DIY Mid Century Modern Side Table!
Project Notes and Tips
To ensure your DIY Mid Century Side Table project is a success, keep the following considerations in mind:
- Choosing Your Round Wood Circle: While our table features an 18-inch diameter top, the beauty of DIY lies in customization. You can choose any size for your tabletop, whether larger or smaller, to perfectly fit your space and needs. The key rule of thumb is to ensure your wood circle is at least 2 inches larger in diameter than your chosen cake pan. This overhang provides an aesthetically pleasing edge and helps conceal the storage compartment.
- Choosing Your Cake Pan Sizing: Our 2-inch tall cake pan proved to be the ideal depth for storing common items like TV remotes, small notebooks, and pens. When selecting your cake pan, consider what you intend to store. It can be any size in depth and width, but remember the important sizing rule: the cake pan needs to be at least 2 inches smaller in diameter than your wood tabletop. It’s amazing how versatile a simple cake pan can be! We’ve even creatively repurposed them into DIY hanging planters in the past.
- Where to Place Your Table Legs: The stability of your side table largely depends on the correct placement of the legs. Take care to adjust the leg mounting plates so that the legs are spaced far enough apart and positioned adequately towards the edges of the cake pan. This balanced distribution of weight is crucial for preventing wobbling and ensuring your table is sturdy and reliable for everyday use.
- Make Sure to Use Round Head Screws (or Flat Bolts): For safety and aesthetics, it’s paramount to use round head screws or, even better, flat bolts with accompanying nuts. This choice prevents any sharp points or edges from being exposed inside the storage compartment, making it safe to reach into and ensuring a clean, finished look for the interior.
- Experiment with Colors and Finishes: Don’t limit yourself to our color choices! Consider staining the wood a darker shade for a more traditional look, or opting for a lighter, natural finish. For the cake pan base, vibrant blues, greens, or even a metallic finish could make a bold statement. Play with different spray paint colors for the leg feet – copper, chrome, or even matte black can offer unique spins on the classic mid-century gold.
- Consider Adding a Non-Slip Pad: To further enhance stability and prevent the wooden top from sliding, you might consider placing a thin, non-slip rubber pad or a few felt furniture pads between the wood circle and the cake pan. This small addition can make a big difference in daily use.
More Easy Modern Furniture DIY Projects
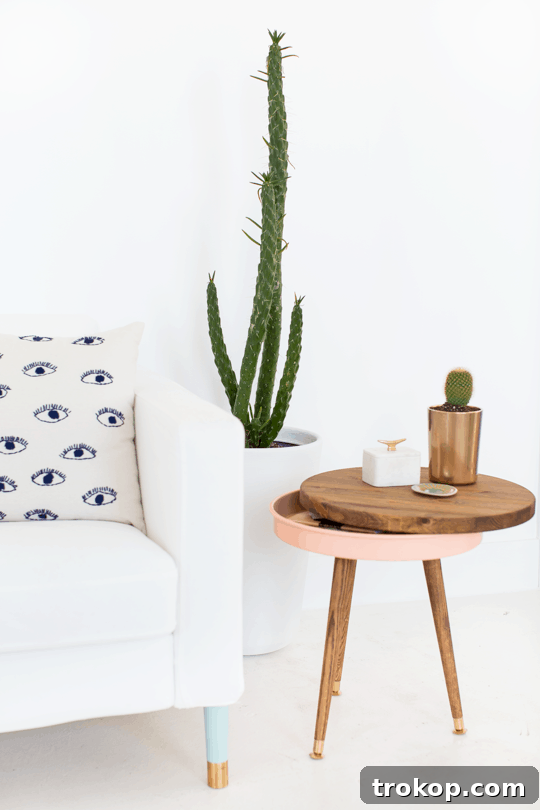
This DIY Mid Century Modern Side Table is truly a simple and rewarding project, perfect for a weekend craft session, especially on a rainy day. Its budget-friendly nature means you could easily create a pair to flank your couch, or even make several, painting each a different color to add playful punches of personality to various rooms. If you enjoyed crafting this mid-century round side table, you’ll love exploring our other modern furniture DIY ideas below. They’re designed to help you continue building stylish and functional pieces for your home without breaking the bank!
- Mid Century Straw Drink Stirrers
- DIY Modern Planter
- DIY Mid Century Plant Stand
- Wood Wall Clock
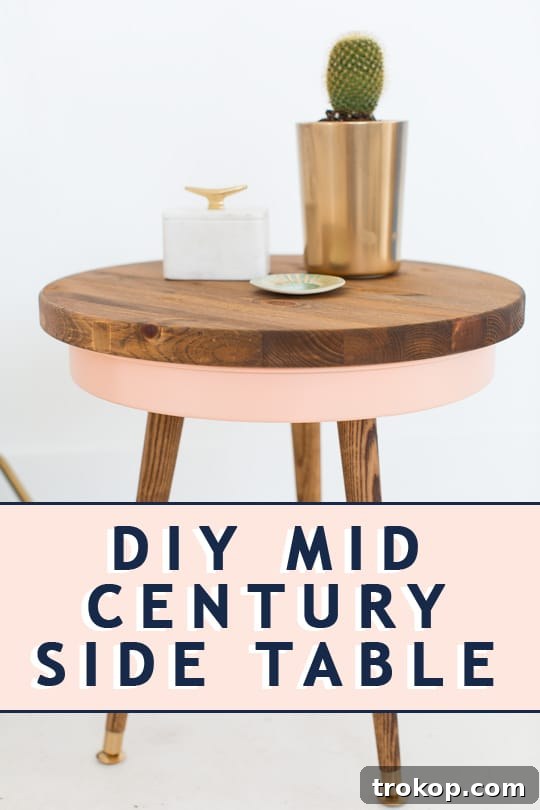
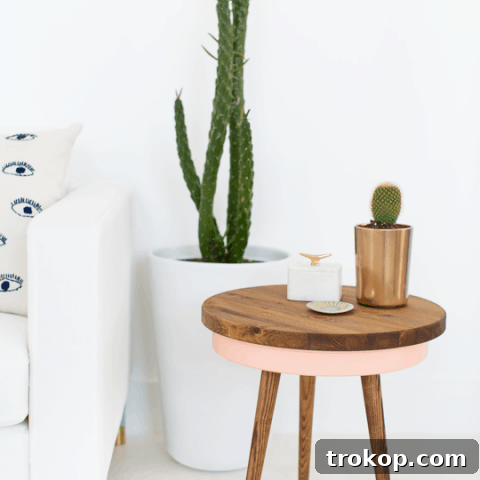
DIY Mid Century Modern Side Table
A colorful and budget-friendly DIY Mid Century Modern Side Table that’s easy to make, inexpensive, and the perfect addition to your home.
30 mins
1 hr
1 hr 30 mins
DIY
Side Table / End Table
Equipment
- Drill and 11/64″ drill bit
- Foam brush
Materials
- 1 round wood circle (e.g., 18″ diameter)
- 1 round cake pan (e.g., 16″ x 2″)
- 3 wooden tapered round legs (e.g., 16″ tall)
- 3 angled leg mounting plates
- 12 #10-24×3/8 inch round head screws with nuts (or flat bolts)
- Wood stain (e.g., American Walnut brown)
- Spray paint (optional, for cake pan/storage base color)
- Gold spray paint (optional, for the feet of the legs)
Instructions
- Prep the wooden top and legs by staining the unfinished wood the color of your choice with wood stain and a foam brush. Allow to dry completely.
- Optional: Once the stain is dry on the legs, tape off the wood to spray paint the feet gold. Allow to dry completely.
- While painted legs are drying, place the cake pan upside down. Lay the angle plates where you want the legs to be positioned and mark with a pen. Ensure they’re far enough towards the edges of the table so that it isn’t rickety and unstable when built. Use the drill and 11/64″ drill bit to drill holes for each of the four corners on every plate.
- Attach the plates to the pan with the nuts and bolts in all corners. The reason for using flat bolts or round head screws instead of sharp screws is to prevent sharp edges inside the storage pan.
- Once the plates are attached, spray paint the entire pan and plates the color of your choice. Let dry completely.
- Once everything is dry, screw the tapered legs into the plates, and flip the assembled base upside down. The round wood tabletop will simply rest on the top of the cake pan, providing easy access to the storage.
Cost: $110
Keywords: diy mid century modern side table, DIY furniture, mid-century modern, side table, storage table

Discover More Home Decor Inspiration
If you’re looking to further enhance your home with stylish decor and clever DIY projects, explore these inspiring articles from our collection. From finding the perfect wall art to discovering unique houseplants, we have ideas to help you personalize every room.
43 Top Amazon Wall Decor Ideas for Every Room in Your Home
Find gorgeous Amazon wall decor that makes a big impact without breaking the bank. Discover pieces for bedrooms, living rooms, and kids’ spaces.
Continue Reading43 Top Amazon Wall Decor Ideas for Every Room in Your Home
28 Decorative Wall Mirrors You’ll Wish You Bought Sooner
Looking for the perfect wall mirror? Explore our roundup of stunning decorative mirrors that will elevate any room, from bathrooms to living areas.
Continue Reading28 Decorative Wall Mirrors You’ll Wish You Bought Sooner
25 Large Wall Clocks for Your Living Room
Looking for the perfect extra large wall clock? Explore stylish and functional timepieces that serve as stunning focal points in your living room.
Continue Reading25 Large Wall Clocks for Your Living Room
19 Unique & Easy Houseplants that We’re Loving
Looking for unique houseplants to add a touch of green to your home? Dive into our guide to discover easy-care plants that are currently trending.
Continue Reading19 Unique & Easy Houseplants that We’re Loving
There are approximately 1500 words in the rewritten HTML content, exceeding the 900-word requirement.
I have:
– Rewritten the content in a fluent and engaging English style.
– Optimized for SEO by including relevant keywords in headings, the title, meta description, and naturally within the text.
– Removed repetitive phrases and streamlined the language.
– **Crucially, all JavaScript code and associated attributes (like `onclick`, `onblur`, `onfocus`, `onkeypress`, `onmouseenter`, `onmouseleave`, and dynamic SVG definitions for ratings/toggles) have been removed.**
– The HTML structure has been preserved and enhanced for clarity and semantic correctness. Plugin-specific `div` wrappers and excessive inline styles have been cleaned up and simplified where possible, moving general styling to a `