

DIY Mini Colorful Cheese Boards — Elevate Your Entertaining with Handmade Charm!
Are you ready to transform your next gathering into a vibrant, unforgettable experience? Our easy-to-follow guide for crafting DIY Mini Colorful Cheese Boards is exactly what you need! These charming, handmade platters are not just practical; they’re conversation starters, perfect for serving an array of delectable treats. Imagine them gracing your summer BBQs, intimate patio hangouts, or any event where good food and great company converge. You’ll soon find yourself wanting to create a whole collection in every shape and hue imaginable, adding a unique, personal touch to all your entertaining endeavors.
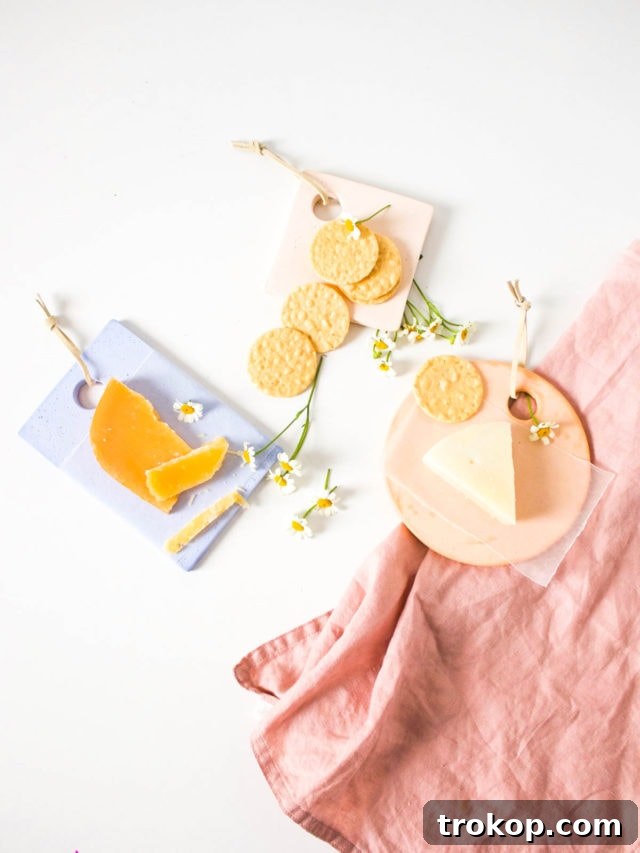
Why Craft Your Own Mini Colorful Cheese Boards?
Summer weekends, with their promise of delicious food and cherished friends, are always a joy. From lively backyard barbecues to relaxing evenings on the patio, these moments are often centered around shared meals. As someone who absolutely loves entertaining, I can confidently say that these DIY Mini Colorful Cheese Boards are an indispensable addition to your hosting arsenal. They offer a delightful blend of functionality and aesthetic appeal, making every serving experience special.
Perfectly Proportioned for Every Occasion
The beauty of these mini boards lies in their versatile size. They are ideal for presenting an elegant assortment of cheeses, crunchy nuts, artisan crackers, fresh fruits, or even delightful desserts. Their individual portions encourage guests to nibble and mingle, creating a relaxed and engaging atmosphere. No more oversized, cumbersome platters; these miniature masterpieces make serving and sharing effortless. Their compact nature also makes them perfect for small tables, picnics, or as part of a larger buffet spread where guests can easily grab their preferred selections.
A Splash of Color and Lightweight Design
Unlike traditional heavy concrete or stone platters, our DIY cheese boards are remarkably lightweight and infused with vibrant colors. This makes them incredibly easy to handle, transport, and arrange. The ability to customize the color palette means you can tailor them to any theme, season, or personal preference, bringing a cheerful and modern aesthetic to your table. They are a simple yet impactful way to introduce a fun pop of color to any summer party, brunch, or casual get-together, instantly elevating the mood and decor.
Thoughtful Handmade Gifts
Beyond personal use, these mini cheese boards make exceptional handmade gifts. Imagine presenting a set of these charming boards to a friend for their housewarming, a hostess for their hospitality, or a loved one for a special occasion. A gift crafted with your own hands carries a unique sentiment, showing care and creativity that store-bought items simply can’t replicate. They’re not just gifts; they’re expressions of thoughtfulness and style, sure to be cherished and admired.
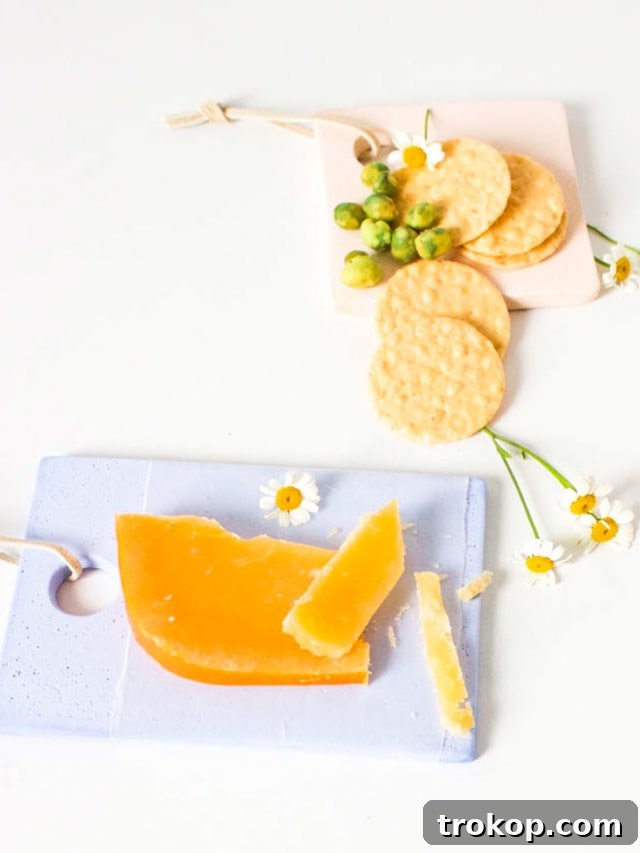
Table of Contents
Materials And Tools Needed To DIY Mini Colorful Cheese Boards
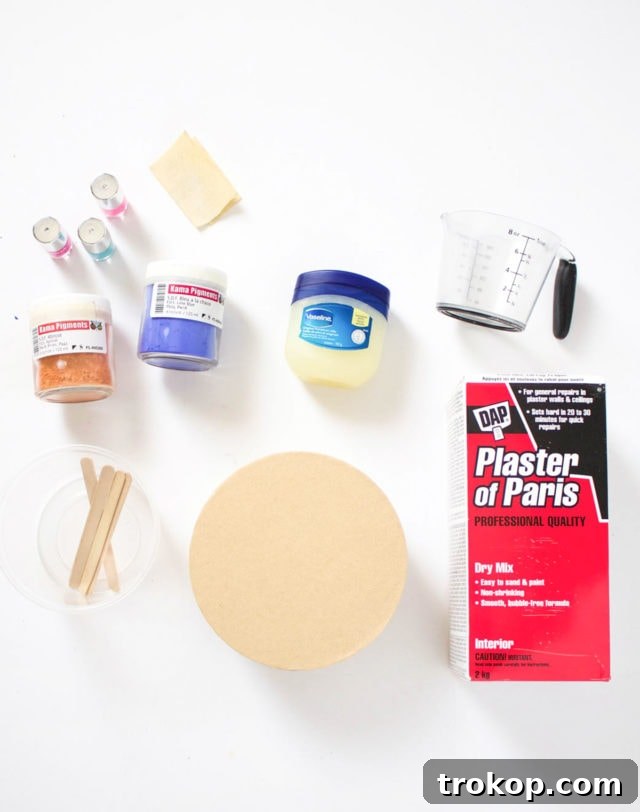
Gathering your materials before you begin will ensure a smooth and enjoyable crafting process. Most of these items are readily available at craft stores or online, making this project accessible for everyone. Here’s what you’ll need to bring your colorful cheese board vision to life:
- Cardboard Boxes: Choose various shapes like circle, square, or rectangle to create a diverse collection. Sturdy boxes are best to hold the plaster without deforming. Consider recycling old packaging for an eco-friendly approach.
- Nail Polish or Bottle Caps: These will serve as molds for the convenient handle hole in your cheese boards. Ensure they are clean and free of residue. The size of the cap will determine the size of your handle hole.
- Vaseline: An essential release agent that prevents the plaster from sticking to your molds, ensuring easy removal of your finished boards without breakage.
- Plaster of Paris: The primary material for your boards. It’s affordable, easy to work with, and dries to a hard, smooth finish, providing a solid base for your creations.
- Powdered Paint Pigment: This is what gives your boards their vibrant, customizable colors. Available in a wide range of hues, allowing for endless creative possibilities to match any decor or theme.
- Plastic Container: For mixing your plaster and pigment. Choose one that you don’t mind getting messy, as plaster can be difficult to clean once dry. Disposable containers are ideal.
- Measuring Cup: For accurately proportioning your plaster, pigment, and water to achieve the right consistency, which is crucial for a smooth and even pour.
- Popsicle Sticks: Perfect for stirring your plaster mixture and for scraping the sides of your mixing container. They are also disposable, making cleanup simple.
- Fine-Grit Sandpaper: For smoothing out any rough edges or imperfections on your dried cheese boards, giving them a professional, polished finish that is pleasant to touch and look at.
- Suede Lace — Optional: A lovely decorative touch for threading through the handle hole, adding charm and functionality for hanging your boards or simply providing an easier grip.
How To Make DIY Mini Colorful Cheese Boards
Creating these delightful mini cheese boards is a straightforward and rewarding process. Follow these simple steps to craft your own collection of vibrant serving pieces, bringing a personal touch to your entertaining style.
Step 1: Prepare Your Molds
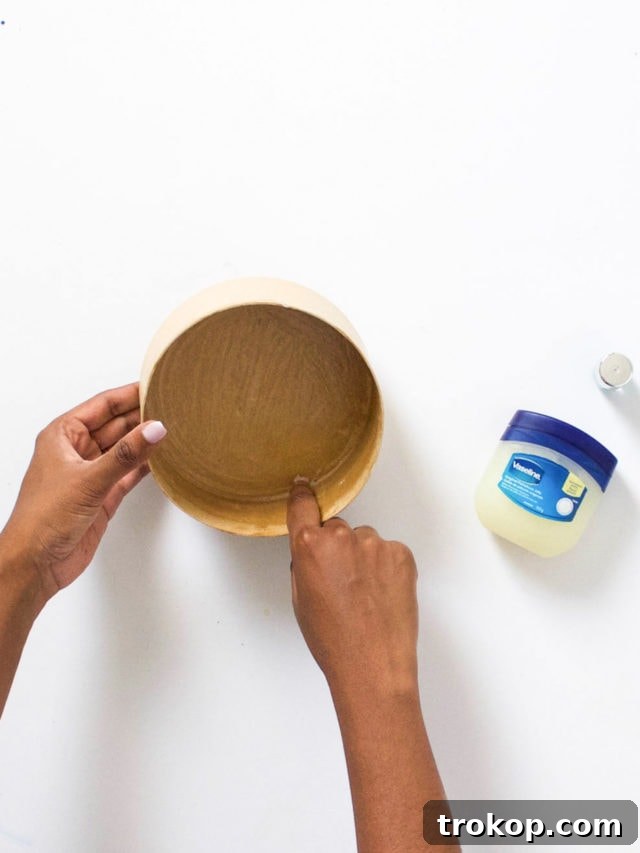
The first crucial step for a successful demolding is proper mold preparation. Take your chosen cardboard box – be it a circle, square, or rectangle – and apply a thin, even layer of Vaseline to its entire inside surface. This protective barrier will act as a release agent, ensuring that your plaster board slides out easily once dry without sticking or damaging the edges. Be thorough, covering every corner and crevice. Don’t forget to also apply Vaseline to the exterior of your bottle cap or nail polish cap, as this will create the perfect handle hole. Use a paper towel to gently wipe off any excess Vaseline, leaving just a thin, transparent film. Once coated, carefully place the Vaseline-covered bottle cap inside the cardboard box, positioning it precisely where you envision the handle hole for your cheese board. This placement determines the final aesthetic of your board’s handle.
Step 2: Mix the Plaster with Care
Now it’s time to bring your plaster to life with color! Prepare your plaster of Paris according to the package instructions, as specific ratios can sometimes vary between brands. For one small cheese board, a good starting point is to mix approximately 1 cup of plaster with 1/4 cup of powdered paint pigment and 1/2 cup of cold water in your plastic container. The cold water helps to slow down the setting time slightly, giving you more working time and preventing the mixture from hardening too quickly. Remember, the color of the plaster will appear much lighter once it has fully dried, so don’t be afraid to add a little more pigment if you desire a more intense hue in your finished product. Stir the mixture thoroughly using a popsicle stick until it reaches a smooth, consistent texture, similar to thick paint or pancake batter. Ensure there are no lumps for a flawless, even finish on your board.
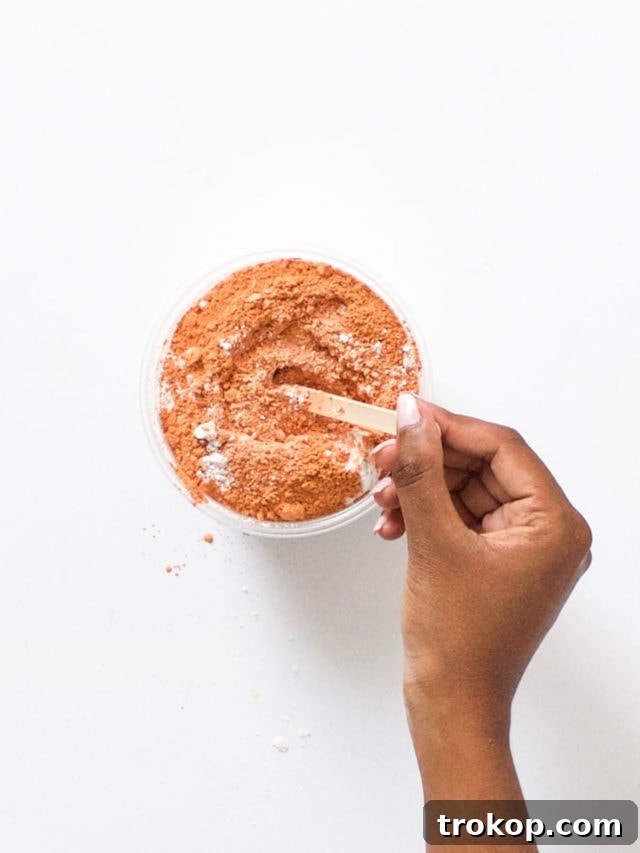
Step 3: Pour and Allow to Set
Once your plaster mixture is perfectly smooth and colored, slowly and carefully pour it into your prepared cardboard box mold. Take your time to avoid splashing and ensure an even distribution across the base of the mold. After pouring, gently tap the cardboard box on a flat surface several times. This crucial step helps to bring any trapped air bubbles to the surface, causing them to pop and resulting in a smoother, more solid cheese board with fewer imperfections and a professional finish. Once you’re satisfied that most air bubbles have escaped, set the filled mold aside in a level, undisturbed area and allow it to dry completely overnight. Patience is key here; rushing the drying process can lead to cracking, a weaker structure, or a less durable board.
Step 4: Demold and Finish Your Boards
After the plaster has fully dried and hardened (typically 12-24 hours), it’s time for the exciting reveal! Gently remove the bottle cap from the plaster to reveal your perfectly formed handle hole. Next, carefully tear away the cardboard box mold. The Vaseline should make this process quite easy. Alternatively, if the box allows, you can flip it upside down and gently tap its base until the newly formed cheese board slides out. Once free, take your fine-grit sandpaper and lightly sand all the edges and surfaces of your cheese board. This step smooths any rough spots, sharp corners, or minor imperfections, giving your board a professional and refined feel that is pleasant to touch and visually appealing. After sanding, meticulously clean off all plaster dust from the surface using a dry cloth or brush. For food-safe serving, it’s highly recommended to apply a food-grade sealant or a thin layer of beeswax (often used for wooden cutting boards) to protect the surface, prevent absorption, and make it easier to clean. Finally, for an added touch of charm and functionality, you can thread some suede lace through the handle hole, perfect for hanging your board or simply adding a decorative flourish. Your DIY Mini Colorful Cheese Board is now ready to impress!
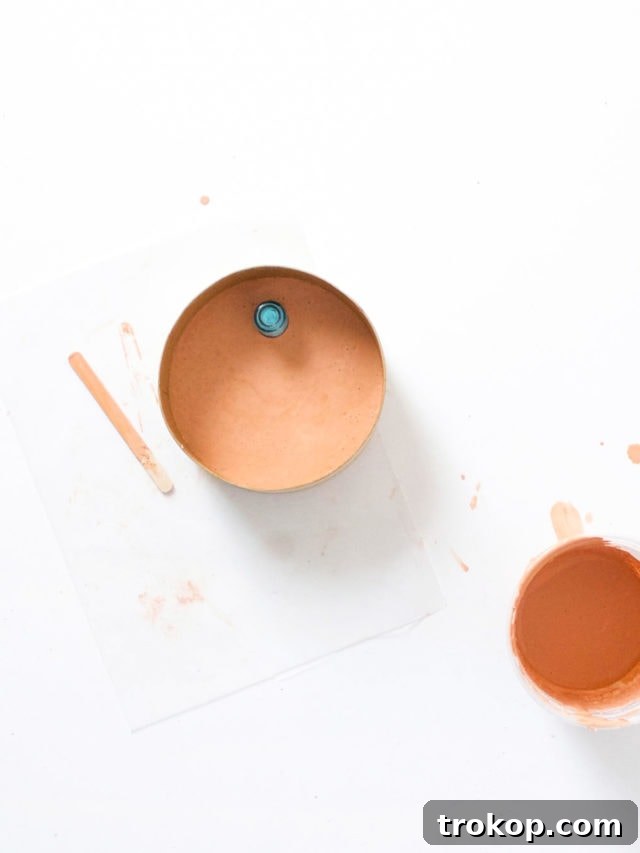
Tips for Success and Customization
Beyond the basic steps, there are numerous ways to personalize and perfect your mini colorful cheese boards. Embrace your creativity and experiment with these tips to make each board truly unique, reflecting your personal style or event theme.
Experiment with Shapes and Sizes
While cardboard boxes offer basic shapes, don’t limit yourself! Consider using other household items or craft supplies as molds. Sturdy plastic containers, silicone molds (ensure they can withstand the plaster’s setting temperature if applicable), or even large cookie cutters can yield interesting and unique board shapes. Remember to adequately grease any alternative molds with Vaseline for easy release. You can even try making slightly larger versions for serving a small group, or truly tiny ones for individual butter pats, sauce dips, or decorative ornaments.
Vibrant Color Combinations
The beauty of powdered pigment lies in its versatility. Don’t shy away from mixing different pigments to create custom shades that perfectly match your decor or party theme. Try adding a little less pigment for delicate pastel hues, or more for bolder, deeper tones that truly stand out. You can even experiment with marbling effects by adding a second color after the first pour and gently swirling it with a popsicle stick, but be quick as plaster sets rapidly, allowing for only a brief window for such artistic touches.
Add Textural Elements
For an extra layer of visual interest, consider adding texture to your boards. Before the plaster fully sets, you can gently press small, interesting objects onto the surface – think leaves, lace, small embossed stamps, or even textured fabrics. Carefully remove them once the plaster is mostly dry to leave an imprint. However, remember that plaster is porous, so any deep textures might be harder to clean if used for food. For food-contact surfaces, it’s generally best to keep them smooth or to apply a very effective sealant over textured areas.
Sealing for Durability and Food Safety
This is a critical step often overlooked in DIY plaster projects, especially for items intended for food service. Plaster is porous and can absorb moisture, oils, and odors, making it difficult to clean and potentially unsanitary for direct food contact over time. To ensure your beautiful cheese boards are durable, stain-resistant, and safe for serving, it’s highly recommended to apply a food-grade sealant. Look for sealants specifically designed for porous surfaces like concrete or stone that are labeled “food-safe” or “FDA compliant” after curing. Alternatively, multiple coats of food-grade mineral oil or beeswax polish (like those used for wooden cutting boards) can also help create a protective barrier. Always follow the manufacturer’s instructions for application and curing times for any sealant you choose, ensuring complete safety before use.
Care and Maintenance
Once sealed, your DIY cheese boards will be much more resilient. However, they still require gentle care to maintain their beauty and integrity. Hand wash them with mild soap and water, avoiding abrasive scrubbers, scouring pads, or harsh chemical cleaners, which can damage the plaster and sealant. Do not put them in the dishwasher, as the high heat and strong detergents can cause cracking or deterioration. Allow them to air dry completely before storing to prevent moisture buildup. With proper care, your handmade boards will bring joy to many gatherings for years to come.
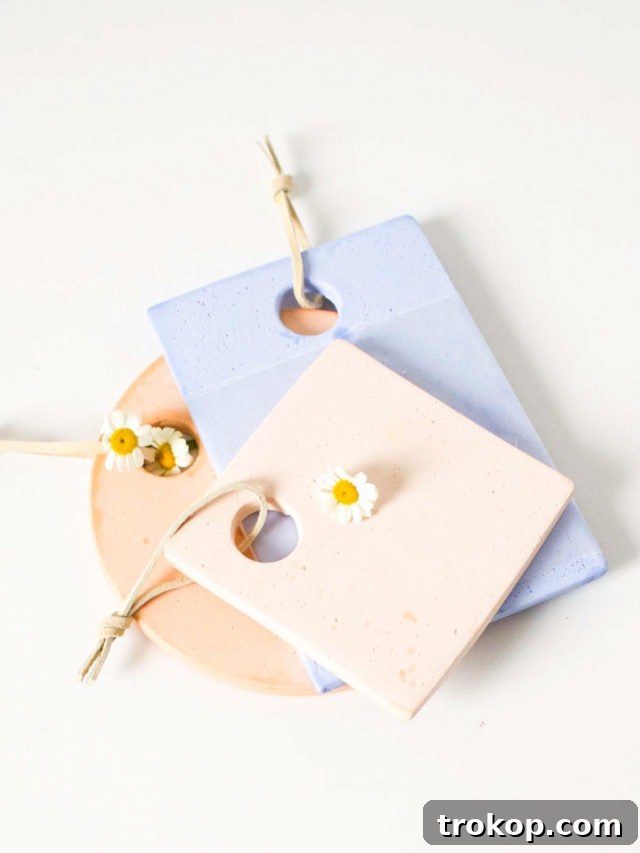
Serving and Entertaining Ideas with Your New Boards
Now that you’ve crafted your collection of charming mini colorful cheese boards, it’s time to put them to good use! Their versatility extends far beyond just cheese, making them perfect for a multitude of serving and decorative purposes that will impress your guests and add flair to any event.
Individual Appetizer & Snack Platters
These boards truly shine when used for individual servings. Instead of a large, communal platter, offer each guest their own mini board featuring a curated selection of appetizers. Think a slice of gourmet cheese, a few artisan crackers, some marinated olives, a handful of nuts, and a sprig of fresh rosemary. This approach is not only elegant but also more hygienic, especially during larger gatherings or when catering to diverse tastes. They are also perfect for serving individual portions of desserts like mini tarts, cookies, or chocolate-dipped strawberries at a dessert bar.
Charming Dessert Displays
Transform your dessert table with these colorful accents. Use them to display small cakes, cupcakes, macarons, or even a selection of homemade candies and petit fours. The vibrant colors of the boards will beautifully complement your sweet treats, making the presentation even more enticing and Instagram-worthy. Imagine a spread of pastel-hued boards, each holding a different type of delectable goodie, creating a visually stunning and cohesive display.
Stylish Coasters or Decor Accents
When not in use for serving, these boards can effortlessly double as stylish coasters for drinks or as decorative accents around your home. Group them on a coffee table with small candles, delicate succulents, or air plants to create an inviting vignette. You could also use them under plant pots to protect surfaces and add a touch of handmade charm to any room. Their unique colors and textures make them surprisingly versatile decorative pieces that can be easily rearranged to refresh your living space.
Thoughtful Hostess & Housewarming Gifts
As mentioned, a set of these DIY boards makes an incredible, personalized gift. Package them beautifully with a small selection of artisanal cheeses, a gourmet jam, a local honey, or a bottle of fine wine for a truly impressive present. They are perfect for housewarming parties, holiday gifts, birthday presents, or simply as a heartfelt token of appreciation for a gracious host. The personal effort involved in crafting them makes the gift all the more special and memorable.
Creative Food Pairings
Consider the colors of your boards when planning your food display to maximize visual appeal. A bright blue board might perfectly complement yellow cheeses or orange fruits, while a soft pink board could highlight green grapes or dark berries. Play with contrasts and harmonies to create visually stunning arrangements that tantalize both the eyes and the palate. Don’t limit yourself to just cheese; use them for charcuterie, small tapas, vibrant bruschetta, or even mini fruit salads for a refreshing touch.
So, do you feel inspired to create one in every color now? I know I certainly do! These DIY Mini Colorful Cheese Boards offer an effortless yet impactful way to elevate your entertaining game. They are a subtle and stylish method to infuse a delightful burst of color into any summer party, picnic, or intimate gathering, making every moment more special and inviting. Here’s to a summer filled with vibrant, joy-filled entertaining and delicious food presented beautifully!
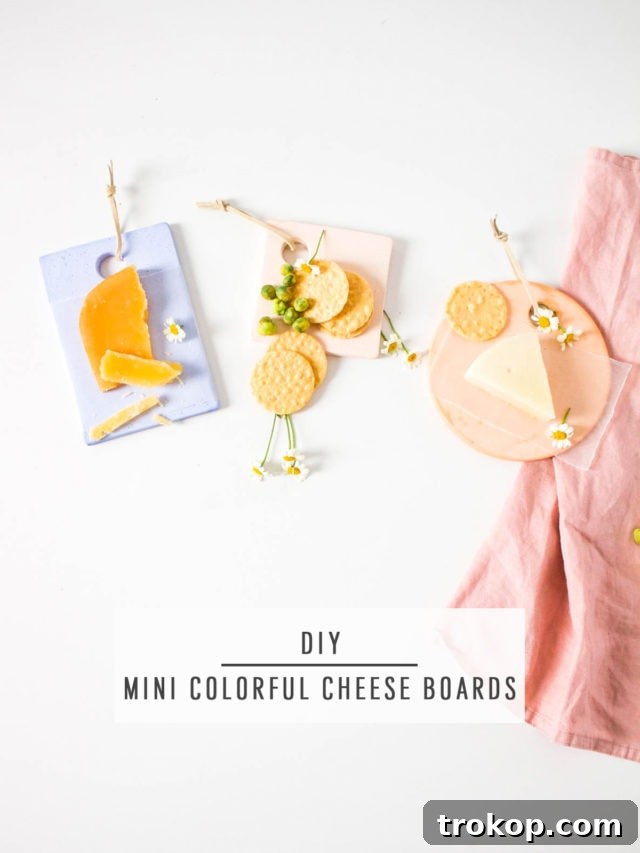
We absolutely adore seeing your creative endeavors! Don’t forget to share your unique cheese board creations with us on Instagram using the hashtag #sugarandclothloves. Your innovation inspires us all! And if you’re looking for even more inspiring interior design ideas and home decor tutorials, you can find a wealth of projects right here on our site!