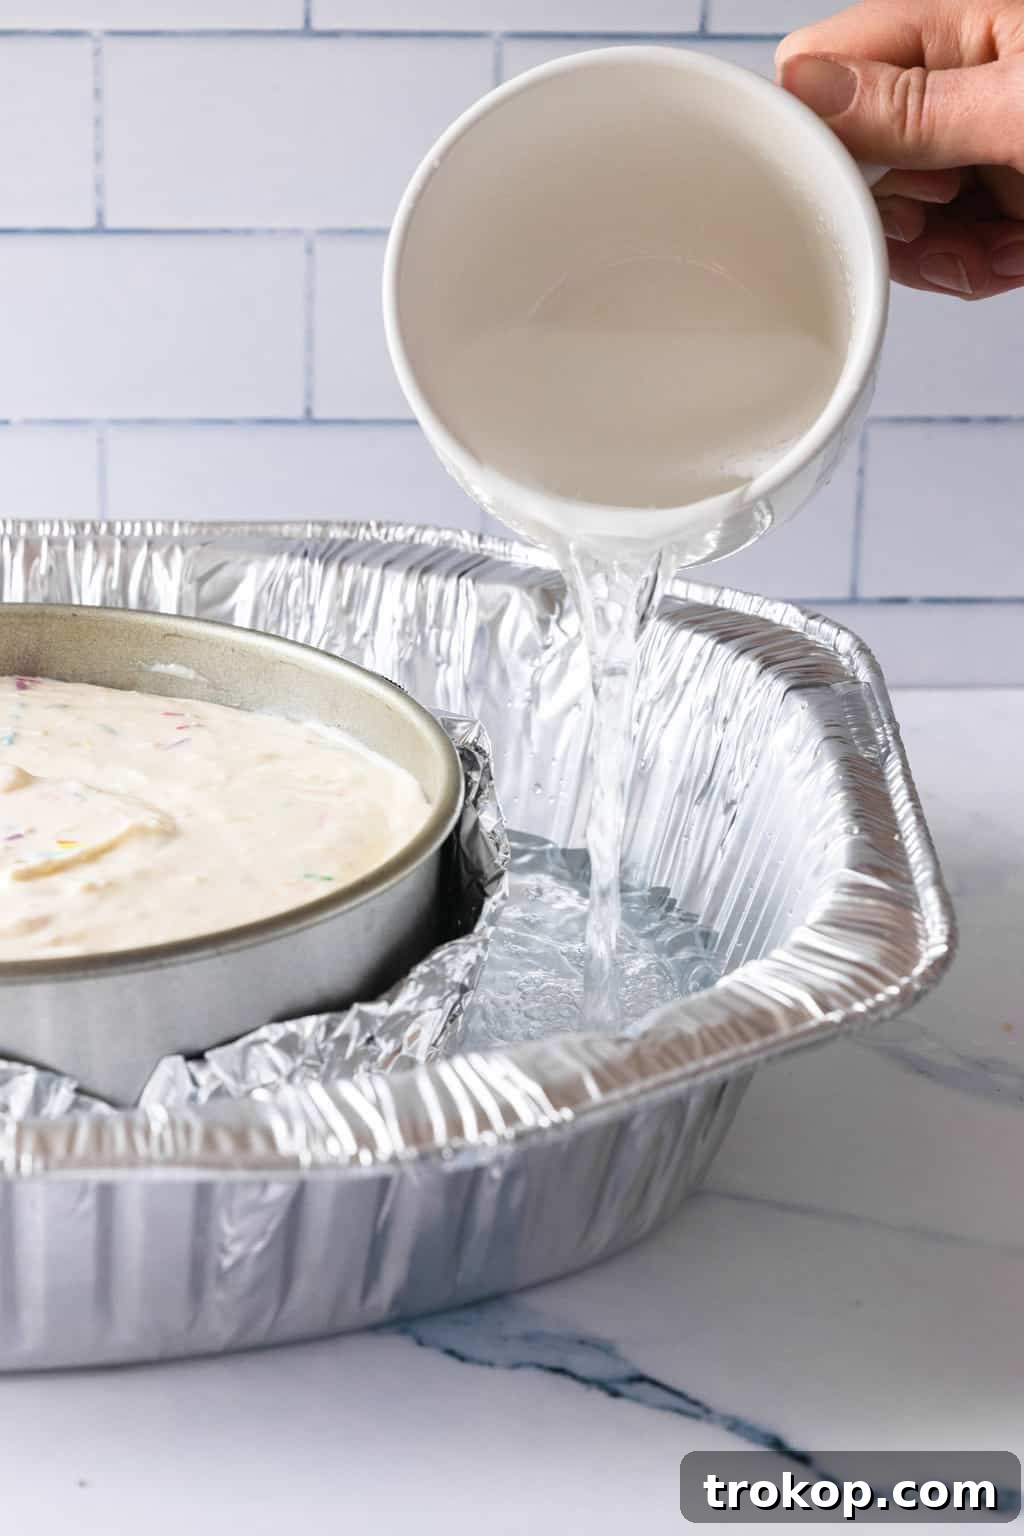
If you’re delving into the delightful world of homemade desserts, mastering the art of the water bath is your ultimate secret weapon for achieving an irresistibly moist and impeccably crack-free cheesecake. This detailed, step-by-step tutorial will guide you through every nuance, ensuring your cheesecake consistently emerges from the oven looking and tasting divine.
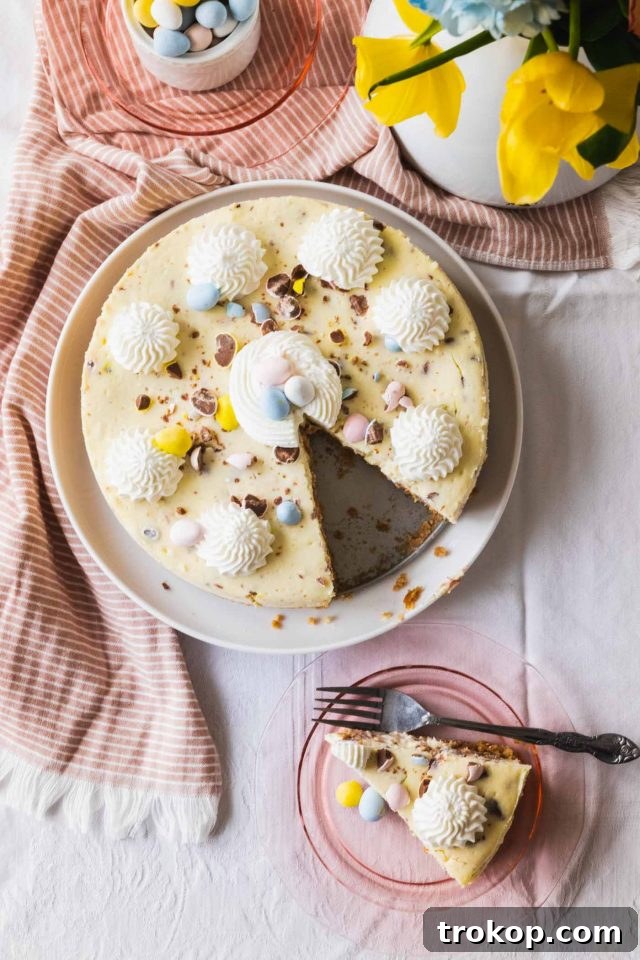
Who can resist the allure of a rich, creamy cheesecake? It’s a timeless dessert, a true showstopper, and certainly one of my (Rebecca’s) all-time favorites!
To consistently achieve that luscious, perfectly baked cheesecake — one free from unsightly cracks and a disheartening sunken center — incorporating a water bath (also known as a bain-marie) into your baking process isn’t just a suggestion; it’s an absolute necessity. This technique creates the ideal baking environment, transforming a good cheesecake into a truly spectacular one.
However, the joy of unveiling a smooth, pristine cheesecake can quickly turn to disappointment if water has seeped into the bottom, leaving your delicate graham cracker crust soggy and compromised. This common mishap can occur even with the highest quality springform pans. That’s why, in this guide, I’ll meticulously teach you the most effective method for wrapping your cheesecake pan, guaranteeing that no water infiltrates your crust while your cheesecake bakes to perfection.

Table of Contents
Why a Water Bath is Crucial for Cheesecake Perfection
Contrary to its name, a cheesecake is more akin to a delicate baked cream cheese custard than a traditional cake. This distinction is vital because the rich, high-dairy, and egg-heavy filling is inherently delicate. Without the proper baking conditions, it’s highly susceptible to common baking woes like cracking across the top, developing an uneven texture, or suffering from a disheartening sunken center.
The secret to creating that signature smooth, dense, and uniformly creamy cheesecake consistency lies in providing a baking environment that delivers low, gentle, and consistently moist heat. This is precisely what a water bath accomplishes. By surrounding your cheesecake with hot water, you effectively regulate the temperature, preventing the oven’s dry, direct heat from shocking the custard.
Furthermore, the water bath generates a steady supply of steam within the oven. This humid atmosphere is critical for preventing the eggs in the cheesecake batter from curdling too quickly, which is a common cause of cracks. The steam also helps the cheesecake to bake more evenly from the edges to the center. In a dry oven, the outer edges of your cheesecake would bake and set much faster than the middle, causing them to puff up and then dramatically collapse or crack as they cool. This leads to an inconsistent, less appealing texture and appearance. A water bath ensures a slow, uniform cooking process, allowing the custard to set gently, resulting in a beautifully smooth, level, and crack-free top.
When to Employ the Water Bath Technique
The general rule of thumb is this: any time you are baking a full-sized, traditional cheesecake, you should absolutely use a water bath. This technique is designed to handle the unique requirements of a large, custardy dessert.
Even if a specific recipe you’re following doesn’t explicitly call for a water bath, you can confidently apply these instructions to achieve superior results. It’s a foundational technique for cheesecake excellence that rarely hinders and almost always enhances the outcome.
However, there are specific instances where a water bath is unnecessary:
- No-Bake Cheesecakes: These rely on refrigeration to set, not oven heat, so a water bath is irrelevant.
- Cheesecake Bars: Due to their shallower depth and smaller volume, cheesecake bars bake more quickly and are less prone to cracking or uneven cooking that a water bath prevents.
- Mini Cheesecakes: Similar to bars, their small size allows for rapid, even baking without the need for a humid environment. For these smaller formats, direct oven heat is usually sufficient.
In essence, if your recipe involves a springform pan and requires baking, the water bath method is your best friend for a truly professional-grade cheesecake.
Essential Tools for Your Cheesecake Water Bath
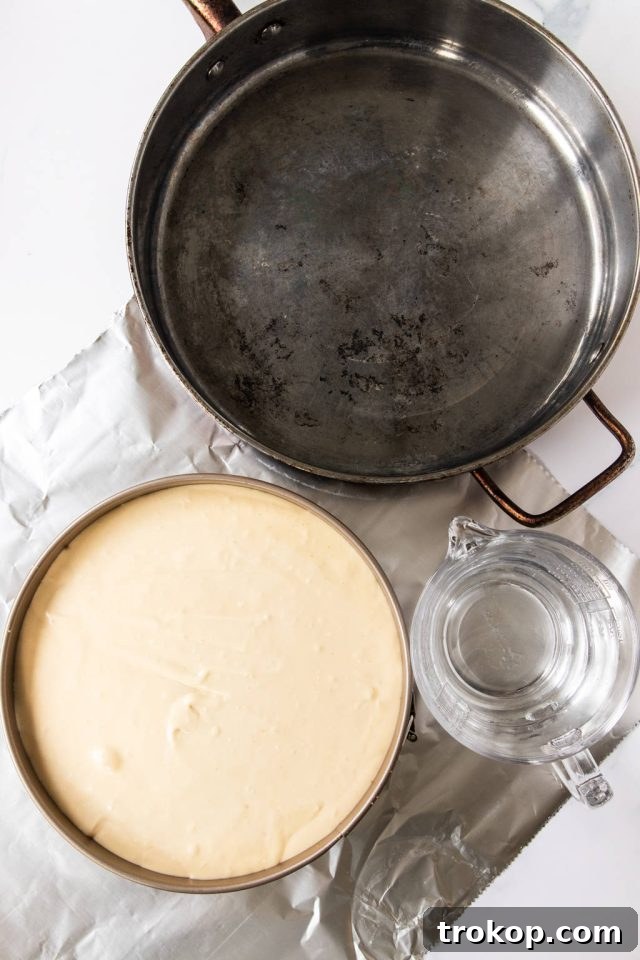
Gathering the right equipment is the first step towards a successful water bath. While the process is straightforward, the quality and type of your tools make a significant difference in preventing common issues like a soggy crust.
High-Quality Springform Pan: This is your primary vessel for the cheesecake. While even the finest springform pans are rarely 100% watertight, a well-constructed pan made from sturdy, heavy-gauge metal offers a much tighter seal than cheaper, flimsy alternatives. Look for pans with a tight-fitting base and a strong clasp. Investing in a good quality pan minimizes the risk of water seepage, giving you peace of mind during baking. Some bakers even suggest a solid bottom cheesecake pan to entirely eliminate seepage concerns, but for traditional springform pans, proper wrapping is key.
Wide, Heavy-Duty Aluminum Foil: This is critical for creating a waterproof barrier around your springform pan. The “heavy-duty” aspect is important because it’s less prone to tearing or puncturing when exposed to hot water. “Extra-wide” foil is even more beneficial as it allows you to wrap the entire pan in a single, seamless sheet. This eliminates the need to overlap and fold multiple pieces of standard foil together, which creates weak points where water could potentially seep through. The fewer seams, the lower the risk of a soggy crust.
A Larger Outer Pan (Roasting Pan, Sauté Pan, or Baking Dish): This is the container that will hold your springform pan and the hot water. It needs to be significantly larger than your cheesecake pan, specifically a couple of inches wider in diameter. This ensures there’s enough space around the springform pan for the water to circulate evenly, providing consistent heat without the sides touching, which could lead to uneven baking. Additionally, the outer pan must be at least 2-3 inches deep to hold a sufficient amount of water, reaching approximately halfway up the sides of your cheesecake pan. Common choices include a large roasting pan, a deep sauté pan, or a larger round or rectangular cake or baking pan.
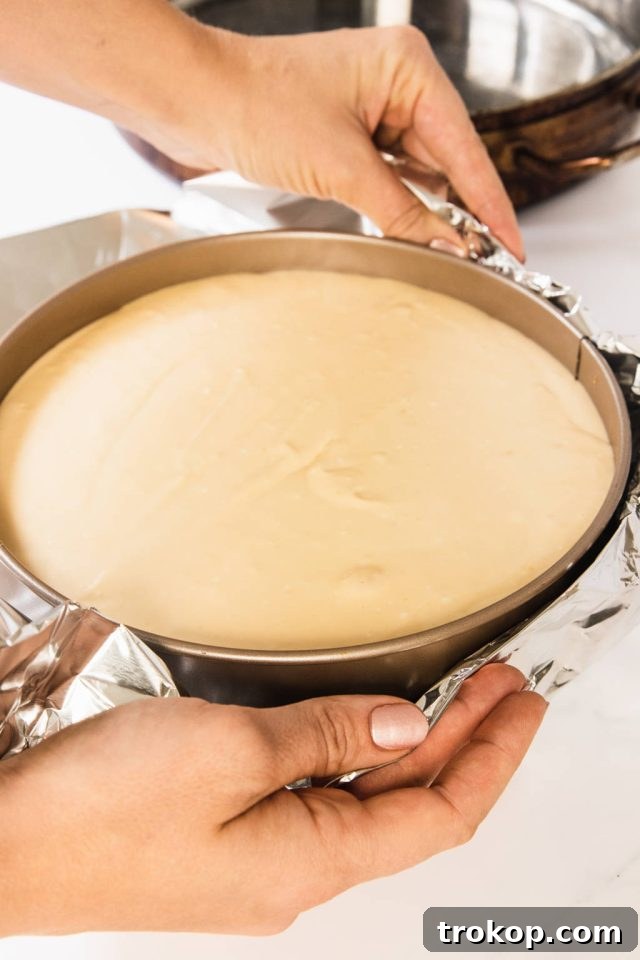
Expertly Wrapping Your Cheesecake Pan for a Water Bath
This crucial step is your primary defense against a soggy cheesecake crust. Take your time and be thorough to ensure a perfectly sealed barrier.
Step 1: Prepare Your Foil Sheets. Start by unrolling your extra-wide, heavy-duty aluminum foil. You’ll need a piece long enough to wrap several inches up the sides of your springform pan, extending well above the top edge. For instance, if you’re using a standard 9-inch springform pan, cut a piece of foil at least 14 inches long. For a 10-inch pan, aim for at least 16 inches. It’s always better to have a bit of extra foil than too little, as you can easily fold down any excess.
Step 2: Position the Pan. Lay your cut piece of foil flat on a clean, dry surface. Ensure it’s smooth and free of wrinkles. Carefully place your filled cheesecake pan (with the crust and filling already in it) directly in the center of the foil sheet. Make sure the foil is centered underneath the pan to allow for even wrapping on all sides.
Step 3: Wrap Tightly and Securely. Bring the edges of the foil up and around the sides of the cheesecake pan. Press the foil firmly against the pan, working your way up. You want the foil to be snug against the pan to prevent water from pooling or seeping. Carefully fold down any excess foil that extends above the top edges of the pan. This creates a secure, watertight seal around the base and lower sides of the springform pan. Many experienced bakers recommend using a double layer of heavy-duty foil for extra protection, especially if you have any doubts about your pan’s seal or the thickness of your foil. Simply repeat the process with a second sheet, wrapping it over the first for an impenetrable barrier.
Once wrapped, lift the pan to inspect it. Ensure there are no visible gaps or tears in the foil, particularly around the base where the springform sides meet the bottom. A perfectly wrapped pan is your guarantee against a soggy bottom crust, laying the foundation for a truly excellent cheesecake.
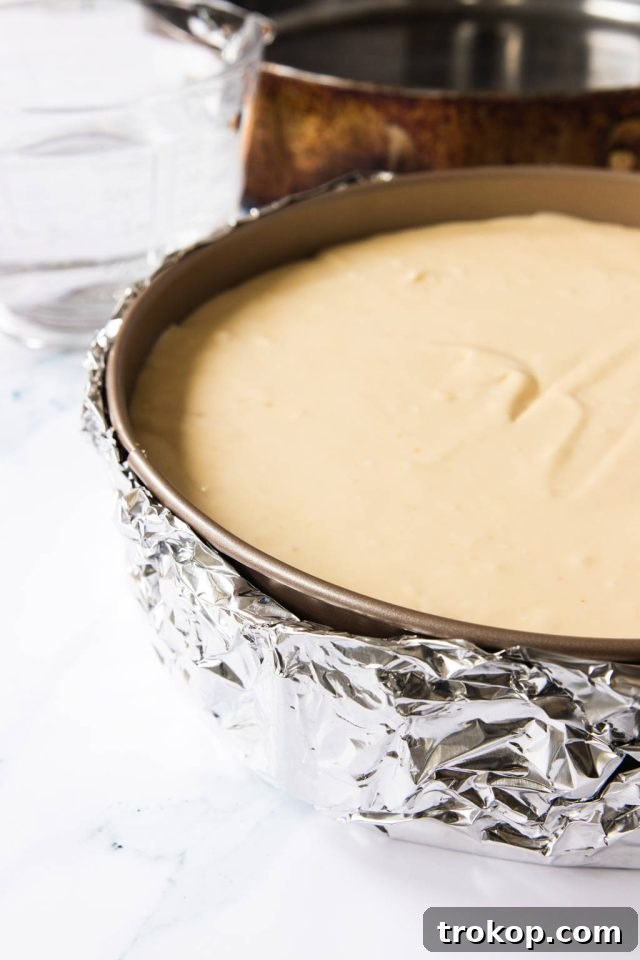
Baking Your Cheesecake with the Water Bath Method
Once your springform pan is meticulously wrapped, it’s time to prepare the water bath and begin the gentle baking process.
Step 1: Oven Preparation. Preheat your oven to the temperature specified in your cheesecake recipe. Most standard cheesecake recipes call for a baking temperature of 325°F to 350°F. While the oven preheats, place an oven rack in the appropriate position. If your recipe provides specific guidance, follow it. Otherwise, positioning the rack in the very center of the oven, or just slightly below center, usually provides the most even heat distribution.
Step 2: Assemble the Water Bath. Carefully fill a measuring cup or kettle with very hot water. The water should be hot, ideally straight from the tap at its hottest setting or warmed on the stovetop, as cold water will significantly drop the oven temperature and prolong baking time. Place your foil-wrapped cheesecake pan into the larger roasting pan. Then, carefully slide this entire assembly onto the preheated oven rack. This sequence is important to prevent accidental splashing.
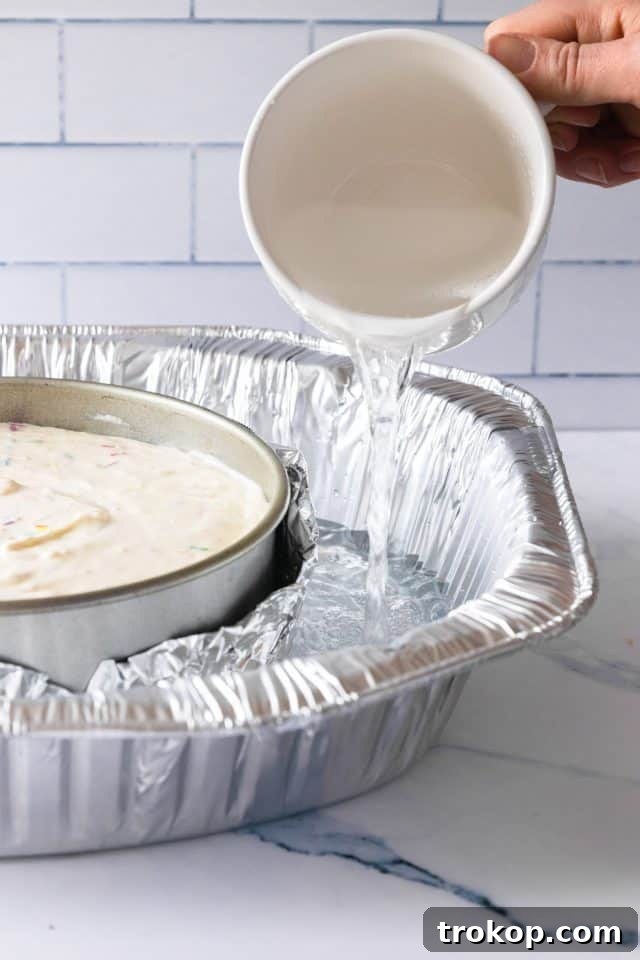
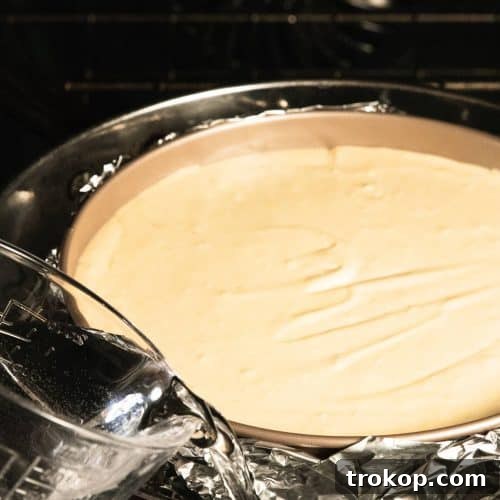
Step 3: Add the Hot Water. With the pans now securely on the oven rack, pour the hot water into the larger outer pan, around the cheesecake. Be extremely careful to pour slowly and steadily, avoiding any splashing onto the cheesecake itself or inside the foil-wrapped pan. Continue pouring until the water level reaches approximately halfway up the sides of your cheesecake pan. The precise amount of water needed will depend on the dimensions of your large outer pan. Once the water is added, gently and slowly slide the oven rack back into its fully closed position, again taking care to prevent any sloshing or splashing. It’s crucial to prevent any moisture from getting inside the foil barrier, as this would compromise your crust.
Throughout the baking process, you typically shouldn’t need to add more water to the bath. However, it’s a good practice to occasionally and carefully check to ensure the water hasn’t completely evaporated, especially during longer baking times. Avoid opening the oven door too frequently, as this can cause temperature fluctuations that might affect your cheesecake.
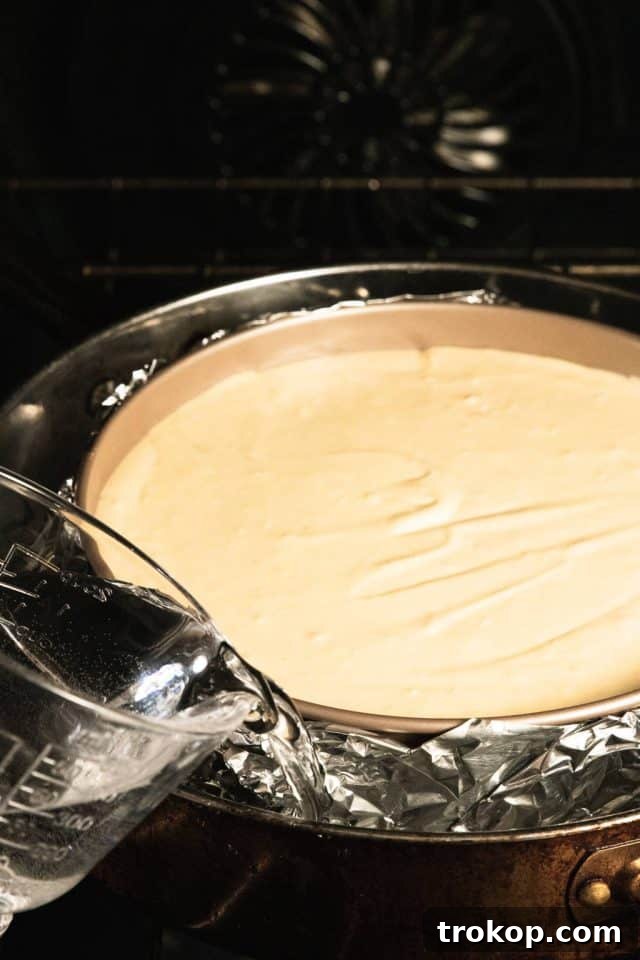
Knowing When Your Cheesecake is Perfectly Done
Determining the exact moment your cheesecake is finished baking is crucial for achieving that ideal creamy texture without overcooking. Baking a cheesecake requires a keen eye and a bit of patience.
Continue baking the cheesecake according to your recipe’s specified time, but always rely on visual cues for final confirmation. The cheesecake is ready when the edges appear set and slightly puffed, while the very center—a circle of about 2-3 inches in diameter—still has a slight, delicate jiggle when you gently shake the pan. This gentle movement in the center is exactly what you want to see. It indicates that the custard is mostly set but not yet completely firm, allowing it to finish cooking and firming up as it cools.
It’s imperative not to bake the cheesecake until the center is completely firm and shows no jiggle at all. If you wait until it looks fully set in the oven, it will be over-baked, resulting in a dry, crumbly, or rubbery texture and increasing the likelihood of cracks forming during cooling. Trust the jiggle! An internal temperature reading, if you use an instant-read thermometer, for a fully baked cheesecake often falls between 150-155°F (65-68°C) in the center.
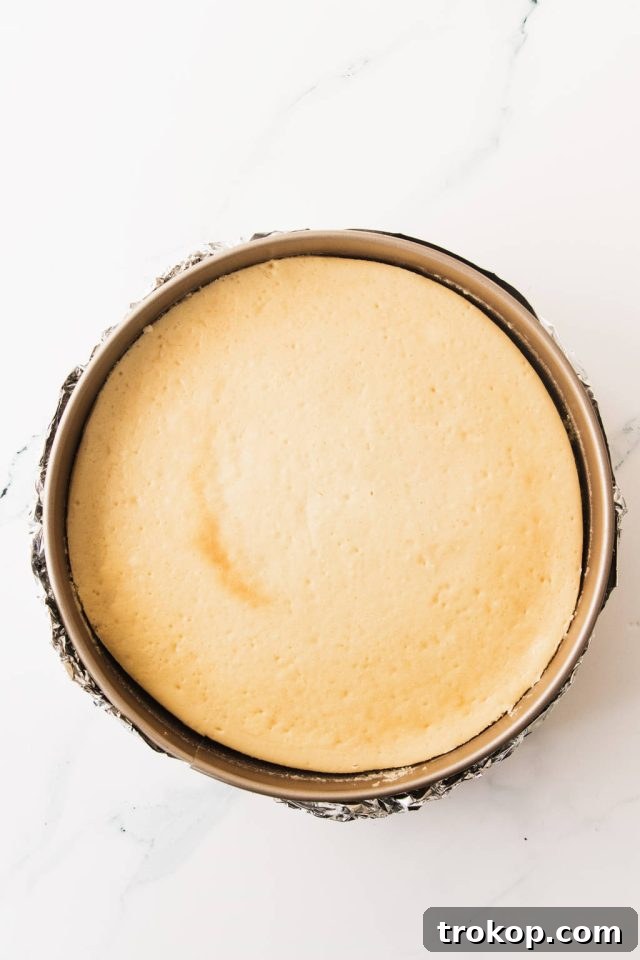
The Art of Cooling Your Cheesecake
Cooling is arguably as important as baking itself when it comes to preventing those dreaded large cracks and splits across the top of your beautiful cheesecake. The cooling process isn’t just about reducing temperature; it’s a continuation of the setting process, and rapid changes in temperature can wreak havoc on delicate custards.
Gradual Cooling in the Oven: Once your cheesecake shows that perfect slight jiggle, turn off the oven completely. Immediately open the oven door a few inches, creating a small gap. Leave the cheesecake inside the oven for at least one hour, or even longer, depending on your recipe and the oven’s heat retention. This gradual transition from a hot environment to a warm, then cooler, environment is critical. It allows the cheesecake to slowly adjust, finish setting without stress, and minimizes the risk of thermal shock that causes cracks.
Room Temperature Cool Down: After the hour in the cooling oven, carefully remove the cheesecake (still in its water bath setup) from the oven. Discard the hot water from the larger pan and then remove the foil-wrapped springform pan. Place the cheesecake on a wire rack to cool completely to room temperature. This step might take another 1-2 hours. Resist the urge to rush this process; patience here pays off with a flawless top.
Loosening and Chilling: Once the cheesecake has reached room temperature, it’s time for a crucial release step. Using a thin, sharp knife, carefully run it around the inner edge of the springform pan, between the cheesecake and the pan’s side. This gentle action helps to loosen the cheesecake, preventing it from sticking to the pan and tearing as it continues to chill and contract slightly. A thinner blade is preferable for a cleaner separation. After this, place the cheesecake (still in its pan, but now loosened) into the refrigerator to chill completely.
The Final Chill: While cheesecake can be chilled for a few hours and still be delicious, allowing it to chill overnight in the fridge is truly ideal. This extended chilling period ensures the cheesecake is thoroughly set, firm, and boasts the best possible flavor and texture. It also allows time for any cheesecake topper ideas to meld perfectly with the creamy base, enhancing the overall experience. Gradual cooling and thorough chilling are non-negotiable steps for a truly professional and stunning cheesecake.
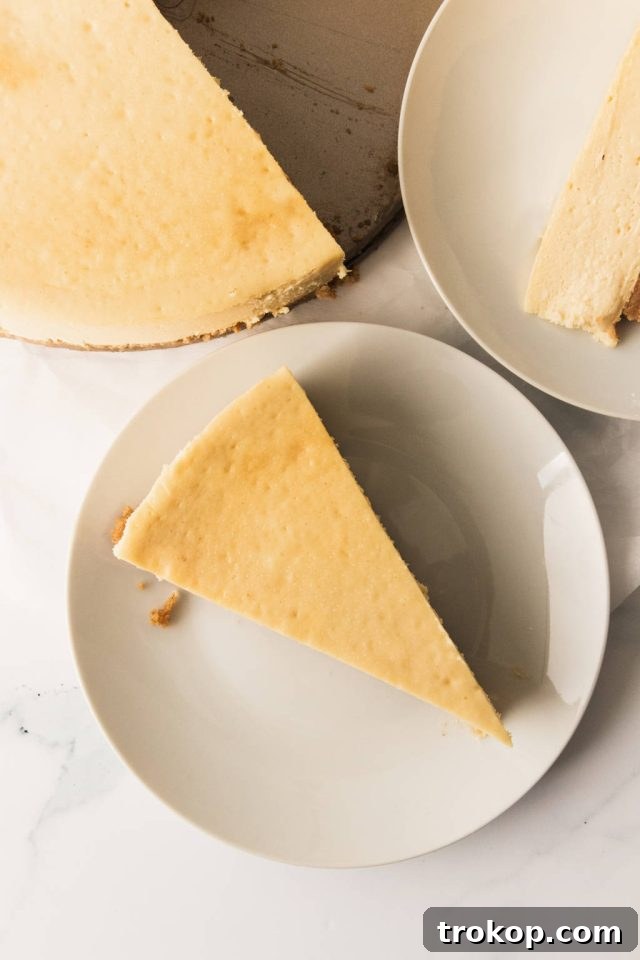
Cutting and Serving Flawless Cheesecake Slices
After all your meticulous effort in baking and cooling your perfect crack-free cheesecake, the last thing you want is messy, uneven slices. Getting clean, elegant cuts can seem tricky, but with the right technique, you can present a dessert that looks as good as it tastes.
The undisputed secret to achieving flawless slices of cheesecake is to use a warm, clean, and sharp knife. Here’s how to do it:
Step 1: Warm the Knife. Run a large, sharp chef’s knife or a long, thin slicing knife under very warm or hot tap water for about 30-60 seconds. The heat from the water will warm the blade, allowing it to glide through the dense, creamy cheesecake filling with ease.
Step 2: Wipe Dry. Immediately after warming, wipe the knife completely dry with a clean kitchen towel. Any moisture left on the blade can stick to the cheesecake and ruin the clean cut.
Step 3: Make the Cut. Place the warm, dry knife at the starting point of your desired slice and press down firmly and evenly through the cheesecake. Avoid sawing motions, as this can create crumbs and jagged edges. Aim for one smooth, decisive cut.
Step 4: Clean and Repeat. For each subsequent slice, repeat the warming and drying steps. This ensures that every single piece you cut is as pristine and perfect as the first. The warm blade not only helps with a clean cut but also prevents the cheesecake from sticking to the knife, making for a much more presentable serving.
Serve your beautifully sliced cheesecake with pride, perhaps garnished with fresh berries, a drizzle of sauce, or a dusting of cocoa powder. Enjoy the fruits of your labor!
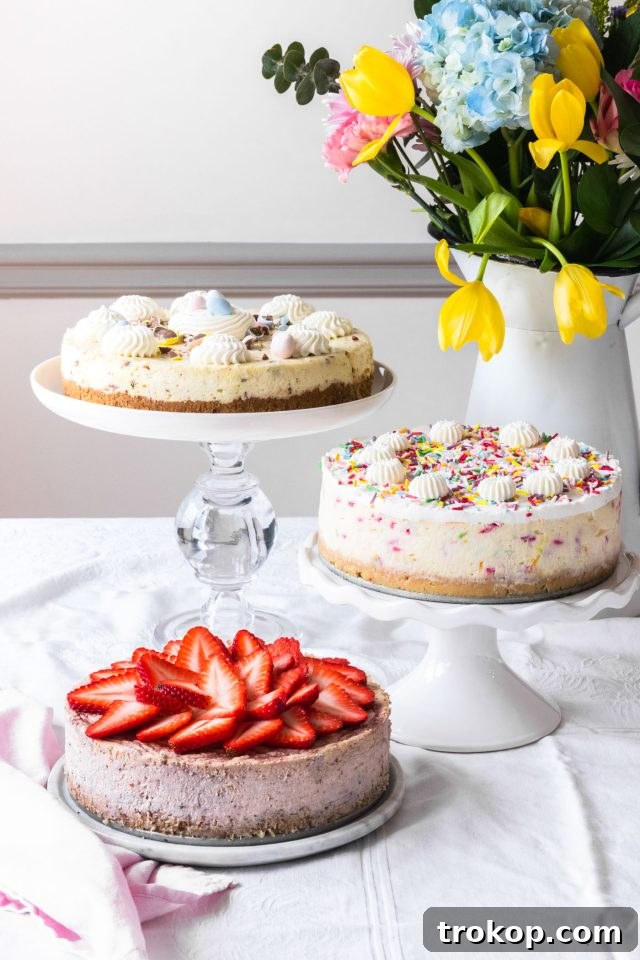
Delicious Cheesecake Recipes to Try
Now that you’re armed with the ultimate technique for a flawless cheesecake, it’s time to put your skills to the test! Here are a few delectable cheesecake recipes from our collection that are perfect for trying out this water bath method and impressing your guests:
- Easter Egg Cheesecake
- Low Carb Cheesecake
- Strawberry Keto Cheesecake
- Caramilk Cheesecake
- Keto Pumpkin Cheesecake
- Funfetti Birthday Cake Cheesecake
- Pecan Cheesecake in a Jar
Cheesecake Water Bath
10 minutes
10 minutes
Equipment
-
Measuring cup
-
Large roasting pan, sauté pan, or baking pan (at least 2-3 inches deep)
-
Oven thermometer (optional, for accuracy)
Materials
- 1 high-quality springform pan
- 1 roll of extra-wide, heavy-duty aluminum foil
- Hot water
Instructions
Wrapping the Cheesecake Pan:
-
1. Starting with extra-wide, heavy-duty foil, cut a piece that is long enough to wrap several inches up the sides of your pan. For a 9-inch pan, cut the foil at least 14 inches long; for a 10-inch pan, cut it at least 16 inches long. It’s better to have it longer than too short.
-
2. Once you’ve cut the foil, lay it out smoothly on a flat surface.
-
3. Place the filled cheesecake pan (with crust and filling) in the center of the foil and wrap the foil tightly around the sides.
-
4. Fold down any extra foil that goes above the edges of the pan, ensuring a snug and secure seal around the base and lower sides. Consider a second layer of foil for added protection.
Baking the Cheesecake with a Water Bath:
-
1. Preheat your oven according to your cheesecake recipe’s instructions (typically 325-350°F). Place an oven rack in the center or just below center.
-
2. Fill a measuring cup or kettle with very hot water. Place the wrapped cheesecake pan into the larger outer pan, then carefully slide this assembly onto the preheated oven rack.
-
3. Pour the hot water into the larger pan around the cheesecake until it’s about halfway up the sides of the springform pan. Move the oven rack carefully to avoid splashing any water. Ensure no moisture gets inside the foil.
-
4. Bake according to your recipe until the edges are set and the center has a slight jiggle. Do not overbake until completely firm.
-
5. Once baked, turn off the oven and open the door a few inches. Let the cheesecake cool gradually in the oven for at least one hour.
-
6. Remove from the oven, discard water, unwrap, and cool completely to room temperature on a wire rack.
-
7. Gently loosen the cheesecake from the pan with a thin knife around the edges, then chill in the refrigerator for at least 4 hours, preferably overnight, for best results.
Notes
- Using extra-wide, heavy-duty foil in one piece significantly reduces the risk of water seeping in compared to overlapping multiple standard-width pieces.
- Ensure your larger outer pan is at least 2-3 inches larger in diameter than your springform pan and at least 2-3 inches deep to allow for adequate water circulation and coverage.
- Always use hot water for the bath to avoid dropping the oven temperature too drastically, which can prolong baking.

Ideas On How to Decorate Your Cake
21 DIY Cake Stand Ideas You Can Make

Italian Meringue Buttercream Frosting Recipe
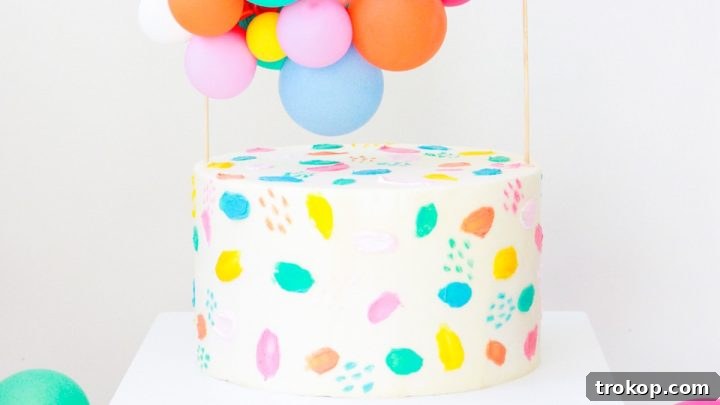
DIY Balloon Cake Topper Plus Painting Frosting Tips

DIY Abstract Floral Pattern Cake

DIY Animal Ear Cake Toppers

3 Winter Cheesecake Toppers Decoration Ideas