
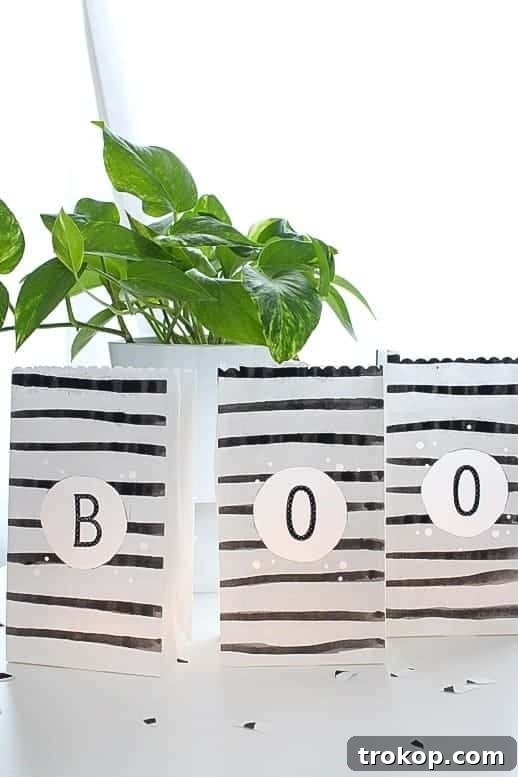
Transform your outdoor space into a magical, festive wonderland with these charming DIY waterproof outdoor paper lanterns. Perfect for adding a whimsical touch to your patio, backyard, or front entryway this Halloween season, these lanterns are not only beautiful but also built to withstand the elements.
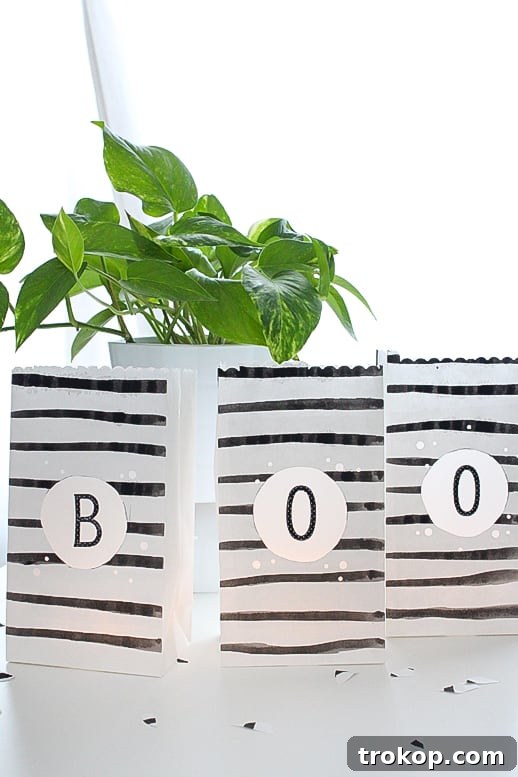
Halloween holds a special place in my heart, primarily for the joyous tradition of passing out candy to eager trick-or-treaters. There's an undeniable charm in seeing tiny tigers waddling up to the door or pint-sized Spider-Men attempting to enunciate "trick or treat" through a lisp. These moments are truly priceless and make the effort of decorating worthwhile.
To complement this delightful experience, I wanted to create outdoor decor that was both kid-friendly and resilient enough to brave unpredictable autumn weather. The solution? These DIY Waterproof Outdoor Paper Lanterns. They offer a simple yet incredibly cute way to illuminate your home’s entrance, casting a warm, inviting glow for all your spooky visitors.
What makes this project truly fantastic is its flexibility. You can unleash your creativity by customizing plain paper bags with unique designs, as I've done. Alternatively, if you're short on time, you can turn this into a quick, five-minute craft by simply choosing your favorite pre-designed paper bags and coating them with outdoor Mod Podge. This product is an absolute game-changer for outdoor crafting, providing a durable, water-resistant finish that feels like magic.
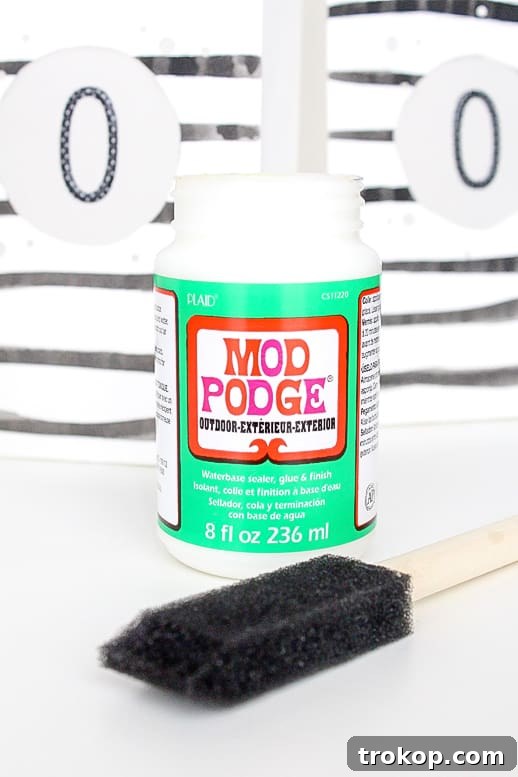
Table of Contents
DIY Waterproof Outdoor Paper Lanterns: An Overview
This tutorial offers a straightforward yet highly effective method for creating paper lanterns that are not only aesthetically pleasing but also fully capable of withstanding various weather conditions. By utilizing a key product like outdoor Mod Podge, we can transform ordinary paper bags into durable, glowing luminaries. These lanterns are ideal for adding a personalized and festive touch to any outdoor celebration, from Halloween trick-or-treating to summer garden parties. The process involves simple steps of sealing, decorating, and illuminating, making it an accessible project for crafters of all skill levels.
Why Choose DIY Outdoor Lanterns?
Opting for DIY outdoor lanterns offers a multitude of benefits over store-bought options. Firstly, it allows for unparalleled personalization. You can match your lanterns perfectly to your existing decor, a specific holiday theme, or your unique aesthetic preferences. This creative freedom means your outdoor lighting will be truly one-of-a-kind. Secondly, it’s often a more cost-effective solution. With basic materials like paper bags and a bottle of Mod Podge, you can create multiple lanterns for a fraction of the price of purchasing pre-made outdoor lighting. Thirdly, the process itself is a rewarding experience. It’s a fun, engaging craft that you can enjoy solo or with family and friends, making memories while creating beautiful decor. Lastly, the satisfaction of creating something functional and beautiful with your own hands is unmatched. These lanterns are not just decorations; they're a testament to your creativity and resourcefulness, providing a warm and inviting atmosphere that lasts.
Essential Materials and Tools for Your Lantern Project
Gathering all your supplies before you begin will make the crafting process smooth and enjoyable. Here’s what you’ll need to create your own waterproof paper lanterns:
- Paper bags: Choose plain white or light-colored bags for best customization results, or patterned ones for a quick project.
- Scissors: For cutting paper and vellum.
- Vellum paper: To diffuse the light softly from inside the lanterns.
- Glue: Standard craft glue for attaching vellum.
- Battery-operated candles: Essential for safe outdoor illumination. Never use real flames in paper lanterns!
- Outdoor Mod Podge Water Base Sealer, Glue and Finish: The star ingredient for waterproofing and durability.
- Foam brush: Ideal for applying Mod Podge smoothly and evenly.
- Sticker letters: (Optional) For spelling out words or creating specific themes.
- Hole puncher: (Optional) Various sizes can add decorative cut-outs.
- Black craft paint: (Optional) For decorative details like watercolor stripes for a Halloween theme.
Step-by-Step Guide: Crafting Your Waterproof Halloween Lanterns
Part 1: Waterproofing Your Paper Bags
The key to these lanterns' outdoor functionality is proper waterproofing. This step is crucial whether you're customizing your bags or simply making store-bought ones weather-resistant.
- Prepare your workspace: Lay down newspaper or a protective sheet to avoid messes, and ensure good ventilation.
- Apply the first coat of Mod Podge: Using a foam brush, generously apply a thin, even coat of Outdoor Mod Podge over the entire exterior surface of the paper bag. Make sure to cover all creases and corners.
- Allow to dry: Let the first coat dry for approximately 15-20 minutes. It should feel tacky but not wet.
- Repeat for multiple coats: Apply several more coats of Mod Podge, allowing adequate drying time (15-20 minutes) between each application. The more coats you apply, the more durable and water-resistant your lanterns will be. Aim for at least 2-3 coats. The water-based sealer, glue, and finish properties of Mod Podge allow it to decoupage and protect almost any surface for outdoor use.
- Curing time is crucial: After the final coat, it is imperative to let the Mod Podge cure completely for 72 hours before exposing the lanterns to outdoor elements. This curing period ensures maximum waterproofing and longevity.
Part 2: Customizing for Halloween Charm
Now for the fun part – adding unique designs to your lanterns! This guide focuses on a classic Halloween look, but feel free to adapt these techniques for any theme.
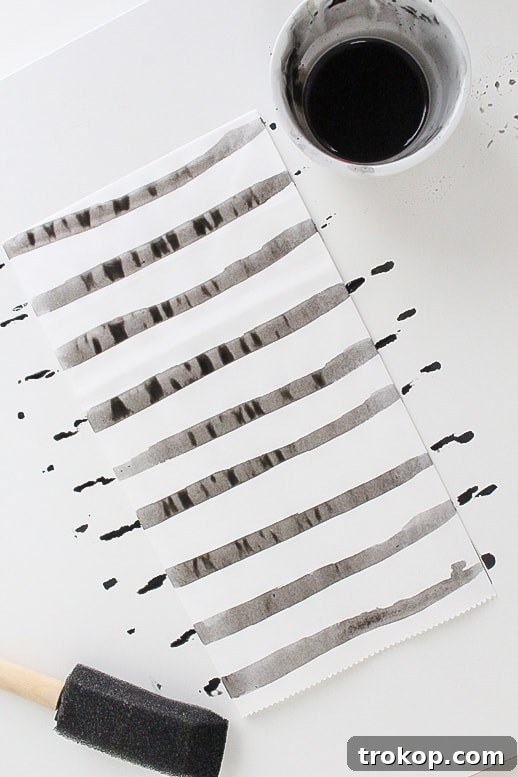
- Paint watercolor stripes (optional): For a spooky yet artistic touch, dilute some black craft paint with a little water. Use a foam brush to paint soft watercolor-style stripes horizontally across your plain white bags. Let the paint dry completely before moving on.
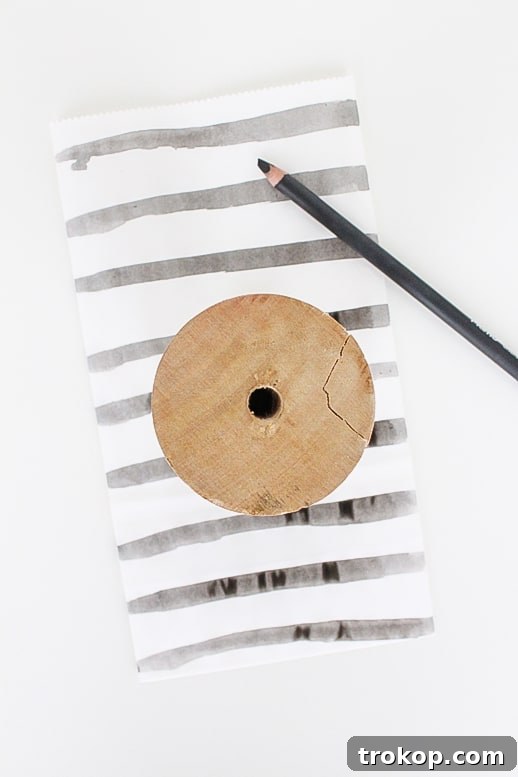
- Create a circular cut-out: Using a small bowl, a spool, or a compass, trace a perfect circle in the center of one side of each paper bag. Carefully cut out these circles with scissors. These will be the glowing "eyes" or "faces" of your lanterns.
- Diffuse the light with vellum: Cut squares of vellum paper slightly larger than your circular cut-outs. Apply glue around the edges of the vellum squares and carefully adhere them to the inside of the paper bags, covering the cut-outs. Vellum creates a beautiful, soft glow.
- Add extra interest with hole punches (optional): For more intricate designs, use varying sizes of hole punches to add additional patterns around the main circular cut-out or elsewhere on the bag. This can create a "starry night" or "polka dot" effect.
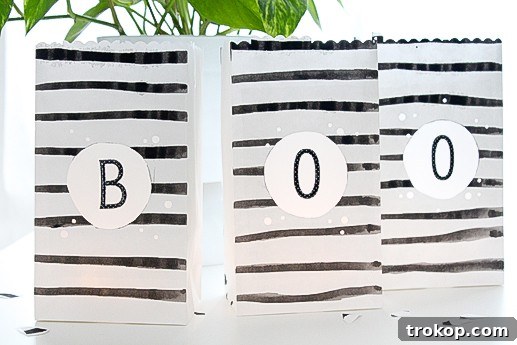
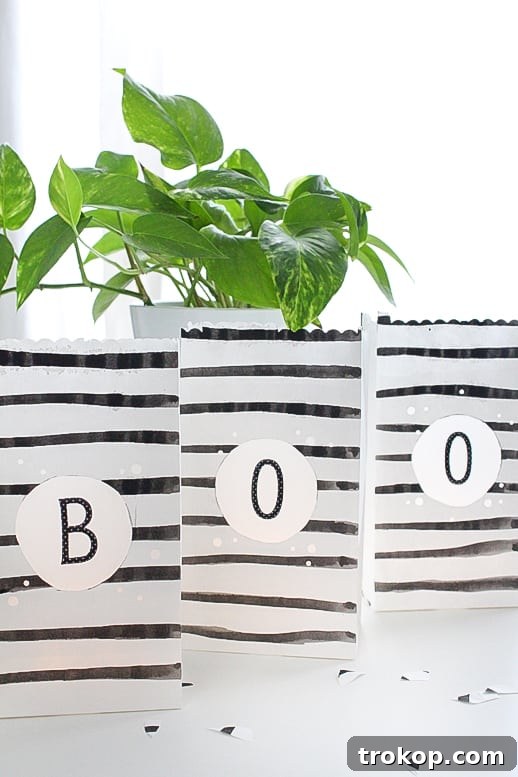
- Personalize with sticker letters (optional): If you want your lanterns to spell out a word like "BOO!" or "WELCOME," carefully place sticker letters onto the vellum paper covering your cut-outs. Ensure they are firmly pressed down.
- Final Mod Podge seal: After all decorations are complete and dry, apply a final comprehensive coat of Outdoor Mod Podge over the entire customized bag, including over the sticker letters if used. This seals your decorations and provides an extra layer of waterproofing. Again, apply several coats with 15-20 minutes of drying time in between, and allow a full 72 hours for curing before outdoor placement.
- Illuminate your creation: Once fully cured, gently open the bags and insert your battery-operated lights. Fan out the bottom of the bag to create a stable base, or add a small amount of sand or pebbles for stability in windy conditions.
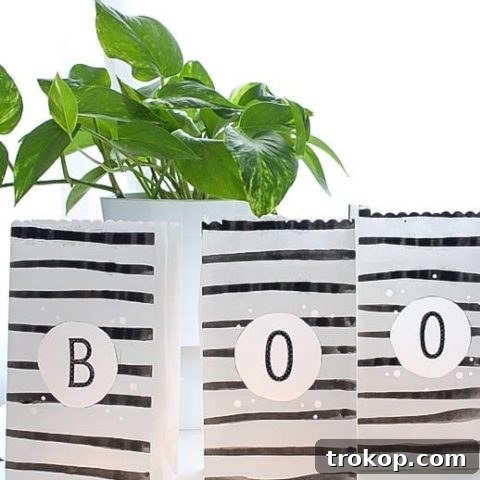
And just like that, you're all set to display your custom, waterproof outdoor paper lanterns!
Ensuring Longevity: Protecting Your Lanterns from the Elements
While Mod Podge Outdoor offers excellent water resistance, an additional layer of protection can significantly extend the life of your paper lanterns, especially in areas prone to heavy rainfall or snow. Once your Mod Podge has fully cured, you can enhance their durability further. Hang each lantern in a well-ventilated area and apply a few good coats of clear, outdoor-grade spray paint or sealant. This creates an extra barrier against moisture. While these measures make the paper highly water-resistant, it’s important to understand that they won't render the lanterns completely impervious to prolonged periods of wet weather. Therefore, it's always a good idea to bring your beautiful creations indoors if a major downpour or snowstorm is expected. This simple precaution will ensure your handmade luminaries continue to brighten your outdoor spaces for many seasons to come.
Beyond Halloween: Versatile Uses for Your Outdoor Lanterns
The beauty of this DIY project is not limited to Halloween. These waterproof paper bag luminaries are incredibly versatile and can be adapted for a wide array of occasions and themes. Imagine soft, pastel-colored lanterns for a spring garden party, vibrant hues for a summer BBQ, or elegant white bags for a winter wonderland display. Simply choose paper bags in different colors, patterns, or sizes, and customize them with various cut-outs or embellishments before waterproofing. You can create a stunning visual impact by lining your walkways, accentuating flower beds, or simply grouping them on your patio table. They add a touch of warmth and charm that transforms any ordinary gathering into a special event. All you need are some plain, small bags and your creativity, and they’ll be ready to glow in no time, offering endless possibilities for decorating your home throughout the year.
Safety First: Tips for Outdoor Lighting
When incorporating any lighting into your outdoor decor, safety should always be the top priority. For these paper lanterns, we strongly recommend using only battery-operated candles or LED tea lights. These alternatives eliminate the fire hazard associated with open flames, making your outdoor display safe for children, pets, and dry foliage. Ensure that the battery packs are securely placed within the lanterns and are not exposed to direct moisture. Additionally, consider the placement of your lanterns. Position them on flat, stable surfaces where they won't easily tip over in the wind. If placing them on the ground, use a small amount of sand, pebbles, or rice in the bottom of each bag to add weight and stability. Keep them away from high-traffic areas where they might be accidentally kicked or knocked over. By following these simple safety guidelines, you can enjoy the beautiful ambiance of your DIY waterproof outdoor paper lanterns with complete peace of mind.
More Creative Outdoor Decor Ideas
If you've enjoyed creating these waterproof lanterns, you'll love exploring more ways to enhance your outdoor living spaces. Here are some additional DIY projects to inspire your next home decor adventure:
- Front Door Decor: Discover charming Cute Halloween Candy And Ghost Decorations to welcome guests.
- DIY Wind Chime: Learn how to make an easy and modern DIY Sculptural Wind Chime.
- Colorful Patio Accents: Bring a little color to your back patio with these fun DIY Faux Grass Decorative Stepping Stones.
- Summer Project: Get ready for sunny days with the perfect summer project: a vibrant DIY Retro Beach Umbrella.
- Jumbo Christmas Garland: Add a festive touch to your exterior with a jumbo DIY twist on a Christmas garland – a striking DIY Wood Lights Christmas Garland.
DIY Waterproof Outdoor Paper Lanterns
Use this simple tutorial to make your own waterproof paper lanterns for any outdoor occasion!
Prep Time: 30 minutes
Dry Time: 2 days
Total Time: 2 days 30 minutes
Category: Lighting, DIY
Equipment
- Scissors
- Foam brush
- Hole punch (optional)
Materials
- Paper bags
- Outdoor Mod Podge Water Base Sealer
- Vellum paper
- Glue
- Battery operated candles
- Sticker letters (optional)
- Craft paint (optional)
Instructions
To waterproof any bag:
- If you’re just wanting to waterproof a store-bought bag for the outdoors, simply use a foam brush to cover the entire bag with Outdoor Mod Podge.
- Paint several coats over the bag, allowing Outdoor Mod Podge to dry 15-20 minutes in between each coat.
- Make sure to allow the Outdoor Mod Podge to seal for 72 hours before placing the lantern outside.
To customize your bag with this Halloween look:
- Water down some black craft paint and use a foam brush to paint watercolor type stripes across plain white bags.
- Using a small bowl or spool, trace and cut out a circle in the middle of the paper bags.
- Glue squares of vellum paper on the inside of the bag to diffuse the light from the circle cut-out.
- You can also use varying sizes of hole punches to add extra interest.
- If you want the lanterns to spell out a word, place a sticker letter to the vellum.
- Cover the entire bag with Outdoor Mod Podge. Paint several coats, allowing 15-20 minutes of dry time in between each coat. Make sure to allow the Outdoor Mod Podge to seal for 72 hours.
- Insert your battery-operated lights, and you’re all set!
Estimated Cost: $40
Keywords: how to waterproof paper lanterns, outdoor luminaries, Halloween crafts

We absolutely adore seeing your home decor projects come to life! Don’t forget to share your amazing creations with us on Instagram using the hashtag #sugarandclothloves. We’re always inspired by your creativity! For even more interior design inspiration and easy DIY tutorials, you can explore all our home decor ideas right here on our blog.
More Easy DIY's To Try for Your Home & Garden
Continue Reading
Continue Reading
Continue Reading
Continue Reading
Continue Reading
Continue Reading
Continue Reading
Continue Reading
Continue Reading
Continue Reading