
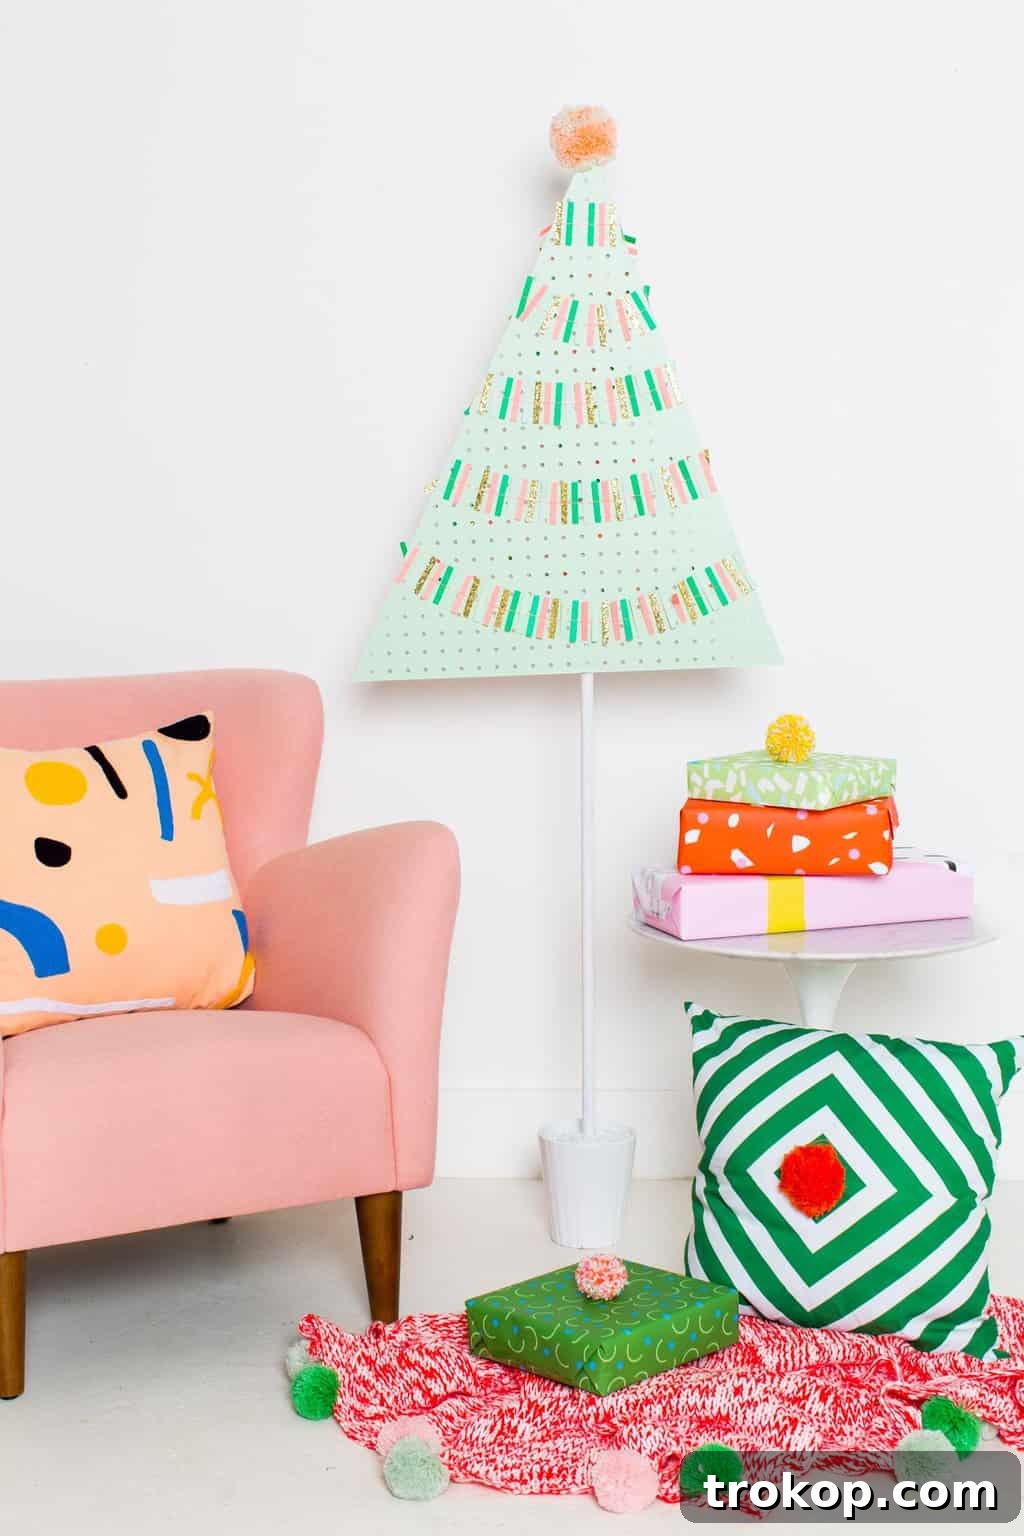
DIY Pegboard Christmas Tree: A Modern & Minimalist Holiday Statement
Are you searching for a unique, space-saving, and undeniably stylish alternative to the traditional Christmas tree this holiday season? Look no further! Our DIY Pegboard Christmas Tree offers a fresh, contemporary twist on festive decor. Moving beyond the conventional, this creative project provides a versatile backdrop for your favorite ornaments, eliminating the mess of shedding needles and the fuss of endless fluffing. Whether you’re decorating a small apartment, a modern living space, or simply seeking a distinctive holiday centerpiece, this pegboard tree is an ingenious solution that combines practicality with aesthetic appeal.
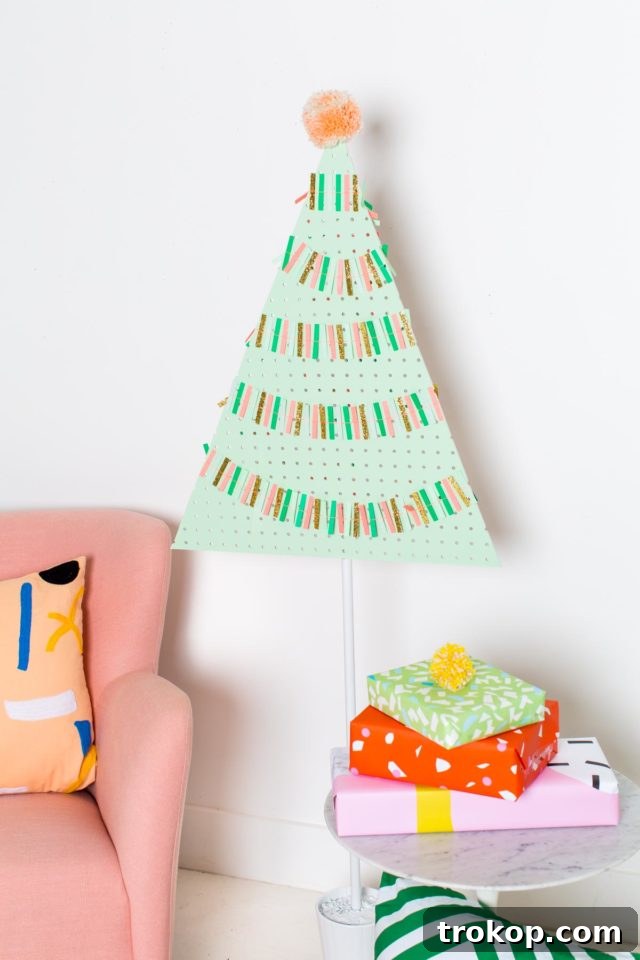
We’re no strangers to embracing alternative Christmas tree ideas. From a charming DIY Cactus Christmas Tree to a whimsical Pom-Pom Christmas Tree, we love exploring creative ways to celebrate the holidays. This year, our focus turned to the incredibly versatile pegboard, transforming it into a functional and beautiful holiday display. This project actually began as signage and decor for a “Girl Crush Holiday Market,” but its charm and practicality quickly convinced us it was too good not to share with a wider audience.
Why Choose a DIY Pegboard Christmas Tree?
Opting for a pegboard Christmas tree comes with a myriad of benefits that make it an attractive choice for many homes:
- No Mess, No Fuss: Say goodbye to fallen pine needles! Unlike real trees, a pegboard tree requires zero cleanup from shedding. It also eliminates the need for tedious fluffing often associated with artificial trees.
- Space-Saving Solution: Ideal for smaller living areas, apartments, or minimalist designs, this tree has a slim profile that takes up minimal floor space while still making a significant visual impact.
- Unleash Your Creativity: Endless Customization: The beauty of pegboard lies in its adaptability. You can easily hang, rearrange, and refresh your ornaments and decor as often as you like, making it incredibly simple to change your holiday theme year after year. From traditional baubles to modern art pieces, anything goes!
- Eco-Friendly & Reusable: This DIY project offers a sustainable alternative to buying a new tree every year. Crafted from durable materials, your pegboard tree can be stored and reused for many festive seasons to come.
- Modern Aesthetic: With its clean lines and geometric shape, a pegboard tree fits perfectly into contemporary interior designs. It can be painted to match any decor scheme, adding a chic touch to your holiday decorations.
Planning Your Pegboard Christmas Tree Design
Before diving into the construction, take a moment to envision your ideal pegboard tree. Consider where it will be placed, the overall size you desire, and the color scheme that best complements your home decor. Will it be a towering centerpiece or a charming accent? The beauty of this DIY project is its flexibility, allowing you to tailor it to your specific needs and aesthetic preferences. This planning stage, though brief, will ensure your finished tree perfectly integrates into your holiday vision.
Materials and Tools Needed for Your DIY Pegboard Christmas Tree
Gathering all your supplies before you start will make the crafting process much smoother. Here’s a comprehensive list of what you’ll need to create your own unique pegboard Christmas tree:
- Pegboard: A large sheet of pegboard. The size will depend on your desired tree height and width. Standard 4×8 foot sheets are common, but you can adjust based on your vision. Consider the thickness for stability.
- Cutting Tool: A rotary or skill saw is essential for precisely cutting the pegboard into its triangular tree shape. Always prioritize safety when using power tools.
- Support Structure:
- 4-6 foot metal pipe: This will serve as the central trunk of your tree, providing stability. Choose a diameter that is sturdy enough for the pegboard.
- Quickrete (Quick-setting cement): To securely anchor the metal pipe in its base.
- Ceramic planter: This will act as the tree’s base, housing the cement and metal pipe. A sturdy, heavy planter is recommended for stability. (Our inspiration came from an Ikea planter).
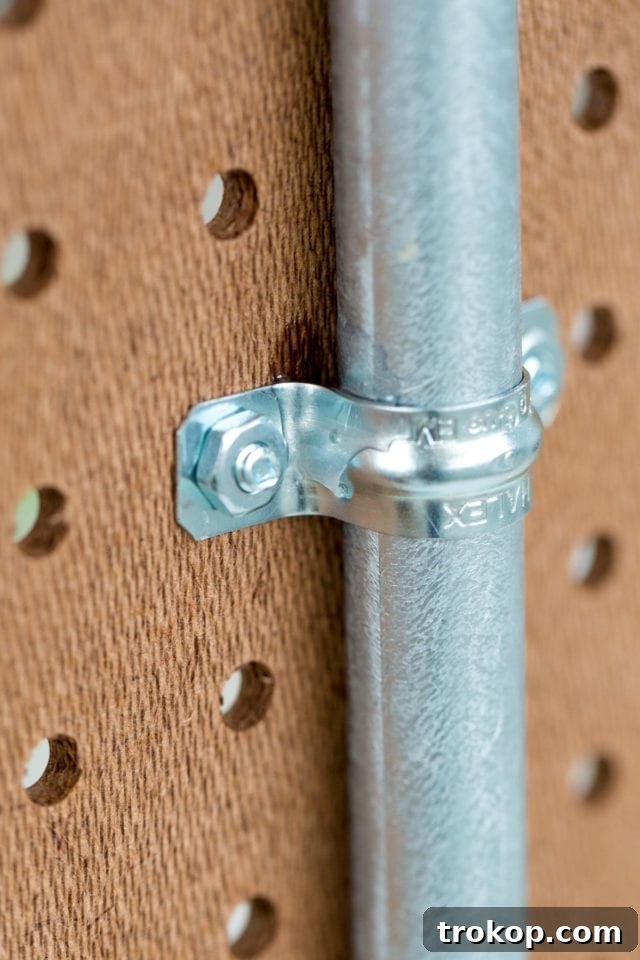
- Assembly Hardware: Two sets of screws and bolts, long enough to go through the pegboard and secure it to the metal pipe. Ensure they have appropriate washers for a tight fit.
- Finishing Touches (Optional but Recommended):
- Mint green paint and paint brush: Or any color of your choice to personalize your tree.
- White spray paint: For a clean base coat, especially if your pegboard isn’t already white.
- Optional Decor: Ornaments, garlands, fairy lights, and any other festive elements you wish to add.
Step-by-Step Guide: How to Make Your DIY Pegboard Christmas Tree
While we initially created this tree for a market display and didn’t capture every detailed step with professional photography, the process is straightforward and manageable for any DIY enthusiast. Don’t worry, we’ll guide you through each stage with clear instructions, allowing your imagination to fill in the visual gaps.
Step 1: Preparing Your Pegboard – The Tree Shape
The first crucial step is to transform your rectangular pegboard into the iconic Christmas tree shape. With careful measurement and a steady hand, you’ll create the main body of your tree.
- Measure and Mark: Lay your pegboard flat on a stable surface. Decide on the desired height of your tree. Mark the center point at the top edge of the pegboard. Then, mark two points at the bottom edge, equidistant from the center, to define the width of your tree’s base. These three points will form your triangle.
- Cut with Precision: Using your rotary or skill saw, carefully cut along the lines connecting the top center mark to each of the bottom marks. Always wear appropriate safety gear, including eye protection and gloves. If you’re unsure about using a power saw, many hardware stores offer cutting services for a small fee.
Step 2: Creating a Sturdy Base for Your Tree
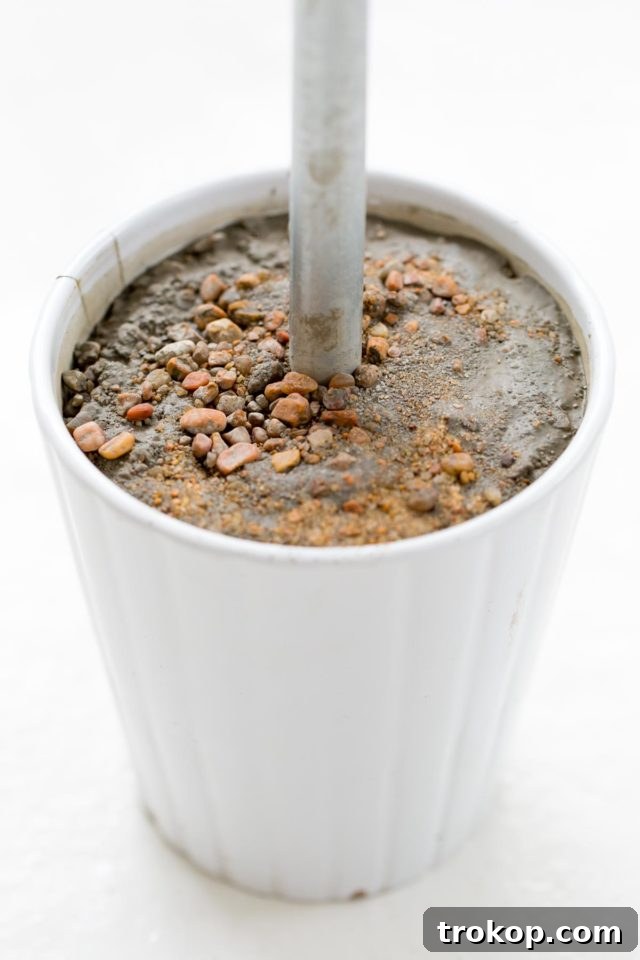
A stable base is paramount for your pegboard tree, especially if you plan to adorn it with ornaments. Quick-setting cement provides the perfect anchor for your metal pipe ‘trunk’.
- Mix the Cement: Follow the instructions on your Quickrete packaging to mix the cement. Ensure it has a consistent, pourable, yet not too watery, consistency.
- Pour into Planter: Carefully pour the mixed cement into your chosen ceramic planter. Fill it to a level that will adequately hold the metal pipe.
- Insert the Pole: Immediately after pouring the cement, insert the metal pipe into the center of the planter. Hold it perfectly vertical until the cement begins to set and can hold the pole upright on its own. Allow the cement to cure fully according to the product’s instructions, which may take several hours. This ensures a rock-solid foundation for your tree.
Step 3: Assembling the Pegboard to the Pole
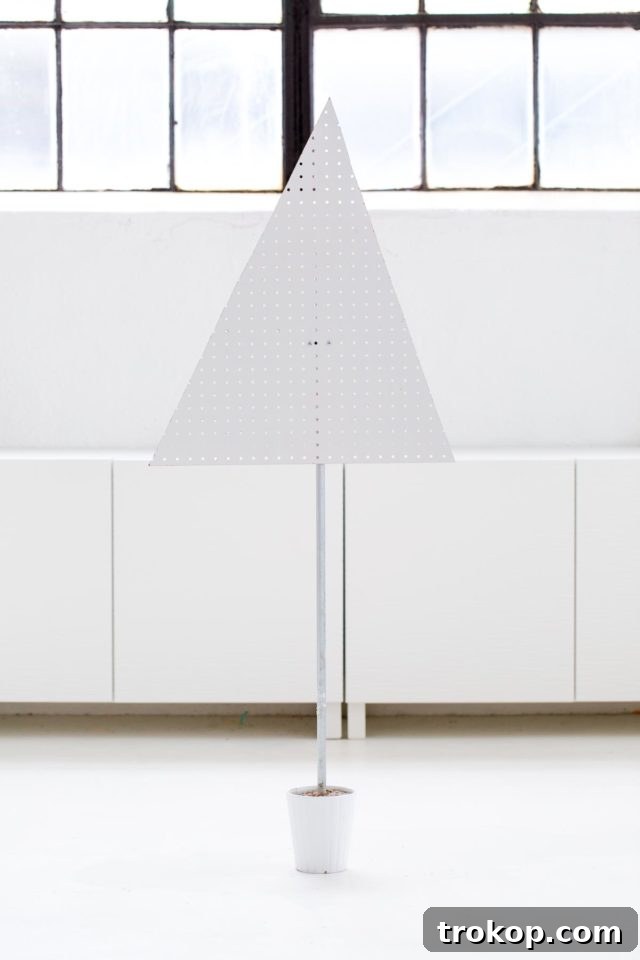
Once your base is completely dry and stable, it’s time to attach the pegboard ‘tree’ to its ‘trunk’.
- Position the Pegboard: Carefully align your triangular pegboard against the metal pole. You’ll want it centered both vertically and horizontally.
- Mark and Drill: Mark the spots on the pegboard where you want to attach it to the pole. Typically, two points—one near the top and one near the middle or bottom—provide sufficient stability. Drill holes through the pegboard at these marked points.
- Secure with Screws and Bolts: Pass the screws through the pegboard and around the metal pole, securing them tightly with bolts and washers. Ensure the pegboard is firmly attached and doesn’t wobble.
- Optional Base Coat: At this stage, you might choose to give the entire structure a unifying coat of white spray paint. This creates a clean canvas for your final color and helps any subsequent paint adhere better.
Step 4: Adding Color to Your Pegboard Tree
Now for the fun part – personalizing your pegboard tree with color!
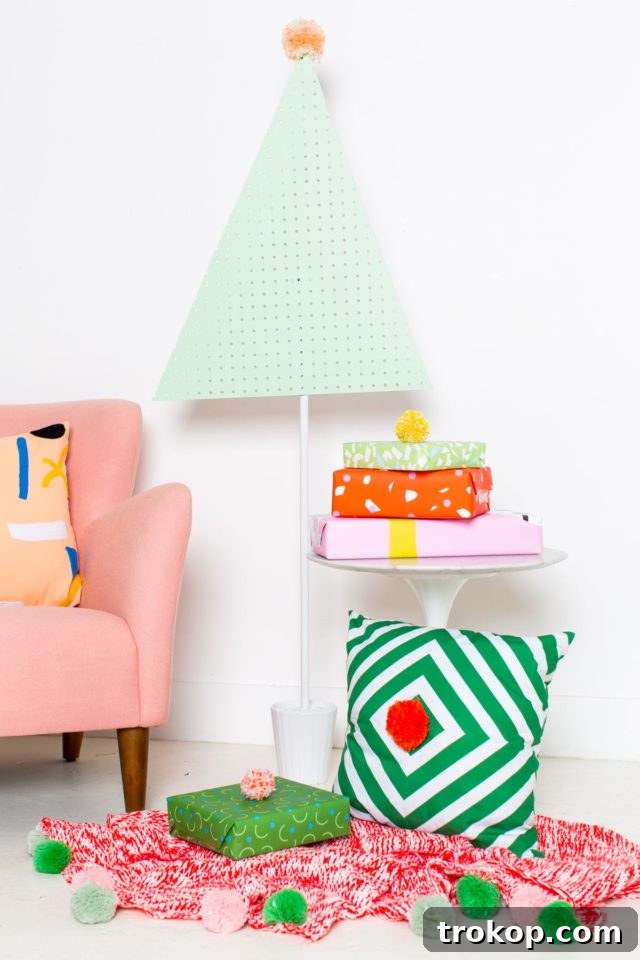
- Paint Application: Once any base coat is dry, use a paintbrush to apply your chosen color to the pegboard. We opted for a soft mint green, but feel free to choose a shade that complements your holiday decor. Apply thin, even coats to avoid drips and ensure thorough coverage.
- Allow to Dry Completely: Patience is key! Ensure the paint is completely dry before moving on to decorating. This prevents smudges and ensures a crisp, professional finish.
Decorating Your Modern Pegboard Christmas Tree
With your DIY Pegboard Christmas Tree constructed and painted, the exciting phase of decoration begins. This is where your personality truly shines, transforming a simple structure into a festive masterpiece.
Minimalist Charm vs. Festive Flair
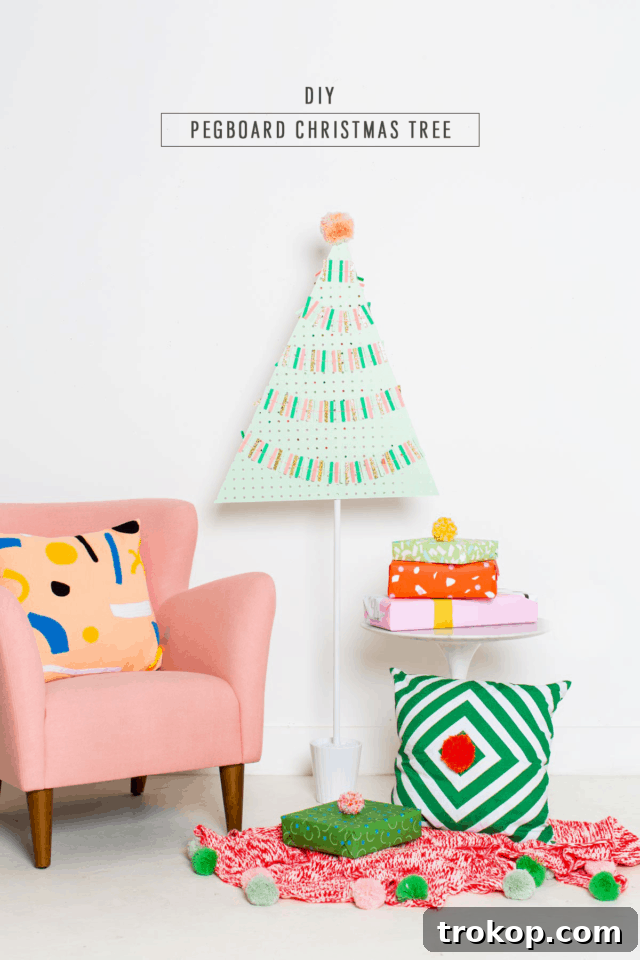
Initially, we debated whether to keep our tree very simple, perhaps with just a single decorative element like a fluffy pom-pom on top. The clean lines and mint green color already made a statement, especially when paired with our elegant pinky Happy Quartz Rose Chair from Article, creating a beautifully styled corner with a cohesive color scheme. There’s undeniable appeal in a minimalist approach, allowing the tree’s unique structure and color to take center stage.
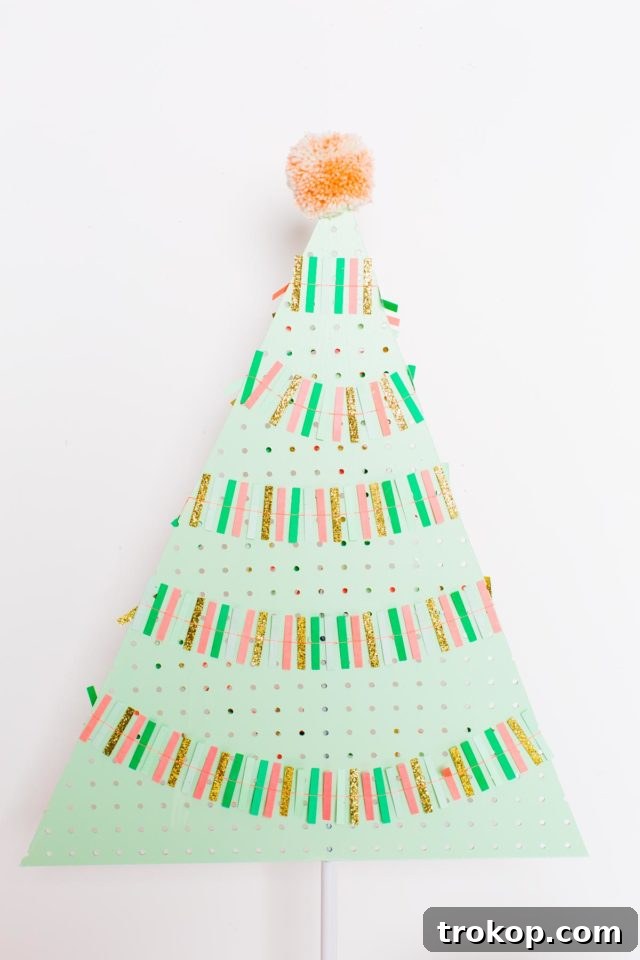
However, the beauty of a pegboard tree is its inherent invitation to decorate! The numerous holes are perfect for hanging a variety of ornaments and accessories, allowing you to easily switch from a minimalist look to a more traditional or whimsical one.
Ideas for Ornaments and Accessories
- Traditional Ornaments: Don’t shy away from classic baubles! The pegboard holes provide perfect spots for hooks, allowing you to hang your favorite glass, plastic, or ceramic ornaments.
- Garlands and Tinsel: Drape delicate bead garlands, festive tinsel, or even homemade paper chains across the pegboard to add texture and sparkle.
- Fairy Lights: Weave battery-operated LED fairy lights through the pegboard holes or around the edges for a warm, inviting glow that truly transforms the tree, especially in the evening.
- DIY & Handmade Decor: This is a wonderful opportunity to incorporate handmade items, such as felt shapes, knitted stars, or dried orange slices, adding a personal touch.
- Pegboard Accessories: Utilize actual pegboard hooks and small shelves to display miniature holiday figures, tiny wrapped gifts, or even small potted plants for a truly integrated look.
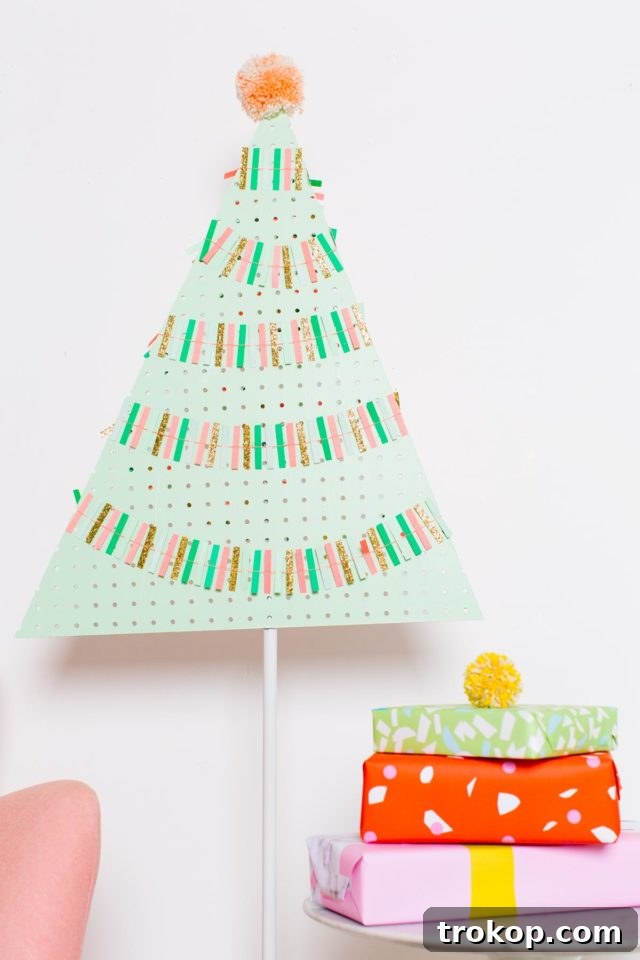
Ultimately, we couldn’t resist adding a cute garland to our tree for a little extra “umph,” and we absolutely loved the way it turned out! It truly is a modern, fuss-free, and space-saving solution for Christmas decor that doesn’t compromise on festive spirit. What unique decorations will you choose for yours?
Maintenance and Storage of Your Pegboard Tree
One of the many advantages of a DIY Pegboard Christmas Tree is its ease of maintenance and storage, ensuring it can bring joy for many holiday seasons to come. To keep your tree looking its best, simply wipe down the pegboard surface with a damp cloth if it collects dust. When the holiday season concludes, carefully remove all decorations. The slim profile of the pegboard makes it incredibly easy to store in a closet, behind furniture, or in a utility space without taking up significant room. If you used a two-part assembly (pegboard and base), you might even be able to detach the pegboard from the pole for even more compact storage, though we recommend keeping the pole cemented in its planter for stability and ease of reassembly next year. This reusability makes it an eco-conscious and economical choice for your annual holiday decor.
Frequently Asked Questions About DIY Pegboard Christmas Trees
- How long does it typically take to make a DIY Pegboard Christmas Tree?
- The actual construction time, excluding drying times for cement and paint, can be as little as 2-3 hours. The quick-setting cement usually takes a few hours to set, and paint drying can add another 4-8 hours depending on humidity and paint type. So, you can realistically complete the project over a weekend.
- Can I customize the size and shape of my pegboard tree?
- Absolutely! This is one of the biggest benefits of a DIY project. You can choose a larger or smaller pegboard sheet, adjust the width-to-height ratio to make it slender or broader, or even experiment with a less traditional, more abstract tree shape. Just ensure your base is appropriately sized and heavy enough to support your chosen design.
- Is a pegboard Christmas tree sturdy enough for heavy ornaments?
- Yes, if constructed properly. The key is a strong, stable base (well-cured cement in a sturdy planter) and secure attachment points between the pegboard and the metal pole. Pegboard itself is quite durable. For very heavy ornaments, consider distributing their weight evenly or reinforcing attachment points with extra washers or specialized pegboard hooks designed for heavier loads.
- What if I don’t have a specific power tool like a rotary or skill saw?
- Don’t let tool limitations deter you! Many large hardware stores offer cutting services for lumber and sheet goods for a small fee. Simply bring in your pegboard sheet and your desired measurements for the triangular cut, and they can often do it for you. Alternatively, you might be able to borrow tools from friends or community workshops.
- Can I use this pegboard tree for purposes other than Christmas?
- Definitely! The versatility of pegboard extends far beyond the holidays. You could repurpose it as a functional display board for photos, artwork, or craft supplies in a home office or studio. With different paint and accessories, it can serve as a stylish backdrop for any season or celebration.
Final Thoughts: Embrace Your Unique Holiday Style
Creating your own DIY Pegboard Christmas Tree is more than just a craft project; it’s an opportunity to infuse your home with personalized holiday cheer. It’s a testament to modern design, sustainable living, and creative problem-solving. This alternative tree offers all the festive charm without the traditional drawbacks, making it a perfect fit for contemporary lifestyles. We hope this guide inspires you to roll up your sleeves and craft a distinctive centerpiece that will be admired by all who visit your home this season. So, gather your materials, let your imagination take flight, and enjoy the process of bringing a truly unique holiday statement to life!