
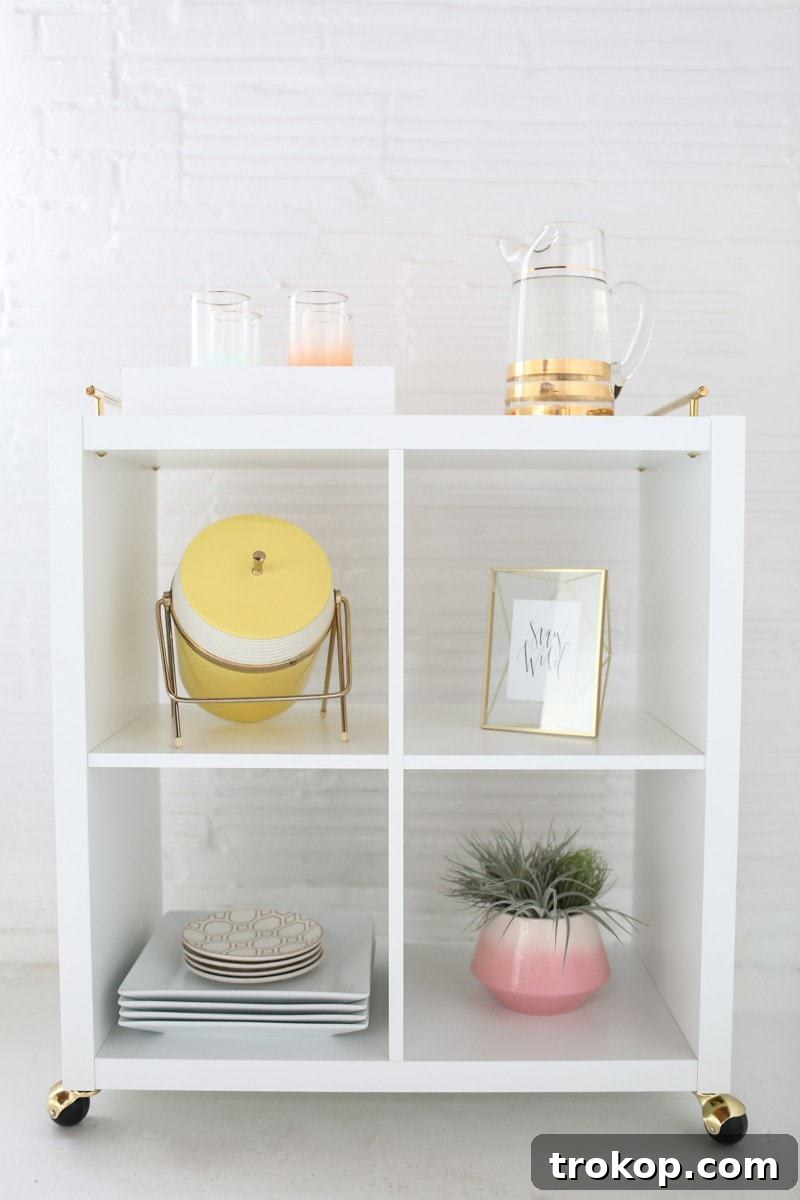
Transforming ordinary furniture into extraordinary pieces is a hallmark of creative home decor, and few brands offer as much potential for customization as Ikea. This guide will walk you through creating a stylish, budget-friendly DIY Ikea bar cart hack using the popular Kallax shelf unit. Perfect for summer entertaining, adding a touch of sophistication to your living space, or even serving as versatile storage in a bustling studio, this project proves that chic design doesn’t have to break the bank. Imagine serving up refreshing cocktails from your custom-built cart, a piece that reflects your unique style while offering practical functionality.
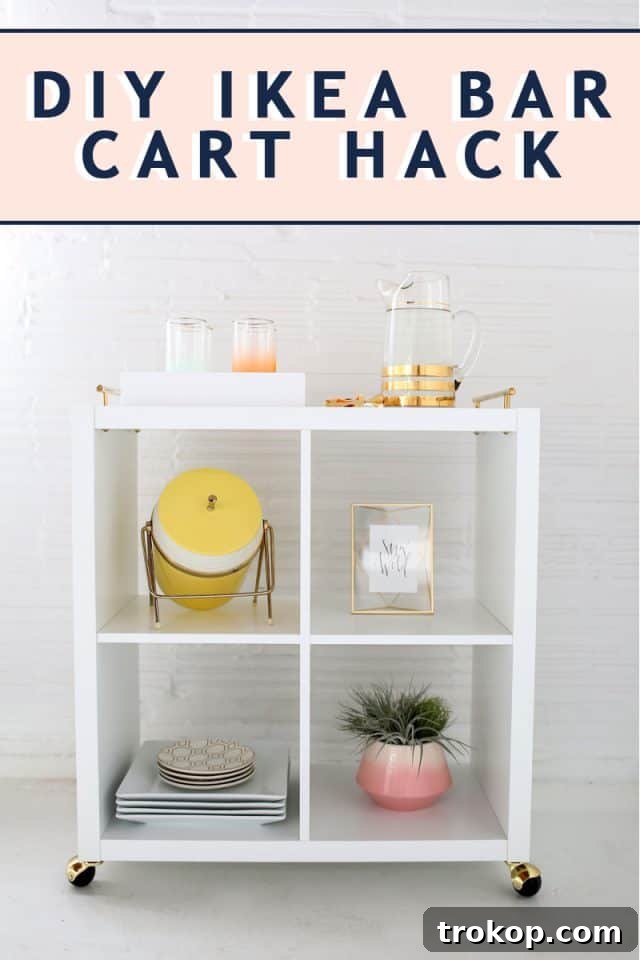
Here at the studio, things are constantly evolving, and we’re always looking for smart, stylish solutions to enhance our space. With the invaluable help of my Dad, who’s been a treasure trove of DIY knowledge – from installing dimmer switches to fixing pesky ice makers and even tackling mosquito issues – we recently embarked on this exciting Ikea hack. The result? A beautiful and functional bar cart that perfectly embodies the studio’s aesthetic. We’re thrilled to give you a sneak peek into the vibe of our upcoming studio reveal through this project. Expect a delightful blend of modern clean lines, airy lightness, playful pops of color, and subtle mid-century twists. This DIY bar cart is more than just a piece of furniture; it’s a statement of style and ingenuity. Ready to craft your own?
Table of Contents
Why Choose a DIY Ikea Bar Cart Hack?
Bar carts have evolved beyond simple serving stations; they are now essential elements of home decor, offering both functionality and a significant style statement. Whether you’re an avid entertainer or simply appreciate a well-appointed home, a bar cart can elevate your space. The beauty of an Ikea hack lies in its incredible cost-effectiveness and the freedom it provides for personalization. Instead of spending hundreds or even thousands on a designer piece, you can achieve a bespoke look for a fraction of the price. This particular DIY project transforms a standard Ikea Kallax shelf unit, a staple known for its clean lines and versatility, into a sophisticated bar cart. It’s the perfect canvas for a modern, light aesthetic infused with a few vibrant color accents and charming mid-century details, making it suitable for a variety of interior design styles.
Beyond its primary role for entertaining, this Ikea bar cart hack is remarkably versatile. It can effortlessly transition into a portable coffee station, a craft supplies organizer, a chic bedside table, or even additional storage in a home office. Its mobility, thanks to the addition of casters, allows you to reconfigure your space on a whim, adapting to different needs and occasions. This project is not just about building a piece of furniture; it’s about creating a flexible design solution that grows with your lifestyle.
Gathering Your DIY Ikea Bar Cart Materials
The foundation of any successful DIY project lies in having the right materials. For this elegant Ikea bar cart hack, we’ve carefully selected components that combine affordability with a high-end aesthetic. Here’s what you’ll need to transform your Kallax shelf into a stunning mobile bar:
- Ikea Kallax Shelf Unit (White): This forms the structural core of your bar cart. Its robust design and simple cubby system make it ideal for storing bottles, glassware, and decor. The white finish provides a clean, modern base that beautifully contrasts with brass accents.
- 14.5 inch Skinny Brass Pulls (2): These elegant brass pulls are crucial for achieving that sophisticated, mid-century modern look. Their slim profile and metallic sheen add a touch of luxury and functionality, serving as handles to easily maneuver your cart.
- 2 inch Bright Brass Hooded Ball Casters (4) and coordinating screws (if not included): Mobility is key for a functional bar cart. These hooded ball casters not only allow for easy movement but also contribute significantly to the overall vintage-inspired aesthetic with their bright brass finish. Ensure you have coordinating screws for secure attachment.
- #8 32 x 2 inch Brass Screws (4): These specialized brass screws are essential for securely attaching the brass pulls. Using brass ensures a cohesive metallic look without any visual discrepancies.
- #8 Brass Finishing Washers (4): Finishing washers provide a neat, professional appearance where the screws meet the shelf, distributing pressure evenly and protecting the wood while enhancing the brass detailing.
- **Drill and coordinating drill bit**: A reliable drill is indispensable for making pilot holes and securing screws. Make sure your drill bit matches the size of your screws for clean, precise holes.
- Gold Foiling Pen — Optional: This handy tool allows you to unify your hardware finishes. If any silver screws are visible or supplied with the Kallax unit, this pen can transform them into a cohesive gold/brass tone.
Step-by-Step Guide to Crafting Your Ikea Bar Cart
Transforming your Ikea Kallax into a chic bar cart is a straightforward process that anyone can tackle. Follow these detailed steps to bring your vision to life:
1. Assemble the Kallax Shelf Unit
Begin by assembling your Ikea Kallax shelf unit according to the manufacturer’s instructions. These instructions are typically clear and easy to follow. However, pay close attention to one crucial modification: do not attach the adhesive felt pads that usually come with the unit for the bottom. These pads are designed for stationary furniture, and since our bar cart will be mobile, they are unnecessary and will be replaced by casters.
2. Install the Brass Casters
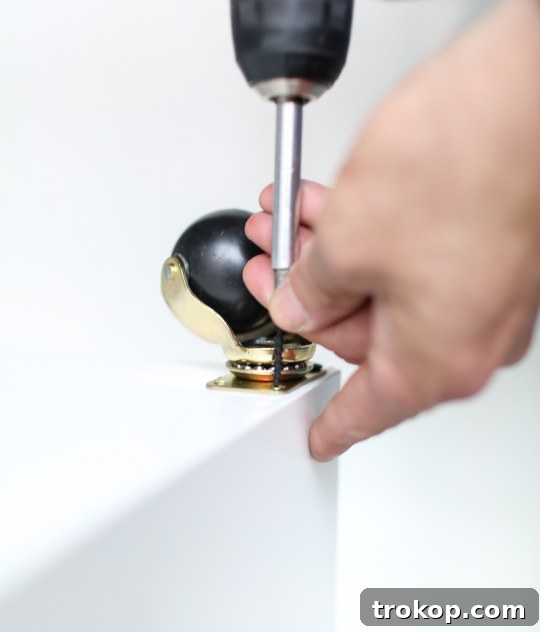
Once the Kallax unit is fully assembled (and standing upside down for easier access), it’s time to add the mobility. Carefully install the four 2-inch bright brass hooded ball casters, one on each of the four bottom corners of the shelf. Use a drill to create small pilot holes before driving in the screws. This prevents the wood from splitting and ensures a secure attachment. Position the casters slightly in from the edges to ensure stability and a clean look.
3. Optional: Unify Metal Finishes with a Gold Foiling Pen
After the casters are securely in place, you might notice that some of the screws used in the Kallax assembly or with the casters are silver, creating a mixed metal look. If you prefer a cohesive, all-brass aesthetic, now is the perfect time to use your gold foiling pen. Carefully color in any visible silver screw heads to match the new brass hardware. This small detail can make a significant difference in achieving a polished, high-end finish. Of course, if you appreciate the intentional contrast of mixed metals, feel free to skip this step!
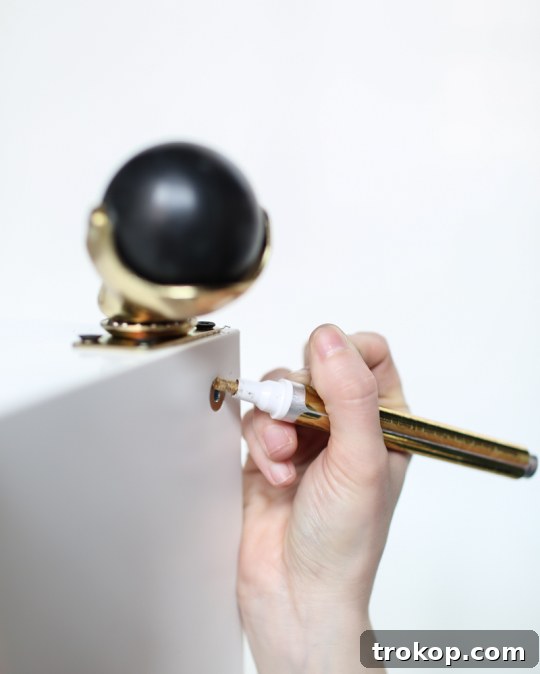
4. Mark and Drill for Handles
Flip the shelf right side up and carefully measure and mark the exact locations where you want your brass pulls to be. For a balanced look, we positioned ours approximately 1/4 inch in from each end of the top edge. A simple trick is to lay the pull on its side, align it, and then mark the drilling points precisely with a pencil. Accuracy here is key for a symmetrical and professional finish. Once marked, use your drill with the appropriate bit to create holes all the way through the top edge of the Kallax unit. Ensure these holes are perfectly aligned with the screw holes on your brass pulls.
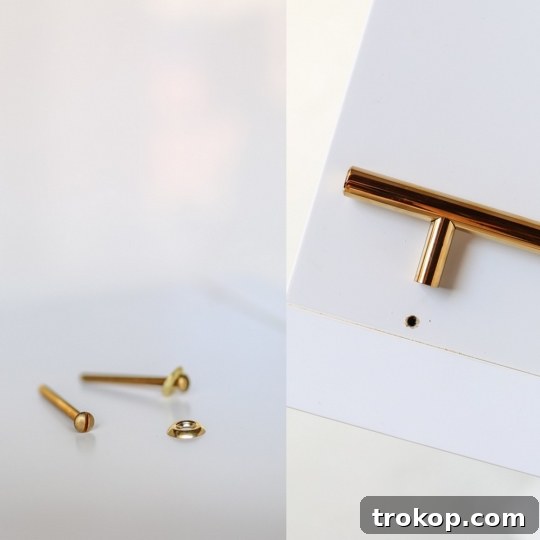
5. Attach the Brass Handles
With the holes drilled, it’s time to secure the handles. From underneath the top edge of the Kallax, insert a #8 brass finishing washer, followed by a #8 32 x 2 inch brass screw, up through the drilled hole. Align the screw with the corresponding hole in your brass pull and carefully twist to secure. Repeat this for all attachment points on both pulls. Ensure the screws are tightened firmly but gently to avoid damaging the unit. The brass washers will not only provide a clean finish but also help distribute the pressure, making the handles more stable and durable.
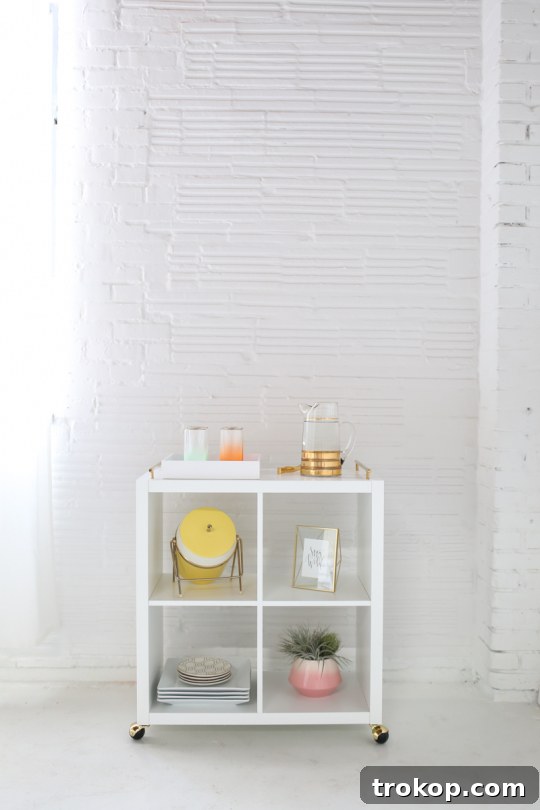
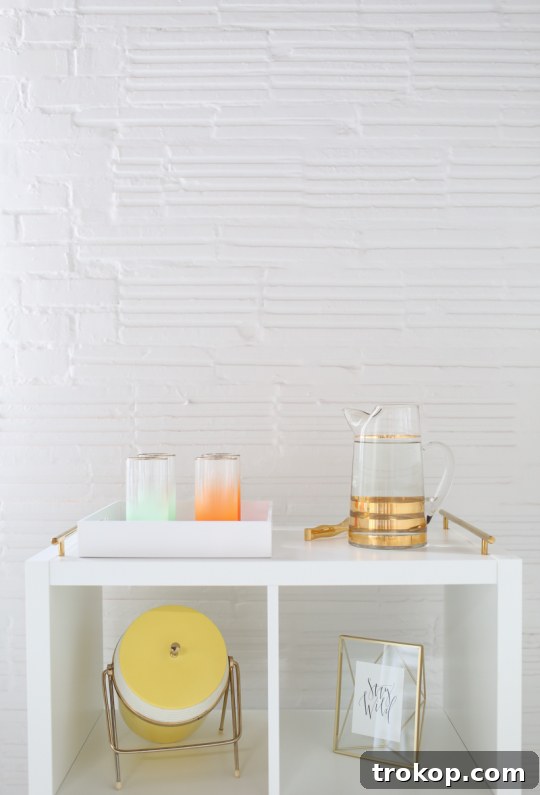
Customizing Your Bar Cart Hardware: Achieving the Perfect Brass Look
One of the fantastic aspects of DIY projects is the ability to tailor them precisely to your taste. If you encounter difficulty finding brass hardware in the exact style or size you desire for your DIY bar cart, don’t fret – there are simple and effective solutions. Brass screws and washers are generally easy to source at most local hardware stores or through online retailers like Amazon, ensuring you maintain a consistent metallic theme for these smaller components.
However, if you’ve fallen in love with a particular handle style that isn’t available in brass, a high-quality brass spray paint can be your best friend. Choose a brass topcoat spray paint designed for metal, and apply it evenly to transform any non-brass handles into a stunning, uniform finish. Remember to work in a well-ventilated area, apply thin, even coats, and allow ample drying time between applications for the best results. This technique gives you endless possibilities for customizing your bar cart’s aesthetic without compromising on your vision.
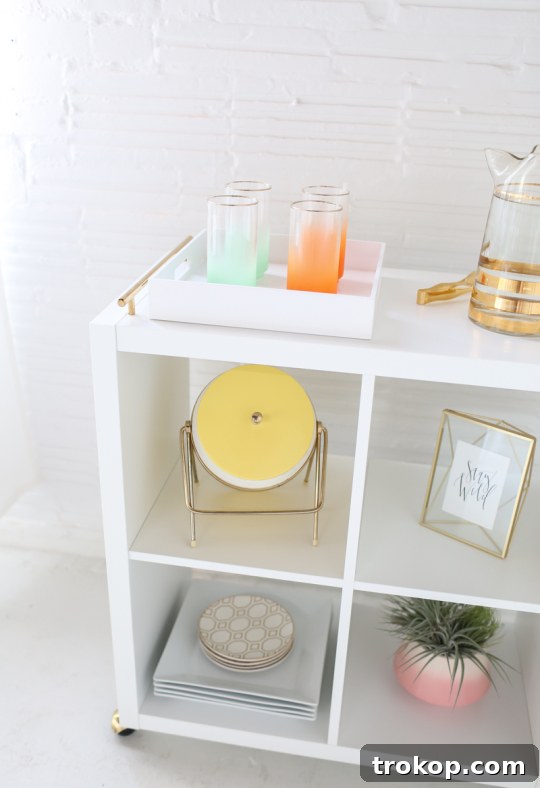
Decorating Your New Ikea Bar Cart Hack
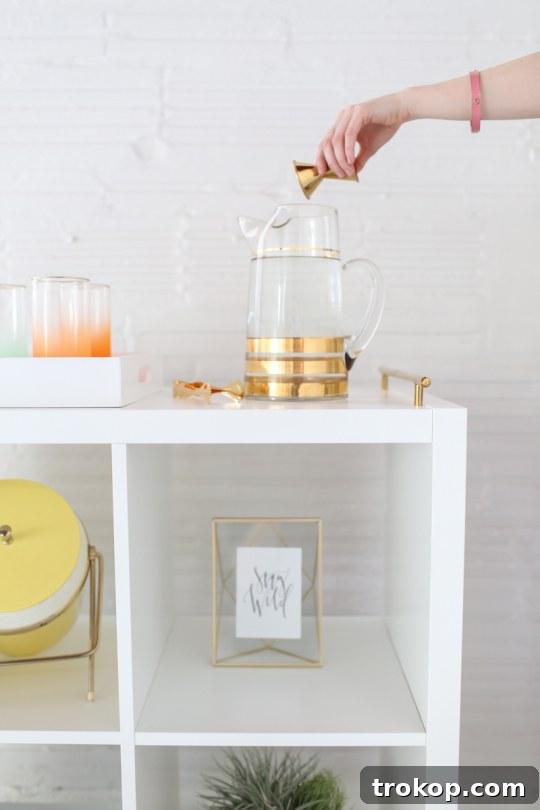
Once your DIY Ikea bar cart is assembled, the real fun begins: decorating it! This is where your personality truly shines through. While I’m partial to my recent vintage obsessions – like the charming Blendo glasses from Jaybird Finds and that incredible tilted ice bucket from Etsy – your decorating choices are limitless. Consider these ideas to style your bar cart:
- **The Classic Bar:** Stock it with your favorite spirits, mixers, and garnishes. Add elegant glassware, a stylish cocktail shaker, jigger, and a small cutting board for citrus. A decorative tray can help organize smaller items and add another layer of sophistication.
- **Vintage Charm:** Embrace a retro vibe with unique vintage glassware, shakers, and even old cocktail recipe books. Thrift stores and antique shops are treasure troves for these finds.
- **Modern Minimalist:** Opt for sleek, clean lines. Choose a limited color palette for your bottles and accessories. Think clear glass, white ceramics, and metallic accents.
- **Seasonal Themes:** Decorate your cart to match the season or upcoming holidays. For summer, think bright colors, fresh flowers, and citrus. For fall, incorporate warm tones, mini pumpkins, or cinnamon sticks.
- **Beyond the Bar:** Remember, this cart isn’t just for drinks!
- **Coffee & Tea Station:** Equip it with a small coffee machine, mugs, sugar, and various tea selections.
- **Craft Corner:** Store your art supplies, knitting projects, or scrapbooking essentials.
- **Reading Nook Companion:** Hold your current reads, a cozy blanket, and a cup of tea.
- **Plant Display:** Use it to showcase a collection of small potted plants and succulents.
The key is to balance functionality with aesthetics. Arrange your items thoughtfully, playing with height and texture to create an inviting display. Don’t be afraid to mix and match styles – a well-curated bar cart tells a story about its owner.
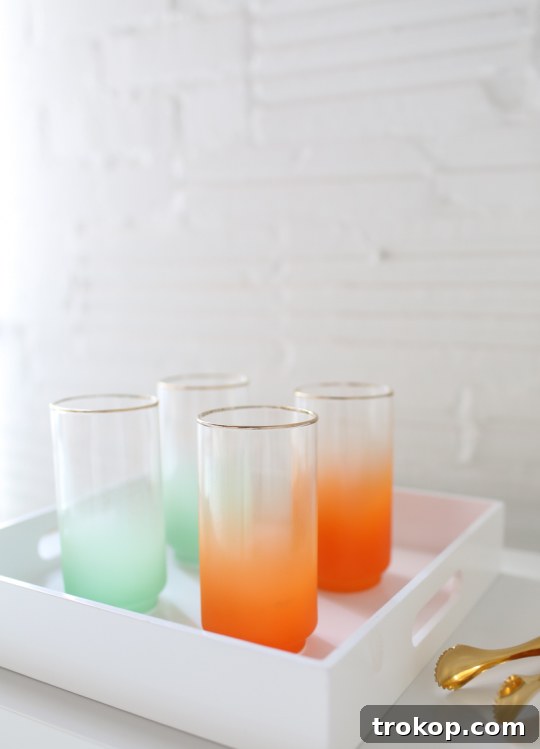
The Versatility and Value of Your Ikea Bar Cart
It’s truly remarkable to consider that this entire stylish and functional project costs less than $70! This makes the DIY Ikea bar cart hack an incredibly budget-friendly solution for enhancing your home decor. Not only does it serve as a fantastic station for entertaining guests with drinks and snacks, but its adaptable design also allows it to function seamlessly as a utility cart, a mobile craft station, or even extra storage in any room. Its robust construction, combined with the elegant brass accents, creates a piece that looks far more expensive than it actually is. This hack is a testament to the power of smart design and a little bit of elbow grease in achieving high-end results on a modest budget.
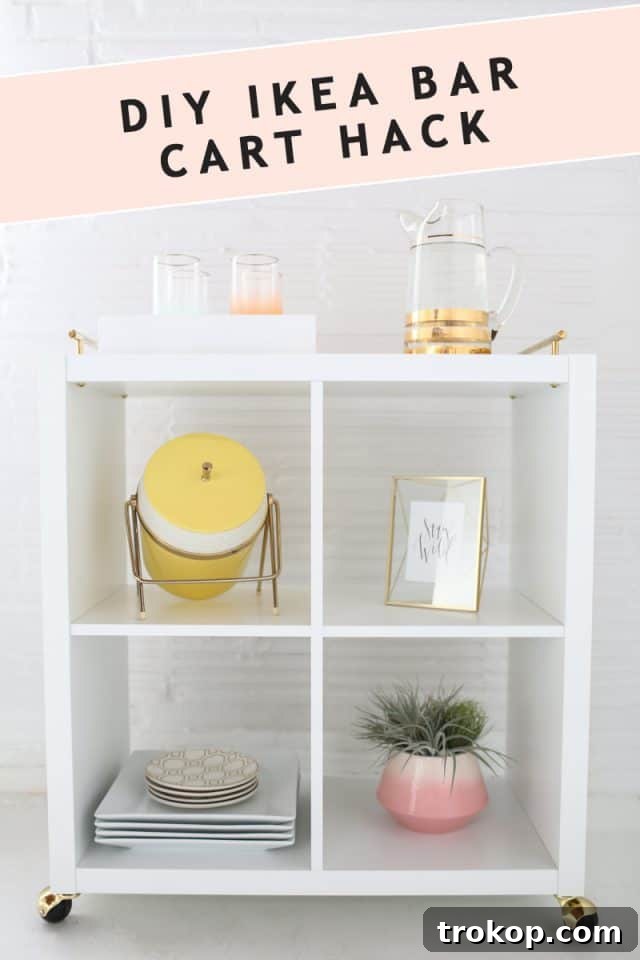
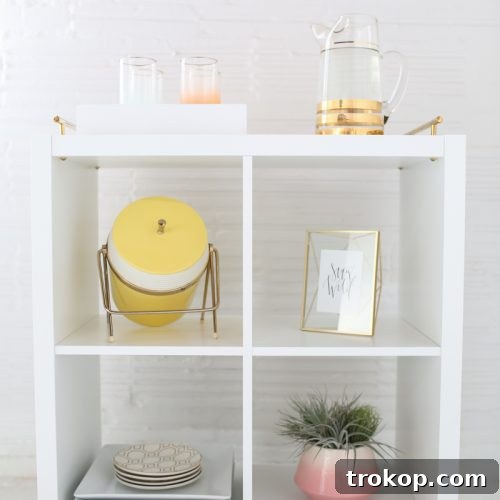
DIY Ikea Bar Cart Hack
2 hrs
DIY
Home Decor, Entertaining
Equipment
- Drill
- Measuring tape
- Pencil
- Appropriate drill bits
Materials
- 1 Ikea Kallax book shelf unit (white)
- 2 14.5″ skinny pull handles (brass)
- 4 2″ bright brass hooded ball casters (with plate and coordinating screws)
- 4 #8-32×2″ screws (brass)
- 4 #8 finishing washers (brass)
- Gold foiling pen (optional)
Instructions
-
Assemble the Ikea Kallax shelf unit according to its instructions. Crucially, do not attach the adhesive felt pads meant for the bottom.
-
Install the four brass casters on each of the four bottom corners of the assembled shelf. Ensure secure attachment using a drill and pilot holes.
-
(Optional) If you prefer a unified brass look, use a gold foiling pen to color in any visible silver screws from the Kallax assembly or casters.
-
Flip the shelf right side up. Measure and mark the desired placement for your brass pull handles. We recommend approximately 1/4 inch in from each end of the top edge. Drill holes completely through these marked points.
-
From underneath the top edge, insert a brass washer and a #8-32×2″ brass screw through the drilled hole and into the corresponding hole on the handle. Secure both handles firmly.
$70
DIY bar cart, Ikea hack, Kallax bar cart, home decor, entertaining, budget DIY, modern decor, brass accents, custom furniture

More Inspiring Ikea Hacks for Your Home
If you loved the process of transforming a simple Ikea Kallax into a stunning bar cart, you’ll be thrilled to discover the endless possibilities of Ikea hacks for every room in your home. These projects prove that with a little creativity and a few affordable materials, you can craft bespoke furniture pieces that perfectly suit your style and needs. Dive into more of our favorite Ikea hack projects:
- **For the Bathroom or Bedroom:** How to make an Ikea Vanity Table Hack for your bathroom or bedroom – DIY Dressing Table
- **For Enhanced Storage:** Our favorite hack for more storage – DIY Ikea Floating Credenza Hack
- **For Parties and Pop-ups:** Something fun for parties or popups – DIY Ikea Ice Cream Cart Hack
- **For an Easy Hardware Refresh:** An easy project by just changing out your hardware – DIY Ikea Dresser Hack
- **For Your Living Room:** Perfect for your living room – DIY Ikea Distressed Wooden Shelves Hack
- **For an Inexpensive Nightstand:** An inexpensive night stand – DIY Ikea Side Table Hack
- **For a Bedroom Refresh:** Ikea Bed Hack with a DIY Wooden Headboard