
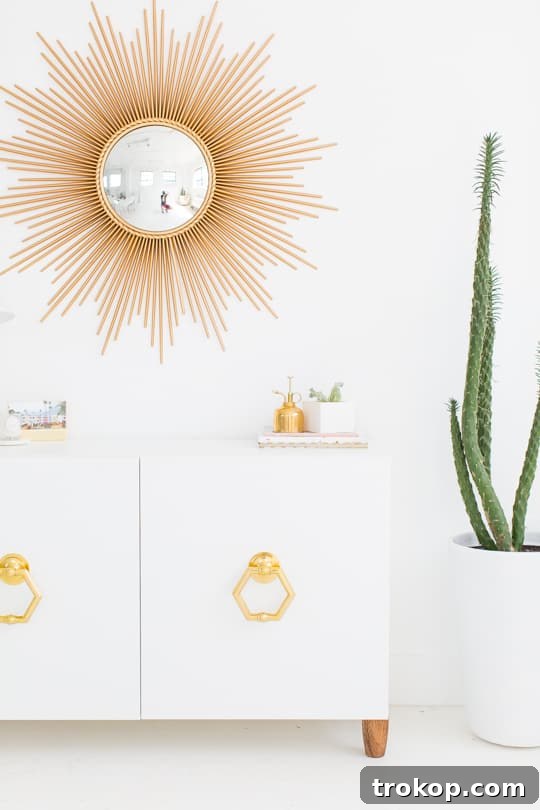
Transform Your Space: A Retro DIY Sideboard IKEA Hack for Stylish Storage
Are you looking to infuse a touch of vintage charm into your home while also solving your storage dilemmas? This retro DIY sideboard, ingeniously crafted from IKEA components, is designed to make your hallways, foyers, living rooms, or even dining areas undeniably cuter and more organized. Get ready to embark on a fun and rewarding IKEA hack project that combines affordability with personalized style!
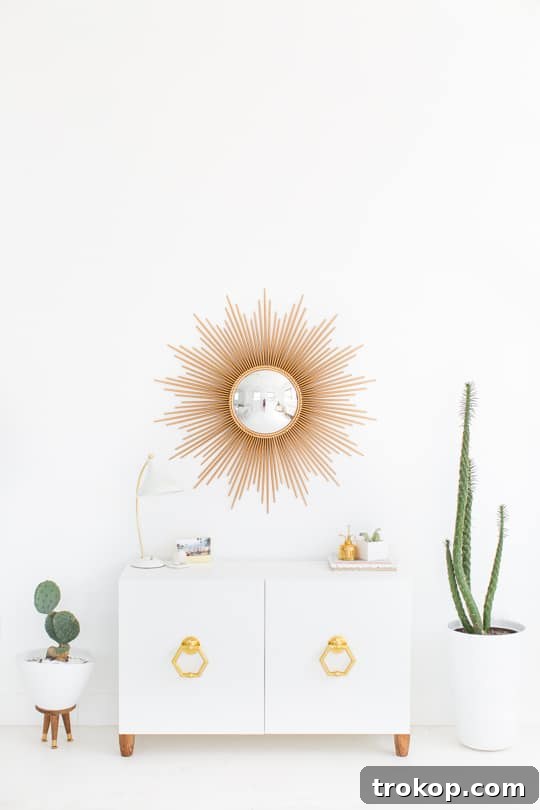
Understanding the Charm of a Sideboard: More Than Just Storage
Let’s be completely transparent: the world of storage furniture can be a bit perplexing. What exactly distinguishes a sideboard from a dresser, a credenza, or a simple storage cabinet? Through a bit of strategic Google image searching and perhaps a few misspelled queries, it becomes clear that these terms, while often used interchangeably, do refer to distinct pieces with unique functionalities and historical contexts.
A **sideboard** traditionally refers to a long, low piece of furniture designed to be placed against a dining room wall, used for serving food and displaying dishware. Its surface provides ample space for serving platters, while drawers and cabinets underneath offer storage for linens, cutlery, and other dining essentials. However, in modern interior design, the sideboard has evolved beyond its dining room origins. It’s now a versatile piece that can grace an entryway, providing a drop zone for keys and mail, or elevate a living room, serving as a media console or a stylish display surface.
In contrast, a **dresser** is typically taller and deeper, featuring multiple drawers primarily for storing clothing in a bedroom. A **credenza** is often used in offices or dining rooms, characterized by its low height and typically sliding or hinged doors, making it ideal for storing files, electronics, or dinnerware. A generic **storage cabinet** is a broad term that can apply to almost any piece with enclosed storage. What makes a sideboard special is its balance of elegant display space and practical, accessible storage, often featuring a lower profile than a dresser but more varied storage options than a simple credenza.
While we ponder the nuanced differences between these pieces, the key takeaway is that a DIY sideboard offers immense versatility and aesthetic appeal for any home. It’s a fantastic way to introduce organized charm and personalized style into your living space. And for this project, we’re taking it a step further by making it an IKEA hack, which means you’re about to enjoy some surprisingly straightforward Swedish furniture building!
To make this project truly unique, we’re actually repurposing front door knockers to serve as oversized, eye-catching hexagon handles. It’s a design choice that adds an unexpected layer of character and a talking point for your guests!
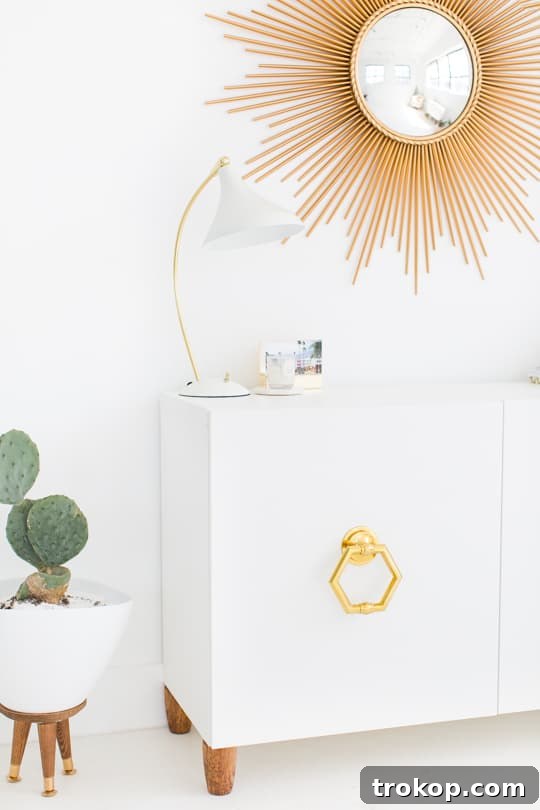
Table of Contents
DIY Retro IKEA Hack Sideboard: Materials You’ll Need
Gathering your materials is the first exciting step in any DIY project. For this retro sideboard, we’re focusing on an IKEA base for ease and affordability, but feel free to adapt with similar cabinet units if the Besta system isn’t available or doesn’t fit your needs. Choosing the right components will ensure both the structural integrity and the aesthetic appeal of your finished piece.
- IKEA Besta Shelf Unit and Coordinating Doors: This will form the core structure of your sideboard. The Besta system is highly versatile and comes in various sizes and finishes. We recommend white doors for a clean, retro canvas, but you can choose any color that suits your decor.
- Four 4-inch Wood Table Legs: The length is crucial for achieving that classic sideboard height. Four-inch legs offer a subtle lift and a stylish foundation. Look for sturdy, unfinished wood legs that can be stained or painted to your preference.
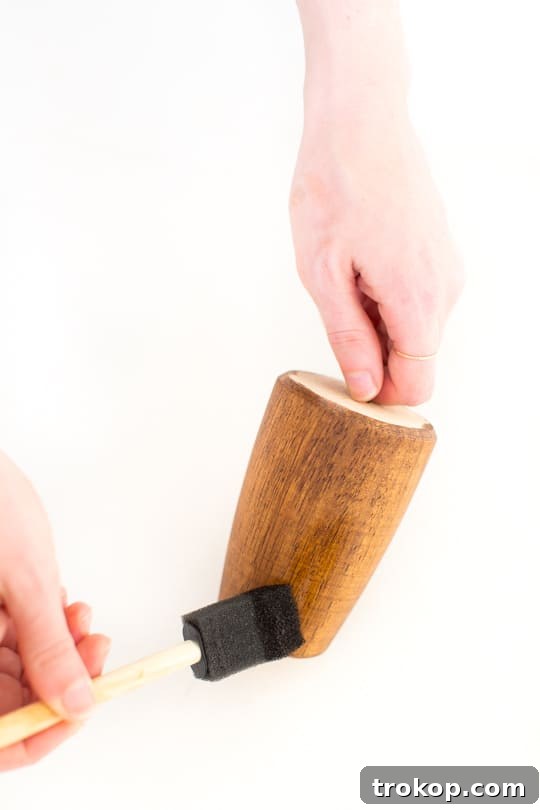
- Wood Stain: To give your new legs a warm, aged look. Our preference for this retro design is Minwax in “Early America,” which provides a beautiful, rich hue. Consider different stain colors to match existing wood tones in your home or to create a striking contrast.
- Foam Brush: Ideal for applying wood stain smoothly and evenly. Its disposable nature also makes cleanup a breeze.
- Two Hexagon Door Knockers: This is where the unique character of your sideboard truly shines! We sourced ours from Rejuvenation for their quality and distinctive design. For an alternative, explore options like this solid brass door knocker, or browse architectural salvage stores for vintage finds. Make sure they are robust enough to function as handles.
- 3/4-inch Screws: You’ll likely need these to replace the standard screws that come with the door knockers, as they are typically designed for thicker doors. Any appropriate length for securing the knockers to your cabinet doors will work.
- Drill: Essential for creating pilot holes and securely attaching the handles and legs. A cordless drill offers maximum flexibility.
- Pencil: For marking precise measurements before drilling.
- Measuring Tape or Ruler: Accuracy is key for a professional-looking finish, especially when positioning handles.
- Paper Towels or Lint-Free Cloths: For wiping off excess stain and cleaning up any messes.
- Safety Goggles and Gloves: Always prioritize safety when working with tools and stains.
How To Make A Retro DIY Sideboard: Step-by-Step Guide
Now that you have all your materials, it’s time to bring your retro sideboard to life! Follow these detailed steps to ensure a smooth and successful DIY experience.
Step 1: Assemble Your IKEA Base
Your first task is to assemble your IKEA Besta shelf unit and attach its coordinating doors. We know, assembling IKEA furniture can sometimes feel like a rite of passage, but the Besta system is generally straightforward. Follow the instructions provided with your IKEA unit carefully. Ensure all connections are secure and tight to create a stable foundation for your sideboard. Taking your time here will prevent wobbles and ensure the doors hang perfectly. This step, while seemingly basic, is crucial for the overall success and longevity of your DIY project.
Step 2: Stain and Prepare the Legs
While the IKEA unit is taking shape, you can work on customizing the wooden legs. Begin by applying your chosen wood stain to the legs using a foam brush. For a lighter, more subtle finish that still highlights the wood grain, apply the stain and then immediately wipe off the excess with a paper towel or a lint-free cloth. This technique allows the wood to absorb just enough pigment for color without becoming overly dark. If you prefer a deeper, richer tone, allow the stain to sit for a few minutes before wiping, or apply a second coat after the first has dried. Remember to work in a well-ventilated area and wear gloves to protect your hands. Once stained to your liking, set the legs aside to dry completely according to the stain manufacturer’s instructions. Proper drying time is essential to prevent stickiness or damage to your flooring later on.
Step 3: Precision Placement for Unique Handles
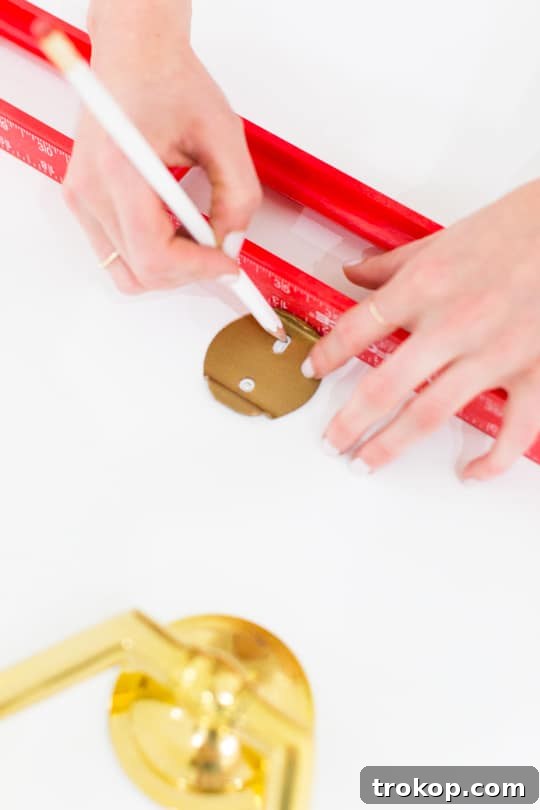
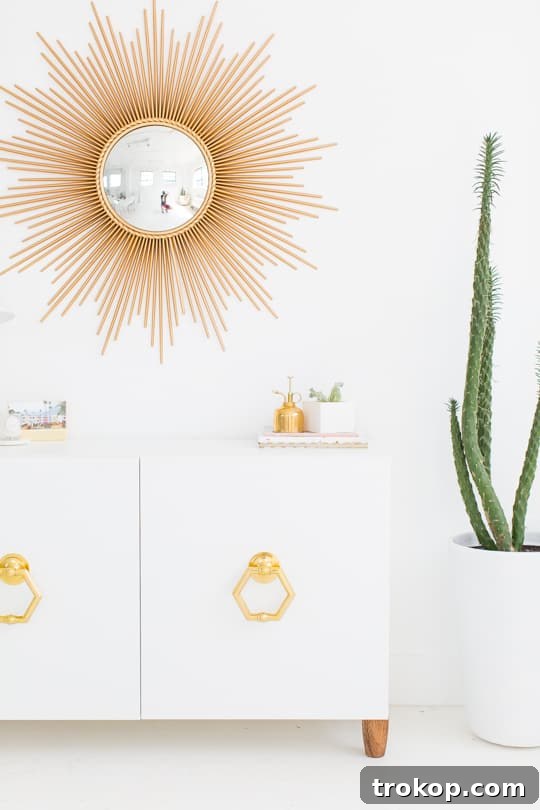
Once your IKEA unit is fully assembled and the doors are attached, carefully lay the sideboard on its backside, with the doors facing upwards. This provides a stable surface for marking and drilling. Now, it’s time to decide on the perfect placement for your distinctive hexagon door knocker handles. Measuring precisely is key to achieving a balanced and professional look. We recommend placing them just above the center of each door. For a two-door unit, you might aim for measurements like 11.5 inches from the outer edge of the shelf and 14 inches up from the bottom edge of each door. Use a pencil and a measuring tape or ruler to mark these points accurately on both doors. Double-check your measurements before proceeding to the next step to ensure symmetry and avoid costly mistakes. The visual impact of these oversized handles depends heavily on their thoughtful positioning.
Step 4: Installing Handles and Legs
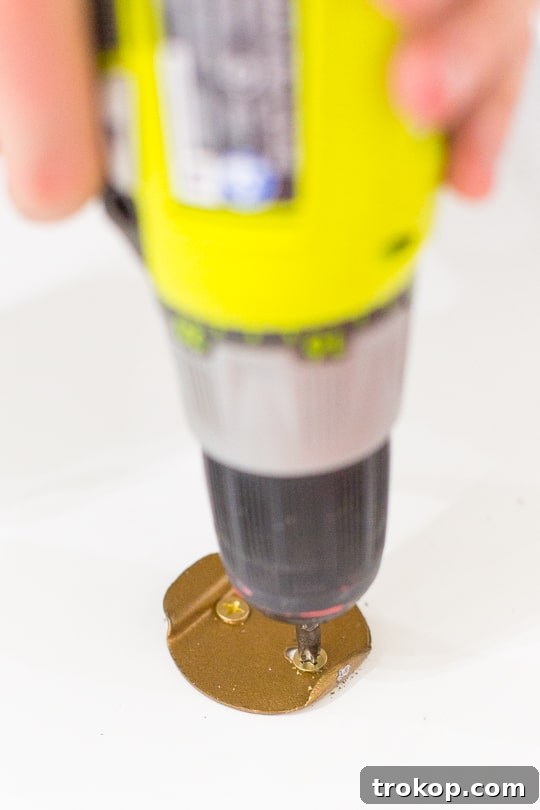
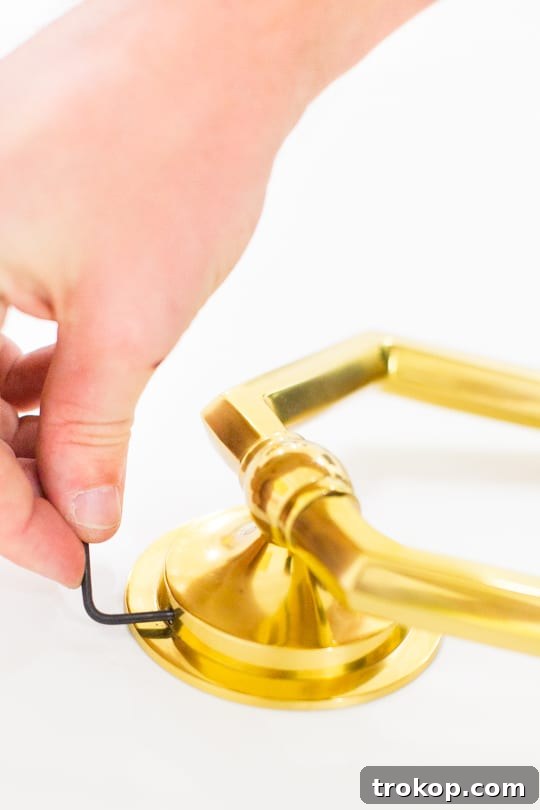
With your marks in place, use your drill to create pilot holes for the mounting plates that come with your hexagon door knockers. Align the plates precisely over your pencil marks and secure them in place with the appropriate screws (you might need your new 3/4-inch screws here if the original ones are too long). Once the plates are firmly attached, tighten the door knockers onto the plates using the allen wrench or tools provided with the knockers. We chose not to install the “stop” mechanism that often accompanies door knockers, as we’re using them purely for aesthetic and functional handles. However, if you feel it adds an extra layer of protection or functionality for your furniture, feel free to include it. Finally, take your fully assembled and handled sideboard and carefully screw the finished, stained legs into the pre-drilled holes on the bottom of the IKEA unit. These holes are typically designed for the standard IKEA adjustable legs, making this step incredibly simple. Ensure all four legs are tightened securely and are level before standing your sideboard upright.
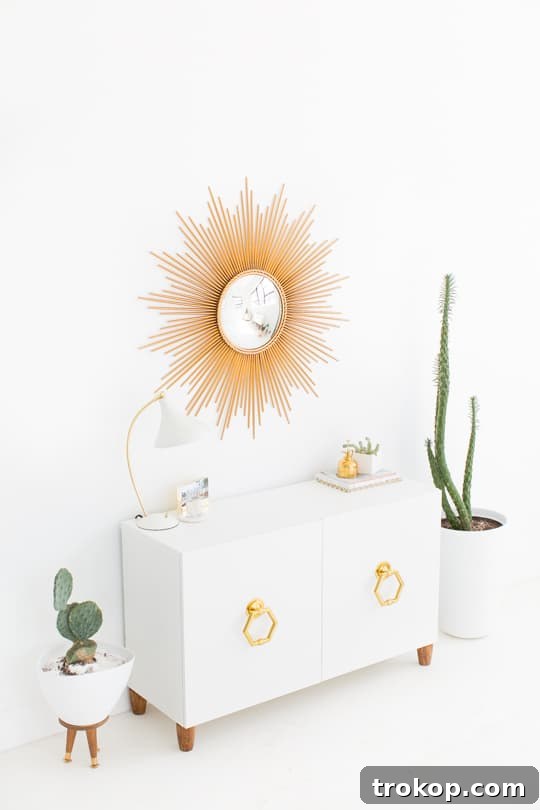
It’s true that high-quality, distinctive handles, especially when buying two statement pieces like these, can add a significant cost to your project. However, the unique visual impact of these hanging hexagon door knockers is undeniable. They truly make a bold statement and elevate the entire piece from a simple IKEA hack to a designer-inspired furnishing. If hanging handles aren’t quite your style, simply using two oversized hexagon knobs could achieve a similar, striking effect. The beauty of DIY is customization! What we’re really getting at is that when it comes to brass accents and design decisions, sometimes it’s hard to hold back!
And there you have it! A stylish and functional DIY sideboard, born from an IKEA hack, ready to transform any space in your home with its unique retro charm.
Styling Your New Retro Sideboard
Now that your stunning retro DIY sideboard is complete, it’s time to style it and integrate it seamlessly into your home decor. A sideboard is not just for storage; it’s a focal point that can enhance the aesthetic of any room. Here are some ideas to help you style your new piece:
- Living Room Focal Point: Position your sideboard against a prominent wall. Top it with a curated selection of decor items. Think a large piece of art or a statement mirror above it, flanked by a tall vase with fresh greenery on one side and a stack of coffee table books with a decorative object on the other. A stylish table lamp can add both ambiance and functionality.
- Entryway Welcome: In a foyer or hallway, your sideboard can be a practical and welcoming element. Use its surface for a decorative tray to catch keys and mail, a small plant, or a scented candle. The cabinets below are perfect for storing gloves, scarves, or even shoes, keeping your entryway clutter-free.
- Dining Room Elegance: Reclaim the sideboard’s traditional role in the dining room. Use the top for serving dishes during gatherings, and store your best dinnerware, placemats, and tablecloths inside the cabinets. A pair of matching decorative objects or small lamps can create a sophisticated symmetry.
- Media Console: Its low profile makes this DIY sideboard an excellent choice for a media console. The closed cabinets can discreetly hide electronics, gaming consoles, and wires, while the top provides a sturdy base for your television or soundbar.
- Accessorize with Intention: When selecting accessories, consider items that complement the retro aesthetic. Mid-century modern inspired ceramics, brass accents, vintage books, or even a small record player can enhance the vibe. Don’t overcrowd the surface; leave some negative space for a cleaner, more deliberate look.
Remember, styling is an evolving process. Experiment with different arrangements until you find what feels right for your space and expresses your personal style. Your DIY sideboard is a blank canvas awaiting your creative touch!
Living Room Sources and Decor Inspiration
To help you complete your retro-inspired living room look, here are some of the stylish items featured with our DIY sideboard, offering a blend of classic design and modern appeal:
Sunburst Mirror from Rejuvenation: A timeless piece that adds a radiant focal point and a touch of glamour to any wall.
Lynwood Single Task Lamp from Rejuvenation: Perfect for adding directed light and a sophisticated, industrial-chic element to your sideboard or desk.
Patterned Pillows from Darci Towns: Introduce texture and pops of color with artisan-crafted throw pillows that complement your retro theme.
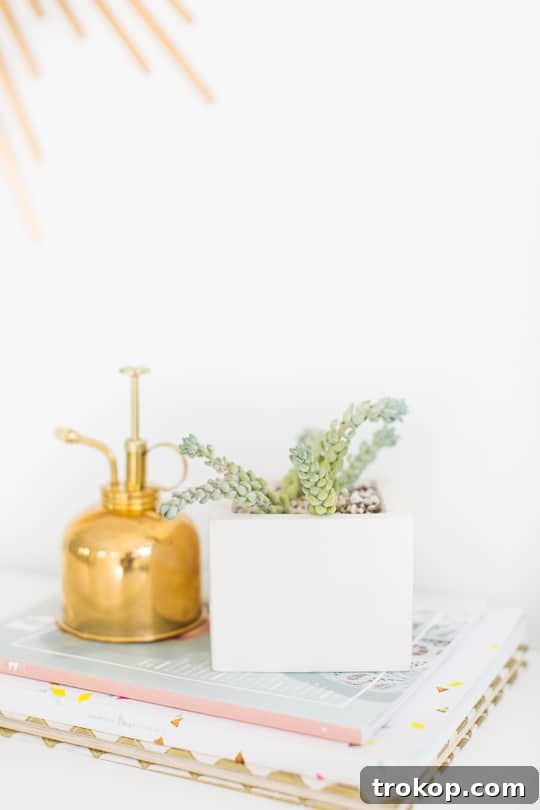
Gold Plant Misting Can from Amazon: A chic and functional accessory for keeping your indoor plants happy and healthy, doubling as a stylish decor piece.
DIY Retro Mid-Century Planter: Complement your sideboard with another DIY project – a retro planter that brings in natural elements and a cohesive design.
More IKEA Hack Ideas for Your Home
If you loved this DIY sideboard project, you’ll be thrilled to discover the endless possibilities that IKEA hacks offer. Transforming affordable and versatile IKEA furniture into custom, high-end looking pieces is a fantastic way to personalize your home decor on a budget. Dive into these other creative IKEA hacks to find your next inspiring project:
- DIY IKEA Drawers – How To Make Easy Rattan DrawersElevate a simple IKEA dresser with the natural elegance of rattan for a bohemian-chic look.Continue Reading
- DIY IKEA Hack Floating CredenzaCreate a sleek, space-saving floating credenza that adds modern sophistication to any room.Continue Reading
- DIY IKEA Hack Dresser And Prepping For GuestsTransform a basic IKEA dresser into a stylish piece perfect for a guest room or master suite.Continue Reading
- DIY IKEA Hack Side TableCraft a unique side table that complements your living space with personalized flair.Continue Reading
- DIY Rag Rug Storage BasketCreate charming and functional storage baskets using colorful rag rugs.Continue Reading
- IKEA Hack – DIY Wooden Headboard Using StikwoodAdd a rustic or modern touch to your bedroom with a custom wooden headboard using Stikwood panels.Continue Reading
Happy hacking!