
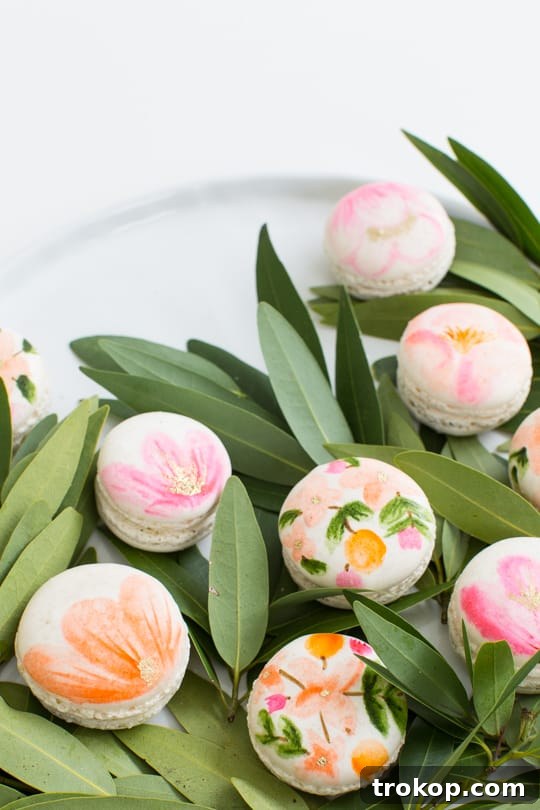
DIY Floral Macarons: A Step-by-Step Guide to Creating Edible Blossom Art
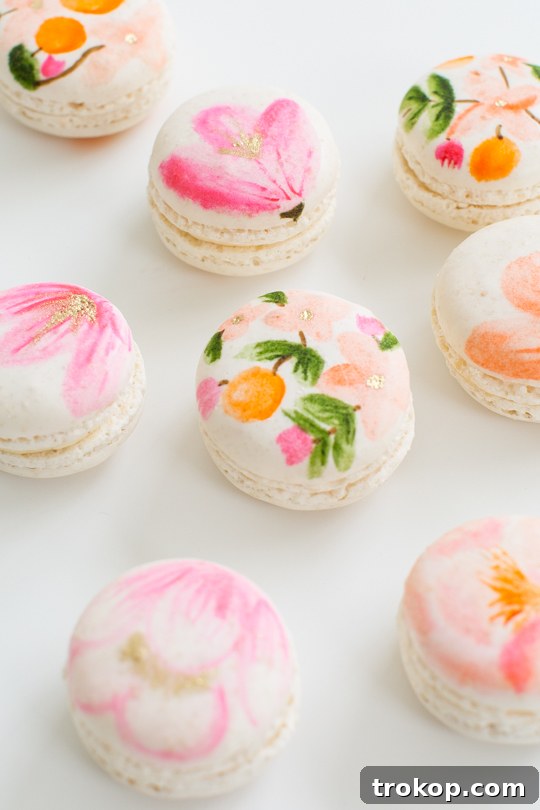
Step into the delightful world of edible art with our comprehensive guide to crafting exquisite DIY floral macarons. These delicate French pastries, already a treat for the palate, transform into stunning miniature canvases when adorned with hand-painted botanical designs. Perfect for adding a touch of elegance to any spring gathering, bridal shower, Mother’s Day brunch, or simply as a special indulgence, these hand-painted macarons are sure to impress. Forget complex baking; this tutorial focuses on the creative decoration process, making it accessible for both seasoned bakers and enthusiastic beginners looking to elevate their dessert game. Get ready to unleash your inner artist and create beautiful, delicious macaron decorations that are almost too pretty to eat!
Why Adorn Your Macarons with Flowers? The Charm of Hand-Painted Treats
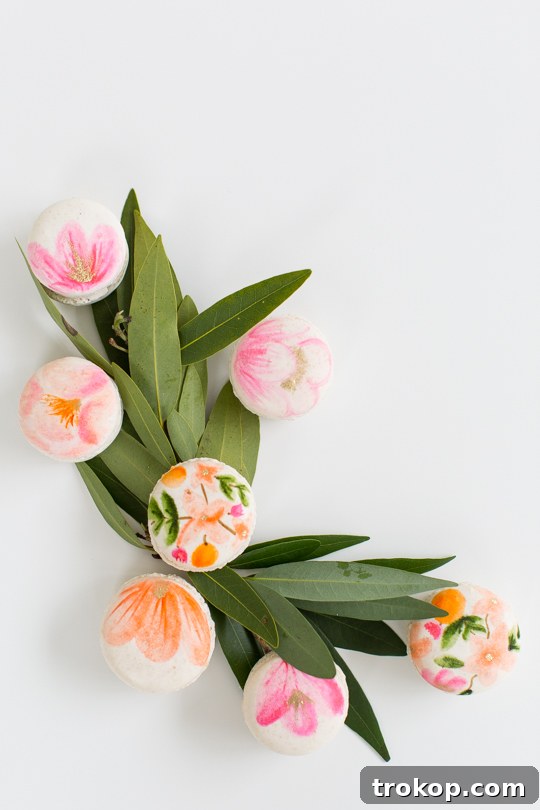
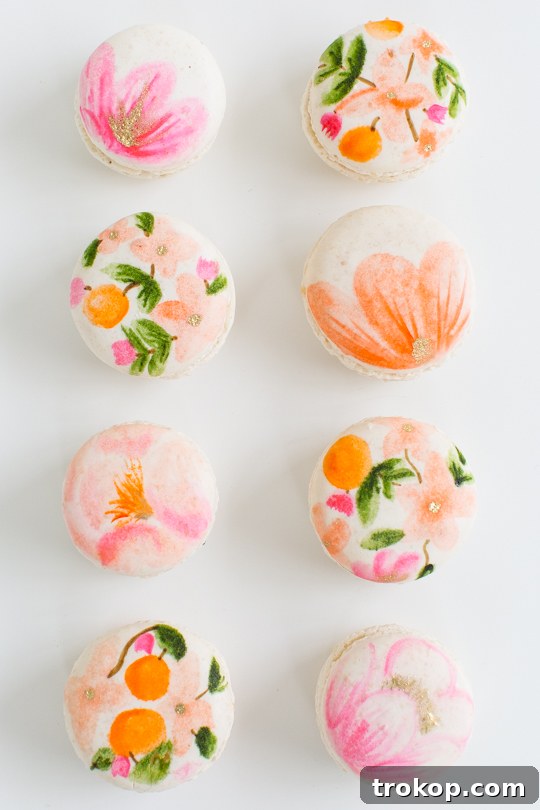
There’s something uniquely enchanting about a dessert that doubles as a work of art. While flowers themselves are ephemeral, their beauty can be immortalized on these sweet confections, offering a delightful surprise to anyone who receives them. Beyond the sheer aesthetic appeal, floral macarons make for incredibly thoughtful and personalized gifts. Imagine presenting a box of these exquisite Mother’s Day treats, each delicately painted, as a heartfelt expression of love. They stand out from conventional desserts, sparking conversations and adding a sophisticated, whimsical touch to any event.
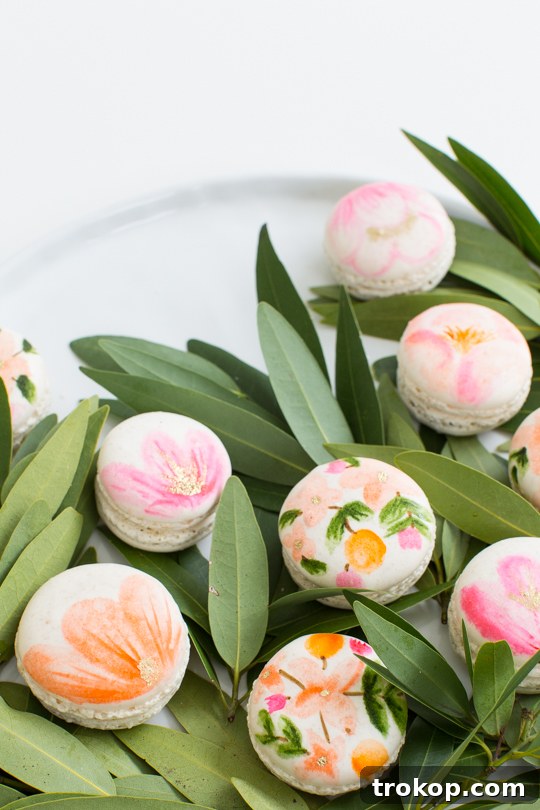
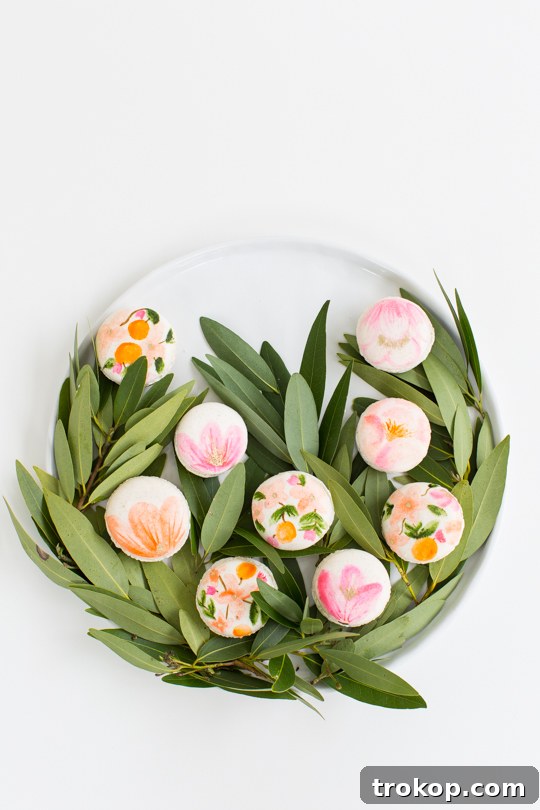
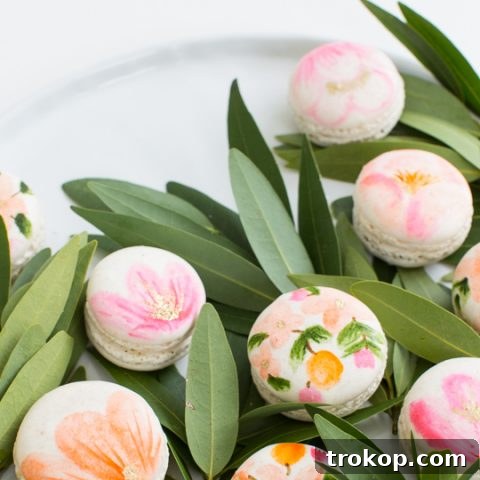
These macaron decoration ideas are not just for gifting; they also serve as stunning decorative elements for your home. Displayed on a charming tray with fresh bay leaves, they can effortlessly replace a traditional floral centerpiece, blending culinary delight with elegant decor. This dual purpose makes them incredibly versatile for various occasions, from a cheerful spring desserts table to an elegant afternoon tea. The act of creating these miniature masterpieces is a meditative and enjoyable craft, providing a wonderful artistic outlet. Plus, they are undeniably Instagram-worthy, ensuring your culinary creations get the appreciation they deserve and inspiring others to try their hand at macaron art!
Essential Tools & Materials for Hand-Painted Macarons
Before you begin your artistic journey, gathering the right materials is key. The beauty of this macaron art project is that it requires only a few specialized items, most of which are readily available online or at craft stores. We’re focusing on decorating pre-made macarons here, whether you’ve whipped up a batch of homemade macarons or opted for store-bought convenience. The quality of your canvas (the macaron shell) and your paints will directly impact the final look of your edible masterpieces, so choose smooth, uncolored shells for the best results.
What You’ll Need:
- Edible food markers: These are fantastic for adding fine details, crisp outlines, or even tiny written messages. They offer incredible precision and are very user-friendly, making them ideal for beginners and intricate work.
- Gel food coloring: Highly concentrated, gel food colorings produce vibrant hues for your edible paints. A small amount is sufficient to create rich, beautiful colors, allowing for a wide palette from a few basic tubes.
- Almond extract: This is your magic medium for creating edible paint. Mixing gel coloring with almond extract (or clear vanilla extract or even a high-proof clear alcohol like vodka for faster drying) creates a smooth, paint-like consistency that dries quickly without leaving your macarons soggy or altering their delicate texture.
- Edible gold food paint: To add a touch of luxury and shimmer, edible gold paint is perfect for dazzling flower centers, elegant borders, or sophisticated accents that catch the light.
- Food-dedicated paintbrushes: A set of small, clean brushes (ranging from very fine tips for intricate details to slightly broader ones for filling in colors) specifically reserved for food use is crucial. This ensures both hygiene and precision in your macaron art.
- Almond or vanilla macarons: These are your blank canvases! Ensure they are plain, uncolored, and fully cooled. Whether you use premium store-bought options or your perfectly baked homemade macarons, a smooth surface is key for painting.
Embracing Your Inner Artist: How to Paint Floral Macarons
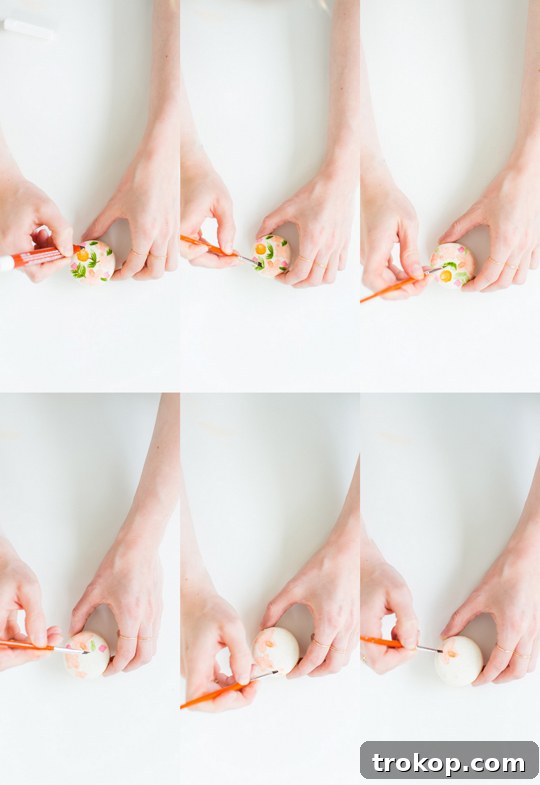
The beauty of decorating floral macarons lies in its forgiving nature; there’s truly no right or wrong way to approach macaron decoration. Your imagination is the only limit! Whether you prefer simple, stylized blossoms or intricate, detailed petals, the process is an enjoyable creative expression. This section will guide you through the fundamental steps to bring your vision to life, ensuring your macarons bloom with delicious artistry. Remember to work in a well-lit area and take your time – this is where the magic happens!
1. Preparing Your Edible Paints
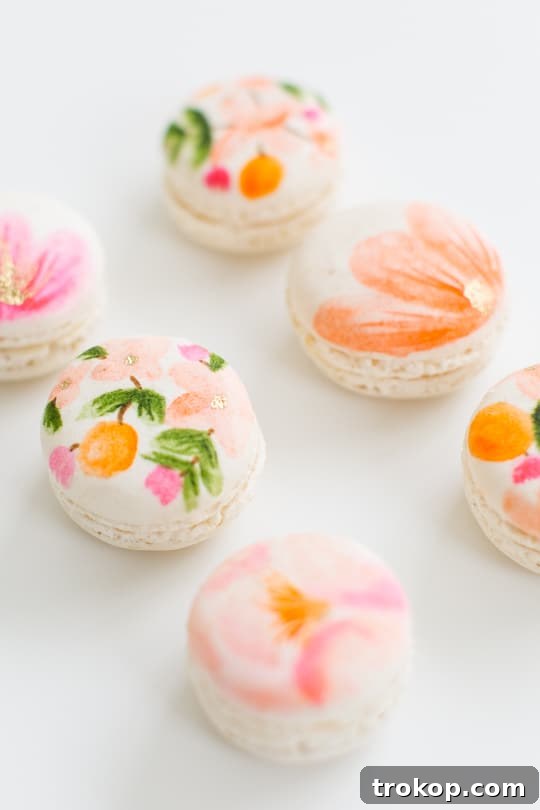
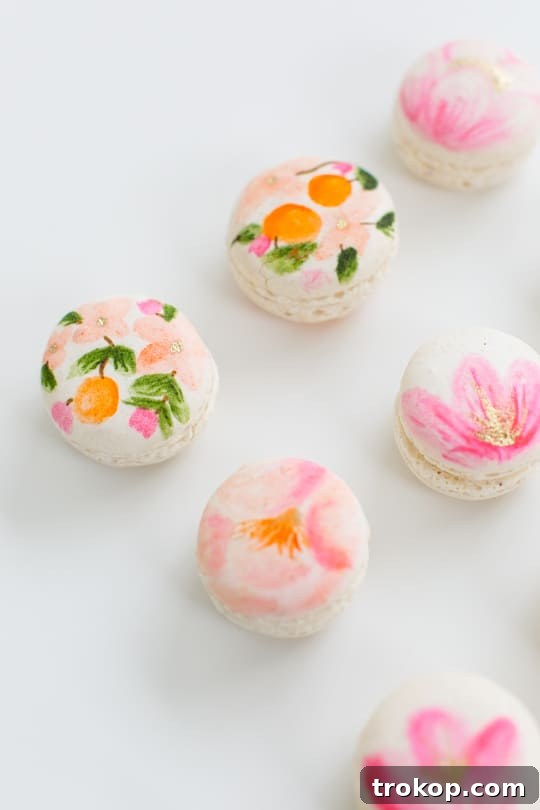
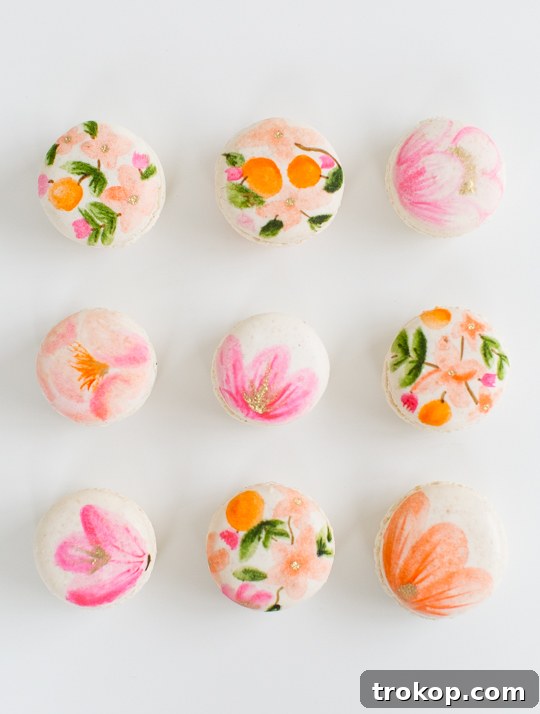
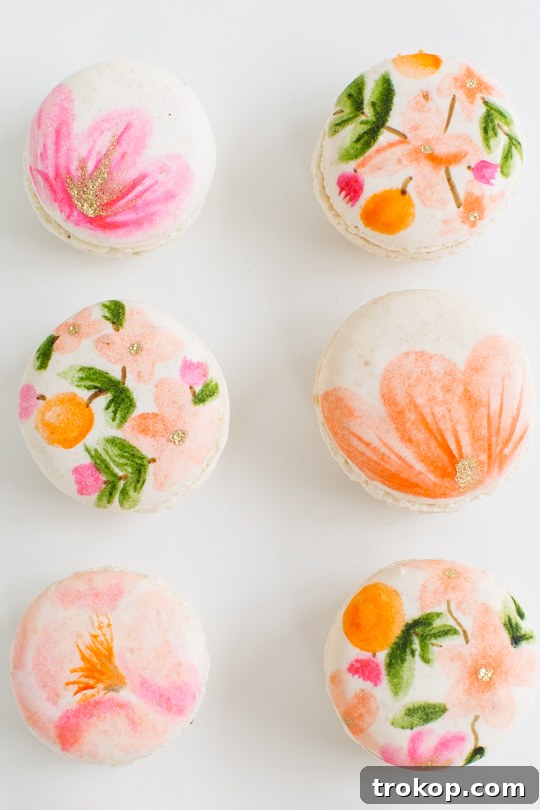
To transform your gel food coloring into vibrant, workable paints, you’ll need to dilute it. Place a small dab of each chosen gel food coloring onto a clean, non-porous surface (like a ceramic plate or a piece of parchment paper). Add a tiny splash of almond extract to each dab of color. Mix with your food-dedicated paintbrush until you achieve a smooth, paint-like consistency. If the paint is too thick, add a bit more extract; if it’s too thin, add a tiny bit more gel coloring. Test the consistency on a spare piece of parchment paper before applying to your macarons. For our example, we used cheerful peach and pink for the main flower petals, contrasting sage green and dark green for lush leaves, shimmering edible gold food paint for sparkling centers, and a touch of vibrant orange for tiny, decorative fruit elements on delicate vines.
2. Building Your Floral Design
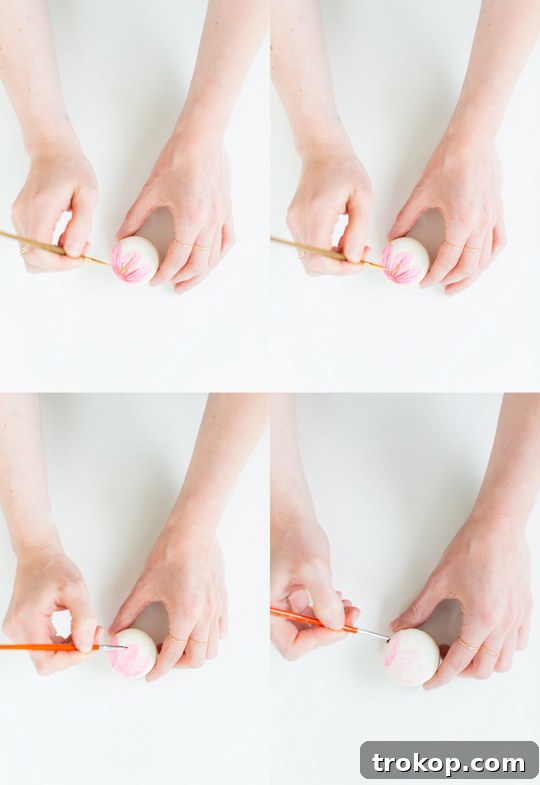
When painting floral designs, it’s often best to start with your lightest colors first and gradually build up your design. This layering technique adds depth and dimension, creating a more professional and artistic look. For instance, begin with a light peach or soft pink for the base of your flower petals, carefully dabbing or sweeping the color onto the macaron shell. Once this base layer is dry to the touch (which happens quickly with almond extract), you can then layer darker shades on top to create accentuation and detail. Think about adding a touch of hot pink to the tips of the petals for a subtle gradient, or applying fine strokes of dark green to create realistic veins on your sage green leaves. This approach allows for greater control and prevents colors from muddling.
3. Adding Finishing Touches and Details
After your primary colors and accents have dried completely, it’s time to add those magical finishing touches that make your hand-painted macarons truly special. Use your edible gold paint with a fine brush to create dazzling centers for your flowers, letting them dry completely for maximum sparkle and impact. For intricate connective elements, a fine-tipped brown food marker can be used to draw delicate vines, subtle stems, or tiny branches, artfully linking various floral elements across the macaron shell. Don’t hesitate to use other food markers to add subtle shading around the edges of your painted florals, enhancing their definition and making them appear more lifelike and dimensional. Remember, patience is key – allow each layer to dry fully before proceeding to the next to prevent smudging and ensure crisp, clean lines that highlight your artistic effort.
Pro Tips for Flawless Hand-Painted Macarons
Achieving beautifully decorated DIY macarons is all about technique and a little patience. Here are some expert tips to ensure your macaron art turns out perfectly, allowing you to create stunning edible gifts or display pieces with confidence:
- Use a Light Hand: This cannot be stressed enough. When applying paint to the delicate macaron shell, use minimal pressure. The surface is porous and fragile; excessive force can cause the color to bleed uncontrollably into the macaron’s texture or even crack the shell, compromising your intricate design. Aim for gentle, controlled strokes.
- Allow Layers to Dry Completely: This is perhaps the most crucial tip for crisp, clean designs. Work on one color or layer at a time, allowing each application to dry completely before applying the next. This prevents colors from blending unintentionally and ensures your design remains sharp and distinct. The almond extract helps paints dry quickly, but always give it a few moments.
- Stick to a Limited Color Palette: While tempting to use every color in your kit, a restricted palette (typically 3-5 main colors, plus gold or silver accents) often results in a more cohesive, sophisticated, and elegant design. Too many colors can make the macaron look cluttered, busy, and overwhelming, detracting from the delicate nature of the pastry.
- Invest in Small, Quality Brushes: For truly delicate and realistic floral details, a fine-tipped, food-safe paintbrush is invaluable. It allows for precision in drawing tiny petals, intricate leaves, delicate stems, and minute veins that larger or poorer quality brushes simply cannot achieve. Consider a few different sizes for versatility.
- Ensure Complete Drying Before Storage or Serving: Once your floral macarons are fully painted, let them air dry for at least 10-15 minutes, or until the paint is completely set and no longer tacky. This crucial step prevents any smudging during handling, stacking, packaging, or serving, ensuring your beautiful work remains pristine for enjoyment.
- Practice Makes Perfect: Don’t be discouraged if your first few attempts aren’t perfect. Like any art form, macaron painting improves with practice. Start with simpler designs, and gradually challenge yourself with more complex patterns as your confidence grows.
- Explore Other Decorating Techniques: If a classic floral design isn’t quite what you’re looking for, or if you want to expand your skills, don’t shy away from experimenting! For example, try these DIY Marbled Macarons for a different artistic and equally stunning effect.
DIY Floral Macarons Recipe
DIY Floral Macarons
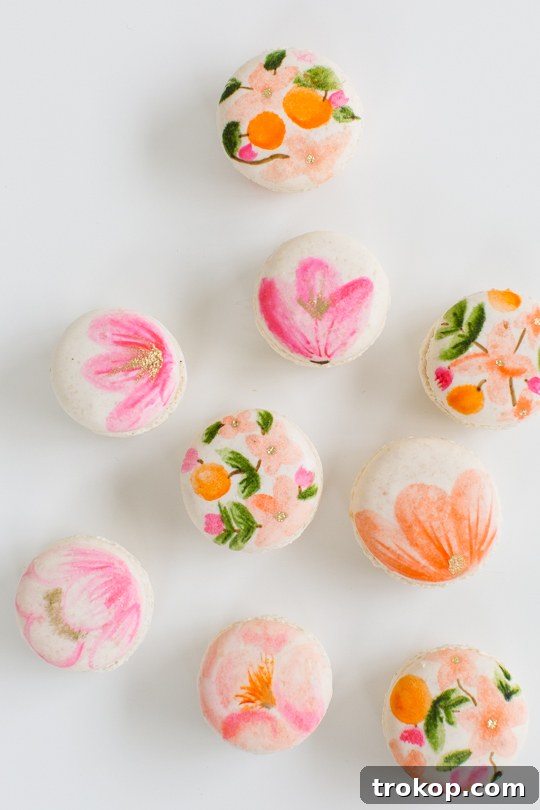
These pretty DIY Floral Macarons pastries are perfect for a springtime party or a thoughtful, artistic gift. They combine the delicate crunch of a macaron with the visual beauty of hand-painted flowers, making them truly unforgettable.
20 mins
10 mins
30 mins
DIY, Dessert
Macarons
Equipment
- Food safe paintbrush (a set with various sizes is recommended for versatility)
Materials
- Edible food markers (for fine lines and details)
- Gel food coloring (select a palette for your floral designs)
- Almond extract (or clear vanilla extract/vodka as a painting medium)
- Edible gold food paint (for shimmering accents)
- Plain almond or vanilla macarons (store-bought or homemade)
Instructions
-
Prepare Your Paints: On a clean, non-porous surface, place small dabs of each desired gel food coloring. Add a tiny splash of almond extract to each dab. Mix thoroughly with your food-safe paintbrush until you achieve a smooth, paint-like consistency. Adjust with more extract or gel coloring as needed.
-
Begin Layering Colors: Start your floral designs by applying the lightest colors first. Gently paint the base shapes of your flowers and leaves onto the macaron shells. Allow this initial layer to dry completely (approximately 5 minutes) before proceeding. Once dry, layer darker shades or complementary colors on top to add depth, dimension, and detailed accents, such as darker veins on leaves or highlights on petals.
-
Add Details and Ensure Dryness: After your layered colors are dry, use a fine brush to apply edible gold paint to the centers of your flowers for a dazzling finish. Let the gold paint dry fully. For additional intricate details like delicate vines or subtle shading, utilize edible food markers. Once all painting is complete, allow the macarons to air dry for at least 10-15 minutes to ensure all colors are set and prevent smudging during handling or storage.
Estimated Cost: Approximately $40 (for initial purchase of specialized materials; macarons not included)
Keywords: diy floral macarons, hand-painted macarons, macaron decoration ideas

We absolutely love seeing your beautiful edible art! Don’t forget to share your stunning DIY Floral Macaron creations with us on Instagram using the hashtag #sugarandclothloves.
More Macaron Decoration Inspiration
If you enjoyed decorating these floral macarons, you might be inspired to try other creative macaron projects. Here are a few more ideas to spark your imagination and expand your repertoire of macaron art:
- DIY Easter Macarons & Paintable Royal Icing Recipe: Explore charming designs perfect for the spring holiday, often featuring pastel colors, adorable bunnies, and playful themes that delight all ages.
- DIY Fruit Macarons: How To Color On Macarons: Learn to transform your macarons into delightful miniature fruit shapes, adding a whimsical and colorful touch that’s perfect for summer parties or picnics.
- Easy Halloween Macarons Dessert – Ghost Macarons Recipe: Get spooky and creative with these fun ghost-themed macarons, an easy yet effective way to add a festive and delicious treat to your Halloween celebrations.
- DIY Bunny Ear Macarons: Create adorable bunny ear details that peek playfully from your macarons, an extra cute touch great for Easter, baby showers, or any occasion that calls for a dose of cuteness.
More Sweet Delights: Beyond Macarons
While macarons hold a special place in our hearts (and stomachs!), there’s a whole world of delicious desserts waiting to be explored. If you’re looking for more delightful sweet ideas to complement your macaron creations or simply expand your baking repertoire, here are some other easy and mouth-watering recipes:
Mango Coconut Pudding Recipe
The Classic Vanilla Bean Cupcake Recipe
No Churn Ice Cream: 3 Ingredient Ice Cream Recipes
Best Chocolate Chip Cookies Recipe
Vanilla Bean Tapioca Pudding Recipe
Two Ingredient Chocolate Croissant Recipe
Whether you’re celebrating a special occasion, looking for a unique gift, or simply seeking a creative and delicious outlet, decorating floral macarons offers a truly delightful and rewarding experience. This comprehensive guide provides all the knowledge, tips, and inspiration you need to transform simple pastries into breathtaking edible art. So grab your brushes, choose your colors, and start painting your way to delicious, beautiful treats! We’d love to hear about your experiences, see your creations, and answer any questions you might have in the comments below.