
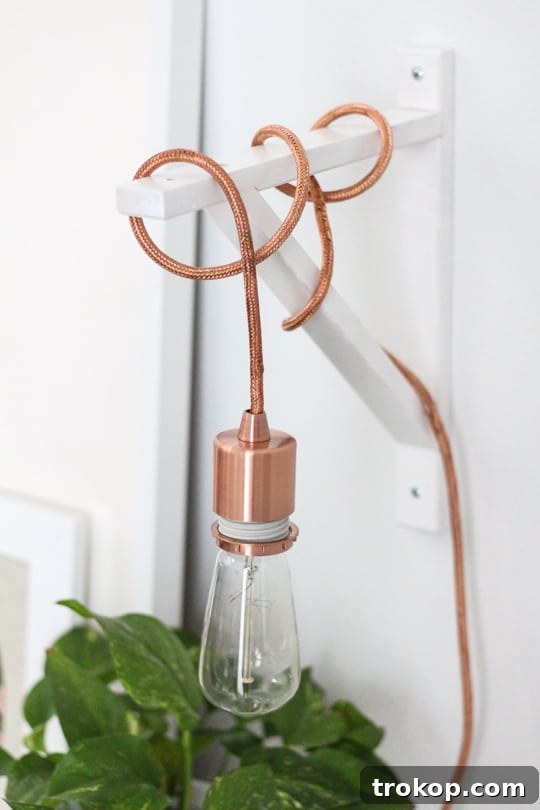
Transform any overlooked corner of your home into a beacon of style and warmth with an effortlessly chic DIY pendant sconce. This project demonstrates how simple, store-bought items can be artfully combined to create custom lighting that looks high-end without the hefty price tag. Elevate your living space, bedroom, or reading nook with a unique lighting solution that adds both functionality and a touch of personalized elegance. Say goodbye to dark, uninspired spaces and welcome a new era of bright, inviting ambiance.
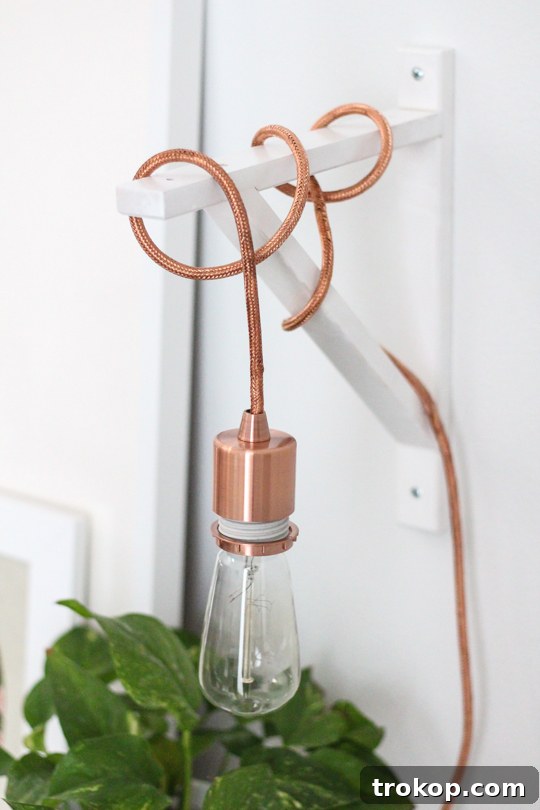
Often, the most straightforward DIY projects yield the most impressive results, and this customizable hanging pendant sconce is no exception. We once faced a common challenge: a corner in our living room that felt persistently dim and lacked character. Rather than investing in expensive fixtures, we opted for a creative, budget-friendly solution: a metallic pendant sconce crafted from readily available components. The beauty of this project lies in its simplicity – no advanced tools, no complex skills, just a dash of imagination and a few carefully selected pieces that come together seamlessly.
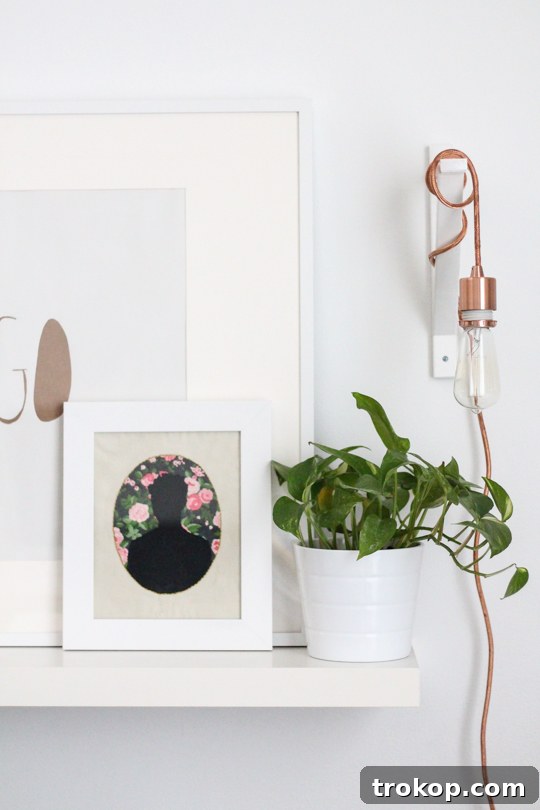
What makes this DIY project truly remarkable is its ability to deliver a custom, designer aesthetic without the need to build everything from scratch. It cleverly incorporates an “IKEA hack” philosophy, proving that thoughtful modification of existing items can lead to stunning bespoke creations. By pairing an affordable IKEA bracket with a stylish metallic pendant light and a few personalized touches, we fashioned a modern yet timeless wall sconce. This unique fixture instantly injected warmth and personality into our space, all while keeping costs minimal and construction time brief. It’s a testament to the idea that thoughtful details can profoundly transform a room with surprising ease.
This metallic pendant sconce hack offers a quick, impactful, and budget-conscious method to enhance any area of your home. Whether your goal is to define a cozy reading nook, introduce additional illumination to a dimly lit living room, or simply add a touch of personal flair to your decor, this project serves as compelling proof. It highlights how combining readily accessible materials with a creative vision can result in a stylish, functional, and deeply satisfying home improvement. It’s an ideal venture for anyone looking to make a significant decor statement with minimal effort and expenditure.
Materials and Tools Needed
Gathering the right materials is the first step to a successful DIY project. For this pendant sconce, we focus on versatile, easily accessible items that allow for maximum customization to match your unique home decor style.
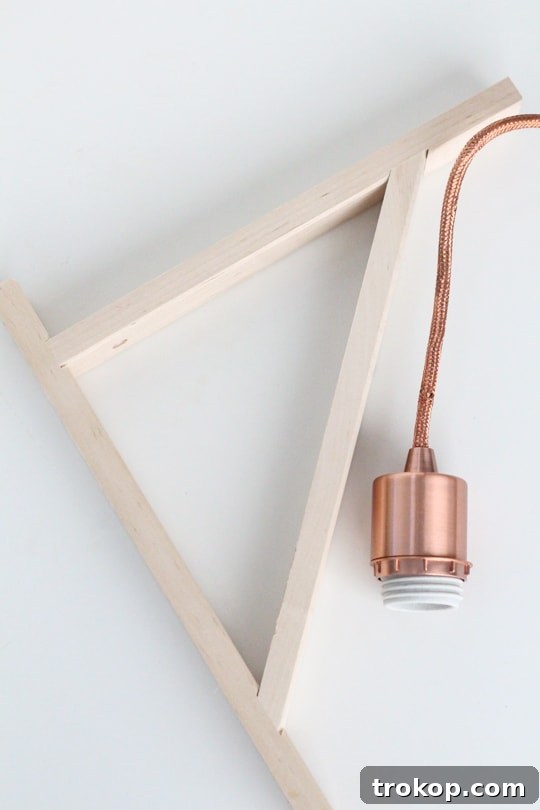
- Shelf bracket: The foundation of your sconce, the bracket choice significantly influences the overall aesthetic. We successfully used an Ikea Ekby bracket for its clean lines and affordability. For a contemporary vibe, consider a sleek metal bracket or a sophisticated brass bracket. If your style leans towards cozy or rustic, beautifully crafted wood brackets can add significant charm. For those seeking an ornate or vintage-inspired look, a decorative metal fan bracket might be the perfect fit. Remember, the bracket isn’t just functional; it’s a key design element.
- Pendant light cord kit or hanging pendant light: This is where your light source comes in. We love the elegant finish of a West Elm metallic pendant for its ready-to-hang convenience. Alternatively, a versatile gold electric cord swag kit (available in a multitude of colors and patterns) or a textured gold rope light kit can provide a similar effect while offering more flexibility in cord design and length. Ensure the cord length is sufficient for your desired drape.
- Lightbulb: The right bulb can transform your sconce from merely functional to a true statement piece. A vintage-inspired Edison bulb is excellent for creating a warm, inviting glow with an industrial-chic touch. Consider LED versions for energy efficiency without sacrificing style. For softer, more diffused light, a frosted or white globe bulb works wonderfully.
- Spray paint (optional): An easy way to customize your bracket’s color and finish, ensuring it perfectly complements your interior decor. Choose from matte, gloss, metallic, or even textured finishes to achieve your desired look.
- Drill: Essential for securely installing your chosen bracket onto the wall.
- Drywall screws and anchors (if needed): To ensure your sconce is firmly attached to the wall, especially if mounting into drywall rather than a wall stud.
- Level (optional but recommended): To ensure your bracket is perfectly straight, contributing to a professional finish.
How to Make a DIY Hanging Pendant Sconce with Wall Mount
Creating your own stylish hanging pendant sconce is a surprisingly simple process that requires just a few steps. Follow this guide to brighten up your space with a custom lighting solution.
1 — Personalize Your Bracket (Optional): Begin by preparing your chosen shelf bracket. If you wish to customize its color, lay it on a drop cloth or protected surface in a well-ventilated area. Apply several light, even coats of your preferred spray paint, allowing each coat to dry completely before applying the next. We opted for a crisp gloss white for a modern, clean aesthetic, but metallic finishes like brass, gold, or matte black, or even a bold pop of color, can dramatically alter the sconce’s character. Ensure the paint is fully cured before proceeding to avoid smudges or damage.
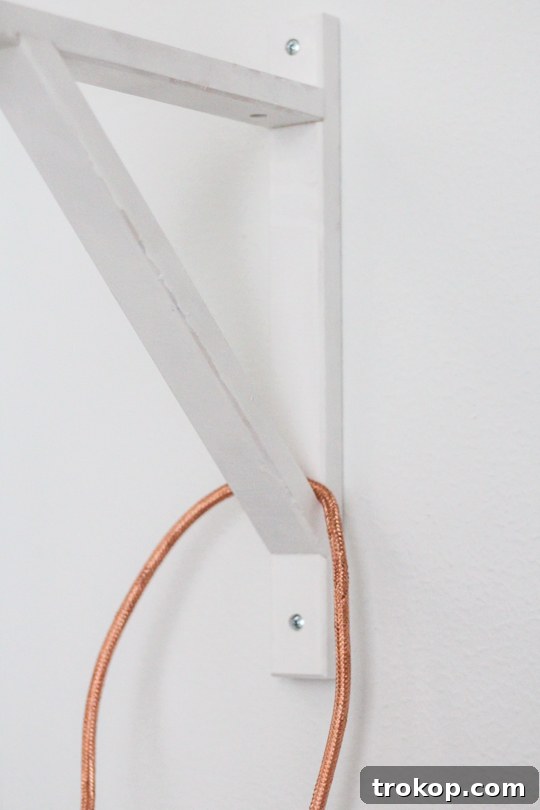
2 — Securely Mount the Bracket: With your bracket prepped, it’s time for installation. Carefully select your desired placement on the wall, considering height and proximity to outlets. Using a level, mark the screw holes for precise alignment. If mounting into a wall stud, use appropriate wood screws. If attaching to drywall, it’s crucial to use sturdy drywall anchors to ensure the bracket can safely support the weight of the pendant light. Use your drill to create pilot holes and then secure the bracket firmly to the wall. Double-check that it’s stable and level.
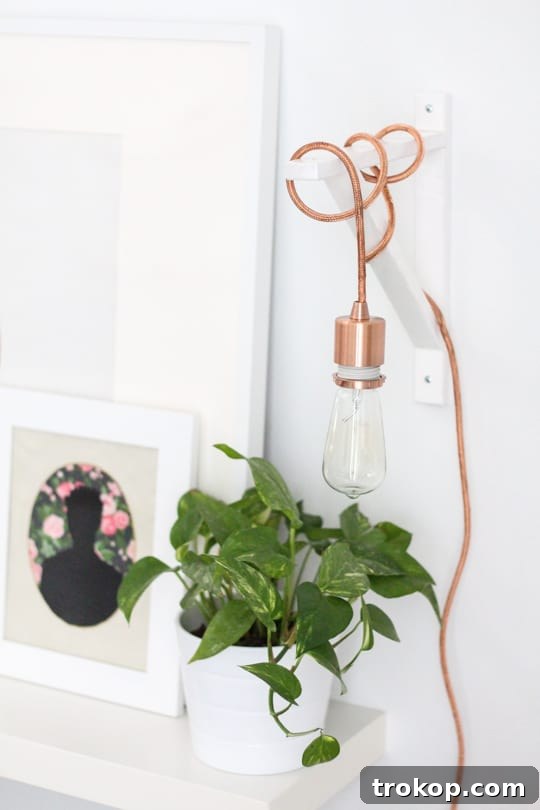
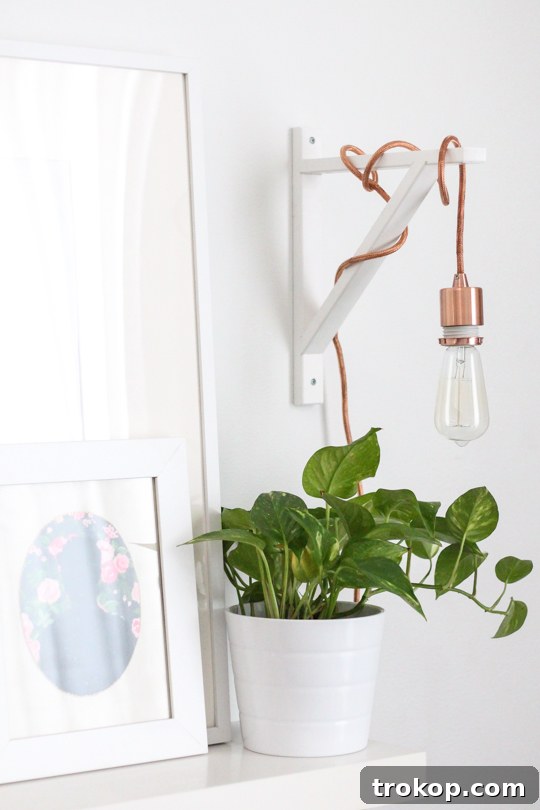
3 — Artfully Arrange the Pendant Cord: This step allows for immense creative expression. Take your pendant light cord and thread it through the designated opening or inset triangle of the bracket. Once threaded, loop the cord up and around the top bar of the bracket. The number of wraps and the looseness of the loops are entirely up to your personal preference. Experiment with different lengths and drapes until the lightbulb hangs at your desired height and the cord forms an appealing visual design. A looser wrap can create a relaxed, bohemian feel, while a tighter, more structured wrap offers a minimalist, contemporary look. Ensure there’s enough slack to easily insert the bulb.
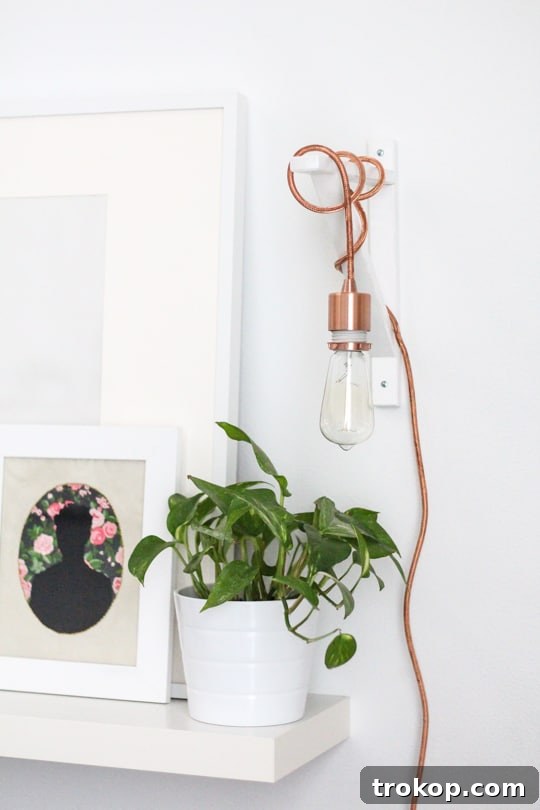
4 — Illuminate Your Space: With the cord expertly styled, carefully screw your chosen lightbulb into the pendant socket. A vintage-inspired Edison bulb is particularly effective for adding a warm, inviting glow and a touch of nostalgic charm. Once the bulb is securely in place, plug in your pendant light, flip the switch, and step back to admire your handiwork! This quick and easy DIY project has successfully created a stylish metallic pendant sconce that instantly brightens your space, adds a unique custom touch, and enhances the overall ambiance of the room.
Tutorial Notes and Tips
To ensure your DIY pendant sconce project goes smoothly and achieves the best possible results, consider these additional tips and insights:
- Embrace Cord Play: The way you drape and wrap the pendant cord is a crucial design element. Don’t hesitate to experiment with different patterns and lengths. A loosely draped cord can create a relaxed, casual, or even bohemian look, while a tighter, more intentional wrap lends itself to a structured, modern, or industrial aesthetic. You can even use cable clips discreetly placed along the wall or bracket to achieve specific cord patterns.
- Bulb Choice Matters: Beyond aesthetics, the type of lightbulb you choose significantly impacts the mood and functionality of your space. A vintage Edison bulb with its visible filaments emits a warm, ambient glow, perfect for creating a cozy atmosphere in a reading nook or bedroom. For areas requiring softer, more diffused light, a frosted globe bulb is ideal. Consider the Kelvin temperature (color of light) – lower Kelvin for warmer light, higher for cooler, more invigorating light. LED bulbs are always a great energy-efficient choice.
- Spray Paint Customization Beyond Color: While painting the bracket to match or contrast your decor is a fantastic option, think beyond solid colors. You could use painter’s tape to create geometric patterns, achieve a distressed look with multiple layers and light sanding, or even apply a clear matte or gloss topcoat to enhance durability and finish. Metallic finishes like brushed gold, aged bronze, or sleek matte black can make a significant design impact.
- Strategic Placement for Maximum Impact: The placement of your sconce is key to its effectiveness and aesthetic appeal. Hang it beside a favorite armchair or above a nightstand to create an inviting reading nook or bedside light. In larger rooms, consider installing a pair of sconces at the same height on either side of a bed, sofa, or piece of art for a balanced and sophisticated look. Ensure the height is comfortable for illumination without causing glare.
- Safety and Stability First: Always prioritize safety during installation. Make certain your bracket is securely mounted into a wall stud for maximum stability. If a stud isn’t available, use appropriate heavy-duty drywall anchors designed to safely support the weight of your chosen pendant light. Regularly check the cord for any signs of wear or damage, especially if it’s frequently adjusted. This is a plug-in light, so electrical work is minimal, but always ensure the bulb wattage matches the fixture’s recommendation.
- Consider Dimmer Functionality: If your pendant light kit is compatible and you have an accessible outlet, incorporating a plug-in dimmer switch can allow you to adjust the light intensity, further enhancing the ambiance and versatility of your sconce for different times of day or activities.
Customization Ideas for Your Pendant Sconce
One of the greatest joys of DIY is the ability to personalize every detail. Your pendant sconce offers numerous avenues for creative expression, allowing you to seamlessly integrate it with any interior design theme:
- Bracket Styles & Textures: Beyond simply painting, think about the bracket’s material and form. A minimalist wire bracket can create an industrial or modern look, while a more ornate, carved wood bracket would suit a traditional or farmhouse style. You could even wrap a simple bracket in decorative paper or fabric for a unique textural element.
- Cord Types & Colors: The cord itself is a key design feature. Fabric-wrapped cords are incredibly popular and come in a vast array of colors, patterns (like chevron or stripes), and textures (like braided or linen). Opt for a contrasting color to make a statement or a matching tone for a subtle blend. Clear cords offer a sleek, nearly invisible look, drawing attention to the bulb and bracket.
- Adding a Small Shade or Cage: While designed as an exposed bulb pendant, you could easily add a small, lightweight lampshade or a decorative metal cage to the bulb for a different aesthetic. A mini drum shade can soften the light, while a wire cage can lean into an industrial or vintage feel. Ensure any added elements are heat-safe and do not obstruct airflow.
- Smart Home Integration: Elevate your DIY sconce with smart technology. By using a smart lightbulb, you can control your new light remotely via an app, integrate it with voice assistants, or set schedules, adding convenience and modern functionality to your custom fixture.
- Placement & Grouping: Consider creating a visual impact by grouping multiple sconces. Two sconces flanking a bed or a piece of art can create symmetry and balance. In a long hallway, several sconces evenly spaced can provide ambient lighting and visual interest.
More Lighting Projects to Try
If you’ve enjoyed creating this DIY pendant sconce and are seeking more ways to illuminate and decorate your home, explore these related projects and inspiring decor ideas:
- Battery Operated DIY Patio String Lights: Perfect for enhancing your outdoor spaces without the need for an electrical outlet.
- DIY Candle Holder for Taper Candles: Add a touch of handmade charm and warm glow to your tabletops.
- Before & After of Installing Skylights in Our New House: Discover how natural light can dramatically transform a home.
43 Top Amazon Wall Decor Ideas for Every Room in Your Home
Continue Reading43 Top Amazon Wall Decor Ideas for Every Room in Your Home
28 Decorative Wall Mirrors You’ll Wish You Bought Sooner
Continue Reading28 Decorative Wall Mirrors You’ll Wish You Bought Sooner
25 Large Wall Clocks for Your Living Room
Continue Reading25 Large Wall Clocks for Your Living Room
19 Unique & Easy Houseplants that We’re Loving
Continue Reading19 Unique & Easy Houseplants that We’re Loving