
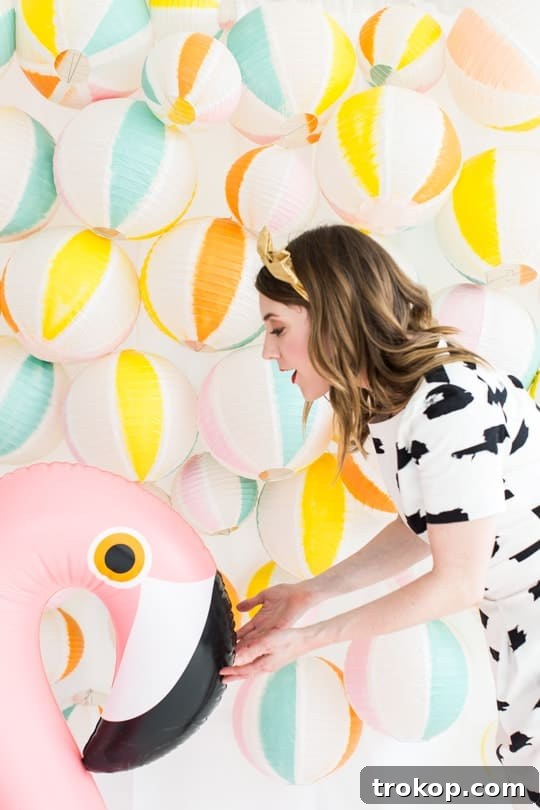
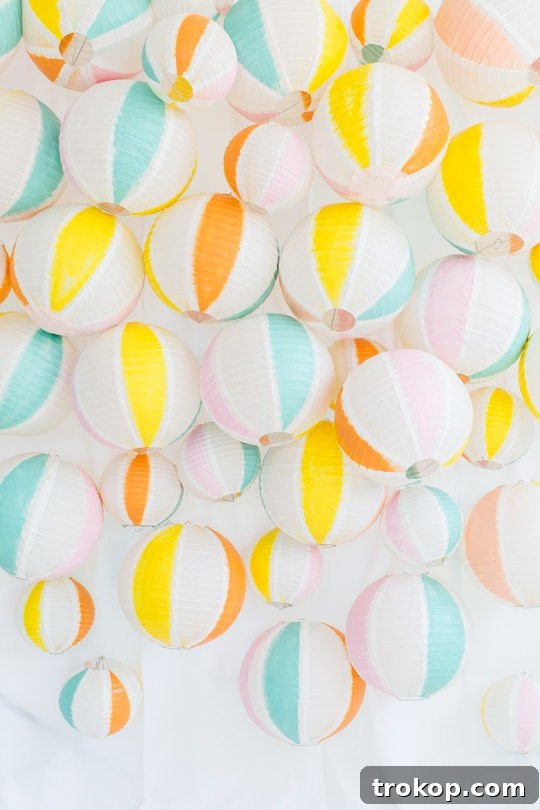
A DIY Beach Ball Backdrop that will definitely make a major statement at all of your summer get-togethers!
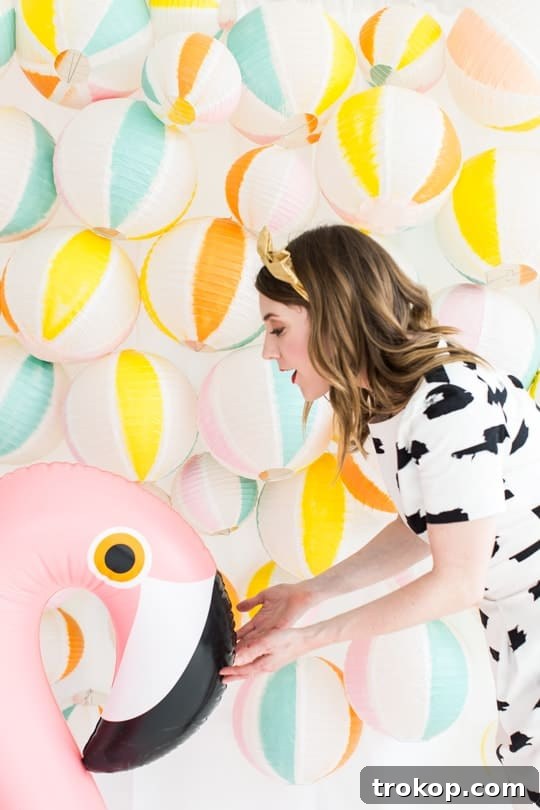
DIY Beach Ball Backdrop: Create Stunning Summer Party Decorations with Paper Lanterns
Are you envisioning a whimsical, incredibly eye-catching backdrop that will truly set the scene for your next beach-themed party or summer gathering? Look no further! We were thrilled when our friend Beth from The Manor invited us to be a part of her fabulous 60’s summer soiree-inspired launch party. Our immediate thought? Beach balls! Nothing quite captures the essence of summertime fun and carefree vibes like vibrant beach balls, right? However, we also wanted to craft something unique—a decoration that felt sophisticated and playful, steering clear of anything too kitschy or typical for a beach party.
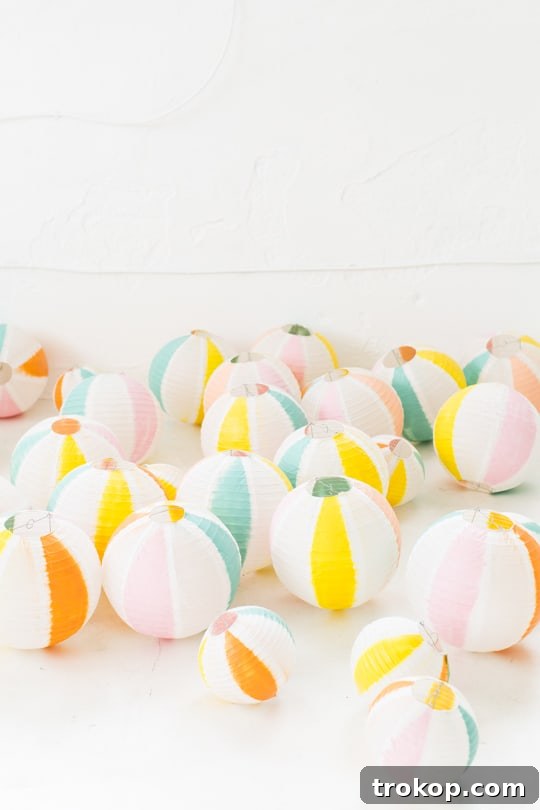
Having previously constructed various backdrops, including our popular paper flower backdrop, and with extensive experience from our time working at Smilebooth, we learned a crucial lesson in photography 101: shiny backdrops are a big no-no. The reflective surfaces can cause unwanted glare and ruin potential photo opportunities. This immediately ruled out using actual plastic beach balls. Instead, we developed an ingenious solution: a stunning DIY beach ball backdrop created from paper lanterns. So, grab your creative spirit, a dose of sunscreen (metaphorically, of course!), and let’s dive into this exciting project that promises to bring a splash of color and fun to any event!

Essential Materials and Tools Needed
Gathering all your supplies before you begin ensures a smooth and enjoyable crafting experience. Here’s everything you’ll need to create your vibrant DIY paper lantern beach ball backdrop:
- Paper lanterns in various sizes — We recommend using mostly 10-inch lanterns for a consistent, yet dynamic, look. Aim for 30-35 lanterns to create a full backdrop, adjusting for your desired coverage area.
- Painter’s tape — Essential for creating crisp, clean lines for your beach ball stripes. Look for a tape that offers clean removal without damaging the paper.
- Spray paint in your colors of choice — Choose a palette that evokes summer, like bright reds, blues, yellows, and greens. Consider quick-drying, matte-finish paints for best results.
- Fishing line — For a virtually invisible way to hang your finished lanterns, ensuring they appear to float effortlessly.
- Backdrop stand — Provides a sturdy framework for your entire display, making it easy to set up and take down.
- White backdrop cloth (or a plain white curtain panel) — Serves as a clean, neutral canvas for your colorful beach balls, making their colors pop.
- Needle and heavy thread — For securely attaching the paper lanterns to the fishing line and backdrop. Choose a strong thread that won’t easily break.
- Yarn or sturdy string and tape — For creating a temporary drying line for your freshly painted lanterns. Ensure it’s strong enough to support the weight of the lanterns without sagging.
Having these items on hand will make the process efficient and help you achieve professional-looking results for your stunning summer party decoration. This well-prepared approach sets the foundation for a beautiful and impactful DIY beach ball backdrop.

Step-by-Step Guide: How to Craft Your Paper Lantern Beach Balls
Transforming simple paper lanterns into charming, striped beach balls is an enjoyable and straightforward process. Follow these detailed steps to create the vibrant spheres that will form the core of your amazing DIY backdrop:
- Assemble Your Paper Lanterns: Begin by carefully assembling all your paper lanterns according to their package instructions. Most come with a metal expander that fits inside. Ensure this rim or frame is securely placed inside to give each lantern its perfect spherical shape. Proper assembly is key for a uniform final look.
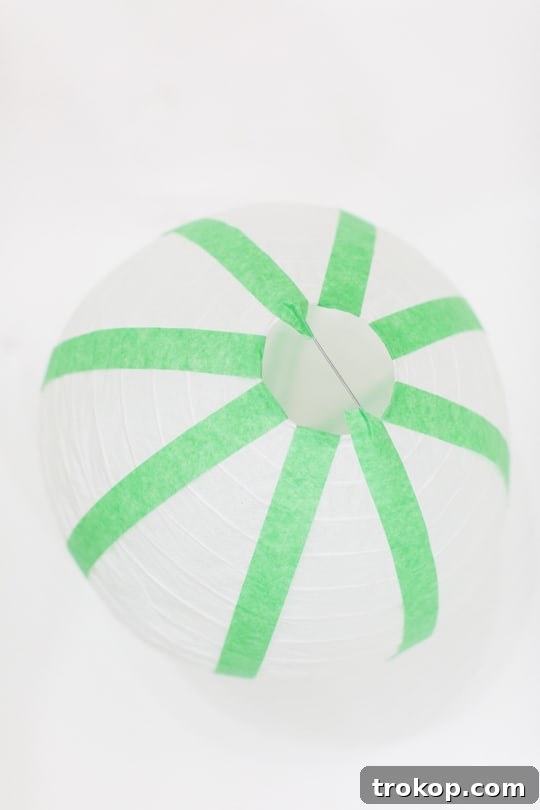
- Apply Painter’s Tape for Stripes: Once assembled, identify the natural seams or segments of the paper lantern. These are usually visible through the rice paper. Carefully place a strip of painter’s tape along every other seam. This tape will act as your guide, creating crisp, unpainted sections and clearly marking where you will apply the spray paint to mimic the iconic stripes of a beach ball. Precision in taping will lead to more defined and professional-looking stripes.
- Set Up Your Drying Station: Before you even pick up that can of spray paint, prepare a dedicated drying area. String a piece of yarn or sturdy string securely across a room, a corner, or even outdoors in a sheltered spot away from dust and direct wind. Make sure to tie or tape each end tightly to a stable fixture, as it needs to hold the collective weight of multiple painted lanterns. This “clothesline” method is crucial for allowing the lanterns to dry evenly without smudging, sticking, or collecting dust on wet paint.
- Spray Paint Your Stripes: With the tape meticulously in place, it’s time to add color! Holding the spray paint can at the recommended distance (usually 6-8 inches) for an even coating, spray every other section of the lantern with your chosen color. Apply the paint in thin, even coats, moving the can steadily to prevent drips and ensure smooth coverage. While we aimed for perfect lines, we sometimes found that a slight overspray created a lovely, subtle ombre effect, which we quite liked! Don’t be afraid to experiment a little, but generally, try to stay within the taped boundaries for a classic beach ball look.
- Allow to Dry and Reveal: Once painted, hang your lanterns on the prepared drying line and allow them to dry completely. This might take a couple of hours, so patience is key. Check the manufacturer’s instructions for optimal drying times. Once thoroughly dry to the touch, carefully peel away the painter’s tape to reveal your perfectly striped, colorful paper lantern beach balls. The crisp contrast between the painted and unpainted sections will create that iconic and playful beach ball appearance, ready to dazzle your guests!
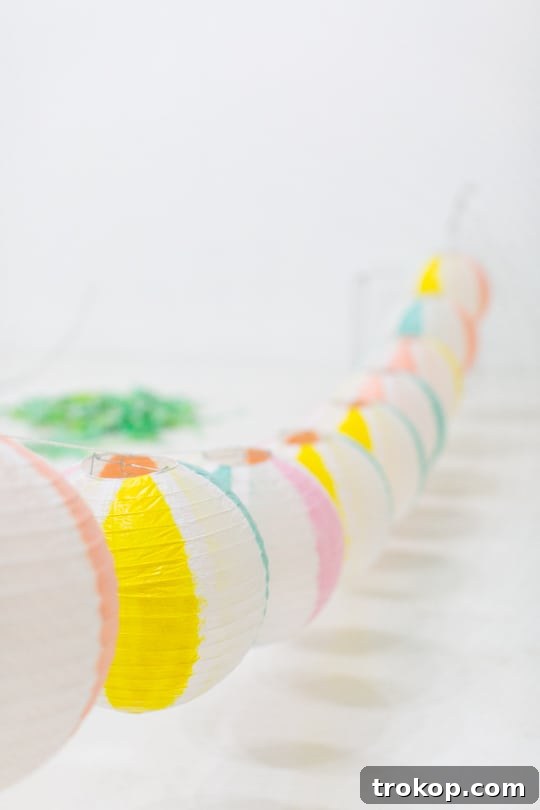
You’ll be amazed at how easily these simple paper lanterns transform into convincing, festive beach balls, ready to make a splash at your event and become a highlight of your summer party decorations!
Assembling Your Stunning Photo Backdrop
With your beautifully striped paper lantern beach balls ready, the next step is to assemble them into a spectacular backdrop that will captivate your guests and serve as a perfect photo opportunity. This process is straightforward and allows for creative flexibility in how you arrange your colorful spheres to achieve the desired effect.
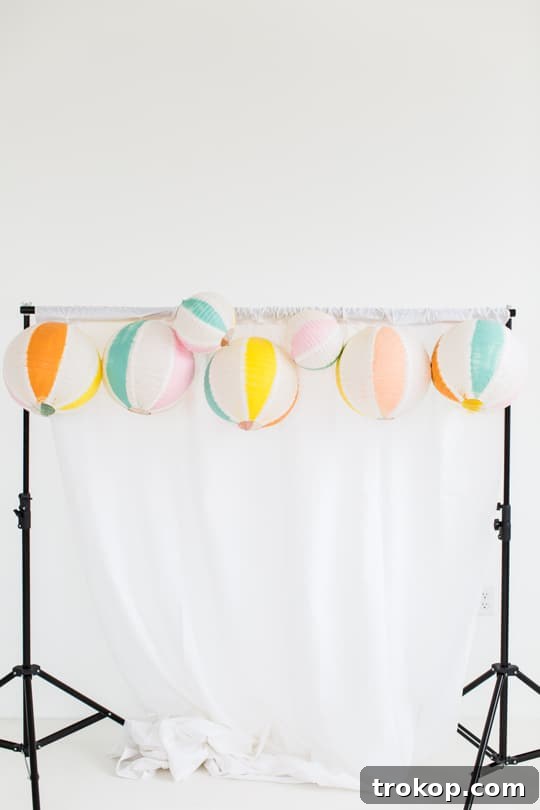
- Set Up Your Backdrop Stand and Cloth: First, erect your backdrop stand in the desired location for your event. This could be against a wall, in a corner, or freestanding. Drape your white backdrop cloth or plain white curtain panel over the stand, ensuring it’s smooth, taut, and wrinkle-free. This provides a clean, neutral base that will make your vibrant paper lanterns truly pop and ensures a professional finish for your DIY beach ball backdrop.
- Layering the Lanterns with Precision: Now, using a strong needle and heavy thread (or fishing line for an even more invisible effect), begin stringing your paper lantern beach balls into place. Start from the very top of your backdrop and work your way down in horizontal rows. The key is to layer them, much like shingles on a roof. This method creates significant depth, dimension, and ensures a full, voluminous look, making the backdrop appear lush and inviting. Experiment with varying the overlap slightly to add organic movement.
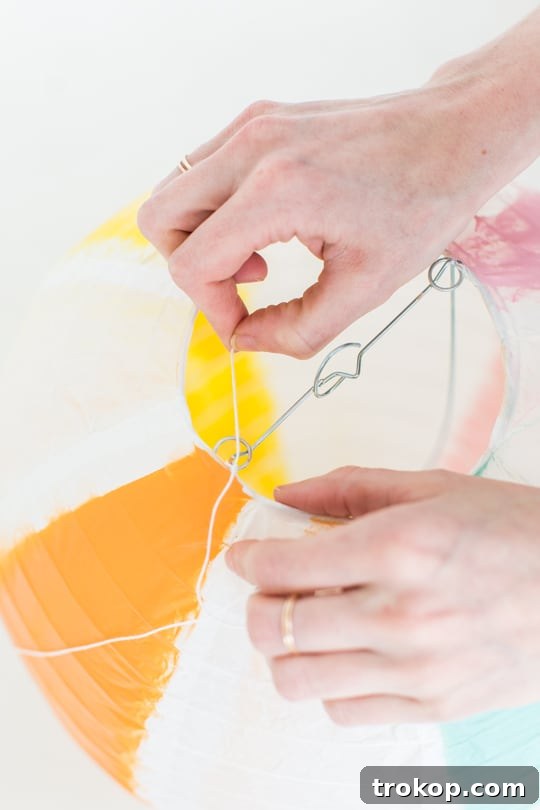
- Conceal the Thread for a Seamless Look: As you string each lantern, strategically hide the thread behind the lantern positioned just above it. For example, if you’re attaching a lantern to a horizontal string, wrap the thread around the top string and then feed it through the lantern’s hanger. By doing this, the hanging mechanism becomes virtually invisible, giving the illusion that the colorful beach balls are floating effortlessly against the white canvas. This meticulous attention to detail elevates the overall aesthetic of your summer party decorations.
Continue this layering process, filling the entire backdrop to your satisfaction. You can experiment with different sizes and color arrangements to create a dynamic and eye-catching display. The resulting DIY beach ball backdrop will not only be a vibrant and fun focal point but also a testament to your creativity, perfect for capturing unforgettable moments at any summer celebration or photo booth event.
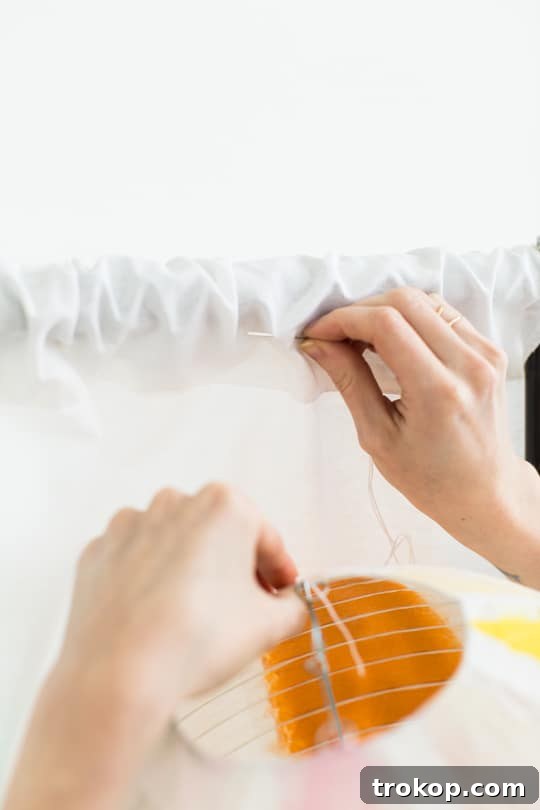
Remember, you can actually hide the thread behind the lantern just above it, ensuring a clean, polished look without visible supports.

We absolutely loved how our backdrop complemented the festive atmosphere at The Manor soiree, hosted by the wonderful Carrie of Wear Where Well. Her awesome flamingo dress perfectly captured the playful spirit of the event, and we couldn’t resist snapping a photo of her against our colorful creation.
Speaking of flamingos, if you couldn’t tell by our immensely popular DIY Flamingo Ring Toss Game, we’re quite obsessed with these elegant birds! We were even trying to come up with a catchy phrase for a giant flamingo decoration we had at the party. It’s tough when nothing rhymes with “flamingo”! But the vibrant pink added another layer of tropical charm to our beach ball theme, proving that combining different summer elements can truly create a magical celebration.
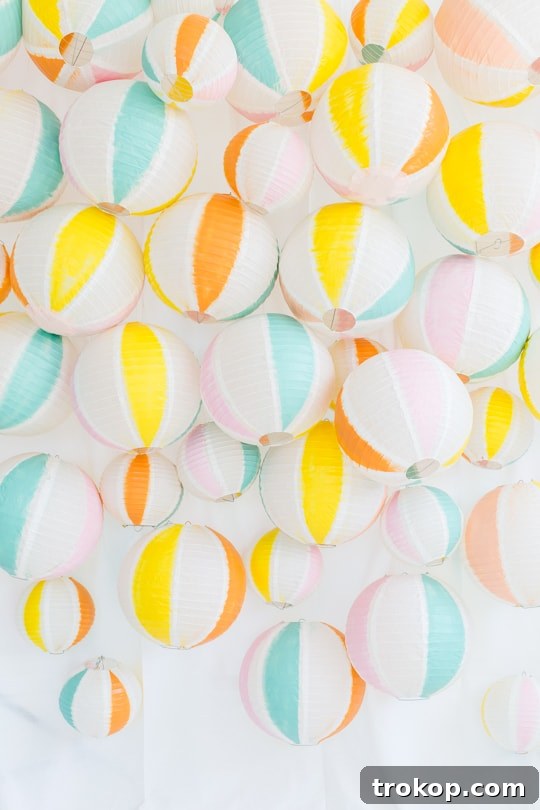
The Science Behind the Shine: Why Real Beach Balls Are a No-Go for Photography
While real beach balls are undeniably fun for play and symbolize summer, they pose a significant challenge when used as a backdrop, particularly for photography. Understanding why can help you make better decorative choices for your events and ensure your photos turn out perfectly, capturing the essence of your summer party decorations without distraction.
The primary issue lies in the material: beach balls are typically made from PVC plastic. This material is inherently glossy and highly reflective. When exposed to light—whether it’s the bright sun, overhead artificial lighting, or a camera flash—these shiny surfaces act like mirrors, creating intense glare and “hot spots” in your images. These reflections can easily wash out details, distort colors, and even create distracting bright patches that detract from the subjects standing in front of the backdrop. In professional photography, avoiding glare and managing reflections is a fundamental rule, often referred to as “photography 101.” A glary background can ruin an otherwise perfect shot, making subjects appear less vibrant and the overall image less appealing.
Paper lanterns, on the other hand, are crafted from a matte, translucent, or semi-translucent material. This texture diffuses light beautifully rather than reflecting it directly. The result is a soft, even glow that enhances your subjects and provides a consistent, vibrant background without any harsh glare. They create a gentle, ambient light that works wonderfully in various lighting conditions, making them an ideal choice for a photo-friendly DIY beach ball backdrop. By opting for paper lanterns, you ensure that every picture captures the joyous, colorful atmosphere of your summer party without any unsightly reflections, allowing for picture-perfect memories that truly shine.
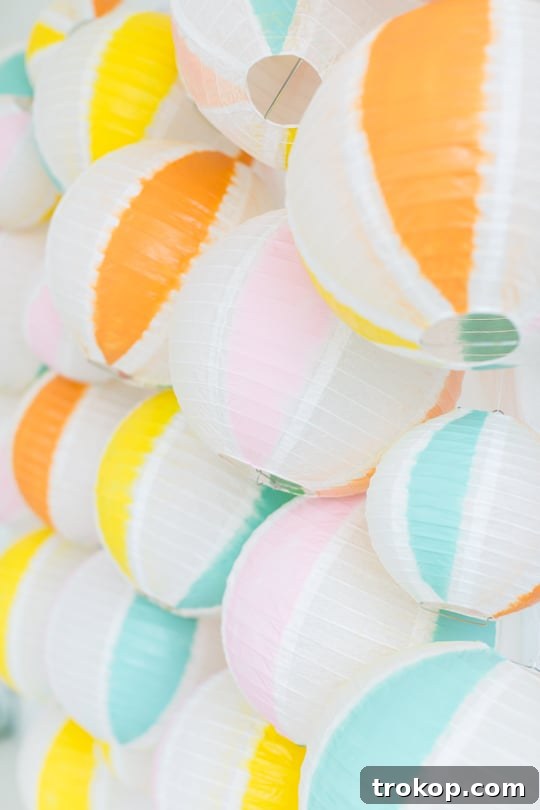
Beyond the Photo Booth: Creative Applications for Your Beach Ball Backdrop
This versatile paper lantern beach ball backdrop isn’t just for photo booths; its vibrant charm and easy setup make it perfect for a multitude of occasions and uses. Its sturdy construction, achieved by stringing the lanterns rather than gluing or pinning, ensures durability and allows for reuse, making it a sustainable choice for your summer party decorations. Here are some creative ways to incorporate this delightful DIY decoration into your local events and celebrations:
- For a Dynamic Photo Booth: Naturally, this backdrop excels in a photo booth setting. It provides a fun, colorful background that instantly encourages guests to pose and express themselves. Elevate the experience by adding themed props like oversized sunglasses, leis, novelty hats, or inflatable flamingos. You could even offer blank spaces on the backdrop or provide speech bubbles for guests to write messages, creating a unique, interactive keepsake from your event. The no-glare surface guarantees stunning photos every time!
- The Ultimate Beach-Themed Party Decoration: This backdrop is a must-have for any beach-themed celebration. Whether you’re hosting a casual summer birthday, a sun-kissed bridal shower, a whimsical baby shower, a memorable summer beach wedding reception, or simply a lively pool party, the beach ball backdrop instantly transports guests to a festive, resort-like atmosphere. Its bright colors complement any tropical or aquatic decor, creating an immersive experience. Since the lanterns are strung, the backdrop is very sturdy and durable, perfect for an outdoor event where a little breeze might occur.
- An Eye-Catching Dessert Table Wall: Transform your dessert table into a stunning focal point by using this beach ball idea as a vibrant background. Position the backdrop directly behind your sweets display to draw attention and create an irresistible visual feast. The colorful “beach balls” will make your cakes, cupcakes, and other treats look even more appealing. Enhance the theme with complementary tropical beach decor elements such as seashell garlands, miniature surfboards, sand dollars, or vibrant floral arrangements.
- Event Entranceway or Welcome Feature: Make a grand statement right at the entrance of your party or event. A DIY beach ball backdrop can serve as an exciting welcome feature, setting a cheerful tone from the moment guests arrive. It’s an excellent way to guide attendees, provide an immediate photo op, and create an immediate sense of celebration and fun.
- Children’s Play Area or Classroom Decor: For events with kids, this colorful backdrop can define a fun play zone. Imagine a vibrant corner where children can enjoy games, crafts, or simply relax amidst the cheerful “beach balls.” It’s also fantastic for decorating a classroom during summer themes or for school events, adding a pop of educational fun.
- Retail Display or Event Booth: Businesses looking to create a festive, attention-grabbing display for a summer promotion, market booth, or product launch can utilize this backdrop. It draws the eye and communicates a fun, lighthearted brand image, making your space memorable and inviting.
With its cheerful aesthetic and durable, reusable design, this DIY beach ball backdrop promises to be a memorable addition, enhancing the atmosphere and photo opportunities at any summer-inspired gathering. Let your creativity shine and turn any space into a vibrant summer paradise!
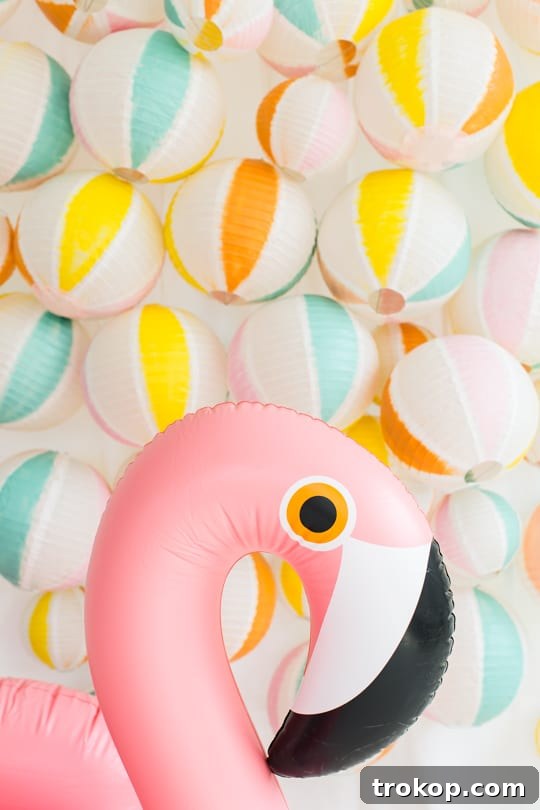
More Inspiration for Your Next DIY Project
Loved creating this beach ball backdrop? If you’re eager for more creative endeavors to elevate your home or party decor, we have a wealth of other DIY backdrop ideas to inspire your next project. Each offers a unique aesthetic and a fun challenge for any craft enthusiast. Dive into these fantastic options to keep your creative momentum going and design truly unforgettable spaces:
- Floral Embroidery Ring Backdrop: A delicate and artistic touch, perfect for bohemian or romantic themes.
- Gold Leaf Photo Backdrop: Add a touch of glamour and luxury with shimmering gold accents for elegant events.
- Paper Flower Backdrop: A classic and versatile option, allowing for endless color and size variations to suit any celebration.
- Pampas Grass DIY Photo Backdrop: Embrace natural textures and a modern, minimalist aesthetic for chic gatherings.
- Hanging Diamond Decor: Create sparkling, geometric visuals that add a sophisticated dimension to any space.
From elegant floral arrangements to glamorous gold leaf, and rustic pampas grass to playful paper flowers, there’s a DIY backdrop for every theme and style. Unleash your creativity and make your next event truly unforgettable with these inspiring homemade party decor ideas!
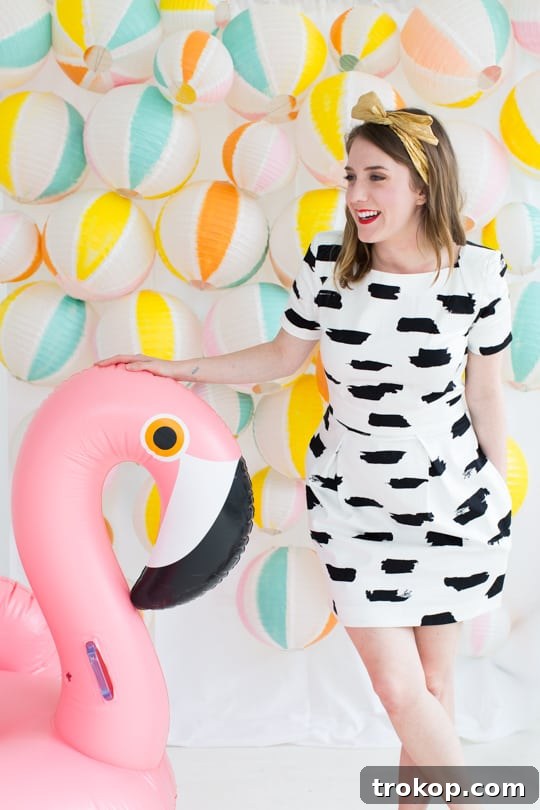
DIY Beach Ball Backdrop Project Details
2 hrs
2 hrs
4 hrs
How-To
Party
Equipment
- Painter’s tape
- Needle and heavy thread
- String
- Tape
Materials
- 30-35 paper lanterns in various sizes
- Spray paint any colors of choice
- Backdrop stand
- White backdrop cloth or plain white curtain panel
- Fishing line
Instructions
How to create the paper beach balls:
-
Assemble all of your paper lanterns per the package instructions with the metal rim inside.
-
Place a strip of painter’s tape along every seam. They should be visible through the rice paper. This will mark where to spray paint.
-
Before spray painting, set up a little place for each lantern to dry by stringing a piece of yarn or sturdy string across a room or corner, and sturdily tying or taping each end tightly to hold the weight of them.
-
Once taped, spray every other section a color of your choice.
-
Let them dry, and then peel away the painters tape.
How to assemble the balls:
-
String the paper lantern beach balls from the top into place with needle and thread.
-
Layer the balls into place (think shingles on a roof), starting at the top. Hide the thread behind the lantern just above it.
Notes

Your Guide to Hosting the Perfect Outdoor Movie Night
From DIY projectors to cozy seating arrangements, explore the best…
Continue ReadingYour Guide to Hosting the Perfect Outdoor Movie Night
17 DIY Cake Toppers that Will Steal the Show at Your Next Celebration
Take your cake decorating skills to the next level with…
Continue Reading17 DIY Cake Toppers that Will Steal the Show at Your Next Celebration
DIY Balloon Cake Topper & Cake Painting Tutorial
Add a touch of whimsy to your cake with a customizable…
Continue ReadingDIY Balloon Cake Topper & Cake Painting Tutorial
Garlic Parmesan Fries Recipe
Transform your kitchen into a flavor haven with our garlic…
Continue ReadingGarlic Parmesan Fries Recipe