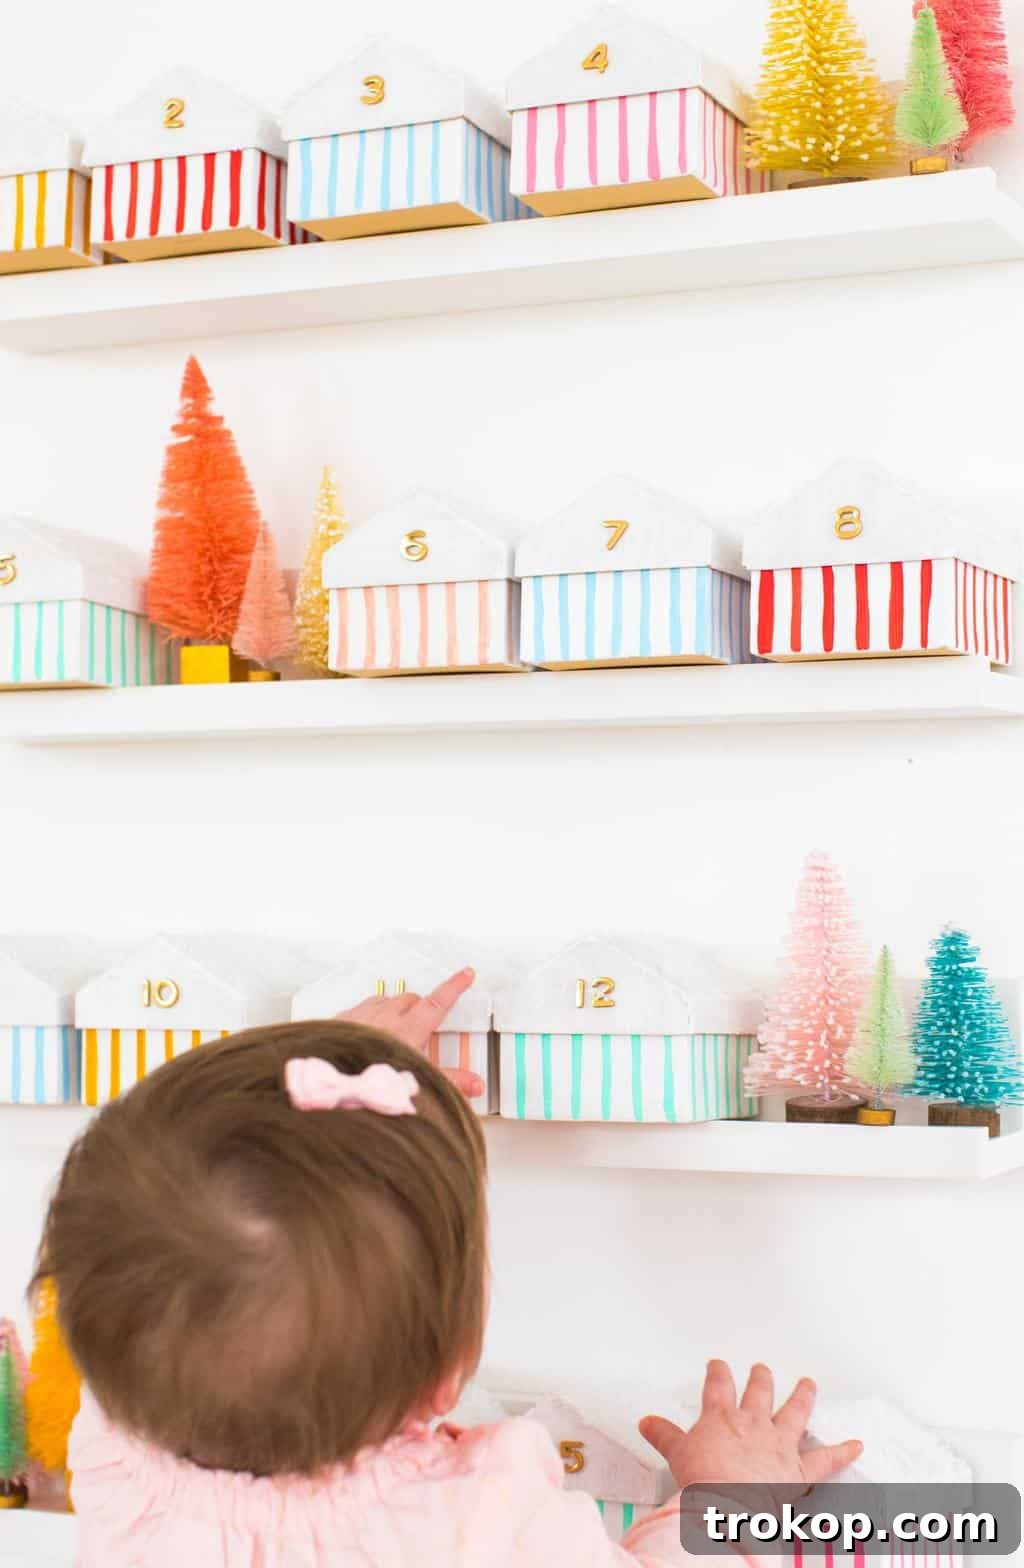
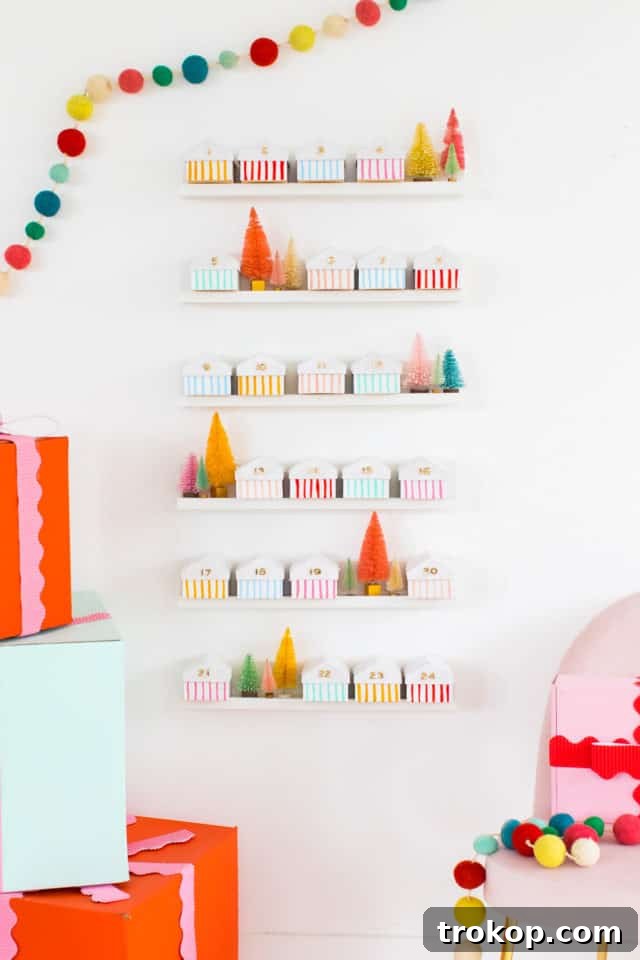
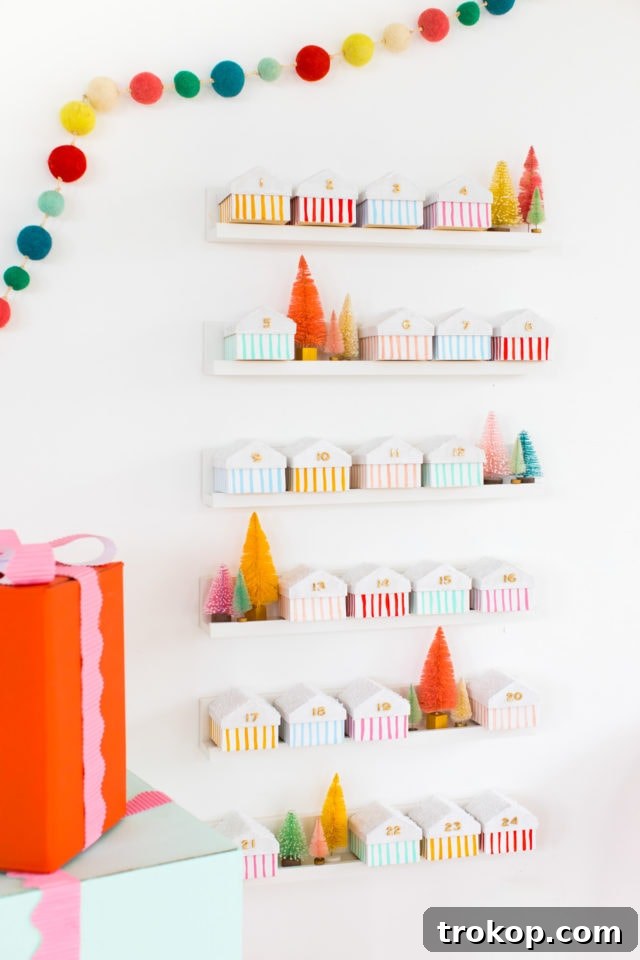
As the holiday season draws near, the air fills with excitement, especially for children eagerly anticipating Christmas. A wonderful tradition that amplifies this festive spirit is the advent calendar. More than just a simple countdown, it’s a daily dose of joy, building anticipation and creating cherished memories. While countless options are available in stores, there’s a unique charm and satisfaction in crafting a homemade advent calendar. This DIY Kids Advent Calendar, featuring an adorable village of mini houses, is designed to be easy to recreate, offers ample space for delightful goodies, and promises a magical countdown to Christmas.
Shopping for Christmas gifts can sometimes be a last-minute scramble, but an advent calendar offers a delightful, structured way to engage children during the hectic holiday season. It provides a daily focus, helping to manage their excitement and keep them happily occupied. We absolutely adore Christmas, and while our own children are still quite young to fully grasp the concept of an advent calendar, we find immense joy in this tradition and the thought of establishing our very first family holiday rituals!
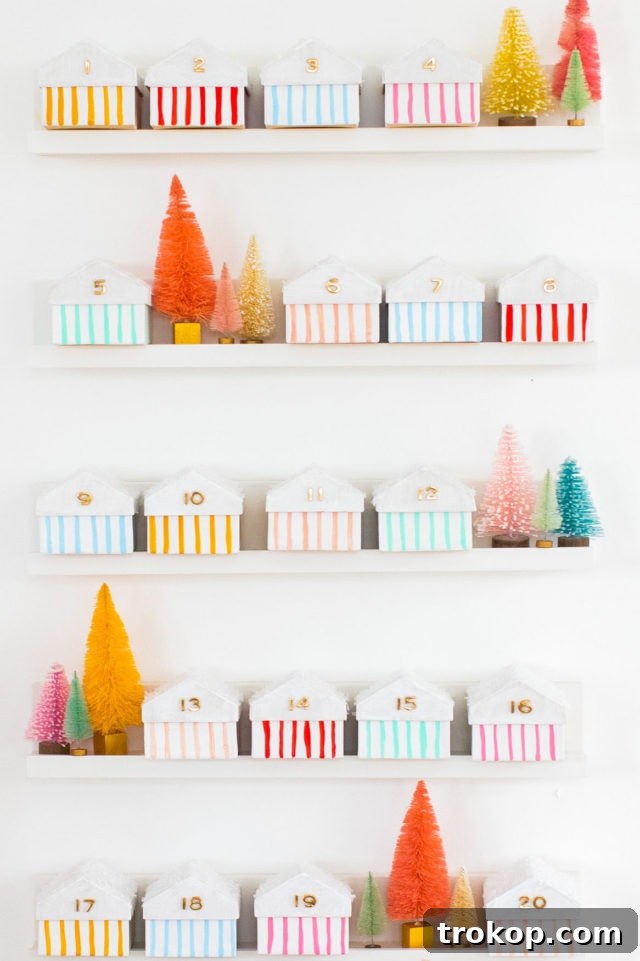
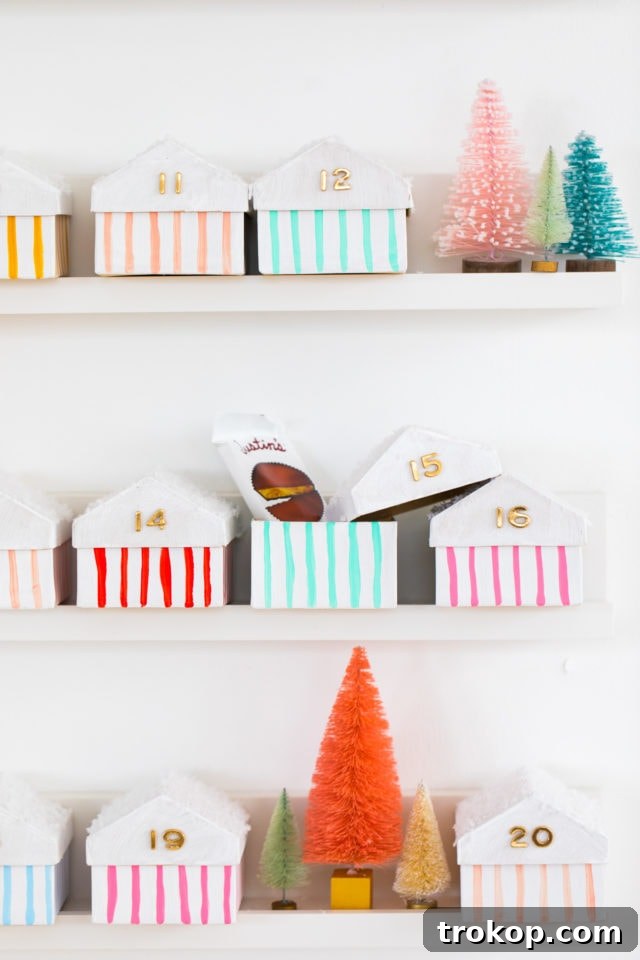
What makes this particular DIY advent calendar stand out is that each of the 24 little boxes is designed to hold a substantial amount. Unlike many store-bought calendars that can barely fit a token, these mini houses are generous. This means you won’t have to worry about finding tiny fillers or disappointing bigger families who want to share the fun. Plus, we’re totally smitten with the vibrant color scheme we chose, adding an extra layer of festive cheer!
So, gather your crafting supplies, perhaps whip up a festive ornament cocktail, put on some cheerful holiday music, and get ready to create a truly special Christmas countdown!
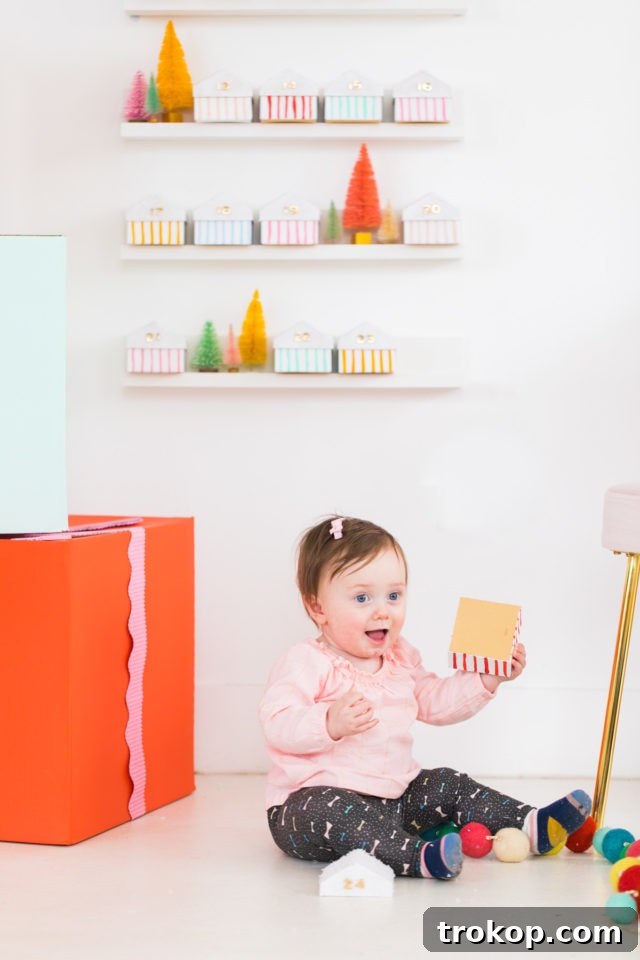
Table of Contents
What Is An Advent Calendar?
An advent calendar is a beloved tradition designed to count down the days until Christmas, typically starting on December 1st and ending on Christmas Eve. The term “Advent” itself derives from the Latin word “adventus,” meaning “coming,” and refers to the four Sundays and weeks leading up to Christmas Day. Historically, advent calendars originated in 19th-century Germany, where families would mark chalk lines on doors or light candles to count down to the festive day. Over time, this evolved into printed calendars with small doors that reveal images, Bible verses, or, most commonly today, small treats or toys.
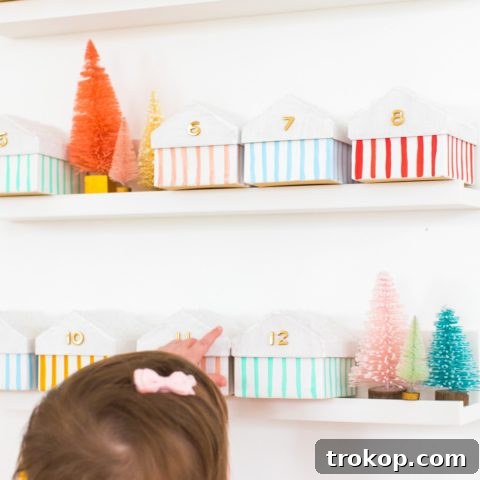
For children, an advent calendar is an incredibly fun and engaging way to build excitement for the holidays. It transforms the waiting period into an enjoyable daily ritual, much like the popular “elf on the shelf” theme. Each morning, opening a new door or box provides a mini surprise, making the countdown feel special and memorable. While some calendars are simple, others can be quite elaborate, filled with anything from chocolates to small toys or even activity suggestions. For our DIY version, we love filling the mini houses with fun snacks and small treasures, ensuring each day brings a little smile without overshadowing the main gift-giving on Christmas Day. It’s a simple tradition with a big impact, fostering patience and adding a magical touch to the Christmas season.
Why Choose a DIY Kids Advent Calendar?
In a world brimming with store-bought options, opting for a homemade advent calendar for your children offers a unique set of benefits that extend far beyond simply counting days. A DIY project, especially one as charming as these mini houses, becomes an experience in itself, enriching the entire holiday season.
- Personalization at Its Best: One of the greatest advantages of a DIY advent calendar is the complete freedom to customize. You can select colors, themes, and fillers that perfectly match your child’s personality, interests, and even your home decor. This means no more settling for generic themes or contents that might not resonate with your little ones.
- Budget-Friendly Fun: While some elaborate DIYs can be costly, this mini house advent calendar is designed to be economical. By sourcing simple materials like cardboard boxes and craft paint, you can create a beautiful and robust calendar without breaking the bank, often saving money compared to high-end pre-filled calendars.
- Sustainable and Reusable: Unlike single-use paper calendars, these durable cardboard houses are built to last. Once the holiday season is over, they can be carefully stored and brought out year after year, becoming a cherished family heirloom. This reusability not only makes them eco-friendly but also adds to their nostalgic value.
- A Unique Bonding Activity: The process of making the advent calendar can be a delightful family activity in itself. Children can help paint, decorate, and even select the goodies, fostering a sense of ownership and excitement for the upcoming countdown. It’s a fantastic opportunity for creative expression and quality time together.
- Generous Treat Capacity: Many commercial advent calendars are notoriously small, barely accommodating a tiny chocolate or sticker. Our mini house design, however, features boxes that are significantly more spacious. This allows for a wider variety of treats and small toys, ensuring each day’s surprise is truly satisfying and fun, especially for families with multiple children.
- Teaching Patience and Anticipation: The daily ritual of opening a box helps children practice patience and understand the concept of delayed gratification. It builds anticipation in a positive way, making the wait for Christmas feel like an exciting journey rather than an endless stretch of time.
Choosing to create your own DIY kids advent calendar is more than just a craft project; it’s an investment in creating meaningful holiday traditions and unforgettable childhood memories. It’s an act of love that your family will look forward to year after year.
DIY Kids Advent Calendar Materials and Tools
This charming advent calendar is crafted from 24 mini cardboard houses, making it not only aesthetically pleasing but also incredibly practical for storage and reuse season after season. Its durable construction ensures it can hold plenty of delightful treats, making it a sustainable and cherished holiday item for years to come. Here’s what you’ll need to bring your colorful Christmas village to life:
- Craft paint in the colors of your choice: Select a palette that speaks to your holiday vision. We opted for a vibrant, cheerful scheme, but pastels, metallics, or traditional red and green would also look fantastic.
- Thick paintbrush for the base color of the houses: A wider brush will help you cover the larger surfaces of the houses quickly and evenly, ensuring a smooth base coat.
- Thin paintbrush for details like stripes: Essential for adding fine lines, intricate patterns, or small details that will bring your houses to life.
- Gold number stickers (1-24): These add a touch of sparkle and clearly mark each day of the advent countdown. You can find these in various fonts and colors to match your theme.
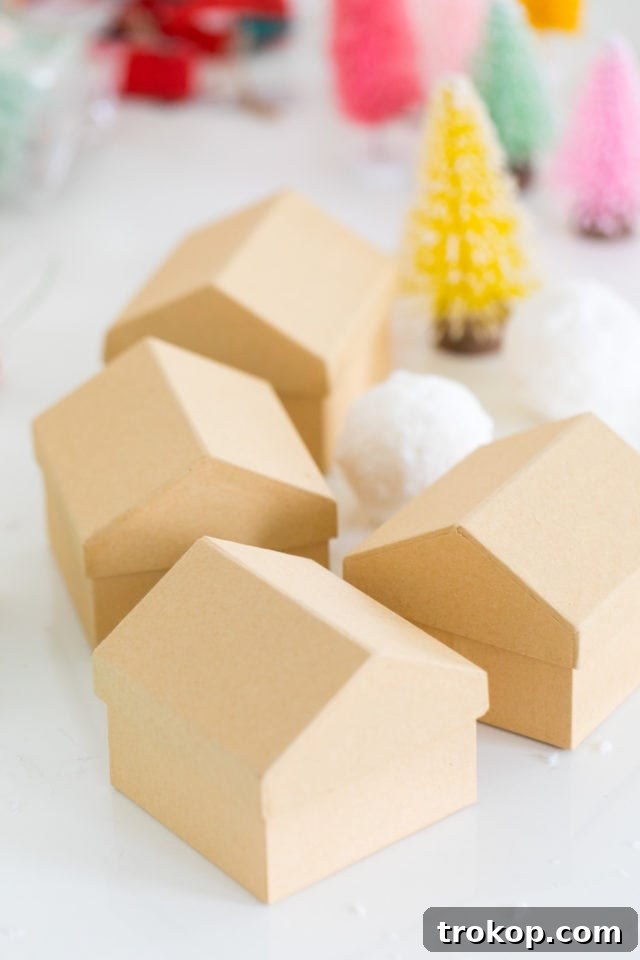
- Mini cardboard houses (24 count): We sourced ours from Oriental Trading, but you can also use similarly sized party favor boxes, or get crafty and make your own from digital templates printed on cardstock. Look for sturdy options that can withstand repeated opening and closing.
- Fake snow (optional, for the roofs): This adds a charming, wintry touch to your little village, mimicking freshly fallen snow.
- Temporary floating shelves (optional): A fantastic solution for displaying your houses neatly and compactly, especially if you’re short on space. They’re easy to install and remove without damaging walls.
- Goodies to put inside!: The most exciting part! Be sure to have a variety of small treats, toys, or activity notes ready for each day.
Remember, the beauty of this DIY project lies in its flexibility. You can customize these boxes as much or as little as you desire. It doesn’t have to be a time-consuming holiday marathon. Simply light your Christmas tree, put on some festive holiday tunes, and let the kids join in the fun of decorating their very own advent calendar houses!
How To Make A DIY Kids Advent Calendar
Creating this DIY advent calendar is delightfully simple, essentially involving painting cardboard houses and affixing numbers. However, you can certainly add extra flourishes to make it truly unique! Here’s a detailed guide to crafting your own:
- Prepare Your Mini Houses: If your mini cardboard houses come flat, assemble them according to their instructions. Ensure all 24 houses are ready for decoration. If using different boxes, ensure they have an opening for daily treats.
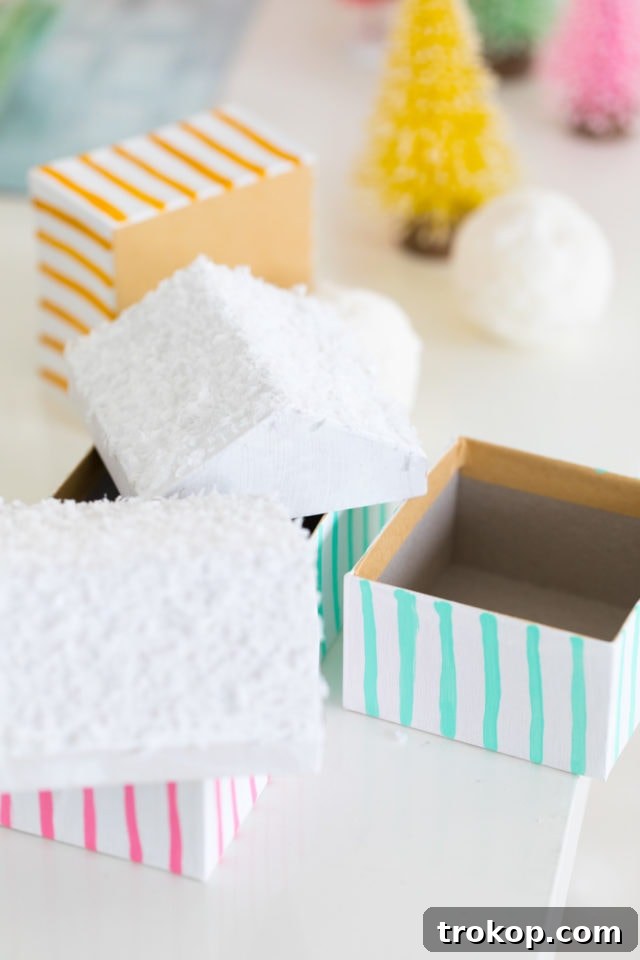
- Base Coat Application: Begin by painting the box bases and lids with your chosen base color. We opted for a crisp white, which serves as a beautiful canvas for further decoration. Apply an even coat and allow it to dry completely. Depending on your paint and box material, you might need a second coat for full opacity.
- Adding the “Snowy” Roofs (Optional): While the white paint on the roofs is still wet, gently sprinkle fake snow over them. The wet paint acts as a natural adhesive, securing the snow in place to create a charming, frosted effect. If the paint dries too quickly, a light mist of spray adhesive can also work. Let this dry thoroughly.
- Decorative Stripes and Details: Once the base color (and snow, if applicable) has completely dried, it’s time to add the decorative elements. Using a thin paintbrush, paint thin stripes on each house in varying colors. Feel free to get creative with patterns – polka dots, chevron, or even small festive motifs would look wonderful. Allow these painted details to dry fully to prevent smudging.
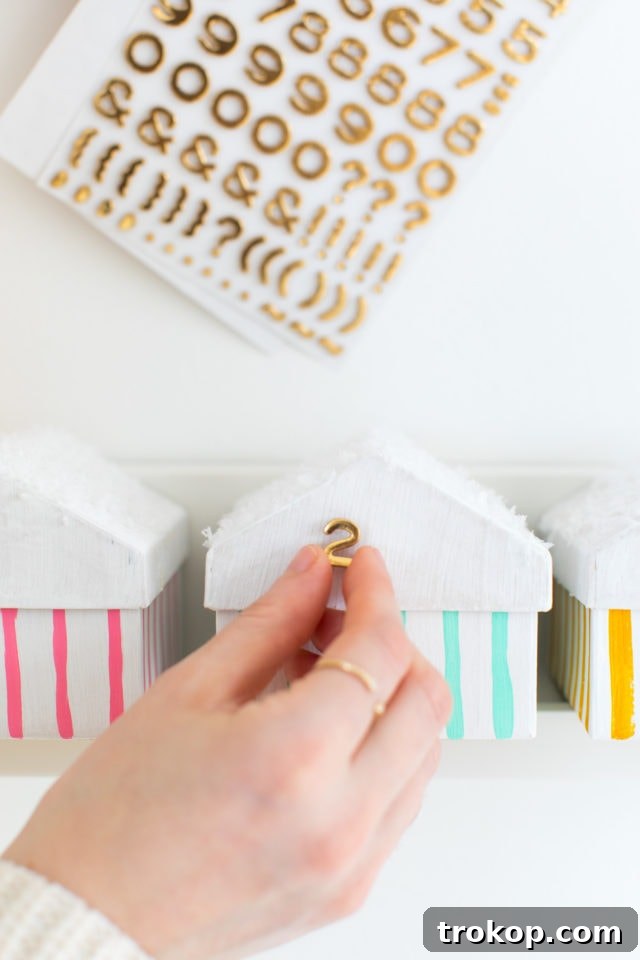
- Affixing the Numbers: Once all the paint is dry, carefully apply the gold number stickers (1 through 24) to the front of each house. Arrange them sequentially, or mix them up for a fun scavenger hunt style advent calendar! Ensure the stickers are pressed down firmly.
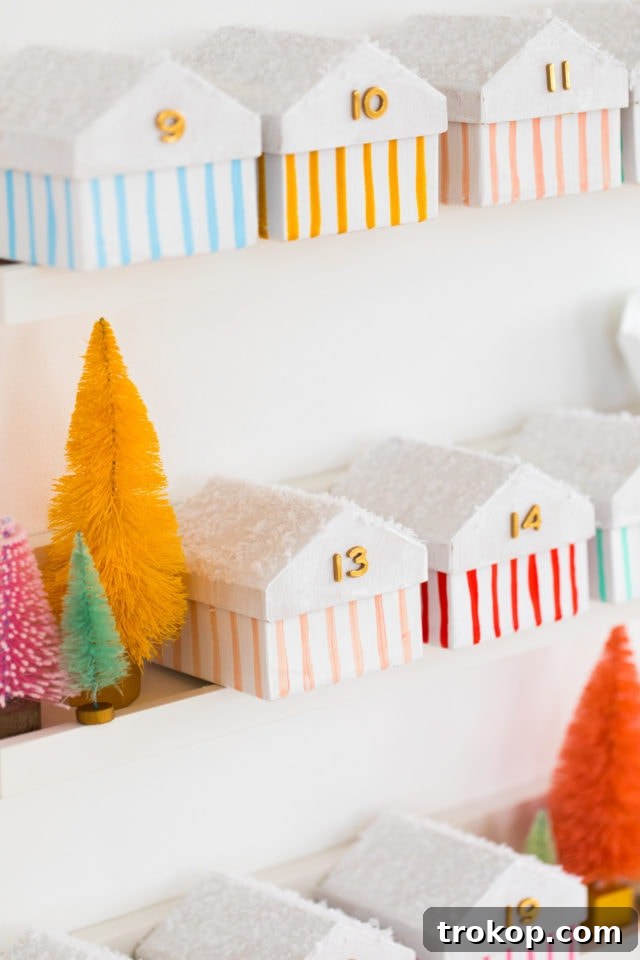
- Display Your Village: For an organized and space-saving display, we highly recommend using temporary adhesive strip wall shelves. These shelves are sleek, incredibly easy to install, and, best of all, can be removed without causing any damage to your walls once the holidays are over. Alternatively, you can arrange your houses on a mantelpiece, a bookshelf, or even scattered around a room for a playful look.
- Fill and Enjoy!: Now comes the most exciting part – filling your advent boxes with delightful goodies! Once filled, your colorful mini house advent calendar is ready to bring joy and anticipation throughout the holiday season. Enjoy the daily ritual of discovery!
This process is not only simple but also offers a fantastic opportunity to involve children in the creation, making it an even more special holiday project. The best part is the flexibility; whether you keep it minimalist or go all out with intricate details, your personalized advent calendar will be a highlight of your Christmas decor.
What to Put in an Advent Calendar
The magic of an advent calendar lies in the daily surprise, and filling it thoughtfully can make the Christmas countdown truly special. While many store-bought calendars come pre-filled with small tokens, creating your own allows for endless possibilities to tailor the contents to your child’s preferences and your family’s values. Remember, our mini house advent calendar offers generous space, so you’re not limited to minuscule items!
Here are some diverse and exciting ideas for what to put in a kids’ advent calendar:
Small Toys & Trinkets:
- LEGO City Blocks or Mini Figures: Small sets or individual mini-figures from their favorite themes can be a huge hit.
- Toy Mini Figures and Characters: Think small animal figures, superheroes, or characters from beloved cartoons.
- Bouncy Balls or Mini Squishies: Fun, tactile toys that kids love.
- Mini Puzzles: Small, simple puzzles for a quick brain teaser.
- Playdough Tubs: Individual mini playdough tubs in festive colors.
- Bath Toys: Small floatable toys or bath bombs (ensure they are child-safe).
- Stickers and Temporary Tattoos: Always a favorite, especially holiday-themed ones.
- Miniature Books: Small storybooks or board books can be a lovely daily treat.
Craft & School Supplies:
- Mini Coloring Notepads and Crayons: Perfect for encouraging creativity.
- Erasers: Fun shapes or scented erasers.
- Glitter Tubes or Washi Tape: Small craft items for future projects.
- Pencils or Pens: Themed or novelty stationery.
Treats & Snacks:
- Individually Wrapped Candies: Chocolates, gummies, candy canes, or lollipops.
- Holiday-Themed Snacks: Mini gingerbread cookies, festive crackers, or fruit snacks.
- Dried Fruit or Mini Snack Bars: Healthier alternatives for daily treats.
Accessories & Wearables:
- Small Kids Accessories: Hair ties, clips, mini bows, or festive socks.
- Lip Balms: Fun flavors or character-themed lip balms.
- Keychains: Small character keychains for backpacks.
Experiences & Acts of Kindness:
- Activity Coupons: Instead of a physical item, include a note promising a special activity: “Family Movie Night,” “Bake Christmas Cookies,” “Hot Chocolate Date,” “Drive to see Christmas Lights,” “Pick out a new ornament.”
- Acts of Kindness: Write a note suggesting “Help a neighbor,” “Donate an old toy,” “Write a thank you card,” or “Give someone a hug.” This instills valuable lessons during the festive season.
The possibilities are truly endless when it comes to filling your DIY advent calendar! Our mini house design provides ample room for a wonderful variety of items, ensuring each day is a unique and exciting discovery for your children.
Tips for Creating Your Own Advent Calendar
Crafting a DIY advent calendar is a rewarding experience, but a little planning and thoughtful consideration can make the process even smoother and more enjoyable. Here are some key tips to ensure your homemade advent calendar is a resounding success:
Plan Ahead of Time:
The holiday season can be bustling, so make sure you start planning for your advent calendar well in advance. This means more than just a week or two before December 1st. Begin thinking about your theme, colors, and potential fillers in late October or early November. This foresight will give you ample time to:
- Gather All Supplies: Avoid last-minute rushes to hardware or craft stores. Ensure you have all the cardboard houses, paints, brushes, and number stickers ready.
- Curate Your Fillers: Sourcing 24 unique and exciting goodies can take time. Start collecting small toys, treats, and activity ideas early. Consider bulk purchases for small items to save money.
- Allocate Crafting Time: Schedule dedicated time for painting and assembling the calendar. If you plan to involve your children, factor in extra time for their creative contributions (and potential mess!).
Find One That Fits With Your Family:
An advent calendar should be a joyful reflection of your family’s unique spirit and beliefs. When choosing your theme and contents, consider what resonates most with everyone:
- Personal Beliefs: Decide if you prefer a religious-themed calendar that includes scripture verses or reflections for each day, or a more secular, festive Christmas-themed calendar focused on holiday cheer and activities.
- Age-Appropriateness: Tailor the size of the boxes and the complexity of the contents to your children’s ages. Toddlers might enjoy simple snacks and chunky toys, while older children might appreciate more intricate puzzles, craft supplies, or activity challenges.
- Family Traditions: Incorporate elements that are already cherished family traditions, such as specific holiday treats or references to beloved Christmas stories. This adds a personal touch that makes the calendar even more special.
Involve the Children:
The process of creating the advent calendar can be as magical as opening it each day. Inviting your children to participate fosters excitement and a sense of ownership:
- Decorating: Let them choose paint colors, apply stickers, or even add their own drawings to the houses. Supervise younger children with paint, but encourage their creative freedom.
- Choosing Fillers: Have them help brainstorm ideas for what to put inside. This makes the surprises even more tailored to their desires.
- Learning and Anticipating: Explaining the concept of the countdown and the meaning behind the advent tradition can enhance their understanding and appreciation.
Creative Display Ideas:
How you display your advent calendar can turn it into a beautiful piece of holiday decor:
- Temporary Shelves: As suggested, temporary floating shelves are a practical and stylish solution for a neat arrangement, especially in smaller spaces.
- Mantlepiece Marvel: Arrange the houses along a fireplace mantel, interspersing them with garlands, fairy lights, and other festive decor.
- Bookshelf Charm: Tuck the houses onto a bookshelf, perhaps with small Christmas figurines or tiny trees.
- Tabletop Centerpiece: Create a charming village scene on a console table or dining buffet, complete with fake snow and miniature trees.
- Suspended Delight: Consider hanging the houses from a branch or a decorative ladder using twine for a whimsical, rustic look.
By keeping these tips in mind, your DIY advent calendar project will not only be a success but also a cherished part of your family’s holiday preparations, creating lasting memories year after year.
More Christmas DIYs and Ideas
We absolutely love the holiday season, and nothing brings us more joy than diving into creative DIY projects and embracing festive traditions. Do you have any favorite holiday traditions or unique advent calendar ideas that you cherish? We’d love to hear about them in the comments below! It’s always inspiring to see how different families celebrate and make the holidays special. Sharing your ideas helps us all discover new ways to spread cheer!
In the meantime, if you’re looking for more ways to infuse your home with handmade charm and festive spirit, you can find a wealth of my favorite Christmas DIYs and inspiring ideas right here:
- Our DIY colorful front door Christmas decor – make a grand entrance this holiday season!
- An easy Christmas scavenger hunt game – perfect for keeping the little ones entertained and engaged.
- DIY Jumbo garland outdoor Christmas decor – create eye-catching, oversized decorations for your home’s exterior.
- Charming mini wooden Christmas trees – a versatile craft for decorating any nook or cranny.
- Creative bottle brush tree Christmas centerpiece ideas – elevate your dining table with these whimsical arrangements.
- Our stunning giant pom pom Christmas tree decor – a soft, playful, and wonderfully unique twist on traditional tree decorations.
From crafting cozy corners to making your front porch sparkle, there’s something here to inspire every holiday enthusiast. Happy crafting and happy holidays!
DIY Kids Advent Calendar: Craft Instructions
This colorful village of mini houses makes for a great reusable kids advent calendar that’s easy to make and store, bringing daily joy to your Christmas countdown!
45 mins
DIY
Holidays
Equipment
- Thick paintbrush for the base color of the houses
- Thin paintbrush for the stripes and details
Materials
- 24 mini cardboard houses
- Craft paint in the colors of your choice
- Gold number stickers (1-24)
- Fake snow optional, for the roofs
- Goodies to put inside each house
Instructions
- Paint the box bases and lids all white (or your chosen base color). While the paint on the roofs is still wet, sprinkle fake snow on top to act as glue and hold the snow in place. Allow to dry completely.
- Once the base color and snow (if used) are fully dried, paint thin stripes or other desired patterns on each house in varying colors. Let each color dry thoroughly before adding another.
- Affix gold number stickers (1 through 24) on the fronts of the houses to represent each day leading up to Christmas.
- Now, fill each mini house with your chosen goodies, small treats, or activity notes, and arrange your beautiful advent calendar for display! Enjoy the daily countdown!
$40
kids advent calendar, DIY advent calendar, Christmas craft, holiday countdown