
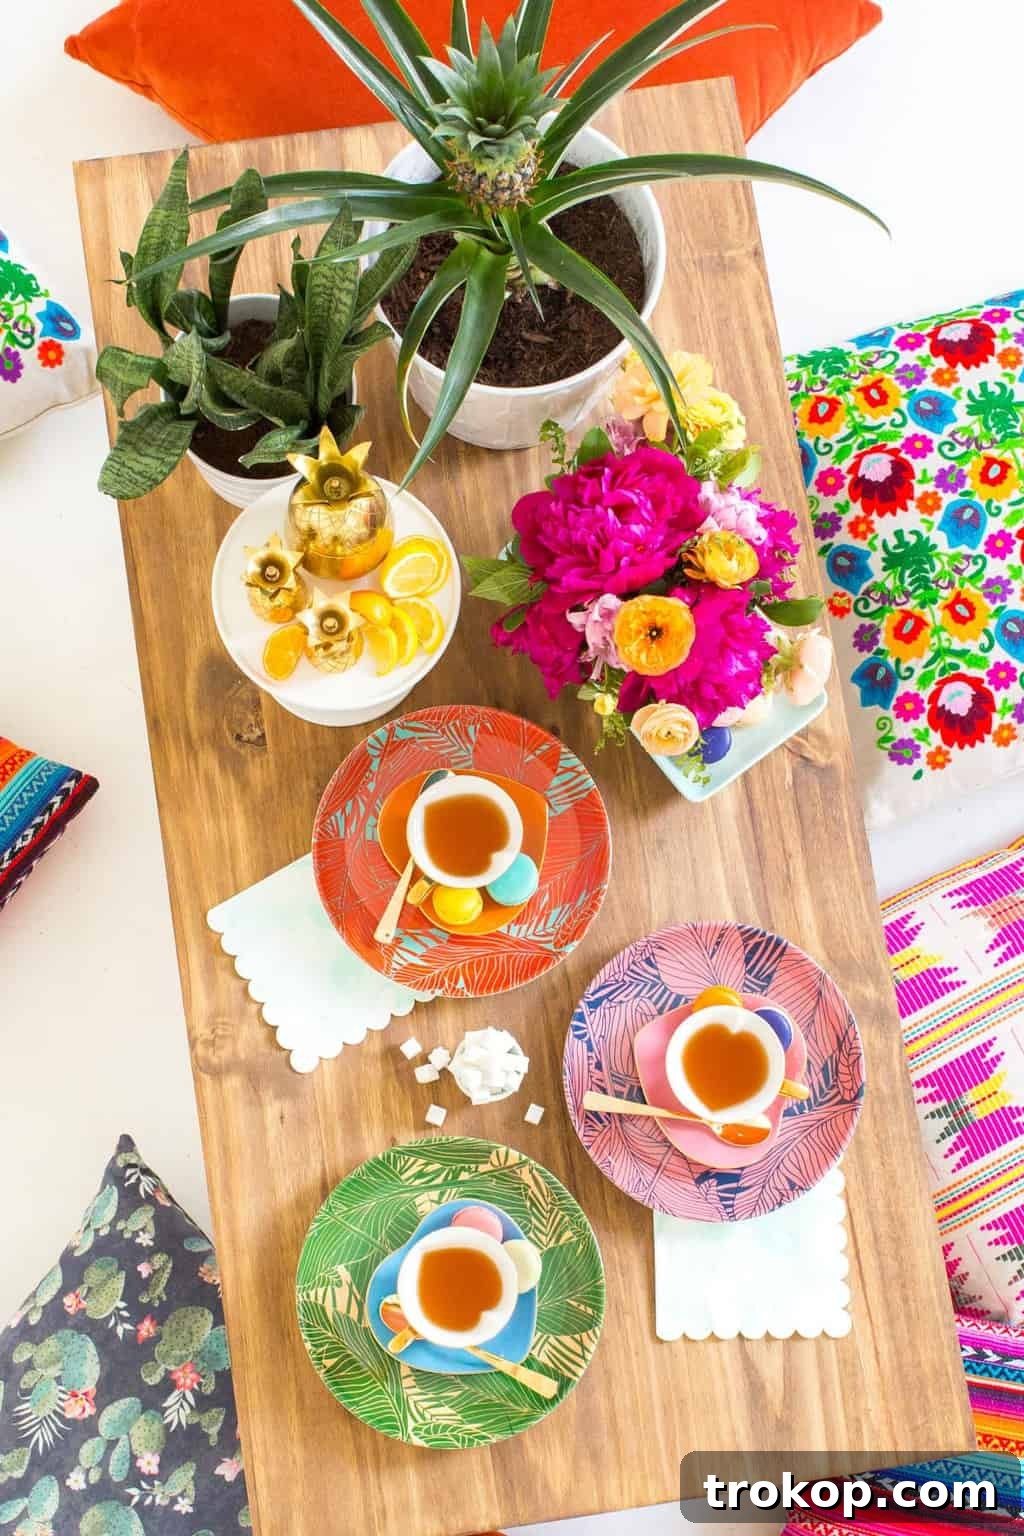
Craft Your Perfect Low-Profile DIY Floor Table for Stylish Seating
Embrace a unique and inviting atmosphere in your home with a super easy-to-build DIY floor table. This project offers a perfectly simple yet highly functional solution for floor seating, eliminating the need for traditional chairs and opening up your living space for more intimate gatherings and relaxed dining experiences. Whether you’re planning a cozy dinner party, a casual game night, or simply seeking a versatile piece of furniture, this custom floor table is designed to impress with minimal effort.
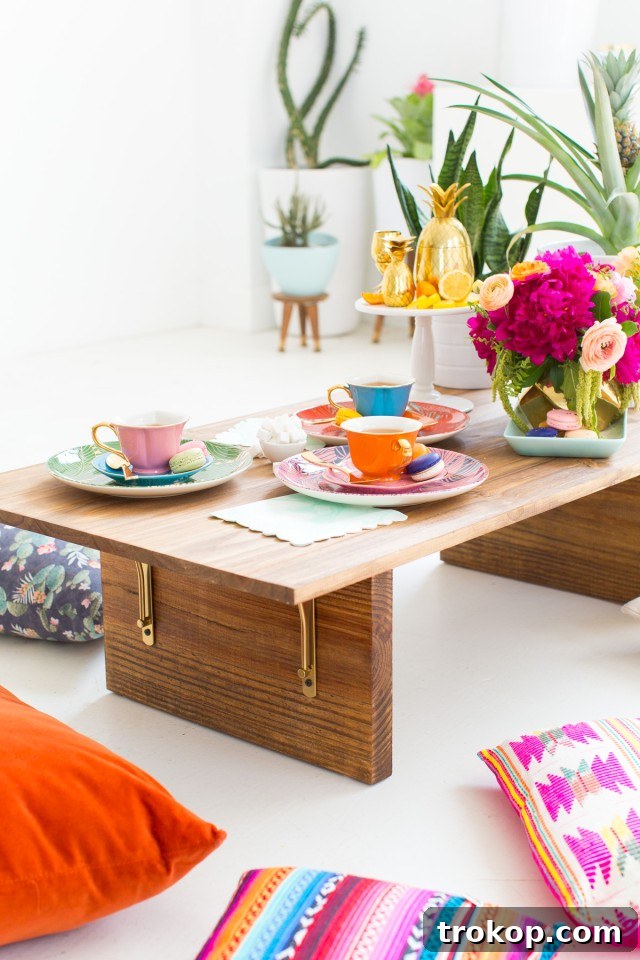
Ready to host a dinner party that stands out? We’re always on the lookout for unique entertaining ideas, and this DIY floor table delivers a surprisingly simple approach to creating a stylish low dining setup. The best part is, you won’t need advanced carpentry skills. Your local home improvement store can handle the heavy lifting, often providing custom wood cuts to your exact specifications. This makes the project accessible for beginners and experienced DIYers alike, saving you time and ensuring precision.
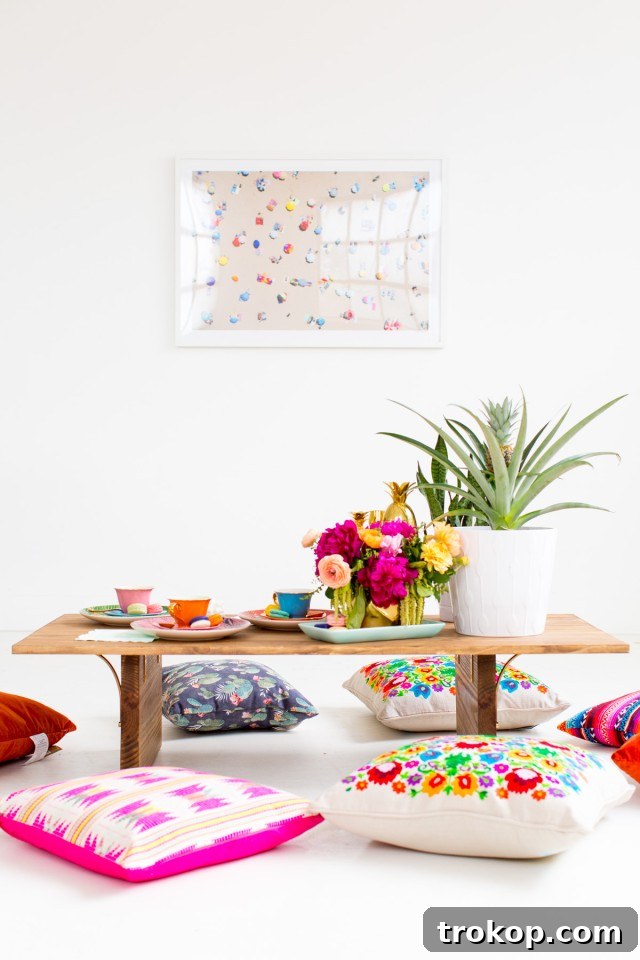
For a truly captivating ambiance, consider incorporating a bohemian aesthetic. Picture your low dining table adorned with quirky dinnerware pieces and surrounded by an assortment of mismatched pillows and plush cushions. The unexpected color combinations and varied textures create a warm, inviting scene perfect for cool-weather al fresco dinners or cozy indoor gatherings. Imagine an evening filled with laughter, delicious food, and the comfort of DIY knot pillows and soft blankets, all centered around your handmade low table.
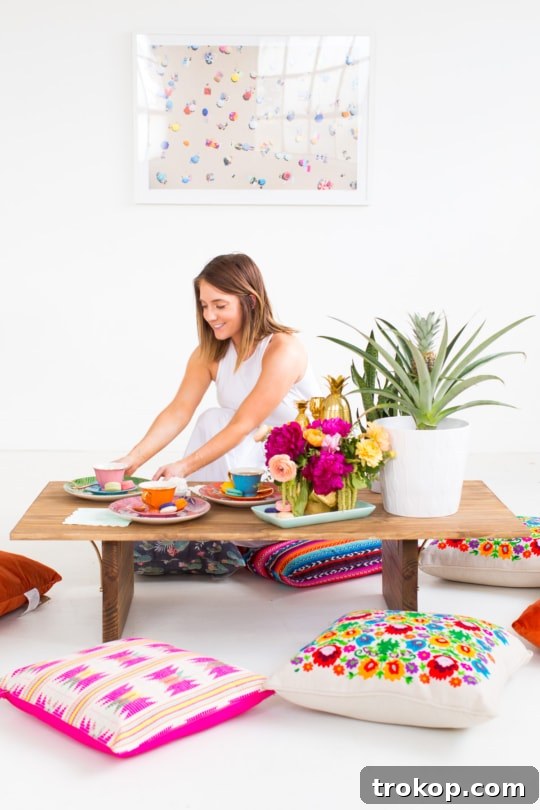
We believe a good DIY project doesn’t have to be complicated. In our experience, the easier the project, the better, especially when you’re juggling it with planning a full dinner menu! Rest assured, this customizable DIY dining table can be whipped up in no time, allowing you to focus on the fun parts of entertaining. Its minimalist design makes it incredibly versatile, fitting seamlessly into various decor styles while providing a practical and comfortable dining solution.

Why Choose a DIY Floor Table?
Opting for a DIY floor table offers a multitude of benefits, transforming your living space into a flexible and inviting haven. Unlike conventional dining setups, a low-profile table provides a unique aesthetic that encourages a more relaxed and communal dining experience. It’s an excellent way to maximize space, especially in smaller apartments or multi-functional rooms, as it can easily be moved or repurposed. Beyond just dining, this type of table can serve as a casual coffee table, a creative workspace, or a central point for board games and artistic projects.
Customization is at the heart of any DIY project, and this floor table is no exception. You have complete control over the wood finish, the color of the brackets, and the overall dimensions, allowing you to create a piece that perfectly complements your existing decor. Whether your style is rustic, modern, minimalist, or bohemian, a DIY floor table can be tailored to fit right in. Furthermore, the inherent charm of a handmade item adds a personal touch to your home, making it feel truly unique and lived-in. It’s a statement piece that speaks volumes about your creativity and love for bespoke home solutions.
Essential Materials and Tools for Your DIY Floor Table
Gathering the right materials and tools is the first step to a successful DIY project. This floor table is designed for simplicity, making it accessible even if your toolbox is modest. Here’s what you’ll need to create your functional and stylish low dining table:
- 24″ x 48″ Finished Wood (1 piece): Look for pre-cut and pre-sanded wood in the finished lumber section of your local home improvement store. Plywood is an excellent choice for keeping costs down while still offering a durable surface. Ensure the edges are smooth to prevent splinters or scratches.
- 18″ x 2″ x 12″ Wood (2 pieces): These will form the legs of your table. If you purchase a longer piece, many home improvement stores offer cutting services, which can save you time and ensure precise, even cuts.
- Wood Stain and Brush: We recommend a half-pint of Minwax Interior Stain in Ebony for a rich, sophisticated look. Choose a stain that includes polyurethane for added protection and durability, making your table water-resistant and easy to clean.
- Arched Brackets (2 sets of 2, totaling 4 brackets): These provide structural support and add a touch of decorative flair.
- Metallic Gold Spray Paint (Optional): If you desire a touch of glam, spray paint your brackets a metallic gold. This small detail can significantly elevate the table’s aesthetic.
- Heavy Duty Construction Adhesive Glue: A strong adhesive, such as liquid nails, is crucial for securely attaching the table legs to the tabletop, ensuring stability.
- Drill and Screws: Essential for fastening the brackets. Ensure you have screws appropriate for your wood thickness.
- Ruler or Measuring Tape: Accuracy in measurement is key for proper alignment and a professional finish.
- Felt Pads (4 pieces): Apply these to the bottom of your table legs to protect your floors and allow for easy movement of the table.
- Sandpaper (Optional): If using unfinished wood or if your custom cuts leave rough edges, sandpaper is essential for smoothing surfaces and rounding sharp corners.
- 4 Right Angle 90-Degree Brackets with Screws: These will reinforce the leg attachment, providing extra stability.
Preparing Your Wood for the Perfect Finish
If you’re having your wood custom cut at the hardware store, a crucial preparatory step is to sand down all edges. Focus on rounding the corners and smoothing any rough surfaces. This not only enhances the aesthetic appeal but also ensures safety, preventing anyone from getting scratched or bumped when interacting with the table or resting their legs underneath. A smooth finish also allows for better stain absorption and a more polished final look.
Step-by-Step Guide: Crafting Your Stylish Floor Seating Table
1. Staining and Protecting Your Wood
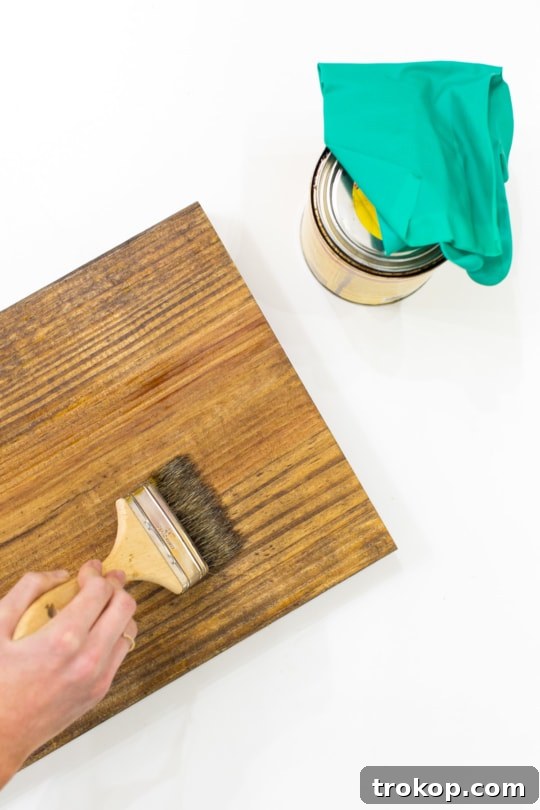
Once your wood pieces are prepped and smoothed, it’s time for staining. Apply your chosen wood stain, ideally one that contains polyurethane. The polyurethane component is vital as it provides a protective coating, making the wood water-resistant and significantly easier to wipe clean, which is essential for a dining surface. Apply the stain evenly with a brush, following the grain of the wood. Allow ample time for the stain to dry completely according to the manufacturer’s instructions, ensuring a durable and beautiful finish before proceeding.
2. Customizing Your Brackets
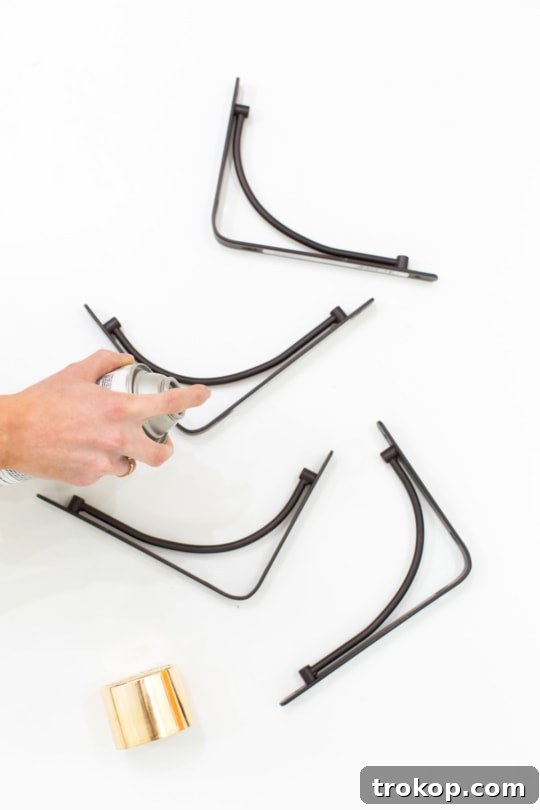
While the wood stain is drying, you can begin to customize your brackets. If you’ve opted for a glamorous touch, spray paint your arched brackets with metallic gold paint. Ensure you work in a well-ventilated area and apply thin, even coats for a smooth, professional finish. Allow the spray paint to dry completely, which typically takes a few hours, before handling them or moving to the next step. This small detail can add a significant “pop” of elegance to your finished table.
3. Precise Measurement and Placement
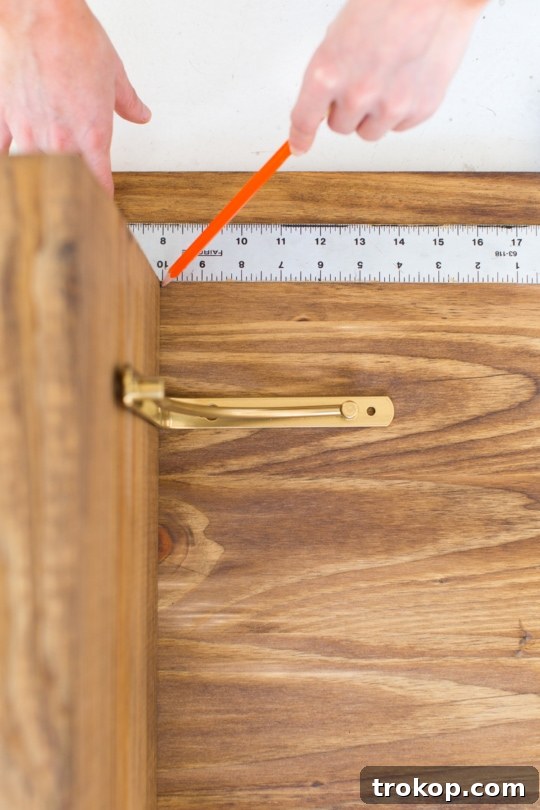
Now, let’s return to your beautiful stained wooden pieces. Carefully measure and mark the underside of the tabletop where the legs will be positioned. This placement should consider the space needed for your brackets. For instance, you might mark 10 inches in from each end of the tabletop, indicating where the leg will meet the bracket. Then, mark 3 inches on either side of that central point to ensure the leg is perfectly centered on your designated measurement. This precision is crucial for a stable and aesthetically balanced table.
4. Preparing for Bracket Installation
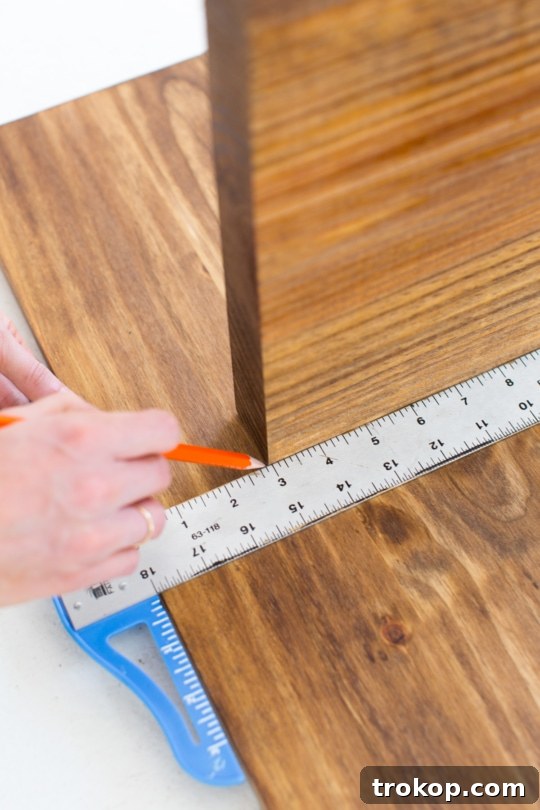
Next, focus on the legs. Measure 3 inches in from each end of the leg, specifically on the side closest to the outside edge. These marks indicate where your brackets will be drilled for maximum support and proper alignment. Once all measurements are complete, temporarily place the legs in their marked positions on the tabletop and trace their outline. You’ll remove them momentarily to apply the adhesive, and the tracing will guide you in placing them back precisely.
5. Securely Attaching the Legs
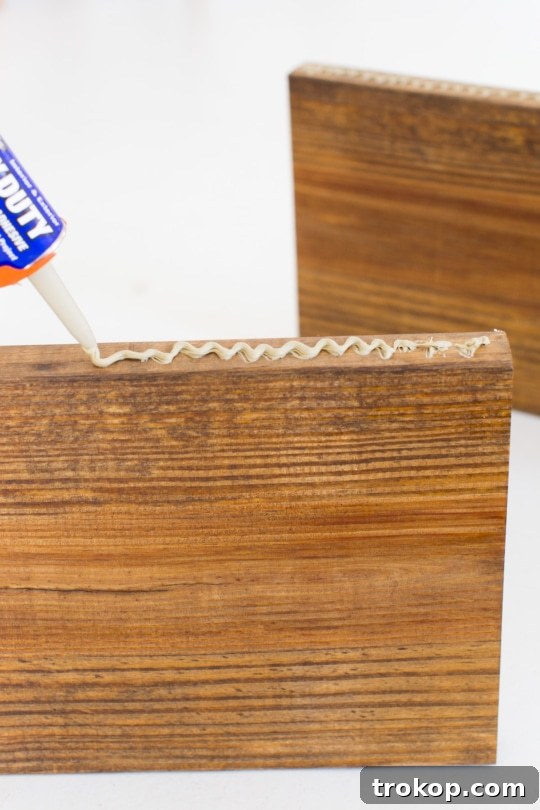
Now, apply a generous but controlled amount of heavy-duty construction adhesive, such as liquid nails, onto one edge of each leg. Be careful not to apply too much, as you want to avoid overflow once the leg is pressed firmly onto the tabletop. Carefully align each leg with its traced outline on the tabletop and press down firmly. Allow the adhesive to set completely, as per the product instructions, before installing the brackets. This curing time ensures a strong bond, providing a stable foundation for your table.
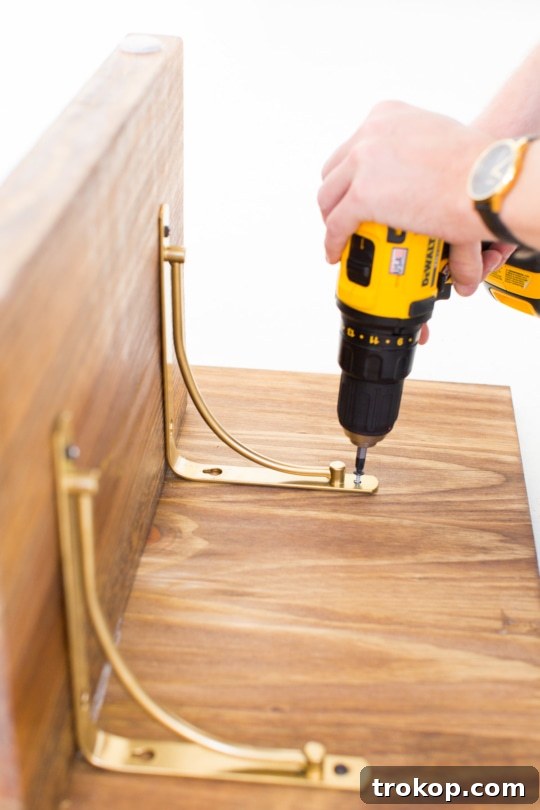
6. Final Touches for Stability and Mobility
While the adhesive is setting, take the opportunity to apply felt pads to the bottom of the table legs. These small but important additions will protect your floors from scratches and allow you to easily maneuver your finished table without damaging surfaces. Once the adhesive has fully cured, position your decorative arched brackets on the measurement marks on the tabletop and screw them securely into place. Starting with the tabletop connection often makes it easier to then drill into the legs accurately.
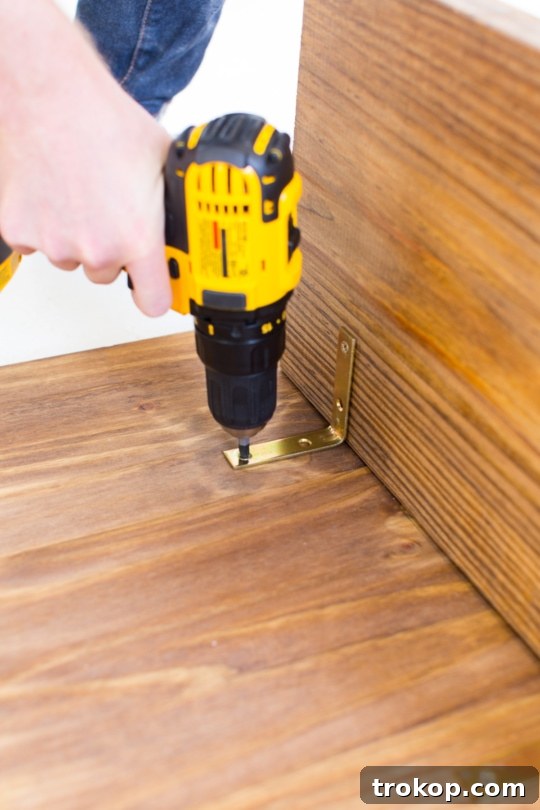
To further enhance the table’s stability, once all the arched brackets are screwed into position, install the four 90-degree angle brackets. Place these on the opposite side of the legs, aligning them with each curved bracket. Screw them firmly into place, creating a robust and secure connection between the tabletop and the legs. This dual bracket system ensures your DIY floor table is not only beautiful but also exceptionally sturdy for all your entertaining needs.
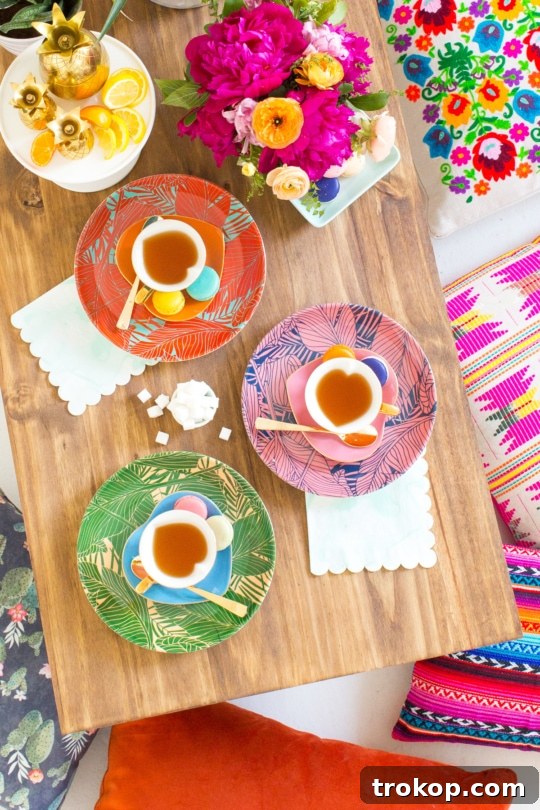
Elevate Your Floor Dining Experience: Styling and Beyond
While we might not always lean towards a full bohemian aesthetic in our styling, we consistently appreciate how it infuses a space with a warm, well-loved, and lived-in feel. A low dining table creates an inherently more inviting and relaxed atmosphere than traditional setups or even the bygone era of bean bag chair floor seating. To truly enhance the comfort and appeal of your new floor table, invest in high-quality, plush floor cushions. These will make a significant difference in your guests’ comfort and overall enjoyment.
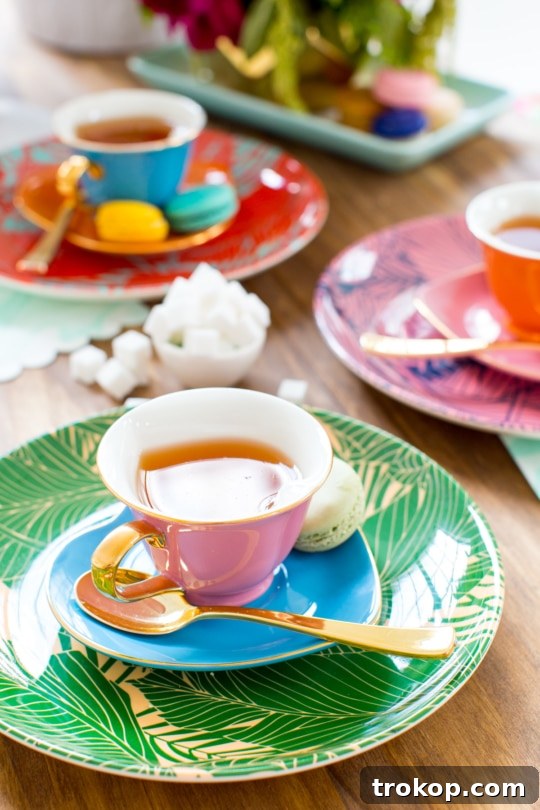
Beyond cushions, styling your low table offers endless creative possibilities. For a bohemian-inspired setting, consider vibrant teacups, a unique gold pineapple tumbler, a mini shot glass set, and palm frond patterned plates. Layer a plethora of colorful floor pillows in various textures and patterns for an eclectic look. Don’t forget ambient lighting, such as string lights or decorative lanterns, to further enhance the mood. This versatile DIY table can also be repurposed as a charming floor desk for creative work or a unique coffee table, adapting to your evolving needs.

Complementary Culinary Delights for Your Floor Table Gatherings
A beautifully crafted floor table sets the stage for memorable dining, and the right menu makes the experience complete. When planning your dinner party, consider dishes that are easy to share and enjoy in a low-seating environment. Finger foods, tapas-style plates, and communal platters are excellent choices, encouraging interaction and a relaxed dining pace. Think about vibrant salads, artisan bread boards, or delicious skewers that are simple to serve and consume without the need for extensive cutlery.
Should you be seeking a few effortless recipe pairing ideas for your DIY tabletop, we’ve got you covered with some delightful suggestions that cater to various tastes and dietary preferences:
- For those minding their carb intake, try our zero-carb bread recipe, freeing up calories for a refreshing Aperol spritz cocktail, delightful gluten-free donuts, or the classic comfort of snickerdoodle cookies.
- Alternatively, if you prefer a more casual affair or a quick snack, skip the elaborate dinner and whip up our easy popcorn recipes or a nostalgic root beer float recipe. These lighter options are perfect for movie nights or informal gatherings around your new floor table.
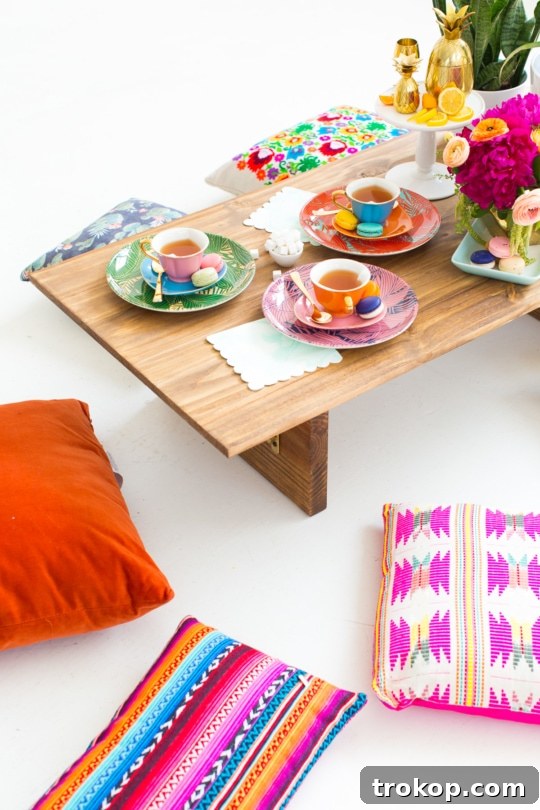
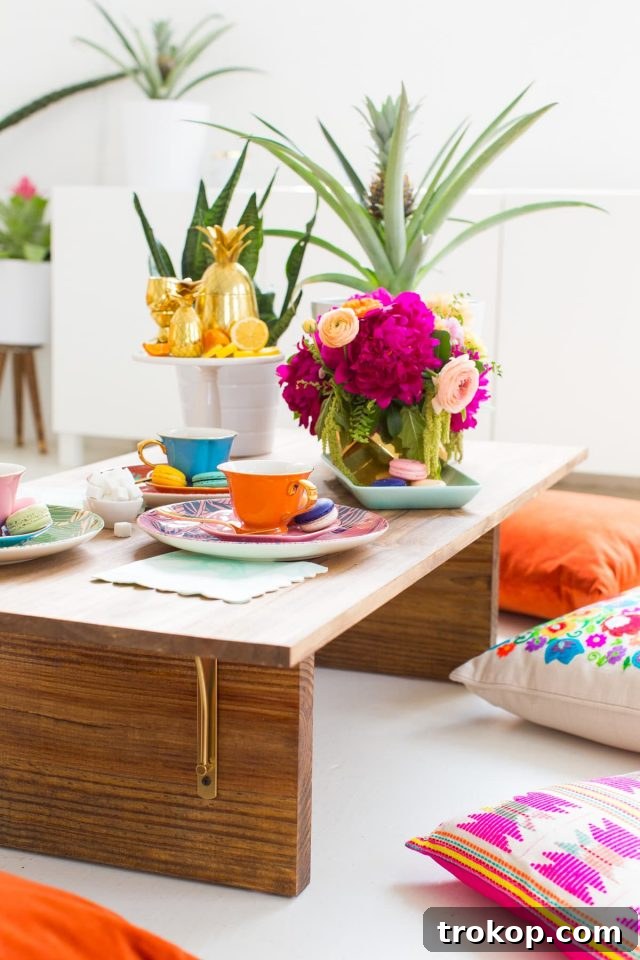
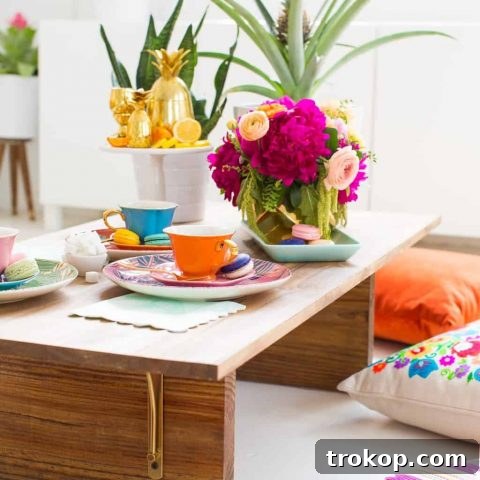
While this floor table is easily customizable in terms of wood finish and color combinations, we highly recommend sticking with the elegant gold brackets. This subtle metallic accent adds a sophisticated pop of glam, beautifully contrasting with various wood tones and decor styles, making your table truly shine as a centerpiece for your floor seating arrangement.
More Inspiring DIY Projects to Spark Your Creativity
Creating this DIY floor table is quite simple, isn’t it? With a bit of painting, gluing, and careful measuring, you’re well on your way to a unique piece of furniture. We’d love to hear if you try out this DIY floor table tutorial as a fresh twist on the classic dining table, offering a distinctive floor seating idea for your home. For those eager to continue their DIY journey, here are a few more of our favorite projects to inspire your next creative endeavor:
- Kids Play Table: An Easy DIY Kids Activity Table
- Abstract DIY Modern Low Bench
- Handmade DIY Gift Ideas
- How to make an Ikea floating cabinet from a DIY Ikea Credenza
- How to make a DIY Ikea TV Stand Hack
DIY Floor Table
2 hours
DIY
Entertaining Decor
Equipment
-
Ruler or measuring tape
-
Drill with screws
-
Sandpaper optional for unfinished wood
-
Brush
Materials
- 1 24″x48″ finished wood pre-cut and pre-sanded in the finished lumber section
- 2 18″x 2″x12″ wood if you buy one long piece, the home improvement store will cut it down to size for you
- Wood stain
- Metallic gold spray paint optional for gold brackets
- Heavy duty construction adhesive glue
- Felt pads for table legs
- 4 right angle 90 degree brackets with screws
Instructions
-
If you’re having the wood custom cut for you at the hardware store, be sure to sand down the edges to be rounded so that anyone bumping into the table and resting their legs underneath won’t get scratched.
-
Once the wood is prepped and ready, use a wood stain with polyurethane to stain the wood the color of your choice.
The polyurethane will help coat the wood to make it water-resistant and easier to wipe clean.
Let it dry completely.
-
While that’s drying, spray paint the brackets gold.
Let those dry completely.
-
Going back to the wooden pieces, measure and mark from each end of the tabletop where you want the legs to rest underneath based on how much space is needed for your brackets.
In our case, we marked 10 inches from each end of the table to where the leg would meet the bracket, and 3 inches on either side of the leg to be centered.
-
Now measure 3 inches in from each end of the leg closest to the outside edge on both ends.
This is where the brackets will be drilled in.
-
Once everything is measured, trace the entire leg in place because you’re going to be removing it to apply the glue and then putting it back in place.
-
Squeeze a generous amount of glue onto one edge of the legs, making sure that it’s not so much that it will overflow on either edge once it’s pressed down onto the table.
Let it set completely before installing the brackets on either edge.
-
While you’re waiting, apply felt pads to the bottom of the table legs for easy maneuvering when it’s complete.
-
Once set, place the brackets on your measurement marks, and screw to the tabletop first.
This will make drilling into the legs easier after that.
-
When all the brackets are screwed in place, place the four 90 degree angle brackets on the opposite side of the legs lining up with each curved bracket, and screw those in place.

28 Decorative Wall Mirrors You’ll Wish You Bought Sooner
Looking for the perfect wall mirror? Explore our roundup of…
Continue Reading28 Decorative Wall Mirrors You’ll Wish You Bought Sooner
37 Best Beach Toys for Vacation Fun
Discover the best beach toys for kids, toddlers, and families…
Continue Reading37 Best Beach Toys for Vacation Fun
Your Guide to Hosting the Perfect Outdoor Movie Night
From DIY projectors to cozy seating arrangements, explore the best…
Continue ReadingYour Guide to Hosting the Perfect Outdoor Movie Night
33 Easy DIY Pumpkin Painting Ideas
Create festive and unique decorations with these pumpkin painting ideas…
Continue Reading33 Easy DIY Pumpkin Painting Ideas