
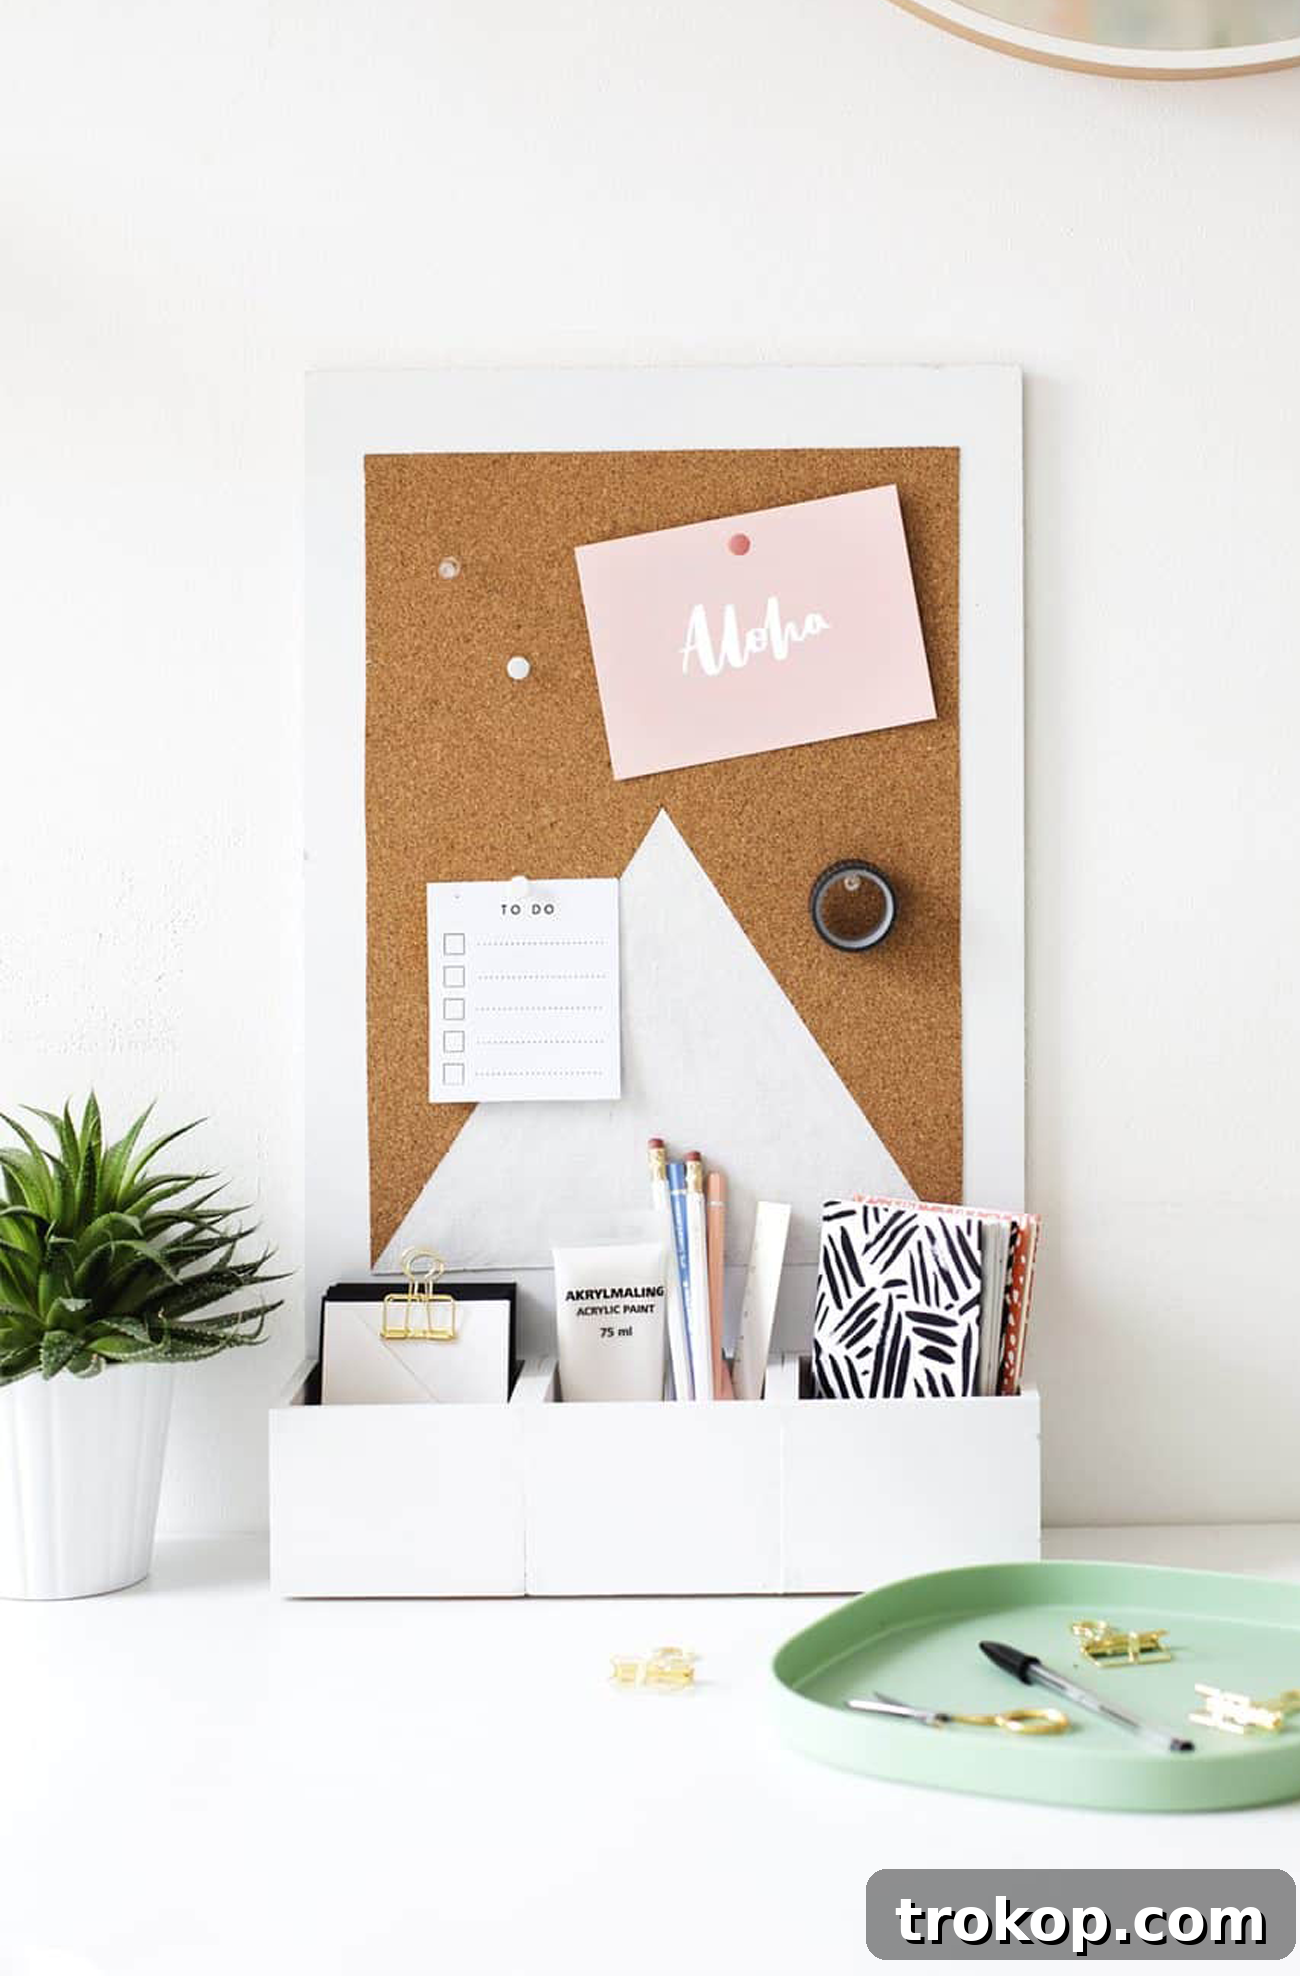
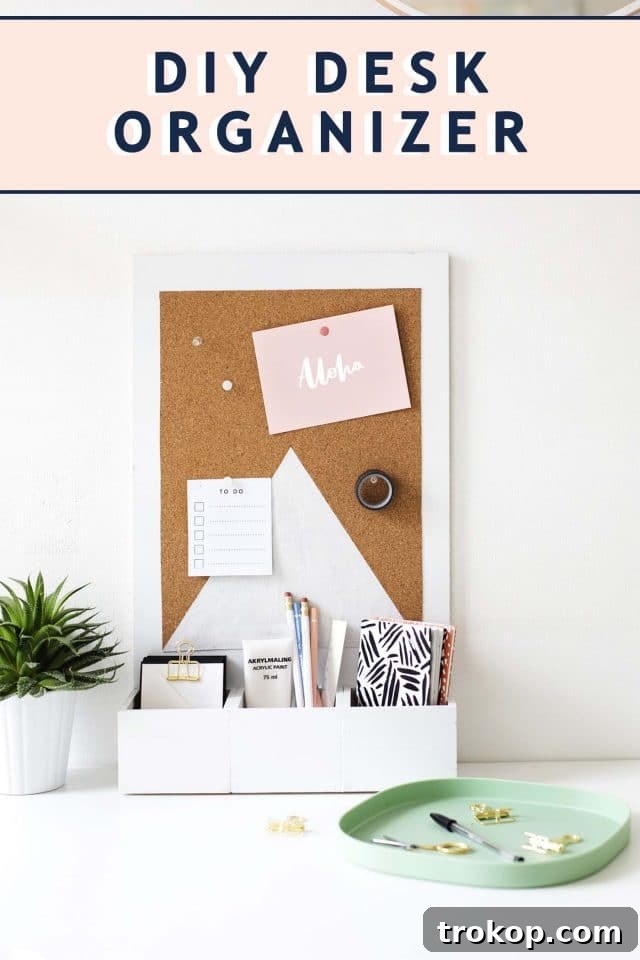
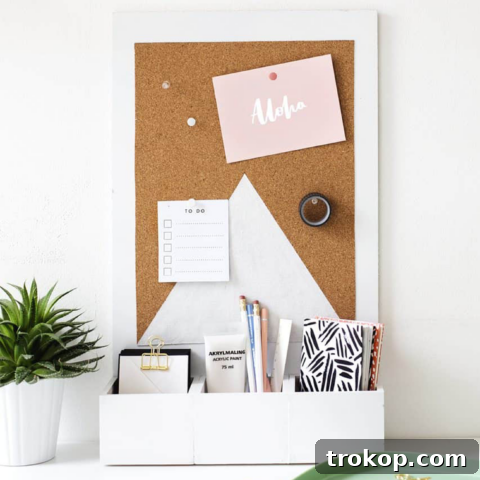
Transform your workspace into a haven of productivity and style with this incredibly easy and modern DIY desk organizer. Featuring a functional cork board, this project eliminates the need for hammers, nails, or drills, making it perfect for anyone looking to declutter and beautify their desk without complex tools or permanent fixtures. Keep your essential office supplies neatly stored and your important reminders visible, all while adding a chic, personalized touch to your home or professional office.
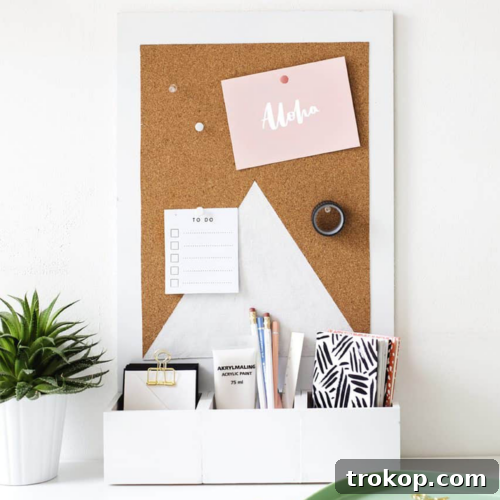
Whether you’re naturally meticulous or constantly aspiring to be more organized, we all understand the profound impact a tidy desk has on our focus and peace of mind. A clear workspace often translates to a clear mind, fostering enhanced creativity and productivity throughout your day. For many, maintaining this ideal state can be a challenge amidst the daily demands of work and life. That’s where smart organization solutions come into play, helping us keep our professional lives running smoothly.
As a seasoned DIY enthusiast, I, Teri, confess that perfect organization is a continuous journey rather than a constant state for me. However, I deeply value the concept of everything having its designated place. My workflow significantly improves when my essentials are at hand and my to-do lists are prominently displayed, guiding my next steps. It seems a well-ordered environment simplifies my approach to tasks, proving that sometimes, simple solutions yield the greatest impact on efficiency.
This DIY project is remarkably straightforward, belying its sophisticated appearance. It offers an elegant solution for corralling office supplies, complete with a versatile pinboard. Imagine a dedicated space where you can tack important lists, expense receipts, critical reminders, or even cherished sources of daily inspiration. This organizer ensures all these elements are not only kept in check but are also presented in a way that enhances your desk aesthetic.
One of the most appealing aspects of this desk organizer is its construction method: no hammers, no nails, and no drills required. This makes it an ideal project for DIY beginners or anyone who prefers a hassle-free crafting experience. Furthermore, its freestanding design means there’s no need to make holes in your walls, which is a significant advantage for renters or those who frequently rearrange their workspace. Its super easy assembly and versatile functionality ensure there’s no reason not to create one for yourself and enjoy a more organized, inspiring desk environment.
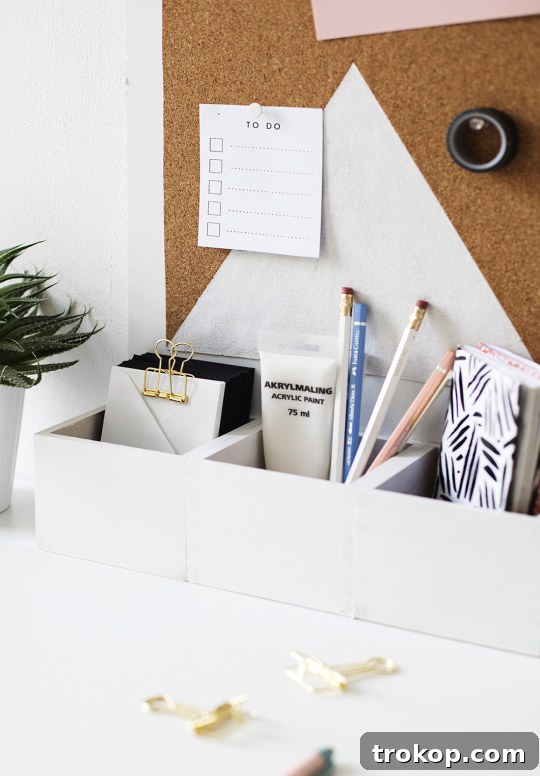
Table of Contents
Materials Needed
Gathering the right materials is the first step to a successful DIY project. For this desk organizer, we prioritize readily available and easy-to-work-with items. Here’s a comprehensive list to get you started:
- Wooden boxes — Choose between 1 to 3 boxes, ideally without lids or with lids easily removed. These will form the storage compartments of your organizer.
- MDF wood sheet — A 10mm thick MDF sheet is recommended for the main backing board. This thickness provides excellent stability. Be sure to have it cut to your desired dimensions at the hardware store.
- Self-adhesive cork sheet — Opt for a cork sheet that is 5mm thick or more to ensure pins hold securely. Self-adhesive makes application much simpler, but regular cork can be used with wood glue.
- Scalpel/X-acto Knife — Essential for precise cutting of the cork sheet.
- Ruler — A sturdy ruler is crucial for accurate measurements and straight cuts.
- Painter’s tape or washi tape — Used for creating clean lines when painting your cork board design.
- Spare paper — To mask off areas you don’t want to paint on the cork board.
- White spray paint — To give your wooden components a clean, modern finish. You can choose other colors if you prefer!
- Strong wood glue — For securely attaching the wooden boxes to each other and to the MDF backing board.
Crafting Your Bulletin Board for Ultimate Office Organization
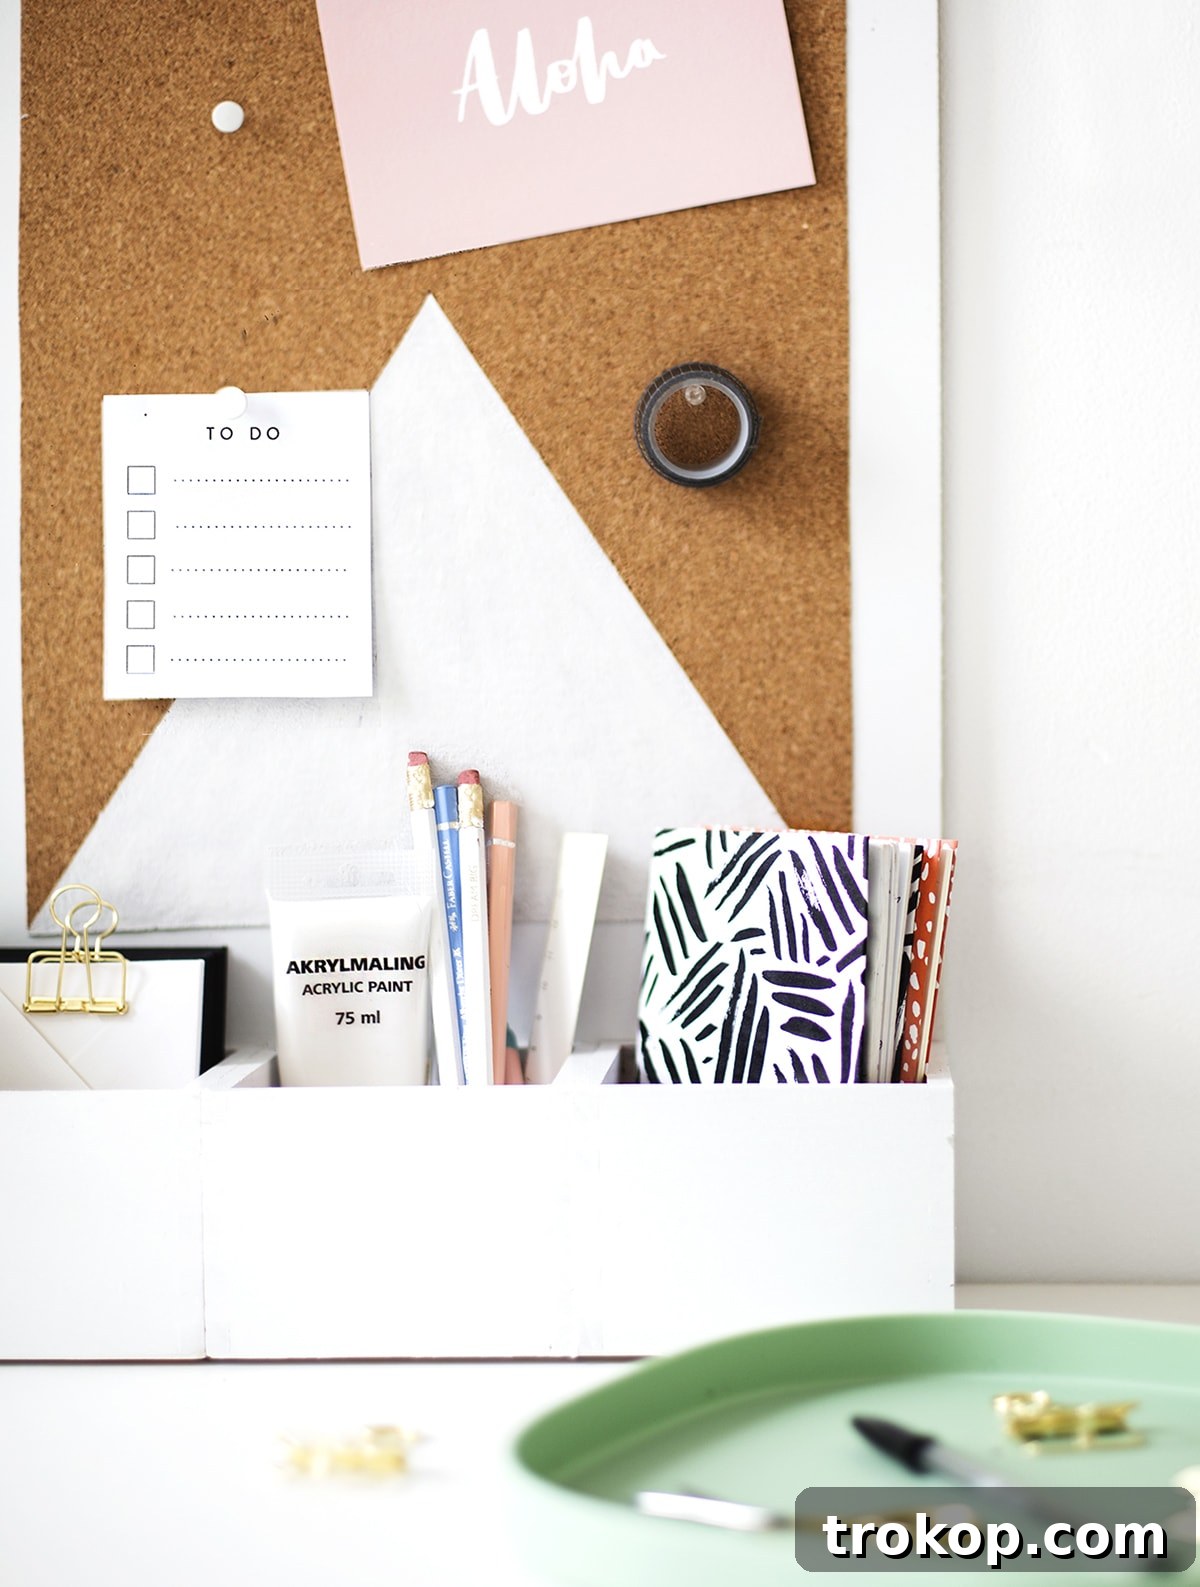
The foundation of your DIY desk organizer’s bulletin board is a sturdy MDF wood sheet. Selecting the correct dimensions and thickness is key to ensuring it can support your cork board and stand upright without wobbling. A thickness of 10mm or more is highly recommended for optimal stability, providing a robust base for all your pinned notes and inspirations.
Begin by carefully measuring the desired height for your backing board. Next, determine the total width by laying your chosen wooden boxes side-by-side. The combined width of all three boxes will dictate the exact width of your MDF sheet, ensuring a seamless fit when assembled. With these precise measurements in hand, a quick trip to your local commercial hardware store is in order. Most hardware stores offer a convenient wood cutting service, where you can purchase your MDF sheet and have it trimmed to your exact specifications, saving you the effort and specialized tools of cutting at home.
Similarly, your local hardware store might also provide custom-cut cork board. If not, self-adhesive cork rolls are readily available online and offer an incredibly convenient application. Should you opt for a non-adhesive cork sheet, simply use a strong wood glue to securely attach the cork to your MDF wood sheet. Ensure even application and firm pressure for a lasting bond.
Step-by-Step Guide to Making a DIY Desk Organizer
Creating your stylish and functional DIY desk organizer is simpler than you might think. Follow these detailed steps to bring your vision to life:
1 — Prepare and Paint Your Wooden Components: Begin the transformation of your wooden elements by applying white spray paint to both the MDF wood sheet and all your wooden boxes. To ensure a smooth, professional finish, prepare your workspace in a well-ventilated area, ideally outdoors or in a garage. Lay down a protective covering like old newspapers or a drop cloth. Apply the spray paint in several light, even coats rather than one thick layer. This technique prevents drips and streaks and ensures consistent coverage. Allow each coat to dry completely, typically 15-30 minutes, before applying the next. Patience here is key to achieving that pristine, modern look.
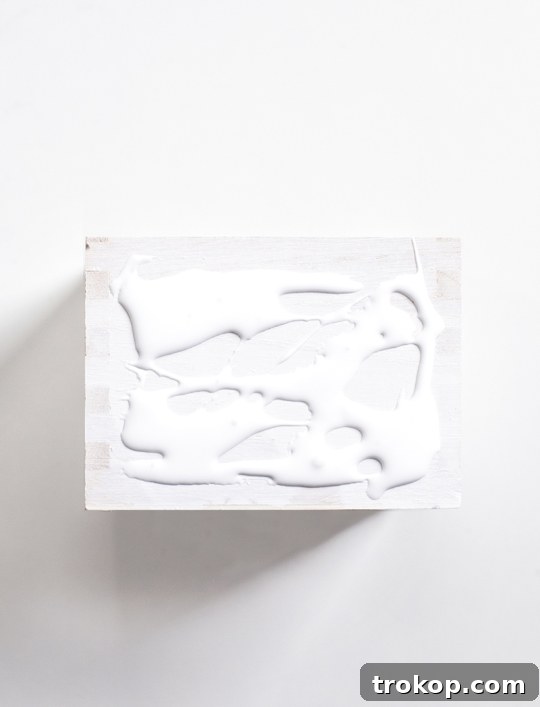
2 — Assemble the Wooden Boxes: Once your painted wood and boxes are thoroughly dry to the touch, it’s time to join the storage compartments. Apply a generous bead of strong wood glue along the sides of the boxes where they will meet. Be mindful not to apply the glue too close to the edges to avoid visible seepage when pressed together. Arrange the three boxes side-by-side, ensuring their open ends face upwards. Gently press them together, applying consistent pressure for one to two minutes to initiate a strong bond. The exact number of boxes can be customized based on your storage needs and the width of your MDF sheet.
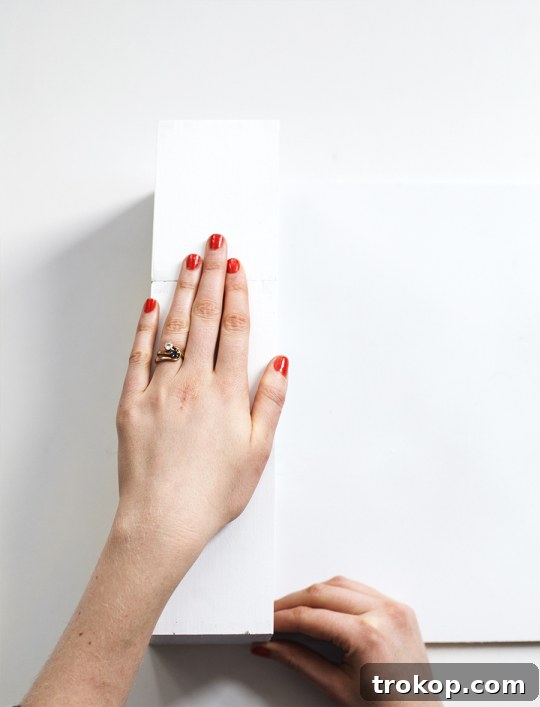
3 — Attach Boxes to the Backing Board: After approximately 15 minutes, the glue bonding the boxes will have started to set, providing a stable unit. Now, carefully apply wood glue to the back surface of the joined boxes and along the bottom edge of the MDF wood board. This dual application ensures maximum adhesion. Crucially, align the bottom edge of the boxes precisely with the bottom edge of the wood board. This alignment creates a perfect right angle, which is essential for your organizer to stand upright and stable on your desk. Apply firm pressure for another minute, then leave the entire assembly to dry undisturbed, ideally overnight, to allow the glue to fully cure and create a lasting, robust structure.
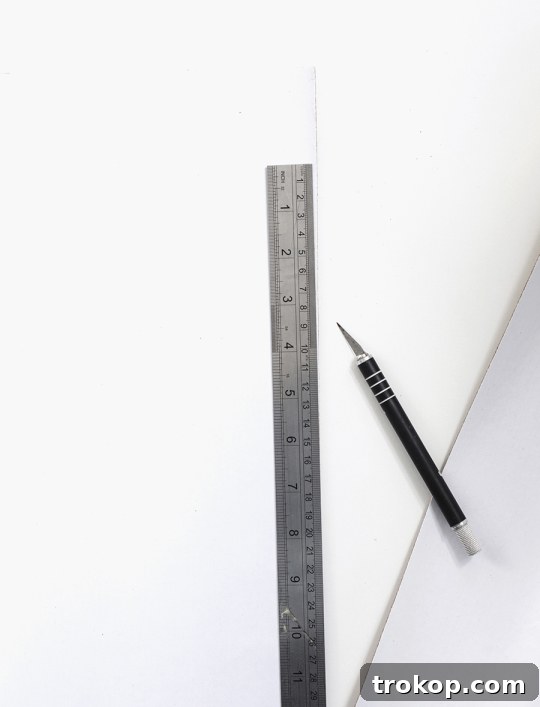
4 — Measure and Cut Your Cork Board: By this stage, your desk organizer’s structure is complete, revealing the perfect space for your pin board. Take your ruler and meticulously measure the exact dimensions required for your cork section to neatly fill this area. For a professional and aesthetically pleasing finish, aim to leave a consistent white border of about an inch around the edges of the cork board. Once you have your precise measurements, carefully draw the shape onto the non-adhesive (peelable) side of your self-adhesive cork sheet. Using your scalpel or X-acto knife and a ruler for guidance, cut out the cork shape with utmost precision. Sharp blades ensure clean, crisp edges, which significantly contribute to the overall polished look of your organizer.
Personalizing Your Cork Board Design
Now for the fun part: adding a unique design to your cork board! This step allows you to infuse your personality and style into your desk organizer, making it truly one-of-a-kind. For this example, we’ll create a chic geometric triangle pattern, but feel free to experiment with any design that inspires you.
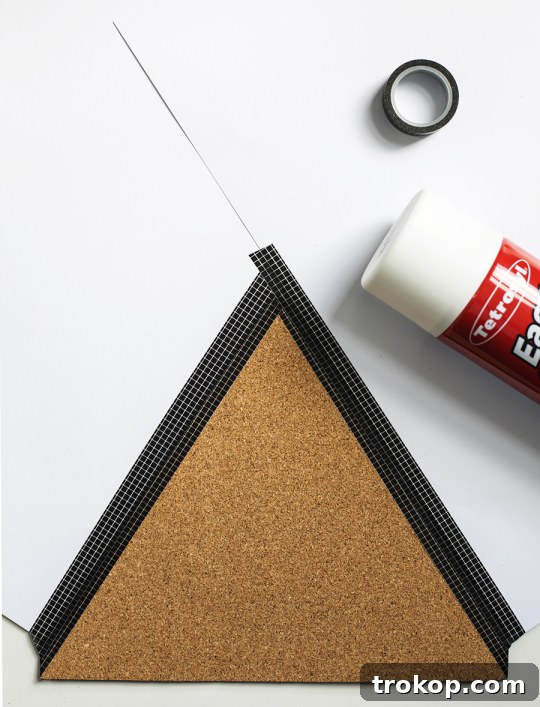
5 — Design and Paint Your Cork Board: On the front surface of your cut cork sheet, locate the horizontal center point. Use this as your guide to create a triangle shape. Place a strip of painter’s tape or washi tape on this center point and extend it diagonally down to one of the bottom corners of the cork. Repeat this process on the other side, creating a symmetrical triangle outline. The vertical position of your center point will determine the height of your triangle – placing it closer to the bottom will result in a shorter, broader triangle, while a higher point will yield a taller, more acute shape. Once your triangle is taped off, use spare paper to completely cover and mask the areas of the cork that you do not wish to paint. Ensure that only the desired triangle section is exposed. Now, with your white spray paint, apply a few light coats to this exposed area. Be aware that some spray paints may react differently with cork; if you notice the spray paint isn’t adhering perfectly, a few coats of regular white craft paint applied with a brush can achieve the same crisp finish. Allow the paint to dry thoroughly between coats and before proceeding.
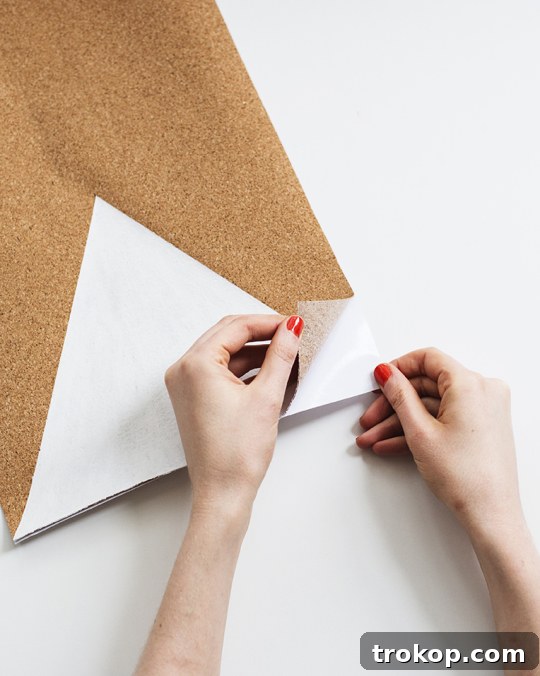
6 — Final Assembly of the Cork Board: Once the paint on your cork board is completely dry, carefully remove the painter’s tape and any spare paper masks. Peel away just a small corner of the backing paper from your self-adhesive cork sheet. Position this corner precisely onto the wood panel of your desk organizer, ensuring it’s perfectly aligned with your intended placement and the desired white border. Once the initial corner is adhered, slowly and steadily peel away the rest of the backing paper while simultaneously pressing the cork onto the wood. Work your way across the entire surface, smoothing out any air bubbles or wrinkles as you go. You can use a clean cloth or a credit card edge to achieve a perfectly smooth, bubble-free finish. And just like that, your beautifully personalized DIY desk organizer is complete and ready to bring order and inspiration to your workspace!
Creative Ways to Customize Your DIY Bulletin Board
The beauty of a DIY project lies in its potential for personalization. While our fresh and minimal triangle design offers a sophisticated touch that brightens any workspace, your bulletin board is a blank canvas for your creativity. Don’t be afraid to experiment with different colors, patterns, and functional additions to make it truly your own.
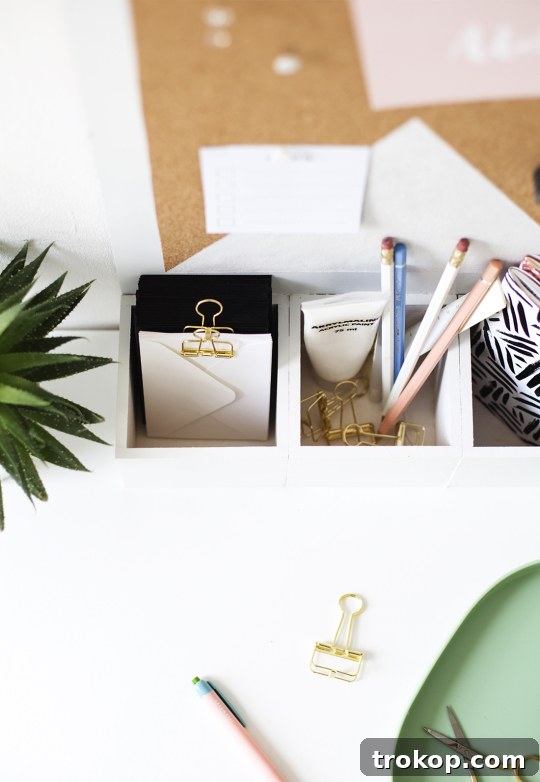
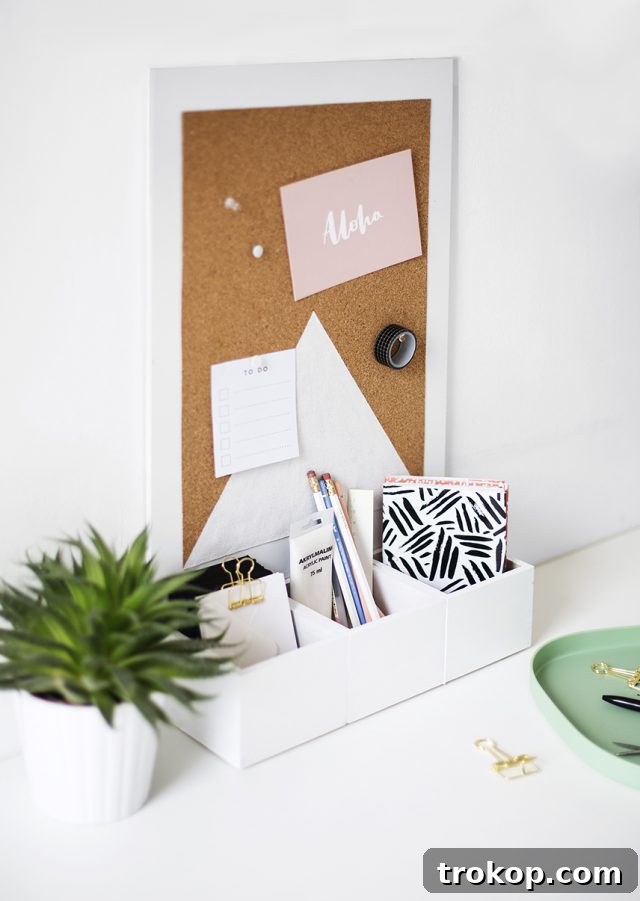
Consider painting unique geometric shapes beyond triangles, like stripes, polka dots, or a checkerboard pattern. Explore a vibrant color palette that complements your existing office decor, or choose bold contrasting hues for a statement piece. Instead of just paint, you could use fabric scraps, decorative paper, or even decoupage techniques to cover sections of the cork board, adding texture and visual interest. Think about functionality too: small hooks can be screwed into the wooden frame for hanging keys or headphones, or tiny shelves can be added to the sides for holding smaller items like paper clips or sticky notes. Once decorated, grab your drawing pins and start adding reminders, inspirational quotes, cherished photos, or even small, lightweight decorative elements. Fill the integrated wooden boxes with all those office strays – pens, pencils, staples, and business cards – instantly transforming clutter into organized efficiency.
Our workspace, often a hub of activity, can quickly become overwhelmed. With an open-plan home, every inch of organization truly helps. This DIY desk organizer, crafted from durable wood, stands as a testament to lasting functionality, outperforming flimsy cardboard alternatives. It’s not just a storage solution; it’s an anchor for a tidy, inspiring desk. Embark on your own quest for a better-organized desk, starting with this versatile and charming DIY project!
Explore Other DIY Organization Projects
Maintaining an organized and inspiring environment is key to a productive lifestyle. If you’ve enjoyed crafting this desk organizer, you’ll love exploring other DIY projects from our extensive archives designed to help you keep every corner of your space clean, tidy, and uniquely yours. Dive into these creative ideas for more office makeovers and clever storage solutions:
- Nesting Desk Organizer — A clever modular design perfect for adaptable storage.
- For your pens and pencils: Hexagonal Desktop Organizer — Add a modern geometric flair to your pen storage.
- Desktop Dry Erase Board — Keep quick notes and daily tasks front and center.
- Geometric Chalkboard Desk — A fun and interactive surface for brainstorming or doodling.
- Home Office Design Makeover Giveaway — Get inspired by a full office transformation.
- Studio Renovation — See how a space can be completely reimagined for functionality and aesthetics.
DIY Desk Organizer: Full Recipe
Tools and Equipment
-
Scalpel or X-acto knife
-
Ruler
-
Painter’s tape or washi tape
-
Wood glue
Materials for This Project
- 1-3 wooden boxes no lids required
- 1 MDF wood sheet 10mm thick and cut to correct size
- 1 Self-adhesive cork sheet 5mm thick or more
- Paper
- White spray paint
Assembly Instructions
-
Spray paint the wood sheet and boxes white. Apply thin, even coats and allow each to dry completely between applications for a smooth finish.
-
Once the wood and boxes are dry, apply wood glue to the sides of the three boxes and firmly press them together, ensuring the open ends face upwards. Hold for 1-2 minutes to secure the bond.
-
Allow the glue joining the boxes to set for about 5 minutes before proceeding to the next step.
-
Apply wood glue to the back of the assembled boxes and the bottom of the wood board. Carefully align the bottom edges to create a perfect right angle, ensuring the organizer stands upright. Apply pressure for one minute.
-
Leave the entire assembly to dry, ideally overnight, to allow the glue to fully cure. This will define the space for your pin board.
-
Measure the designated cork area using a ruler, planning for approximately a one-inch white border around the edges for a clean look.
-
Draw the measured shape onto the peelable backing of the cork sheet. Using a scalpel and ruler, carefully cut out the cork piece.
-
For your cork board design, find the horizontal center point on the front of the cork sheet to guide your chosen shape, such as a triangle.
-
Use painter’s tape or washi tape to outline your design, for instance, extending from the center point to the bottom corners to form a triangle. Adjust the center point’s height for desired triangle proportions.
-
Cover the rest of the cork with spare paper, taping it down to protect the unpainted areas, ensuring only your design remains exposed.
-
Apply a few light coats of spray paint to the exposed design area. If spray paint doesn’t adhere well to the cork, use a few coats of regular white paint.
-
Once the paint is completely dry, carefully remove the tape and paper masking. Peel away a small corner of the cork’s backing paper.
-
Position this initial corner onto the wood panel, carefully lining it up. Slowly pull away the remaining backing paper while pressing the cork onto the wood, smoothing it out as you go.
-
Ensure the cork is smooth and securely adhered, and your DIY desk organizer is now complete!

46 Cute Desk Accessories to Brighten Your Workspace
From colorful pens to quirky paperweights, spruce up your work…
Continue Reading46 Cute Desk Accessories to Brighten Your Workspace
19 Unique & Easy Houseplants that We’re Loving
Looking for unique house plants? Dive into our guide to…
Continue Reading19 Unique & Easy Houseplants that We’re Loving
16 Genius Ikea Desk Hacks You Need In Your Life
Discover the ultimate IKEA desk hack guide for a stylish…
Continue Reading16 Genius Ikea Desk Hacks You Need In Your Life
DIY Flip Photo Album
This DIY Flip Photo Album tutorial shows you how to…
Continue ReadingDIY Flip Photo Album