
DIY Minimal Beaded Blanket Holder: Your Ultimate Guide to Stylish Blanket Storage
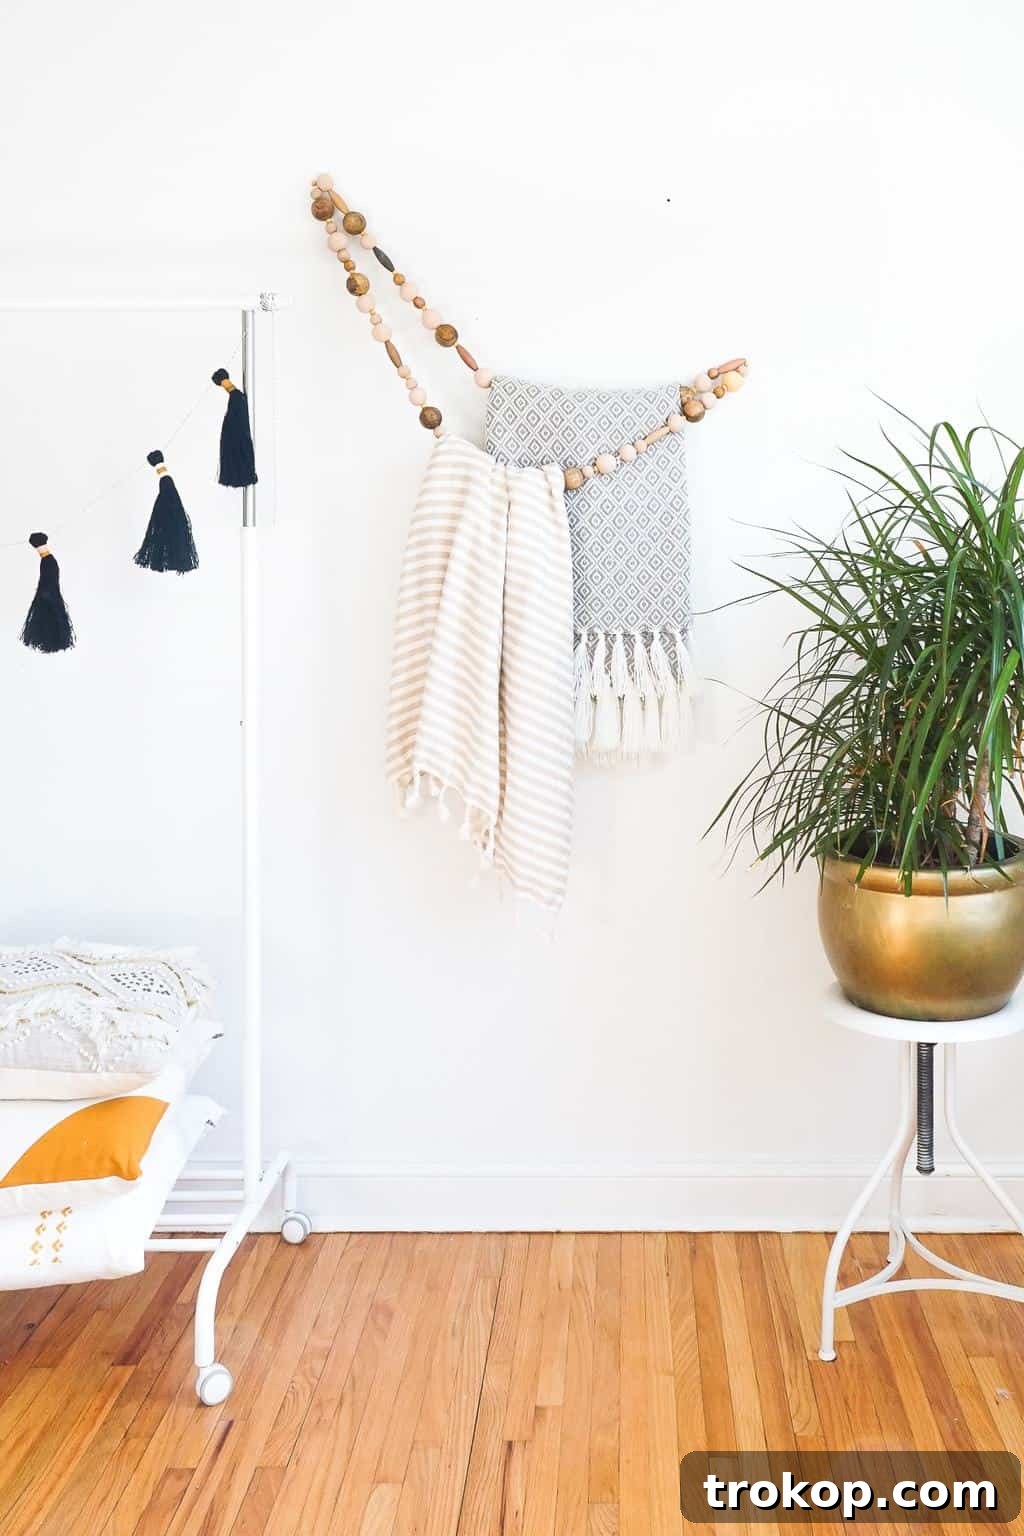
Are you running short on storage space but have a growing collection of cozy blankets? Instead of tucking them away in a closet, why not transform them into a beautiful display? Our fun and easy-to-make DIY Minimal Beaded Blanket Holder offers a chic solution to both declutter your space and enhance your home decor.
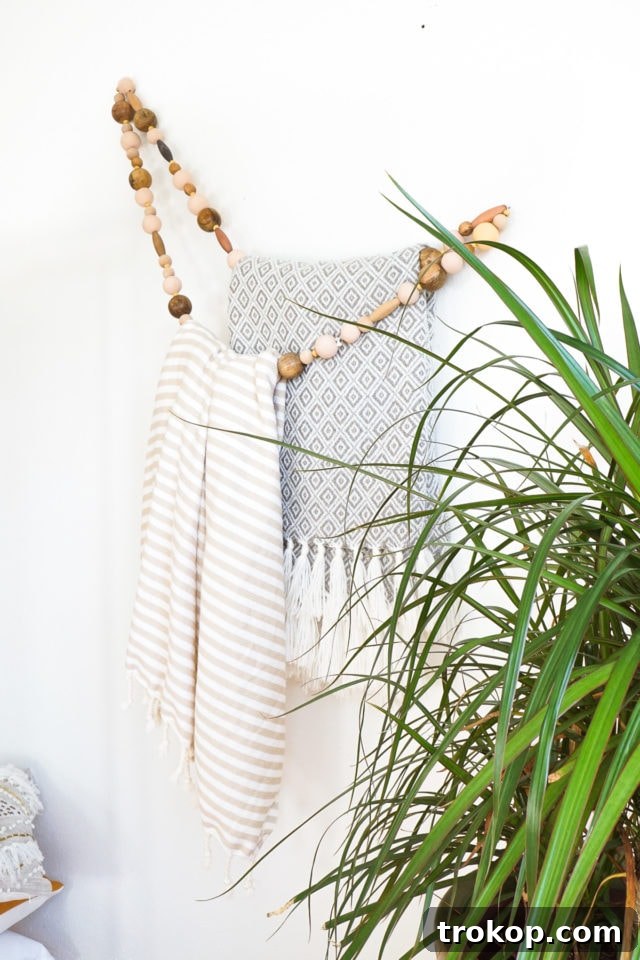
As the seasons change and cooler evenings draw in, blankets inevitably make their way out of storage. Whether you’re snuggling up for a movie night with a warm beverage or adding an extra layer to your bed, having your favorite throws easily accessible is key. However, this often leads to piles of blankets and a cluttered look that can detract from your carefully curated living space.
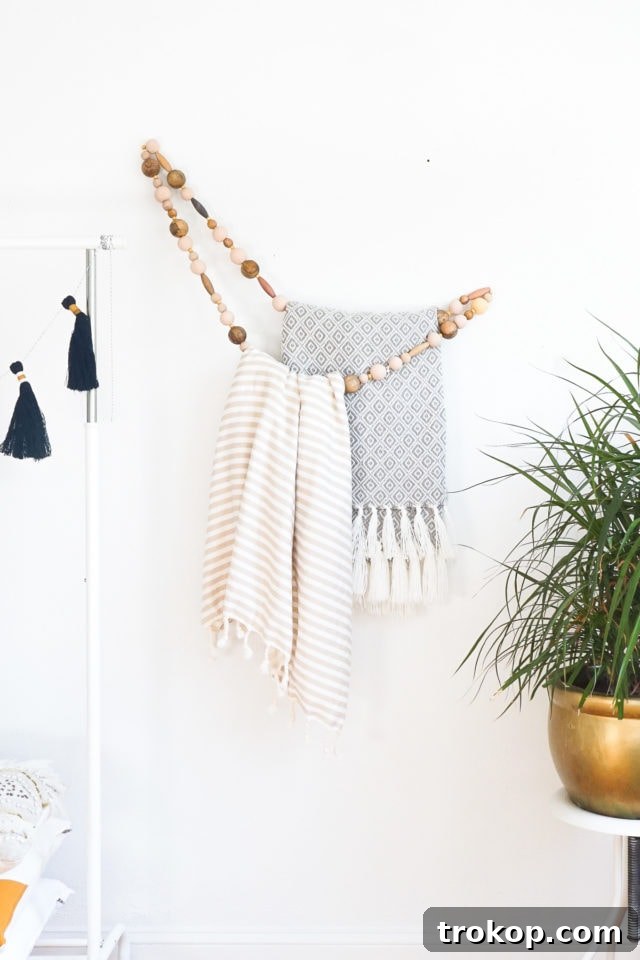
In older homes, like our charming 1930s abode, closet space can be a rare luxury. Faced with the challenge of finding a spot for extra throws in our bedroom, we looked to the walls for inspiration. The result is this elegant and practical DIY Minimal Beaded Blanket Holder – a creative project that Erin originally envisioned, blending functionality with a touch of handmade charm.
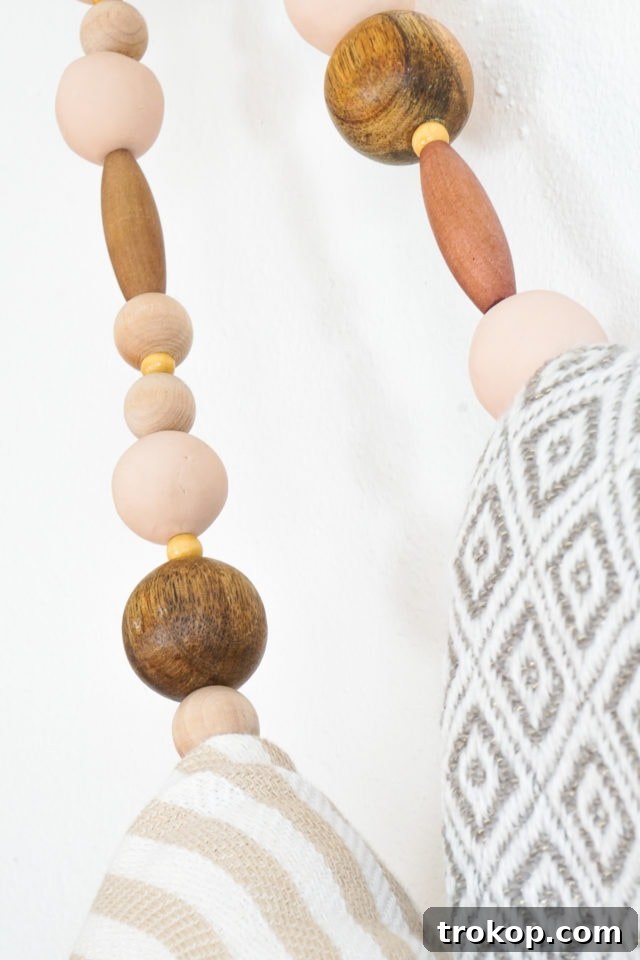
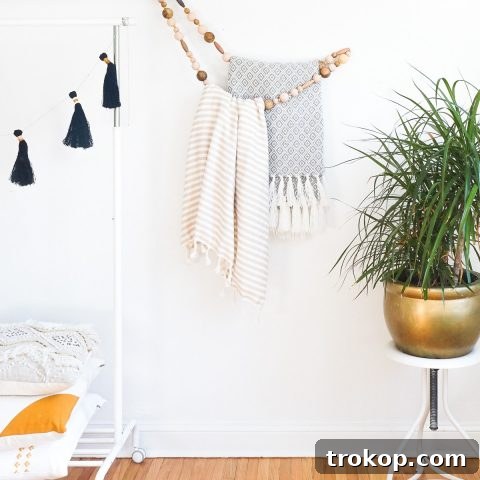
This ingenious holder combines the natural warmth of wood with the modern versatility of polymer clay beads. Strung together, they form a stylish wall-mounted loop, perfect for gracefully draping blankets in even the tightest of spaces. Paired with other clever storage solutions like a DIY Rag Rug Storage Basket, this project is one of our favorite ideas to store your blankets beautifully and maintain an organized, serene home throughout the year.
So, if you’re ready to embrace the warmth of your blankets without sacrificing style or space, let’s gather our supplies and get beading!
Why Choose a Beaded Blanket Holder for Your Home?
Beyond simply providing a place to store blankets, a DIY beaded holder offers numerous advantages for the modern homeowner:
- Space-Saving Elegance: Unlike bulky blanket ladders or baskets that take up valuable floor space, this wall-mounted design frees up your room while adding an artistic element.
- Customizable Aesthetic: The beauty of DIY lies in personalization. You can choose bead colors, materials, and string types to perfectly match your existing decor, whether it’s bohemian, minimalist, modern farmhouse, or Scandinavian.
- Functional Decor: Your blankets become part of your decor! Neatly draped over the beaded loop, they add texture, color, and a sense of coziness to any room, turning clutter into an attractive display.
- Easy Accessibility: No more digging through chests or closets. Your favorite throws are always within arm’s reach, making impromptu snuggle sessions or layering on the bed effortless.
- Eco-Friendly Potential: By choosing natural materials like wood and clay, you can create a sustainable decor piece that aligns with an eco-conscious lifestyle.
- Rewarding DIY Project: This project is relatively simple, even for crafting beginners. The satisfaction of creating something beautiful and functional with your own hands is truly priceless.
Materials and Tools Needed to Make a DIY Minimal Beaded Blanket Holder
To embark on this delightful crafting journey, you’ll need just a few essential materials and tools. We’ve included links to help you find exactly what you need:
- Polymer Clay – We recommend starting with a beige or neutral tone for a minimal look, but feel free to choose any color that complements your home decor. Approximately 1 lb should be sufficient, allowing for experimentation and creating various bead sizes.
- Assorted Wood Beads – Look for a variety of shapes and sizes to add visual interest. Large, medium, and small spheres, as well as oblong or cylindrical wood beads, work wonderfully. Unfinished natural wood offers a beautiful contrast with colored clay beads.
- Durable String or Cord – A strong cord, such as a sturdy cotton rope, jute, or macrame cord, is crucial. Our recommended length is 80 inches (approximately 2 meters) to accommodate a good number of beads and provide ample hanging space for blankets. Ensure it’s thick enough to hold the beads securely but thin enough to pass through them.
- Plastic Tapestry Needle – A large-eye, sturdy plastic needle will make stringing the beads significantly easier, especially for the polymer clay beads where you’ll be creating the initial hole.
- Baking Sheet – Standard baking sheet for curing your polymer clay beads.
- Oven – To bake and harden the polymer clay beads according to package instructions.
- Wall Nails or Hooks – Choose nails or decorative hooks that can support the weight of the blanket holder and your blankets. Two strong nails are usually sufficient.
- Hammer – For safely securing the wall nails.
How to Make a DIY Minimal Beaded Blanket Holder: Step-by-Step Tutorial
Follow these simple steps to craft your own stylish and functional beaded blanket holder. This project is a fantastic way to add a personalized touch to your home.
Step 1: Create Your Polymer Clay Beads
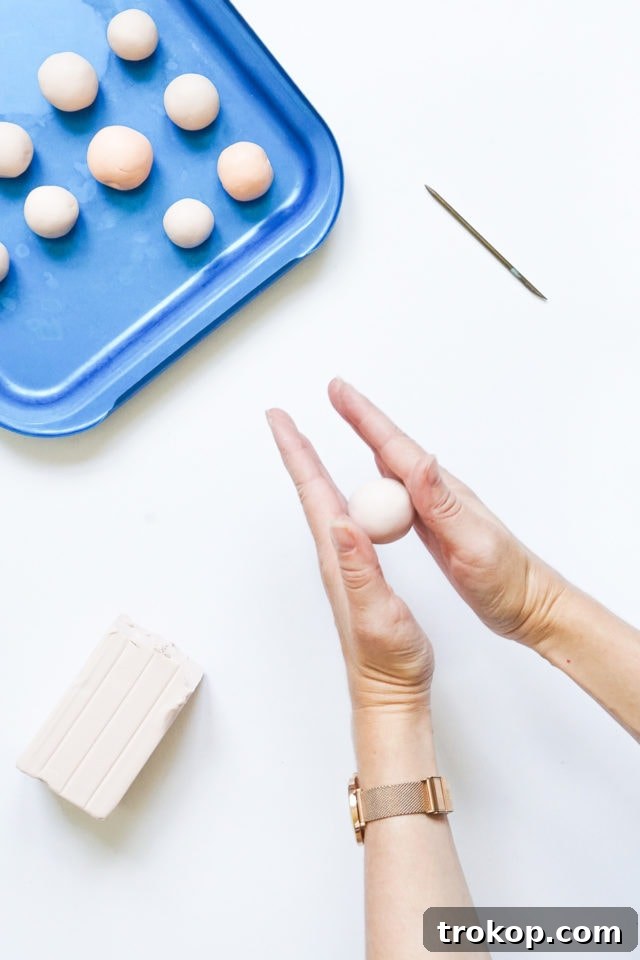
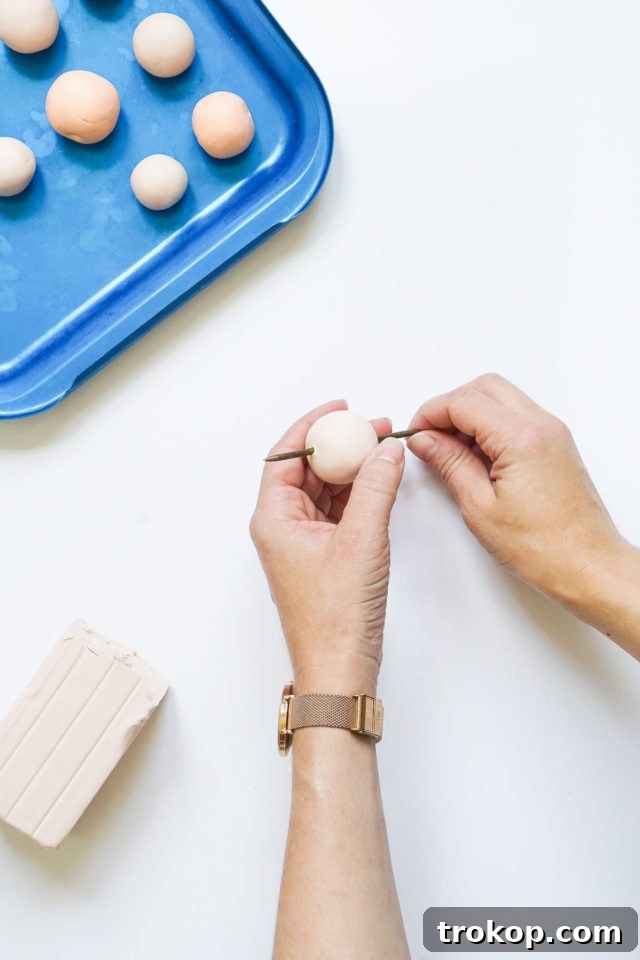
Begin by conditioning your polymer clay until it’s pliable. Then, roll small portions of the clay into balls, aiming for a size between 1.5 to 2 inches in diameter. The exact size can vary, creating a more organic look, but try to keep them somewhat consistent for a balanced aesthetic. Once you have a ball, use your plastic tapestry needle to carefully poke a hole through the center. Wiggle the needle gently as you push it through to ensure the hole is wide enough to easily accommodate your string or cord later. Creating slightly larger holes will prevent frustration during the stringing process.
Step 2: Bake the Clay Beads to Harden
Carefully place your freshly made clay beads onto a baking sheet. Preheat your oven to 275 degrees Fahrenheit (135 degrees Celsius). Bake the beads for approximately 10 minutes for every 1/4 inch of thickness. For example, a 1-inch thick bead would bake for about 40 minutes. Always refer to your specific polymer clay’s packaging for precise baking instructions, as times and temperatures can vary by brand. Once baked, remove the beads from the oven and allow them to cool completely before handling. This cooling process is crucial for the beads to fully harden.
Step 3: Prepare Your String
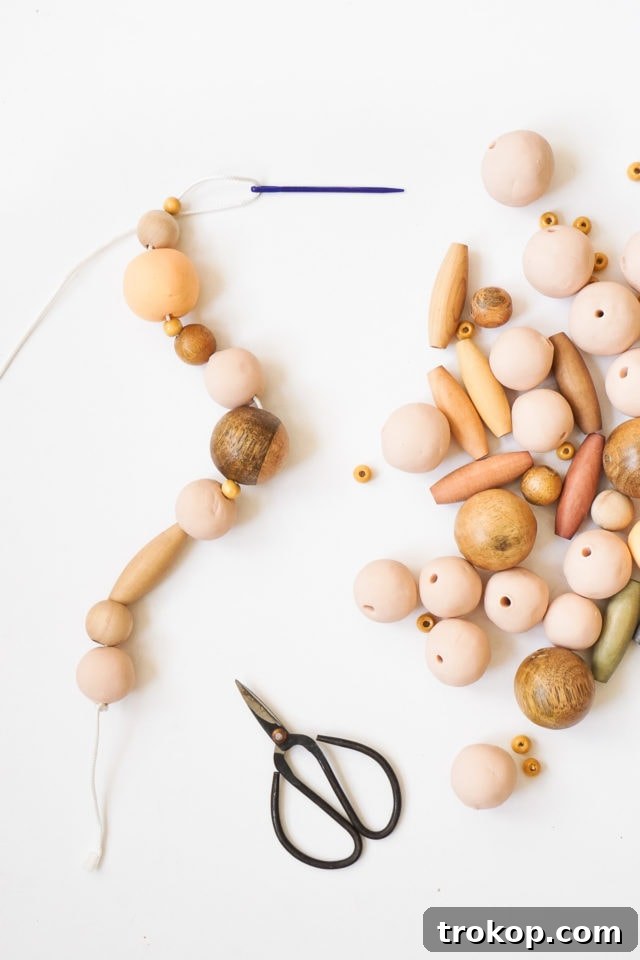
Take your 80-inch string or cord. At one end, tie a large, secure knot. This knot needs to be substantial enough to prevent any beads from sliding off once you begin stringing them. A double or triple knot is recommended to ensure maximum security.
Step 4: String the Beads
Now comes the fun part! Using your plastic tapestry needle, begin stringing the polymer clay beads and assorted wood beads onto the cord. Experiment with different arrangements – a random order often creates a wonderfully organic and minimalist look, but you could also create a repeating pattern. Play with the varying sizes and textures of the beads to achieve a design that truly reflects your style. Continue stringing until the entire length of the string, or your desired length, is covered in beads, leaving a short tail at the end for tying.
Step 5: Secure the Beaded Loop
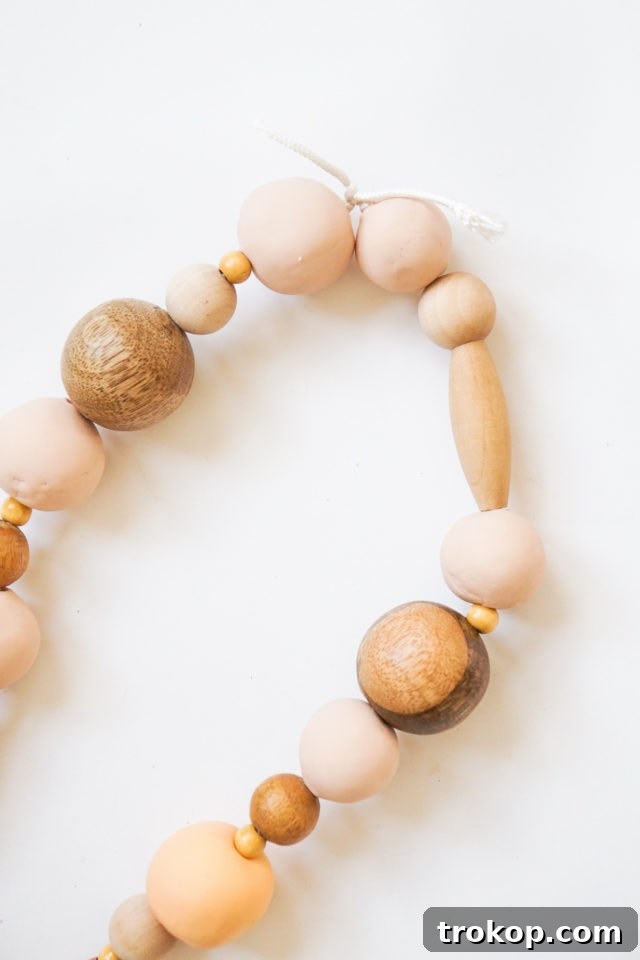
Once all your beads are strung and the cord is filled to your liking, bring the two ends of the string together. Tie them securely with a triple knot, ensuring there’s no slack and the beads are snug but not overly tight. Trim any excess string, leaving a small tail, and if desired, you can dab a small amount of strong adhesive on the knot for extra durability, though this is optional.
Step 6: Wall Mounting
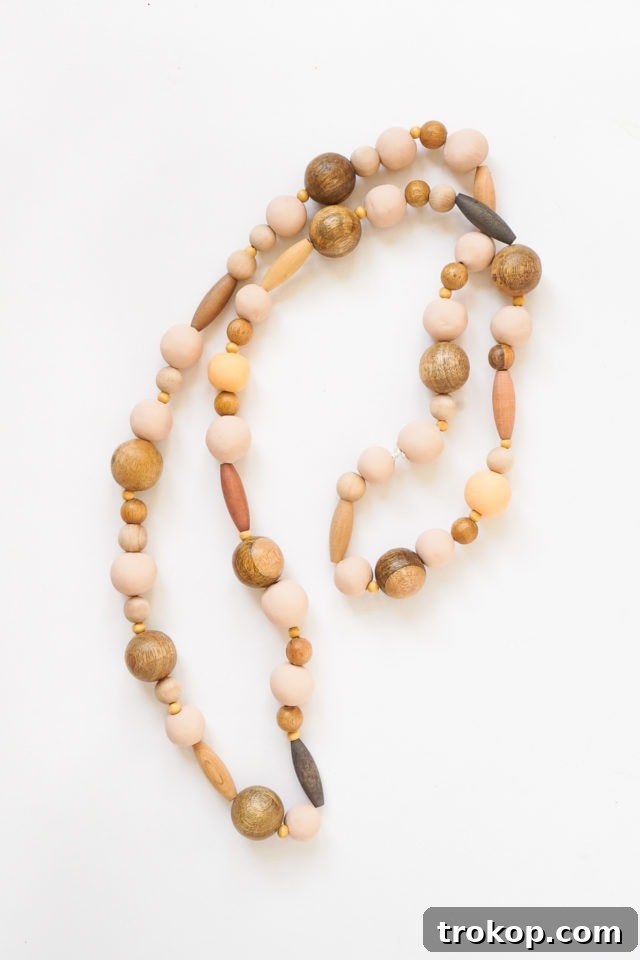
Select the ideal spot on your wall for the blanket holder. We recommend hammering two sturdy nails into the wall roughly 36 inches apart. This spacing generally works well for holding multiple blankets while allowing them to drape nicely. However, adjust the distance based on the length of your beaded loop and the size of the blankets you intend to hang. For a balanced, uniform appearance, use a level to ensure your nails are perfectly aligned. Alternatively, for a more playful and dynamic asymmetrical look, you can place the nails at slightly different heights. Ensure the nails are strong enough to support the weight of the beads and several blankets.
Step 7: Display Your Beautiful Blankets
Finally, hang your finished beaded loop on the two wall nails. Now you can elegantly drape your favorite blankets over the loop, transforming them into a beautiful and functional piece of wall art. This is the perfect spot for your vibrant DIY Watercolor Throw Blanket or your charming XOXO throw blanket. Step back and admire your handiwork – a perfect blend of style and practicality!
Customization and Styling Tips for Your Beaded Blanket Holder
One of the joys of DIY is the ability to tailor projects to your unique taste and existing home aesthetic. Here are some ideas to personalize your beaded blanket holder:
- Color Play: Don’t limit yourself to beige clay. Experiment with vibrant hues, pastel shades, or even marbled polymer clay beads to add a pop of color that complements your room’s palette.
- Material Mix: Beyond wood and polymer clay, consider incorporating other types of beads such as ceramic, glass, or even painted metal beads for different textures and sheens.
- Varying Lengths: While our guide suggests 80 inches, you can adjust the string length to create longer, more dramatic wall hangings, or shorter ones for smaller spaces.
- Embellishments: Add decorative tassels, leather accents, or charms to the ends of the string or even at intervals along the beaded loop for an extra touch of flair.
- Pattern Perfection: Instead of a random stringing, design a deliberate pattern with your beads. Alternate colors, sizes, or materials for a more structured and modern look.
- Thematic Decor: Create a holder that fits a specific theme. For a coastal vibe, use blue and white beads with natural driftwood pieces. For a bohemian feel, incorporate intricate macrame knots into the string.
- Lighting Integration: Consider weaving a subtle string of battery-operated fairy lights through the blankets draped on the holder for an enchanting evening glow.
Care and Maintenance for Your DIY Blanket Holder
To ensure your beautiful beaded blanket holder remains a stunning feature in your home for years to come, here are a few simple care tips:
- Dust Regularly: Gently dust the beads and string with a soft cloth or a feather duster to prevent dust buildup.
- Spot Clean Clay Beads: If your polymer clay beads get soiled, gently wipe them with a damp cloth and a mild soap solution. Avoid harsh chemicals, which could damage the clay or its finish.
- Check Knots: Periodically check the knots that secure your string to ensure they remain tight and secure, especially if you frequently change out blankets or if the holder bears significant weight.
- Mind the Weight: While sturdy, be mindful not to overload the holder with too many heavy blankets, which could strain the string or the wall nails.
- Protect from Direct Sunlight: Prolonged exposure to direct sunlight can cause some polymer clays to fade or become brittle over time. If possible, place your holder in a spot where it’s not constantly exposed to harsh UV rays.
DIY Minimal Beaded Blanket Holder: Quick Project Guide
DIY Minimal Beaded Blanket Holder
Follow these steps below to create your own custom blanket holder!
Active Time: 1 hour
Bake Time: 10 mins (per ¼” thickness)
Total Time: 1 hour 10 mins
Course: DIY
Category: Home Decor
Equipment
- Hammer
- Baking sheet
- Wall nails or hooks
- Oven
Materials
- 1 lb Polymer clay (in beige or color of your choice)
- Assorted wood beads (large, medium, small spheres, oblong)
- 1 durable string or cord (approx. 80″ long)
- 1 plastic tapestry needle
Instructions
- Roll clay into 1.5”-2” balls and poke a hole through the center using the tapestry needle.
- Wiggle the needle around a bit as you make the hole so it’s large enough to accommodate the needle and string.
- Bake beads at 275 degrees F for 10 minutes per ¼” thickness. Remove from the oven and cool.
- Tie a big knot at one end of the string (large enough to keep the beads from sliding right off).
- String polymer beads and wood beads onto the cord in a random order.
- Once the entire length of the string is covered in beads, tie the two ends together with a triple knot.
- Hammer 2 nails into the wall roughly 36” apart or at a length wide enough to hold your blankets. Our string is 80″ long.
- Hang the nails level with one another for a uniform look or at different heights to create a dynamic asymmetrical look.
- Hang the bead loop on the wall and drape it with blankets!
Estimated Cost: $35
Keywords: diy beaded blanket holder, minimalist home decor, blanket storage, handmade wall decor
Elevate Your Home with Handcrafted Charm
This minimalist beaded blanket holder is more than just a storage solution; it’s a statement piece that brings warmth, texture, and a personal touch to your interior design. Imagine this beautiful creation gracing your bedroom wall, providing easy access to those comforting blankets throughout the winter months, or adding a stylish accent to your living room. Where will you hang yours?
We absolutely love seeing your creativity come to life! Don’t forget to share your own DIY beaded blanket holder with us on Instagram using the hashtag #sugarandclothloves. We cherish seeing all your unique creations and how you integrate them into your homes!
For even more inspiring DIY home decor ideas and tutorials just like this one, be sure to explore our related posts below. We’re always sharing new ways to infuse your living spaces with character and style.
More Home Decor Ideas to Inspire Your Next Project
- How To Make A DIY Watercolor Wall Art – Watercolor Prints
- DIY Gold Foil Wall Art With Free Printables
- How To Make A DIY Pegboard Wall Art
- DIY Paper Shapes Wall Art
Our Home Projects
Continue Reading
Continue Reading
Continue Reading
Continue Reading
Continue Reading
Continue Reading