
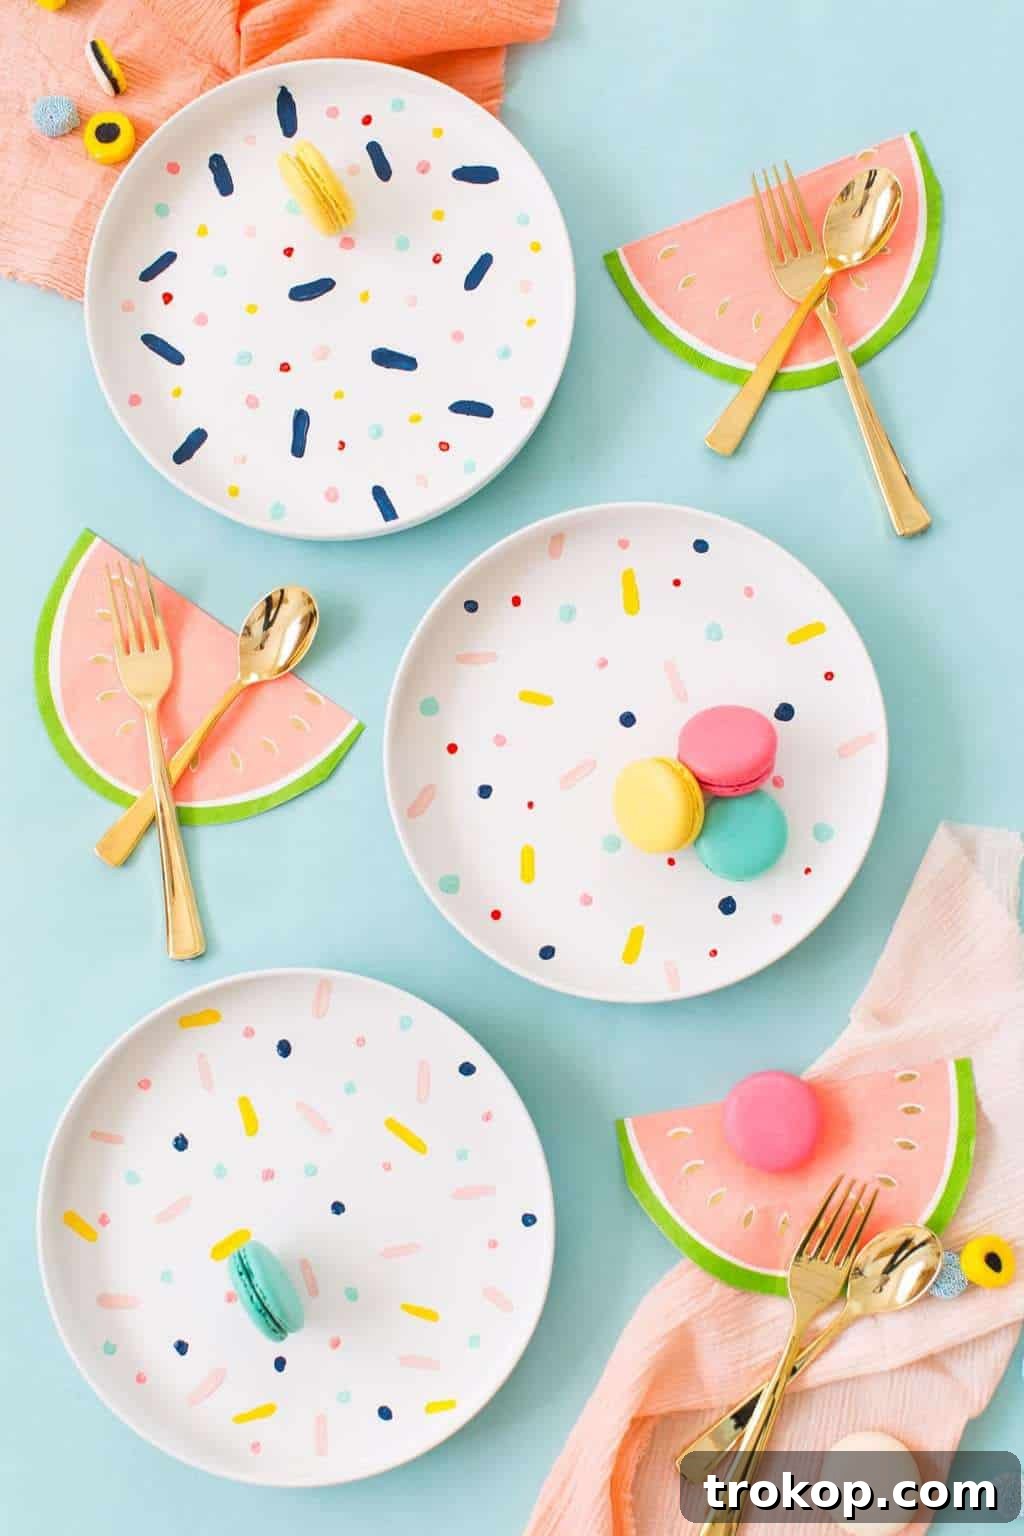
DIY Confetti Pattern Placemats: Add a Touch of Joy to Your Table with This Easy Craft
Sometimes, the simplest ideas yield the most delightful results, and these DIY Confetti Pattern Placemats are a perfect example. This project is as easy as it gets, making it an ideal activity for a relaxed afternoon, whether you’re seeking a creative outlet for yourself or looking for a fun engagement with the kids. These placemats are not just functional; they’re a vibrant statement piece that brings a playful energy to any dining setting.

To make this creative endeavor even more accessible, we’ve partnered with Q-tips. These versatile cotton swabs are truly the unsung heroes of this craft, transforming into perfect disposable “paintbrushes” that allow for precise, yet free-spirited, dotting and patterning. This collaboration highlights how everyday items can be reimagined as powerful tools for artistic expression. Whether you’re orchestrating a lively craft session with children or enjoying a sophisticated craft night with friends over cocktails, these confetti placemats promise an enjoyable and stress-free creative experience for all skill levels.
Unleash Your Inner Artist: The Simplicity of Confetti Patterns
The true charm of this DIY project lies in its forgiving nature. There’s absolutely no expectation for you to be a professional painter; in fact, the more abstract and spontaneous your design, the more authentic and charming your confetti pattern will be. If you possess the simple skill of dotting an ‘i’, then you are more than equipped to master this craft! This makes it an ideal activity for beginners, children, or anyone looking to de-stress with a simple, rewarding creative task.
Moreover, the confetti pattern concept is incredibly adaptable. Once you’ve mastered it on placemats, you’ll find inspiration to apply this cheerful design to almost any surface imaginable. Think about revamping old table linens, creating custom notecards for special occasions, personalizing back-to-school supplies for a unique touch, or even adding a whimsical flair to decorative trays. This simple technique offers endless possibilities for injecting personality and vibrancy into various aspects of your home and life.
And speaking of delightful confetti, why not extend the fun to your culinary creations? Here’s a quick and easy recipe for DIY Edible Confetti, perfect for garnishing desserts or adding a festive touch to any treat!
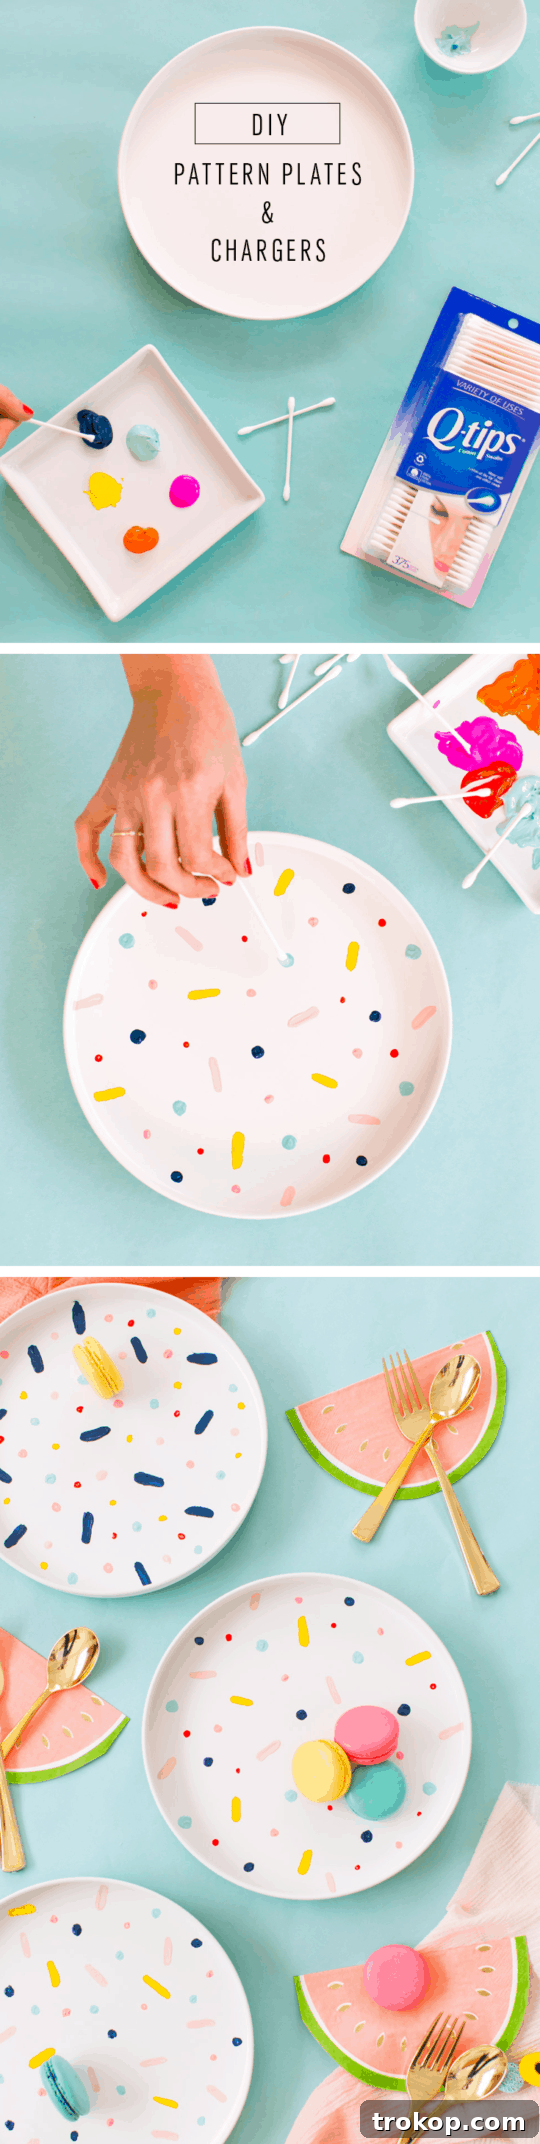
Table of Contents
Materials and Tools Needed to Make DIY Confetti Pattern Placemats
Embarking on this delightful DIY project requires only a handful of easily accessible materials. You’ll likely find most of these items at your local craft store, an art supply shop, or even within your own home. Here’s a comprehensive list to ensure you’re fully prepared to create your stunning confetti placemats:
- Smooth White Chargers or Placemats: These will serve as the canvas for your colorful designs. Opt for surfaces that are smooth and relatively non-porous to ensure the paint adheres well and the colors pop. Excellent choices include ceramic, melamine, durable plastic, or even sturdy cardboard placemats that offer a clean, bright background for your confetti. The smoother the surface, the more defined your dots will appear.
- Smooth white chargers
- Placemats
- Q-tips Cotton Swabs: The star tool for this project! Q-tips are perfect for applying small, precise dots, as well as larger, more abstract smudges. Their absorbent cotton tips allow for excellent paint transfer, and their disposability means no messy brush cleanup. Ensure you have a generous supply, especially if you plan to use multiple paint colors without mixing them.
- Q-Tips cotton swabs
- Craft Paint in Your Choice of Colors: Acrylic craft paints are highly recommended for this project. They are readily available, come in a vast array of colors, dry relatively quickly, and offer excellent coverage. Choose a palette that reflects your personal style or complements your home decor. Vibrant primary colors for a playful look, elegant pastels for a softer touch, or even metallics for a sophisticated sparkle – the choice is yours! Remember to select non-toxic paints, particularly if children will be involved in the crafting.
- Craft paint in the colors of your choice
- Clear Mod Podge (Optional, but Highly Recommended): This is an essential ingredient for ensuring the longevity and practicality of your placemats. A clear, protective topcoat of Mod Podge will seal your beautiful paintwork, protecting it from scuffs, scratches, and spills. More importantly, it creates a smooth, wipeable, and food-safe surface, making your placemats easy to clean after every meal. Be sure to choose a Mod Podge formula that specifies it’s suitable for a protective, cleanable finish.
- Clear Mod Podge
- Protective Surface or Drop Cloth: Always prepare your workspace by laying down old newspapers, plastic sheeting, or a dedicated drop cloth to protect your table or crafting area from accidental paint splatters.
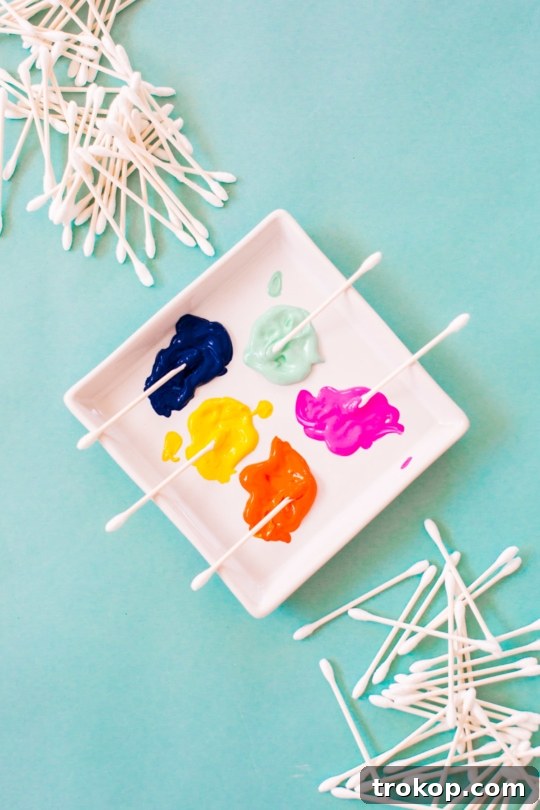
- Small Dishes or a Paint Palette: To neatly pour out and organize your various paint colors, making it easier to dip your Q-tips without contaminating colors.
How to Make DIY Confetti Pattern Placemats: A Simple Step-by-Step Guide
Creating these vibrant and personalized confetti placemats is an incredibly rewarding and straightforward process. Follow these easy steps, and you’ll soon have a set of unique placemats ready to brighten your dining table:
Step 1: Set Up Your Creative Space and Begin Dotting
Start by preparing your workspace. Lay out your placemats or chargers on a protective surface, such as newspaper or a plastic sheet, to catch any errant paint. Pour small amounts of your chosen craft paint colors into separate dishes or sections of a paint palette. Now, the fun begins! Grab a Q-tip for each color (or dedicated Q-tips for specific color families) and start dipping. The essence of these Confetti DIY Pattern Placemats is abstract freedom. There’s no need for perfect symmetry or predefined patterns. Simply use the Q-tips to create an array of dots, dashes, swirls, or whimsical abstract shapes across the surface of your placemats. Vary the pressure and angle of the Q-tip to create different dot sizes and textures. Mix and match colors freely to achieve a lively, confetti-like effect. The more varied your marks, the more dynamic and playful your finished placemats will appear. Don’t hesitate to experiment and let your imagination guide your hand!
Step 2: Allow the Painted Design to Dry Completely
Once you are satisfied with your confetti masterpiece, it is absolutely vital to let the paint dry thoroughly. The drying time will largely depend on the specific type of craft paint you used and how thickly it was applied. As a general rule, craft acrylic paints are usually dry to the touch within 20-30 minutes. However, to ensure full curing and to prevent any smudging or damage during the next step, it’s best to allow the placemats to air dry for at least 1-2 hours, or even longer, if humidity is high. Patience at this stage will guarantee a crisp, clean finish for your artwork.
Step 3: Seal and Protect for Durability and Easy Cleaning
For a durable, long-lasting finish that can withstand everyday use and spills, apply a generous finishing coat of clear Mod Podge. If your placemats are intended to come into direct contact with food, ensure you are using a food-safe clear sealant or spray lacquer that is appropriate for the material of your placemats. Using a soft brush or a foam applicator, apply an even, thin layer of Mod Podge over your entire dried confetti design. This protective layer will not only seal the paint, preventing chips and fading, but it will also create a smooth, food-safe surface that is incredibly easy to wipe clean after each use. Allow the Mod Podge to dry completely according to the product manufacturer’s instructions, which may take several hours or even overnight for full curing. Once fully dry, your beautifully personalized placemats will be ready to adorn your table, bringing joy and a custom touch to every meal.
What’s the Best Material for Making Placemats?
When it comes to crafting or buying placemats, the “best” material isn’t a one-size-fits-all answer. It largely depends on your personal preferences, dining habits, desired aesthetic, and how much maintenance you’re willing to undertake. Here’s a detailed look at various popular materials for placemats:
- Fabric Placemats: Fabric, such as cotton, linen, or canvas, offers immense versatility in terms of patterns, colors, and textures. They provide a soft, traditional, and inviting look, easily matching diverse interior styles. For DIY projects like our confetti placemats, a sturdy cotton or canvas fabric is excellent as it readily accepts paint. While many are machine washable, they can be prone to wrinkles and may require ironing. Fabric can also absorb spills, potentially leading to stains if not addressed quickly.
- Leather or Faux Leather Placemats: These materials exude sophistication and elegance. Leather and faux leather placemats are highly durable, resistant to wear and tear, and offer a smooth, luxurious surface. They are typically easy to wipe clean, making maintenance quite simple for most spills. They are an excellent choice for a more formal dining setting or if you desire a long-lasting, chic option that can withstand frequent use.
- Vinyl Placemats: Prioritizing effortless cleaning and robust durability? Vinyl placemats are your go-to. They are inherently waterproof, incredibly resilient, and can be swiftly wiped down with a damp cloth or sponge. Vinyl comes in a vast array of designs, often mimicking the appearance of other materials like fabric, wood, or stone. Their practicality makes them a popular choice, especially in households with young children, for casual dining, or outdoor use.
- Glass or Acrylic (Plastic) Placemats: For a contemporary, minimalist, or sleek aesthetic, glass or acrylic placemats are superb. They provide a transparent or translucent barrier, allowing the beauty of your table surface to show through while protecting it from heat, scratches, and condensation rings. While glass is elegant, it can be heavy and prone to breakage. Acrylic offers a lighter, shatter-resistant alternative that is equally easy to clean and maintain, though it can scratch more easily than glass.
- Cork Placemats: An eco-friendly and naturally absorbent option, cork placemats are excellent for protecting table surfaces from heat and moisture. They bring a rustic, natural, and warm aesthetic to the table and are lightweight. While good for absorbing minor spills, larger liquid messes might soak into the material, requiring prompt cleaning.
- Melamine Placemats: Melamine placemats are a beloved choice due to their exceptional durability and the vast array of attractive designs they feature. Crafted from a robust hard resin, often topped with a decorative layer, they are highly resistant to heat, scratches, and impacts. Their non-porous surface makes them incredibly easy to clean with a simple wipe, making them an ideal and resilient option for daily use in busy households.
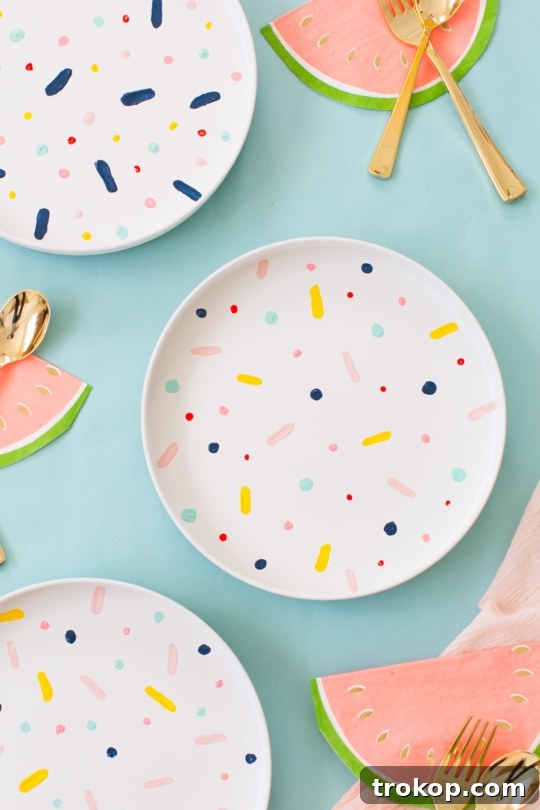
Ultimately, the best placemat material aligns with your lifestyle. For our DIY confetti project, smooth white chargers or placemats (like those made from melamine, smooth wood, or even heavy cardstock sealed effectively) provide the ideal smooth canvas for your vibrant dots, ensuring your handmade decor adds a cherished touch to your dining table.
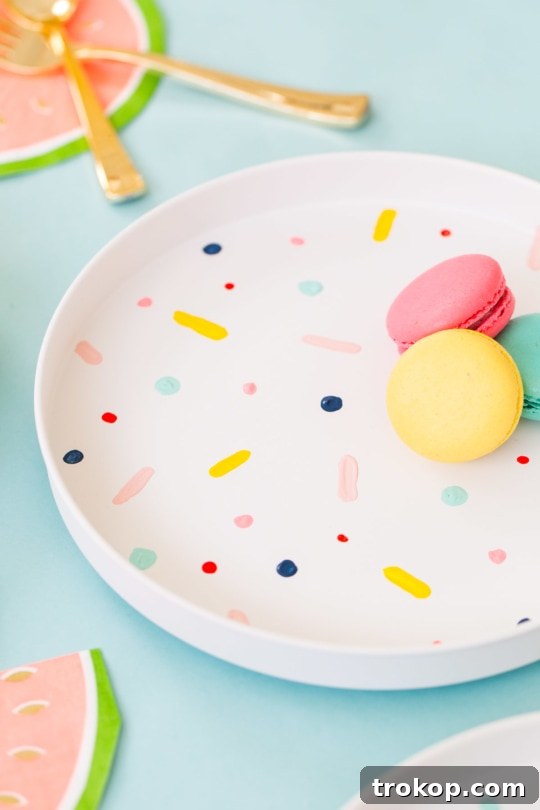
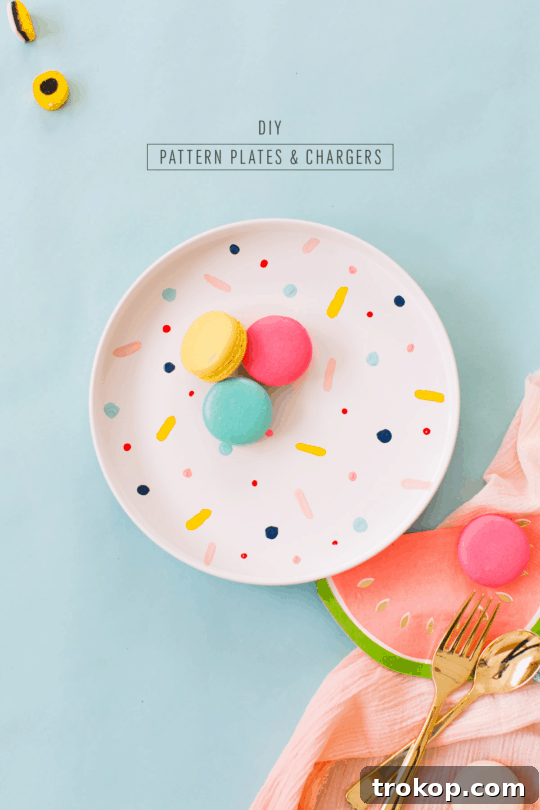
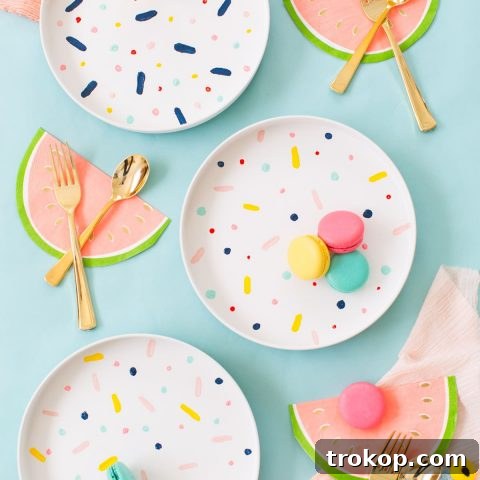
Once your DIY Confetti Pattern Placemats are complete, the styling possibilities are endless! I, for one, couldn’t resist using mine to beautifully display a delectable selection of macarons. After all, a sweet addiction is hard to kick, especially when it perfectly complements your charming handmade decor! But of course, the choice is entirely yours. Let these vibrant placemats serve as a delightful backdrop for your culinary creations, a cheerful stage for everyday meals, or simply as a colorful accent on your dining table.
On the topic of cozy days and creative pursuits, do you have any cherished go-to rainy afternoon hobbies that offer an escape from everyone’s beloved Netflix binge? Perhaps you’re already a seasoned enthusiast of crafting your own home decor, like these DIY placemats? We’re always keen to discover new and exciting ways to spend those indoor days productively and artistically. If you’re looking for even more inspiration to elevate your table settings, be sure to explore these other quick and easy placemat projects, perfect for summer entertaining or any season:
- DIY Pom Pom Placemats
- DIY Faux Leather Placemats
More Confetti DIY Projects and Ideas to Spark Your Imagination
If the joyful spirit of confetti has captured your heart and sparked your creative imagination, you’ll be delighted to explore how this festive theme can extend to many other wonderful DIY endeavors. Keep the celebration going with these fantastic confetti-inspired projects and ideas:
- DIY Mini Confetti Print Cakes: Bring the whimsical fun of confetti to your dessert table with charming, custom-designed mini cakes.
- Funfetti Birthday Cheesecake: Celebrate any occasion, big or small, with a decadent cheesecake bursting with colorful sprinkles, truly embodying the vibrant spirit of funfetti.
- How to Make Homemade Confetti: Master the art of creating your own edible confetti, perfect for decorating desserts, drinks, or adding a playful flourish to any culinary creation.
- Simple Jumbo DIY Confetti Poppers: Elevate the excitement of any party or special celebration with these easy-to-make jumbo confetti poppers, ensuring an unforgettable burst of color and joy.
DIY Confetti Pattern Placemats
Equipment
- Q-tips cotton swabs
Materials
- Smooth white chargers or placemats
- Craft paint in the colors of your choice
- Mod Podge (clear food-safe sealer)
Instructions
-
Lay out your paint choices. Use the cotton swabs to paint the placemats or plates with different abstract shapes and colors. Experiment with dot sizes and patterns.
-
Let the painted pattern dry completely. This might take 1-2 hours depending on paint thickness.
-
Spray with a finishing coat of clear Mod Podge (ensuring it’s food-safe if required) so that you have a smooth, food-safe surface that can be wiped clean after each use. Allow to cure overnight for best results.

We absolutely love seeing your handmade creations! Don’t forget to share your unique DIY Confetti Pattern Placemats with us on Instagram using the hashtag #sugarandclothloves. Your projects inspire us and our vibrant community! For even more exciting interior design inspiration, innovative home decor tutorials, and creative ideas to personalize your living spaces, you can explore all our resources right here on our blog.
More DIY Home Decor & Craft Recommendations!
Ikea Bar Cart DIY Stylish Ideas
DIY Canvas Art: How To Make Your Own Canvas Print
Homemade Reed Diffuser – Natural Ways To Make Your Home Smell Amazing!
DIY Coaster Ideas – Geometric Fun Design For Your Coaster!
Ikea Hack – DIY Wooden Headboard Using Stikwood
DIY Distressed Wooden Shelves