
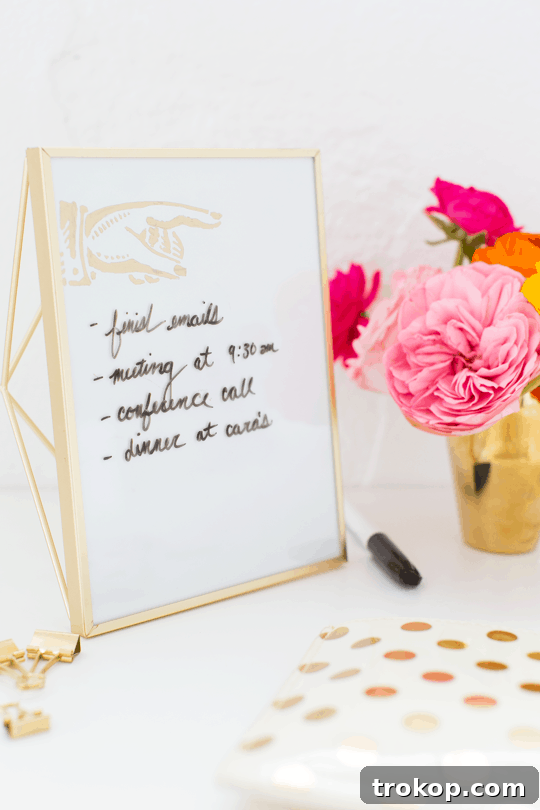
Transforming ordinary office supplies into something delightful and functional is easier than you think. Say goodbye to dull desk accessories and hello to personalized style with this charming DIY Dry Erase Board. Crafted from items you likely already have around your home, this project offers a simple yet impactful way to elevate your workspace and boost your productivity. It’s more than just a writing surface; it’s a stylish statement that helps keep your daily tasks in clear view.
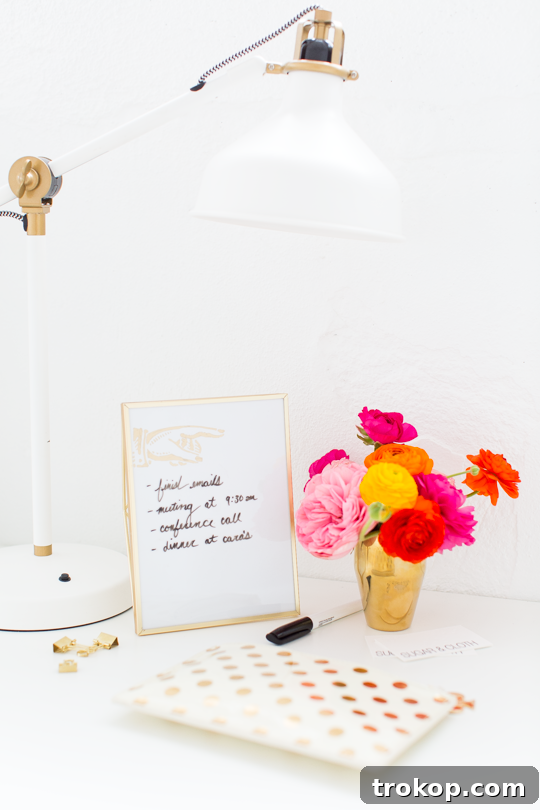
For many of us, life moves at a whirlwind pace. Juggling a multitude of responsibilities, from family commitments and household projects to professional endeavors, can feel overwhelming. In such a demanding environment, the thought of forgetting an important task can create unnecessary stress and anxiety. This is where the power of a good list comes in. Writing down our to-dos, thoughts, and ideas provides a tangible sense of control and clarity, allowing our minds to relax and focus on the task at hand rather than constantly worrying about what might be missed.
While digital notes have their place, there’s something uniquely satisfying about jotting down tasks with a pen—or in this case, a dry erase marker. The act of physically crossing an item off a list offers a small but significant burst of accomplishment. However, traditional office dry erase boards often lack aesthetic appeal, typically featuring stark white panels that can feel out of place in a thoughtfully designed home office. Finding a cute, desktop-friendly dry erase board that complements your decor can be surprisingly challenging and expensive. That’s why creating your own custom version is a brilliant solution – merging practicality with personalized style, all while being incredibly budget-friendly.
This DIY project redefines the typical office supply, transforming it into a functional piece of desk decor. Instead of settling for a bland, store-bought option, you can create a beautiful and reusable tabletop dry erase board using just a few common household items. It’s a testament to how creativity and a little ingenuity can result in stylish and effective home office organization. Our current mantra? Affordable elegance and effortless design!
Materials and Tools for Your DIY Desktop Dry Erase Board
One of the best aspects of this DIY dry erase board project is its minimal material requirement. You truly don’t need to splurge on specialized supplies; the key component, a photo frame, might already be gathering dust in a closet or storage box. This makes it an incredibly sustainable and cost-effective craft project. If you’re looking to add a personal touch beyond the basic functionality, such as a permanent “to-do list” heading or a custom graphic that won’t wipe away with your daily notes, you can easily stencil it onto the background paper using a permanent marker, like an elegant gold foil pen. Imagine a beautiful gold border or a chic custom title that adds a touch of sophistication to your daily reminders!
Speaking of gold foil, if you’re a fan of elegant decor, you might also love exploring our DIY Gold Foil Wall Art tutorial, complete with free printables. These stunning pieces are perfect for adding a touch of glamour to any room, beautifully complementing your new desktop dry erase board.
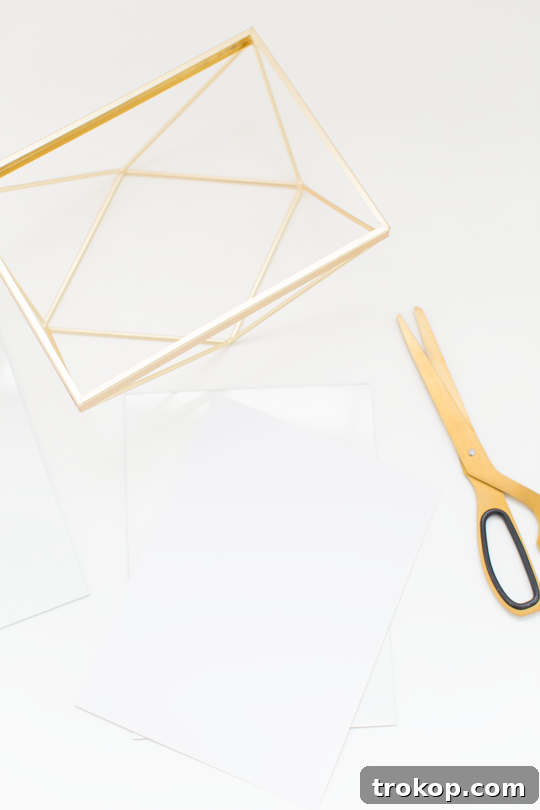
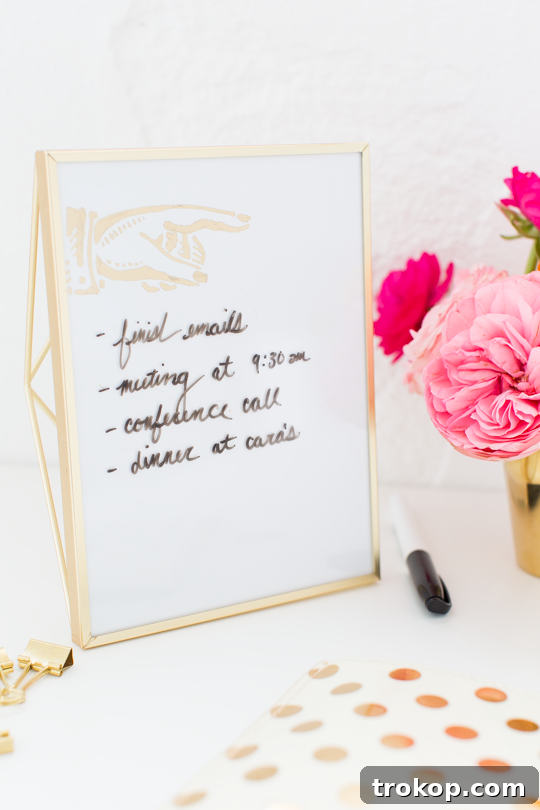
- Photo frame with glass of your choice — The size and style are entirely up to you! For a chic, modern look, we used this 5″x7″ gold geo picture frame. Any frame with a glass front will work, eliminating the need for expensive whiteboard panels or special whiteboard paint. The glass surface itself acts as your reusable writing canvas. Consider frames with unique textures or colors to match your home office aesthetic.
- White paper or cardstock — This serves as the crisp, clean backdrop for your notes. You can experiment with colored paper or even patterned scrapbook paper if you want a more vibrant or decorative look that peeks through your writing.
- Scissors — For precisely cutting your paper to fit the frame.
- Gold foiling pen — Optional, but highly recommended for adding elegant, permanent designs or headings to your background paper.
- Stencil — Optional, ideal for creating neat, repeatable designs or text. Our collection includes pieces from an old Martha Stewart stencil set, but any decorative stencil will do.
- Dry erase markers and a small eraser/cloth — (Not listed in original, but essential for use!)
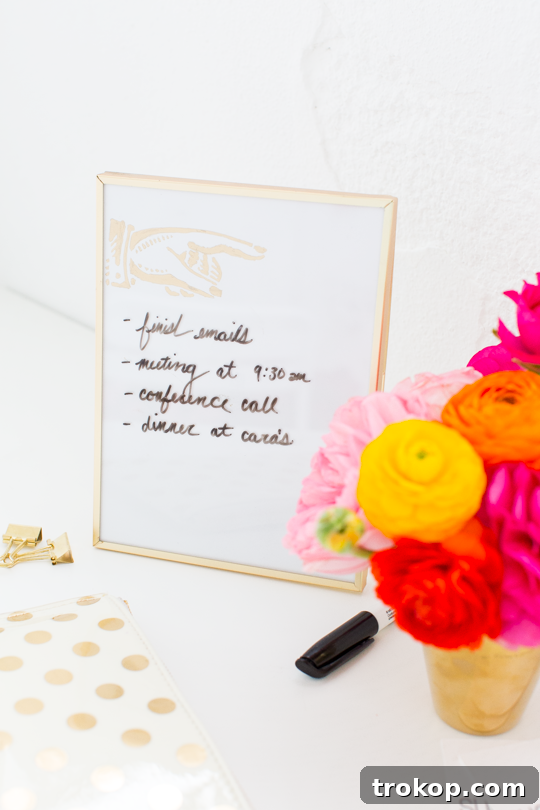
How to Make a Desktop DIY Dry Erase Board: A Step-by-Step Guide
Creating your own personalized dry erase board is a quick and satisfying project that requires minimal effort but delivers maximum impact. Follow these simple steps to transform a basic picture frame into a stylish and functional desktop organizer that reflects your unique taste and helps you stay on top of your game.
- **Prepare Your Frame and Glass:** Begin by selecting a photo frame that perfectly fits your available desktop space and aesthetic preferences. Carefully remove the backing, any existing photo, or artwork from the frame. Then, gently take out the glass pane. This glass will be your new writing surface, so it’s crucial to clean it thoroughly with glass cleaner and a lint-free cloth. Ensure there are no smudges, dust, or residue that could interfere with your writing or drying process. A pristine surface is key to a smooth dry erase experience.
- **Cut and Fit Your Backdrop Paper:** Measure the exact dimensions of the glass pane. Using sharp scissors or a craft knife, cut a piece of white paper or cardstock to precisely match these measurements. The goal is for the paper to fit snugly within the frame, behind the glass, without any gaps or wrinkles. This white backdrop will provide the ideal contrast for your dry erase markers, making your notes clear and legible. For a unique touch, you could even use a light-colored patterned paper, but ensure the pattern isn’t too busy to detract from your writing.
- **Optional: Personalize Your Design (Get Creative!):** This is where you can truly make your dry erase board your own. If you wish to add permanent decorative elements or a consistent “to-do list” heading that won’t accidentally wipe off, now is the time. Using a stencil, if desired, carefully apply your chosen graphic or text onto the white paper with a permanent marker, such as a gold foil pen. Think about adding motivational quotes, your name, or a cute icon. Allow the ink to dry completely to prevent smudging when you assemble the frame. This permanent layer adds a custom, professional finish to your DIY project.
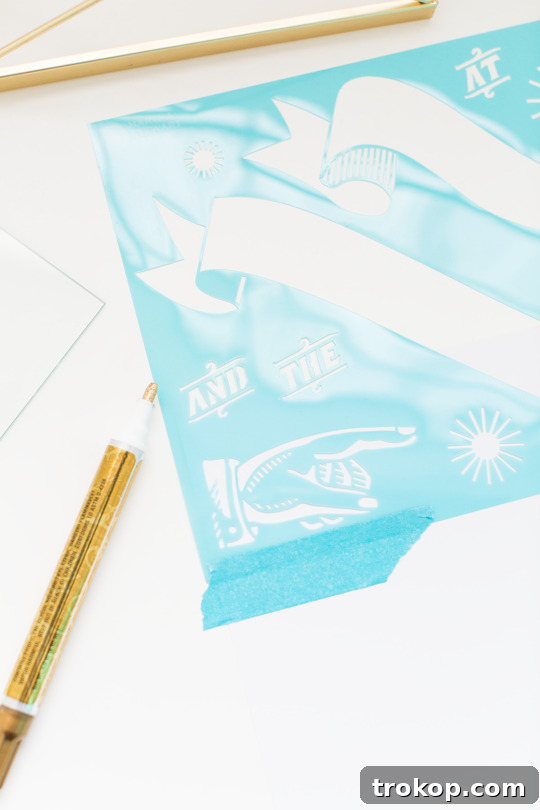
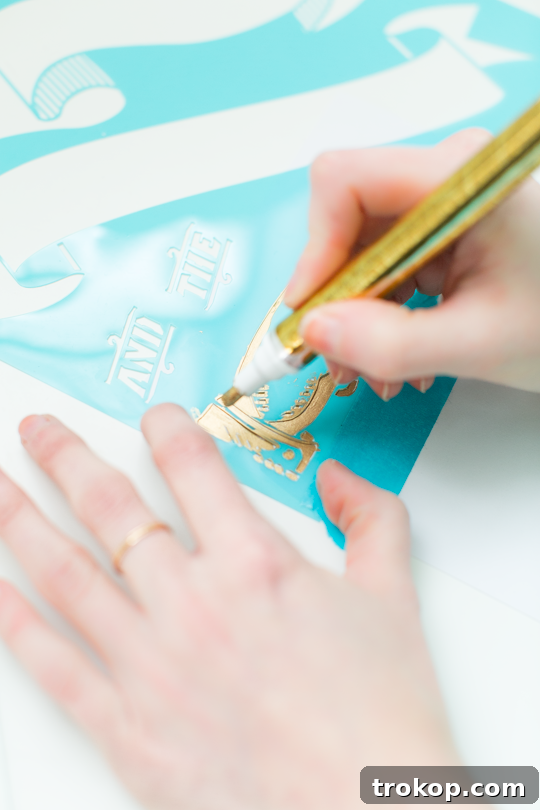
- **Assemble the Board:** Once your personalized paper is dry, carefully place it inside the frame, positioned behind the clean glass. Ensure it lays flat against the glass without shifting.
- **Secure the Backing:** If your photo frame includes a backing board, reattach it now. This step is crucial for holding the glass and your paper backdrop securely in place, creating a firm surface for writing. If your frame doesn’t have a backing, you might consider adding a piece of cardboard cut to size to provide stability.
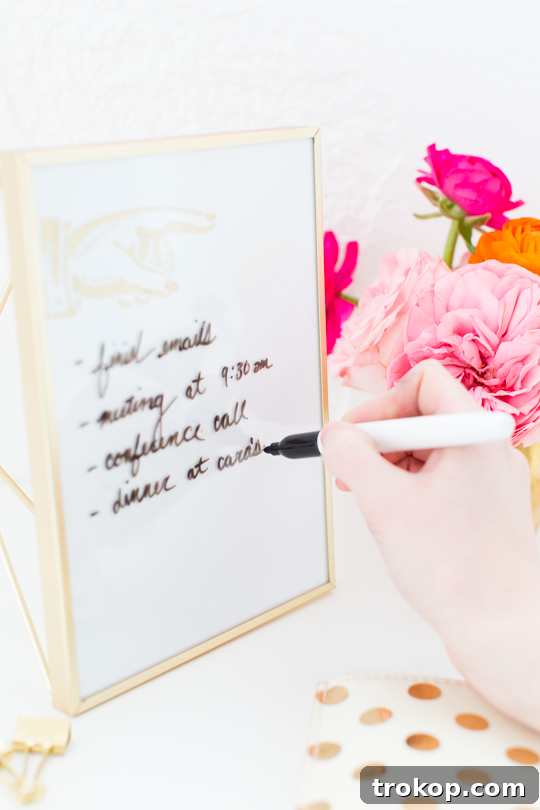
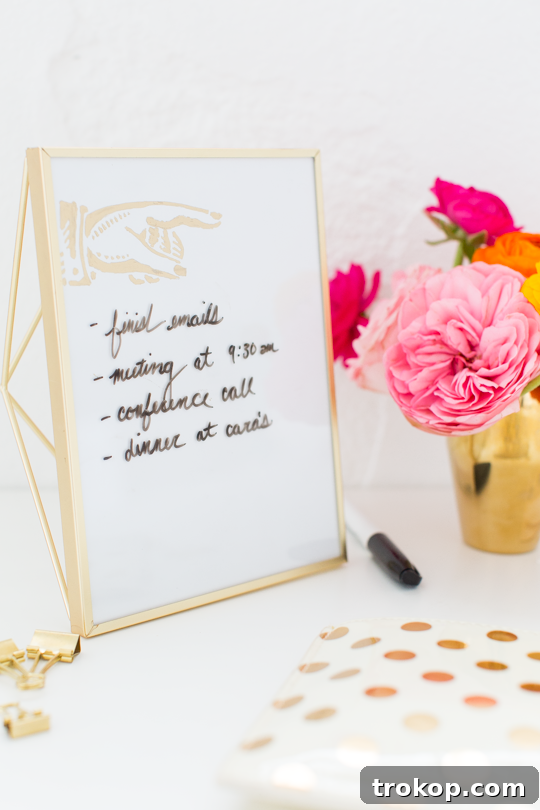
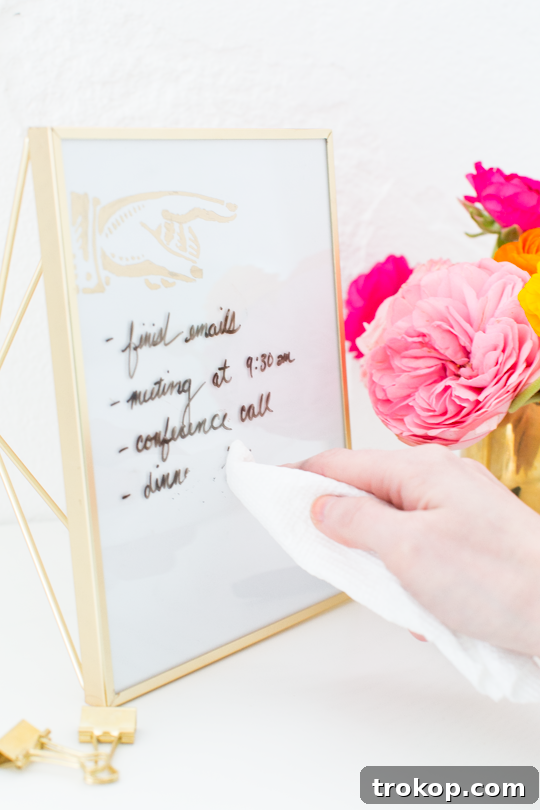
And just like that, your custom DIY Dry Erase Board is ready for action! Position the frame on your desktop in a spot where it’s easily visible and accessible. Grab your favorite dry erase markers and start jotting down notes, reminders, or creative ideas directly onto the glass surface. The beauty of this design is its reusability – simply wipe away your notes with a dry cloth or a small eraser when you’re ready for a fresh start. It’s incredibly easy, endlessly versatile, and adds a touch of sophistication to your desk.
Beyond its practicality, this project serves as a lovely decorative piece. It’s a pretty way to maintain an organized desk, allowing you to display your cute accessories while keeping essential information at your fingertips. Pair it with other handmade items, like a hexagon DIY pencil holder, to create a truly cohesive and inviting workspace that sparks joy and boosts your daily motivation!
Beyond the Board: Other DIY Organization Projects to Try
A tidy and inspiring workspace is key to productivity and well-being. Once you’ve mastered your DIY Dry Erase Board, why not continue your journey into creative organization? We’ve curated some of our favorite DIY projects from our archives, packed with clever ideas to help you maintain a clean, tidy, and aesthetically pleasing environment. These projects are not only fun to make but also incredibly functional, proving that organization doesn’t have to be boring or expensive.
- **DIY Nesting Desk Organizer Set**: Create a modular set of organizers that fit together perfectly, providing dedicated spots for all your pens, clips, and small office supplies. This customizable set helps declutter your drawers and desktop.
- **Hexagonal DIY Pen Holder**: Add a touch of modern geometry to your desk with this unique pen holder. It’s not just for pens; use it to store brushes, markers, or even small plants for a stylish accent.
- **Geometric DIY Chalkboard Desk**: Transform an ordinary desk into a dynamic surface where you can doodle, write notes, and plan your day. The geometric design adds a contemporary flair, making your workspace both interactive and artistic.
- **DIY Desktop Organizer with Cork Board**: Combine storage with a functional pinboard to keep important notes and photos within sight. This organizer is perfect for displaying inspiration and keeping small items contained.
DIY Dry Erase Board
Equipment
- Scissors
Materials
- 1 photo frame with glass any size of your choice
- 1 white cardstock or construction paper
- Gold foiling pen optional
- Stencil Optional
Instructions
- Take out the glass from the photo frame and clean it thoroughly to ensure there are no smudges or residue.
- Cut a piece of white paper to the same size as the glass in the frame. Make sure it fits snugly within the frame without any gaps so that you have a nice white backdrop to write on.
- Optional: Personalize your dry erase board by adding decorative elements, like a stenciled drawing or “to-do list” heading. Add your desired permanent graphic or text onto the white paper using the gold foil pen. Let it dry completely.
- If the frame has a backing, reattach it to hold the glass and paper securely in place. Now you can write on the front glass of the frame with dry erase markers!

We absolutely adore seeing your creative projects! Don’t forget to share your beautifully crafted DIY Dry Erase Board with us on Instagram using the hashtag #sugarandclothloves. Your innovative designs inspire our entire community! For those eager to explore more ways to enhance their living spaces with style and practicality, you can find a wealth of home decor tutorials, design tips, and inspiring ideas right here on our blog. Happy crafting and organizing!
46 Cute Desk Accessories to Brighten Your Workspace
From colorful pens to quirky paperweights, spruce up your work area with these charming and functional desk accessories that add personality and joy.
Continue Reading46 Cute Desk Accessories to Brighten Your Workspace
19 Unique & Easy Houseplants that We’re Loving
Looking for unique house plants to bring life and freshness into your space? Dive into our guide to discover easy-care, stylish greenery that thrives indoors.
Continue Reading19 Unique & Easy Houseplants that We’re Loving
16 Genius Ikea Desk Hacks You Need In Your Life
Discover the ultimate IKEA desk hack guide for creating a stylish and highly functional workspace on a budget, turning simple pieces into personalized masterpieces.
Continue Reading16 Genius Ikea Desk Hacks You Need In Your Life
DIY Flip Photo Album
This DIY Flip Photo Album tutorial shows you how to create a unique and personalized way to display your favorite memories right on your desktop, bringing joy to your workspace.
Continue ReadingDIY Flip Photo Album