
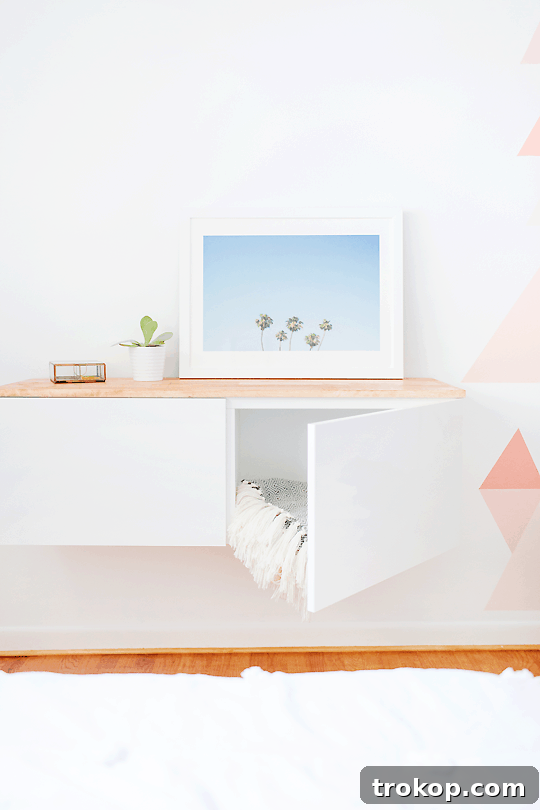
Elevate Your Space with a DIY Floating Credenza: The Ultimate IKEA Besta Hack
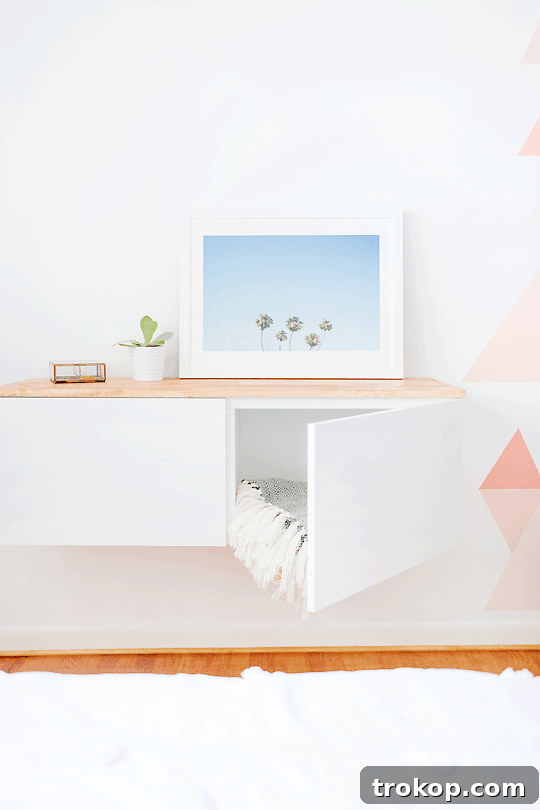
Transforming your living space doesn’t always require a hefty budget or extensive professional help. Sometimes, all it takes is a clever IKEA hack to unlock the full potential of your home decor. Our DIY Floating Credenza IKEA Hack is a testament to this, where modern design meets practical storage, seamlessly redefining any room. This project offers a chic, minimalist aesthetic while providing essential functionality, making it a perfect addition to various spaces, from a child’s bedroom to a sophisticated living area.
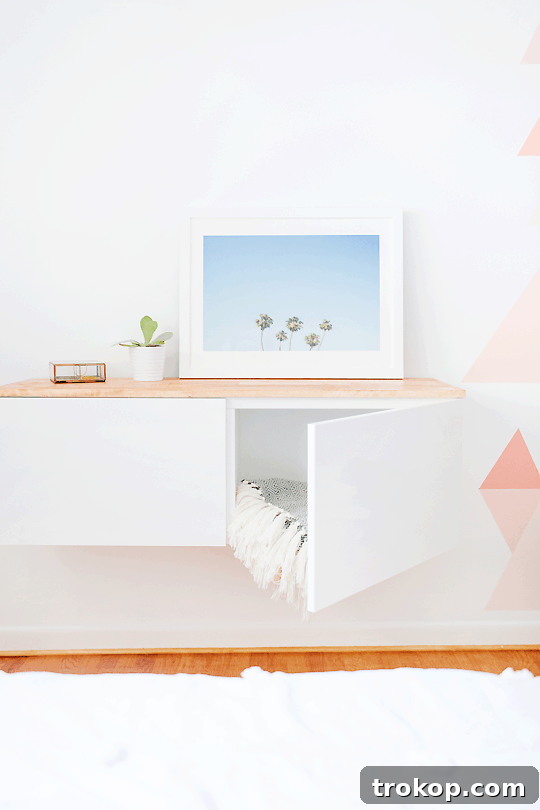
We recently embarked on a mission to elevate a modern girl’s bedroom, aiming for a look that was both mature and playful, vibrant and organized. The room, though small, desperately needed smart storage solutions. The answer? An IKEA Besta hack, of course! IKEA Besta units are renowned for their versatility and clean lines, making them an ideal foundation for countless DIY projects. This floating credenza not only maximized the floor space, creating a more open feel, but also introduced a sophisticated touch with its custom wood top. It proved to be the perfect height for easy access, allowing little ones to tuck away their toys independently, much to the delight of both child and parent. This project truly embodies the win-win philosophy of smart home design.
Join us as we guide you through crafting your own elegant floating credenza. Whether you’re a seasoned DIY enthusiast or new to the world of home improvement, this project is designed to be accessible and rewarding, promising a stylish outcome that looks far more expensive than its actual cost. Say goodbye to clutter and hello to a beautifully organized, modern space with this ingenious IKEA Besta transformation.
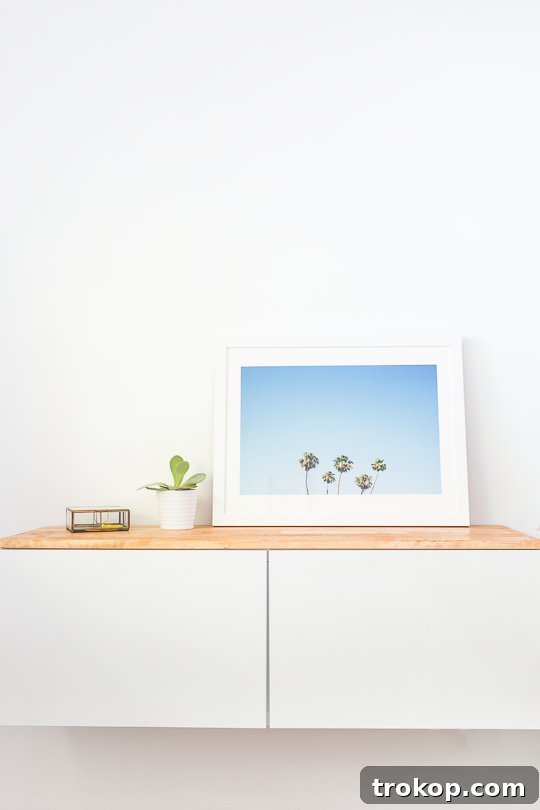
Table of Contents
Materials and Tools Needed to Make an IKEA Floating Credenza Or Modern Floating Wall Credenza
Before you begin your exciting journey into creating a custom floating credenza, gathering all the necessary materials and tools is crucial. This will ensure a smooth and efficient building process, allowing you to focus on the craftsmanship rather than scrambling for supplies. The beauty of this IKEA Besta hack lies in its simplicity and the readily available components. Here’s a detailed list of what you’ll need:
- IKEA Besta Shelf Unit with high gloss white doors: This forms the base of your credenza. We opted for high-gloss white doors to add a clean, contemporary touch, but you can choose any finish that matches your aesthetic. The Besta system is highly modular, offering various sizes and configurations to suit your space.
- Besta shelf suspension rails: These essential rails are what will allow your credenza to “float” by securely mounting it to your wall. They are designed specifically for the Besta system and are critical for a stable installation. You’ll likely need two rails for a standard Besta unit, ensuring even weight distribution and robust support.
- 3/4″ x 47 3/4″ x 16″ Aspen panel: This wood panel will become the custom top of your credenza, adding warmth and a high-end finish. Aspen is an excellent choice due to its light color, smooth grain, and ability to take stain beautifully. Most major hardware stores like Lowe’s offer precise wood-cutting services, so be sure to get your panel cut to the exact dimensions specified for a perfect fit. If you prefer a different wood type like oak, maple, or walnut, feel free to substitute based on your desired look and budget.
- Wood stain in the color of your choice or a stain/polyurethane combo: The stain allows you to customize the wood panel to complement your existing decor. We chose Golden Oak for its warm, inviting tones, which perfectly contrasted with the white Besta unit. If you’re looking to save a step, a stain/polyurethane combo product can be very efficient, providing color and protection in one application.
- Clear high gloss polyurethane: (Optional for top coat) While a stain/polyurethane combo might suffice, an additional clear high gloss polyurethane top coat provides extra durability and a beautiful, protective sheen. This is especially recommended for surfaces that will see frequent use or potential spills, offering enhanced protection against scratches and moisture.
- Dry brush: A good quality dry brush is essential for applying stain and polyurethane smoothly and evenly. Choose a brush size appropriate for the width of your wood panel to ensure efficient coverage.
- Contact cement glue and brush: This strong adhesive is ideal for bonding the wood panel to the Besta unit. Contact cement provides a firm, lasting bond and, unlike many wood glues, doesn’t expand significantly while drying, which means less clamping time and a cleaner finish. Be sure to work in a well-ventilated area when using contact cement.
- Fine sandpaper: Sanding is a crucial step to achieve a smooth, professional finish on your wood panel. Fine-grit sandpaper (e.g., 220-grit) is perfect for preparing the surface for stain and for smoothing any sharp edges, ensuring the credenza is safe, especially in a child’s room.
- Basic Tools: Beyond these specific materials, ensure you have common DIY tools on hand, such as a drill, a level, a measuring tape, a pencil, and a stud finder (for secure wall mounting). Safety glasses are also highly recommended when working with power tools and chemicals.
Steps To Make A DIY Ikea Hack Floating Credenza
Now that you have all your materials and tools ready, let’s dive into the step-by-step process of building your stylish and functional DIY IKEA Besta floating credenza. Careful attention to each step will ensure a beautiful and sturdy final product.
1 — Assemble the IKEA Besta Unit (Main Exterior First)
Begin by assembling the main exterior frame of your IKEA Besta unit according to the detailed instructions provided by IKEA. These guides are usually very clear and easy to follow. However, for this specific hack, it’s crucial to intentionally leave off the doors and any interior shelves for now. This approach allows for easier mounting of the unit to the wall and provides unobstructed access when it’s time to attach your custom wood top. Focusing on the exterior frame first simplifies the initial installation process, making the unit lighter and more manageable.
2 — Measure and Mark the Wall for Placement
Carefully measure and mark the exact position on your wall where you want your floating credenza to be installed. Consider the room’s layout, existing furniture, and the desired height for accessibility and aesthetics. For instance, if it’s for a child’s room, ensure the height allows them easy reach to open and close the doors. Use a level to ensure your marks are perfectly straight, as this will dictate how evenly your credenza hangs. Mark the top and bottom edges of where the Besta unit will sit, as well as the positions for the suspension rails.
3 — Install the Besta Suspension Rails
With your measurements marked, proceed to install the Besta suspension rails. These rails are engineered to provide robust support for your floating unit. It is absolutely critical to install these rails directly into wall studs for maximum stability and safety. Use a stud finder to locate the wooden studs behind your drywall. Follow the instructions that come with the Besta suspension rails for proper attachment. Securely fastening the rails into studs prevents the credenza from pulling away from the wall, ensuring it can safely bear the weight of its contents.
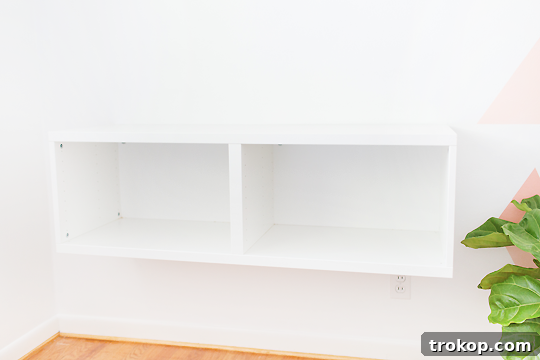
4 — Mount the Besta Unit and Attach the Doors
Once the suspension rails are securely in place, carefully lift and attach the Besta unit frame onto the rails according to IKEA’s instructions. Ensure it clicks firmly into position and feels stable. After the main unit is mounted and secured to the wall, you can now proceed to attach the doors. This sequence is important because attaching the doors beforehand would make the unit heavier and more cumbersome to mount. Carefully align the hinges and screw the doors into place, adjusting them as needed for a perfect, even closure.
5 — Verify the Aspen Wood Panel Fit
Before proceeding with staining and finishing, gently place your custom-cut Aspen wood panel on top of the installed Besta unit. Double-check that it fits perfectly, covering the entire top surface without overhangs or gaps. As mentioned in the materials list, lumber departments at stores like Lowe’s are usually happy to cut the panel to your exact specifications. Ensuring a snug fit at this stage confirms that your measurements were accurate and saves you from potential adjustments later.
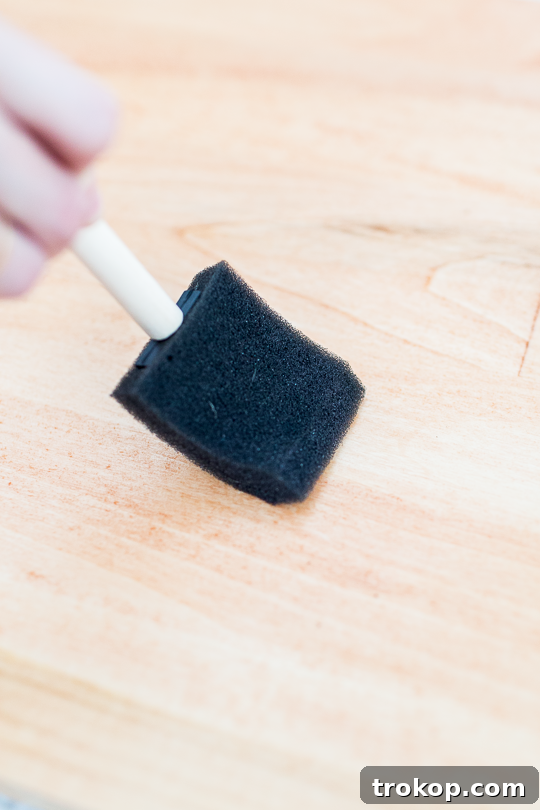
6 — Sand the Wood Panel for Smoothness and Safety
Now, it’s time to prepare your Aspen wood panel for staining. Using fine-grit sandpaper (around 220-grit), thoroughly sand the entire surface of the wood panel until it is perfectly smooth to the touch. Pay special attention to the edges and corners. For an added layer of safety, especially if the credenza is for a child’s room, gently round out any sharp edges. This not only gives the credenza a more finished, refined look but also prevents potential bumps and scrapes.
7 — Stain the Wood Panel
With the panel smoothly sanded, apply several even coats of your chosen wood stain using a dry brush. Apply the stain in the direction of the wood grain for the best results. Allow each coat to penetrate and dry slightly before applying the next, ensuring an even and rich color. Once you’ve achieved your desired depth of color, allow the stained wood to dry completely for at least 24 hours in a well-ventilated area. This drying time is crucial for the stain to fully cure and prevent any stickiness or unevenness in the subsequent polyurethane application.
8 — Apply Polyurethane for Protection
After the stain has thoroughly dried, apply the clear high-gloss polyurethane. Follow the manufacturer’s instructions on the can for application, which typically involves thin, even coats. Polyurethane provides a durable protective layer, guarding the wood against moisture, scratches, and daily wear and tear, while also enhancing the wood’s natural beauty and the depth of the stain. If you are using a stain/polyurethane combination product, this step will be integrated into the staining process, simplifying the finishing. Ensure adequate drying time between coats and for the final coat to fully cure, which can take several hours or even days depending on the product and humidity.
9 — Attach the Finished Wood Panel
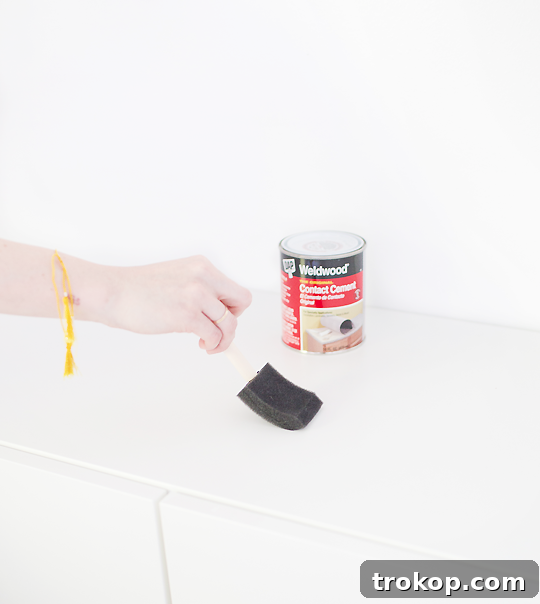
Once the wood panel is completely dry and cured, it’s time to permanently attach it to the top of your Besta unit. Brush contact cement evenly onto the top surface of the Besta shelf unit. Carefully align the finished wood panel and firmly press it into place. Contact cement creates a strong bond instantly upon contact, which is a major advantage over traditional wood glue, as it eliminates the need for extensive clamping while it dries. If you opt for wood glue, you would need to apply even pressure and clamp the panel down for several hours until the glue sets, as wood glue tends to expand slightly. Follow the specific instructions for your chosen adhesive to ensure optimal adhesion.
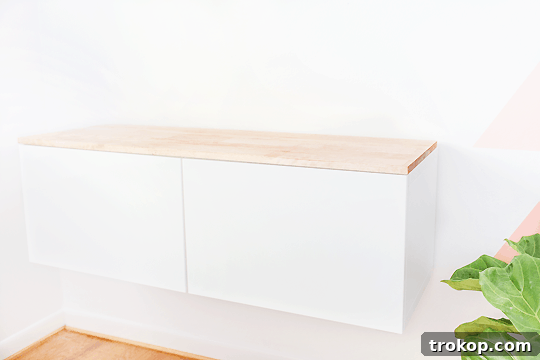
10 — Final Touches and Enjoy!
With the wood panel securely attached and the glue fully set, your DIY IKEA Besta floating credenza is complete and ready for action! Step back and admire your handiwork. Now comes the fun part: filling it with anything and everything! Whether it’s toys, books, dishes, blankets, or media components, this versatile piece of furniture is designed to bring organization and style to your home. Enjoy the satisfaction of having created a custom, modern, and highly functional storage solution that elevates your space.
Styling Your Floating Credenza
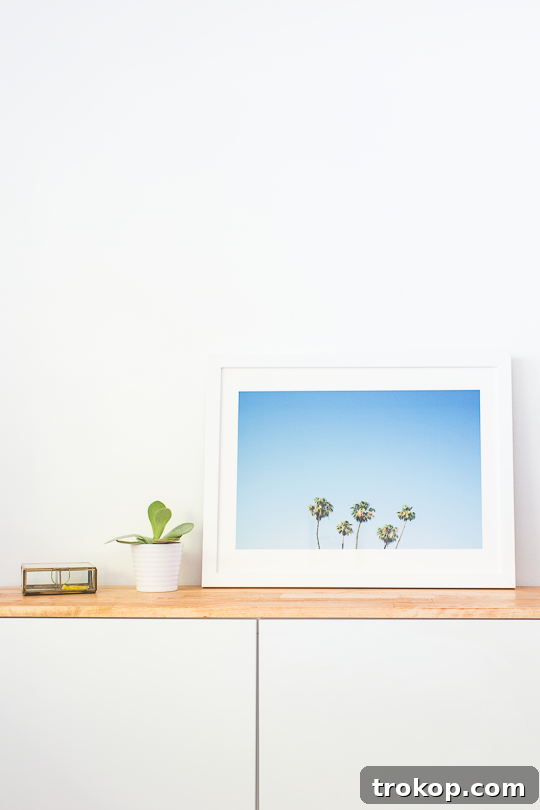
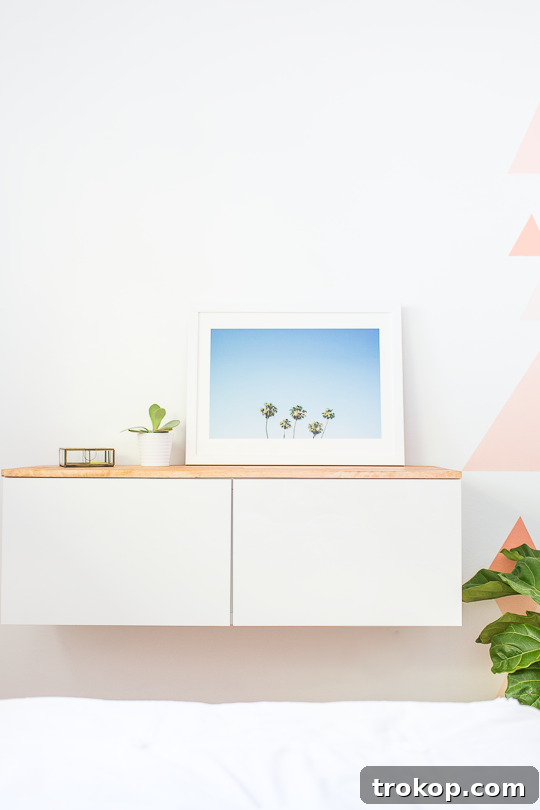
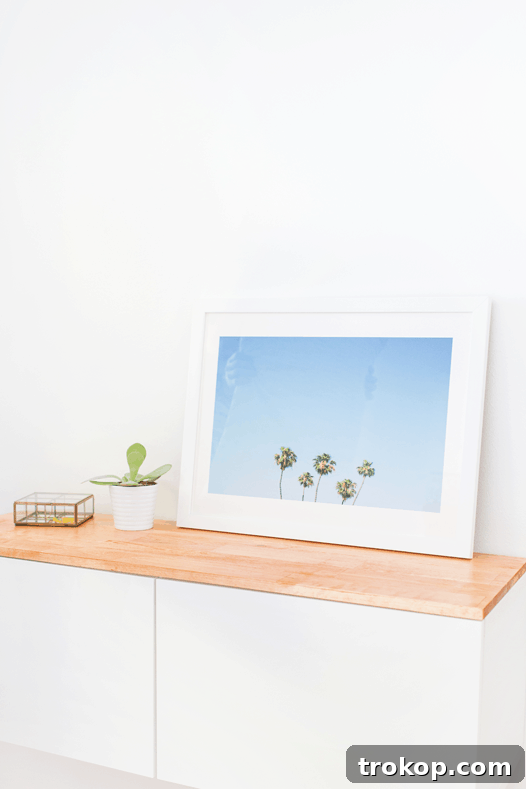
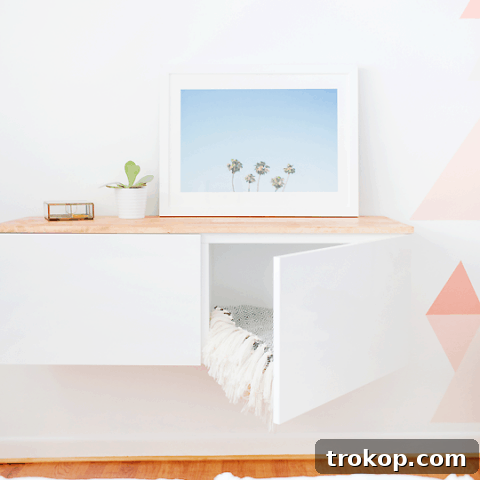
Once your DIY floating credenza is complete, the final step is to personalize it with thoughtful styling. The minimalist design of the Besta unit, combined with the warm wood top, provides a perfect canvas for various decor styles. For our modern girl’s bedroom makeover, we opted for a clean and simple approach that highlights both function and aesthetics. We topped it off with a striking 24×18″ palm tree framed print from Minted, adding a touch of nature and a pop of vibrant green. Complementing this, a cute succulent in a modern planter and a chic gold knick-knack box from Anthropologie added texture and visual interest. Consider adding small stacks of books, a unique vase, or a subtle table lamp to create inviting vignettes. The key is to select a few curated items that reflect your personal style and the overall ambiance of the room, keeping the surface organized yet visually appealing.
More Easy DIY Home Projects
We believe in the power of DIY to transform spaces and inject personality into your home. This floating credenza is just one example of how a bit of creativity and elbow grease can yield stunning results. You can also catch a glimpse of the geometric accent wall we painted using Valspar Reserve paint in the images, a project we’ll be detailing soon! If you enjoyed creating this DIY floating credenza and are eager for more home improvement adventures, explore some of our other favorite IKEA hacks and easy DIY projects from our archives:
- Ikea Bar Cart DIY Stylish Ideas: Discover how to turn a basic IKEA utility cart into a sophisticated bar cart perfect for entertaining or adding a chic touch to your dining area.
- DIY Color Block Storage Ideas: Learn how to add a playful and modern aesthetic to any storage unit using bold color-blocking techniques.
- Ikea Hack Retro DIY Sideboard: Dive into the world of retro design by transforming a simple IKEA piece into a vintage-inspired sideboard that makes a statement.
Each of these projects is designed to be approachable, helping you add custom, unique pieces to your home without breaking the bank. Happy hacking!
DIY Ikea Hack Floating Credenza: Project Overview
Equipment
-
Fine sandpaper
-
Dry brush for applying stain/polyurethane
-
Contact cement glue brush
-
Drill
-
Level
-
Measuring tape
-
Pencil
-
Stud finder
-
Safety glasses
Materials
- 1 IKEA Besta shelf unit with high gloss white doors
- 2 pieces Besta shelf suspension rails
- 1 piece 3/4″ x 47 3/4″ x 16″ Aspen panel
- Wood stain or a stain/polyurethane combo in the color of your choice (e.g., Golden Oak)
- Clear high gloss polyurethane for top coat (optional, but recommended for durability)
Instructions
-
First, build the main IKEA Besta unit exterior, according to the IKEA instructions that it comes with. Remember to leave off the doors and the interior shelves for later installation.
-
Measure and precisely mark where you want the floating credenza to be placed on the wall, using a level to ensure perfect straightness.
-
Next, install the Besta suspension rails to the wall, making sure to anchor them securely into wall studs as per the included instructions, for maximum stability.
-
Once the Besta unit frame is securely mounted on the wall, attach the unit doors last, aligning them carefully for a clean look.
-
When the unit is installed on the wall, place the Aspen wood panel on top to ensure it fits appropriately and covers the entire surface. Remember, hardware stores can cut it to size for you.
-
Now, sand the wood panel surface down until it is perfectly smooth to the touch. Make sure to round out any sharp edges to enhance safety and provide a more refined finish.
-
Then, stain the wood with several even coats of your chosen stain, applying in the direction of the grain. Allow it to dry thoroughly for 24 hours in a well-ventilated area.
-
Once dry, apply the clear high gloss polyurethane according to the can instructions. This step adds a protective, durable finish. (If using a combination stain, this step is integrated.)
-
Lastly, brush on the contact cement to the top of the Besta shelf. Then, carefully rest the finished wood panel on top, pressing firmly to adhere. Contact cement eliminates the need for clamping, unlike wood glue.
-
Once the glue is completely set, you’re ready to fill your DIY IKEA hack floating credenza with toys, dishes, blankets, or anything you need to store!

This room makeover series is made possible in partnership with Valspar. Thank you for supporting the brands that allow us to bring bigger and better content to you!
Ready to tackle more DIY projects? Explore our handpicked selection of creative and functional IKEA hacks and home decor ideas to inspire your next home transformation.
DIY Ikea Play Kitchen Hacks to Make it One-of-a-Kind
Continue ReadingDIY Ikea Play Kitchen Hacks to Make it One-of-a-Kind
16 Genius Ikea Desk Hacks You Need In Your Life
Continue Reading16 Genius Ikea Desk Hacks You Need In Your Life
22 Home Office Ideas that Promote Productivity & Creativity
Continue Reading22 Home Office Ideas that Promote Productivity & Creativity
15 Entryway Storage Ideas to Tame Your Cluttered Chaos
Continue Reading15 Entryway Storage Ideas to Tame Your Cluttered Chaos