
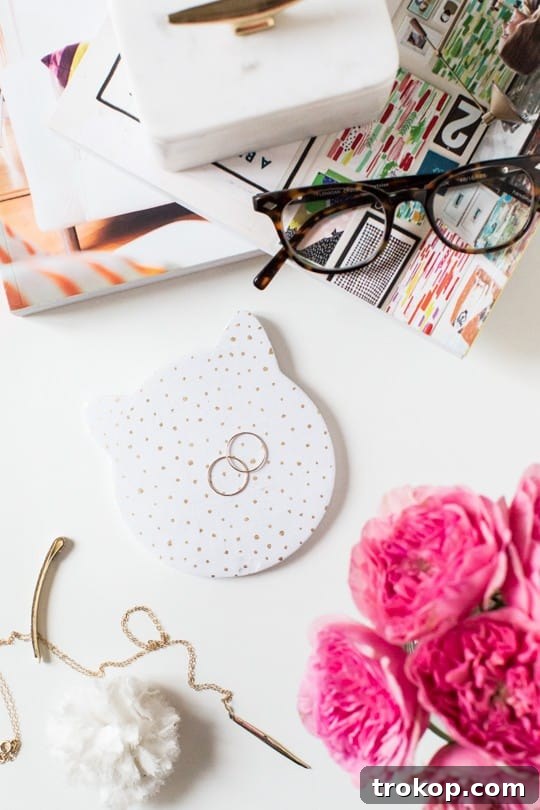
Unleash your inner artist and delight the cat lover in your life with an irresistibly charming DIY Cat Trinket Dish! This simple yet captivating craft project is purr-fect for organizing tiny treasures, adding a personalized touch to any space, or creating a heartfelt handmade gift.
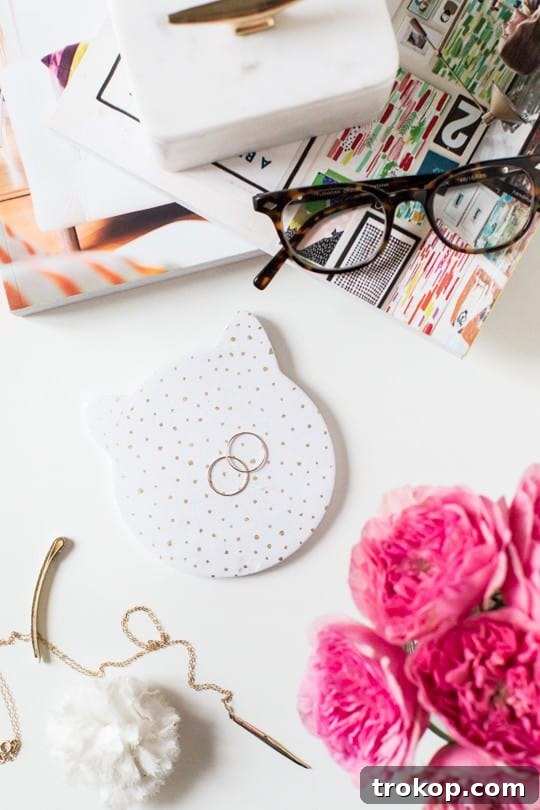
Calling all feline enthusiasts and creative crafters! If you’ve been searching for a unique and endearing way to celebrate your love for cats, or to spoil a friend who adores their whiskered companions, then our comprehensive DIY Cat Trinket Dish tutorial is exactly what you need. This guide offers a delightful journey into the world of air dry clay, transforming a simple block of material into a functional and utterly adorable dish.
Air dry clay is an incredibly versatile and forgiving medium, making it ideal for crafters of all skill levels, including children. Its accessibility means you don’t need special equipment like a kiln, allowing you to create beautiful objects right from your kitchen table. While you can sculpt any shape imaginable, we’ve chosen a charming cat design, inspired by our very own beloved feline, Thomas. This makes the project even more personal and special.
Imagine this custom-made trinket dish gracing a bedside table, holding delicate jewelry, or adorning a desk, keeping paperclips and small notes tidy. It’s more than just a dish; it’s a unique piece of home decor that truly reflects a love for cats, adding warmth and personality to any room. Furthermore, a handmade cat trinket dish makes for an incredibly thoughtful and personalized gift. It shows effort, care, and a deep understanding of the recipient’s passions – perfect for birthdays, holidays, or just because. So, gather your rolling pin, prepare to unleash your creative spirit, and get ready to craft a truly meow-gical masterpiece that will bring joy for years to come!
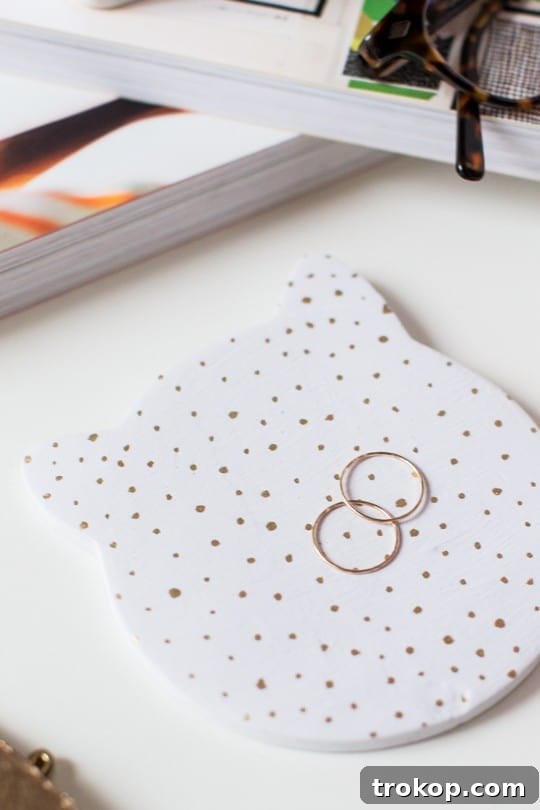
Table of Contents
Toggle
Materials and Tools Needed
Before diving into the creative process, ensure you have all the necessary supplies. Most of these items are readily available at craft stores or online, making this a convenient project for spontaneous crafting sessions.
- White air dry clay: The star of our project! Air dry clay is perfect because it hardens without baking, simplifying the process. White clay provides a clean canvas for painting and decorating.
- Rolling pin: Essential for achieving an even thickness in your clay. A standard kitchen rolling pin works perfectly, or you can use a smooth glass bottle as an alternative.
- Cat cookie cutter: This will give your trinket dish its iconic feline shape. Our cutter measures approximately 4 inches, which is an ideal size for a small dish. Feel free to use a different size or even a different animal shape if you prefer!
- Foam brush: Great for applying an even coat of paint without leaving brush marks.
- White craft paint: An optional but recommended step for a crisp, finished look. Acrylic craft paint works wonderfully and dries quickly.
- Optional: Gold leaf pen: For adding elegant metallic accents, like the gold dots we used, or to highlight edges.
- Optional: Sealant (e.g., clear craft varnish or Mod Podge): While not listed, a sealant is highly recommended to protect your finished dish from moisture, dirt, and wear, extending its lifespan and preserving its beauty.
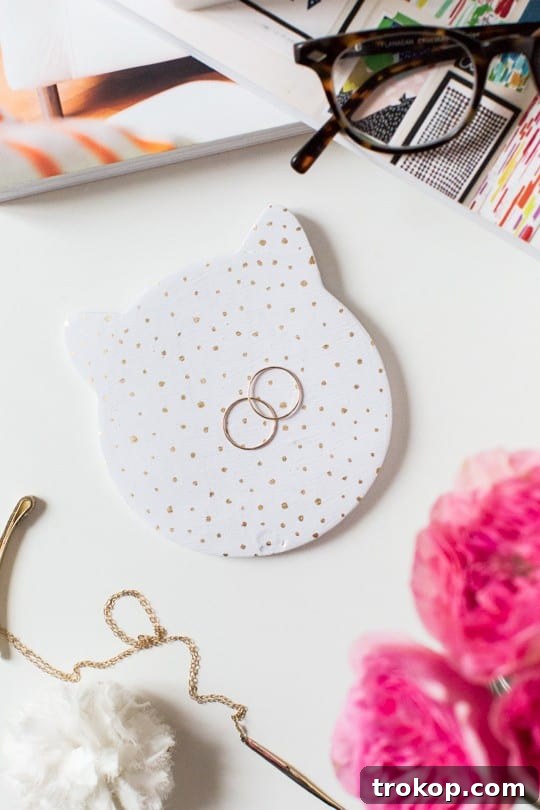
How to Make a DIY Cat Trinket Dish
Follow these simple steps to bring your adorable cat trinket dish to life. Precision and patience are key for the best results, especially during the drying phase.
1 — Begin by taking a generous fistful of your air dry clay. Knead it thoroughly with your hands for about 2-5 minutes. This crucial step softens the clay, making it more pliable and easier to work with, while also helping to remove any air bubbles that could cause cracks during drying. Think of it like warming up dough – you want it smooth and consistent.
2 — On a clean, smooth, non-stick surface (a plastic mat, a piece of parchment paper, or even a ceramic tile works well), roll out the clay using your rolling pin. Aim for a thickness of approximately 1/2 inch. This thickness is ideal for a sturdy trinket dish that won’t be too fragile. Ensure the rolled-out clay is large enough to comfortably accommodate your cat cookie cutter with a small border around its edge. A consistent thickness across the entire piece is vital for even drying and strength.
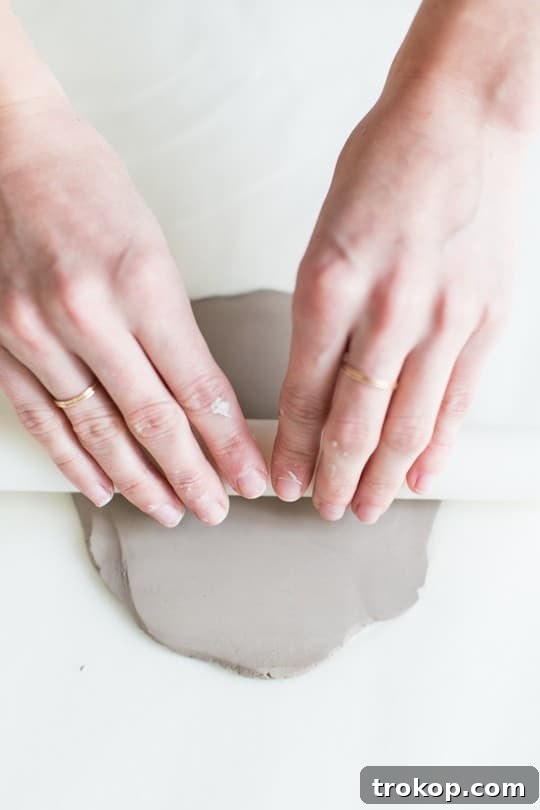
3 — Carefully position your cat cookie cutter onto the rolled-out clay. Press it down firmly and evenly to create a clean, crisp cut. Gently wiggle the cutter side-to-side slightly to ensure the clay detaches cleanly from the edges. Once cut, carefully remove the excess clay from around the cutter. You can re-knead this excess clay and use it for other small projects or a second trinket dish.
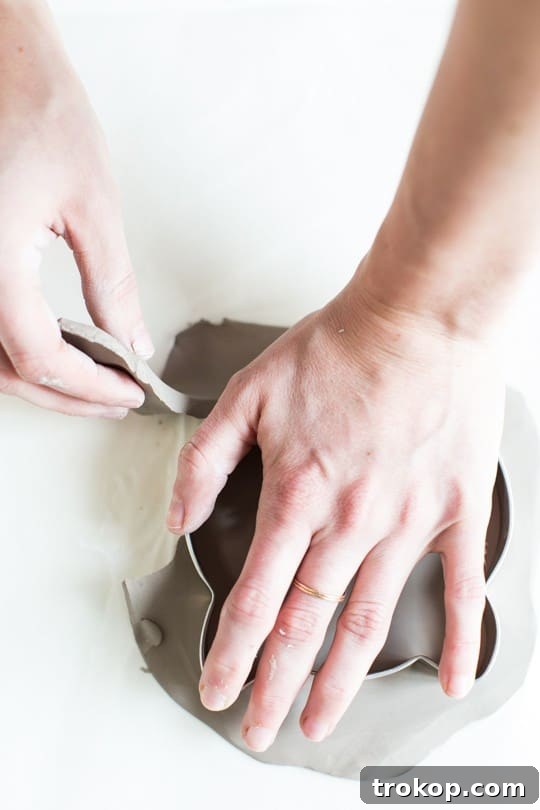
4 — Now, transfer your cat-shaped clay, with the cookie cutter still in place, to a flat, non-stick surface. A baking sheet lined with parchment paper is an excellent choice. This initial drying step, with the cutter still around the clay, helps maintain those perfectly clean and sharp edges that can sometimes be lost when handling wet clay directly.
5 — After allowing the clay to sit and firm up slightly within the cutter for about 30-60 minutes (depending on humidity), gently push the cat-shaped clay out of the cutter. By letting it harden a bit first, you ensure the delicate edges and detailed shape remain intact, giving your handmade item a professional finish.
6 — Allow your clay cat to fully air dry. This is the most crucial part of the process, and patience is a virtue! Depending on the clay’s thickness, humidity, and room temperature, drying can take anywhere from 24 to 72 hours. Our 1/2-inch thick dish took approximately 72 hours to achieve complete dryness. You’ll know the air dry clay is fully cured when it changes from its original color to a uniform off-white or light gray, and feels firm and lightweight. Avoid rushing this step to prevent cracks.
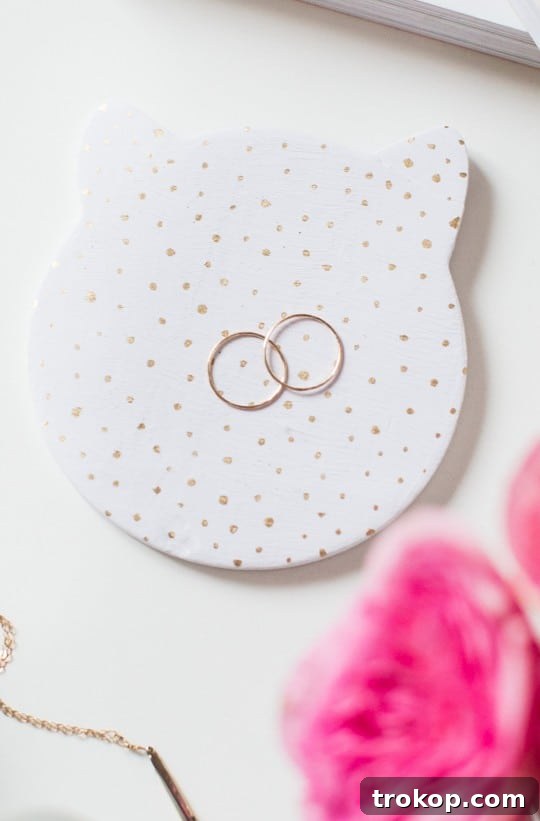
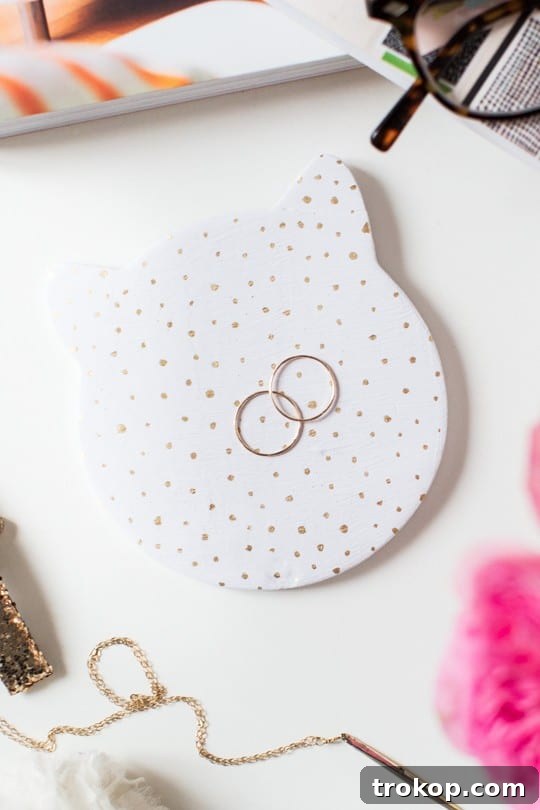
7 — Optional: Once completely dry, you can personalize your dish with paint. Use a foam brush to apply an even coat of white craft paint for a pristine base. Let this coat dry completely. Then, unleash your creativity! We added charming gold dots using a gold leaf pen, but you could paint intricate patterns, add your cat’s name, or use different colors to match your home decor. Once decorated, consider applying a clear sealant for durability and a polished finish.
Tutorial Notes and Tips
Enhance your crafting experience and achieve even better results with these additional tips and creative ideas:
- Shape the dish: The beauty of this project lies in its versatility. You can leave the cat cutout flat for a simple, elegant coaster or shallow tray for tiny items. Alternatively, for a more functional dish shape, gently lift the edges of the cat cutout while the clay is still slightly damp but firm. You can use your fingers to delicately curve the sides upwards, or even place the clay over a small, inverted bowl or cup to help it form a perfect concave shape as it dries. Be sure to smooth out any rough edges with a little water on your finger.
- Experiment with other shapes: Don’t limit yourself to just cats! If a cat cookie cutter isn’t available, or if you simply want to try something different, feel free to use a freehand template of any animal, a geometric shape, or even another favorite cookie cutter. This project is infinitely customizable, allowing you to create dishes that reflect any interest or theme.
- For faster drying: While air drying is the standard and safest method for air dry clay, you can expedite the process slightly. Turn your oven to its absolute lowest setting (typically around 150°F or 65°C) and leave the oven door slightly ajar to allow moisture to escape. Place your clay pieces on a baking sheet lined with parchment paper inside the oven. It is crucial to monitor the clay at all times, as air dry clay is not designed for baking, and too much heat can cause cracking or burning. Check every 30 minutes, turning the pieces to ensure even drying. Remove once firm and completely dry to the touch.
- Turn it into wall art: Before the clay completely dries, you can transform your trinket dish into decorative wall art. Use a skewer or toothpick to create a small hole near the top edge of the cat shape. Once fully dry, thread a piece of decorative ribbon, twine, or leather cord through the hole for easy hanging. This makes a charming decorative accent for any wall.
- Add a protective sealant: To increase the durability and longevity of your finished trinket dish, especially if it will be used frequently or hold items that might introduce moisture (like damp jewelry), apply a clear sealant. A craft varnish, Mod Podge, or even a clear spray sealant works well. This protects the paint, prevents chipping, and adds a subtle sheen.
- Troubleshooting cracks: If small cracks appear during drying, don’t despair! You can often repair them. Mix a tiny bit of fresh clay with water to create a “slip” or paste. Gently fill the cracks with this mixture and smooth it over with a wet finger. Allow the repair to dry completely, then sand lightly if needed before painting.
- Cleaning and care: Once finished and sealed, your trinket dish should be wiped clean with a soft, dry cloth. Avoid submerging it in water or using harsh cleaning agents, as this can degrade the clay or sealant over time.
All Things Pets and Animals
If you enjoyed crafting this feline-inspired dish, you’ll love exploring more projects and ideas for pets and animal lovers. Here are some related posts to spark your next creative endeavor or help you find the perfect gift:
- The Ultimate Guide to Choosing the Perfect Pet Gifts
- No Sew DIY Pet Pillows
- Best Paw-some Gifts for Dog Owners
- DIY Litter Box Cover
- DIY Animal Knobs
- DIY Animal Memo Holders
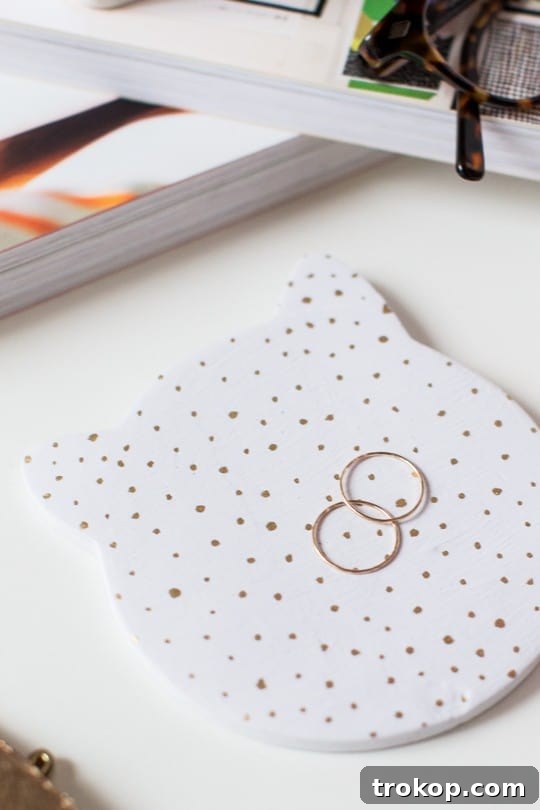
DIY Cat Trinket Dish
Equipment
-
Rolling pin
-
Cat cookie cutter
-
Foam brush
Materials
- Air dry clay any color of choice
- Craft paint optional, in color of your choice
- Gold leaf pen optional for decorating
Instructions
-
Take a fistful of air dry clay and knead it for a few minutes until it is soft and pliable.
-
On a smooth surface, roll out the clay to about 1/2 inch thick, ensuring it’s large enough for your cookie cutter.
-
Press the cat cookie cutter firmly onto the clay, wiggle slightly for a clean cut, then remove excess clay.
-
Place the cat-shaped clay with the cutter still in place on a non-stick surface to begin drying.
-
After the clay has firmed up slightly, gently push it out of the cookie cutter to retain sharp edges.
-
Allow the clay to fully air dry for 24-72 hours, until it turns an off-white color and is firm.
-
Optional: Apply white craft paint with a foam brush, let it dry, then add details like gold dots with a gold leaf pen.

25 Best Clear Stadium Bags for Concerts, Sports & Events
Stay stylish and compliant with the best clear stadium bags for your next concert, sports game, or public event. Our guide helps you find fashionable yet functional options that meet venue security requirements without compromising on style, ensuring you can carry your essentials worry-free and in vogue.
Continue Reading25 Best Clear Stadium Bags for Concerts, Sports & Events
Jet-Set with These 46 Top Travel Gifts for Men
Whether he’s a frequent flyer, an occasional explorer, or dreams of his next big adventure, these 46 top travel gifts for men are sure to inspire wanderlust and enhance any journey. From practical gadgets to luxurious travel essentials, find the perfect present for the traveling man in your life.
Continue ReadingJet-Set with These 46 Top Travel Gifts for Men
Your Guide to Hosting the Perfect Outdoor Movie Night
From DIY projectors to cozy seating arrangements and delicious snacks, explore the best tips and ideas to create an unforgettable cinematic experience under the stars. Learn how to set up, decorate, and make your outdoor movie night a magical event for family and friends.
Continue ReadingYour Guide to Hosting the Perfect Outdoor Movie Night
60 Amazon Bedroom Decor Picks to Revamp Your Room
Discover the best Amazon bedroom decor items to create a stylish, comfortable, and personalized sanctuary. From cozy bedding and elegant lighting to clever storage solutions and decorative accents, explore 60 top picks that will help you effortlessly revamp your room on any budget.
Continue Reading60 Amazon Bedroom Decor Picks to Revamp Your Room