
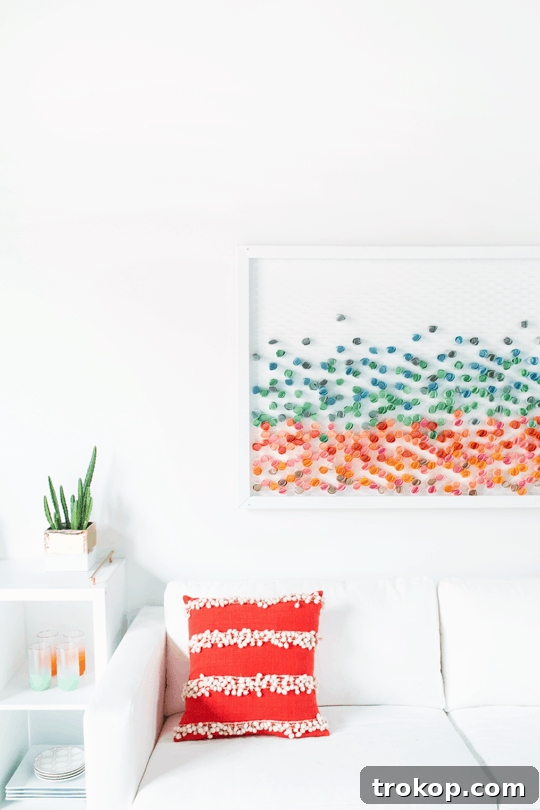
Transform your living space with a touch of personal flair by creating stunning DIY Paper Wall Art! This engaging and remarkably easy project offers a fantastic opportunity to breathe new life into an old frame and a collection of forgotten paper scraps. Utilizing a simple yet effective technique involving chicken wire, you can craft a captivating, layered paper masterpiece that truly stands out.
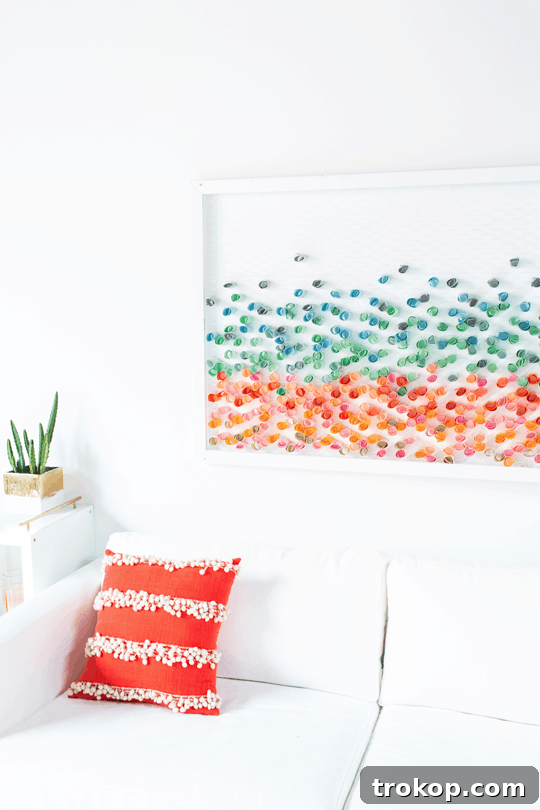
Tired of Bare Walls? Unleash Your Creativity with Upcycled Home Decor
Are your walls looking a little lackluster? Do you yearn for a creative outlet but find yourself constrained by a busy schedule or limited resources? This innovative DIY Paper Wall Art project is the perfect solution. It champions the art of upcycling, transforming what might otherwise be discarded into a vibrant, three-dimensional statement piece for your home. Imagine taking a dusty old frame from the attic and a handful of colorful paper remnants and turning them into a focal point that sparks conversation and joy.
The inspiration for this unique handmade wall decor originated from observing an amazingly clever photo backdrop at a Smilebooth event. The artist ingeniously crafted an entire display using nothing more than chicken wire and paper, inspiring us to develop our own streamlined version of an easy paper wall hanging. This project not only delivers beautiful results but also offers a satisfying creative experience that’s accessible to everyone, regardless of crafting experience.
One of the project’s most appealing aspects is its accessibility and versatility. Chicken wire, a surprisingly adaptable material, is readily available at most hardware stores and forms the robust foundation for your artistic expression. The beauty of this base is that it allows for endless layering possibilities with paper. You can experiment with any type of paper imaginable, from vibrant construction paper and textured cardstock to elegant vintage book pages, old maps, or even your children’s drawings. Each choice adds unique texture, depth, and character, making every piece truly one-of-a-kind. This freedom in material selection ensures that your upcycled home decor can perfectly match your existing aesthetic or introduce an exciting new element.
Furthermore, this project is a celebration of repurposed frame art. Instead of buying new materials, you can revive an old frame that’s been collecting dust in a forgotten corner. This not only gives the frame a fresh lease on life and a whole new purpose but also aligns with sustainable crafting practices. Once completed, your stunning new art piece can grace virtually any room in your home – from brightening up a home office, adding character to a living room, or bringing a personalized touch to a bedroom. Its three-dimensional nature adds a unique visual interest that traditional flat artwork often lacks.
Whether you’re a seasoned crafter looking for your next project or a complete beginner eager to try something new, this comprehensive tutorial will guide you through every step of the process. So, gather your materials, unleash your inner artist, and get ready to add a captivating touch of personalized 3D flair to your home in no time. This is more than just a craft; it’s an opportunity to create meaningful decor that reflects your personality and creativity.

Materials and Tools Needed for Your DIY Paper Wall Art
Before diving into this exciting project, ensure you have all the necessary materials and tools at hand. Gathering everything beforehand will make the crafting process smooth and enjoyable. Remember, the beauty of this budget-friendly DIY is its flexibility; feel free to adapt the colors and types of paper to suit your personal taste.
- Wooden Frame: Any size or style of wooden frame will work beautifully. Look for one that has a flat back to easily attach the chicken wire. An old picture frame, a thrift store find, or even a vintage window frame can be repurposed.
- Chicken Wire: You’ll need enough to cover the entire back of your chosen frame, with approximately a one-inch overlap on all sides for secure attachment. This provides the unique grid structure for your paper art.
- Colored Paper: Prepare a generous supply of paper cut into 2-inch by 8-inch strips. This standardized size works well for creating the layered effect, but don’t hesitate to experiment with different dimensions for varied results. Construction paper is a great start, but consider patterned paper, old book pages, or even tissue paper for diverse textures.
- Staple Gun and Staples: Essential for securely attaching the chicken wire to the wooden frame. Ensure your staples are long enough to grip the wood effectively.
- Wire Cutters: These are crucial for cutting the chicken wire to size and trimming any excess or sharp edges. Heavy-duty wire cutters will make this task much easier and safer.
- Needle-Nose Pliers: These specialized pliers are incredibly useful for bending over any sharp ends of the chicken wire, ensuring a safe and clean finish.
- Spray Paint (Optional): If you want to customize the color of your frame or even the chicken wire itself to match your decor, a can of spray paint in your desired hue will do the trick.
- Wall Standoff Spacers and Appropriate Screws: These are optional but highly recommended for a professional, floating mount. Choose a size appropriate for your frame and wall type. Our example used 15/16-inch spacers.
- Drill and Drill Bit: Necessary if you plan on using wall standoff spacers for mounting. Select a drill bit that corresponds to the size of your mounting screws.
Step-by-Step Guide to Creating Your Paper Wall Art
Follow these detailed instructions to create your unique handmade wall art. Take your time with each step, and don’t be afraid to add your own creative touches!
- Prepare the Chicken Wire: Lay your wooden frame face down on a flat, protected surface. Unroll your chicken wire and use wire cutters to trim it to a size slightly larger than the back opening of the frame. Aim for an overlap of about one inch on all sides. This extra margin will ensure a secure attachment.
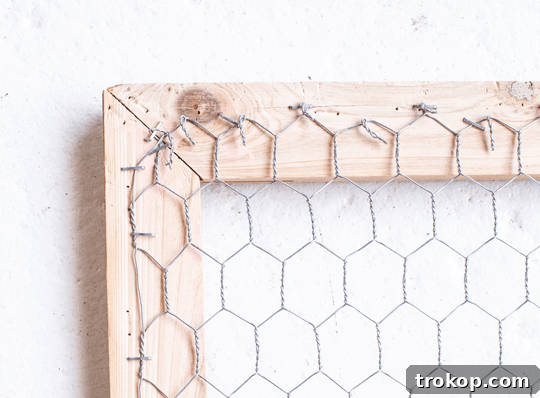
- Secure the Chicken Wire to the Frame: Carefully center the cut chicken wire over the back of the frame. Using your staple gun, begin securing the wire to the frame. Start by placing a few staples in the center of each side, gently pulling the wire taut as you go. Then, work your way outwards, placing staples every 1-2 inches. This ensures the chicken wire is tightly stretched across the frame, preventing any sagging. Once fully stapled, use your wire cutters to trim away any significant excess chicken wire close to the staples. With needle-nose pliers or the side of your wire cutters, carefully bend over any sharp wire edges to prevent injury and create a neat finish.
- Optional: Customize with Spray Paint: If you desire a different look for your frame or the chicken wire, now is the time to apply spray paint. Ensure you’re in a well-ventilated area. Apply several light, even coats to both the frame and the chicken wire, allowing each coat to dry thoroughly according to the paint manufacturer’s instructions. This step allows for further personalization, making your upcycled frame project truly unique.
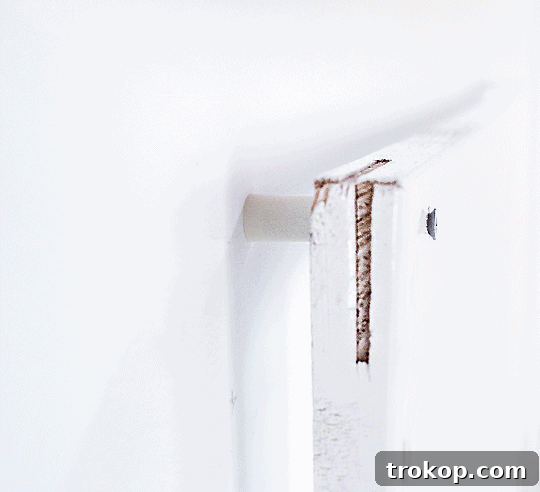
- Prepare for Wall Mounting (Optional, for standoff spacers): If you plan to use wall standoff spacers for a modern, floating effect, measure and mark the precise placement of the screw holes on the back of your frame. Typically, these will be in all four corners. Choose a drill bit that corresponds to the size of the screws provided with your standoff spacers. Carefully pre-drill pilot holes at your marked positions. Pre-drilling prevents the wood from splitting and makes screw insertion much easier.
- Install Wall Standoffs and Mount the Frame: Follow the specific installation directions provided with your wall standoff spacers. Line up the standoff hardware with the pre-drilled holes on the frame and secure them using a screwdriver. Do not overtighten. Next, carefully mark the corresponding positions on your wall where the frame will hang. Depending on your wall material (e.g., drywall, brick, plaster), you may need to use wall anchors and pre-drill pilot holes for the screws. Use a drill bit slightly smaller than your screw diameter. Once the wall standoffs are securely attached to the wall, carefully mount your frame onto them, ensuring it is level and stable.
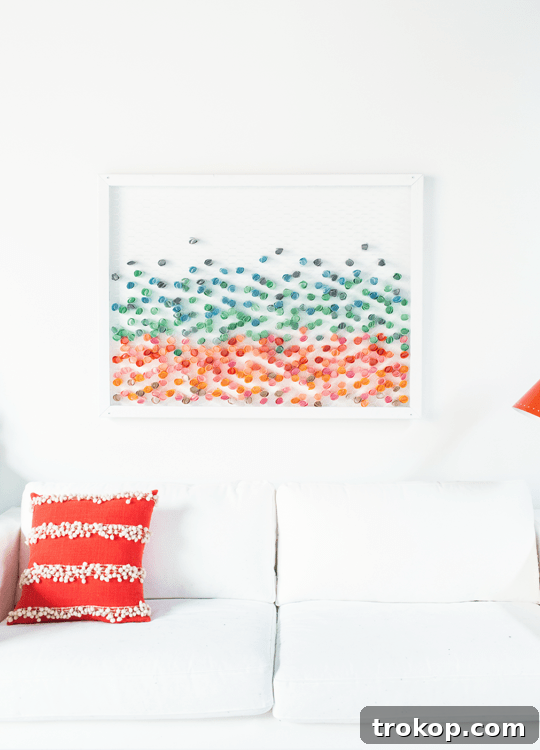
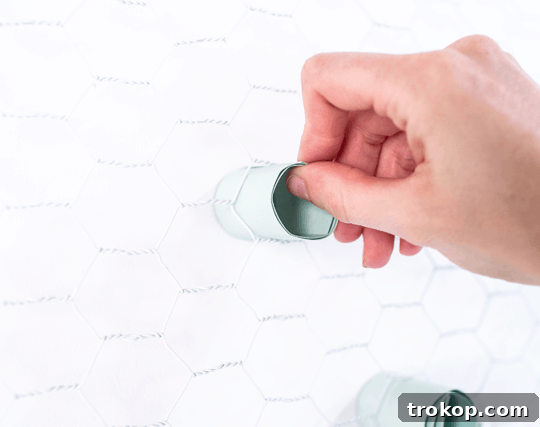
- Add the Paper Strips: Now for the most exciting and creative part! Take your 2-inch by 8-inch strips of colored paper. Roll each strip tightly or loosely, depending on the desired texture and volume you want to achieve. Once rolled, gently insert the paper strips into the hexagon openings of the chicken wire. You can push them through from the front or weave them in from the back. There’s no right or wrong way – experiment with different colors, patterns, and densities.
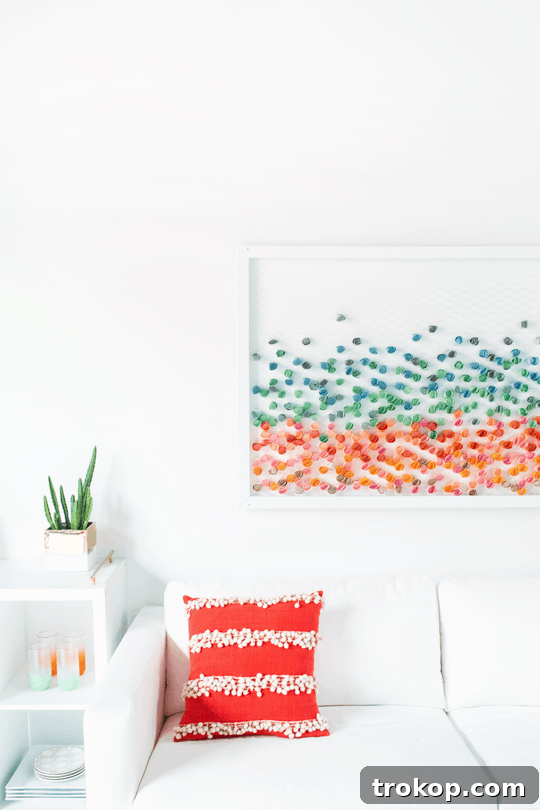
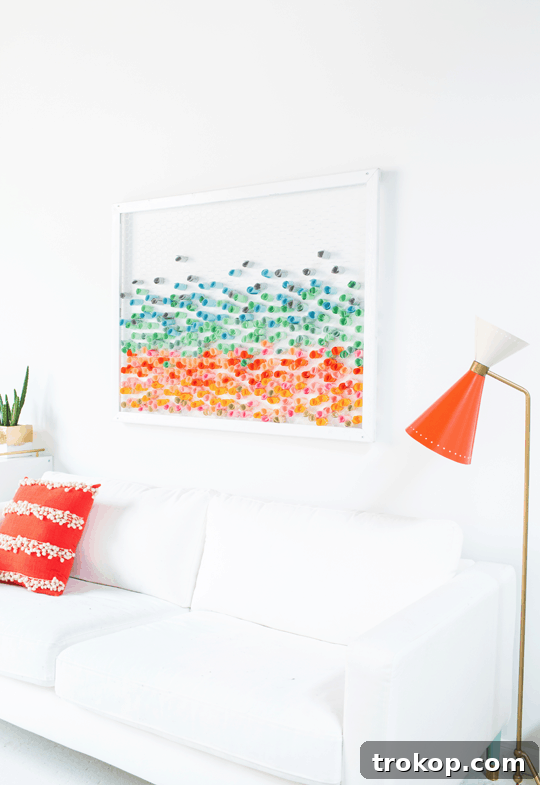
- Arrange and Refine Your Artwork: Continue filling up the chicken wire grid with paper strips, creating patterns, gradients, or a random explosion of color. You can fill the entire frame, leave some areas sparse for a minimalist look, or create specific shapes and designs. Step back frequently to assess your progress. You can easily add more paper pieces, rearrange existing ones, or trim any strips that seem out of place. This iterative process allows you to refine your creative wall art until you are completely satisfied with your layered paper masterpiece.
Tutorial Tips and Notes for Best Results
To ensure your DIY paper wall art project is a resounding success, consider these additional tips and creative variations:
- Experiment with Paper Types: Don’t limit yourself to just construction paper! Explore a variety of paper types and textures to achieve unique visual and tactile effects. Consider using tissue paper for a delicate, translucent look, patterned papers for intricate designs, old book pages or sheet music for a vintage aesthetic, or even recycled magazines and newspapers for an eco-friendly and vibrant collage. Each material brings its own character to the finished piece.
- Securing Paper (Optional): While the chicken wire is designed to hold most paper pieces in place, especially if rolled tightly, you can use small dabs of spray adhesive or a tiny drop of craft glue on the end of a paper strip if you find certain pieces need extra security. This is particularly useful for lighter papers or if your art will be in a high-traffic area.
- Endless Customization: This project is inherently customizable. Adjust the size of the frame to fit your wall space, choose a color palette that complements your room’s decor, or vary the paper strip dimensions for different visual effects. You can create abstract designs, subtle color gradients, or even spell out initials or simple words with careful paper placement. Let your imagination be your guide!
- Beyond Rolling: Instead of rolling, try folding paper strips in accordion style, crimping them, or cutting them into various shapes before inserting them. These techniques can add even more depth and visual interest to your artwork.
- Utilize Leftovers: Don’t let small paper scraps go to waste! Use any leftover pieces to construct other creative projects, such as a DIY Paper Shapes Artwork or custom greeting cards.
- Theme Your Art: Consider creating themed paper wall art for specific seasons (e.g., warm tones for autumn, pastels for spring) or holidays. This allows your decor to evolve with the year.
More Easy DIY Projects for Your Home
If you enjoyed crafting this unique chicken wire craft, you’ll love exploring other creative ways to decorate your space. Dive into our archives for more inspiring and easy-to-follow DIY tutorials that can add personality and charm to every corner of your home:
- DIY Wooden Artwork: Discover how to create rustic or modern wooden art pieces to complement your interior design.
- DIY Rainbow Wall Hang: You’d never guess that we used pool noodles for this surprisingly vibrant and cheerful wall decor!
- Free Printable Watercolor Art: Instantly elevate your walls with beautiful, free printable watercolor designs.
- DIY Pegboard Art: Combine functionality and aesthetics with customizable pegboard art that can serve as both decor and organized storage.
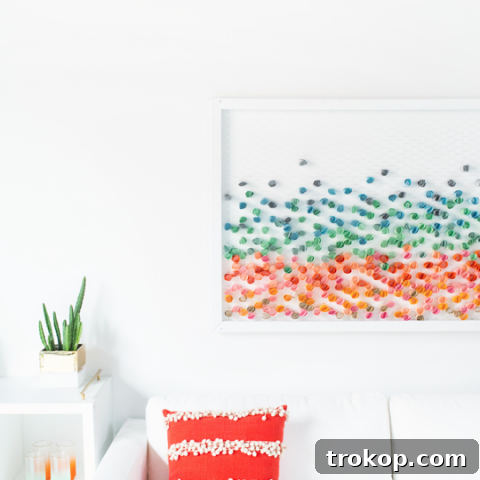
DIY Paper Wall Art: Quick Guide
This easy DIY Paper Wall Art, crafted from paper, chicken wire, and an old wood frame, makes a captivating statement piece for your home decor!
Prep Time: 1 hour
Total Time: 1 hour
Course: DIY
Category: Wall Art
Equipment
- Wire cutters
- Staple gun and staples
- Needle-nose pliers
- Drill and drill bit (if using standoff mounts)
Materials
- Wooden frame (any size/style)
- Chicken wire (enough to cover frame back with overlap)
- Spray paint (optional, in color of your choice)
- Colored paper (cut into 2″x8″ strips, various colors/textures)
- Standoff wall mounts & screws (optional, for floating mount)
Detailed Instructions
- Cut the chicken wire to a size slightly larger than the back of your frame (approx. 1-inch overlap).
- Secure the chicken wire to the back of the frame using a staple gun, pulling taut. Trim excess and bend sharp edges with pliers.
- Optional: Spray paint the frame and wire, allowing it to dry completely.
- If using standoff mounts, measure and mark placement on the frame. Pre-drill holes for screws and spacers.
- Install wall standoffs according to package directions, then mount the frame to the wall.
- Roll up the 2″ x 8″ colored paper strips and insert them into the hexagon openings of the chicken wire.
- Fill and arrange the paper strips as desired to create your unique art piece.

Related Wall Decor Ideas
43 Top Amazon Wall Decor Ideas for Every Room in Your Home
Find gorgeous Amazon wall decor that makes a big impact on a budget, perfect for any style…
Continue Reading43 Top Amazon Wall Decor Ideas for Every Room in Your Home
28 Decorative Wall Mirrors You’ll Wish You Bought Sooner
Looking for the perfect wall mirror to elevate your decor? Explore our roundup of stunning options…
Continue Reading28 Decorative Wall Mirrors You’ll Wish You Bought Sooner
25 Large Wall Clocks for Your Living Room
Looking for the perfect extra large wall clock to make a statement? Explore stylish designs and functional decor…
Continue Reading25 Large Wall Clocks for Your Living Room
19 Unique & Easy Houseplants that We’re Loving
Looking for unique house plants to brighten your indoor space? Dive into our guide to beautiful, low-maintenance options…
Continue Reading19 Unique & Easy Houseplants that We’re Loving