
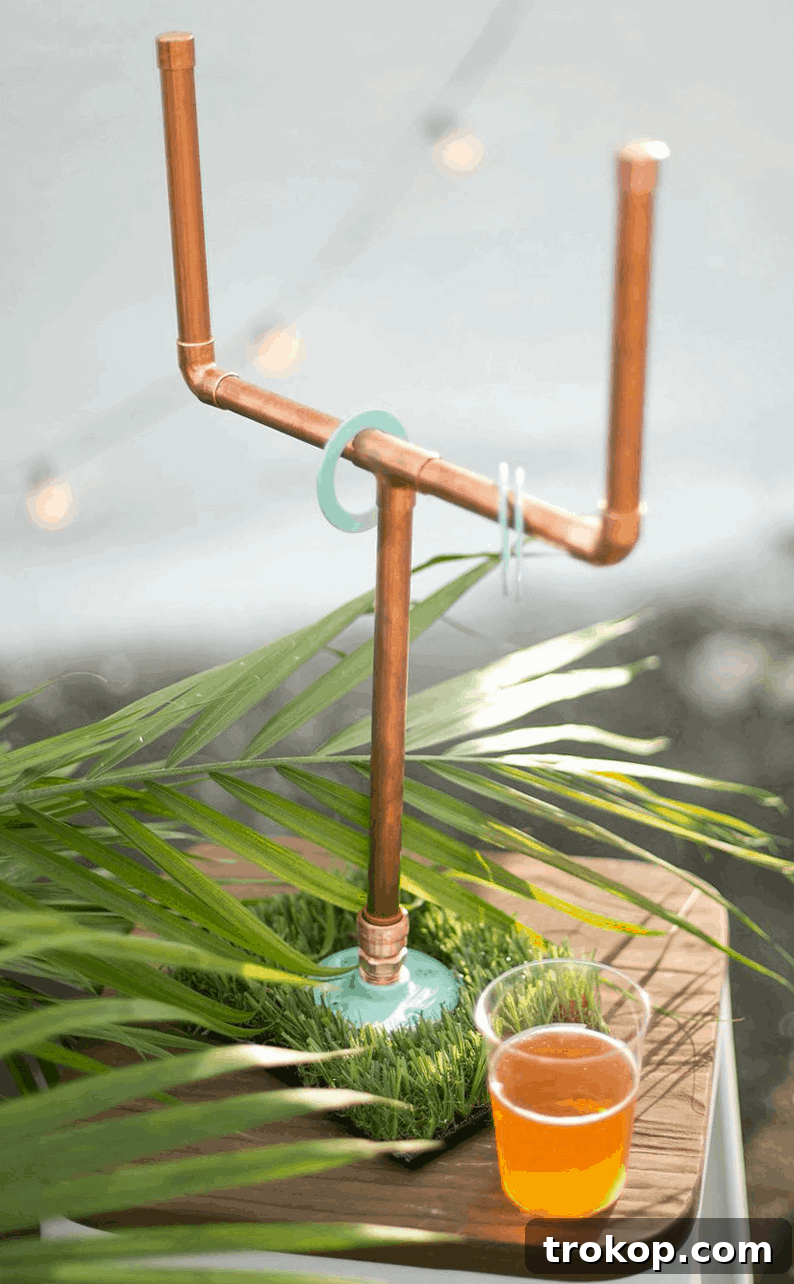
Craft Your Own Fun: The Ultimate DIY Copper Washers Yard Game for Tailgates & Parties
Are you ready to elevate your outdoor gatherings, tailgating events, or football watch parties with a classic game reimagined? Introducing a modern, DIY version of the beloved Washers Yard Game, crafted with stylish copper pipes! This project offers a fantastic way to add a personalized touch to your entertainment lineup, promising hours of engaging fun for friends and family alike.
We recently embarked on this DIY adventure, and I must confess, our initial attempt inadvertently led to what felt like the most challenging yard game on the planet! In my rush to prepare for a rooftop watch party photoshoot, I overlooked finding larger metal washers. The result? Watching a grown man nearly lose his mind with exhilaration after finally sinking a single washer around a goal post after a grueling half-hour of relentless effort was, to say the least, hilarious.
This anecdote serves as a crucial piece of advice: while you absolutely should make this awesome DIY Washers Yard Game, please promise me you’ll procure washers that are adequately sized. Trust me, you don’t want to curse my name during your first game session! With the right size washers, this game becomes an incredibly accessible and enjoyable activity for all skill levels.
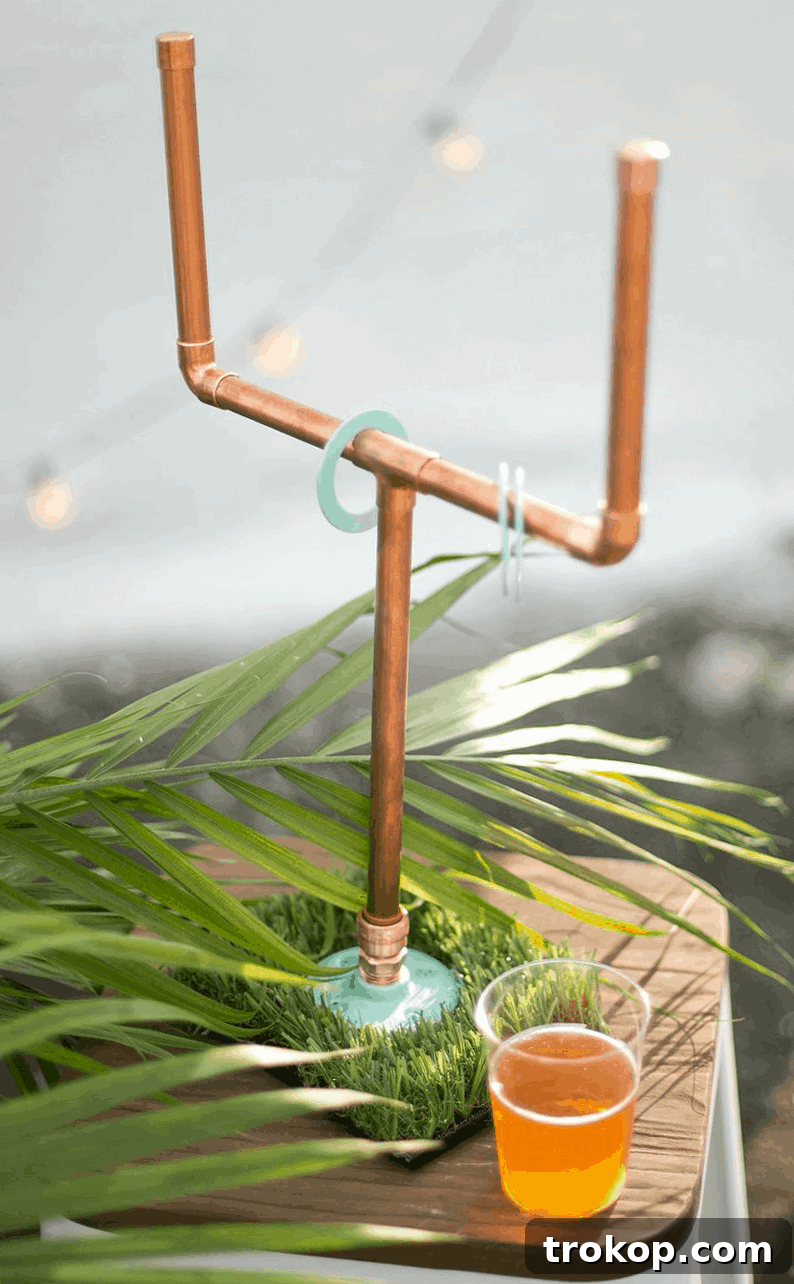
Why Build a DIY Copper Washers Yard Game?
Beyond the sheer joy of creating something with your own hands, a DIY Washers game offers a multitude of benefits that make it an essential addition to your outdoor entertainment arsenal.
Perfect for Any Occasion
This copper washers game is incredibly versatile. Whether you’re hosting a lively tailgate before the big game, a casual backyard barbecue, a family reunion, or even just a relaxed afternoon with friends, this game fits right in. Its compact design when disassembled makes it highly portable, allowing you to bring the fun wherever you go. Imagine the friendly competition and laughter it will inspire at your next gathering!
Customizable and Unique
One of the best aspects of a DIY project is the ability to infuse your personal style. From choosing your favorite spray paint colors to match your favorite team or party theme, to selecting unique finishes for the wood bases, every element can be tailored. This isn’t just a game; it’s a statement piece that reflects your creativity and passion for fun.
A Rewarding Project for All Skill Levels
Don’t be intimidated by the idea of DIY! This project is designed to be straightforward, even for beginners. With clear instructions and readily available materials from your local hardware store, you’ll find the process both enjoyable and highly rewarding. The sense of accomplishment you’ll feel after completing your very own handcrafted yard game is unmatched.

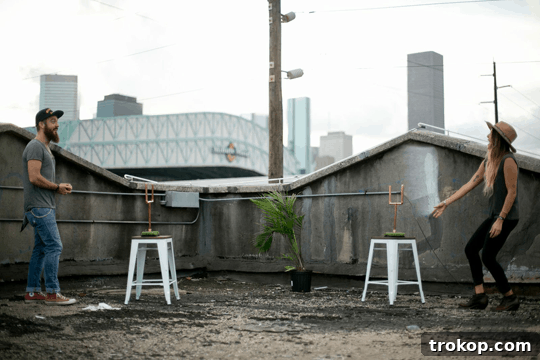
Table of Contents
Understanding the Washers Yard Game
Our DIY Washers game draws inspiration from classic ring toss and traditional washer toss, offering a similar objective with a unique copper aesthetic. It’s also conceptually similar to our popular DIY Flamingo Ring Toss game, but with a more robust and stylish design.
Basic Rules and Objective
The primary goal of the game is simple: players take turns tossing washers, aiming to get them around the designated goal posts. Each successful toss around a post earns a player or team points. The beauty of this game lies in its adaptability – you can customize the distance, scoring system, and even add bonus points for specific throws, making it as competitive or casual as you desire. We find that setting up two goal posts a fair distance apart (e.g., 10-20 feet) creates a balanced challenge.
Customizing Your Gameplay
Since this is a DIY creation, the rules are entirely yours to define! Here are a few ideas to get you started:
- Scoring Variations: Assign different point values for washers that land inside the base, lean against the post, or perfectly ring the post.
- Team Play: Divide into two teams, each with their own colored washers, and alternate throws.
- Distance Challenges: Vary the throwing distance for different skill levels or to add an extra layer of difficulty.
- Tabletop Fun: The compact nature of these goal posts also makes them fantastic tabletop decor for a sports-themed party. Imagine a mini-game right on your snack table!
It’s easy to make, and even easier to play—provided you follow our crucial tip about purchasing large washers!
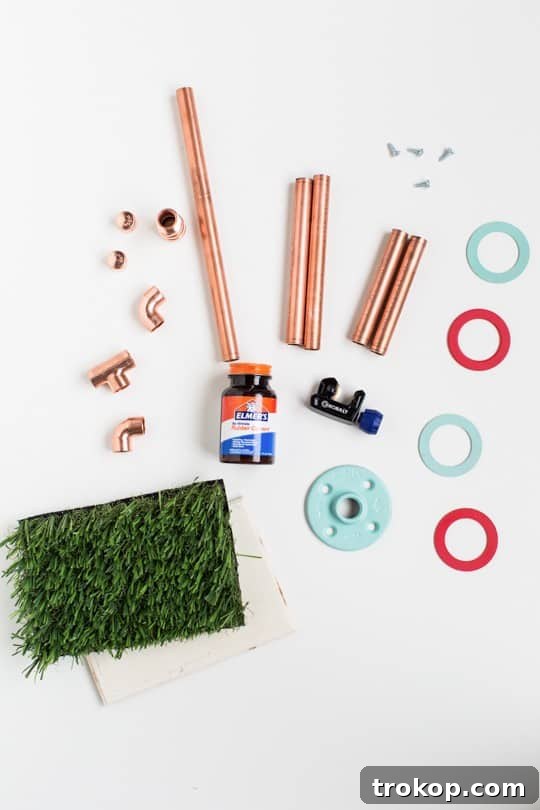
Gathering Your Supplies: Materials and Tools Needed for the DIY Washers Yard Game
Before you dive into building, ensure you have all the necessary materials and tools. Most of these items can be found at your local hardware store, making this a convenient and budget-friendly project.
Essential Materials
- 8 copper pipes, each measuring 4 1/4 inches long
- 2 copper pipes, each measuring 10 inches long
- 2 of 1/2-inch copper T fittings
- 2 of 1/2-inch copper 90-degree elbow fittings
- 2 of 1/2-inch galvanized floor flanges
- 4 of 1/2-inch copper end caps
- 2 of 1/2-inch copper push-fit male adapters
- 8 #8 1/2-inch wood screws
- 6 metal washers (remember our advice: the BIGGEST size you can find!)
- 2 pieces of 6″x8″ wood for the bases
- 2 pieces of 6″x8″ astro turf or faux grass for the bases
- 2 spray paint colors of your choice (one for each team)
- Contact cement (for securing copper pipes)
- Hot glue sticks (for hot glue gun)
- Optional: Craft paint (e.g., black) and a foam brush for painting the wooden boards
Tools You’ll Need
- Mini tube cutter (for copper pipes, if not pre-cut)
- Hot glue gun
- Box cutter or utility knife (for astro turf)
- Screwdriver or power drill (for wood screws)
- Protective gloves and eyewear (for safety during cutting and painting)
Step-by-Step Guide: How to Construct Your DIY Washers Yard Game
Follow these instructions carefully to build your durable and stylish copper washers game. Active construction time is approximately 30 minutes, with an additional hour for drying.
Step 1: Assembling the Copper Goal Posts
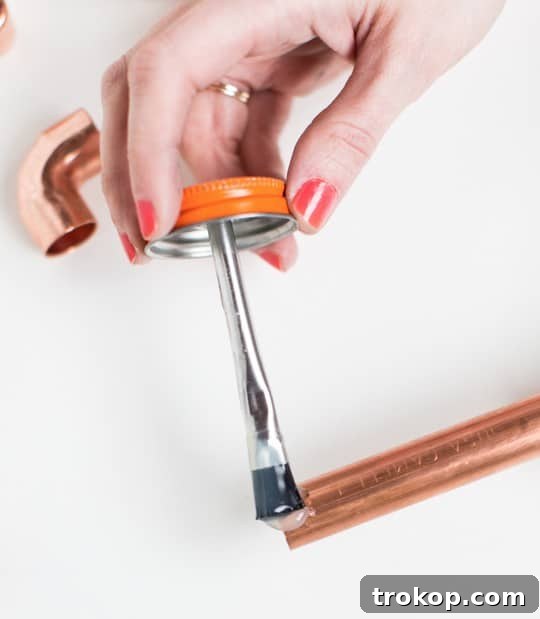
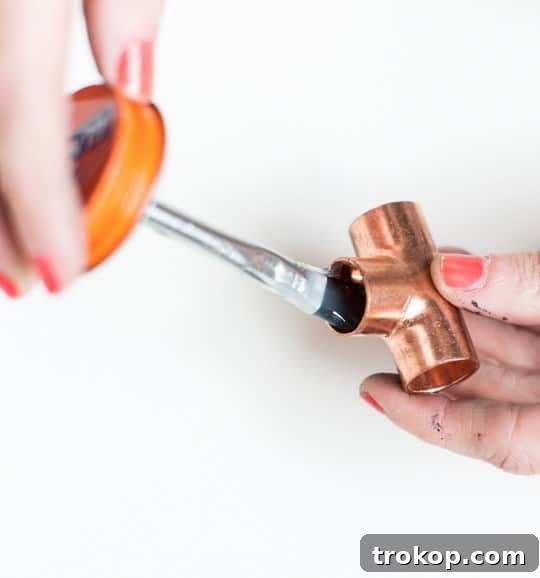
Begin by constructing the two copper goal posts. For a secure and lasting bond, use contact cement. Brush the contact cement onto the inside of each fitting (T fittings, elbow fittings, end caps) and the outside ends of the copper pipe pieces that will be inserted into them. It’s crucial to apply cement to both surfaces for a strong connection.
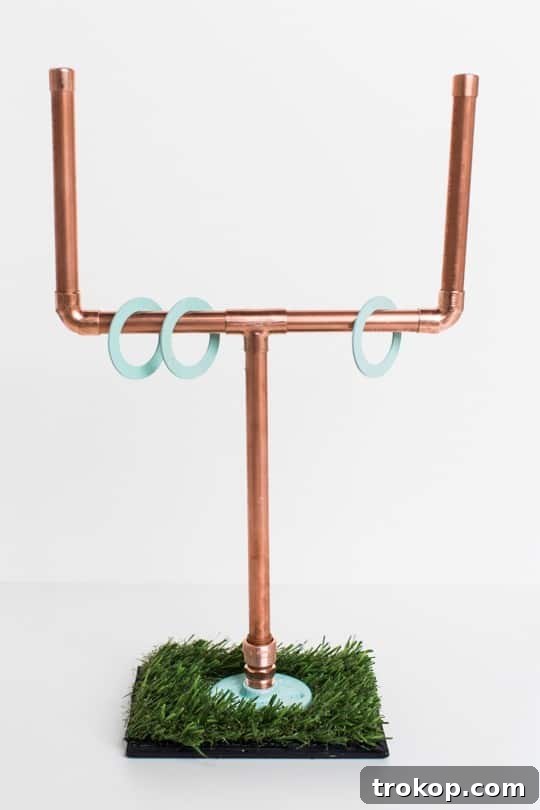
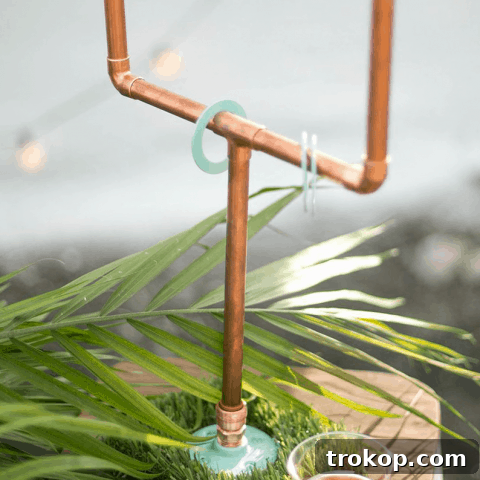
After applying the contact cement, allow it to become tacky. This typically takes a few minutes, as specified by the cement’s instructions. Once tacky, carefully insert the pipe sections into the fittings, pressing firmly to ensure a tight, permanent bond. Refer to the visual guide below for precise placement of each pipe length and fitting. You’ll create two identical goal posts that resemble miniature football uprights.
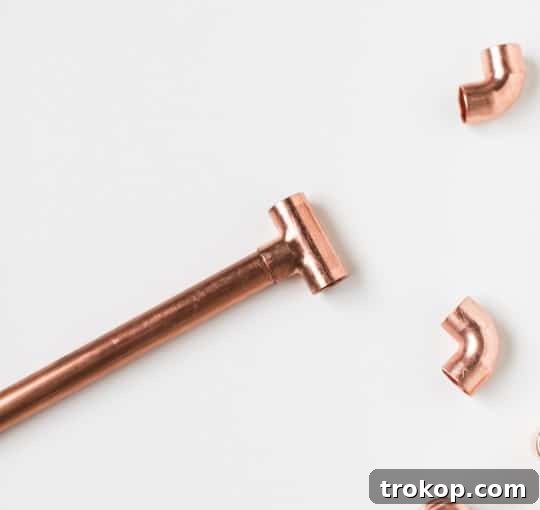
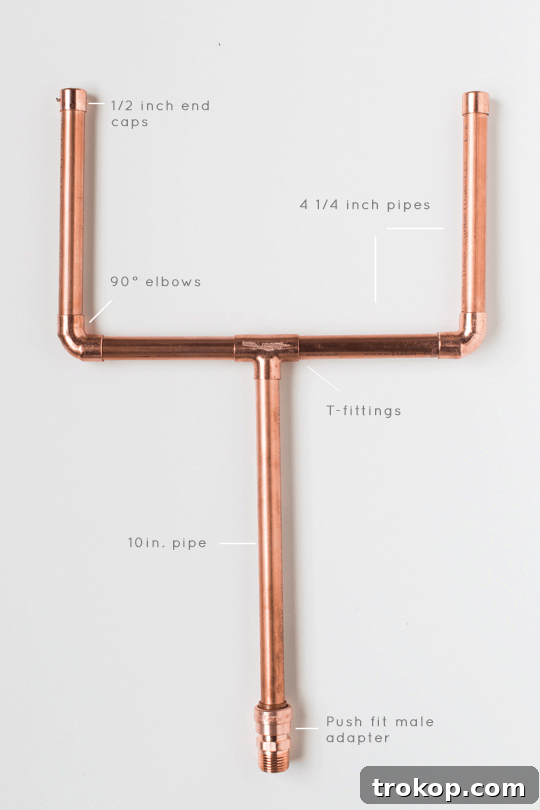
Once all the copper pieces are joined and the cement has set, your finished goal posts should stand strong and look like the example above.
Step 2: Preparing the Game Bases
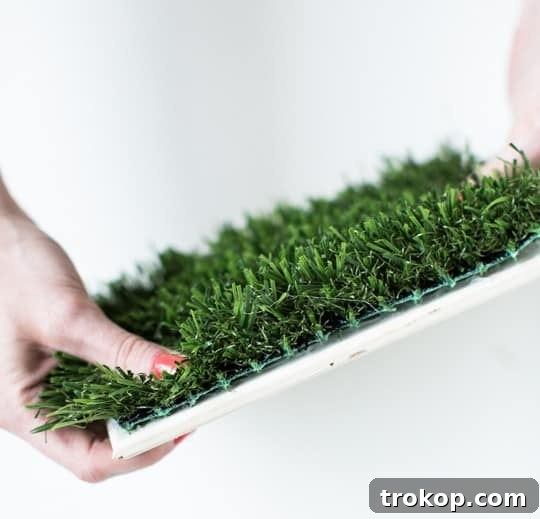
Next, prepare the wooden bases for your goal posts. Take your two pieces of 6″x8″ wood. Apply hot glue to the surface of each wooden board, then carefully press the pieces of astro turf (or faux grass) onto the glued surface, ensuring they adhere smoothly and completely. This creates a visually appealing “field” for your game.
For an extra polished look, you have the option to paint the exposed edges of the wooden boards. I found that painting them black with craft paint and a foam brush helped the boards blend seamlessly with the astro turf, creating a more professional finish. This step is entirely optional but adds a nice touch.
Step 3: Painting Your Team Washers and Base Plates
While the contact cement on your goal posts and the hot glue on your bases are drying, it’s time to add some team spirit! Take your 6 metal washers and 2 galvanized floor flanges. Choose your two preferred spray paint colors—one for each team.
Spray paint three of the washers and one of the galvanized floor flanges with your first team color. Allow them to dry completely according to the paint manufacturer’s instructions. Then, spray paint the remaining three washers and the other galvanized floor flange with your second team color. This color differentiation is crucial for easy team identification during gameplay.
Step 4: Securing the Goal Posts to the Bases
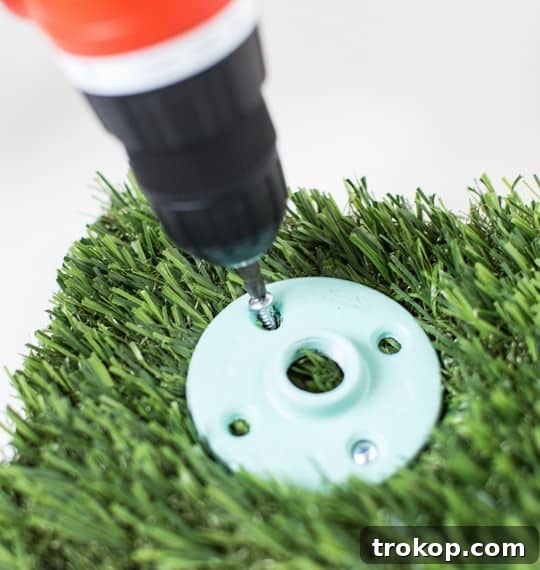
Now, it’s time to attach the painted floor flanges to your astro turf bases. Position a painted floor flange in the center of one of your astro turf-covered wooden boards. Ensure that the turf allows the screw plate to sit level and flush against the wooden board. If the turf is too thick or uneven, you may need to use a box cutter to carefully trim away a small section of the astro turf where the plate will sit, creating a stable, flat surface for the flange.
Once the plate is perfectly positioned, use the #8 1/2-inch wood screws to securely drill the plate in place through the astro turf, adhering it firmly to the wooden base. Repeat this process for the second base and floor flange.
Step 5: Final Assembly and Game Setup
With the floor flanges securely attached to the bases, the final step is to combine your crafted copper goal posts with their respective bases. Take one assembled copper goal post and twist it firmly into the threads of the galvanized floor flange on one of your bases. Repeat with the second goal post and base. Ensure both posts are stable and upright.
Finally, pair each completed goal post with its corresponding colored washers. You are now all set to play your brand-new, customized DIY Washers Yard Game! Remember our earlier lesson: while we initially chose washers that were far too small, inadvertently creating the “hardest drinking game in the world,” I wholeheartedly recommend opting for the biggest washers you can find to ensure maximum enjoyment and accessibility for all players.

Pro Tips for Your DIY Washers Game Success
Choosing the Right Washers
This cannot be stressed enough: the size of your washers dramatically impacts the game’s difficulty and fun factor. While smaller washers might appeal to those seeking an extreme challenge, for general enjoyment at parties and gatherings, larger washers (e.g., 2-3 inches in diameter) are highly recommended. They make the game accessible to a wider range of ages and skill levels, ensuring everyone can participate and have a good time.
Enhancing Durability
While copper is naturally durable, consider applying a clear coat sealant to your painted washers and even the copper pipes to protect them from the elements and wear and tear. This will help maintain their vibrant colors and shiny finish, ensuring your game looks great for many events to come. For the wooden bases, a weather-resistant sealant can prevent warping or damage from moisture.
Safety First
When working with tools like a mini tube cutter, hot glue gun, and spray paint, always prioritize safety. Wear protective eyewear when cutting pipes and applying cement or paint. Work in a well-ventilated area when spray painting. If children are helping with the project, ensure they are supervised during appropriate steps, and handle any sharp tools or chemicals yourself.
FAQs About Your DIY Copper Washers Yard Game
How portable is this game?
Very! The copper goal posts can be easily twisted off the galvanized floor flanges, allowing them to be stored and transported separately from the bases. This modular design makes the entire game compact and simple to pack for tailgates, picnics, or moving between different event locations.
Can I use different materials for the posts?
While copper pipes offer a unique aesthetic and good durability, you could explore other pipe materials like PVC for a more budget-friendly option. However, PVC may require different types of fittings and adhesives, and painting it effectively for a lasting finish might also require specific primer. Copper’s inherent weight also adds stability to the posts.
What if I don’t have Astro Turf?
No problem! You can use various materials for your bases. Felt, outdoor carpet remnants, or even painting the wooden bases directly with a green “grass” effect could work. The astro turf adds a nice aesthetic touch, but it’s not strictly necessary for the game’s functionality.
How can I make it easier for kids to play?
For younger players or those new to the game, use even larger washers, shorten the throwing distance, or allow them to throw from a closer designated line. You can also implement a “practice round” without scoring to let them get comfortable with the throwing motion.
Conclusion: Ready for Endless Outdoor Fun!
Creating your own DIY Copper Washers Yard Game is a project that delivers on all fronts: it’s fun to build, highly customizable, and provides endless entertainment for any outdoor gathering. From the satisfying clang of a washer hitting the copper pipe to the cheers of triumph, this game is sure to become a cherished part of your party traditions.
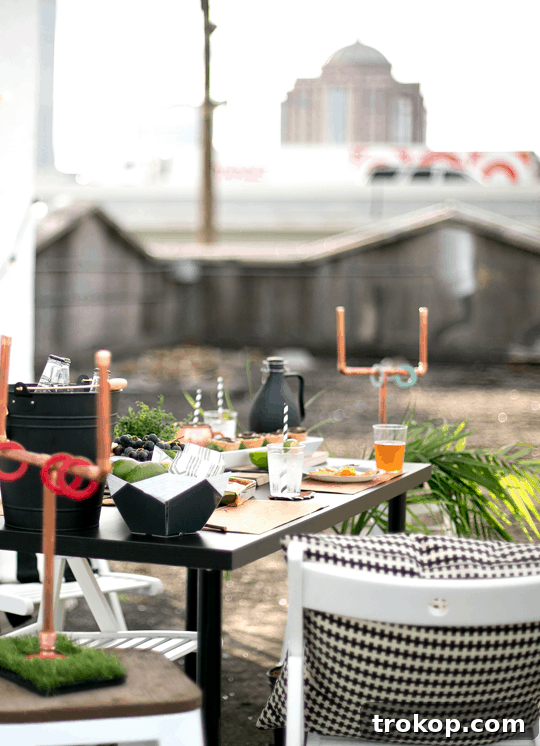
We absolutely loved how this game came together as part of our larger rooftop party setup, demonstrating its versatility and charm. A special thank you to Brandi and Jacob for modeling their pretty faces and showing off this fantastic yard game!
So gather your materials, follow these steps, and get ready to toss your way to unforgettable memories!
DIY Washers Yard Game
Learn how to make a fun and affordable washers game out of items you can find at your local hardware store!
Active Time: 30 mins
Drying time: 1 hr
Total Time: 1 hr 30 mins
Course: DIY
Equipment
- Box cutter
- Hot glue gun and glue sticks
- Mini tube cutter
Materials
- 8 pieces copper pipes measuring 4 1/4 inches long
- 2 pieces copper pipes measuring 10 inches
- 2 pieces 1/2 copper T fittings
- 2 pieces 1/2 copper 90 degree elbow fittings
- 2 pieces 1/2 inch galvanized floor flanges
- 4 pieces 1/2 copper end caps
- 2 pieces 1/2 copper push fit male adapters
- 8 pieces #8 1/2 in. wood screws
- 6 pieces metal washers
- 2 pieces 6″x8″ wood for the base
- 2 pieces 6″x8″ astro turf or faux grass for the base
- 2 spray paint colors of your choice for each team
- Contact cement
Instructions
- Build the copper goal posts with contact cement by brushing the glue on the inside of the joints and the outside of the posts that will be placed inside the joints.
- Let the contact cement become tacky before inserting the posts in the joints. See full guide for placements.
- To make the base, hot glue the pieces of astro turf to the wooden boards. I painted the boards black with craft paint and a foam brush afterwards to make the board blend better, but that’s totally up to you!
- While that’s drying, spray paint 3 washers and one base plate one color, and the other set another color to differentiate the teams.
- Making sure the turf allows the screw plate to sit level, use the screws to drill the plate in place through the turf, adhering it to the wooden base. You may have to cut away some of the turf if necessary to make sure it’s level.
- Once that’s complete, twist the goal post into place in the plate, and pair it with the corresponding colored washers and you’re all set!
Notes
- You can paint the wooden boards black with craft paint and a foam brush afterwards to make the board blend better.
Cost: $30
Keywords: diy washers game, copper washers game, tailgating game, outdoor game

Discover More Creative DIY Projects