
DIY Distressed Wood Shelves: Achieve Rustic Charm on a Budget
Transform your living space with the timeless appeal of distressed wood shelves. Achieve that coveted farmhouse or industrial look without breaking the bank or wrestling with the scarcity of authentic reclaimed lumber. This comprehensive guide will walk you through the journey of creating beautiful, custom distressed wooden shelves that look genuinely aged and full of character.
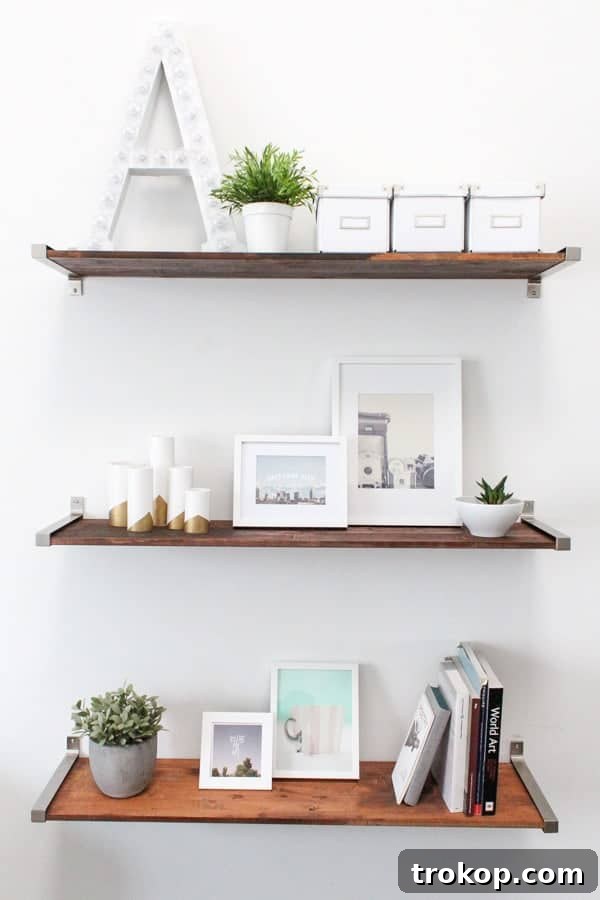
The Irresistible Allure of Distressed Wood
There’s an undeniable charm to the weathered appearance of distressed wood. It speaks of history, warmth, and a comforting authenticity that modern, pristine finishes often lack. Whether you’re drawn to the cozy embrace of farmhouse style, the rugged elegance of industrial design, or the simple beauty of rustic decor, distressed wood elements are often at the heart of these aesthetics. They add depth, texture, and a unique focal point to any room, transforming bland walls into captivating displays.
From shelving units to furniture pieces, the aged look of wood effortlessly elevates interior design, creating an inviting atmosphere that feels both lived-in and thoughtfully curated. It’s this innate ability to inject character and personality that fuels our collective obsession with finishes that tell a story.
The Challenge with Reclaimed Wood: High Demand, High Cost
While genuine reclaimed wood offers unparalleled authenticity, it comes with significant drawbacks. Sourcing high-quality reclaimed lumber can be a daunting task, often involving extensive searches for specific dimensions and wood types. The demand for reclaimed materials has soared in recent years, driving up prices to premium levels. What’s more, reclaimed wood can be inconsistent in quality, prone to hidden imperfections, and may require substantial preparation to be safe and suitable for home use, including cleaning, delousing, and ensuring structural integrity.
Imagine the frustration of finding the perfect piece, only to discover its exorbitant price tag or the sheer difficulty in acquiring it. It’s akin to spotting the last coveted cupcake at a party – everyone wants it, and the competition (and cost) can be fierce. This common predicament often leaves design enthusiasts searching for viable, budget-friendly alternatives that don’t compromise on aesthetic appeal.
DIY Distressed Shelves: Your Solution to Rustic Charm on a Budget
This is where the magic of DIY comes into play. Creating your own distressed wood shelves offers a powerful solution to the challenges of sourcing reclaimed wood. Not only does it provide a remarkably cost-effective alternative, but it also gives you complete creative control over the final look. You can customize the degree of distressing, the color palette, and the finish to perfectly match your existing decor and personal style. The satisfaction of crafting something beautiful and functional with your own hands is an added bonus.
The best part? With the right techniques and a little patience, your DIY distressed shelves will be virtually indistinguishable from their expensive, reclaimed counterparts. They’ll exude the same rustic charm and character, proving that stunning home decor doesn’t have to come with a hefty price tag.
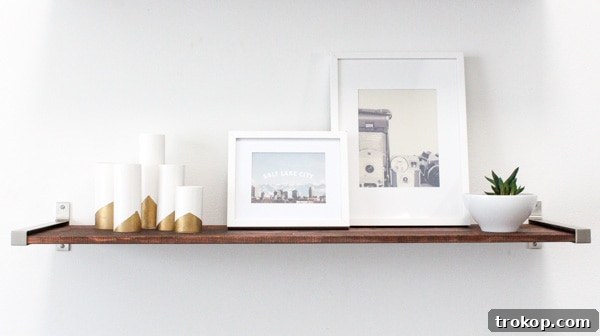
Essential Materials and Tools for Your Project
Embarking on this DIY journey requires a thoughtful selection of materials and tools. The beauty of this project lies in its accessibility – most items can be found at your local hardware store or even around your home.
Materials:
- New Lumber: Pine, fir, or any other relatively soft wood works best for distressing as it’s easier to dent and scratch. Common dimensional lumber (e.g., 1×8, 2×10) is ideal for shelves.
- Wood Stain: Choose a color that complements your desired aesthetic. Darker stains often enhance the distressed features.
- Paint (Optional): Acrylic or latex paint in your chosen base and top coat colors if you’re layering for a multi-toned distressed look.
- Sandpaper: Various grits, from coarse (80-100) for initial distressing and shaping, to medium (150-220) for smoothing, and fine (220+) for finishing.
- Wood Sealer/Polyurethane: A clear coat to protect your finished shelves from moisture and wear.
- Rags or Brushes: For applying stain, paint, and sealer.
- Wood Screws/Brackets: For mounting your shelves securely.
Tools for Distressing:
- Hammer: For creating dents and dings. Use different parts of the hammer for varied marks.
- Chain: A heavy chain can be swung or dragged across the wood to create random scuffs and impressions.
- Wire Brush: Excellent for adding texture and mimicking woodworm holes or natural wear.
- Chisel or Utility Knife: For creating deeper gouges, scratches, or even false saw marks.
- Screwdrivers/Nails: For making small, irregular holes or marks.
- Safety Glasses and Gloves: Always prioritize safety when working with tools and chemicals.
A Glimpse into the Distressing Process
While a full, detailed tutorial (linked below) will provide step-by-step instructions, understanding the general process will help you visualize the transformation:
- Prepare Your Wood: Start with clean, raw lumber cut to your desired shelf lengths. Lightly sand any rough edges.
- Inflict “Damage”: This is the fun part! Use your chosen tools (hammer, chain, wire brush, etc.) to carefully create dents, scratches, and gouges. Think about where natural wear and tear would occur – edges, corners, and areas that would typically be handled. Don’t be afraid to experiment, but aim for a natural, random look rather than uniform patterns.
- Apply Base Coat (Optional): If you want a multi-layered distressed paint finish, apply a base coat of paint and let it dry completely.
- Stain or Top Coat Paint: Apply your wood stain or the main color paint. If using stain, apply generously and wipe off excess according to product instructions. If using paint, apply your desired coats.
- Sand for Wear: Once the stain or paint is dry, use sandpaper (starting with medium grit, then finer) to strategically sand away some of the finish. Focus on edges, raised areas, and spots where the wood would naturally show wear. This will reveal the raw wood beneath or your base coat, creating the distressed effect.
- Further Distressing (Optional): At this stage, you might add more light scratches or use a dry brush technique with a contrasting paint color to highlight textures.
- Seal and Protect: Apply several coats of a clear wood sealer or polyurethane to protect your shelves and give them a durable finish. Lightly sand between coats for a super smooth result.
- Install Your Shelves: Once dry, mount your shelves securely using appropriate hardware.
Design Versatility and Styling Tips
Distressed wood shelves are incredibly versatile and can enhance almost any room or design scheme. Their inherent character makes them a focal point, whether holding books, plants, or decorative curios.
- Farmhouse Kitchen: Display vintage dishware, Mason jars, and cookbooks.
- Industrial Living Room: Pair with metal brackets and display minimalist art or concrete planters.
- Rustic Bathroom: Hold towels, toiletries in apothecary jars, or small potted succulents.
- Cozy Bedroom: Use as nightstands or display personal treasures and soft lighting.
- Eclectic Home Office: Organize books and files while adding a touch of personality.
Consider the color and finish of your shelves in relation to your wall color and existing furniture. Lighter distressed woods can brighten a space, while darker stains add depth and sophistication. Don’t forget the importance of proper lighting to highlight the textures and items on your shelves.
Maintenance and Longevity of Your DIY Shelves
Once your beautiful distressed shelves are installed, a little care will ensure they remain a stunning feature for years to come. Because they are sealed, cleaning is simple: a damp cloth is usually sufficient for dust and light spills. Avoid harsh chemical cleaners that could damage the finish. While the distressed look intentionally incorporates imperfections, the clear protective coat ensures durability and protects the wood from further damage and moisture.
Beyond Aesthetics: The Joy of DIY and Sustainability
Beyond the undeniable aesthetic appeal and cost savings, embarking on a DIY project like distressed shelves offers profound personal rewards. There’s immense satisfaction in looking at a functional, beautiful piece of furniture and knowing you created it with your own hands. It’s an empowering experience that fosters creativity and self-reliance.
Furthermore, choosing to transform new, readily available lumber rather than always seeking out reclaimed wood can be a more sustainable approach in some contexts. You’re reducing demand on potentially finite or difficult-to-source materials, and instead, giving new life and character to standard lumber through innovative techniques.