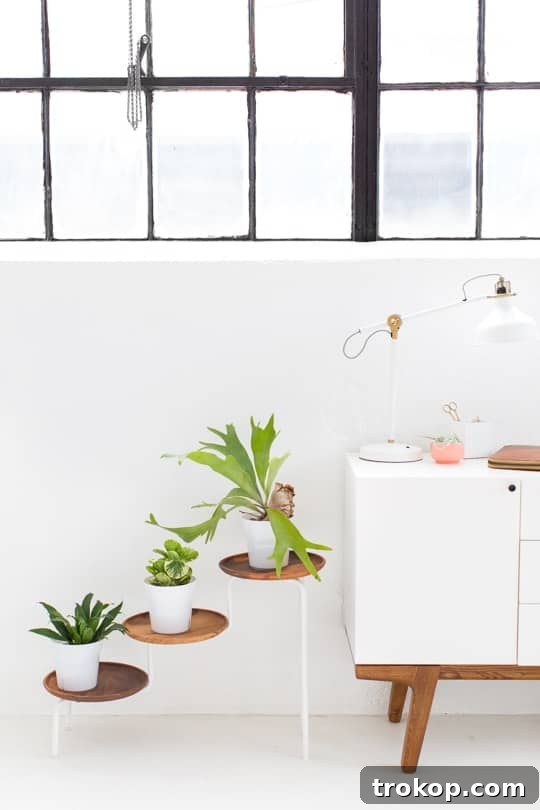
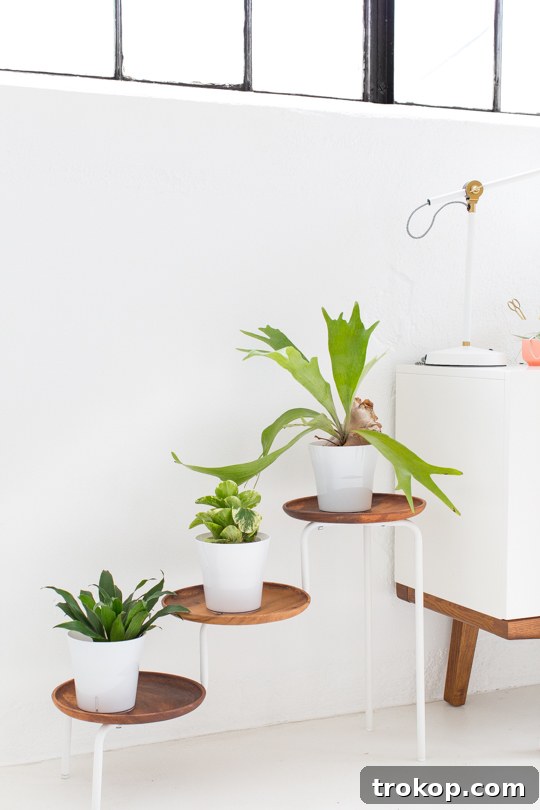
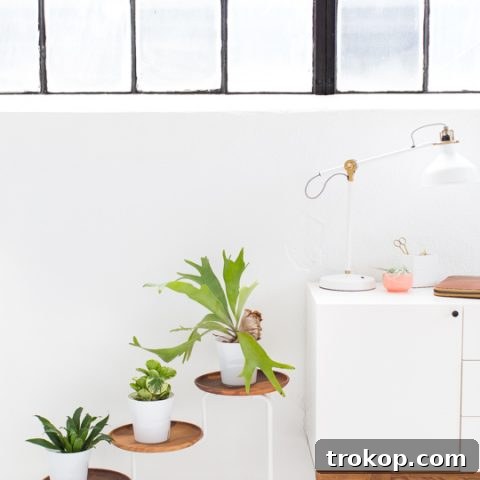
Welcome summer into your home with a stunning, yet incredibly simple, Modern DIY Acacia Wood Plant Stand! For all the plant enthusiasts out there, you know your beloved greenery deserves a stylish abode that complements your interior design. This project offers a chic solution, blending the natural beauty of acacia wood with a clean, modern aesthetic that will elevate any space.
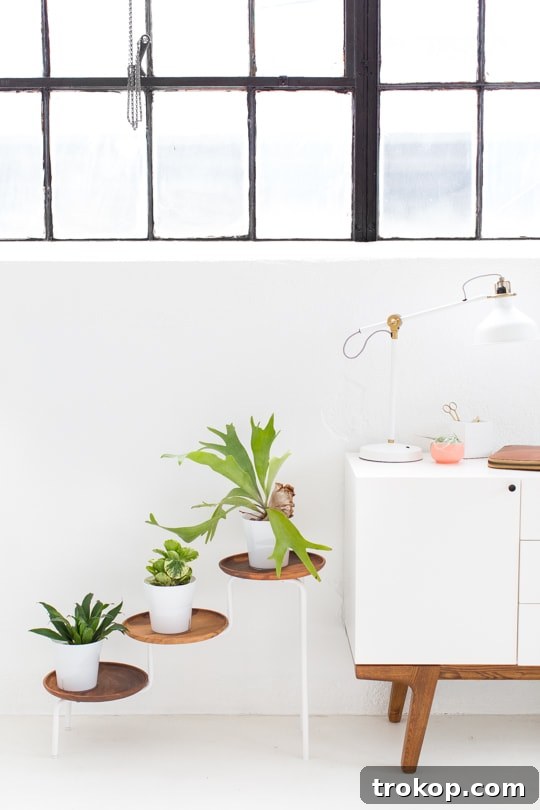
You might start thinking I possess an extraordinary green thumb with the sheer number of DIY plant stands I’ve been crafting lately. But truthfully, my passion lies more in creating beautiful homes for plants than in mastering horticulture itself. And if that makes me a “plant stand poser,” I’m perfectly content, especially with this gorgeous Modern DIY Acacia Wood Plant Stand gracing my living space. It truly adds a touch of sophistication to my indoor plant collection.
This stand is so captivating that it earned a spot in our curated list of favorite DIY plant stand ideas. What makes it even more appealing? It’s a clever IKEA hack! We’re starting simple here, but rest assured, the customization possibilities are endless. So, if you happen to find yourself near an IKEA during your weekend adventures, consider picking up one of these foundational pieces to transform into your very own modern plant haven.
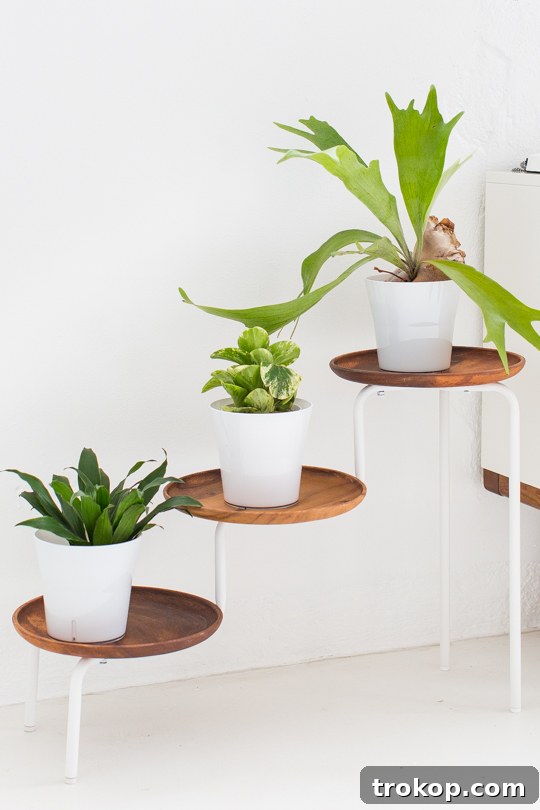
Table of Contents
The Benefits of DIY Plant Stands
Diving into a DIY project like building a plant stand offers a multitude of advantages beyond just getting a new piece of furniture. Firstly, it allows for unparalleled personalization. You get to choose the exact materials, finishes, and dimensions to perfectly match your home decor and plant collection, creating a truly unique item that store-bought options can rarely replicate. Secondly, DIY projects are often more cost-effective. By sourcing materials yourself and utilizing existing pieces, like an IKEA stand, you can achieve a high-end look without the designer price tag. Thirdly, there’s immense satisfaction in creating something with your own hands. The sense of accomplishment you feel when you step back and admire your handcrafted plant stand, knowing you brought it to life, is incredibly rewarding. Lastly, it’s an opportunity to engage in a creative outlet, learn new skills, and potentially discover a new passion for woodworking or home improvement.
Why Acacia Wood is Perfect for Your Plant Stand
Choosing the right wood is crucial for any furniture project, and acacia wood stands out as an excellent choice for a modern plant stand. Known for its remarkable durability and stunning grain patterns, acacia offers both beauty and resilience. This hardwood is naturally resistant to moisture and fungi, making it ideal for holding plants, which can sometimes lead to spills or condensation. Its rich, warm tones and distinctive patterns vary from piece to piece, ensuring that each acacia wood plant stand possesses a unique character. Furthermore, acacia wood is often considered a sustainable option due to its fast growth rate and widespread availability. Its inherent strength means your plant stand will be robust and long-lasting, capable of supporting various plant pots without worry. The elegant appearance of acacia also effortlessly complements contemporary, minimalist, and mid-century modern interior styles, adding a touch of natural sophistication to your decor.
The IKEA Hack Advantage: Smart & Stylish
The beauty of an IKEA hack lies in its ingenious simplicity and affordability. Starting with a readily available and budget-friendly piece, like the IKEA PS plant stand, provides a solid foundation that eliminates many initial woodworking challenges. You bypass the need to construct a basic frame from scratch, saving significant time and effort. IKEA furniture is designed for easy assembly, which means you get a sturdy base with minimal fuss. This allows you to focus your creative energy on the aesthetic elements – in this case, adding luxurious acacia wood details that transform an ordinary item into a bespoke design statement. It’s a smart way to achieve a custom, high-end look without extensive craftsmanship or specialized tools. The adaptability of IKEA pieces makes them perfect canvases for DIY enthusiasts looking to infuse their personality and style into their home decor on a budget.
Materials and Tools Needed to Make a DIY Modern Acacia Wood Plant Stand
Before embarking on your crafting journey, gather all the necessary items. Having everything ready will ensure a smooth and efficient DIY experience.
- Ikea PS plant stand: This forms the core structure of your plant stand.
- Acacia wood plates: These will be the decorative and functional surfaces for your plants.
- Super glue or E6000 glue: Essential for securely attaching the wood plates. E6000 is known for its strong bond and flexibility.
- Flat socket cap screws, connecting cap nuts, and clamps: (Optional, for the more robust method) These provide a more permanent and sturdy attachment for the wood plates, giving a “floating” appearance.
- A saw (e.g., jigsaw or circular saw): Needed if you choose to cut your own acacia wood logs or modify the plates.
- Drill with appropriate bits: For making pilot holes for screws, if using the robust method.
- Sandpaper (various grits): For smoothing edges and preventing splinters.
- Washers: To protect your plant pots from screw damage and help prevent water issues.
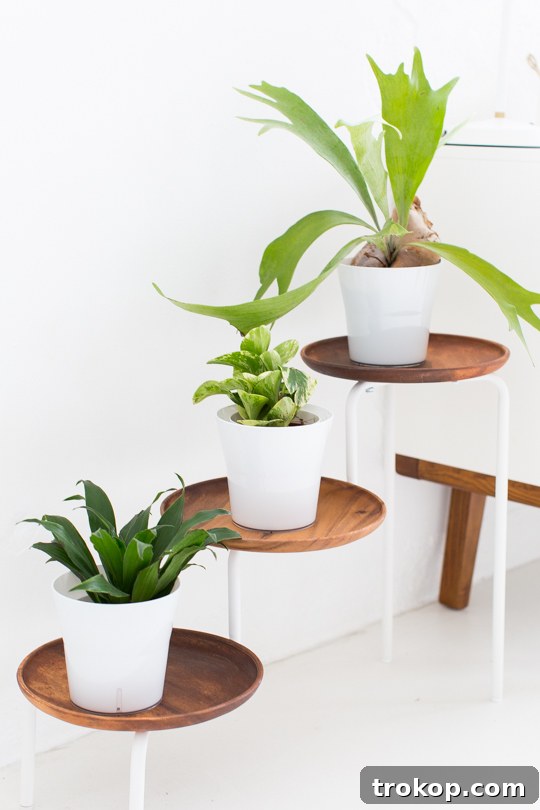
How to Make an Indoor DIY Acacia Wood Plant Stand
There are two primary ways to approach this DIY project: a quick and easy method using glue, or a more involved but sturdier method using screws, which results in a sleek, “floating” wood plate look.
Method 1: The Simplified (Glue) Approach
This method is perfect if you’re short on time or prefer a less complex project. It leverages the original design of the IKEA PS plant stand with minimal modification.
- Assemble the IKEA Stand: Follow the instructions provided with your IKEA PS plant stand to assemble it completely, including the white metal plates.
- Prepare Acacia Plates: Ensure your acacia wood plates are clean and dry.
- Apply Adhesive: Apply a generous amount of strong super glue or E6000 glue to the top surface of each white metal plate on the IKEA stand.
- Attach Wood Plates: Carefully center and press an acacia wood plate onto each glued metal plate.
- Secure and Cure: Use clamps to hold the acacia plates firmly in place while the glue dries and cures completely. Refer to your chosen adhesive’s instructions for recommended curing times. Once dry, your stand is ready for plants!
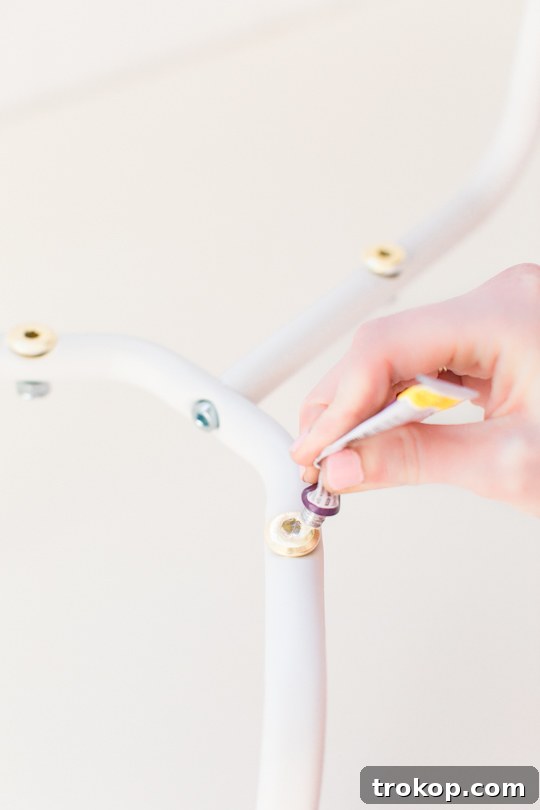
While I initially went the harder route (as pictured in some photos), I can honestly say that this simplified method, using glue to attach the acacia plates directly onto the IKEA stand’s white metal circles, makes the project approximately 20 times easier. It still delivers a beautiful, modern aesthetic with significantly less effort.
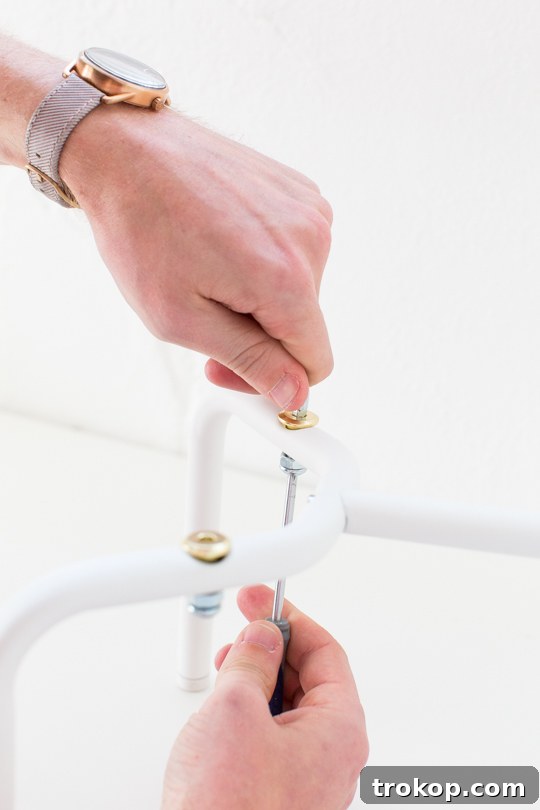
Method 2: The Robust (Screw) Approach
This method is for those who desire a sturdier, more integrated look where the acacia wood plates appear to float without the visible white metal plates underneath. It involves a bit more customization and tools but results in a highly durable and refined plant stand.
- Assemble the IKEA Poles: Begin by assembling only the poles of the IKEA stand as instructed, omitting the white metal plates.
- Prepare Wood Log Pieces: If using a single acacia wood log, cut it into four equal pieces. Then, for each piece, use a saw to cut a hole in the center, ensuring it’s large enough to comfortably fit your plant pots.
- Attach Wood to Fasteners: Use E6000 glue to securely attach the acacia wood plates (or your cut log pieces) to the flat brass cap nuts. Use clamps to hold them firmly in place while the glue sets and seals completely.
- Sand and Smooth: Once the glue is dry, sand the edges of the holes you cut and the outer surfaces of each wood piece. This step is crucial for achieving a smooth finish and preventing any potential splinters, ensuring a safe and polished product.
- Prepare for Legs/Casters: Now, it’s time to attach the stand’s legs or casters to your prepared wood pieces. Drill four small, evenly spaced pilot holes in each wood piece.
- Attach Legs/Casters: Screw in the legs or casters using two screws for each, ensuring a stable and balanced base.
- Final Assembly for Plants: Finally, place your plant pots inside the holes on the wood plates. Use large screws to fasten them into place. For added protection against water damage, remember to place a washer between the screw head and the pot.
While the simplified glue method offers convenience, if you have a few extra minutes, we highly recommend this robust tutorial. Using screws instead of glue provides significantly more sturdiness and longevity for your plant stand. It’s a testament to turning a simple concept into a beautiful and enduring piece of home decor, even if it involves a slight detour from the easiest path. The end result is a truly custom, high-quality acacia wood plant stand that will beautifully display your green companions.
Frequently Asked Questions
What Kind Of Wood Should I Use For A Plant Stand?
Choosing the right wood for your plant stand depends heavily on its intended location and the aesthetic you’re aiming for. For outdoor plant stands, durability and resistance to the elements are key. Excellent choices include cedar, known for its natural resistance to rot and insects, teak, a highly durable and water-resistant hardwood, and eucalyptus, which offers good weather resistance. More affordable options like pine or fir can also be used outdoors, but they absolutely require proper sealing with a weather-resistant finish to protect them from moisture and UV damage, extending their lifespan.
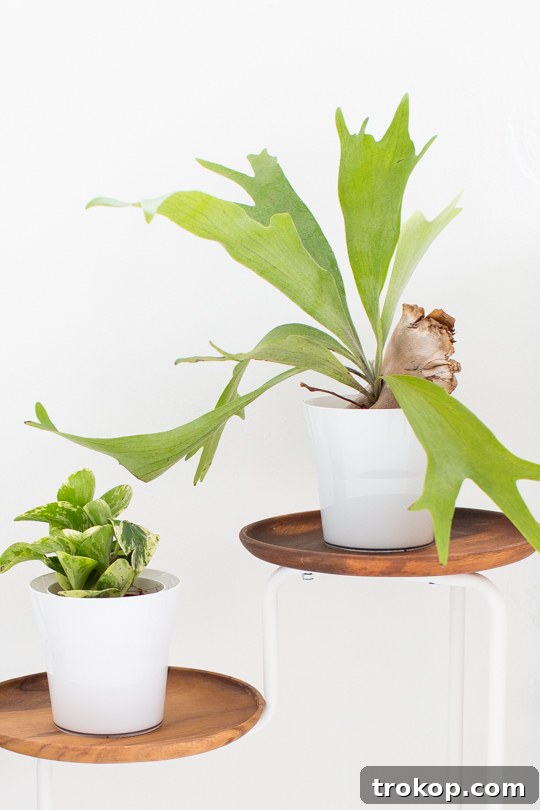
For indoor plant stands, you have more freedom, focusing more on aesthetics and less on extreme weather resistance. Popular choices for a sophisticated look include maple, cherry, and oak, all of which offer beautiful grain patterns and varying color tones. For a more exotic or unique touch, consider mahogany, with its rich, deep hues, or bamboo, known for its light weight and sustainable properties. Whichever indoor wood you choose, ensure it’s properly sealed to prevent water stains from accidental spills or condensation, protecting both the wood and your floors. For this project, we specifically chose acacia wood for its stunning grain, durability, and perfect fit for a modern mid-century aesthetic.
Will Wooden Planters Rot?
The question of whether wooden planters will rot is a common and valid concern, and the answer is nuanced: it largely depends on the type of wood, how it’s treated, and the environmental conditions. Wood is an organic material, and without proper care, it can indeed rot when exposed to consistent moisture and microbial activity. However, with the right choices and maintenance, wooden planters can last for many years.
Factors influencing rot:
- Wood Type: Some woods are naturally more resistant to rot than others. As mentioned, cedar, redwood, and teak contain natural oils and compounds that deter decay. Softer woods like pine and fir are more susceptible to rot and require more extensive treatment.
- Moisture Exposure: Constant contact with water, poor drainage, and high humidity accelerate rot. This is especially true for outdoor planters or indoor ones without proper liners.
- Ventilation: Good airflow around and under the planter helps prevent moisture buildup, which can lead to fungal growth and rot.
- Soil Contact: Direct contact between untreated wood and wet soil creates an ideal environment for rot.
To prevent rot and extend the life of your wooden planters:
- Proper Sealing: Apply a high-quality, water-resistant sealant or wood preservative to all surfaces of the wood, especially areas that will come into contact with soil or water. This creates a barrier against moisture.
- Drainage: Ensure your planters have adequate drainage holes to prevent waterlogging. Adding a layer of gravel or pot shards at the bottom can also help.
- Liners: For added protection, consider lining the interior of your wooden planter with a heavy-duty plastic liner or landscape fabric. This creates a barrier between the soil and the wood, significantly reducing moisture exposure. Make sure to puncture drainage holes in the liner as well.
- Elevate Planters: If possible, slightly elevate outdoor planters off the ground to improve airflow and prevent constant contact with damp surfaces.
- Regular Inspection: Periodically check your wooden planters for any signs of damage, cracks, or discoloration. Address these issues promptly by re-sanding and re-sealing affected areas.
By taking these preventative measures, you can ensure your beautiful wooden plant stand or planter remains a cherished part of your home decor for a long time.
More Easy DIY Plant Projects to Try
If you enjoyed crafting this acacia wood plant stand, you’ll love exploring these other creative plant-related DIYs to further enhance your green spaces:
- DIY Mini Face Planters
- DIY Mini Copper Planters and Organizers
- DIY Mid Century Stand Planters
- Bundt Pan Planter
DIY Acacia Wood Plant Stand Recipe Card
DIY Acacia Wood Plant Stand
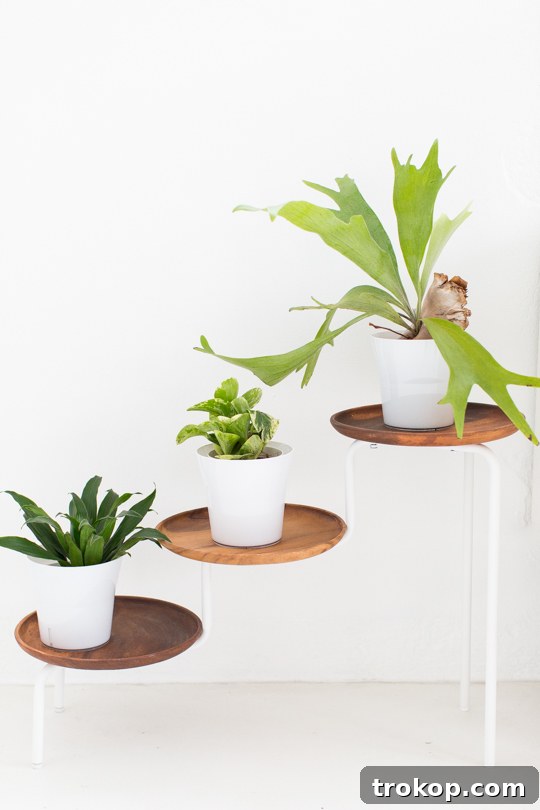
Ring in summer with this simple and very doable Modern DIY Acacia Wood Plant Stand!
Equipment
- Super glue or E6000 glue
- Saw (e.g., jigsaw, circular saw)
- Drill
- Sandpaper
Materials
- 1 Ikea PS plant stand
- 3 acacia wood plates
- 8 flat socket cap screws (optional)
- 8 connecting cap nuts (optional)
- 3 clamps (optional)
- Washers (optional, but recommended)
Instructions (Robust Method)
- Cut your acacia wood log into four equal pieces.
- Then, use your saw to cut a hole in the center of each piece, large enough to fit your plant pot.
- Use E6000 to glue the wood plates to the flat brass cap nuts and use clamps to hold them in place while they seal.
- Sand the edges of the holes you just cut, as well as the outside of each log piece. This will help prevent splinters.
- Now it’s time to attach the legs or casters. Drill four small holes in each log piece spaced evenly apart. Then, screw in the legs or casters, using two screws for each.
- Finally, place your plant pots inside the holes and screw them into place with the large screws.
Notes
Be sure to use a washer between the screw head and the pot to prevent any water damage.
If you are looking for a simpler method, assemble the IKEA stand as-is and glue the acacia wood plates on top of the existing white metal plates.
If you have a few extra minutes, we recommend sticking to our robust tutorial since it is sturdier using screws instead of glue.

Don’t forget to share your beautifully crafted DIY Acacia Wood Plant Stand with us on Instagram using the hashtag #sugarandclothloves. We always love seeing all of your creative projects and how you bring them to life!