
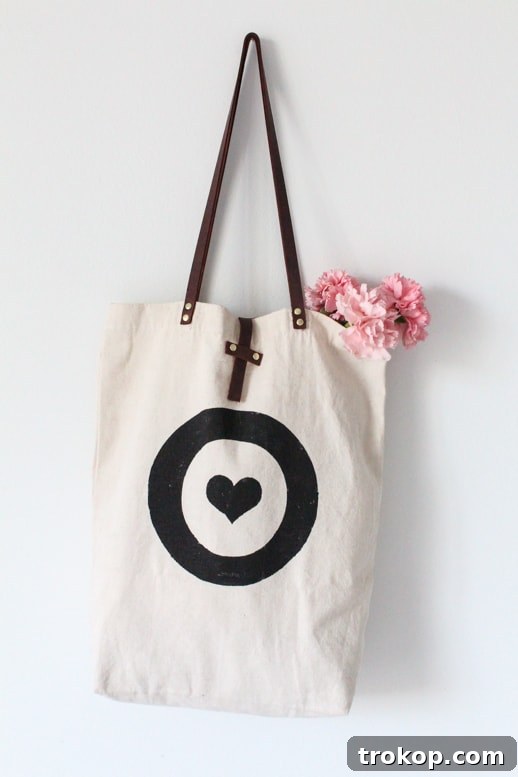
Are you looking to inject new life into an old favorite bag or elevate a simple canvas tote into a unique, statement piece? Look no further! This comprehensive tutorial will guide you through the process of revamping any bag with elegant and durable leather straps. It’s a surprisingly simple and inexpensive DIY project that promises to take your accessory game up a significant notch, transforming an ordinary item into something truly special.
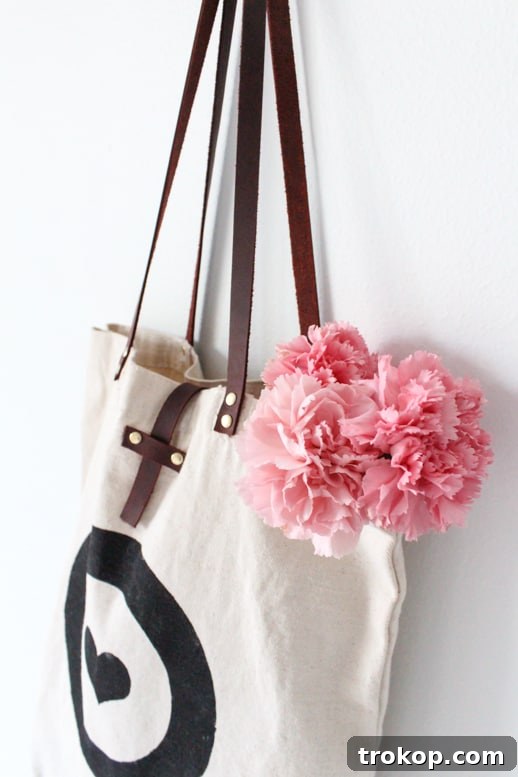
Many of us have beloved bags that, while still perfectly functional, might have seen better days or simply lost their initial charm. Perhaps the original straps are worn, flimsy, or just don’t match your evolving personal style. This DIY project offers a brilliant and creative solution, allowing you to breathe sophistication, durability, and a fresh aesthetic into your cherished accessories without the need for a costly replacement. Imagine turning a basic canvas tote, an old fabric handbag, or even a tired crossbody bag into a high-end looking item, complete with the rich texture and timeless appeal of genuine leather, all for a fraction of the cost of a new designer piece.
This process is not only about saving money but also about embracing customization and contributing to sustainable fashion practices. Instead of prematurely discarding an item that still has potential, you’re giving it a second life, tailoring it precisely to your personal taste and extending its functional lifespan. We are constantly seeking ingenious ways to refresh and update items we already own, enhancing their aesthetic appeal and reducing waste. Just like our popular DIY Pattern Paper Leather Tote, this project empowers you to achieve that coveted luxurious leather look with minimal effort and maximum impact.
The true beauty of this bag revamp lies in its remarkable simplicity and the dramatic transformation it delivers. What might begin as a humble, everyday tote can be elevated to appear far more expensive and sophisticated than its actual material cost – often requiring as little as $15 in supplies! A few months ago, I received a charming tote that quickly became an indispensable part of my daily routine. Its constant use made it a prime candidate for an upgrade, and it was only a matter of time before it earned a sophisticated overhaul with custom leather straps. This tutorial will show you exactly how you can achieve this stunning transformation for your own bags, step by step, ensuring a beautiful and durable result.
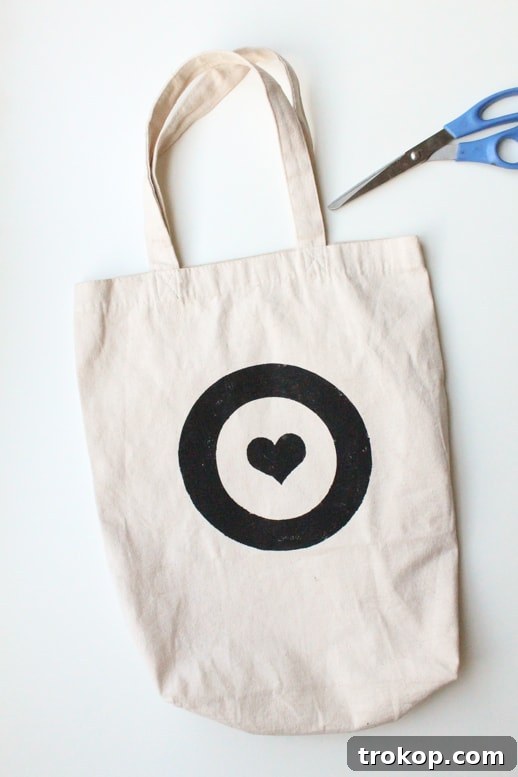
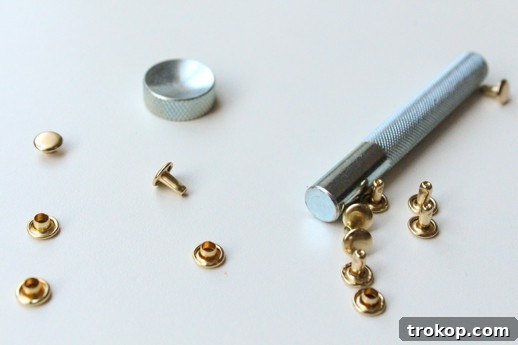
Table of Contents
Essential Materials and Tools for Your Bag Makeover
Before diving into the hands-on fun of transforming your bag, it’s crucial to gather all the necessary materials and tools. Having everything readily available will ensure a smooth, efficient, and enjoyable crafting experience, leading to a professional-looking result. Here’s a detailed breakdown of what you’ll need to successfully modify your old bag and bestow upon it a brand new, luxurious identity:
- Small Rivet Starter Kit: This kit is absolutely essential for securely attaching the new leather straps to your bag. It typically includes a variety of rivet sizes (usually double-cap rivets for a neat finish on both sides) and the specialized tools required to set them properly. Investing in a good quality kit with a setter tool and an anvil will significantly simplify the process and ensure your rivets are strong and aesthetically pleasing. You can easily find suitable options online, such as this small rivet starter kit on Amazon.
- Sharp Scissors: A pair of sharp, high-quality scissors is indispensable for achieving clean and precise cuts. You’ll need them for cleanly severing the old straps and for accurately cutting your new leather pieces to the correct dimensions. Fabric shears or heavy-duty craft scissors are ideal for handling both fabric and leather without fraying or jagged edges. Dull scissors can make the job frustrating and lead to uneven results, so ensure yours are sharp.
- Leather Hole Punch: To create neat, consistently sized holes in both your leather straps and the bag’s fabric for the rivets, a specialized leather hole punch is a must-have tool. This device ensures clean perforations, which are vital for a strong and aesthetically pleasing attachment. A rotary hole punch is highly recommended as it offers multiple hole sizes on a rotating wheel, making it versatile for various projects and thicknesses of material. Consider a robust option like the General Tools Leather Punch for reliable performance.
- Tote Bag (or any bag you wish to revamp): This is your primary canvas for transformation! Select a bag that is structurally sound and clean, as its foundation will support the new straps. While a simple canvas tote is often an ideal base for showcasing leather accents, don’t hesitate to experiment with fabric handbags, denim totes, or even a sturdy messenger bag. The minimalist design of such bags often allows the new leather straps to truly stand out. Here’s a similar tote bag that would be perfect for this kind of project.
- Leather Straps: These are the star components of your bag’s makeover! For convenience and consistency, you can purchase pre-cut leather straps from craft stores or specialty leather suppliers like Tandy Leather. This saves you the effort of cutting raw leather. Alternatively, if you’re comfortable with leatherworking or desire a very specific width or texture, you can buy a larger hide or piece of leather and cut your own straps. When selecting, look for leather that is sturdy enough to hold its shape and withstand daily use, yet pliable enough to work with the hole punch and rivets. For reference, a similar strap can be found online. The choice of leather color, finish (e.g., smooth, pebbled, distressed), and thickness will profoundly impact the final look and feel of your revamped bag, so choose carefully to match or complement your bag’s existing aesthetic and your personal style.
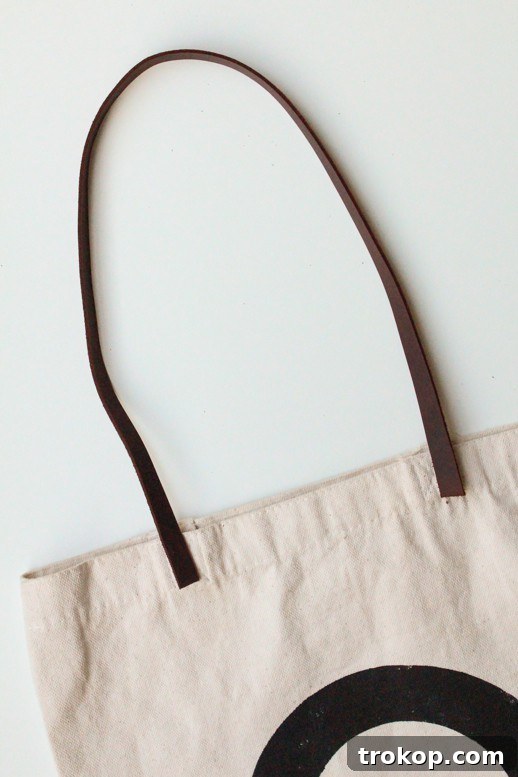
How to Revamp Any Bag with Stylish Leather Straps: A Step-by-Step Tutorial
Ready to give your bag a stunning, custom upgrade? Follow these detailed steps to transform your everyday tote or any other bag into a chic, leather-accented masterpiece. This guide covers everything from preparing your bag to securely attaching your new straps and even adding an optional, functional closure for enhanced security and style.
Step 1: Prepare Your Bag by Removing Old Straps
The initial and crucial step is to carefully remove the existing straps from your chosen bag. Using your sharp scissors, meticulously cut them off as close to the bag’s trim or main seam as you can. The primary objective here is to leave a clean, unobstructed edge on the bag’s body without causing any damage to the underlying fabric or structure. Take your time with this step, working slowly and deliberately, to ensure you create a smooth and pristine foundation for the attachment of your new leather straps. If the old straps are deeply sewn or reinforced, a seam ripper can be an invaluable tool for precise removal. Once removed, safely discard the old straps.
Step 2: Measure and Cut Your New Leather Straps
Next, it’s time to prepare the star components: your new leather straps. Measure and cut two pieces of leather, ensuring each piece is approximately 22 inches long. This length is generally considered ideal for comfortable shoulder straps, providing a pleasant drop when worn. However, personal preference plays a significant role here, so feel free to adjust the length based on how you envision carrying the bag (e.g., slightly longer for a relaxed crossbody style, or shorter for a more elegant hand-carry). Similarly, the width of the straps is entirely customizable; a 1/2 inch thick strap offers a classic, refined look, while wider straps can create a bolder, more robust, or even a rustic aesthetic. It is paramount to ensure both straps are cut to identical lengths and widths to maintain a balanced and symmetrical appearance on your revamped bag.
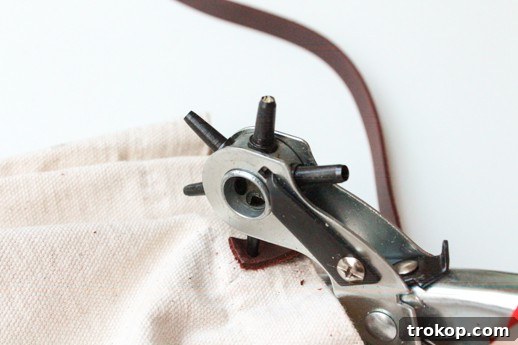
Step 3: Mark Placement and Punch Holes for Rivets
Before making any permanent changes, carefully plan the precise placement for your new leather straps. Lay your bag flat on a work surface and position one leather strap on one side, ensuring it is perfectly centered and symmetrical along the top edge. Using a pencil or fabric chalk, mark exactly where you intend the rivets to be placed. Typically, rivets are positioned a few inches down from the bag’s top edge and spaced evenly for optimal aesthetics and strength. For maximum support and a truly professional finish, we highly recommend making two holes for two rivets on each end of the strap. This strategy effectively distributes the weight and significantly reduces the risk of the straps tearing away from the bag over time. Once your markings are clear and you’re satisfied with the alignment, use your leather hole punch to carefully punch through both the leather strap and the bag fabric at each marked point. Double-check your alignment one final time before making the holes to prevent any irreversible errors.
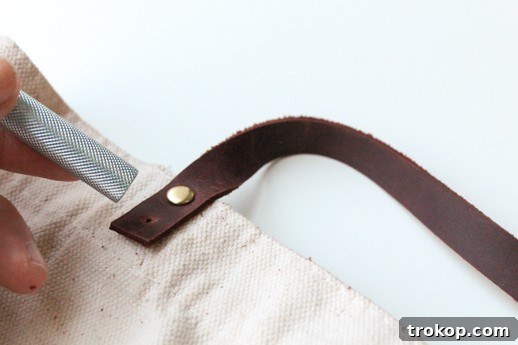
With all the necessary holes precisely punched, it’s now time to securely insert the rivets. Always refer to and follow the specific instructions provided with your rivet starter kit, as setting methods can vary slightly between manufacturers. Generally, this process involves pushing the longer rivet post through the holes from the inside of the bag, placing the rivet cap on top from the outside, and then using the specialized setting tool (often with a hammer or mallet) to firmly crimp and secure the rivet. Ensure each rivet is fastened tightly and flush against the material to create a durable connection and prevent the straps from coming loose or rotating over time. Repeat this for all rivet points on both main straps.
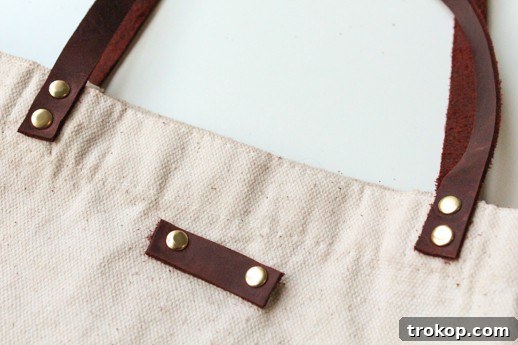
Step 4 (Optional): Create a Secure Closure Strap
For an added layer of functionality, security, and a refined stylistic element, you can opt to create a closure strap for your bag. Begin by measuring and cutting a small piece of leather that is approximately 1 inch wider than the desired final width of your closure strap. This additional width is crucial as it allows for a secure and snug fit when the main closure strap passes through it. Once this leather piece is cut, carefully punch a hole on each end of it and insert rivets to firmly attach it as a loop or enclosure on one side of your bag’s opening, typically on the interior or just below the top edge. This strategically placed piece will serve as the anchor point through which your main closure strap will pass, ensuring your belongings remain safe and secure inside your bag.
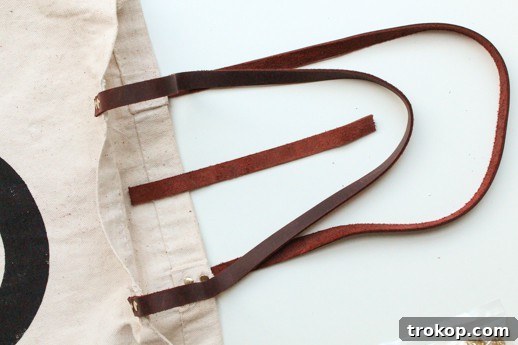
Step 5: Cut the Main Closure Strap
Now, prepare the other half of your closure mechanism by cutting another piece of leather to serve as the main, functional closure strap. This piece should typically be about 6 to 7 inches long. The precise length will depend on the overall size and depth of your bag, as well as the exact placement of the enclosure piece you created in the previous step. It’s important to ensure that this strap is sufficiently long to comfortably reach and securely rest within the enclosure when the bag is closed, allowing for both easy opening and reliable fastening without being either too loose or excessively tight. A slight overlap with the enclosure piece is generally ideal for optimal security and ease of use.
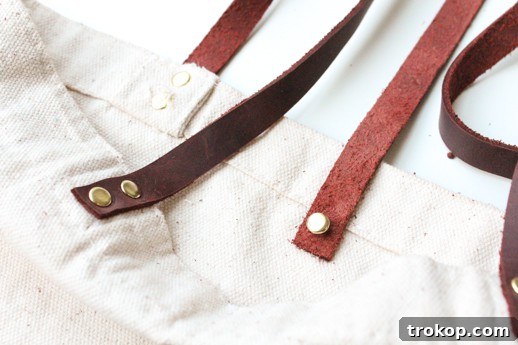
Step 6: Attach the Main Closure Strap to Your Bag
With the 6-7 inch main closure strap prepared, you will now attach it to the opposite side of your bag’s opening from where you previously placed the enclosure piece. For a cleaner and more polished final look, it is often best to attach this strap with the “wrong” side (the unfinished or less visible side) of the leather facing upwards during the riveting process. Punch a single hole at one end of this main closure strap and use a rivet to firmly attach it to the interior or the top edge of your bag. Carefully ensure that its position aligns perfectly with the enclosure piece when the bag is closed, allowing for a smooth and effective fastening mechanism. Precision in this step ensures the closure functions seamlessly and looks professional.
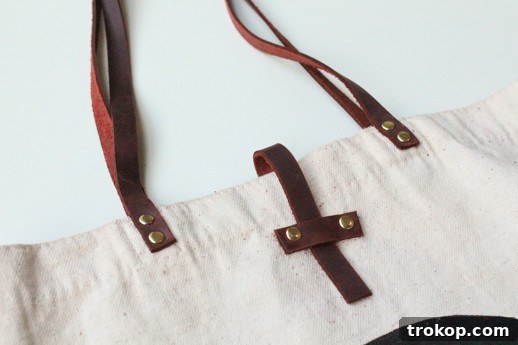
Step 7: Final Assembly and Enjoy Your Revamped Bag!
With both the main shoulder straps securely attached and the optional closure system expertly in place, your bag transformation is now almost entirely complete! To finalize the closure mechanism, simply take the main closure strap and fold it over the bag’s opening, then feed it under the enclosure piece you installed earlier. Test the closure thoroughly to ensure it holds firmly and securely, yet remains easy and intuitive to manipulate when opening and closing your bag. Take a moment to step back and truly admire your handiwork! You have successfully revamped your bag, imbuing it with a stylish, customized, and uniquely personal look that is sure to draw compliments and turn heads. This project beautifully demonstrates how even simple, thoughtful changes can have a profound and lasting impact on the overall aesthetic appeal and functional feel of your most cherished accessories.
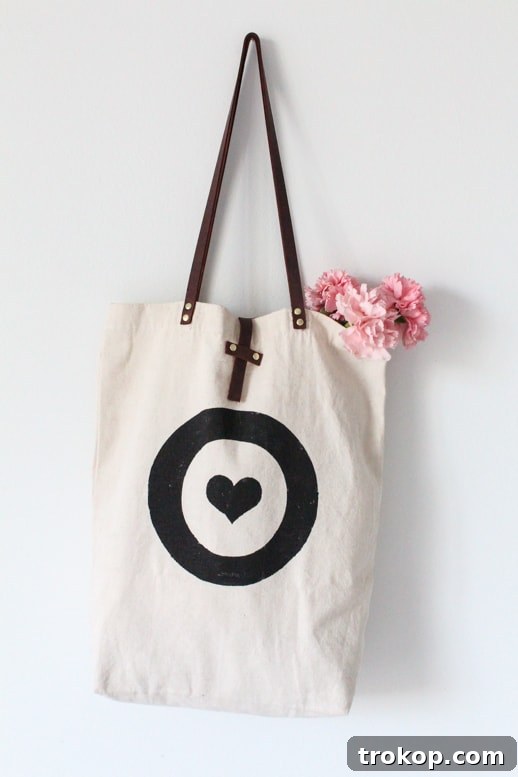
Why Choose Leather Straps for Your Bag Revamp?
Swapping out old, worn, or plain straps with high-quality leather ones instantly imparts a luxurious and sophisticated touch to any bag. Leather is a textile that offers unparalleled benefits, making it a beloved material for DIY enthusiasts, crafters, and fashion lovers alike. Its natural durability is a key advantage; genuine leather straps will stand up to the rigors of daily wear and tear for many years to come, often far outlasting many synthetic alternatives. This inherent longevity not only ensures your revamped bag remains beautiful for longer but also makes it a more sustainable and environmentally conscious choice, as you’re investing in a material that ages gracefully and doesn’t need frequent replacement, reducing consumption.
Beyond its robustness, leather boasts an inherent elegance and timeless aesthetic that never goes out of style. It famously develops a unique and rich patina over time, a characteristic that only enhances its beauty and adds a personalized character and depth unique to your bag’s journey. The tactile experience – the rich texture and supple feel of genuine leather – instantly elevates the perceived value of your bag, making even a budget-friendly tote appear high-end and designer-inspired. Furthermore, leather is incredibly versatile; it’s available in an expansive array of colors, finishes, and thicknesses, from smooth and polished to rugged and distressed. This vast variety allows for almost endless customization options, empowering you to truly personalize your bag to perfectly match your individual style, current trends, or a specific outfit. Whether you prefer classic brown, sleek black, vibrant red, or a soft pastel, there’s a leather option that will flawlessly complement your creative vision.
More Creative DIY Projects with Leather You’ll Love
The incredible versatility of leather extends far beyond just enhancing bag straps! This remarkable natural material can be transformed into a myriad of beautiful, functional, and stylish items for both your home and personal accessories. From elevating your dining experience with elegant modern leather placemats to crafting unique and sturdy furniture pieces like chic leather stools, the creative possibilities are truly boundless. If you’ve enjoyed the satisfaction of this bag revamp project, you’ll undoubtedly love exploring more of our easy and rewarding DIY projects that feature leather. Dive into our archives and discover some of our absolute favorites that expertly blend practicality with impeccable design:
- Pom Pom Leather Luggage Tag: Add a playful yet sophisticated touch to your travel gear. These customized leather luggage tags, adorned with fun pom-poms, are not only simple to craft but also help your bags stand out effortlessly on any baggage carousel.
- Leather Hexagon Vanity Tray: Bring a touch of modern luxury to your dressing table, desk, or bedside table. This project guides you in creating a stylish hexagon-shaped leather tray, perfect for organizing beauty essentials, jewelry, or small trinkets.
- DIY Leather Bar and Drink Tags: Elevate your home entertaining with custom leather tags. Use them to label your bar bottles, create personalized drink markers for guests, or even as unique gift tags. They add a refined and thoughtful detail to any gathering or special occasion.
- Pattern Paper Leather Tote: If you’re captivated by the idea of a fully customized leather tote, this project allows you to create a truly unique bag by combining intriguing pattern paper with stylish leather accents. It’s an ingenious way to blend different textures and materials for a truly bespoke accessory.
- Customizable Retro DIY Sunglasses Case: Protect your favorite eyewear in a fashion-forward way with a handmade leather case. This project offers ample opportunity for personalization, making it a distinctive accessory that perfectly reflects your individual taste and flair.
- How to Make a Patterned DIY No Sew Neckerchief: While not exclusively a leather project, this easy no-sew tutorial for creating patterned neckerchiefs beautifully complements leather accessories, demonstrating how simple techniques can yield fashionable results.
- DIY Pom Pom Slippers: Infuse your home life with comfort and a touch of whimsy by crafting these adorable pom-pom adorned slippers. While primarily fabric-based, leather can be ingeniously incorporated for durable soles or decorative trim, adding both style and longevity.
- DIY Abstract Embroidered Sweater: Explore the art of embroidery on fabric, a craft that beautifully complements leatherwork. By mastering this, you can create rich, textured pieces that blend soft and structured elements, enhancing your wardrobe.
- Statement DIY Pom Pom Scarf: Discover another enjoyable and straightforward way to create eye-catching accessories. A bold pom-pom scarf can be the perfect vibrant accent piece to pair with your newly revamped, sophisticated leather-strapped bag.
- Polka Dot DIY No Sew Infinity Scarf: Continue your journey into easy, no-sew fashion hacks. This infinity scarf project is ideal for beginners and perfectly aligns with the hands-on, creative approach of leather crafting, offering quick and stylish results.
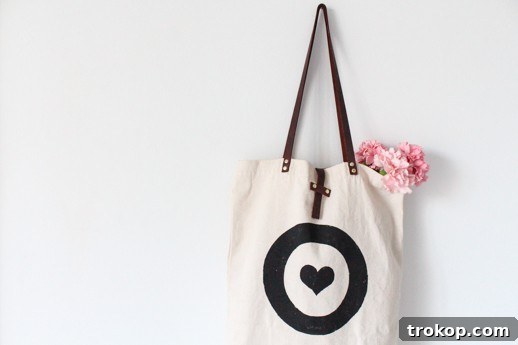

DIY Leather Straps Bag Project Overview
Print Instructions
Looking for a creative and easy way to update your old bag? This DIY bag hack using leather straps is the perfect solution! It’s an affordable project that delivers a high-end look and custom feel in minimal time.
Active Time: 30 minutes
Total Time: 30 minutes
Course: DIY
Category: Style & Beauty
Equipment
- Scissors
- Leather hole punch
Materials
- 1 tote bag (or any bag you wish to revamp)
- 1 leather strap (or enough leather to cut two 22″ straps and closure pieces)
- 1 small rivet starter kit
Instructions
- Cut the existing straps off your bag as close to the trim as you can.
- Measure and cut two 22″ leather pieces to use as straps. The width is up to you for comfort; 1/2″ thick is recommended for a classic look.
- Once you have determined the desired placement for your straps, use the leather hole puncher to punch through the straps and tote bag. Two holes for two rivets on each side are highly recommended for added support and durability.
- Insert the rivets into the holes you previously made, carefully following the instructions provided with your rivet starter kit to ensure a secure attachment.
- Optional: If you wish to incorporate a closure strap, measure and cut a piece of leather that is approximately 1″ wider than your desired closure strap width, and insert a rivet on each side to create an enclosure loop. This ensures a snug and effective closure.
- Cut another piece of leather, about 6-7″ long, to serve as the main closure strap. Ensure this length is sufficient to comfortably reach and securely interact with the enclosure piece.
- When attaching the main closure strap, make sure the “wrong” side (unfinished side) of the leather is facing up. Use a rivet to firmly attach it to the bag, aligning it precisely with the enclosure.
- To complete the closure, simply fold the main closure strap over and then under the enclosure. Your beautifully revamped bag is now finished and ready to enjoy!
Estimated Cost: $15
Keywords: diy leather bag strap, bag makeover, leather craft, tote bag upgrade, customized bag, handmade accessory

We absolutely love seeing your creative endeavors and the unique transformations you achieve! Don’t forget to share your newly revamped bag and any other DIY bag hacks you create with us on Instagram using the hashtag #sugarandclothloves. Your innovative creations inspire us and our vibrant community of crafters and DIY enthusiasts! For even more exciting home decor tutorials, inventive fashion hacks, and a plethora of creative ideas, we invite you to explore all our projects right here in our archives. Happy crafting, and enjoy your beautifully customized accessory!