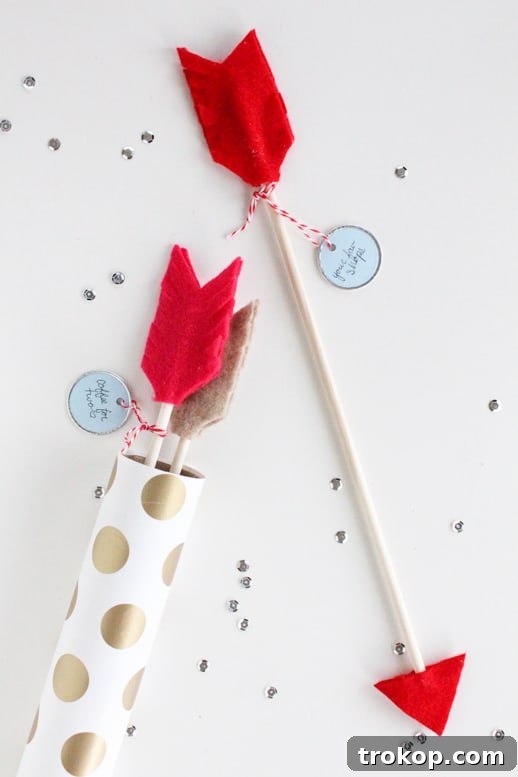
Valentine’s Day, a time often associated with chocolates, flowers, and grand romantic gestures, can sometimes feel a bit… mushy for those who prefer to express their affection through creativity. If you find yourself in the “crafty not mushy” camp, then you’re in for a treat! This year, move beyond the predictable and craft something truly memorable: DIY Date Idea Arrows. These charming, personalized arrows are not just a gift; they’re an invitation to create shared memories, perfectly tailored for your special someone.
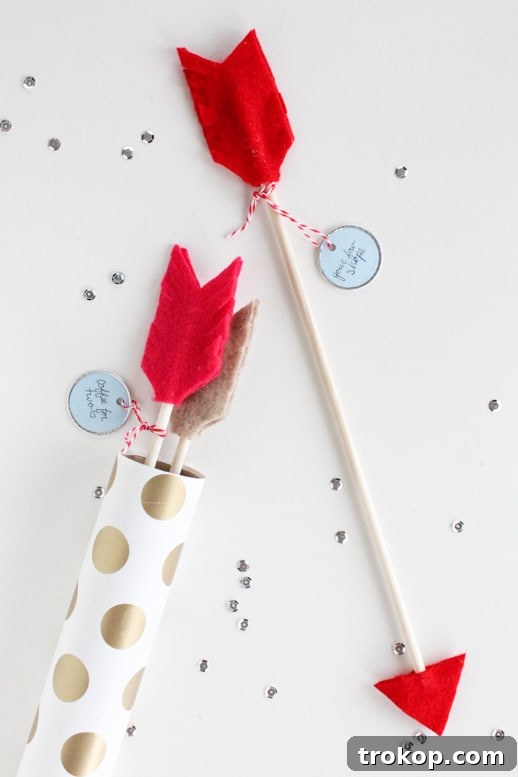
There’s a unique magic to handmade gifts, especially when they encourage quality time and shared experiences. These DIY Date Idea Arrows embody that magic, transforming simple materials into a thoughtful treasure chest of future adventures. Forget the fleeting joys of store-bought trinkets; these arrows promise connection, laughter, and a deeper bond. Whether it’s a cozy movie night, an adventurous day trip, or a romantic dinner cooked together, each arrow holds a promise, making every chosen date a delightful surprise.
While this project is ideal for Valentine’s Day, its concept of “date night tags” or “experience vouchers” is wonderfully versatile. These arrows can be adapted for anniversaries, birthdays, or simply as a spontaneous gesture of love at any time of the year. They serve as a constant reminder of the fun awaiting you and your partner, encouraging you to prioritize quality time together. Pair them with a beautifully curated date night gift basket, or even some adorable DIY Valentine Arrow Cookie Picks, and you’ll have a comprehensive and heartfelt present that’s sure to impress.
Even if you don’t consider yourself a seasoned crafter, the beauty of this project lies in its simplicity and adaptability. The fundamental idea of writing date ideas on labels and attaching them to a charming vessel can be executed in countless ways. This guide will walk you through creating these delightful arrows, providing all the details you need to make a gift that speaks volumes about your love and creativity.
Table of Contents
Why Choose DIY Date Idea Arrows?
In a world saturated with commercialized gifts, a handmade present stands out. DIY Date Idea Arrows are more than just a craft; they are a heartfelt expression of love and effort. Here’s why they make an exceptional gift:
- Uniquely Personalized: Unlike generic gifts, these arrows allow you to tailor each date idea specifically to your relationship and your partner’s preferences. From revisiting a cherished memory to exploring a new hobby together, every arrow can reflect your unique bond.
- Thoughtful & Creative: The act of making something with your own hands speaks volumes. It shows that you’ve invested time, thought, and effort into creating something special, far more meaningful than a quick purchase.
- An Experiential Gift: Material gifts can fade, but experiences create lasting memories. These arrows offer a tangible representation of future adventures, focusing on shared moments and quality time, which are invaluable in any relationship.
- Budget-Friendly: Crafting these arrows can be significantly more economical than buying expensive gifts, allowing you to allocate resources towards the actual date experiences themselves.
- Promotes Connection: The process of choosing and writing down date ideas can be a reflective exercise, reminding you of all the wonderful things you enjoy doing together. The anticipation of picking an arrow and embarking on a date fosters excitement and strengthens your connection.
- Reusable & Sustainable: The arrows themselves can be kept as a keepsake, and the “date ideas” concept can be continually refreshed. It’s a gift that keeps on giving, fostering an ongoing tradition of intentional dates.
Materials and Tools Needed to Make DIY Date Idea Arrows
Gathering your supplies is the first exciting step in bringing these date idea arrows to life. The beauty of this project is that most materials are readily available at your local craft store, and you can easily customize colors and textures to match your style or your loved one’s preferences.
- 1/4 inch dowel rods: These sturdy wooden sticks will form the shaft of your arrows. The length you choose should be practical for handling and presentation, often dependent on the size of your mailing tube or display vessel. About 12-18 inches is a good general length, allowing for clear display of the labels.
- Felt sheets: Opt for a variety of colors that resonate with Valentine’s Day (reds, pinks, whites, golds) or colors that are meaningful to your relationship. Felt is ideal because it’s easy to cut, doesn’t fray, and provides a soft, tactile finish for the arrowheads and fletching (feathers).
- Tacky glue: Or any reliable fabric craft glue. Tacky glue is excellent for felt as it dries clear and creates a strong, flexible bond without soaking through the material. Ensure you have enough to generously cover the surfaces for secure adhesion.
- Scissors: Sharp craft scissors are essential for clean, precise cuts on the felt, ensuring your arrowheads and fletching have crisp edges.
- Mailing tubes: These will serve as the charming “quiver” for your arrows. Choose a size that can comfortably hold all your finished arrows without them being too cramped or too loose. Cardboard mailing tubes are sturdy and easy to decorate.
- Wrapping paper: This is optional but highly recommended for decorating your mailing tube. Select a pattern or color that complements your felt choices or the overall aesthetic you’re aiming for. Polka dots, stripes, or even a solid metallic paper can add a touch of elegance.
- Round hanging labels: We found success with labels from Martha Stewart’s line at Staples, but any round or even rectangular tags will work. Look for ones that are thick enough to prevent ink bleed-through and have a pre-punched hole for easy attachment. These are where your creative date ideas will be written!
- Pen: A fine-tipped pen or marker will ensure your date ideas are legible and neat on the labels. Choose an ink color that stands out against the label.
- Twine or Ribbon: A small amount of twine or thin ribbon will be needed to attach the date idea labels to the dowel rods. Natural jute twine offers a rustic charm, while a thin satin ribbon can add a touch of sophistication.
How to Make DIY Date Idea Arrows
Let’s dive into the step-by-step process of crafting these delightful date idea arrows. Precision and patience are key, but the process is straightforward and enjoyable.
Step 1: Preparing the Arrowheads (Tips)
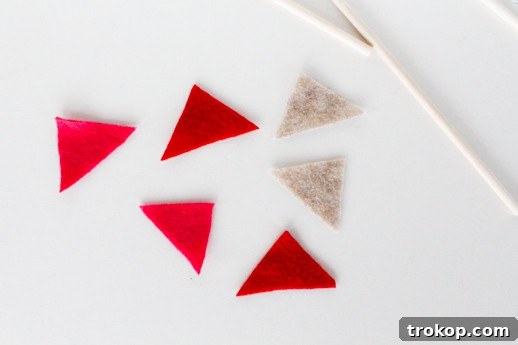
Begin by sketching a clean triangle shape on a piece of cardboard or heavy paper to use as a template. The size of your triangle will dictate the visual impact of your arrowhead, so aim for something proportionate to your dowel rods – typically about 2-3 inches on each side for a good balance. Once you have your template, carefully cut it out. Using this template, cut out two identical triangles from each color of felt you plan to use for the arrowheads. If you’re making three arrows, you’ll need six felt triangles in total. Precision here ensures a professional finish.
Step 2: Applying Glue to the First Triangle
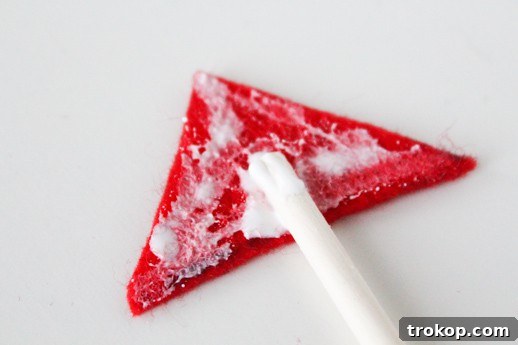
Lay one felt triangle on a flat, protected surface. Apply a thin, even layer of tacky glue across the entire surface of the triangle, paying special attention to the edges. Ensure complete coverage to prevent any lifting once dried. A small brush or even a toothpick can help spread the glue evenly, particularly to the points and edges.
Step 3: Positioning the Dowel Rod
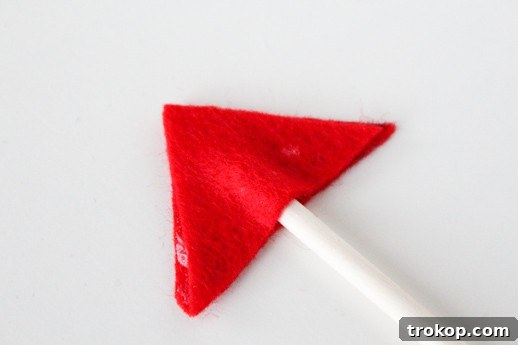
Carefully place one of your dowel rods onto the glued felt triangle. Position it so that the tip of the rod is just below the halfway point of the triangle’s base. This ensures that when the second triangle is applied, the dowel rod will be securely encased within the arrowhead, providing stability and a neat appearance.
Step 4: Securing the Arrowhead
Take a second felt triangle of the same color and apply glue to its surface, mirroring the first. Carefully place this second glued triangle directly over the first, aligning all the edges precisely. Gently press the two felt pieces together around the dowel rod, smoothing out any air bubbles and ensuring a firm bond. Pay extra attention to the edges to create a seamless arrowhead. Repeat this process for all your dowel rods, creating one arrowhead for each arrow. Allow adequate drying time as per your glue’s instructions, usually at least 30 minutes to an hour before handling too much.
Step 5: Trimming and Refining Arrowheads
Once the glue has completely dried and the felt pieces are firmly adhered, use your sharp scissors to carefully trim any uneven edges around the felt triangles. This step is crucial for giving your arrowheads a clean, professional, and finished look. Don’t rush this part; precise trimming makes a significant difference in the overall aesthetic.
Step 6: Creating the Fletching (Feathers)
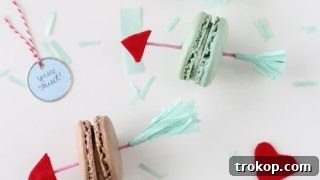
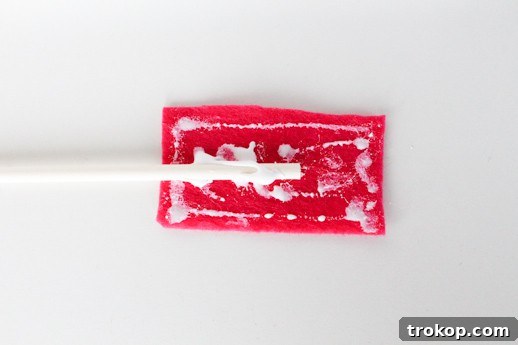
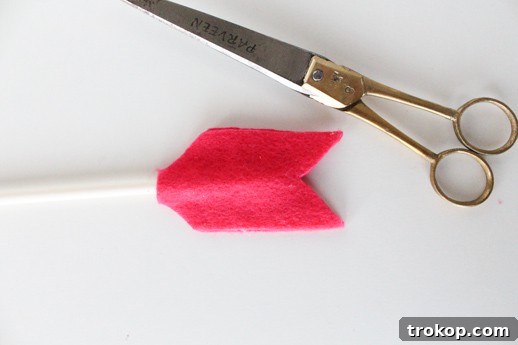
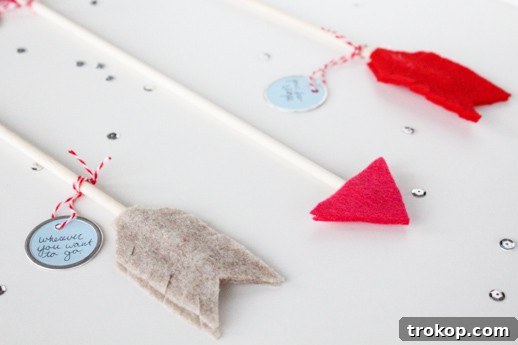
Now it’s time to add the “feathers” to the other end of your dowel rods. For these, you’ll repeat a similar gluing process but use a rectangle shape for your felt pieces instead of triangles. Cut out two matching felt rectangles for each arrow, again, choosing colors that complement or contrast nicely with your arrowheads. The size of the rectangle depends on how large you want your fletching to be; typically, a rectangle about 2-3 inches long and 1.5-2 inches wide works well. Apply glue to one rectangle, place the end of the dowel rod centrally, then cover with the second glued rectangle, pressing firmly to bond. Once the glue has dried, take your scissors and carefully cut a small V-shape into the bottom edge of the felt rectangles, mimicking a feathered notch. Then, make small, even cuts along the side edges of the rectangles to create a soft, fringed look, giving the appearance of feathers. This adds a whimsical and authentic touch to your arrows.
Step 7: Adding Your Date Ideas
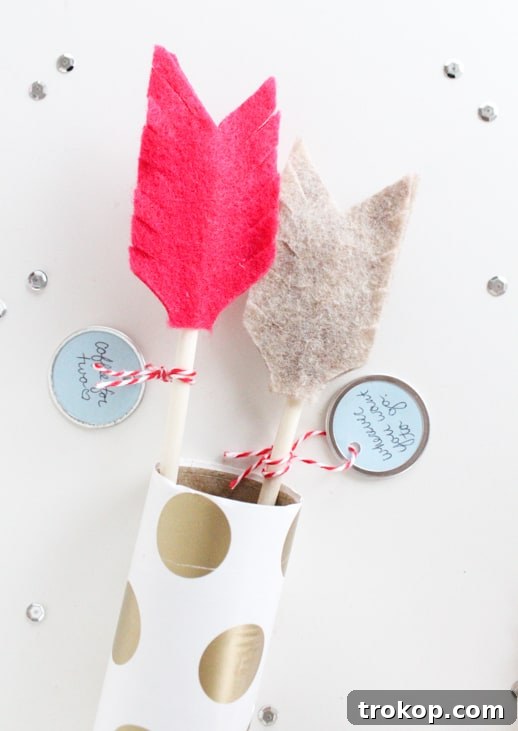
With your arrows fully assembled, it’s time for the most exciting part: personalizing them with date ideas! Take your round hanging labels and, using your chosen pen, clearly write one unique date idea on each label. Consider a mix of ideas: cozy nights in, adventurous outings, romantic dinners, or even silly, fun activities that you both enjoy. Once written, use a piece of twine or thin ribbon to thread through the label’s hole and securely tie it around the dowel rod of each arrow. You can tie a simple knot or a small bow for added charm. Make sure the labels are positioned so they are easily readable.
Step 8: Decorating the Mailing Tube
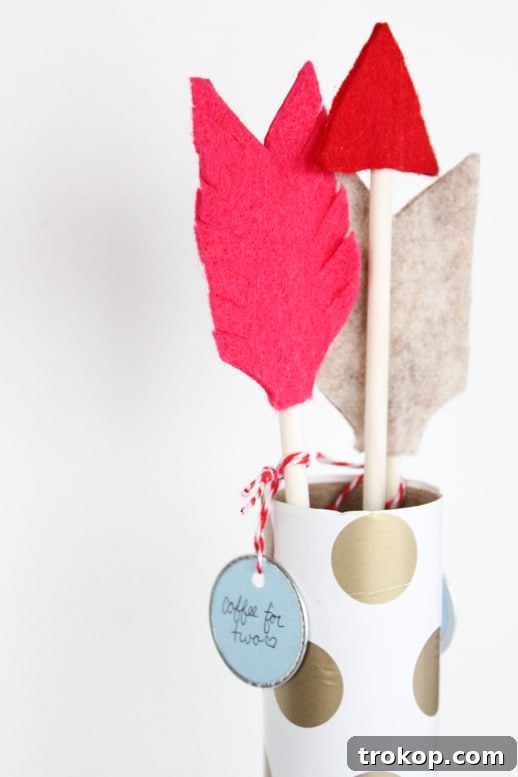
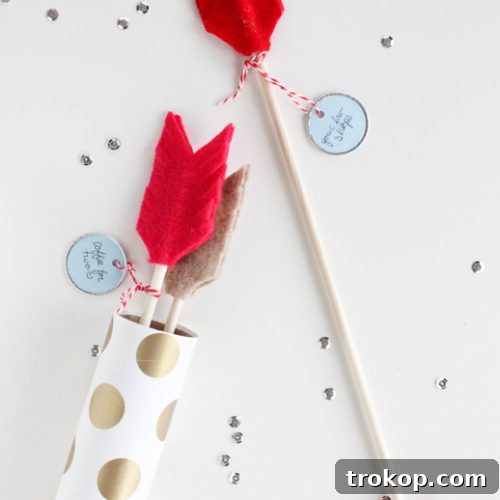
To complete your thoughtful gift, decorate the mailing tube that will hold your date arrows. This “quiver” enhances the presentation and makes the gift even more special. You can wrap it in elegant wrapping paper, like the gold polka-dotted paper mentioned from Hobby Lobby, or choose to paint it, decoupage it with photos, or adorn it with ribbons and bows. Personalize it further by writing a message on the outside or adding a tag that says, “Pull an arrow for our next adventure!”
Crafting the Perfect Date Ideas: Tips & Inspiration
The success of your DIY Date Idea Arrows largely depends on the creativity and thoughtfulness behind each date suggestion. Here’s how to brainstorm and select ideas that will truly resonate with your partner:
- Know Your Partner: What are their passions, hobbies, and secret wishes? Tailor ideas to their individual interests. Do they love art? A museum visit. Are they foodies? Trying a new restaurant or cooking a complex recipe together.
- Variety is Key: Don’t make all dates the same. Mix it up with:
- Relaxation Dates: Movie night at home with blankets and popcorn, spa day, quiet evening reading together.
- Adventure Dates: Hiking a new trail, exploring a nearby town, visiting a local attraction you haven’t seen.
- Culinary Dates: Cooking a meal from a new cookbook, baking cookies, trying a different cuisine restaurant.
- Creative Dates: Painting together, visiting an art gallery, trying a pottery class.
- Nostalgic Dates: Recreating your first date, looking through old photo albums, visiting a meaningful place from your past.
- Silly & Fun Dates: Board game night, building a fort, a themed dress-up evening.
- Consider Your Budget: Include a mix of free, low-cost, and occasional splurge ideas. This ensures spontaneity without financial stress. Examples: “Picnic in the park” (free), “Coffee shop date” (low cost), “Concert tickets” (splurge).
- Time of Year: If the arrows are for year-round use, include seasonal ideas like “Pumpkin picking in the fall” or “Ice skating in winter.”
- Keep it Flexible: While specific ideas are great, sometimes a broader suggestion like “Spontaneous road trip” allows for more flexibility and adventure.
- Inside Jokes & Memories: Incorporate elements that are unique to your relationship. An inside joke as a date idea can be incredibly personal and touching.
- Write it Clearly: Make sure your handwriting is legible and the idea is concise. You want the chosen date to be clear and exciting!
By filling your arrows with well-thought-out, diverse, and personal date ideas, you’re not just giving a gift; you’re promising a future filled with connection and joy.
Presentation Ideas for Your DIY Date Arrows
Once your DIY Date Idea Arrows are complete, the presentation can elevate them from a simple craft to an unforgettable gift. How you present them adds to the anticipation and magic of the experience.
- The “Quiver” Reveal: The decorated mailing tube acts as a perfect quiver. Present it to your partner with a flourish, perhaps with a tag that says, “Your next adventure awaits!” The act of reaching into the tube to select an arrow is part of the fun.
- Integrated into a Gift Basket: As mentioned, these arrows are a fantastic addition to a themed gift basket. If you’ve planned a romantic date night gift basket, tuck the arrows among other goodies like their favorite snacks, a bottle of wine, cozy blankets, or ingredients for a special meal. Each item can subtly hint at the date possibilities contained within the arrows.
- Creative Display: Instead of a mailing tube, consider displaying the arrows in a beautiful vase or a rustic jar. This allows them to double as a decorative piece that can be placed on a mantle or bedside table, serving as a constant, charming reminder of your shared dates.
- “Cupid’s Quiver” Theme: Lean into the Valentine’s theme by decorating the mailing tube or display vessel with ribbons, glitter, or heart-shaped cutouts. You could even add a tiny bow and arrow charm to the outside.
- The Grand Gesture: For an extra special reveal, place the mailing tube in a surprising location, perhaps somewhere your partner will discover it on Valentine’s morning, or as the centerpiece of a romantic dinner.
- Awaiting the Choice: Presenting the arrows in a way that encourages your partner to *choose* their next date empowers them and makes them an active participant in the gift, adding another layer of excitement.
No matter how you choose to present them, the DIY Date Idea Arrows are guaranteed to be a hit. They’re a symbol of love, thoughtfulness, and the countless wonderful moments you look forward to sharing.
More Unique Valentine’s Day DIYs and Recipes
If you’ve enjoyed making these date idea arrows and are looking for more ways to celebrate love with a personal touch, explore these other creative Valentine’s Day projects and delicious recipes:
- DIY You’re Dynamite Valentine’s: Another super easy and incredibly cute project that cleverly utilizes mailing tubes, perfect if you have extras from your arrow project! It’s a playful way to tell someone they’re explosive.
- DIY Candied Valentine’s Day Printables: These charming printables are fantastic for small, sweet gifts. Just print, add candy, and you have an adorable and thoughtful treat for friends, classmates, or colleagues.
- Funny DIY Printable Cards: For those who appreciate humor, these printable cards offer a refreshing change from traditional, sappy sentiments. Perfect for a good laugh with your loved ones.
- Frosted Heart-Shaped Brownies: What’s Valentine’s Day without a sweet treat? These brownies are not only delicious but also shaped like hearts and beautifully frosted, making them a perfect homemade dessert to share.
DIY Date Idea Arrows
These easy-to-follow arrows will help you plan the perfect date night every time!
Equipment
- Scissors
Materials
- ¼ inch dowel rods — Length is dependent on how long your mailing tubes are.
- Felt sheets — Colors of your choice
- Tacky glue — Or any fabric craft glue
- Mailing tubes
- Wrapping paper — Optional for wrapping around the tube.
- Round hanging labels — We purchased labels from Martha Stewart’s line at Staples.
- Pen
- Twine or Ribbon
Instructions
- Cut out a triangle to use as a pattern for the tips of the “arrows”. Cut out two triangles from each color of felt.
- Place one felt triangle on a flat surface and cover with tacky glue, making sure to get the edges.
- Then, place a dowel rod just below halfway down the base of the triangle.
- Cover a second triangle with glue. Then place it over the first, lining up the edges, and press gently together to secure the arrowhead. Repeat this for all dowel rods (for example, if making three arrows).
- Once the glue has dried, carefully trim up the edges of the felt triangles with scissors to give them a more finished and sharp look.
- Repeat the same steps as for the arrowheads to create the fletching (feathers) for the ends of the arrows. This time, use a rectangle shape for the felt pieces. Once glued in place on both sides, cut a V-shape into the bottom edge of the felt and then cut sections along the side edges of the rectangles to create a fringed, feathered look.
- Once all the arrows are assembled, write your personalized date ideas (or even special messages) onto the round hanging labels. Securely wrap each label around an arrow with twine or ribbon.
- To decorate the mailing tube that will hold your arrows, wrap it in your chosen wrapping paper (e.g., gold polka-dotted wrapping paper) or decorate it to your taste.