

Unleash Your Creativity: Crafting Stunning DIY Foam Gradient Trees for Contemporary Christmas Charm
For all our devoted followers who adore modern, contemporary, and abstract aesthetics, get ready to be inspired! These DIY Foam Gradient Trees are absolutely perfect for bringing a fresh, vibrant twist to your holiday decor this season. Forget the traditional evergreens for a moment and imagine a dazzling display of color that perfectly captures your unique style.
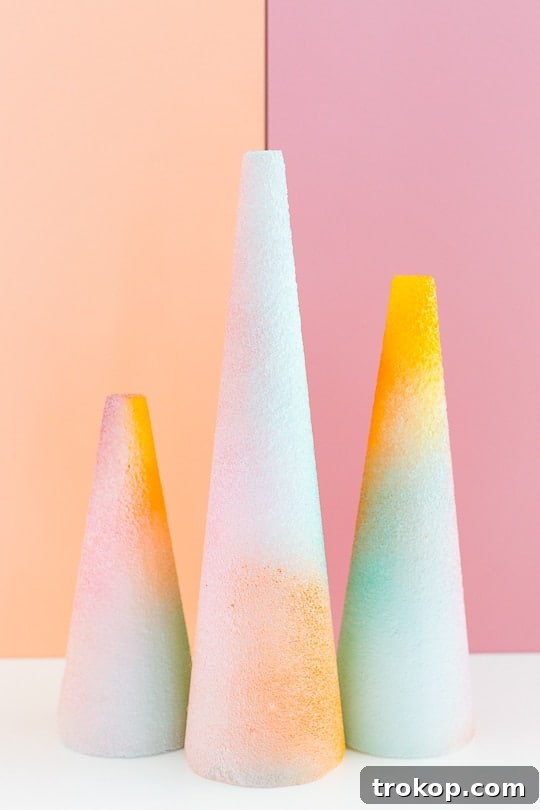
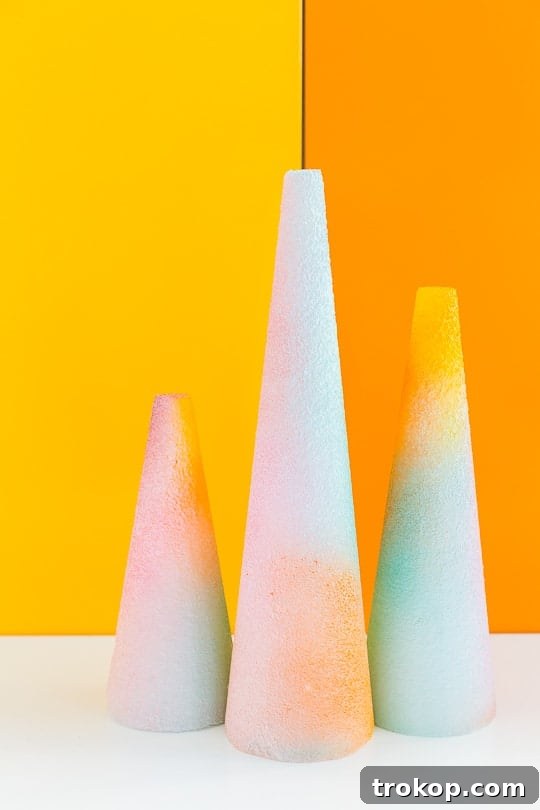
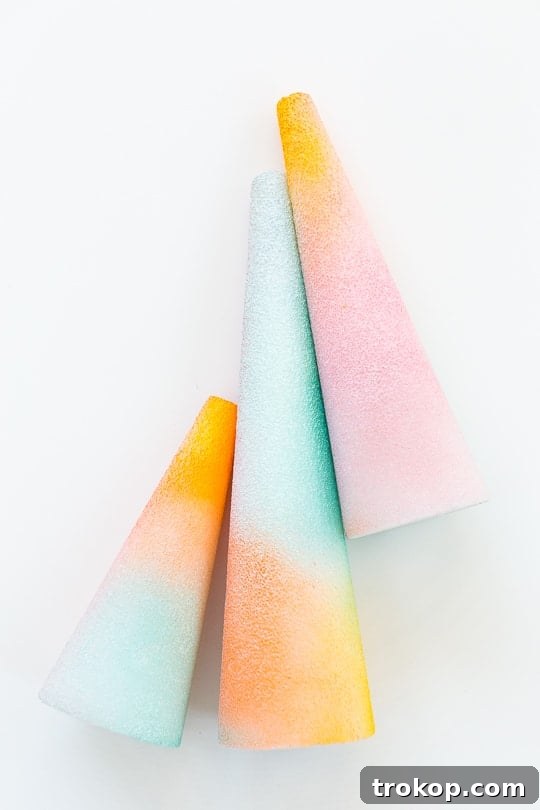
These aren’t just trees; they’re sculptural art pieces that infuse any space with energy and a playful spirit. Whether you’re decking out a minimalist apartment, a bustling creative studio, or simply looking to add a pop of unexpected joy to your home, these gradient foam trees are your next must-try holiday craft project. Their unique ombre effect, achieved with surprising ease, makes them stand out from any conventional decoration.
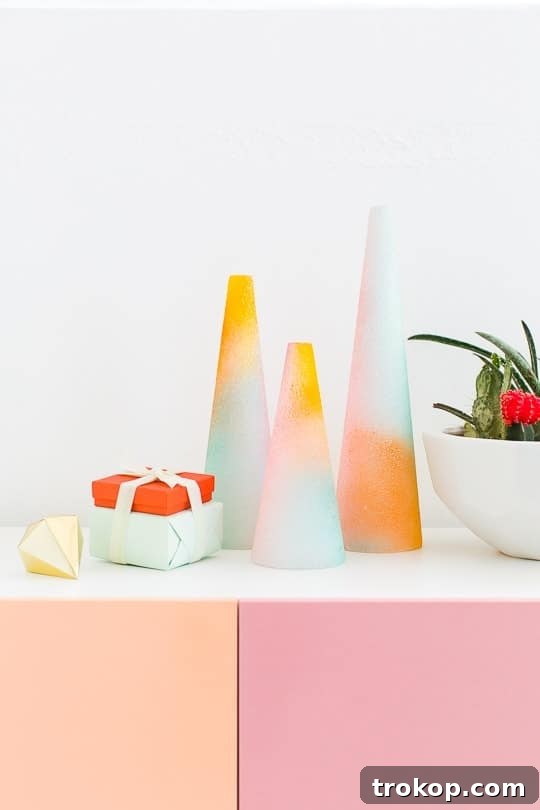

Now, for those who lean towards more traditional decor, we invite you to keep an open mind! Perhaps a little squinting will help you see them as magnificent, rainbow-hued fish dancing on your mantelpiece? Just kidding… mostly! While these trees are a bold departure from classic holiday themes, their inherent cheerfulness and artistic flair are universally appealing. They are designed to celebrate color and creativity, making them the ideal addition to any space that embraces originality.
The beauty of these DIY foam gradient trees extends far beyond Christmas. Think about their potential as captivating table number markers for a wedding, whimsical birthday hat decor, stylish signage holders for an event, or even enchanting accents for a child’s bedroom. Their versatility is truly boundless, encouraging you to explore endless creative applications throughout the year. So, come along with us and let’s dive into this incredibly fun and rewarding DIY adventure!

Why Embrace DIY Foam Gradient Trees This Holiday Season?
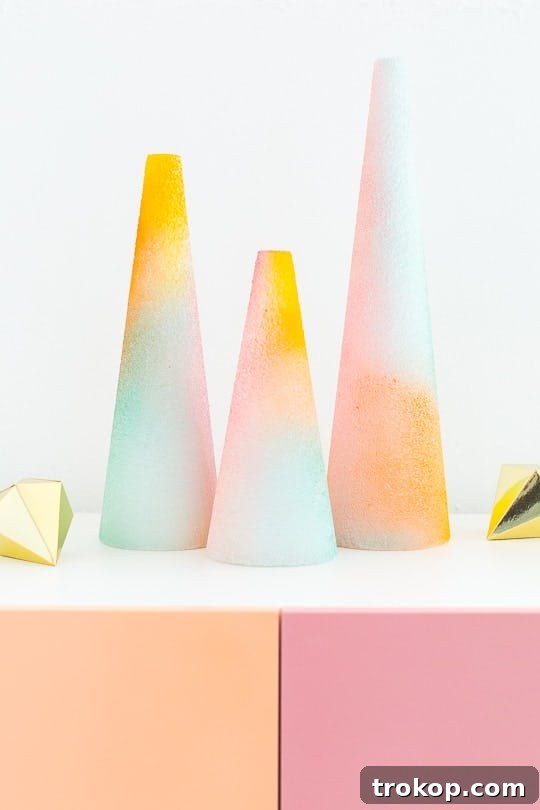
In a world often saturated with predictable holiday decor, these DIY Foam Gradient Trees offer a refreshing escape. Their inherent modern, abstract, and artistic aesthetic instantly elevates any space, turning ordinary corners into vibrant focal points. Imagine a collection of these colorful cones arranged on a mantelpiece, a side table, or as a striking centerpiece, each one a testament to your personal style and creativity. They provide an opportunity to break free from the traditional red and green, allowing you to curate a holiday palette that truly speaks to you.
One of the most appealing aspects of this project is the incredible degree of customization it offers. You have complete control over the color palettes, sizes, and even the “shapes” of your gradients. Do you prefer cool blues and purples for a wintry, ethereal look? Or perhaps bold, fiery reds and oranges to evoke warmth? Maybe a cheerful rainbow spectrum to brighten up dreary winter days? The possibilities are endless. This project allows you to inject your unique personality directly into your holiday decorations, creating pieces that are genuinely one-of-a-kind and reflective of your taste.
These trees are particularly perfect for urban apartments, minimalist homes, or creative studio spaces where traditional, bulky decor might feel out of place. They are lightweight, easy to store, and make a significant visual impact without demanding much physical space. Moreover, they challenge the conventional notion of what a “Christmas tree” can be, offering a playful yet sophisticated alternative that’s perfect for those who love to experiment with design and aren’t afraid to embrace a bit of modern flair. Let these gradient trees be your statement pieces this season, sparking joy and conversation among your guests.
Essential Materials Needed to Craft Your DIY Foam Gradient Trees
Creating these vibrant gradient trees requires only a few key materials, making this a budget-friendly and accessible craft for everyone. The beauty lies in the simplicity of the supplies and the captivating effect they produce when combined. Here’s what you’ll need to get started on your colorful holiday journey:
- Foam cones for crafting in varying sizes: The foundation of your trees! We love the slightly abstract, flat-topped foam cones for a truly modern look, but you can also find more traditional pointed cones if that better suits your vision. Having a variety of heights and widths will add visual interest to your display. Look for smooth, sturdy foam that will hold up well to spray paint.
- Spray paint in various colors: This is where the magic happens! Choose 2-4 complementary or contrasting colors per tree to achieve your desired gradient effect. Consider different finishes like matte, satin, or gloss for added texture and visual depth. Good quality spray paint will ensure vibrant colors and smooth application. Don’t forget a clear sealant if you want to protect your creations and give them a lasting sheen.
- Protective gear and workspace setup: Always prioritize safety when working with spray paint. You’ll need a well-ventilated area, a drop cloth or old newspapers to protect your surfaces, and optionally, gloves and a face mask to prevent inhalation of fumes and keep your hands clean.
- Optional: Turntable or lazy Susan: This can make the spray painting process much easier, allowing you to rotate the cones evenly as you apply paint for a seamless gradient.
When selecting your spray paint colors, think about the mood you want to create. Bright neons for an energetic vibe, pastels for a softer, dreamier feel, or jewel tones for a sophisticated, rich look. The key to a successful gradient is choosing colors that blend harmoniously or create a striking transition.
Step-by-Step Guide: How To Create Your Own DIY Foam Gradient Trees
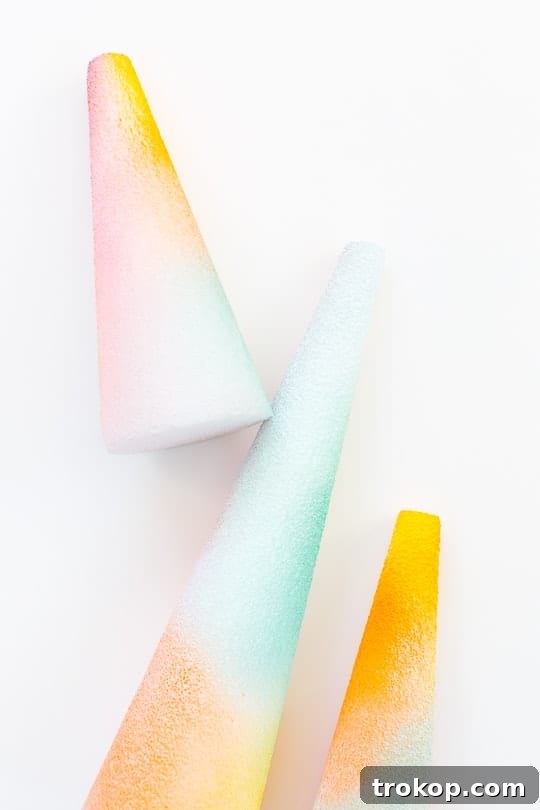
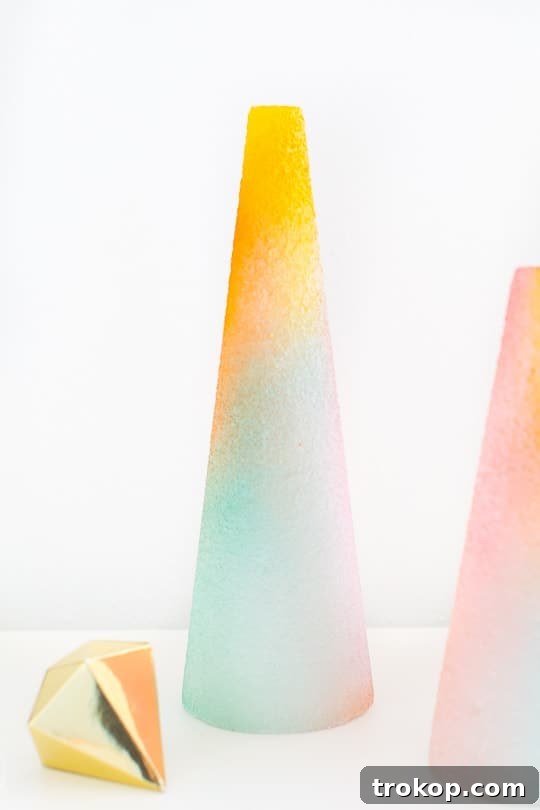
Get ready for a surprisingly simple yet incredibly rewarding crafting experience! These colorful little guys are as easy to make as randomly spray painting foam cones – almost with your eyes closed! The beauty of this project is that perfection isn’t the goal; rather, it’s about embracing the natural blur and blend of colors to create a unique gradient effect. Here’s how to achieve these stunning modern trees:
- Prepare Your Workspace: Set up your crafting area in a well-ventilated space, preferably outdoors or in a garage with open windows. Lay down a drop cloth, old newspapers, or cardboard to protect your surfaces from overspray. If you have a turntable, place it on top of your protected surface. Wear gloves and a mask for safety.
- Position Your Foam Cone: Place your first foam cone on the protected surface or turntable. Ensure it’s stable and won’t tip over during painting.
- Apply the First Color (Base): Start with your lightest or bottom-most color. Hold the spray can further back from the foam cone than you might typically. This is crucial for achieving a light mist rather than a heavy, solid coat. Begin spraying the bottom section of the cone, allowing the paint to lightly feather upwards. Don’t worry about complete coverage; you’re aiming for a soft, transparent layer.
- Introduce the Second Color: With your second chosen color, begin spraying slightly above where your first color ended, allowing it to overlap and blend naturally with the first color. Maintain that distance to ensure a gentle mist. Rotate the cone slowly as you spray to ensure even application. The overlap is what creates the “gradient” or “ombre” effect, so focus on a smooth transition rather than distinct lines.
- Continue with Subsequent Colors: Repeat the process with your third and fourth colors (if using more). Each color should lightly overlap with the one below it, gradually moving up the cone. Experiment with how much you overlap and the intensity of each mist to create different gradient looks. The key is to build up the color in light layers, allowing them to blur together organically.
- Allow for Drying Time: Once you’re happy with your gradient, set the cone aside in a safe, ventilated area to dry completely. Drying times can vary depending on the paint type and humidity, so refer to your spray paint can’s instructions. Applying a second light coat of any color after the first dries can deepen the hues if desired.
- (Optional) Apply a Clear Sealant: Once fully dry, you can apply a clear sealant spray to protect the paint and give your trees a subtle sheen or a matte finish, depending on your preference. This step can enhance durability, especially if the trees will be handled often.
- Repeat and Experiment: Repeat these steps for all your foam cones, experimenting with different color combinations and gradient transitions. Create a collection of various sizes and hues to build a truly dynamic and eye-catching display.
Remember, there’s no right or wrong way to blend these colors. The entire idea behind gradient is that the colors blur together, creating a beautiful, soft transition. Don’t be afraid to be a little imprecise; that’s where the artistic charm lies!
Creative Styling and Placement: Beyond the Christmas Tree
The true genius of these DIY Foam Gradient Trees lies not just in their creation, but in their incredible versatility. While they make for spectacular alternative Christmas trees, their modern aesthetic and customizable nature mean they can bring joy and style to your home far beyond the holiday season. Here are some creative ways to style and place your newly crafted masterpieces:
- Holiday Vignettes: For Christmas, group them together in varying sizes on a mantelpiece, a side table, or as a striking centerpiece for your dining table. Pair them with fairy lights, metallic accents, or natural elements like pinecones and greenery for a balanced look. The gradients will add a burst of unexpected color amidst more traditional elements.
- Year-Round Decor Accents: Don’t pack them away after December! These trees are perfect for injecting color into your home any time of year. Use them as playful decor for a child’s room, a vibrant addition to a creative workspace, or a unique conversation starter on a bookshelf. Change their context, and they transform from holiday decor to modern art.
- Event Embellishments: Hosting a party or special event? These gradient cones can serve as fantastic decor. Imagine them as whimsical table numbers for a wedding or birthday, adding a custom, colorful touch. They can also hold small signs, act as unique party hat bases, or be integrated into a vibrant photo booth backdrop.
- Seasonal Home Styling: Adapt their colors to different seasons. Opt for spring pastels, bright summer hues, or warm autumnal tones to refresh your home decor throughout the year. They are an easy way to switch up your seasonal styling without a major overhaul.
Integrating these trees into your existing decor is simple. If your home is minimalist, let them be the vibrant focal point. In a more eclectic setting, they can blend seamlessly with other colorful pieces, adding another layer of texture and visual interest. Their abstract form ensures they complement a wide range of interior design styles, from Scandinavian chic to bohemian bliss.
Discover More Alternative DIY Christmas Trees
Love this non-traditional holiday decor and eager to explore more unique ways to celebrate the season? If you’re passionate about moving beyond conventional decorations and embracing creative DIY solutions, you’re in luck! Our archives are filled with innovative ideas for alternative Christmas trees that are just as charming and impactful as our gradient foam trees. Here are some of our favorite DIY projects to inspire your next holiday crafting session:
- Pegboard Christmas Tree: A brilliant solution for small spaces or minimalist aesthetics. This customizable tree allows you to hang ornaments, photos, or even small shelves, making it both decorative and functional.
- Mini Christmas Tree: For those who adore understated elegance, our DIY Wooden Christmas Tree offers a rustic yet modern charm. Crafted from simple wooden elements, these small trees bring warmth and a natural touch to any vignette or tabletop.
- DIY Confetti Cones: If you’re looking for something festive and playful, these confetti cones are a delightful option. They’re quick to make and add an instant burst of celebratory sparkle, perfect for parties or a whimsical display.
- Pom Pom Christmas Tree: Embrace texture and softness with this incredibly charming pom pom tree. It’s a fantastic project for adding a cozy, whimsical, and tactile element to your holiday decorations, especially beloved by children and adults alike.
- Balloon Garland Tree: Make a grand, temporary statement with a festive balloon garland shaped like a tree. This option is perfect for large gatherings or dramatic photo backdrops, creating an airy and spectacular focal point.
Each of these projects offers a unique take on holiday decorating, proving that with a little creativity, you can craft a Christmas season that is truly your own. Dive into these tutorials and discover the joy of personalized, handmade decor!

Share Your Creations & Find More Inspiration
We absolutely adore seeing your creative visions come to life! Don’t forget to share your beautifully crafted DIY Foam Gradient Trees and other home decor projects with us on Instagram using the hashtag #sugarandclothloves. We love to feature your unique creations and celebrate your DIY triumphs with our community!
Are you hungry for even more interior design inspiration, innovative DIY projects, and stylish home decor ideas? You can find an extensive collection of all our home decor tutorials and creative ideas right here. From seasonal transformations to everyday enhancements, we’re dedicated to helping you craft a home that reflects your personality and passion. Happy crafting!