
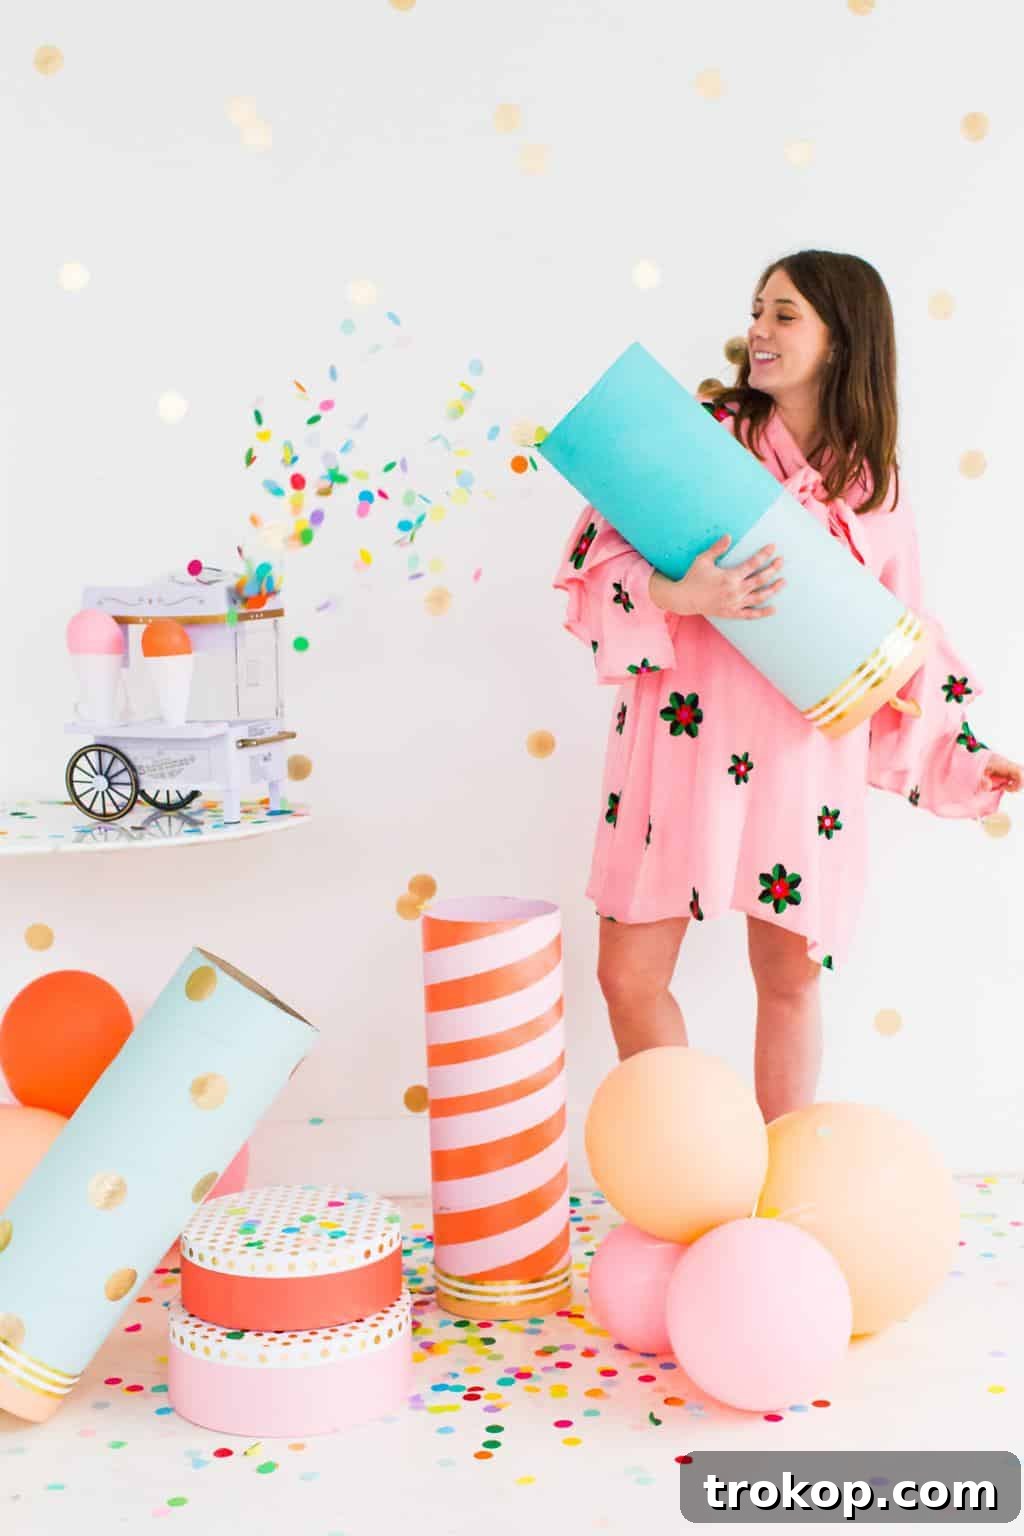
Get ready to unleash a cascade of vibrant joy at your next gathering with our super fun and incredibly simple tutorial for crafting Jumbo DIY Party Confetti Poppers! Whether you’re ringing in the New Year, celebrating a milestone birthday, or simply want to add an extra layer of excitement to any event, these impressive, refillable poppers are guaranteed to bring a burst of color and unforgettable moments. Forget flimsy store-bought alternatives; our homemade version is sturdy, eco-friendly, and offers endless opportunities for customization to perfectly match your party’s theme.
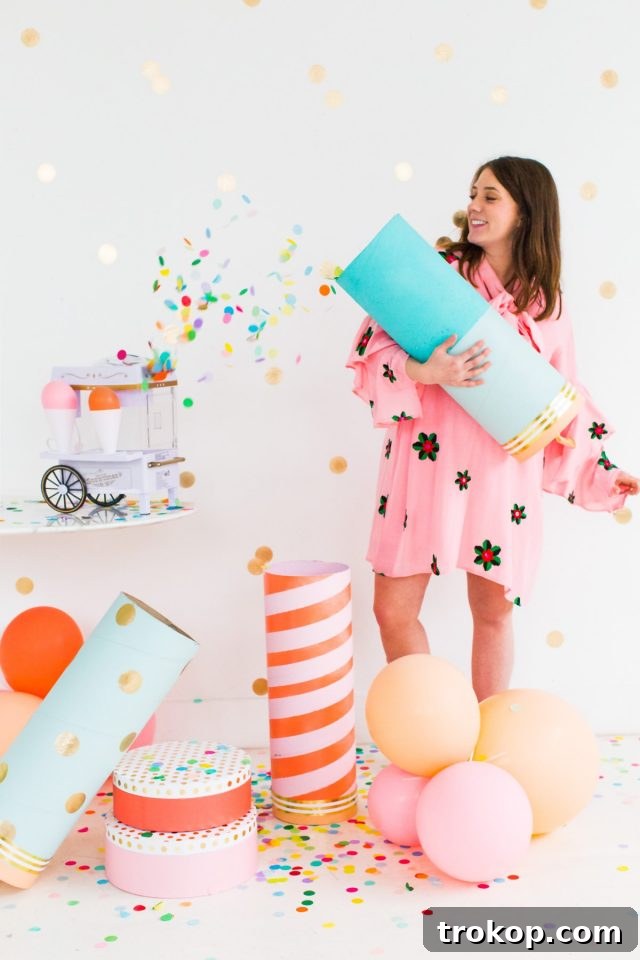
There’s something universally enchanting about confetti, and with these Jumbo DIY Party Confetti Poppers, you can multiply that magic exponentially! This project isn’t just about crafting; it’s about creating an experience. Imagine the delight on your guests’ faces as a colorful shower erupts with a satisfying pop. We’re thrilled to guide you through this process, transforming a few readily available materials from your local hardware store and party supply shop into spectacular party features. From glitzy New Year’s Eve celebrations to lively adult birthday parties or any occasion throughout the year, these poppers fit right in.
One of the biggest advantages of our DIY confetti poppers is their refillable design. This means the fun doesn’t stop after just one pop! Easily restock with your favorite confetti mixes and keep the party energy soaring. This also makes them a budget-friendly option, allowing you to reuse them for multiple events without constantly purchasing new party favors. While they shine in metallic hues for a glamorous New Year’s vibe, their design is incredibly versatile. Don’t hesitate to infuse them with your unique personality through bold colors and creative patterns. If “jumbo” isn’t quite the scale you’re looking for, you can easily adapt this concept for miniature versions, opening up even more creative possibilities for your celebrations.
So, gather your supplies, ignite your creativity, and let’s dive into making some confetti magic. Because every day, and especially every celebration, deserves a dazzling display!
Materials and Tools for Your Jumbo Confetti Poppers
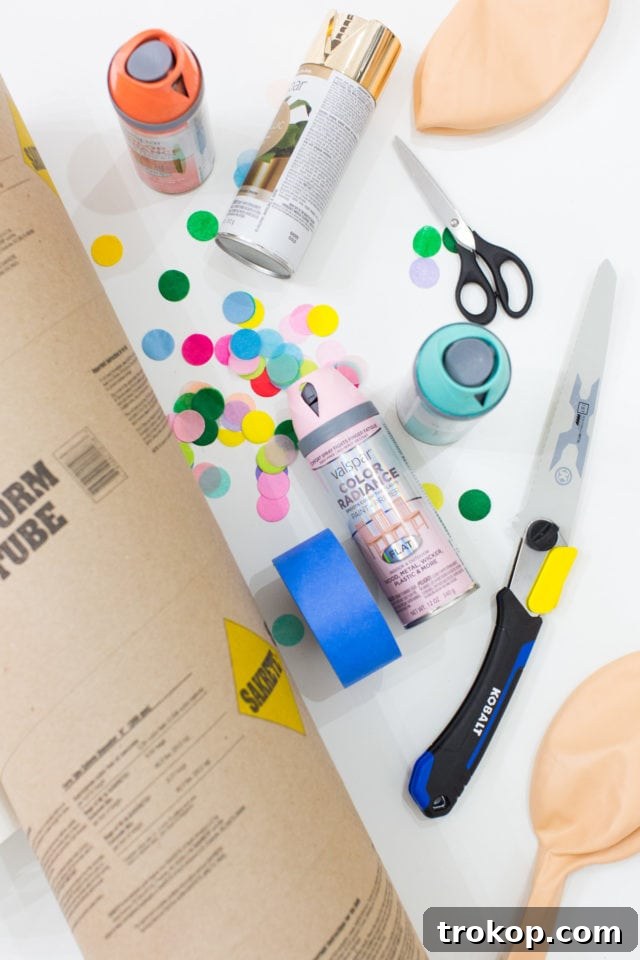
Crafting these jumbo confetti poppers is surprisingly straightforward, requiring just a few key items that are readily available. A quick trip to your local hardware store and a party supply shop will set you up with everything you need to begin this fun project. Here’s a detailed list of the essential materials and tools:
- 8″ x 48″ tube form: This is typically a cardboard concrete form tube, found in the building materials section of hardware stores like Lowe’s. Its sturdy construction and large diameter are perfect for creating the impressive “jumbo” size of these poppers.
- Scissors: A good pair of sharp scissors is essential for cutting balloons, gift wrap, and any additional decorative elements precisely.
- Painter’s tape: Crucial for creating clean lines and crisp patterns when spray painting your tubes. It ensures professional-looking designs and protects areas you don’t want painted.
- Spray paint in the colors of your choice: This is where you can truly customize your poppers to match any party theme. Consider metallics for a sophisticated look, or bright, playful colors for birthdays and summer celebrations. Ensure you have enough to apply multiple thin coats for best results.
- Optional: Gift wrap for decorating the bottom border: A fantastic way to add a polished, decorative touch. Choose patterns and colors that complement your paint scheme or party theme for an extra layer of visual appeal.
- 36″ inch party balloon (one per popper): The larger the balloon, the more tension and a better “pop” you’ll achieve. These can be found at party supply stores or online. Ensure they are strong and stretchable.
- Kobalt folding saw: Ideal for making clean and straight cuts through the cardboard tube form. If you don’t have this specific brand, any utility saw suitable for cutting thick cardboard will work. Always prioritize safety when using cutting tools.
- Fine sandpaper: Used to smooth out any rough edges on your cut tubes, ensuring a safe and aesthetically pleasing finish. This also helps prepare the surface for painting.
- Glue gun and glue sticks: Perfect for quickly and securely attaching the balloon to the tube, as well as any decorative gift wrap or trim you choose to add. Hot glue provides a strong, instant bond.
- Confetti of your choice: The star of the show! You can use pre-made confetti, or get creative by cutting up old magazines, metallic garland, colored paper, or even biodegradable natural elements like dried flower petals. We particularly love adding cut-up gold garland for larger, eye-catching pieces that shimmer as they fall!
How to Make Jumbo DIY Party Confetti Poppers: A Step-by-Step Guide
Crafting these fantastic jumbo confetti poppers is a fun and rewarding process. Follow these detailed instructions to create your own impressive party accessories that will surely be a hit!
-
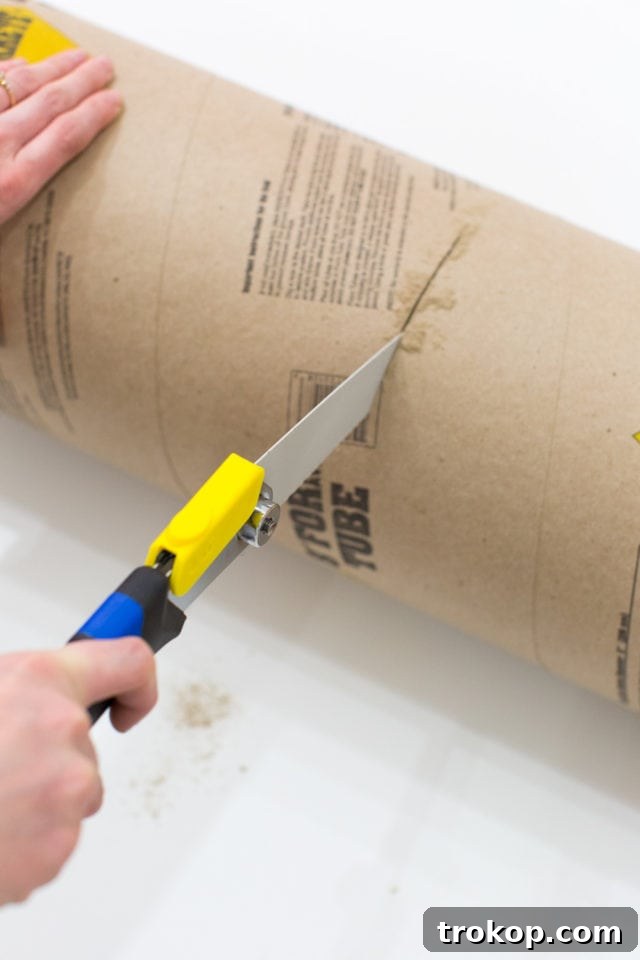
Step 1: Prepare Your Tube Forms. Begin by taking your 8″ x 48″ tube form. Using your Kobalt folding saw or a similar heavy-duty cutting tool, carefully cut the tube precisely in half. This strategic cut will efficiently yield two equally sized, formidable popper bases from a single tube, making your project both cost-effective and productive. Always ensure you are working on a stable surface and exercising proper safety precautions when handling saws. The resulting two 24-inch cylinders will form the main body of your jumbo confetti poppers.

-
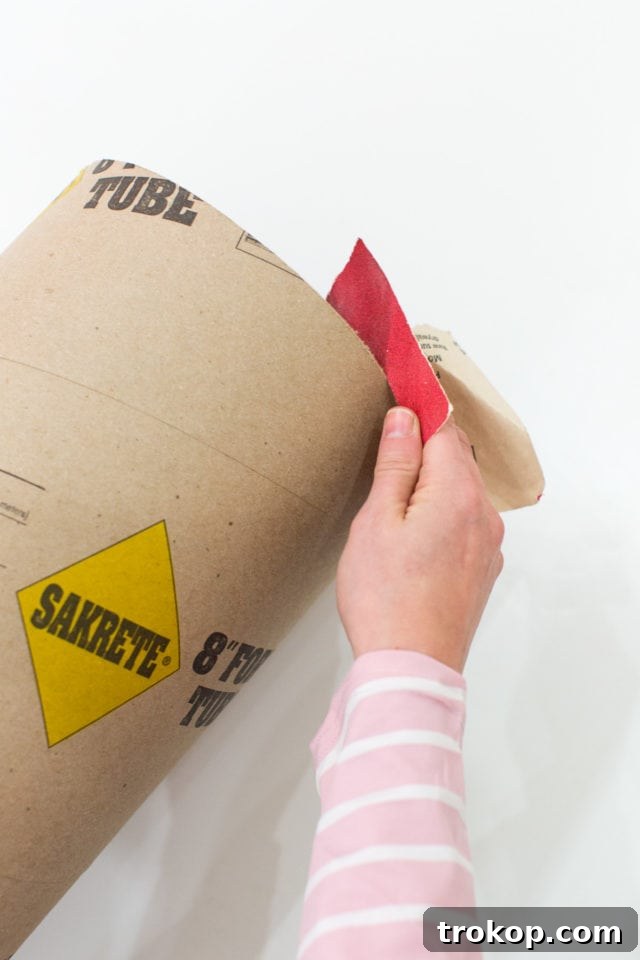
Step 2: Smooth the Edges for Safety and Finish. After cutting, the edges of your cardboard tubes might be a bit rough or uneven. This is where fine-grade sandpaper comes in handy. Gently sand down all the freshly cut edges until they are perfectly smooth and splinter-free. This vital step is not only for aesthetics, ensuring a professional and polished appearance, but also for safety, making the poppers comfortable and safe for everyone to handle during the party. A smooth edge also provides a better surface for later steps, like paint adhesion and balloon attachment.
-
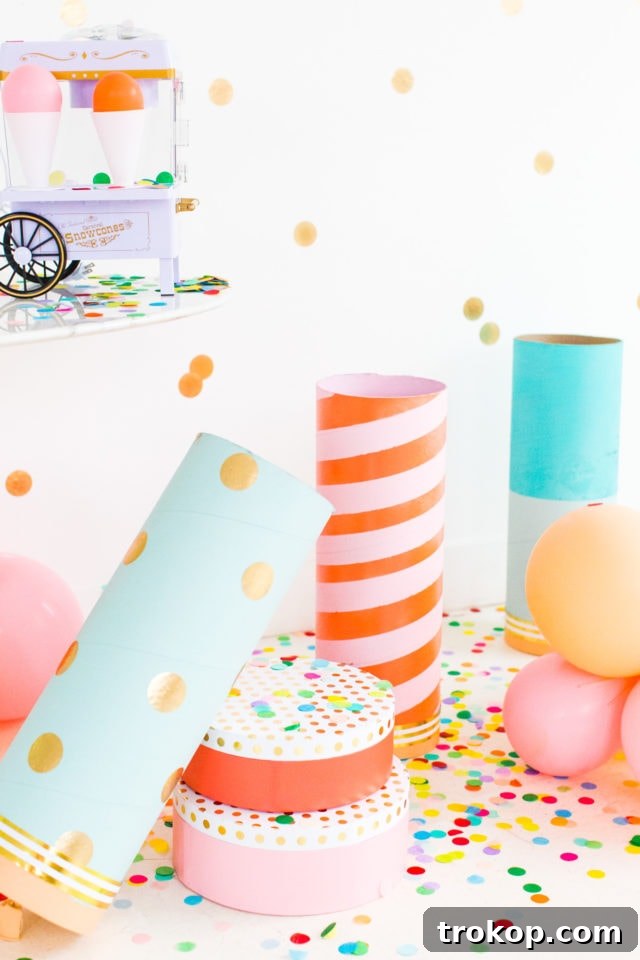
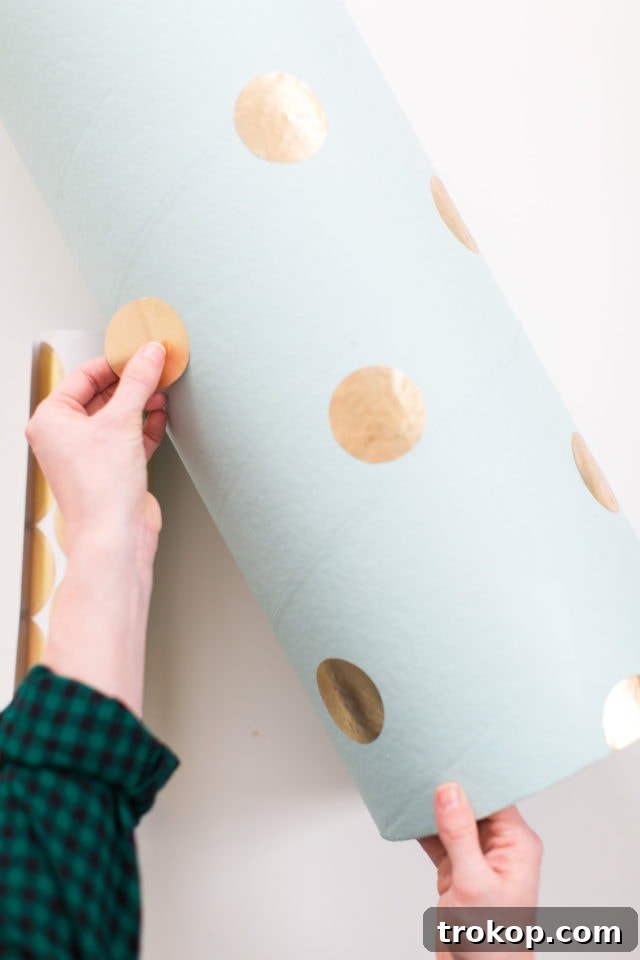
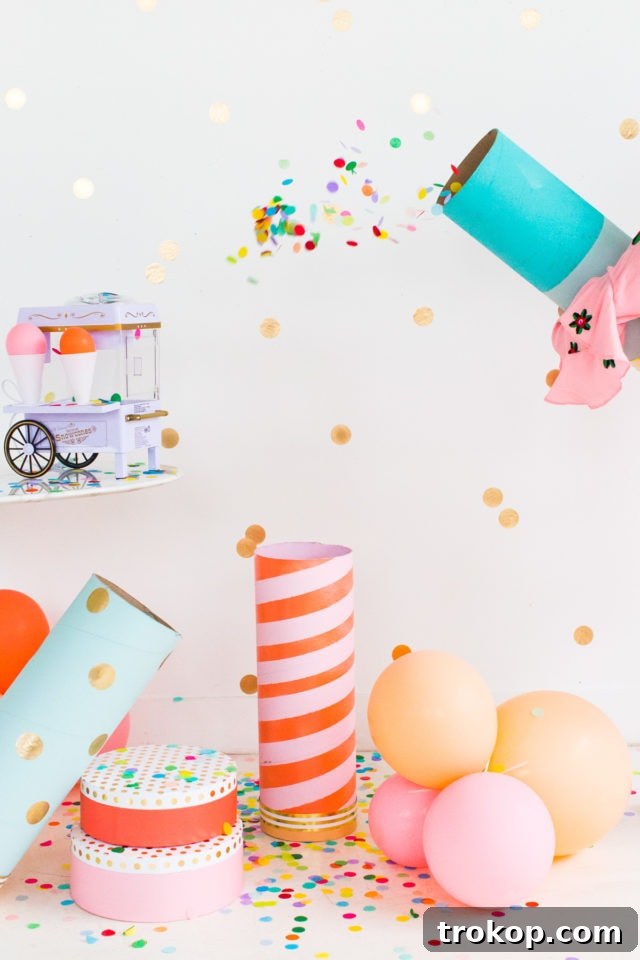
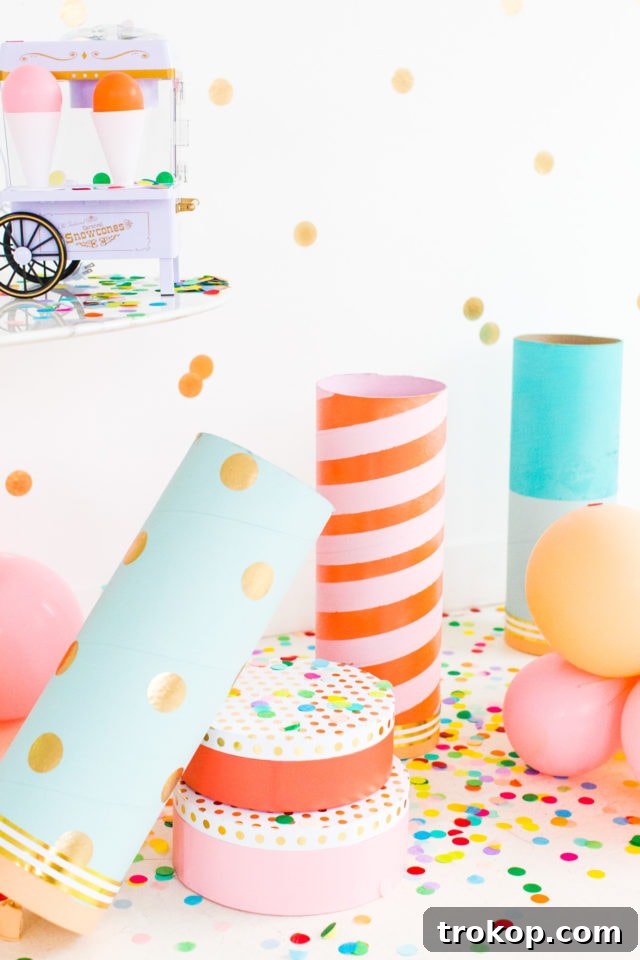
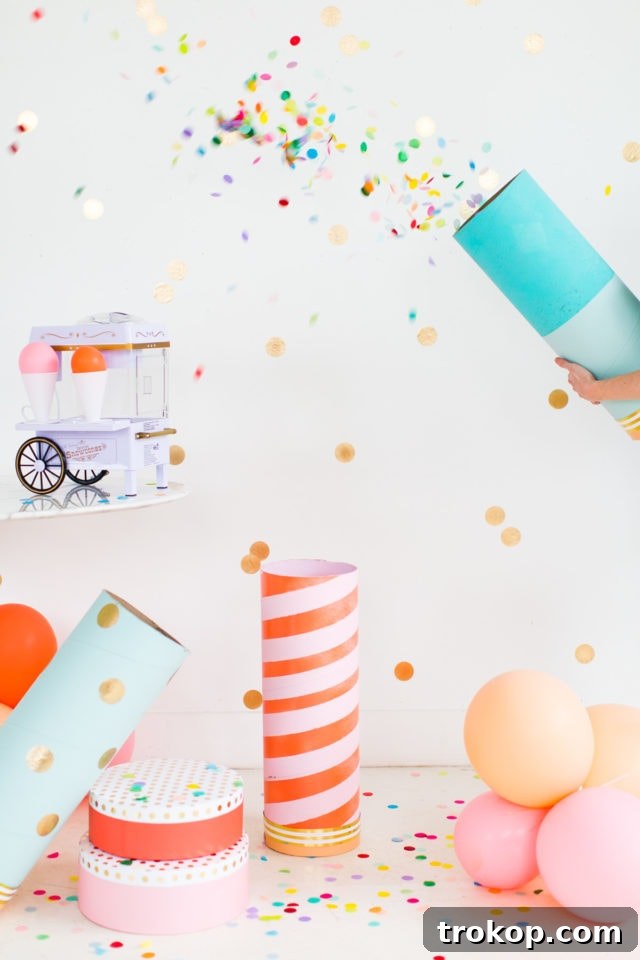
Step 3: Decorate with Spray Paint and Creative Patterns. Now for the artistic part! Employ painter’s tape to meticulously create your desired design or pattern on the exterior of each tube. This could be anything from bold geometric shapes to elegant stripes, or even whimsical polka dots. Once your design is taped off, apply spray paint in thin, even coats. The key to a flawless finish is patience: allow each coat to dry completely before applying the next, and resist the urge to apply a thick single coat, which can lead to drips and uneven textures. We created three distinct designs for our poppers: one featuring a striking color block, another boasting a chic spiral stripe pattern (achieved by painting a solid base color, then taping off stripes before applying a second contrasting color), and a third, glamorous design in solid gold, elevated with metallic gold adhesive dots for extra sparkle. Let your imagination guide you!
-
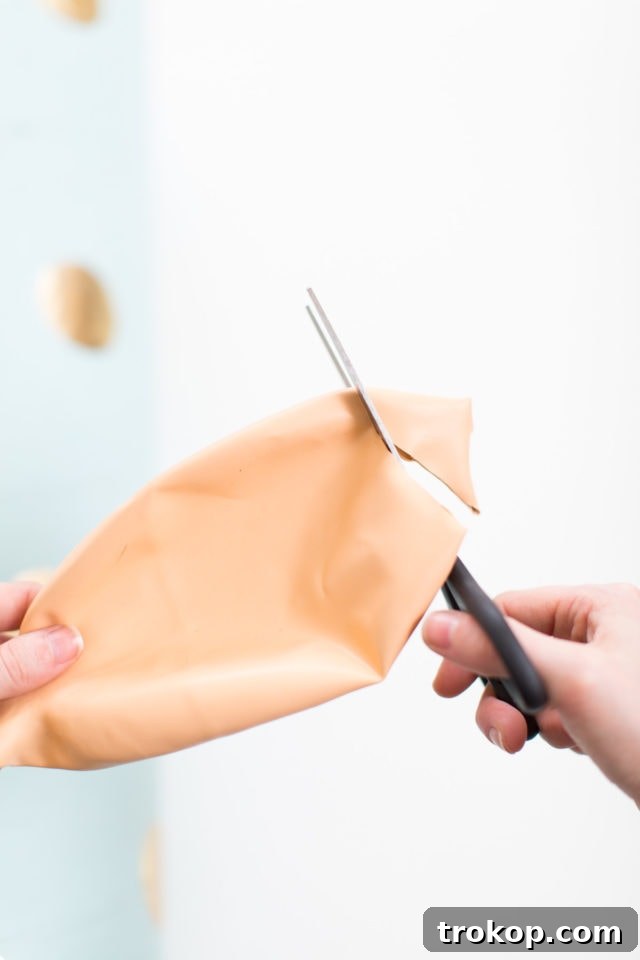
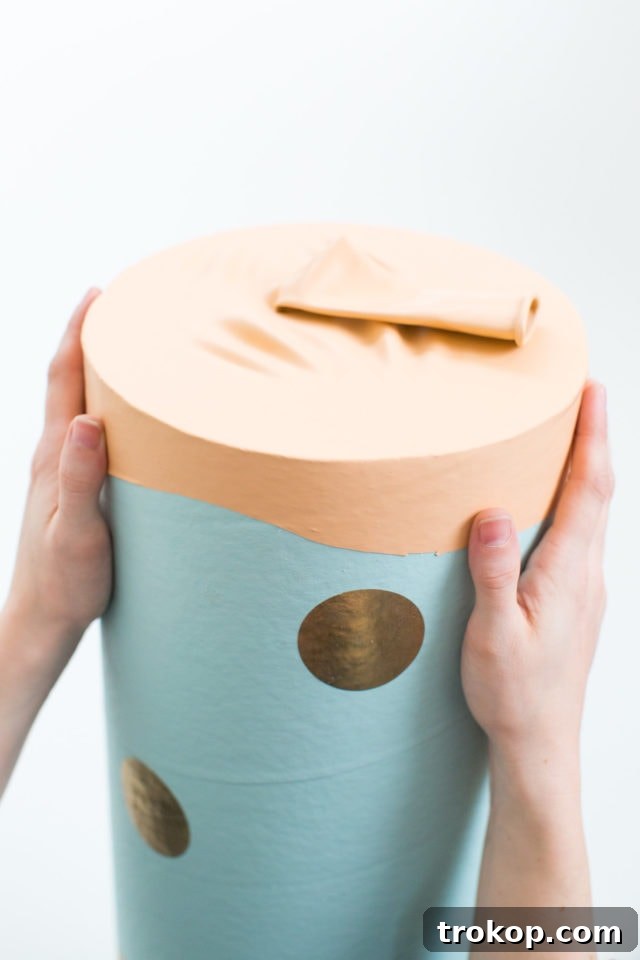
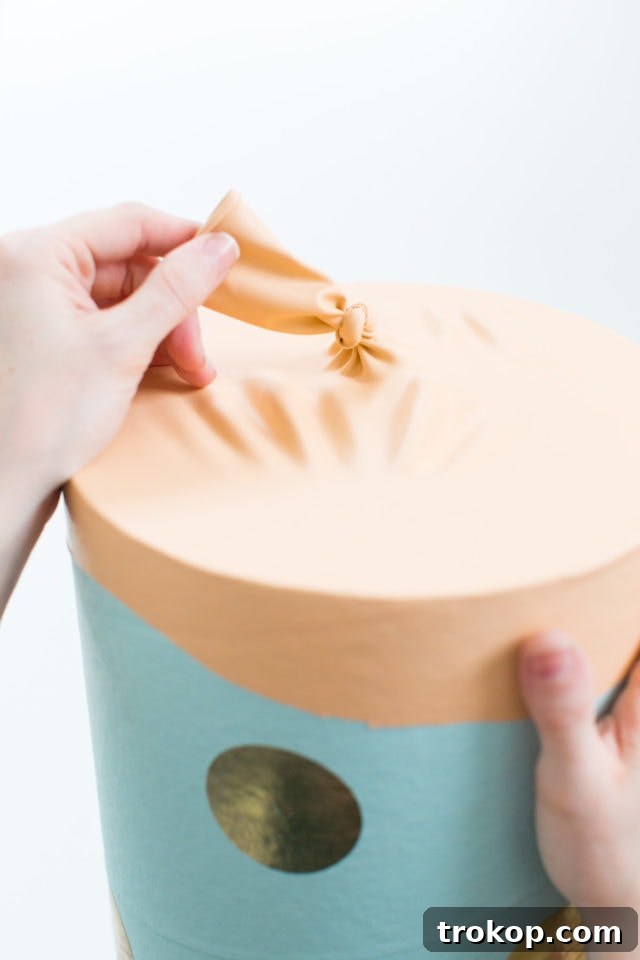
Step 4: Attach the Balloon Mechanism for the “Pop.” This step is critical for your popper’s functionality. Take one of your large 36-inch balloons and carefully cut approximately 1.5 inches off the end, specifically the narrow opening where you would typically inflate it. This cut creates a wider, more manageable opening. Next, stretch this newly cut opening tightly over one end of your decorated cardboard tube. It’s crucial that the balloon forms a secure, airtight seal around the tube. The tighter the fit, the more effective and satisfying the “pop” will be. Once securely in place, tie a sturdy knot at the very end of the balloon’s tail. This knot will serve as the handle that you pull back to create tension and launch the confetti, so ensure it’s strong enough to withstand repeated enthusiastic pulls.
-
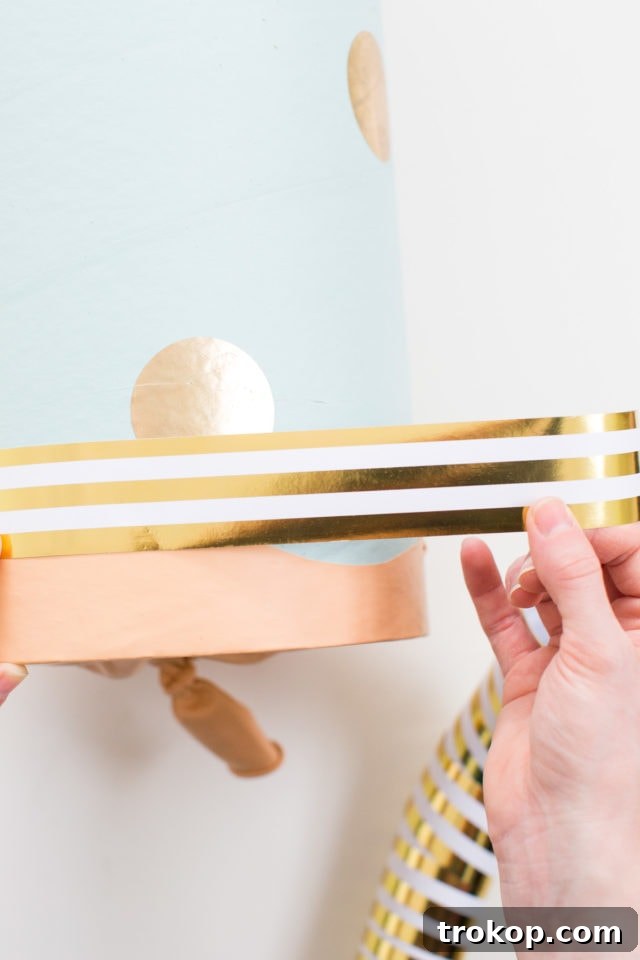
Step 5: Add Optional Decorative Trim for a Polished Look. If you’re a connoisseur of details and desire an impeccably finished product, this optional step is for you. Cover the area where the balloon meets the cardboard tube with a decorative strip. You can use a piece of complementary gift wrap, a festive ribbon, or any trim of your choice. Apply it neatly and secure it firmly with a hot glue gun. This not only conceals the transition point between the balloon and the tube but also adds an extra layer of personalization and a refined touch, making your jumbo confetti popper look professionally made.
-
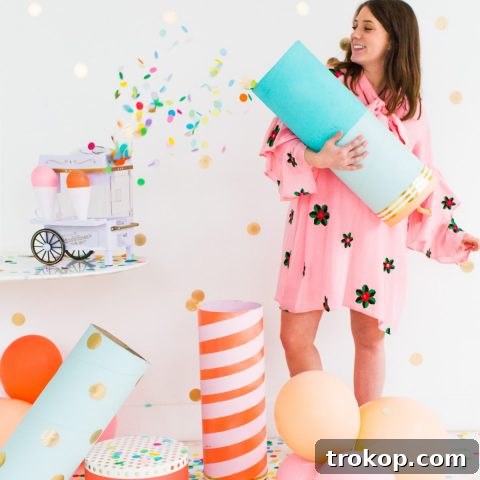
Step 6: Fill Your Poppers and Unleash the Fun! Your jumbo DIY confetti poppers are now complete and ready for action! Hold the popper with the balloon end pointing away from you and the open end facing upwards. Fill the tube generously with your favorite confetti. Don’t be shy – the more confetti you add, the more spectacular the explosion of color will be! Once loaded, firmly grip the tube with one hand, pull back on the balloon knot handle with the other, and then swiftly release it. Watch as a dazzling shower of confetti launches into the air, bringing instant joy and a festive atmosphere to your party! Remember, these are refillable, so you can keep the fun going throughout your event.
These jumbo DIY confetti poppers are guaranteed to bring smiles and gasps of delight to your friends and family. They’re incredibly simple to construct, a breeze to use, and inject a literal pop of color and excitement into any party or celebration. We truly hope you have as much fun making and using them as we do!
Customization Ideas for Every Occasion
The beauty of these DIY confetti poppers lies in their incredible versatility. You can easily adapt them to suit any event, holiday, or personal preference. Here are some ideas to spark your imagination:
- Themed Colors: For a patriotic Fourth of July celebration, opt for red, white, and blue paint with matching confetti. For a baby shower, use pastel pinks or blues, or a mix for a gender-neutral theme. Halloween could feature spooky blacks, oranges, and purples with bat or ghost-shaped confetti.
- Confetti Variations: Beyond traditional paper confetti, think outside the box! Use biodegradable glitter, metallic shredded tinsel, small pompoms, dried flower petals for an eco-friendly option, or even tiny paper cutouts shaped like stars, hearts, or numbers. For a truly unique touch, incorporate themed items like tiny plastic rings for a bridal shower or small, lightweight candies for a kids’ party (just make sure they’re safe to launch and collect!).
- Personalized Touches: Add monograms, birthdates, or celebratory messages using adhesive letters or stencils. You could even have guests sign the poppers as a fun activity before the main event.
- Miniature Versions: If jumbo isn’t your style or you’re catering to smaller hands, use narrower cardboard tubes (like those from paper towel rolls) and smaller balloons. These are perfect for party favors or as a cute addition to place settings.
- Interactive Designs: Paint a base color, then use chalkboard paint in sections where guests can write their wishes or messages before the confetti blast.
Styling Your Party with Jumbo Confetti Poppers
These jumbo confetti poppers aren’t just for a quick burst of fun; they can also be an integral part of your party’s aesthetic. We’re absolutely obsessed with how they transform any space, and we’re sure you’ll be seeing a lot more of them in future celebrations! Here’s how we incorporated them into our setup, along with the styling sources we used, inspiring you to create your own Instagram-worthy moments:
- Lowe’s Nostalgia White and Gold Snow Cone Maker: This added a charming, retro touch to our party setup, perfectly complementing the festive, celebratory vibe of the confetti poppers. Its white and gold color scheme integrated seamlessly with a glamorous theme.
- Lowe’s Modway Lippa Marble Dining Table: The sleek and elegant design of this table provided a sophisticated backdrop, allowing the colorful poppers and other festive decor to truly stand out. Its clean lines and luxurious feel elevated the entire party scene.
- Lowe’s WallPops Geometric Gold Dot Wall Stickers: These adhesive wall decals offered an instant decorative upgrade, adding a playful yet chic metallic element to the background. They created a dynamic visual effect that harmonized beautifully with the celebratory theme.
- Lowe’s Gold Tinsel Strings (used as confetti): Instead of traditional paper confetti, we cut up gold tinsel strings. This not only added extra shimmer and texture to our confetti blasts but also ensured that even the confetti itself was a decorative element, catching the light as it floated down.
- Tinsel Garland: Used for general party decoration, the tinsel garland further enhanced the celebratory atmosphere, tying in with the metallic confetti and creating a cohesive, festive look throughout the space.
When you try your hand at making these jumbo DIY confetti poppers, be sure to tag us and @lowes on Instagram! We absolutely love seeing your amazing craft projects and how you integrate them into your New Year’s Eve parties, birthdays, or any other festive occasion!
More DIY Projects and Ideas to Spark Your Creativity
If you’ve enjoyed crafting these jumbo confetti poppers, you’re in luck! There’s a whole world of exciting DIY projects waiting to be explored. From innovative decor solutions to delicious recipes, these ideas will help you continue to personalize and elevate your home and celebrations. Dive into more of our favorite tutorials:
- How to Make a DIY Floating Flower Table Display: Create a breathtaking centerpiece with this elegant and surprisingly simple tutorial, perfect for adding a touch of floral sophistication to any dinner party or special event.
- 10 Fourth Of July DIY’s And Recipes To Try: Gear up for Independence Day with a collection of festive crafts and mouth-watering recipes that will make your Fourth of July celebration truly spectacular.
- Edible DIY Layered Cookie Cake Recipe: Indulge your sweet tooth and impress your guests with this delightful layered cookie cake recipe, a fun and delicious twist on traditional desserts.
- How to Make DIY Animal Ear Cake Toppers: Add a whimsical and adorable touch to any cake with these easy-to-make animal ear cake toppers, perfect for birthdays, baby showers, or themed parties.
Jumbo DIY Confetti Poppers – Project Overview
These jumbo DIY confetti poppers are easy to make and a fun way to add some flair to any celebration. Great for all kinds of parties!
1 hr
30 mins
1 hr 30 mins
DIY Project
Entertaining Decor
Equipment Needed
- Scissors
- Painter’s tape
- Kobalt folding saw
- Fine sandpaper
- Hot glue gun and glue sticks
Essential Materials
- 1 cardboard tube form (8″x48″)
- 2 36″ party balloons
- Spray paint in any color of your choice
- Gift wrap (optional, to decorate tube)
- Confetti of your choice (e.g., paper, tinsel, eco-friendly options)
Step-by-Step Instructions
-
Cut the 8″ x 48″ cardboard tube form in half using a folding saw to create two popper bases.
-
Smooth out all cut edges with fine-grade sandpaper for a safe and clean finish.
-
Use painter’s tape to create a design, then spray paint the tubes in thin, even coats. Let the paint dry completely.
-
Cut approximately 1.5″ off the end of a 36″ balloon. Stretch the cut opening tightly over one end of a tube, then tie a knot at the balloon’s end to create a handle.
-
(Optional) Use a strip of gift wrap or trim of your choice and secure it with a glue gun where the balloon meets the tube for a polished look.
-
Fill the open end of the tube with your favorite confetti, pull back on the balloon knot, and quickly release it to unleash the fun!
$20
diy confetti party poppers, homemade party fun, jumbo celebration crafts

Please note: This article is part of a sponsored partnership with Lowe’s. While we received compensation for this collaboration, all opinions and product recommendations expressed herein are entirely our own and genuinely reflect our creative vision. As part of our commitment to giving back, Sugar & Cloth proudly donates 5% of all sponsored campaign earnings to charity. You can learn more about our initiative to change the blogging game by giving back right here!
We’re excited to see your magnificent creations! Don’t forget to share your DIY Jumbo Confetti Poppers with us on Instagram using the hashtag #sugarandclothloves. We always cherish seeing all of your innovative projects and how you bring them to life! And if you’re eager for more quick and engaging DIY ideas, you can find them all right here to fuel your next crafting adventure!
Discover More Inspiring DIYs and Party Ideas
Looking for more creative ways to celebrate or enhance your living space? Explore these fantastic articles for additional inspiration and DIY projects that are sure to delight.
30th Birthday Gift Ideas: Unique & Meaningful Gifts for Turning 30
Celebrate the big 3-0 with unique and thoughtful 30th birthday gifts that truly make a statement. Discover personalized presents and memorable experiences for this significant milestone.
Continue Reading
Your Guide to Hosting the Perfect Outdoor Movie Night
From DIY projectors to cozy seating arrangements, explore the best tips and tricks to transform your backyard into an unforgettable cinematic experience for friends and family.
Continue Reading
17 DIY Cake Toppers that Will Steal the Show at Your Next Celebration
Take your cake decorating skills to the next level with these 17 creative and easy-to-make DIY cake toppers. Perfect for adding a personal and memorable touch to any dessert.
Continue Reading
DIY Balloon Cake Topper & Cake Painting Tutorial
Add a touch of whimsy to your cake with a customizable DIY balloon cake topper, along with expert tips for painting frosting to create stunning, edible designs.
Continue Reading