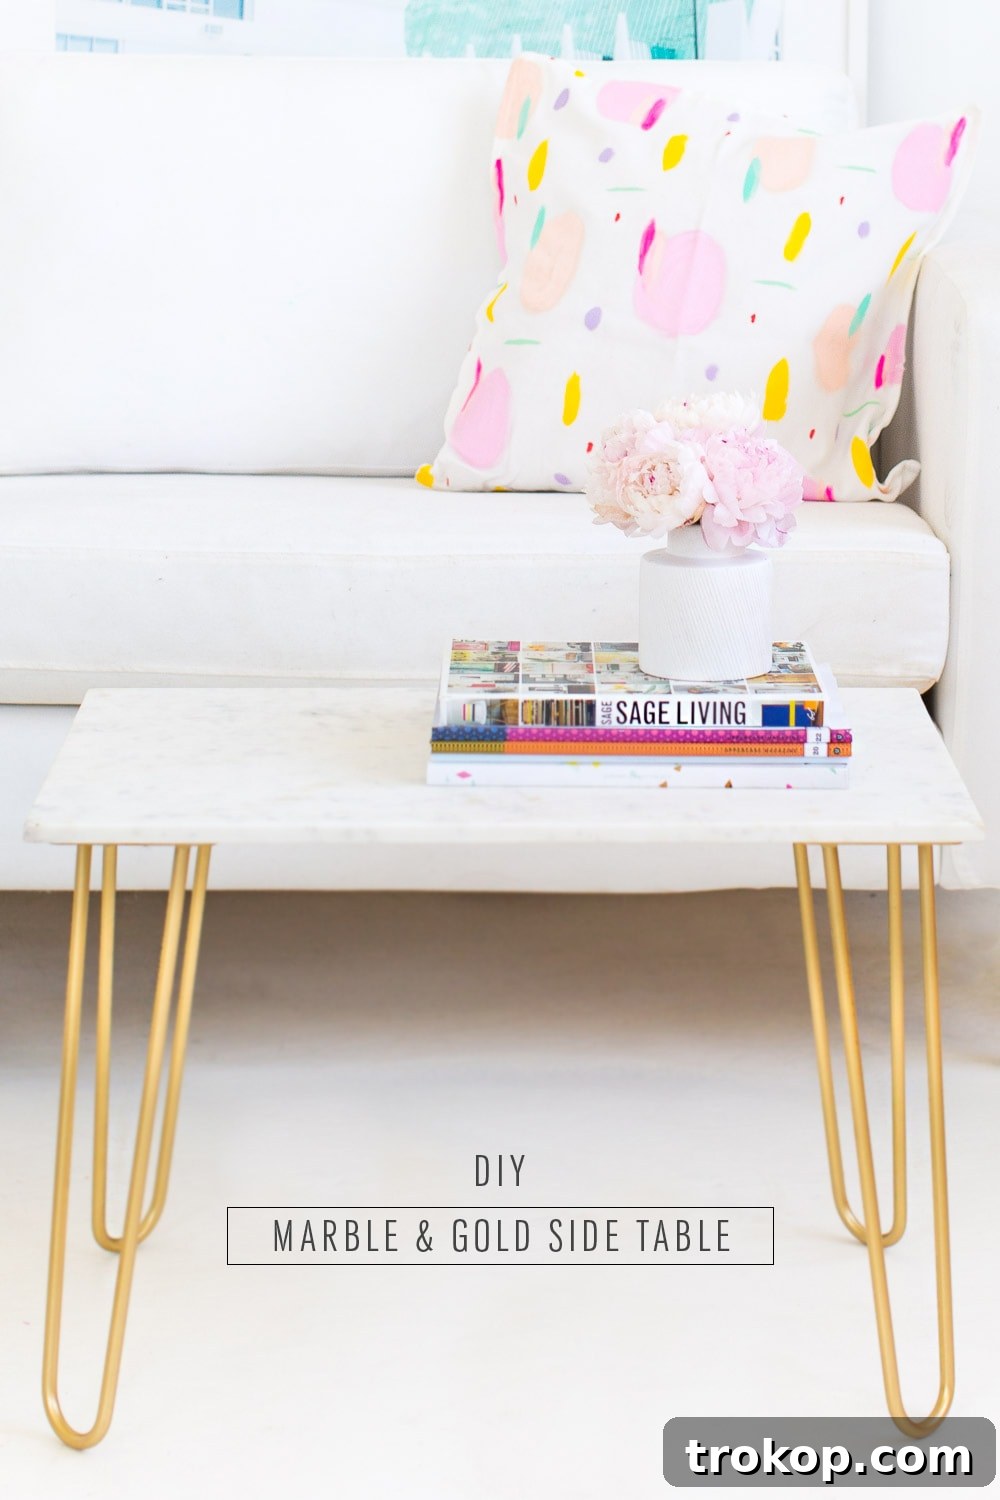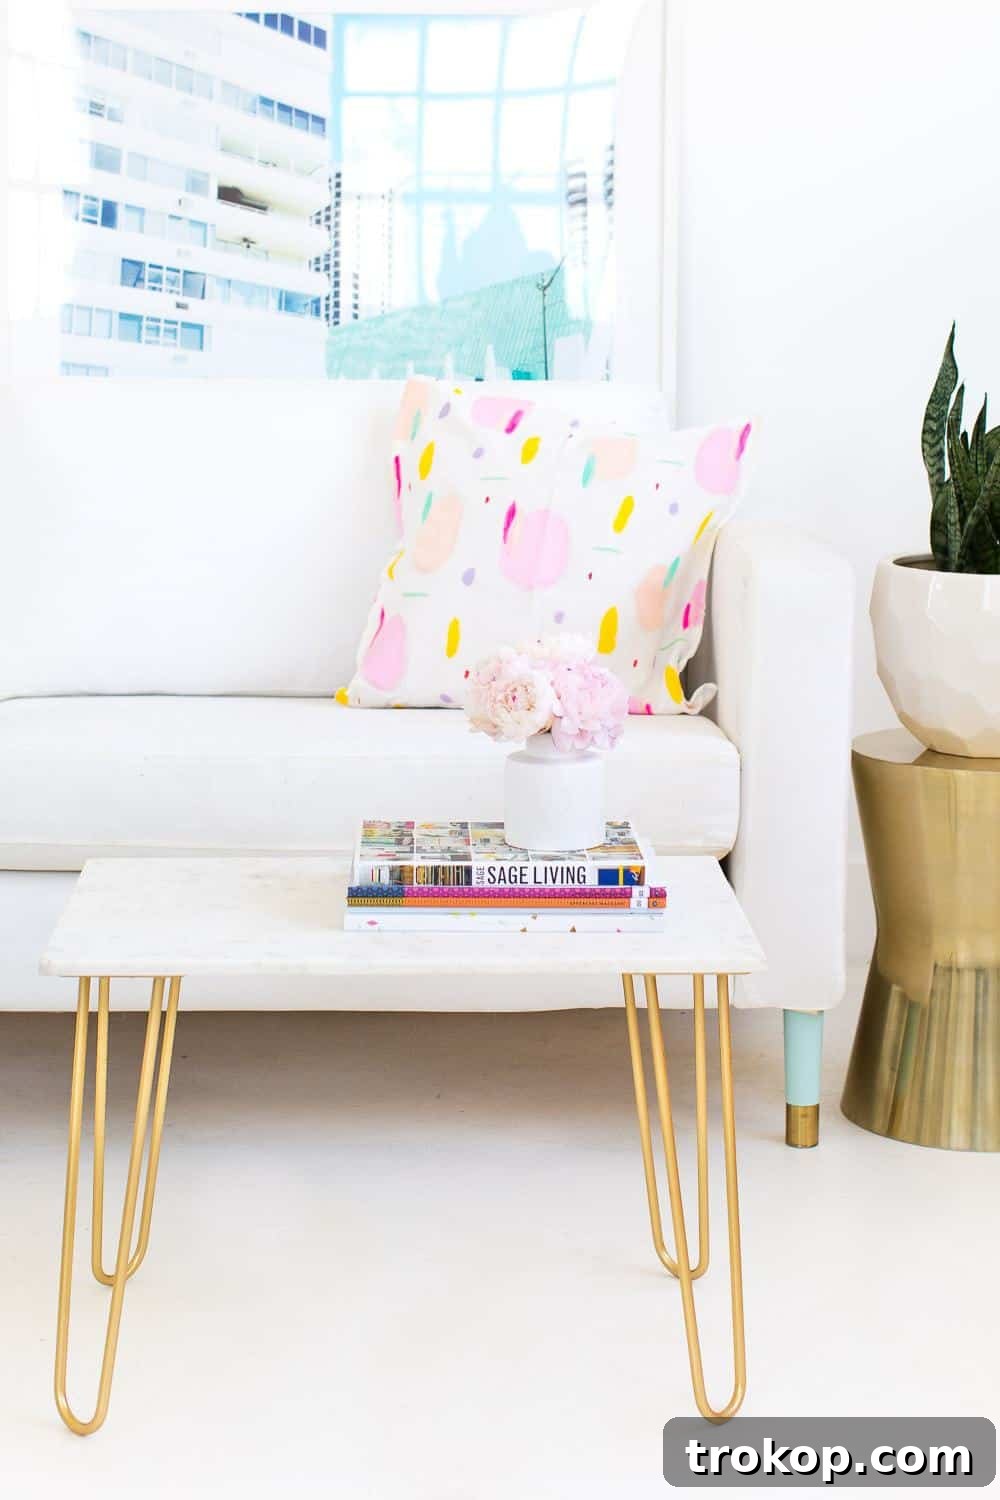
DIY Marble Table Top with Gold Accents: Achieve Luxury on a Budget
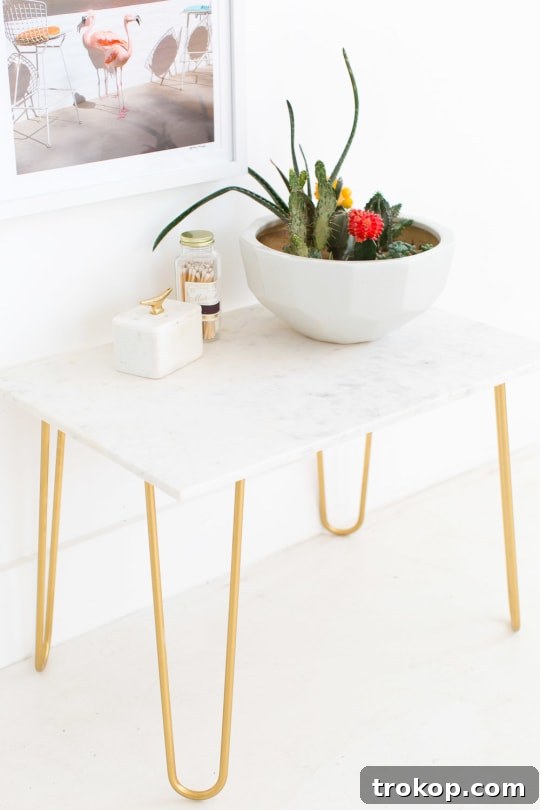
Transforming your living space with stylish furniture doesn’t have to break the bank. Imagine creating a magnificent DIY Marble Table Top with Gold Accents for a fraction of the cost of designer pieces you’ve admired online. This project is not just about saving money; it’s about the profound satisfaction of crafting a custom, high-end look for your home, perfectly tailored to your personal aesthetic.
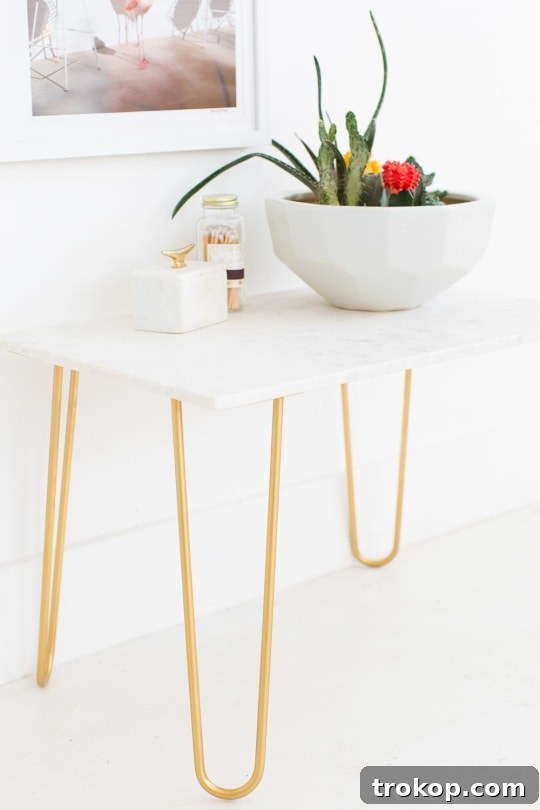
For quite some time, my eyes have been drawn to exquisite marble table tops, especially those adorned with shimmering gold accents. These pieces offer unparalleled elegance and versatility, making them ideal for styling photo shoots around the studio or simply elevating a room’s ambiance. However, the price tags associated with these luxury items—such as this particular one retailing for a staggering $1100—were undeniably out of my budget. This common dilemma faced by many home decor enthusiasts often leads to a search for creative and affordable solutions, and I was determined to find one.
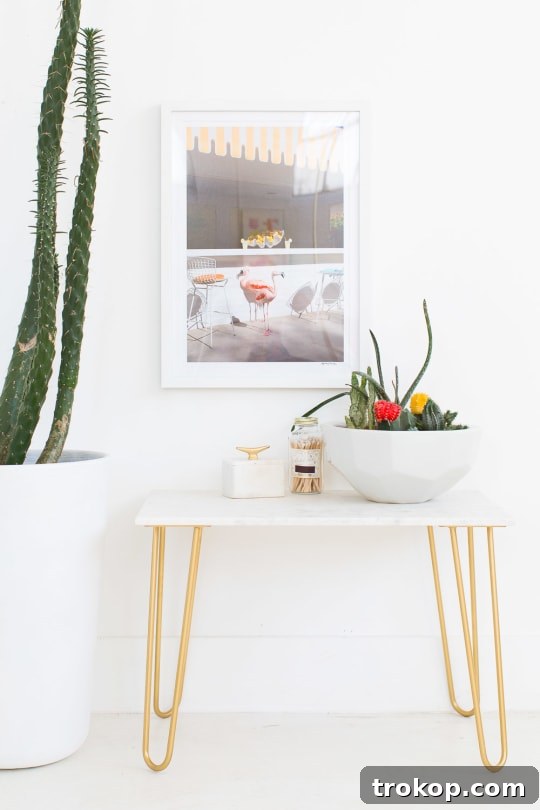
After weeks of admiring these dream tables from afar, I finally decided to take matters into my own hands, embarking on a DIY journey that any ardent admirer of marble and gold would naturally pursue. The result? A remarkably simple yet sophisticated DIY marble and gold side table, crafted with passion and a keen eye for design, proving that luxury can indeed be accessible.
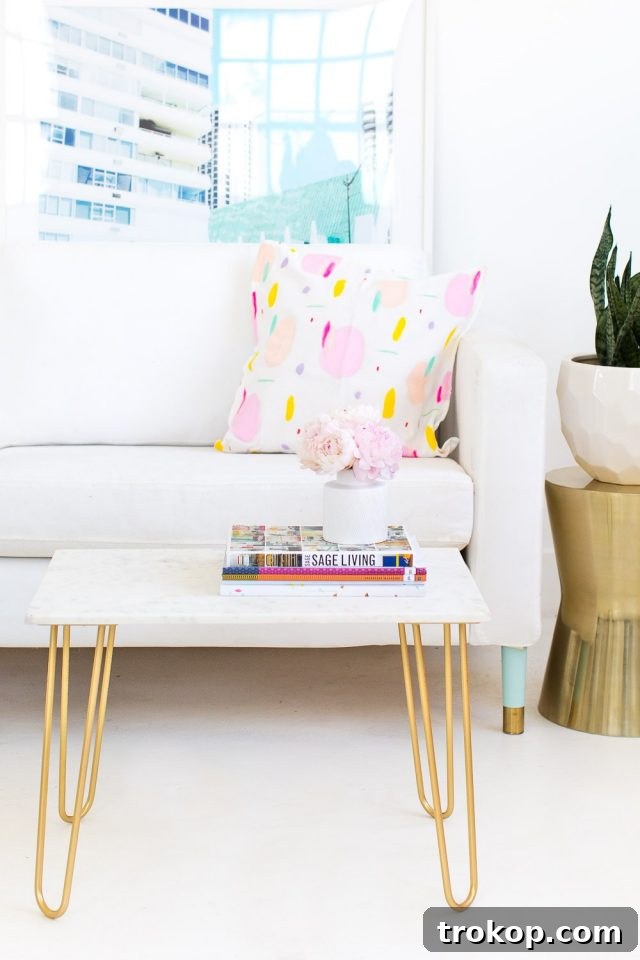
The combination of classic hairpin legs and elegant marble tops is not exactly a new phenomenon in interior design. This pairing has long been celebrated for its timeless appeal, blending industrial chic with natural beauty. However, the true triumph of this project lies in constructing a high-quality coffee table of this caliber for approximately $120, a stark contrast to the exorbitant $1,100 price tag of a similar retail item. This substantial cost saving alone provided more than enough motivation for me to jump on board this DIY trend!
I must confess, the outcome of this endeavor has filled me with immense pride and excitement. This DIY Marble Tabletop with Gold Accents proved to be so straightforward and enjoyable to assemble that I found myself wishing I had tackled it months earlier, when it first appeared on my home renovation wishlist. I often have a tendency to procrastinate on what I perceive as “big” home decor project undertakings, but this was definitely not one of them. Its simplicity and impactful result completely changed my perspective on DIY furniture.
As an added bonus, I’m thrilled to share my secret for ensuring metallic gold spray paint finishes endure beautifully in high-traffic areas, maintaining their pristine appearance for years to come. This crucial tip will elevate your DIY projects, making them not only visually stunning but also incredibly durable and long-lasting.
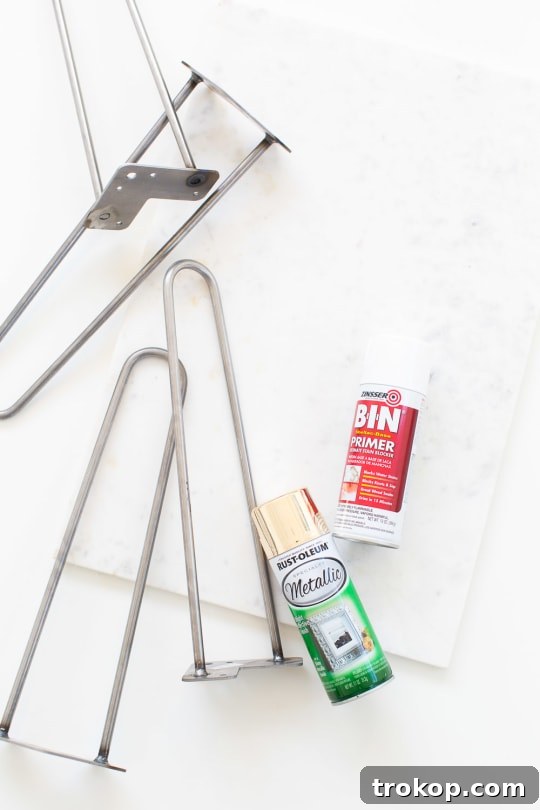
Materials and Tools Needed to Make a DIY Marble Table Top
Gathering the right materials and tools is the essential first step towards a successful DIY project. For this stunning marble and gold accent table, you’ll need a few key items. Many of these can be found at your local hardware store or ordered conveniently online, often saving you a trip and ensuring you get exactly what you need for a smooth building process.
- Heavy Duty Construction Adhesive: Specifically designed for granite and marble surfaces, such as Liquid Nails Marble Adhesive, along with a caulking gun for precise application. This adhesive is crucial for securely attaching the heavy marble top to the legs, ensuring long-term stability.
- Hairpin Legs: A set of four steel hairpin legs. These iconic legs add a touch of mid-century modern flair and provide robust structural support. Consider the height and thickness based on whether you’re building a side table or a coffee table.
- Gold Spray Paint: A high-quality gold Rustoleum spray paint or your preferred brand. Choosing a metallic finish will give your table that highly sought-after luxurious gleam. You might need more than one can depending on the size of your legs and desired coverage.
- Primer: BIN Spray Primer is excellent for ensuring optimal adhesion of your spray paint, especially on slick metal surfaces like steel. It creates an ideal base, preventing future chipping and promoting an even paint finish.
- Marble Board: A suitable marble board for the table top. The size and thickness will dictate the final dimensions and weight of your table. For a versatile side table, a board roughly 18-24 inches in diameter or square typically works very well. Ensure the edges are smooth and finished for a professional look.
- Spray Shellac Sealant (Optional but Highly Recommended): A spray shellac sealant provides an indispensable extra layer of protection. This is particularly important for achieving a pristine, long-lasting metallic paint job that resists fingerprints and scratches in high-traffic areas.
The total estimated cost for this DIY version is approximately $120. When you compare this incredibly modest investment to the retail price of similar designer tables, which often exceed $1000, the exceptional value and profound satisfaction of this project become abundantly clear. This budget-friendly approach empowers you to achieve a truly high-end, custom look without the high-end price tag, making luxury home decor attainable for everyone.
How to Make a Gold Accent Table: Step-by-Step Guide
Creating your own gold accent table with a luxurious marble top is a rewarding experience that adds a touch of custom elegance to any room. Follow these detailed steps to ensure a flawless finish and a sturdy, beautiful piece of furniture that will stand the test of time.
Step 1: Preparing and Painting the Hairpin Legs
The first and most crucial step involves meticulously preparing and painting your hairpin legs. The longevity, brilliance, and overall appearance of your gold finish depend heavily on proper initial preparation and careful application.
- Clean the Legs Thoroughly: Since the hairpin legs are typically made of unfinished steel, it’s absolutely essential to clean them rigorously. Wash them thoroughly with soap and water to remove any manufacturing oils, dirt, rust inhibitors, or residues that might prevent the paint from adhering properly. After washing, rinse them extremely well and allow them to dry completely. Any moisture left behind can lead to paint adhesion issues or rust.
- Apply Primer for Optimal Adhesion: Once the legs are bone dry, prime them with a good, even coat of BIN primer. Primer is a game-changer; it creates a smooth, uniform surface for your gold paint and significantly enhances its adhesion, thereby preventing future chipping, peeling, and scratching. Apply the primer in a well-ventilated area using smooth, even strokes. Let the primer dry completely according to the manufacturer’s instructions, typically for at least an hour, or until it’s dry to the touch and no longer tacky.
- Apply Gold Spray Paint in Layers: For that perfect, radiant gold finish, apply two light, even coats of gold spray paint. Begin by applying the first light coat, ensuring you cover all surfaces evenly. Allow this coat to dry for about 15-20 minutes, or until it’s dry to the touch. Then, apply a second light coat. This layering technique is critical for preventing drips, achieving an even, consistent color, and building up a rich metallic sheen.
- Seal with Shellac for Unbeatable Durability: To ensure your metallic gold finish is not easily scuffed and maintains its pristine, high-end look—especially since this table is likely to be a focal point in a high-traffic area—it’s vital to allow the metallic gold coats to dry completely for several hours, or even overnight, in a clean, dust-free environment. Once the gold paint is fully cured and dry, spray it with a thorough, even coat of spray shellac sealant. This shellac will create an incredibly durable, hard coating that expertly protects the paint from unsightly fingerprints, everyday scratches, and general wear and tear, giving your DIY table a professional, factory-finished quality that will last for years.
Step 2: Applying the Adhesive to the Legs
Once your beautifully painted and sealed legs are completely dry and ready, it’s time to prepare them for secure attachment to the marble top. The correct adhesive and precise application technique are absolutely vital for creating a strong, lasting bond.
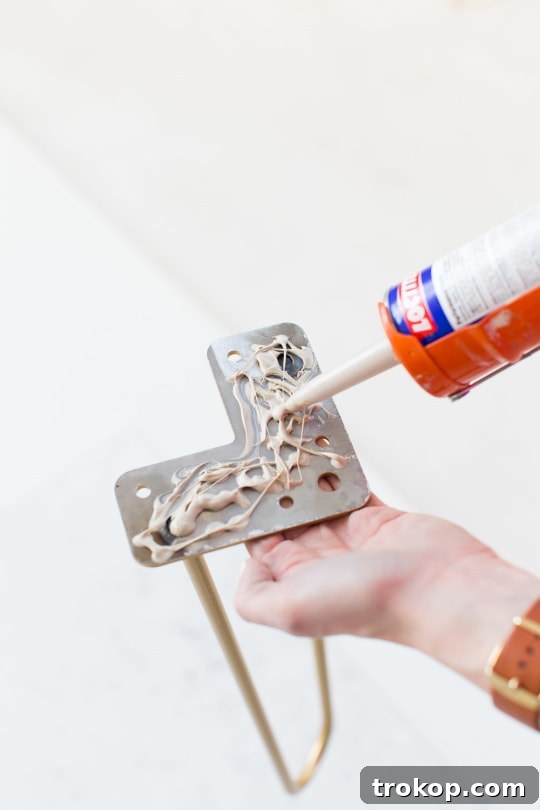
- Apply Construction Adhesive Evenly: With the spray shellac fully cured, use your caulking gun to apply a healthy, consistent layer of heavy-duty construction adhesive (such as Liquid Nails, specifically formulated for granite and marble surfaces) to the bottom plates of each steel leg. Ensure that you cover all the main surface areas and edges of the plate to maximize contact with the marble. A robust bond is key to the table’s stability.
- Exercise Caution to Avoid Excess Adhesive: While you need a generous amount of adhesive for a strong bond, it’s crucial not to apply too much. An excessive amount will inevitably ooze out from the sides when you press the legs against the marble, creating a messy situation that is not only difficult to clean but can also compromise the clean, polished aesthetic of your finished table. Aim for a sufficient but controlled layer.
Step 3: Attaching the Marble Top and Curing
This final assembly step requires both precision and patience to ensure a strong, lasting bond between the newly prepared legs and the luxurious marble top. The curing process is just as important as the application itself.
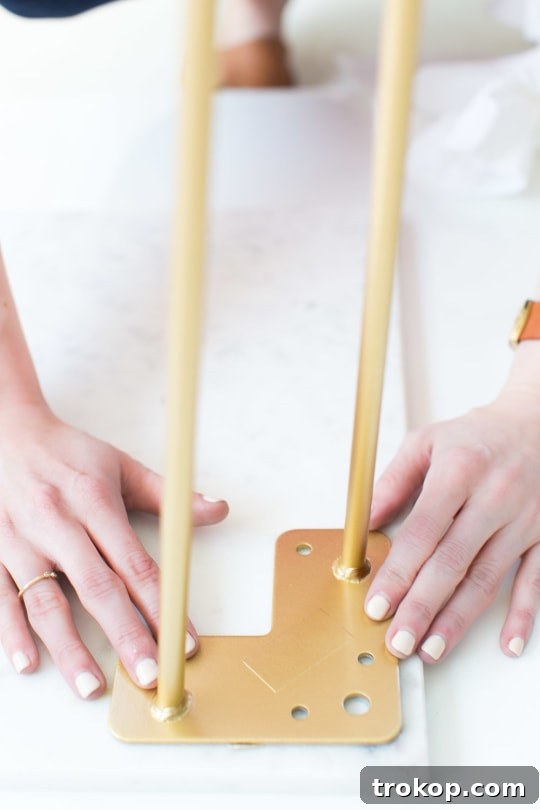
- Position the Marble Board with Care: Lay your marble board upside down on a smooth, clean, and well-protected surface. Using a moving blanket, old sheet, or cardboard can prevent scratches or damage to the marble’s finished surface. Ensuring the surface is level will also help with even adhesive distribution.
- Attach the Legs Symmetrically: Carefully place each prepared leg, adhesive-side down, onto the four designated corners of the upside-down marble board. Press firmly and evenly to ensure excellent contact between the adhesive and the marble. Take your time to position them symmetrically and squarely. You might want to measure or use a template to ensure perfect alignment, as this will affect the table’s final balance and appearance.
- Allow Adequate Curing Time: Once all four legs are securely in place, leave the entire table upside down to dry for a minimum of 48 hours. This extended curing time is absolutely vital, allowing the heavy-duty construction adhesive to fully bond, harden, and reach its maximum strength, creating an incredibly durable and stable table. Resist the urge to move, adjust, or flip the table during this critical drying period, as disturbing the bond can weaken it significantly.
And just like that, you’re all set! After the essential curing period, your stunning DIY marble and gold accent table is ready for styling, entertaining, and becoming a luxurious focal point in your home. This project, which can easily be completed over a single weekend, offers incredible value and a high-end designer look for a mere fraction of the retail cost. It’s a truly impactful home upgrade that delivers significant “bang for your buck,” providing both aesthetic beauty and functional elegance. Don’t you agree?
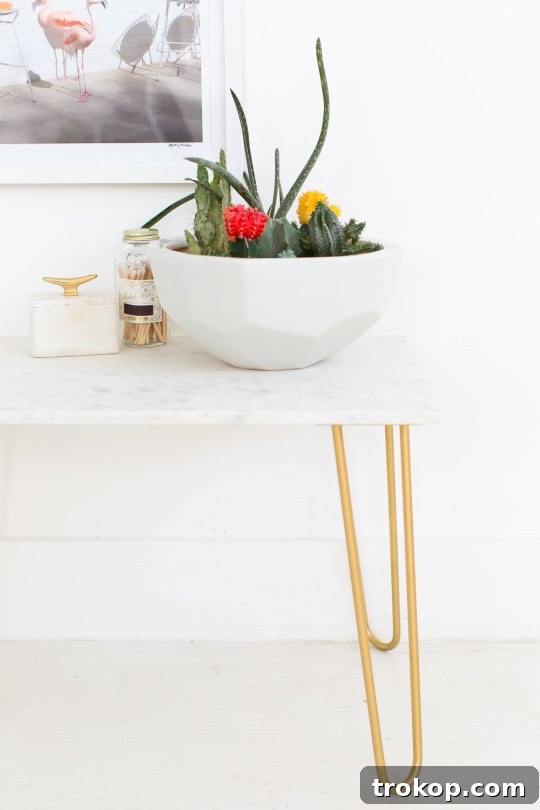
Have you embarked on any marble table top DIY projects yourself? I’d absolutely love to see them and hear about your experiences! Be sure to tag me on Instagram or other social media platforms so I can admire your creations and follow along with your design journey. If marble isn’t quite your personal jam, my incredibly talented friend Brittni created a fantastic DIY wooden bench using similar hairpin legs, which is another project I’m absolutely enamored with and highly recommend. For those curious about the patterned throw pillows featured in some of these images, you can find the comprehensive DIY guide right here!
DIY Marble Table Top: Comprehensive Project Guide
DIY Marble Table Top With Gold Accents: Project Overview
Creating this elegant DIY marble table top with opulent gold accents offers the luxury of custom-designed furniture at an unbeatable price. It’s a perfect blend of high style and practical craftsmanship, making it an incredibly winning project for any home improvement enthusiast looking to elevate their space.
Prep Time: 1 hr
Dry Time: 2 days
Total Time: 2 days 1 hr
Course: DIY
Category: Home Decor
Equipment
- Caulking gun
Materials
- 4 steel hairpin legs
- 1 shellac base primer spray
- 1 gold spray paint (or any color of your choice)
- 1 spray shellac sealant
- 1 heavy duty construction adhesive for granite and marble surfaces
- 1 marble board
Instructions
- Prep your hairpin legs for painting. Since they’re unfinished steel, first wash them thoroughly with soap and water. Then, prime the legs and allow them to dry completely according to primer instructions.
- Paint the hairpin legs with the gold spray paint. Apply two light coats, allowing ample drying time in between each application to prevent drips and ensure an even finish.
- Spray the legs with a shellac sealer. This crucial step enhances their durability and provides a protective layer against scuff marks, fingerprints, and general wear and tear, ensuring a long-lasting metallic shine.
- Once the spray shellac is completely sealed and cured, spread a healthy, even layer of construction adhesive (such as Liquid Nails for granite and marble) on the bottom of each of the steel leg plates. Ensure thorough coverage without applying excessive amounts to prevent oozing.
- Lay the marble board upside down on a smooth, clean surface. Then, carefully place and press each leg with the construction glue firmly onto the four corners of the board, ensuring good contact. Leave them upside down to dry for the first 48 hours to allow the adhesive to fully cure and achieve maximum bond strength.
Notes for a Perfect Finish
- For the most impeccable gold finish, always remember to spray two light, even coats of gold paint, allowing adequate drying time between each coat. This technique is key to preventing drips and ensuring a smooth, consistent application that truly shines.
- To ensure the legs are not easily scuffed or marred, particularly for a table destined for a prominent spot in your home, allow the metallic gold coat to dry completely for several hours (or even overnight) before proceeding with the sealing step.
- Applying a thorough and even coat of spray shellac creates a remarkably robust and hard coating once fully dried. This step is absolutely critical to protecting your exquisite gold paint finish from daily wear.
- The shellac finish is your best defense against those unsightly fingerprints that often mark metallic paints. Furthermore, it significantly boosts the legs’ resistance to scratches and general wear, preserving the table’s luxurious look.
- When applying the heavy-duty construction adhesive, ensure you cover all main areas and edges of the leg plate for maximum gripping power and a secure, stable bond.
- Exercise caution with the amount of adhesive used; applying too much will cause it to ooze out from the sides when pressed against the marble, creating an unnecessary cleanup challenge and potentially detracting from the table’s clean aesthetic.
Project Cost: $120
Keywords: diy marble table, gold accent table, hairpin leg table, modern side table, home decor, budget-friendly DIY, luxury furniture, custom table

Explore More DIY Projects
Ready for your next creative adventure? Dive into more inspiring DIY home decor and crafting ideas!
Continue Reading
Continue Reading
Continue Reading
Continue Reading
Continue Reading
Continue Reading