

DIY Valentine Arrow Cookie Picks: Elevate Your Sweet Treats with Handmade Charm
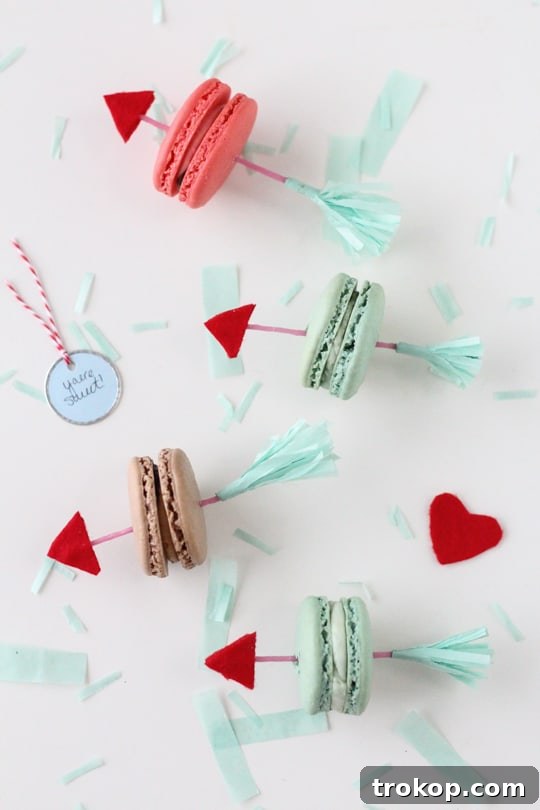
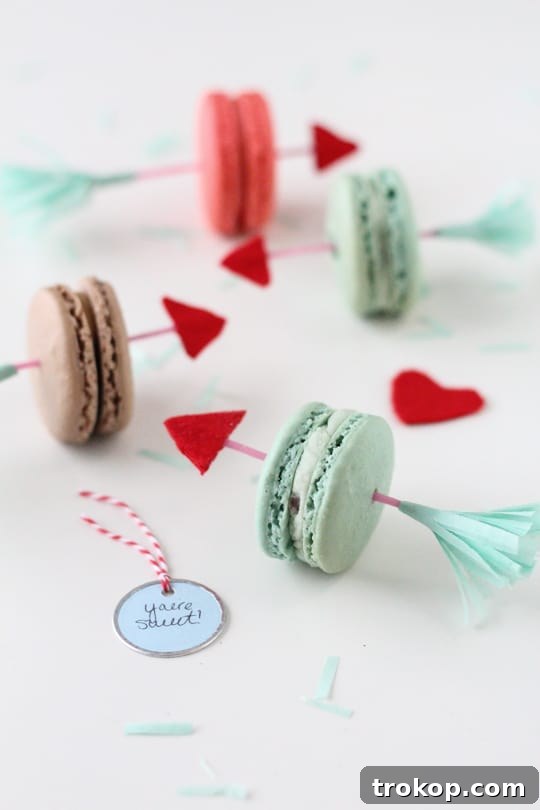
There’s an undeniable joy in elevating ordinary moments with a touch of handmade charm, especially when it comes to sweet treats. Much like dressing up a beloved pet in a tiny, adorable costume, enhancing a perfectly delicious macaron or cookie adds an extra layer of cuteness that’s simply irresistible. Why settle for just cute when you can easily double the delight? These DIY Valentine arrow cookie picks are an incredibly simple project that promises to transform your desserts into whimsical, eye-catching masterpieces. Not only are they remarkably easy to create, but they also guarantee your treats will be the most talked-about delights at any gathering, making them perfect for Valentine’s Day, anniversaries, or simply to express a little love.
Why Handmade Dessert Picks Are a Must-Have
In a world of mass-produced goods, a handmade touch truly stands out. These personalized arrow cookie picks offer a unique way to infuse personality and thoughtfulness into your dessert presentation. Whether you’re a seasoned baker or simply looking to add flair to store-bought goodies, these DIY decorations are:
- Effortlessly Charming: They instantly elevate the aesthetic of any dessert, making even the simplest cookie feel special.
- Perfectly Customizable: Choose colors and materials that match your theme, mood, or the recipient’s preferences.
- Budget-Friendly: Made with readily available and inexpensive craft supplies, they are a fantastic alternative to costly store-bought decorations.
- Fun to Make: A delightful craft project that’s enjoyable for all skill levels, offering a relaxing and rewarding creative outlet.
- Versatile: Ideal not just for Valentine’s Day, but also for engagement parties, bridal showers, anniversaries, or any occasion that calls for a touch of love.
Gather Your Creative Arsenal: Materials You’ll Need
One of the best aspects of this DIY project is the simplicity of the materials. You likely have many of these items in your craft drawer already, making it an accessible and spontaneous activity. Here’s what you’ll need to create your adorable arrow picks:
- Toothpicks or Skinny Candles: These form the base of your picks. Toothpicks are perfect for delicate macarons and small cookies, while skinny birthday candles or even bamboo skewers can be used for cupcakes, brownies, or mini cakes, adding a more substantial presence.
- Adhesive Felt: This is key for creating the arrowheads. Adhesive felt is incredibly convenient as it eliminates the need for extra glue, making the process cleaner and quicker. Choose vibrant colors like red, pink, or white for a classic Valentine’s look, or experiment with other hues to match your event theme.
- Scissors: A sharp pair of craft scissors will ensure clean cuts for both the felt and tissue paper.
- Fringe Scissors (Optional, but Recommended): If you have them, fringe scissors will make quick work of creating perfectly even tassels, saving you time and effort. If not, regular scissors will work just as well, albeit requiring a little more precision.
- Tissue Paper: This will be transformed into the delicate tassels. Opt for soft, colorful tissue paper that complements your felt choices. Multiple sheets will be stacked for a fuller tassel effect.
- Tacky Glue: A reliable tacky glue is essential for securely attaching the tissue paper tassels to your picks. Its strong bond and quick-drying properties are ideal for this project.
Crafting Your Cupid’s Arrows: A Step-by-Step Guide
Now that you have all your materials, let’s dive into the fun part: creating these charming dessert picks. Follow these simple steps for a flawless finish.
Step 1: Prepare Your Tassels from Tissue Paper
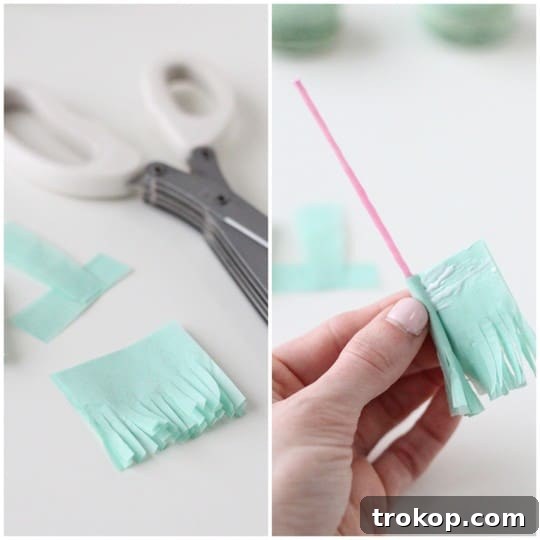
Begin by making the festive tassels that will adorn one end of your arrow. Stack several sheets of tissue paper – about 3-5 sheets work well for a nice, full tassel. Fold the stack in half lengthwise, ensuring the edges align neatly. Using your fringe scissors, carefully cut along the bottom edge, stopping approximately three-quarters of the way up the folded paper. This creates the fringe without detaching the top section. If you don’t have fringe scissors, don’t worry! You can achieve the same effect by using regular scissors to cut thin, even slits, maintaining consistent spacing and depth. The more precise your cuts, the neater your tassel will appear.
Step 2: Assemble the Tassel onto Your Pick
Once your fringe is cut, unfold the tissue paper and lay it flat. Apply a thin, even stripe of tacky glue across the uncut top edge of the fringed tissue paper. Place one end of your toothpick or skinny candle stick directly onto the glued edge. Carefully and snugly roll the fringed tissue paper all the way around the stick, ensuring the tassel is tightly wrapped. Secure the very end of the roll with a small dab of tacky glue to prevent it from unraveling. Allow the glue to dry completely before handling extensively, as this will ensure your tassel is firmly attached and durable.
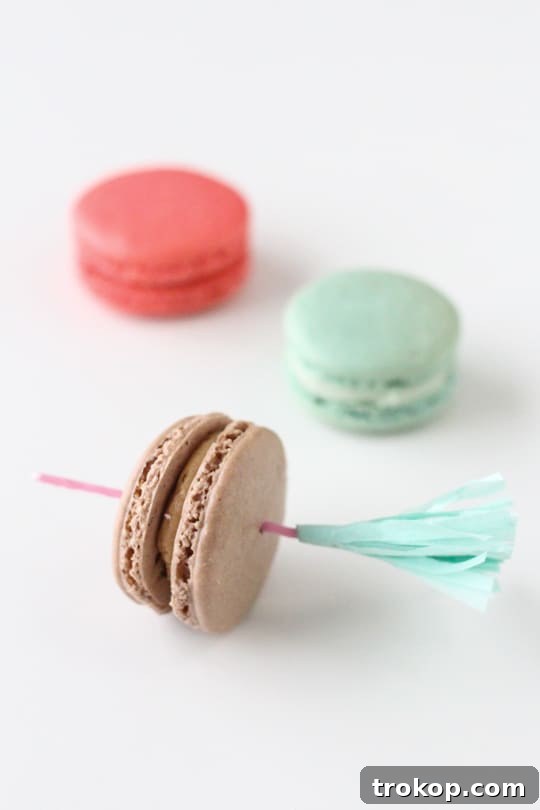
Step 3: Attach the Arrowhead for a Polished Look
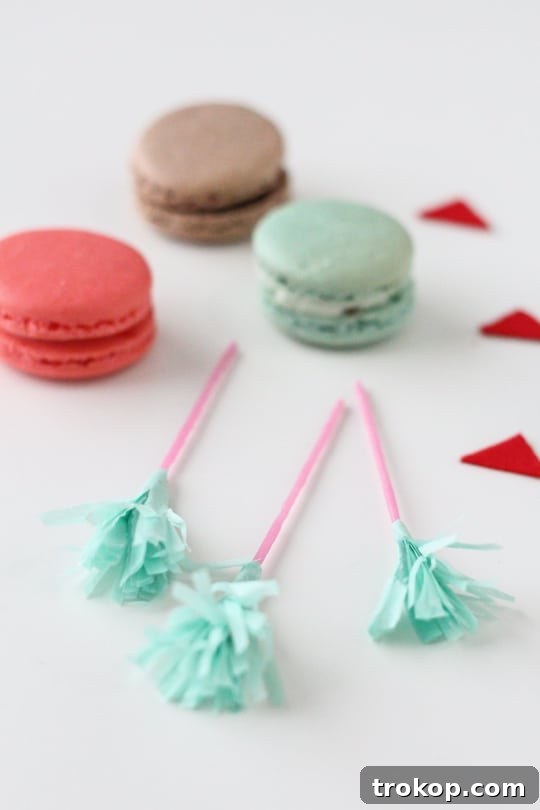
Now it’s time to add the iconic arrowhead. From your adhesive felt, cut out small, identical triangles. You will need two triangles of the same size for each arrow pick you are making. For consistency, you might want to create a small paper template first. Once your triangles are cut, peel off the adhesive backing from one triangle. Carefully align and press this triangle onto the opposite end of the pick from where your tassel is attached, ensuring the pointed end faces away from the stick. Then, peel the backing from the second triangle and adhere it precisely to the other side of the stick, perfectly sandwiching the pick between the two felt triangles to form a neat arrowhead. Press firmly to ensure good adhesion.
Step 4: Inserting Your Finished Picks into Desserts
With your DIY Valentine arrow cookie picks complete, the final step is to gently insert them into your chosen sweet treats. If you’re using macarons, exercise caution as they can be delicate and prone to cracking. Gently push the pick through the center of the macaron, applying steady, light pressure. For cookies, cupcakes, or other sturdier desserts, insertion will be easier. These picks are best inserted just before serving to maintain their pristine appearance and prevent any potential moisture transfer from the dessert. Distribute your treats with a touch of handmade love!
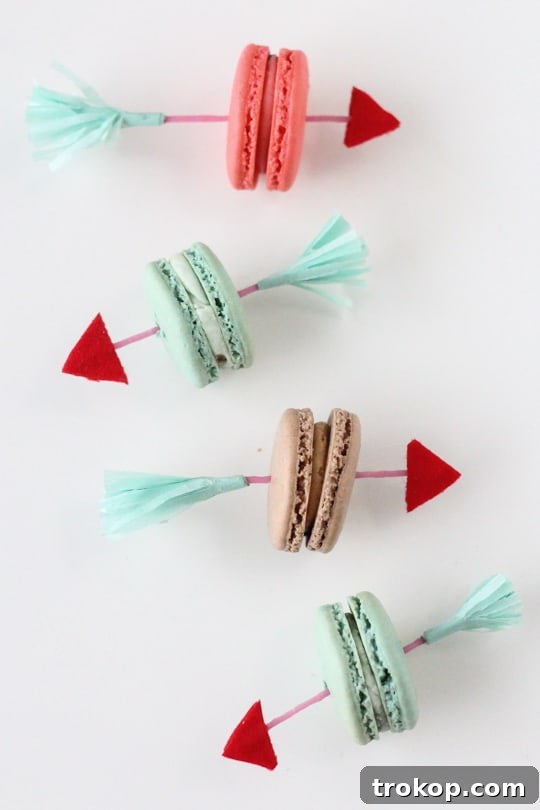
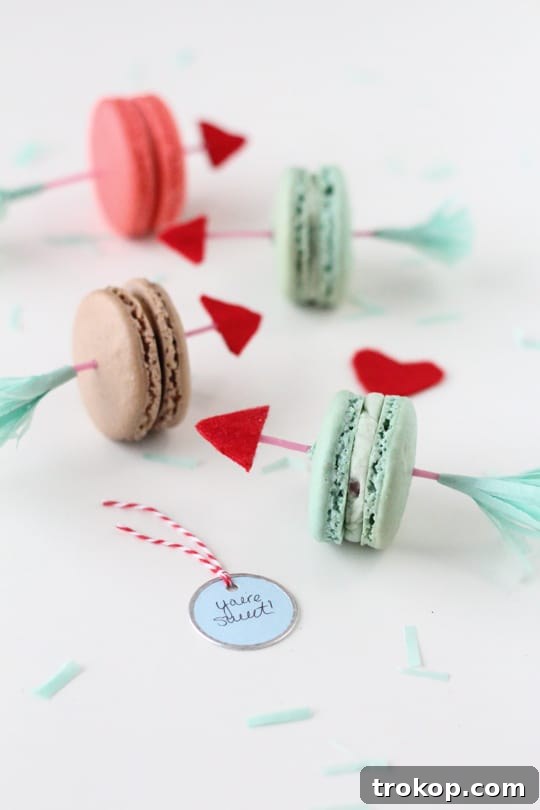
Tips for Success and Creative Variations
To make your DIY Valentine arrow cookie picks truly exceptional, consider these helpful tips and exciting variations:
- Color Coordination: Choose tissue paper and felt colors that complement your dessert or event theme. Classic reds and pinks for Valentine’s Day, pastels for baby showers, or metallics for a sophisticated touch.
- Experiment with Materials: Instead of plain felt, try glitter felt for extra sparkle. Use different textures of tissue paper for varied tassel effects.
- Different Pick Bases: For larger desserts like cakes or brownies, consider using longer bamboo skewers or craft sticks as your pick base for more stability.
- Add More Embellishments: A tiny dab of glitter glue on the felt arrowhead, a small sticker, or a hand-drawn detail can add an extra personalized touch.
- Prepare in Advance: These picks can be made days or even weeks in advance, making party prep much smoother. Store them in an airtight container away from direct sunlight.
- Safety First: If serving to young children, ensure the toothpicks are firmly secured and consider using edible alternatives like pretzel sticks for very small treats to minimize choking hazards.
- Personalized Notes: To truly capture the spirit of love, attach a tiny rolled-up scroll with a sweet message or a small tag tied with string near the tassel end. This adds an unforgettable personal touch, making them perfect for gifting.
Beyond Valentine’s Day: Versatile Dessert Toppers
While these arrow picks are undoubtedly perfect for Valentine’s Day, their charm isn’t limited to a single holiday. Think of them as versatile decorations that can elevate any celebration:
- Anniversaries: A delightful way to celebrate years of love, perhaps with felt arrowheads in gold or silver.
- Engagement Parties & Bridal Showers: Symbolizing Cupid’s arrow, they are a fitting and adorable decoration for couples starting their journey together.
- Baby Showers: Use pastel-colored felt and tissue paper for a sweet announcement or celebration of a new arrival.
- Birthdays: Customize with the birthday person’s favorite colors to make their treats extra special.
- “Just Because” Moments: Sometimes, the best reason to make something beautiful is simply to brighten someone’s day.
These arrow picks aren’t just for macarons either! They can beautifully adorn a variety of sweet treats:
- Cupcakes: Insert them directly into frosting for an instant upgrade.
- Brownies & Bars: Cut your brownies into heart shapes and add an arrow pick for a festive dessert.
- Mini Tarts & Pies: A cute embellishment for individual servings.
- Cake Pops: Enhance the visual appeal of these bite-sized delights.
- Fruit Skewers: Add a playful touch to healthy snacks.
Share the Love, One Sweet Treat at a Time
With this comprehensive guide, you’re now equipped to create delightful DIY Valentine arrow cookie picks that will undoubtedly bring smiles and a touch of romance to any occasion. The simplicity of the craft combined with its impactful visual appeal makes it a truly rewarding project. Whether you’re making them for a grand party, a thoughtful gift, or a quiet moment with a loved one, these handmade decorations are a testament to the power of personal touches. So gather your materials, let your creativity flow, and get ready to spread a little extra love, one beautifully adorned sweet treat at a time!