
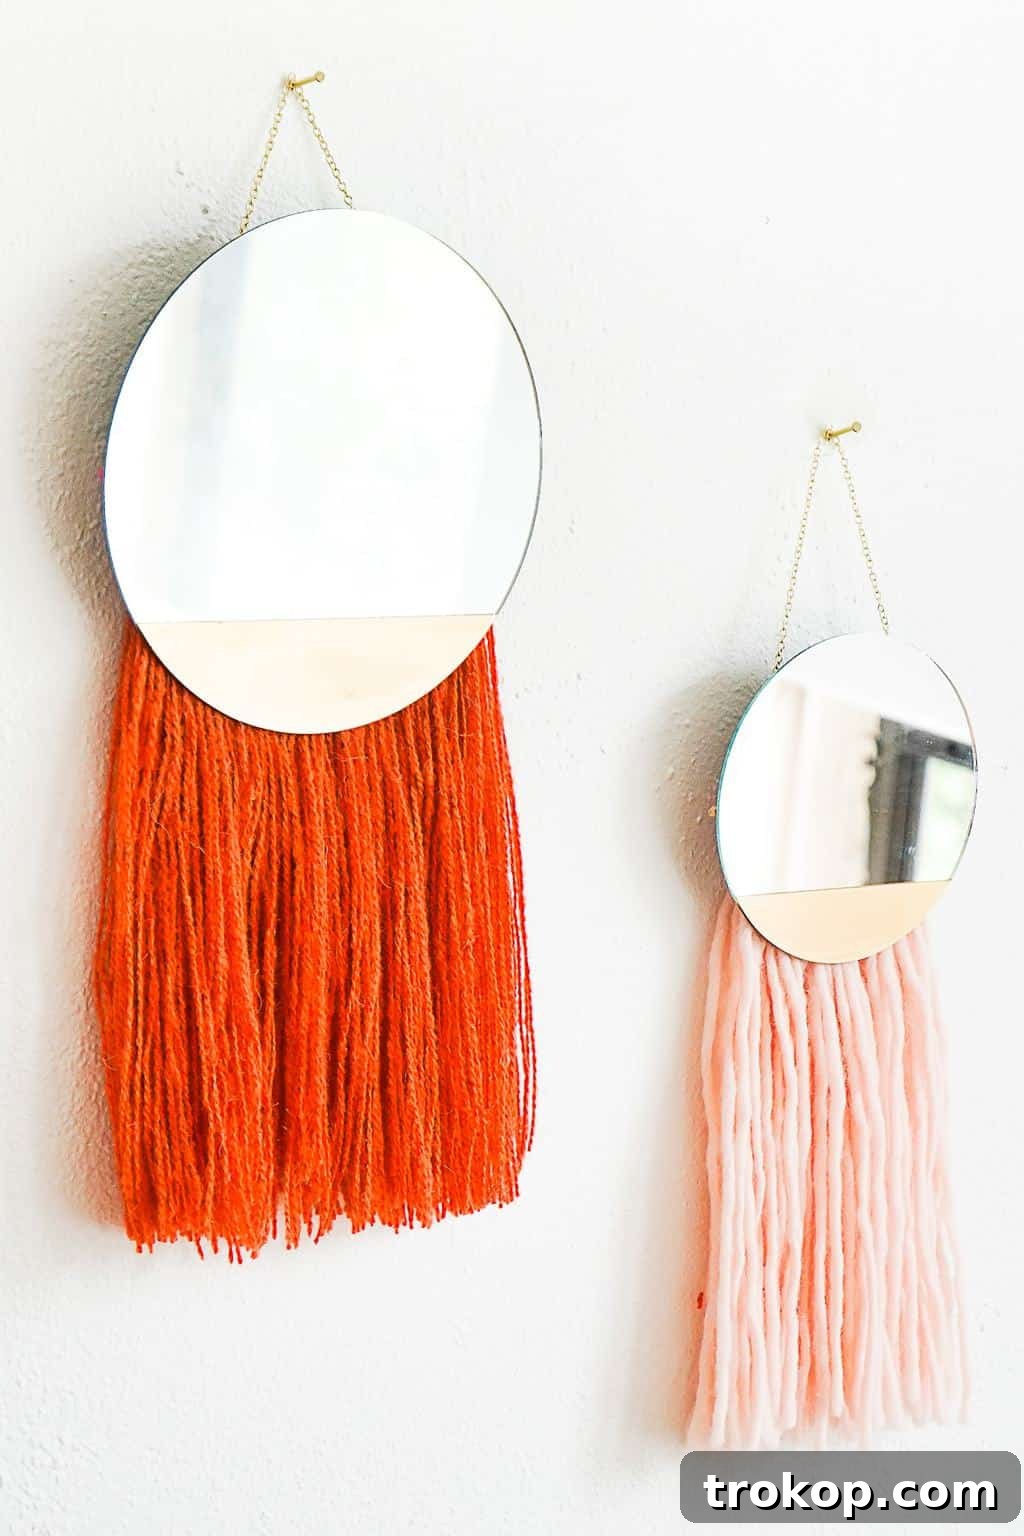
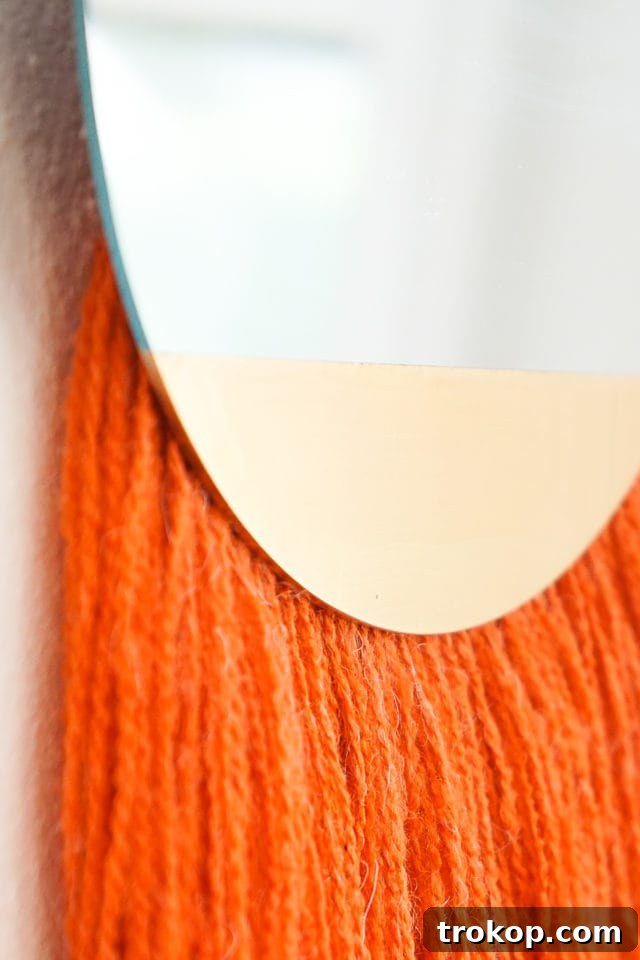
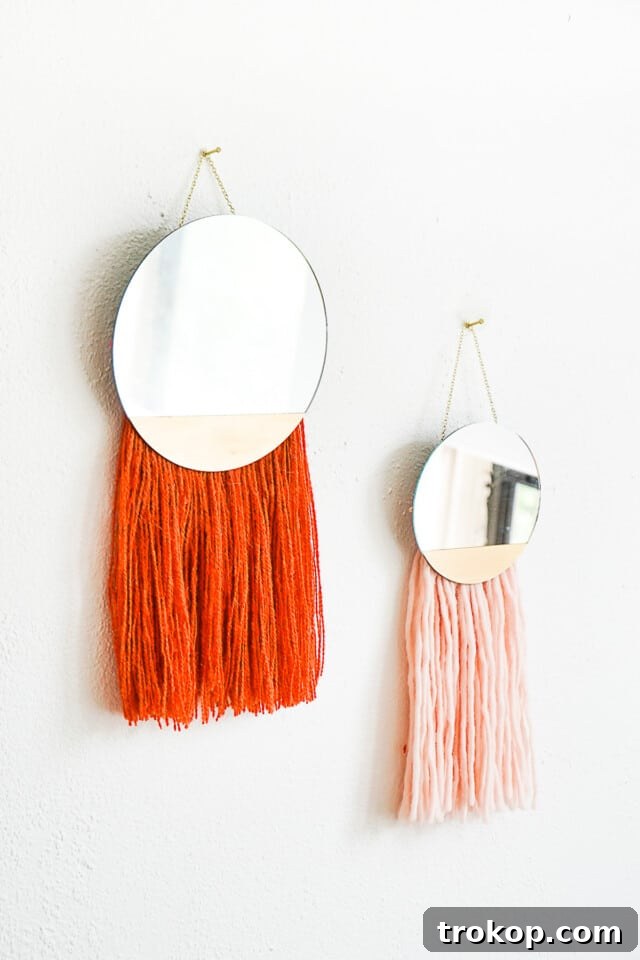
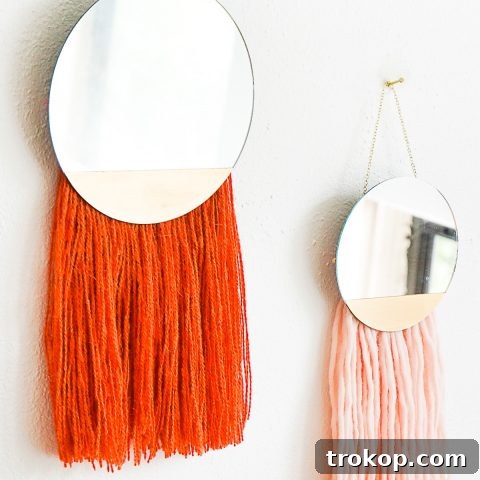
Elevate your home decor with a stunning, personalized touch by creating your very own DIY Fringe Boho Mirror. This engaging project combines the cozy appeal of soft yarn fringe with elegant gold accents, resulting in a chic wall hanging that perfectly captures modern bohemian aesthetics. It’s an easy, rewarding craft that promises to transform any space into a brighter, more stylish sanctuary.
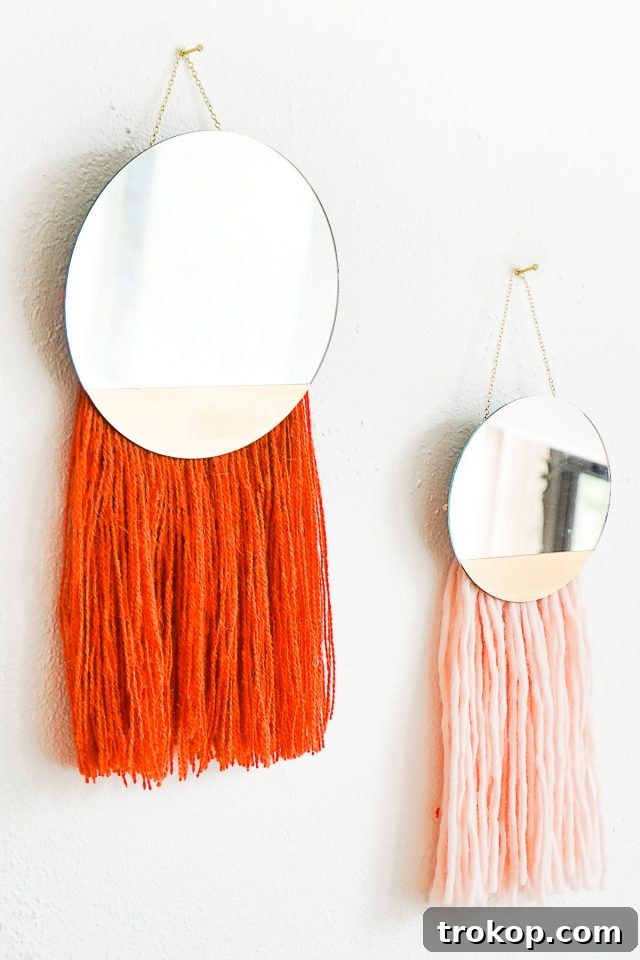
Craft Your Own Chic DIY Fringe Boho Mirror
As the seasons transition and the days grow shorter, bringing with them a natural decrease in daylight, we often find ourselves searching for creative ways to brighten our living spaces. One of the most effective and aesthetically pleasing decorating tricks is incorporating mirrors. Mirrors are not just functional items; they are powerful design elements that can significantly impact a room’s ambiance. They masterfully reflect available light, making darker corners feel more illuminated and vibrant. Beyond their light-enhancing qualities, mirrors also add remarkable visual interest, serving as focal points that draw the eye and create a sense of depth. For smaller rooms, strategically placed mirrors can work wonders, making them appear more expansive, open, and airy.
This is precisely why we’re so thrilled to share this DIY Fringe Mirror tutorial. It’s a project that beautifully marries practicality with a captivating boho-chic style, offering a handmade mirror that is as fashionable as it is useful. Imagine this versatile piece gracing your entryway, providing a quick check before you head out the door, or becoming a standout element within a curated gallery wall in your living room. Its unique blend of soft textures and metallic shimmer instantly elevates any space, infusing it with character and warmth.
Our journey into creating unique mirrors isn’t new. We’ve previously explored various DIY mirror concepts, including a sleek DIY concrete vanity mirror, a vibrant color block DIY hanging mirror, and a sophisticated DIY leather mirror. Each project has allowed us to experiment with different materials and techniques, but this fringe boho mirror stands out for its accessibility and impactful design.
If you’re someone who appreciates DIY home decor projects that offer a rich blend of texture, warmth, and a subtle touch of glam, this boho mirror tutorial is an absolute must-bookmark. It’s an opportunity to infuse your personality into your surroundings with a handmade item that speaks volumes about your style. Keep reading to discover the simple, step-by-step instructions and transform your home today!
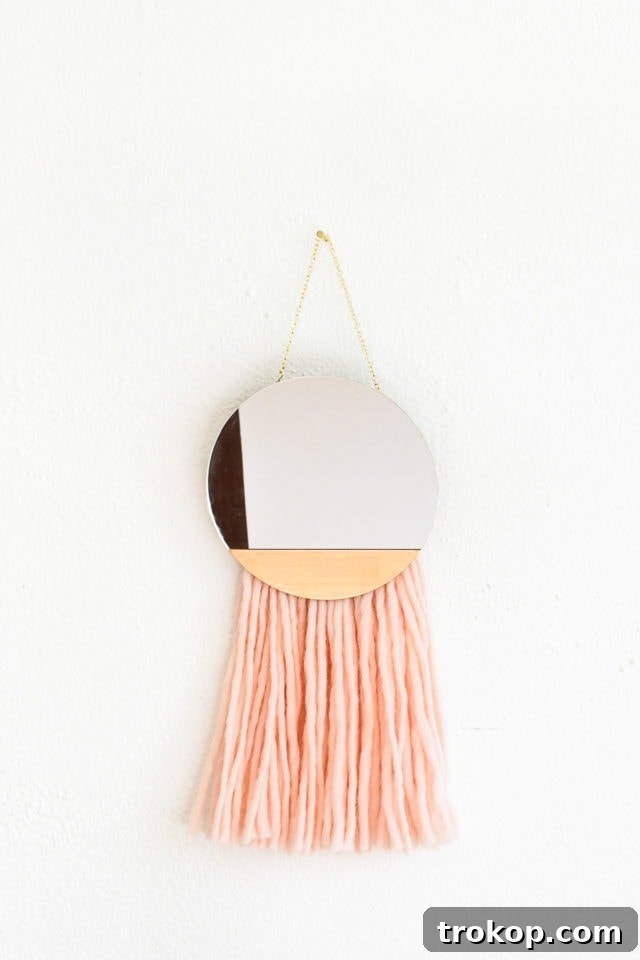
Table of Contents
Materials and Tools Needed for Your DIY Fringed Mirror
Gathering your materials is the first exciting step in any DIY project. For this stunning fringe boho mirror, you’ll need the following items. We’ve included links to help you find similar products, ensuring you can start crafting without delay!
- Mirror: Our project featured a 7-inch round mirror, perfect for a subtle yet impactful wall accent. You can find a similar one here. When selecting your mirror, consider opting for a lightweight option like an acrylic mirror or a frameless craft mirror. This choice is crucial for preventing undue strain on the adhesive and your wall over time. If you plan to repurpose a heavier, framed mirror, remember to use more robust mounting hardware or an alternative hanging method to ensure safety and durability.
- Yarn: This is where the “fringe” magic happens! You’ll need approximately 160 pieces of yarn, each precisely cut to 23 inches long. These will be divided into 4 equal bundles for easy handling during the knotting process. Choose a yarn that complements your decor—think soft cottons, chunky wool, or even a textured blend for added interest.
- Wooden Skewer or Dowel: A 6-inch length is ideal for accommodating a 7-inch mirror and creating a balanced fringe display. If your mirror is larger or smaller, adjust the dowel length accordingly to match the mirror’s width or desired fringe span.
- Metallic Gold Paint: A key element for adding that touch of glam and definition to your mirror. A high-quality metallic acrylic paint will provide good coverage and a brilliant finish.
- 12-inch Gold Link Chain: This chain will serve as the elegant hanging mechanism, adding a sophisticated metallic detail. Ensure the links are strong enough to support the mirror’s weight.
- Jump Rings: Essential for securely attaching the gold chain to the wooden skewer. Opt for sturdy jump rings that won’t easily bend or open.
- Moldable Adhesive Glue: This type of adhesive is excellent for securely mounting the wooden skewer to the back of the mirror. Its moldable nature allows for easy application and strong bonding.
- Painter’s Tape: Crucial for creating clean, crisp lines when applying the metallic gold paint to your mirror.
- Foam Paint Brush: Ideal for smooth, even application of paint, especially for smaller detail work on the mirror.
- Scissors: A sharp pair of scissors will be indispensable for cutting yarn and painter’s tape with precision.
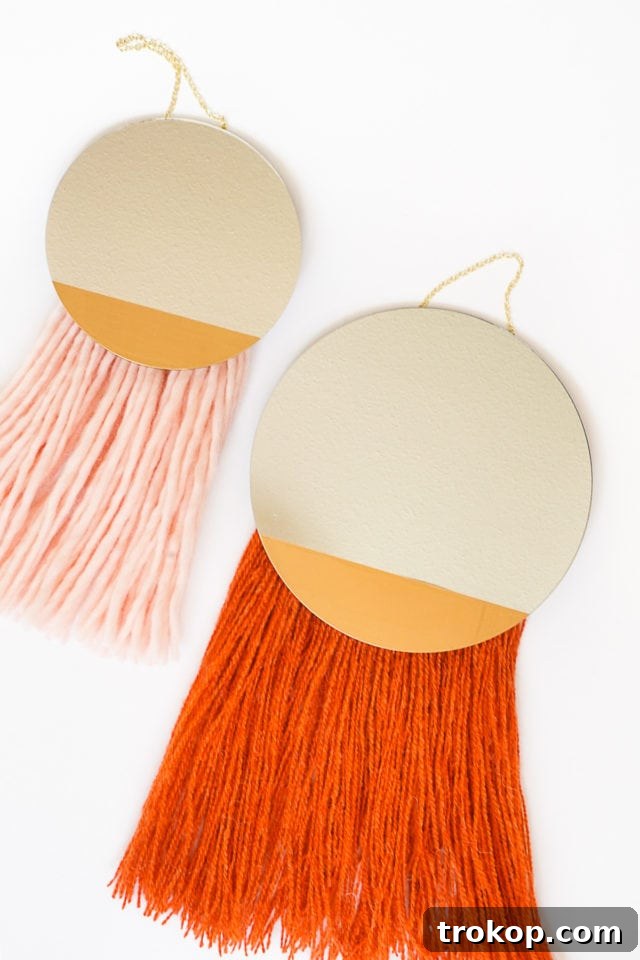
How to Make a DIY Fringe Boho Mirror: Step-by-Step Instructions
Ready to bring your boho mirror to life? Follow these clear steps to craft your beautiful wall decor.
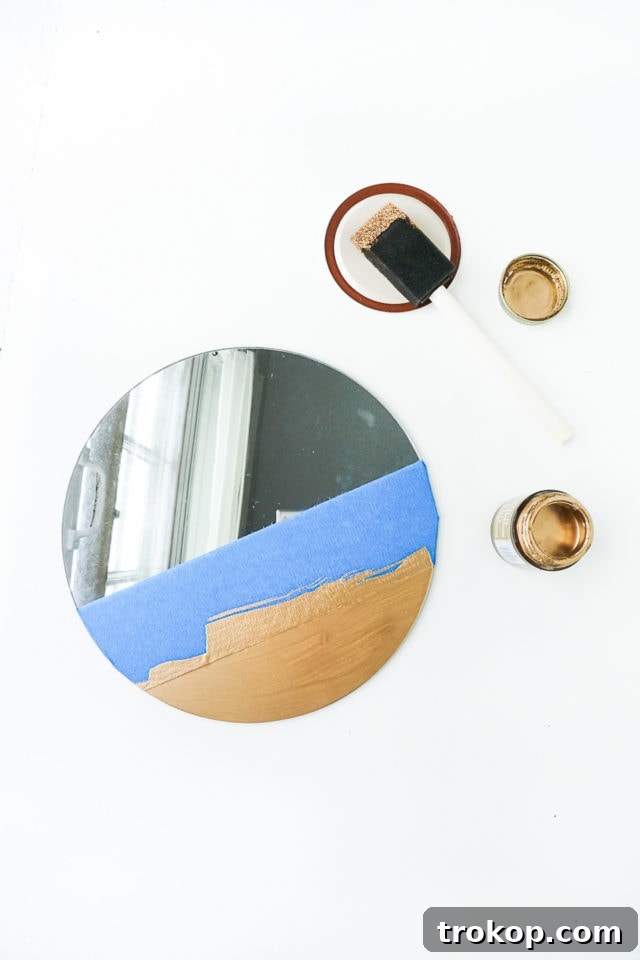
- Paint Mirror Accents: Begin by carefully taping off the bottom section of your round mirror using painter’s tape. Ensure the tape forms a clean, straight line across the mirror’s surface, defining the area you wish to paint. With your foam brush, apply the metallic gold paint evenly over the taped-off section. This will create a striking contrast and a touch of elegance. Once painted, set the mirror aside in a well-ventilated area and allow the paint to dry completely. This might take a few hours, depending on the paint type and humidity.
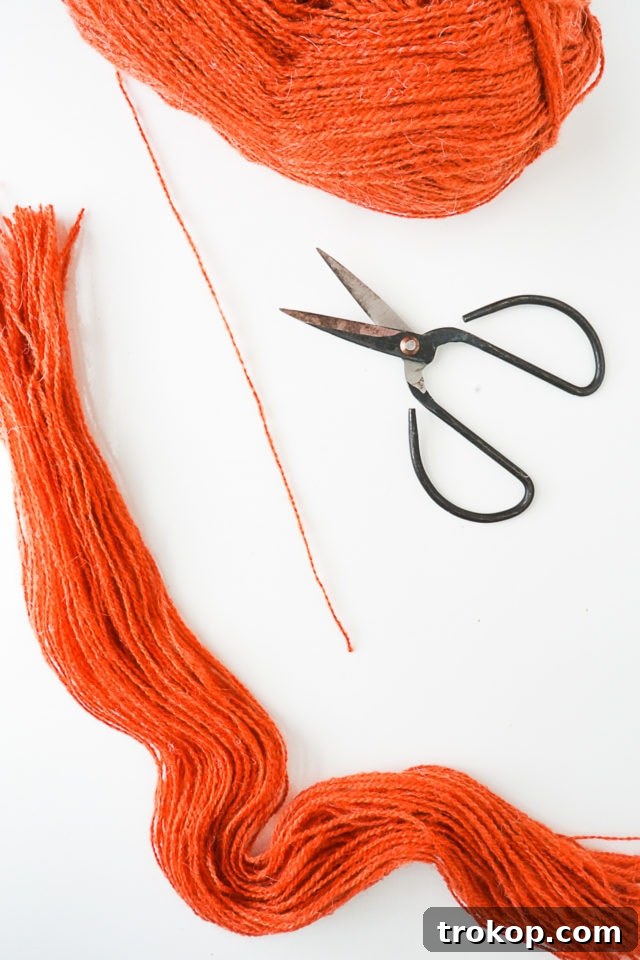
- Prepare the Yarn Fringe: Take your chosen yarn and cut 160 individual pieces, each measuring 23 inches in length. Precision here will contribute to a more uniform and polished fringe. Once all pieces are cut, divide them into 4 equal bundles, with 40 strands per bundle. This makes the next step more manageable.
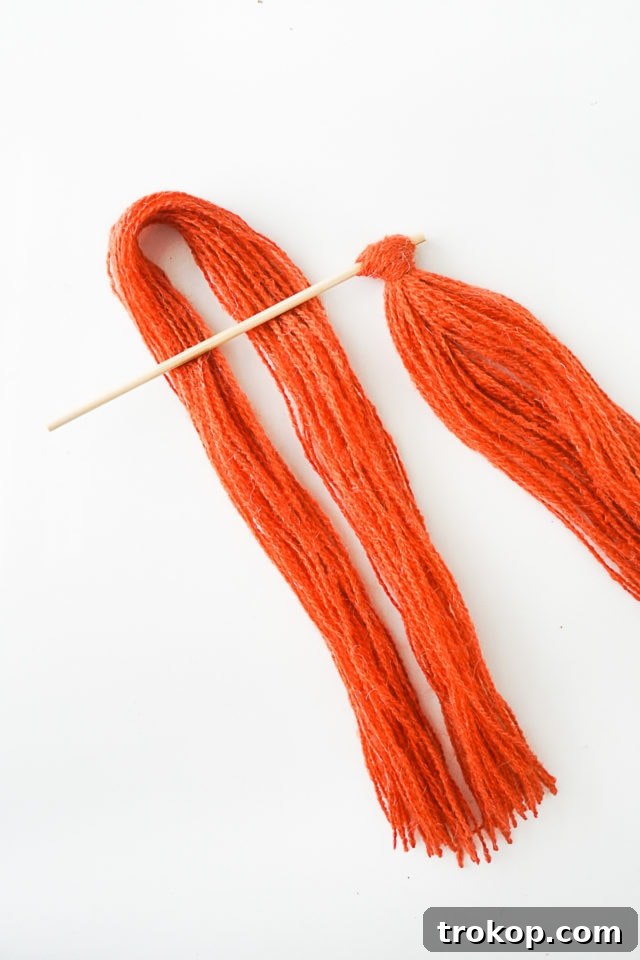
- Attach Yarn to Skewer using Lark’s Head Knot: Select one of your yarn bundles. Fold it precisely in half lengthwise, ensuring the ends align. Carefully wrap this folded bundle over the wooden skewer. Then, thread the loose ends of the yarn through the loop created by the fold. This technique forms a “lark’s head knot,” a common and secure knot for fringe work. Pull the ends tightly to secure the yarn firmly to the skewer.
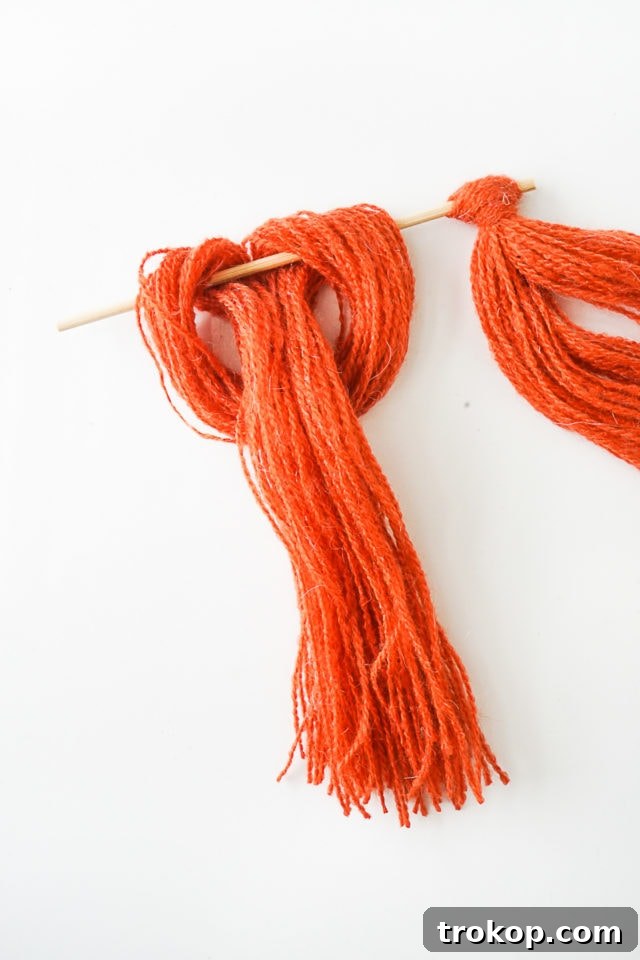
- Complete the Fringe: Repeat the lark’s head knot process with the remaining 3 yarn bundles. As you attach each bundle, make sure to space them evenly along the length of the wooden skewer. This even distribution is key to creating a full, luxurious, and visually appealing fringe effect that will be centered beneath your mirror.
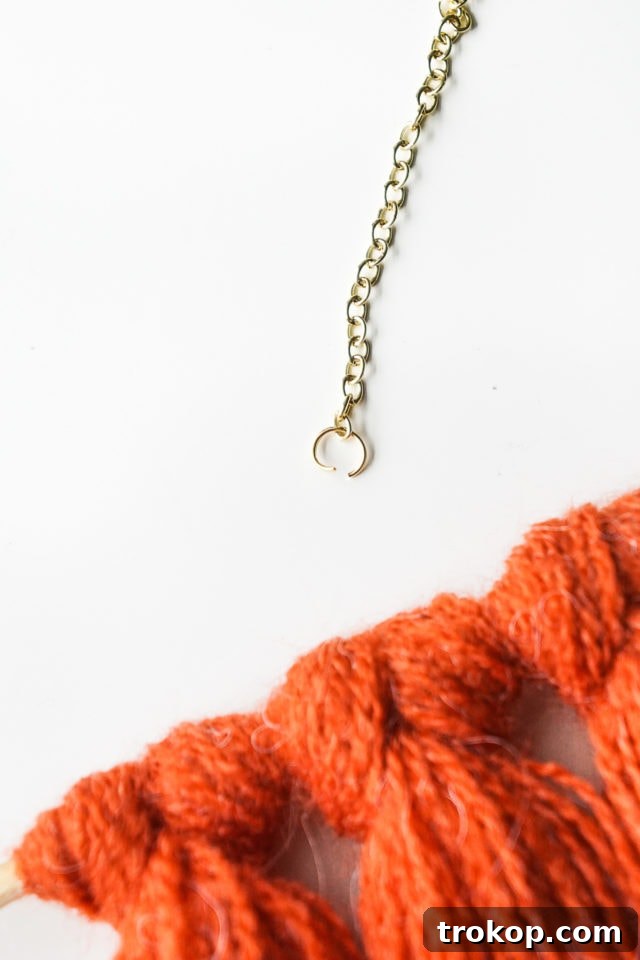
- Attach the Hanging Chain: Take your 12-inch gold link chain. Use jump rings to securely connect each end of the chain. These jump rings will also be used to attach the chain to the wooden skewer.
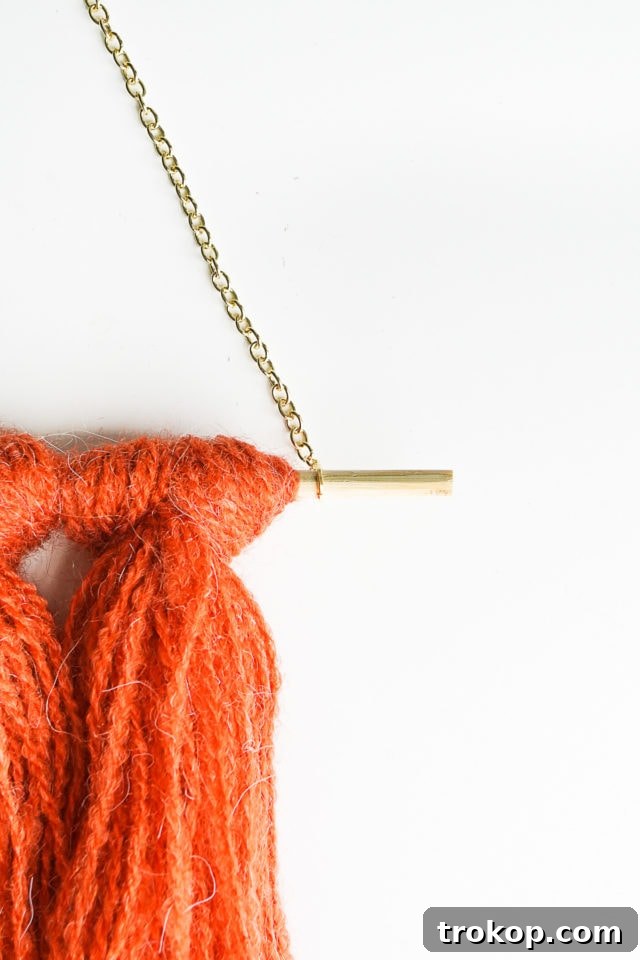
- Loop Chain onto Skewer: Loop one jump ring around each end of the wooden skewer. Position the chain so it forms a graceful arc above the yarn fringe, ensuring it is centered and ready to serve as the hanging point for your mirror.
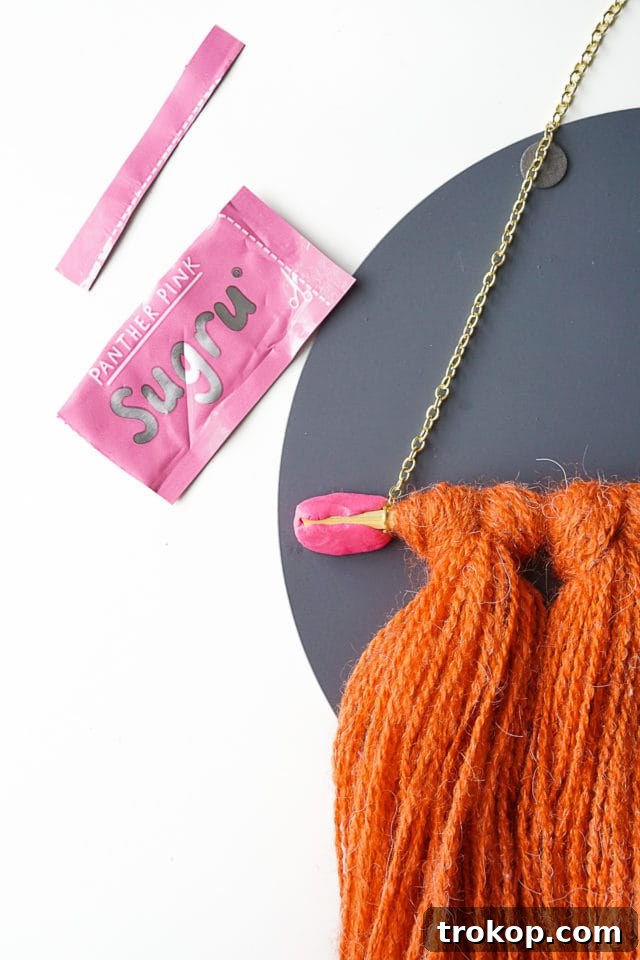
- Mount the Fringe to the Mirror: To prevent any scratches or damage to your newly painted mirror, lay it face-down on a soft cloth or towel. Take your moldable adhesive glue and form it into two evenly sized ovals. Press one adhesive oval firmly onto each end of the wooden skewer. Carefully position the skewer just above the gold-painted section on the back of the mirror and press it down firmly. This secure bond is crucial, so apply consistent pressure. It is essential to allow the adhesive to cure completely for at least 24 hours before you attempt to hang your mirror. This ensures maximum strength and longevity.
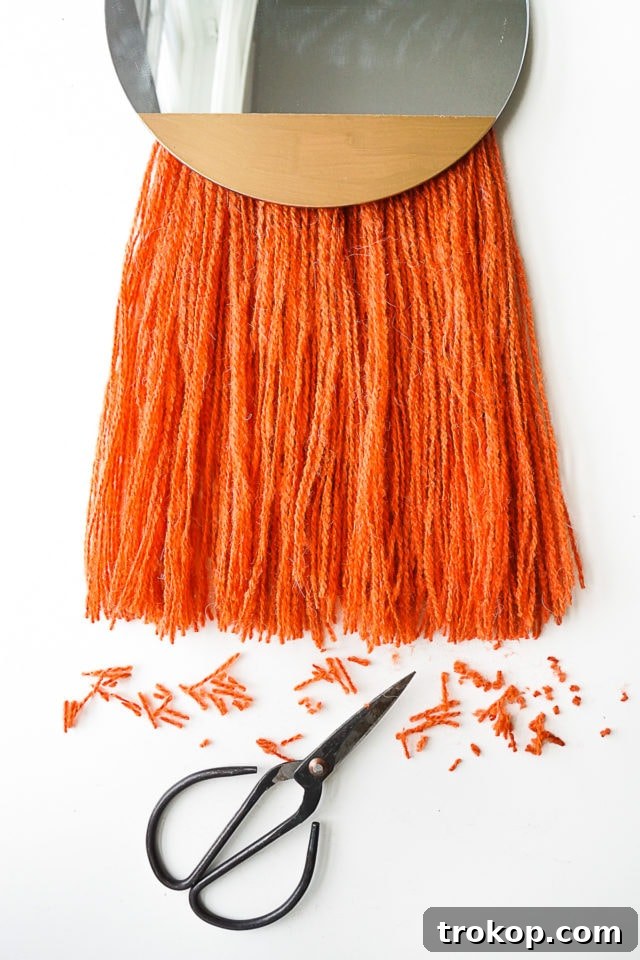
- Finish the Fringe: Once the adhesive has fully cured, carefully flip your mirror over. Now comes the final touch! Using sharp scissors, trim any excess yarn to create a uniform length and a neat, straight bottom edge for your fringe. Gently fluff the yarn to achieve a full and polished look. Your beautiful DIY Fringe Boho Mirror is now ready to be hung and admired!
Tutorial Notes and Tips for Your Fringe Boho Mirror Project
Enhance your DIY experience and customize your fringe boho mirror with these helpful tips and creative ideas:
- Experiment with Yarn Textures: Don’t limit yourself to a single type of yarn. For more dynamic visual texture and depth, consider mixing chunky yarn, soft braided cotton cord, or even shimmering metallic threads with your standard yarn. This can create a truly unique and eye-catching effect.
- Customize the Color Scheme: While the tutorial features a classic, versatile palette, feel free to unleash your creativity with colors! Opt for bold black fringe for a striking, modern contrast, soft blush or pastels for a feminine and gentle touch, or even a vibrant rainbow effect using multiple yarn colors to match your room’s personality.
- Achieve Even Fringe: A neatly trimmed fringe makes all the difference in the final appearance. To get that perfectly straight bottom edge, use painter’s tape or a ruler as a guide when trimming the yarn. Take your time with this step and avoid rushing; an uneven fringe can detract from the overall polished look of your mirror.
- Add Beads or Charms: For an extra layer of personality and bohemian flair, thread a few wooden beads, ceramic charms, or small tassels onto some of the individual yarn strands before you secure them to the skewer. This adds intricate detail and a touch of whimsy.
- Test the Adhesive Grip: The most crucial step for a lasting display is ensuring the adhesive is fully cured. It’s very important to let the glue set for at least 24 hours (or longer, as per product instructions) and hang your mirror on a secure hook rated for its weight. As an alternative, you can consider hot gluing the skewer directly to a mirror frame (if applicable) or using high-quality command strips specifically rated for the total weight of your mirror and fringe assembly. Always prioritize secure mounting.
- Consider Mirror Shape: While our tutorial uses a round mirror, this fringed design can be adapted to other shapes! A rectangular or oval mirror could offer a different aesthetic, allowing the fringe to create a unique border.
- Placement Matters: Think about where your mirror will hang. In a hallway, it offers a functional final glance. In a living room, it can reflect natural light and artwork. In a bedroom, it adds a cozy, personal touch. The right placement enhances both function and decor.
More Easy Fringe and Boho Decor Ideas
If you’ve enjoyed crafting your fringe boho mirror and are looking for more DIY home decor inspiration, explore these related posts that celebrate texture, warmth, and the relaxed bohemian style:
- Cane Decor Trend: Rattan Furniture We’re Loving
- DIY Yarn Fringe Pillow
- Ikea Hack: DIY Rattan Drawers
- DIY Door Knob Tassel
DIY Fringe Boho Mirror (Project Summary)
1 hour
30 minutes
1 day
1 day
1 hour
30 minutes
DIY
Decor
Equipment
-
Scissors
-
Foam paint brush
-
Painter’s tape
Materials
- 1 mirror (similar here)
- 160 pcs yarn
- 1 wooden skewer 6” length
- 1 gold chain 12″ length
- 2 jump rings
- Metallic gold paint
- Moldable glue
Instructions
-
Paint the mirror: Use painter’s tape to mask off a small section along the bottom of the mirror. Apply metallic gold paint to the taped-off area. Set aside and let dry completely.
-
Prepare the yarn fringe: Cut 160 strands of yarn, each measuring 23 inches long. Divide the yarn into 4 equal bundles.
-
Take one bundle and fold it in half lengthwise. Wrap the folded bundle over the wooden skewer. Then, thread the loose ends through the loop to create a lark’s head knot. Pull tight to secure.
-
Repeat with the remaining 3 bundles, spacing them evenly along the skewer.
-
Attach the hanging chain: Use jump rings to connect each end of the metal chain. Loop one jump ring around each end of the wooden skewer so the chain forms an arc above the fringe.
-
Mount the fringe to the mirror: Lay the mirror face-down on a soft cloth to avoid scratching the surface or disturbing the gold paint. Form the moldable adhesive into two evenly sized ovals. Press each adhesive oval onto the ends of the wooden skewer.
-
Firmly attach the skewer to the back of the mirror, positioning it just above the gold-painted section. Allow the adhesive to cure for at least 24 hours before hanging.
-
Trim the fringe: Once fully cured, flip the mirror over and trim the yarn to create an even, polished fringe edge. Hang and enjoy your new boho mirror wall decor!
$25
diy boho mirror, diy fringe mirror

We absolutely love seeing your handmade creations! Don’t forget to share your newly crafted DIY Fringe Boho Mirror with us on Instagram using the hashtag #sugarandclothloves. For endless interior design inspiration, innovative craft ideas, and more home decor tutorials, you can explore all our projects right here. Let your creativity flourish and keep transforming your home one beautiful DIY project at a time!
Further Inspiration for Your Home
43 Top Amazon Wall Decor Ideas for Every Room in Your Home
Find gorgeous Amazon wall decor that makes a big impact without breaking the bank. Discover affordable and stylish options for every aesthetic and space.
Continue Reading43 Top Amazon Wall Decor Ideas for Every Room in Your Home
28 Decorative Wall Mirrors You’ll Wish You Bought Sooner
Looking for the perfect wall mirror? Explore our roundup of decorative mirrors that are both functional and fashionable, guaranteed to elevate any room.
Continue Reading28 Decorative Wall Mirrors You’ll Wish You Bought Sooner
25 Large Wall Clocks for Your Living Room
Looking for the perfect extra large wall clock? Explore stylish and functional timepieces that double as striking decor for your living room.
Continue Reading25 Large Wall Clocks for Your Living Room
19 Unique & Easy Houseplants that We’re Loving
Looking for unique house plants? Dive into our guide to easy-to-care-for and distinctive houseplants that will instantly refresh your indoor environment.
Continue Reading19 Unique & Easy Houseplants that We’re Loving